The Raven” from Edgar Allan Poe was his most popular literary creation, although it did not bring him much financial success. Over the years, this poem has been reprinted, parodied and illustrated countless times, making it a cultural icon. Critical opinion has always been divided, but it nevertheless remains one of the most famous poems ever written. Reading a statement like that is motivating in ways most people can’t comprehend. But if you’re a truck guy like I am, I bet you can instantly relate.
Do we build these trucks to make big profits and retirement funds? Certainly not. But I bet you would get excited to build a truck that impacted an audience and was the topic of conversation throughout the entire industry. The pride you get from appreciation and admiration can easily outweigh the feeling of seeing big digits in your bank account, but we can’t lose money either, right? Sometimes, to the criticism of others, you sacrifice hidden details to save on labor costs, but when you have a budget in mind you stick to it. The option to revisit these details are always there when we’re ready.
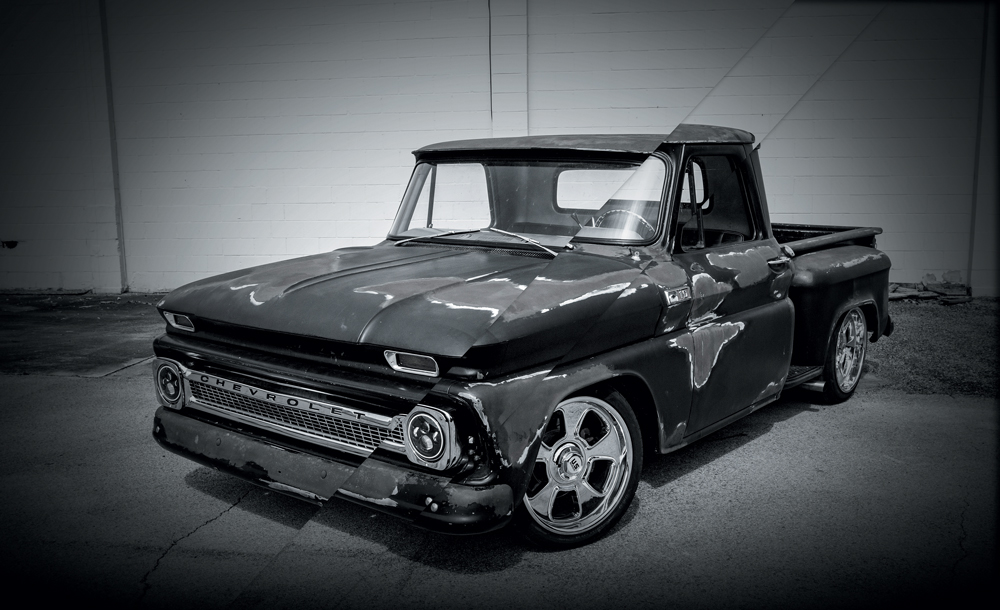
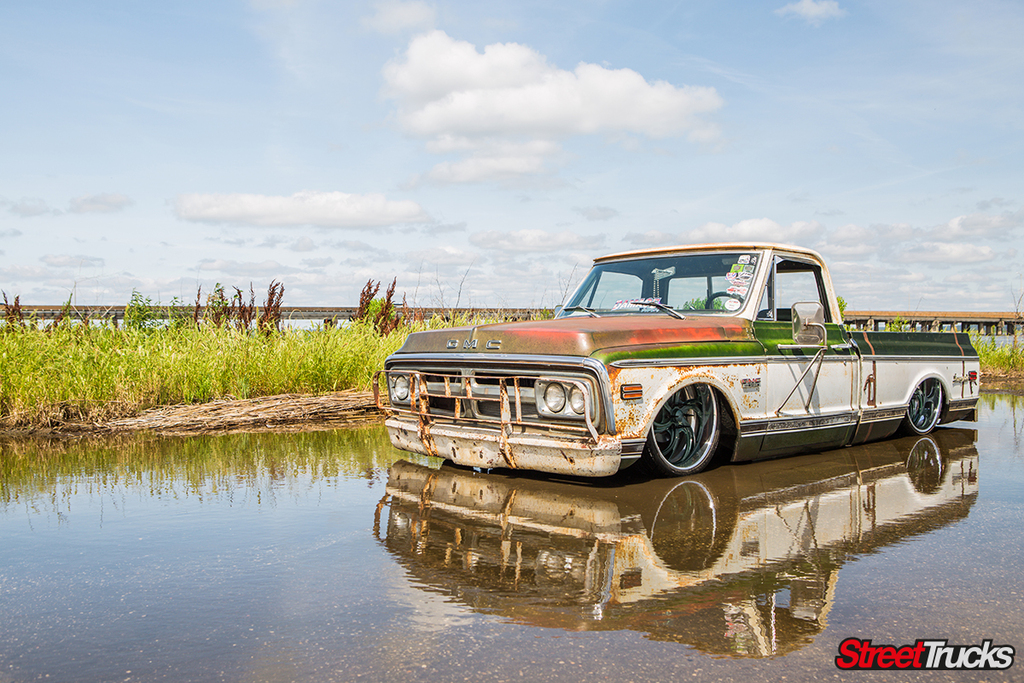
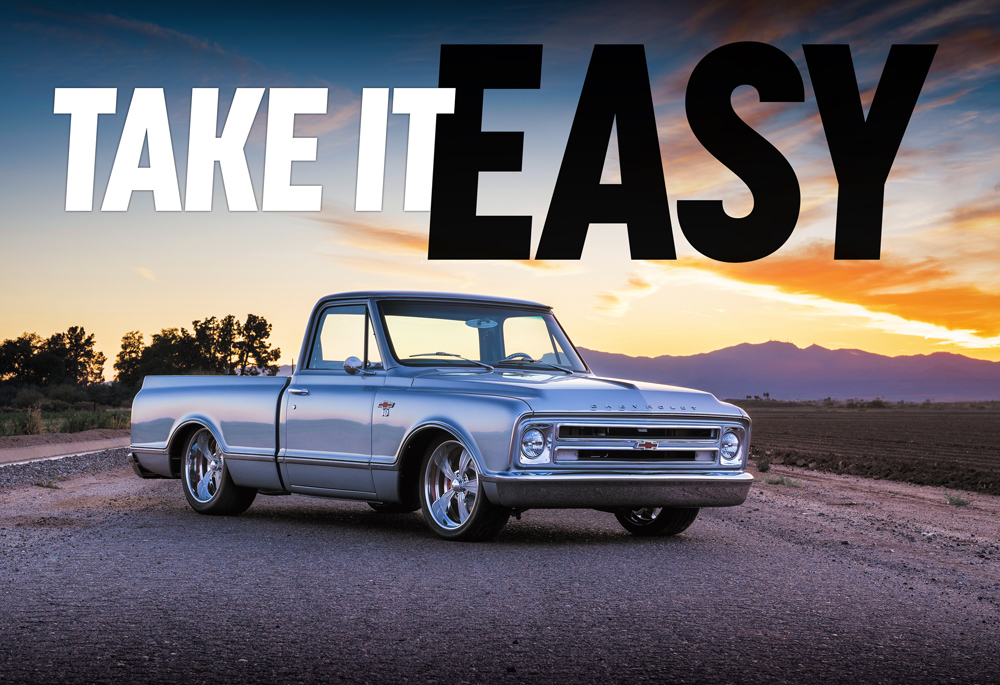
This year’s C10 Builders Guide project is called “The Raven” as it’s now a daily-driven intimidation machine, capable of consistent use with enough peddle power to soar down the streets. A ’65 Chevrolet is not the most common year to restore and modify, but the style of the hood and those hips had us hooked. Along with the simplicity of the OEM suspension and drivetrain comes a long line of aftermarket parts from many of the incredible manufacturers that advertise with us. From pricey frame swaps to simple lowering kits, almost anything is available for these classic trucks. It’s no wonder that the C10 community is so strong and knowledgeable. The plan for this pickup is simple: a budget of $15,000 and using nothing but bolt-on, factory replacement parts that you can order and install yourself, if you have the time and tools, of course. I know this may be out of budget for some readers, but to build a truly reliable daily driven classic truck, there is a price to pay.
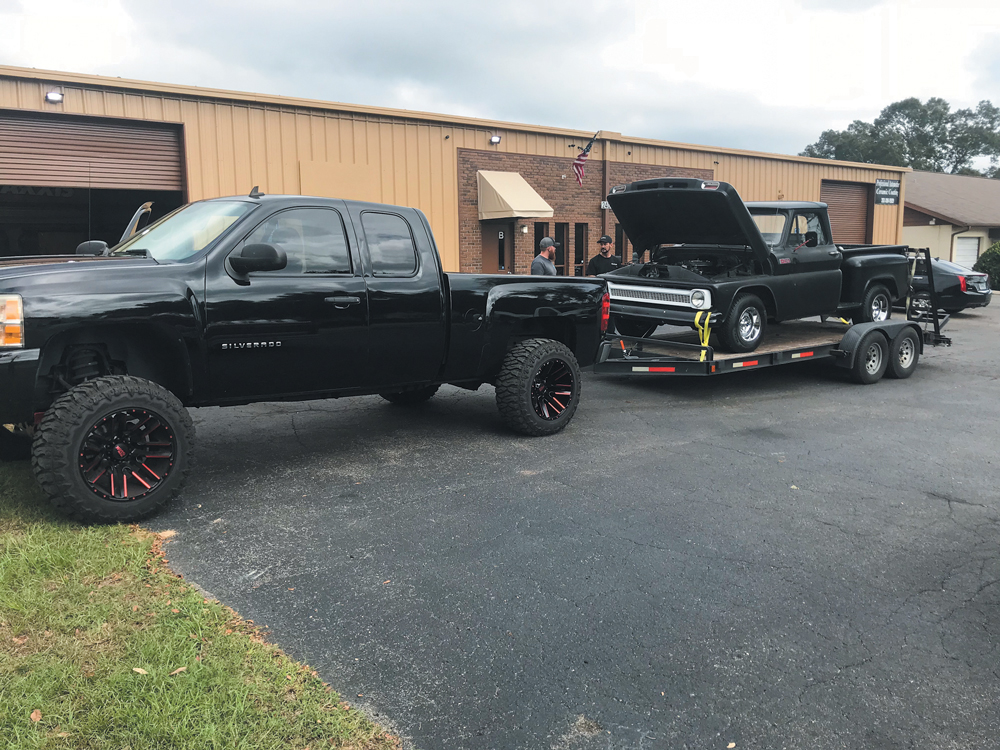
Check out our detailed breakdown of all the parts we have ready to go and follow up on this build in the pages of C10 Builders Guide. Additional in-depth articles will be online at www.streettrucksmag.com as well, so be sure to grab your device and enjoy!
The Raven started out as a barely running and driving ’65 Chevy C10 with a 350c.i. small block engine attached to a 700R4 transmission. No power steering and an out-of-spec carburetor setup makes this classic more of a trophy than a truck, but we changed that!
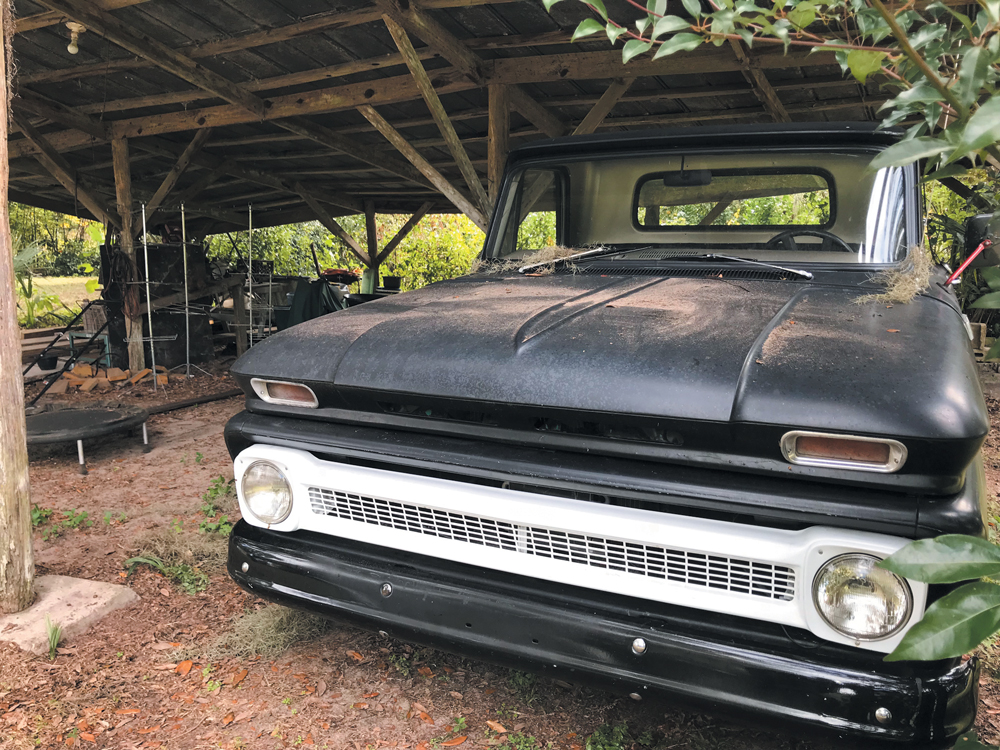
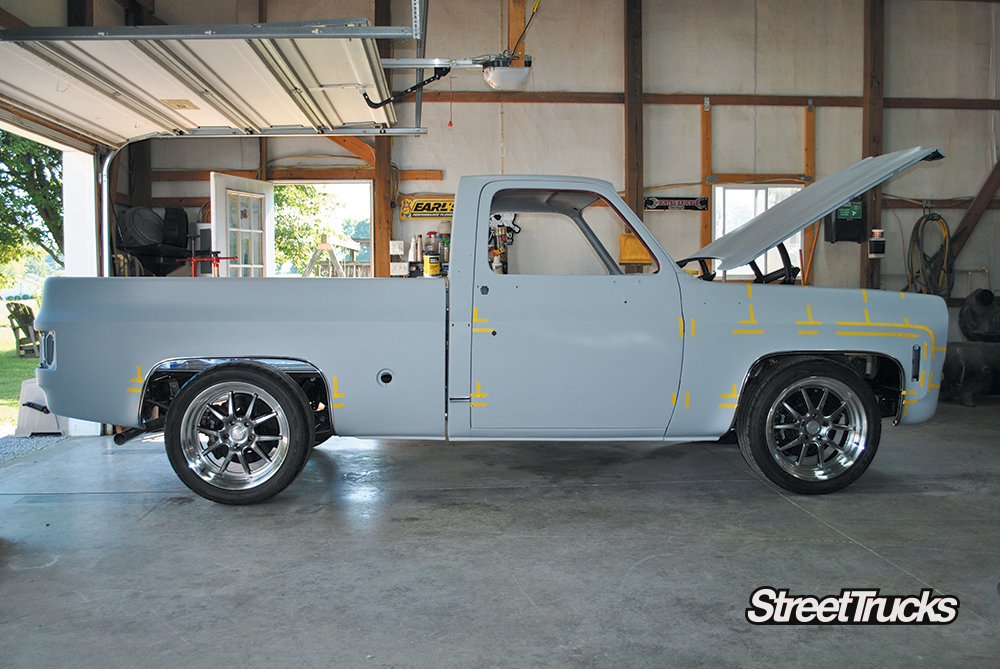
The first task on the list was to drag the truck out of the pole barn and drag it over to the shop to start prepping it for some upgrades. Make sure you clean your project before you start working on it. Your eyes will thank you.
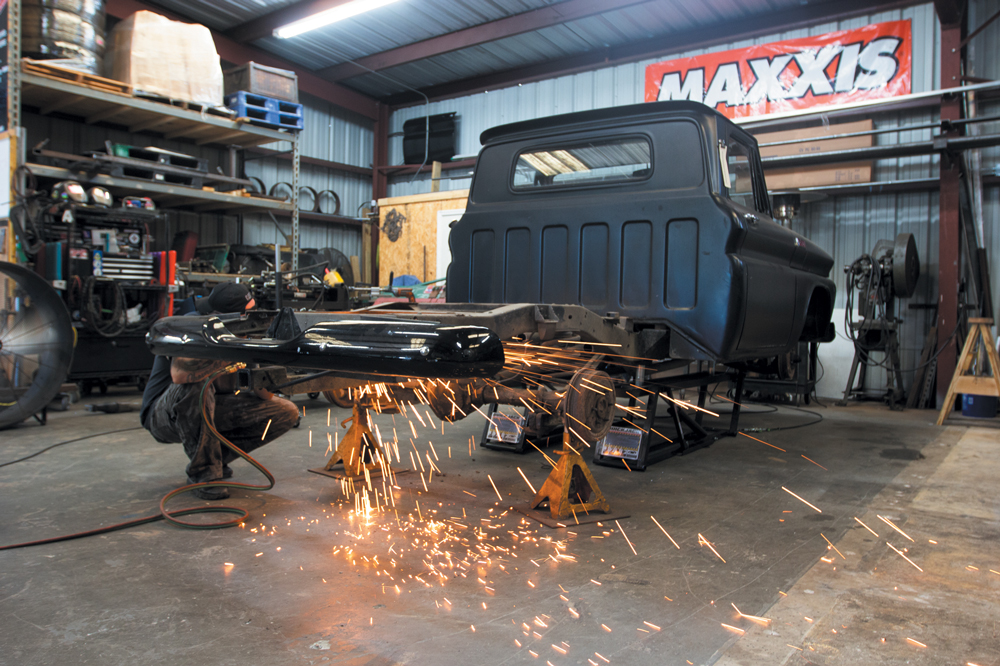
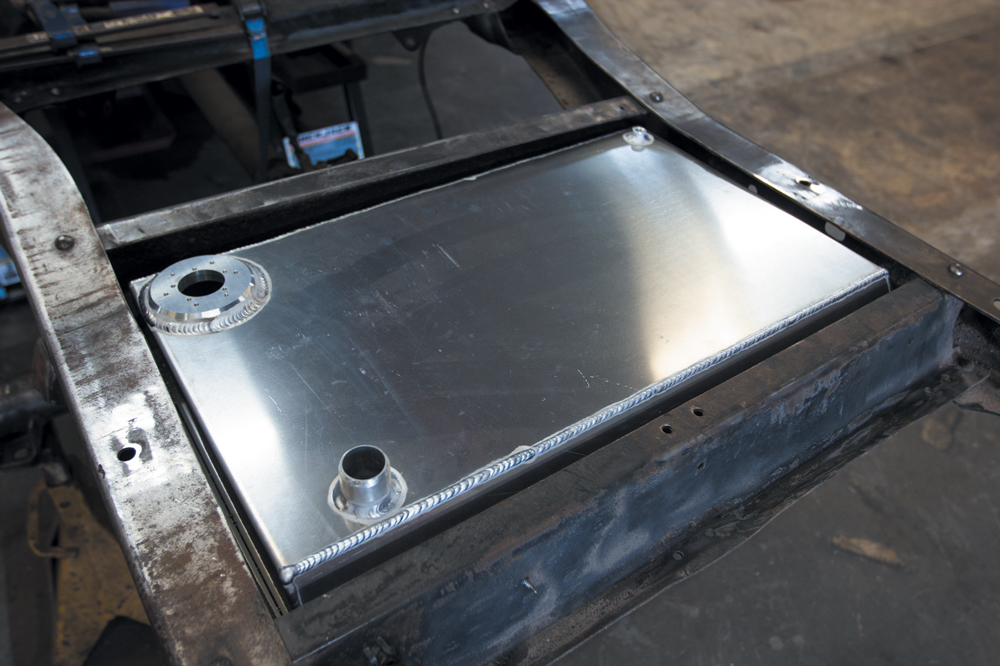
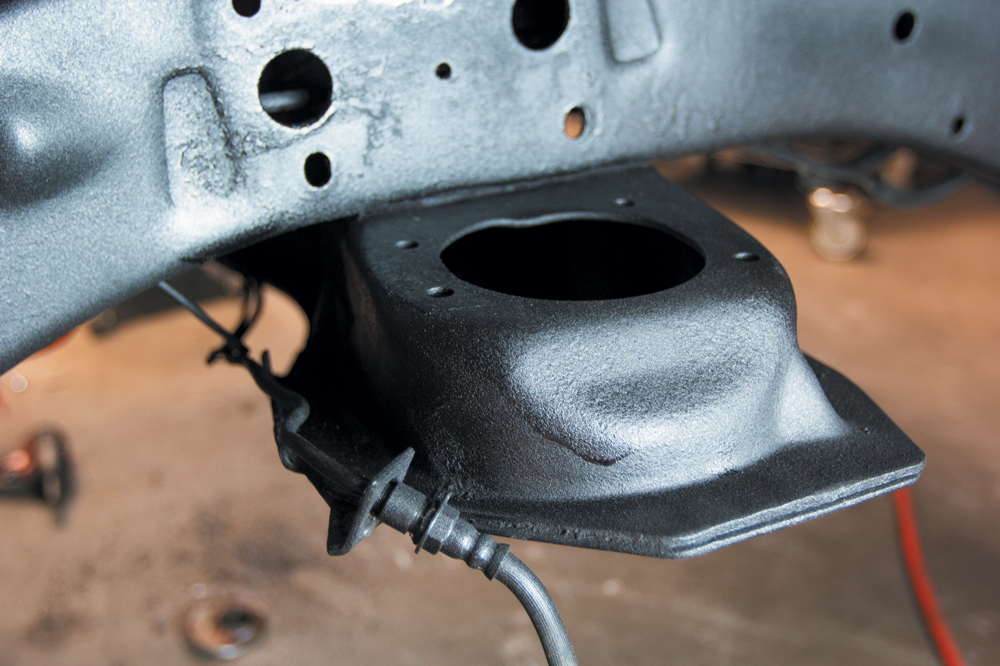
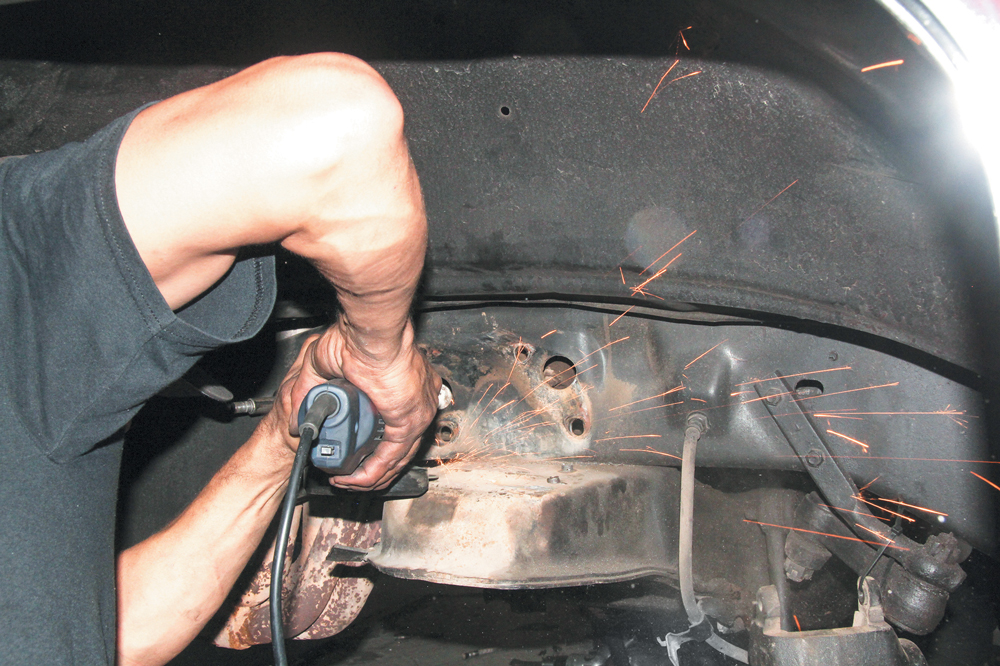
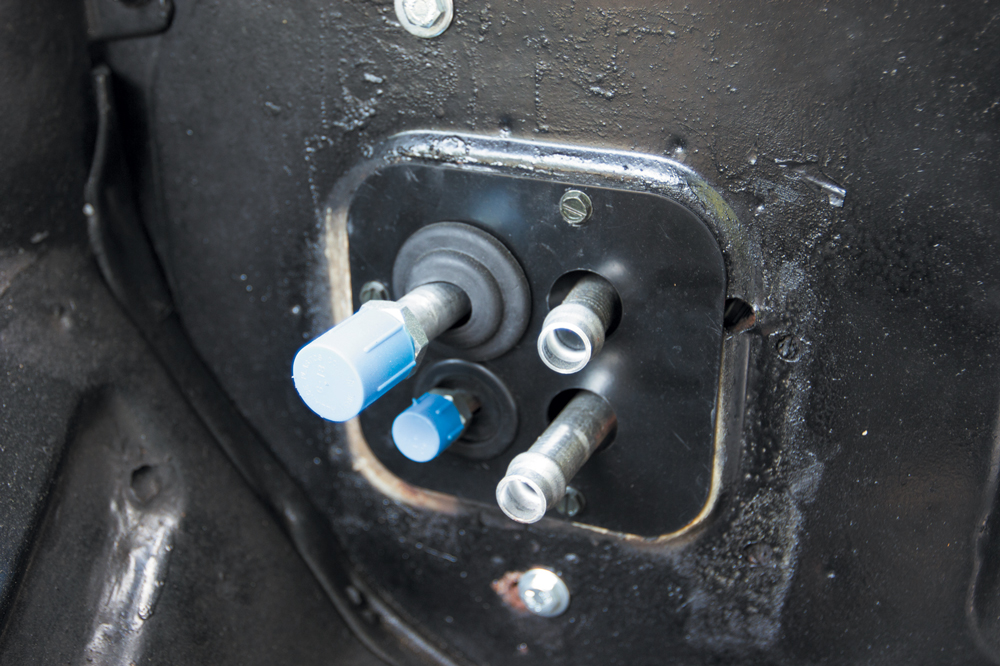
With the truck on our QuickJack portable lift, Dallas from Full Pen Fabrication started cutting the old hardware off the frame rails and finished by grinding down the frame to bare metal.The first item to be installed is this 19-gallon aluminum fuel gas tank combo kit from Performance Online (Part #AGT6366-XX; $561). This new lightweight aluminum gas tank is going to replace our factory gas tank in the cab. These tanks are designed to fit between the frame rail and rearward of the axle on ’63-’66 Chevy and GMC trucks. By moving the fuel tank out of the cab, you gain much-needed room to allow for further customization, it also increases fuel capacity and safety. These tanks are made of heavy gauge aluminum and offer a light weight, fully baffled design. Vent bung size is 1/4”NPT, Fuel feed bung size is 3/8”NPT.
Performance Online KIT Includes:
19-gallon aluminum fuel tank
Mounting straps
Fuel filler hose
30 OHM sending unit
Stainless fuel cap
Top fitting: quarter-inch pipe
Pick-up (bottom) fitting: three-eighths pipe
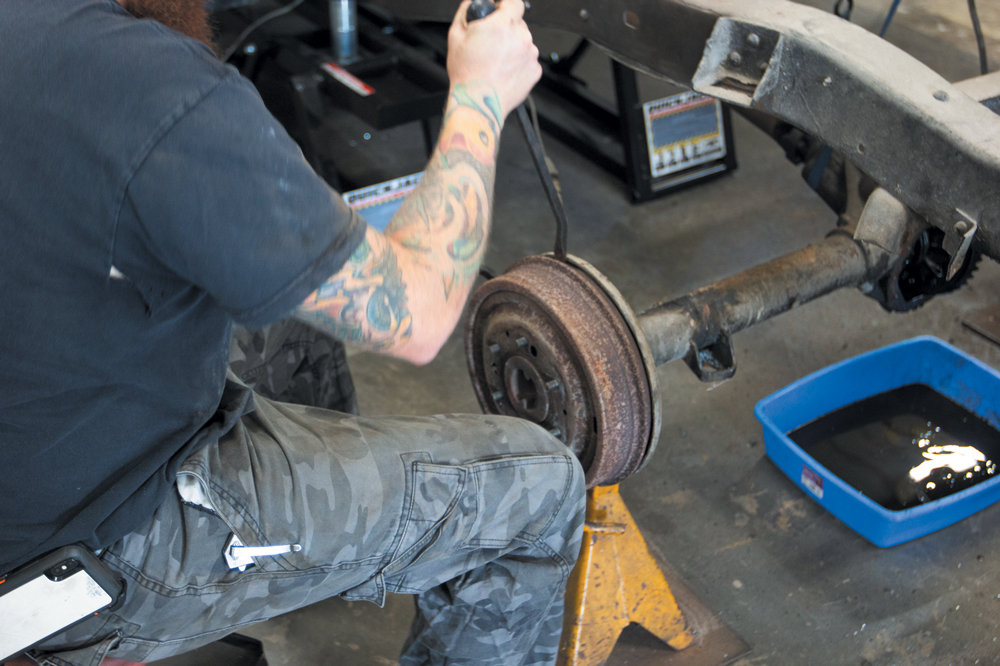
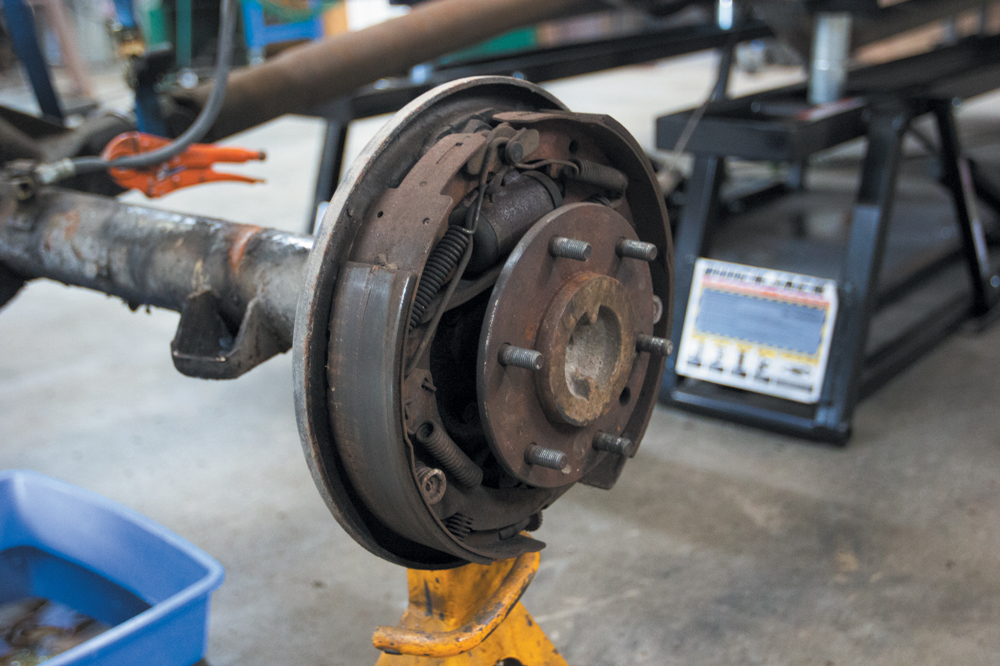
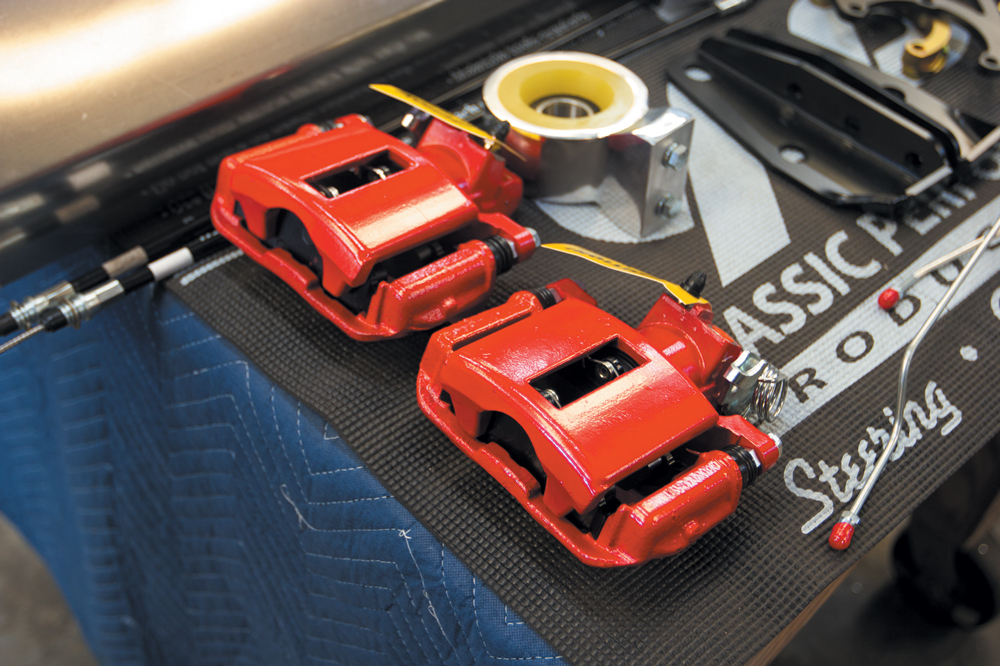
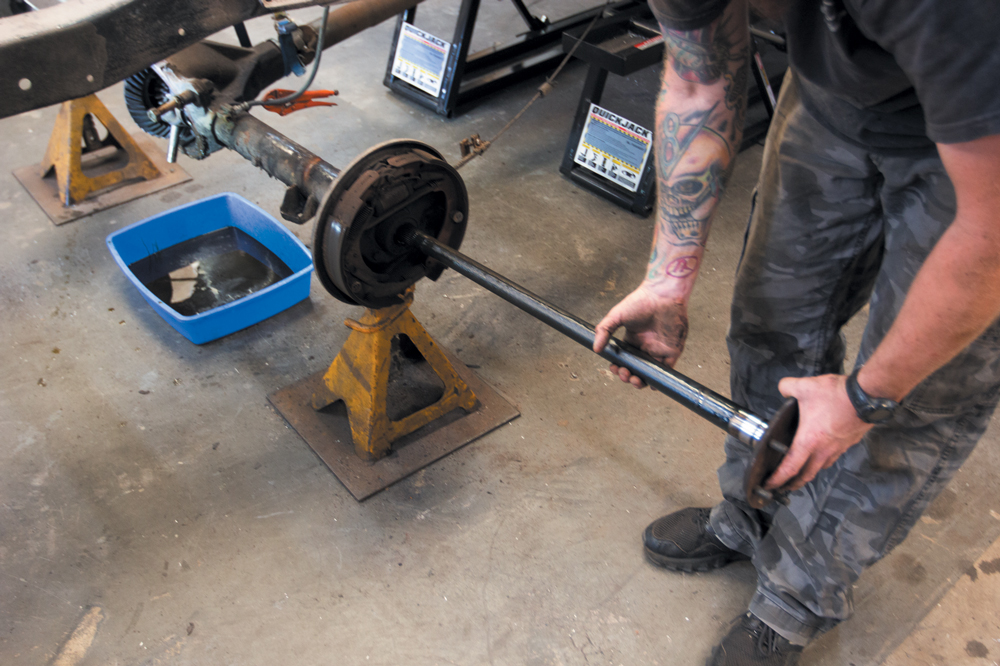
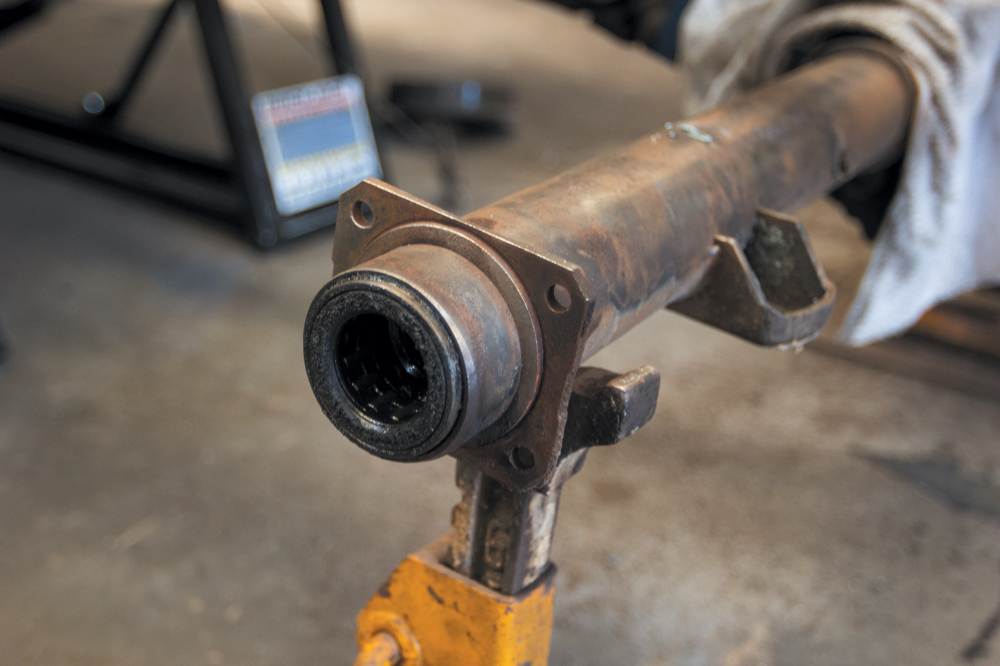
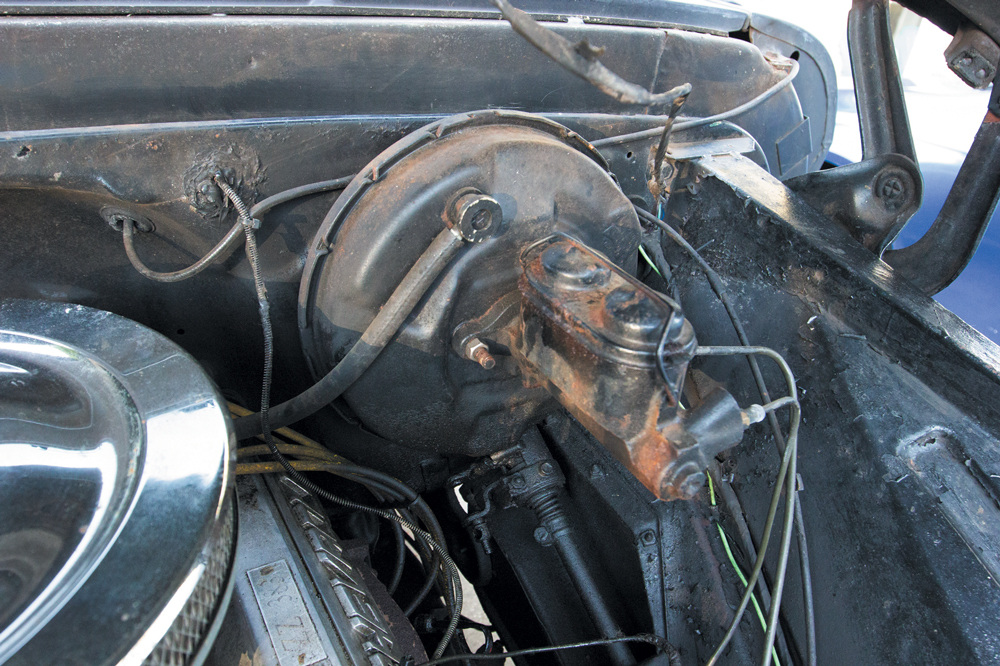
We will be swapping out the factory brakes for a new set from CPP, so the original hardware needs to be removed.
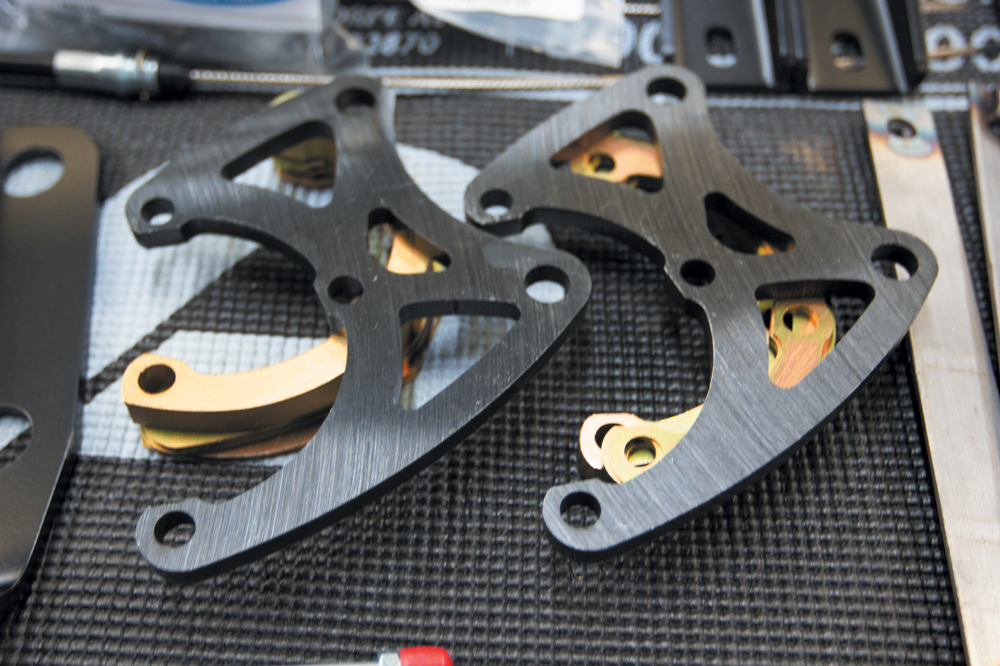
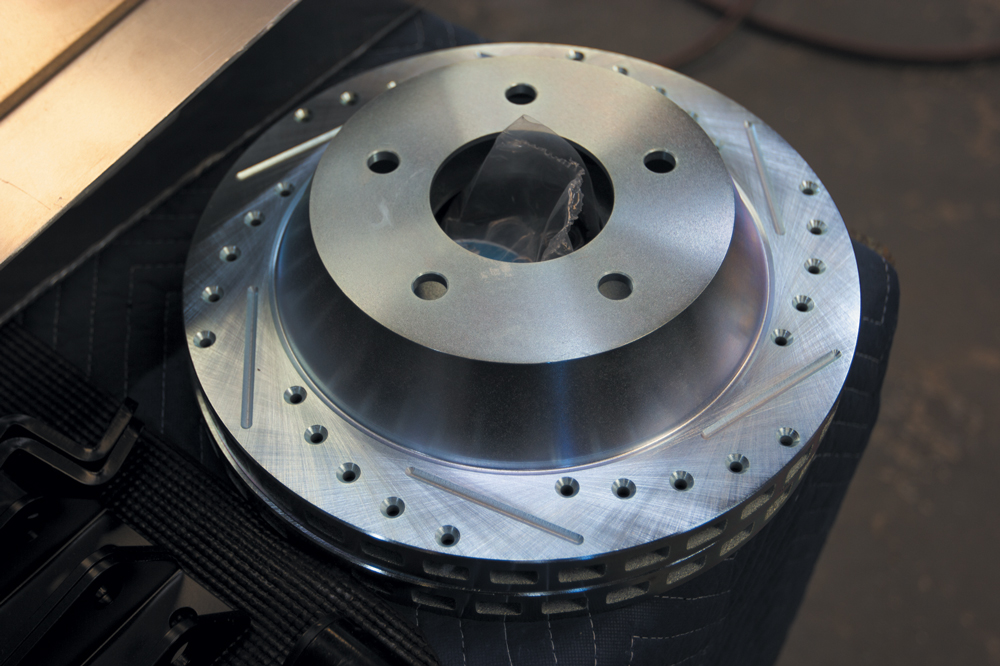
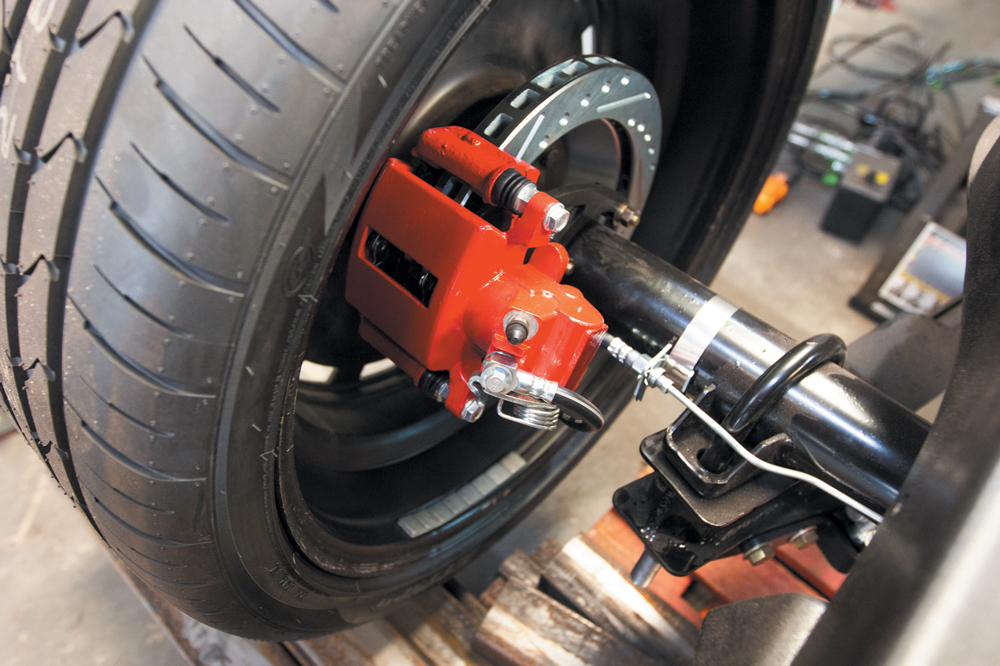
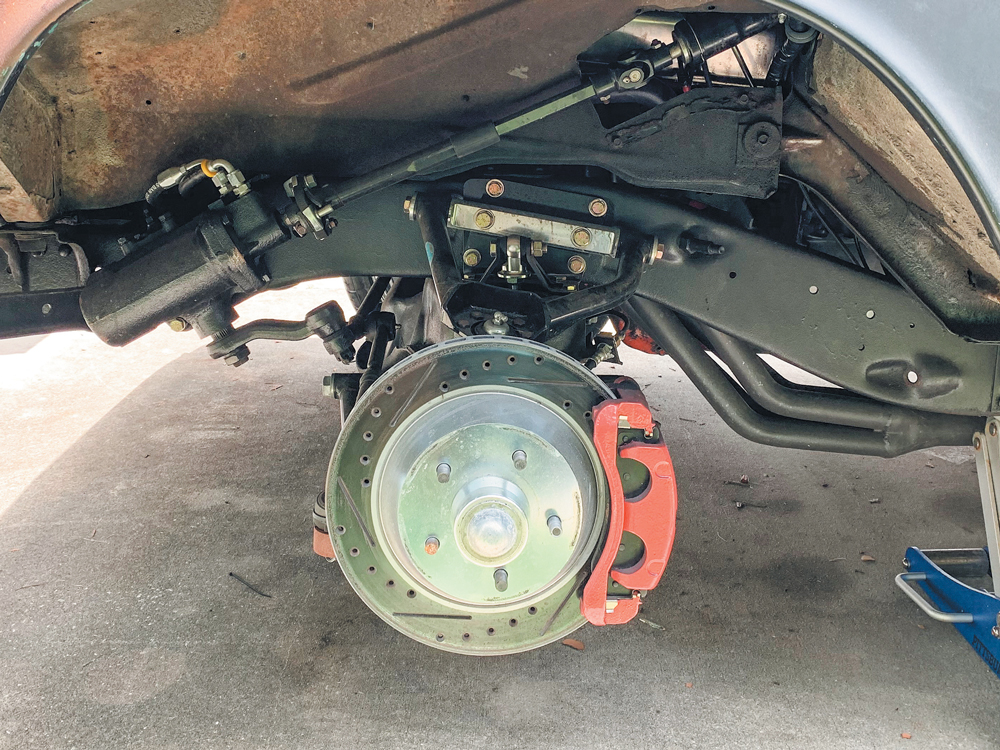
To complete the brakes, we installed CPP’s 5-lug axle shafts, brake brackets, rotors and calipers for a killer, clean look. The custom-made caliper bracket is designed to mount directly to the backside at the axle flanges of the rear end using the provided hardware.
These CPP brackets will bolt to the hub and allow our new caliper and spindle to be attached.
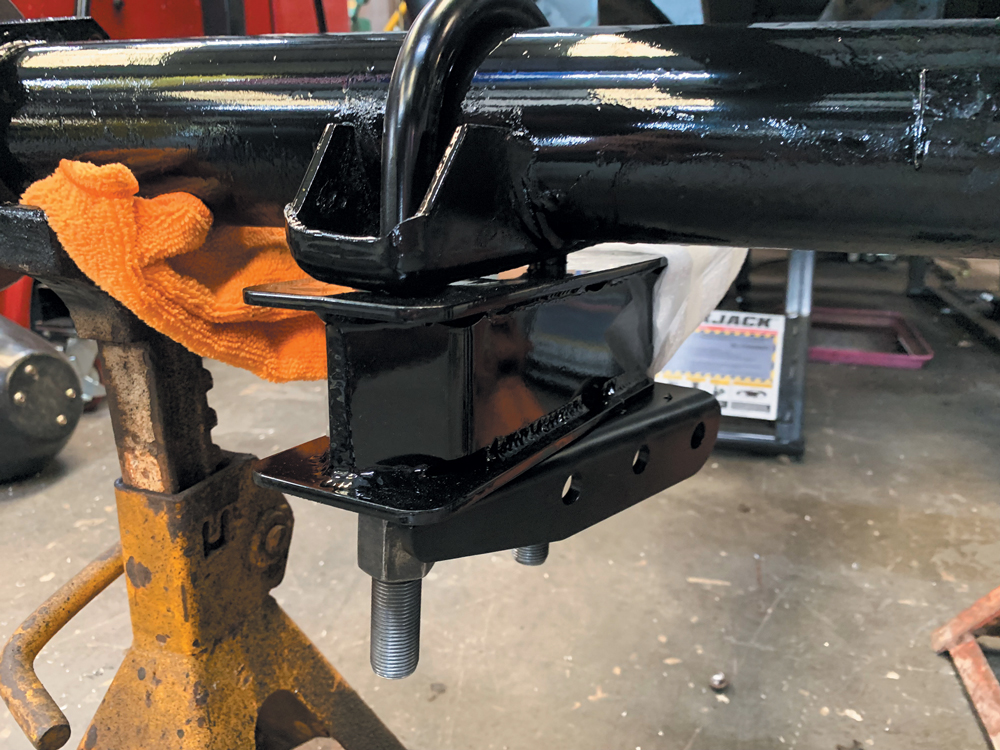
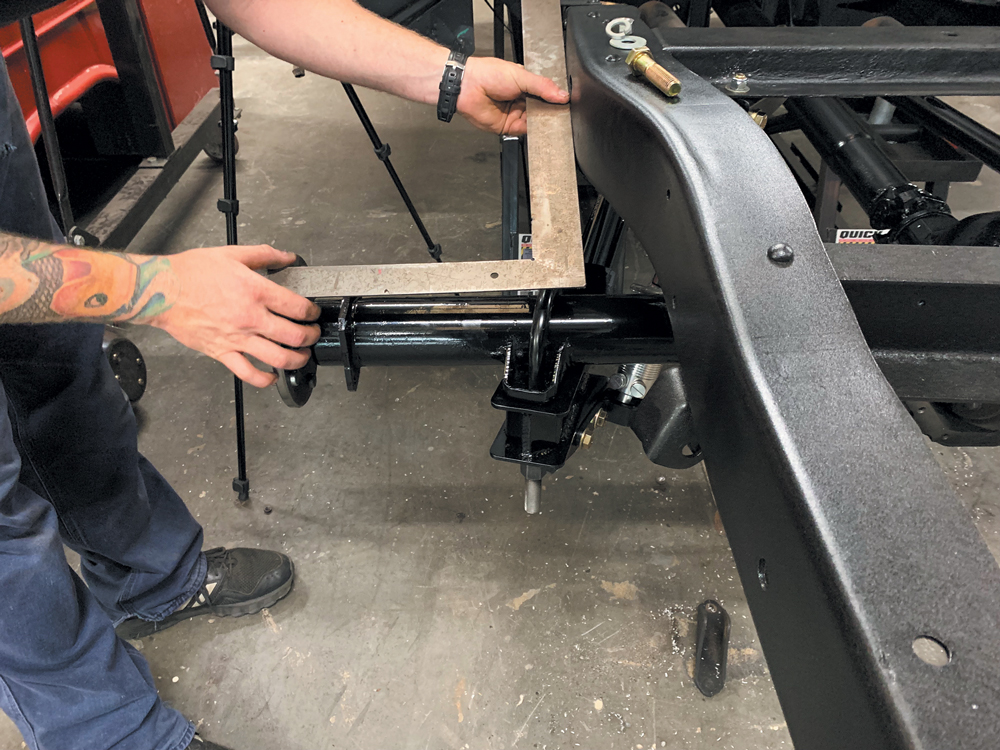
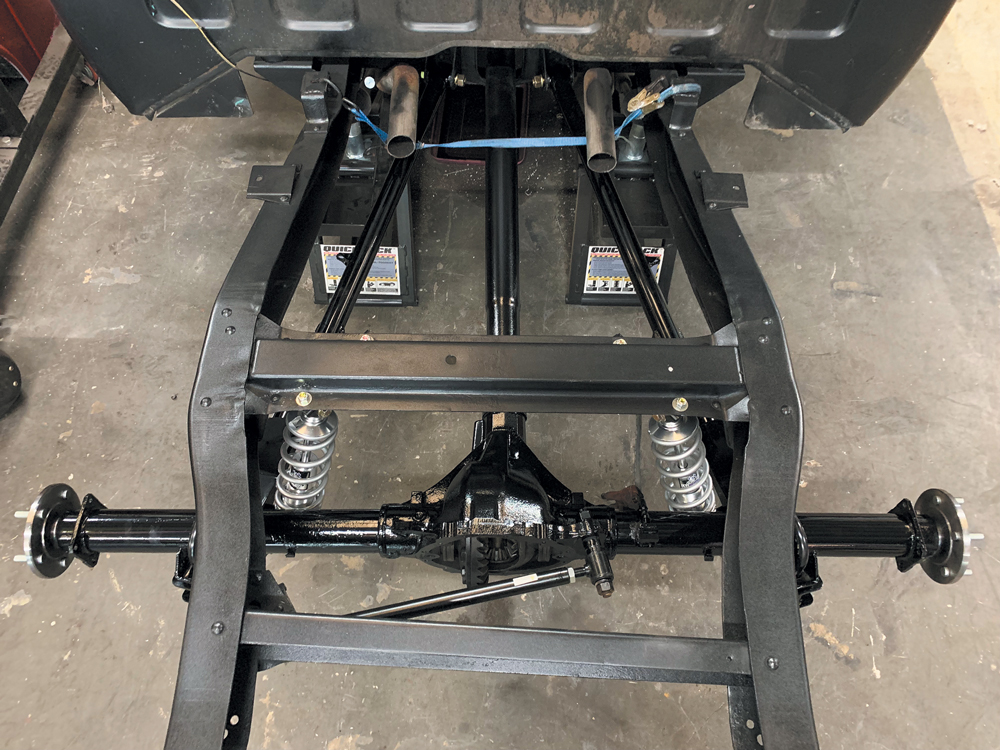
With the frame rail cleaned and painted, we can start installing the CPP rear axle coilover mounts and tubular trailing arms. The CNC-Bent & Laser-Cut Mounting Brackets along with grade-8 hardware make for a simple bolt-on installation.
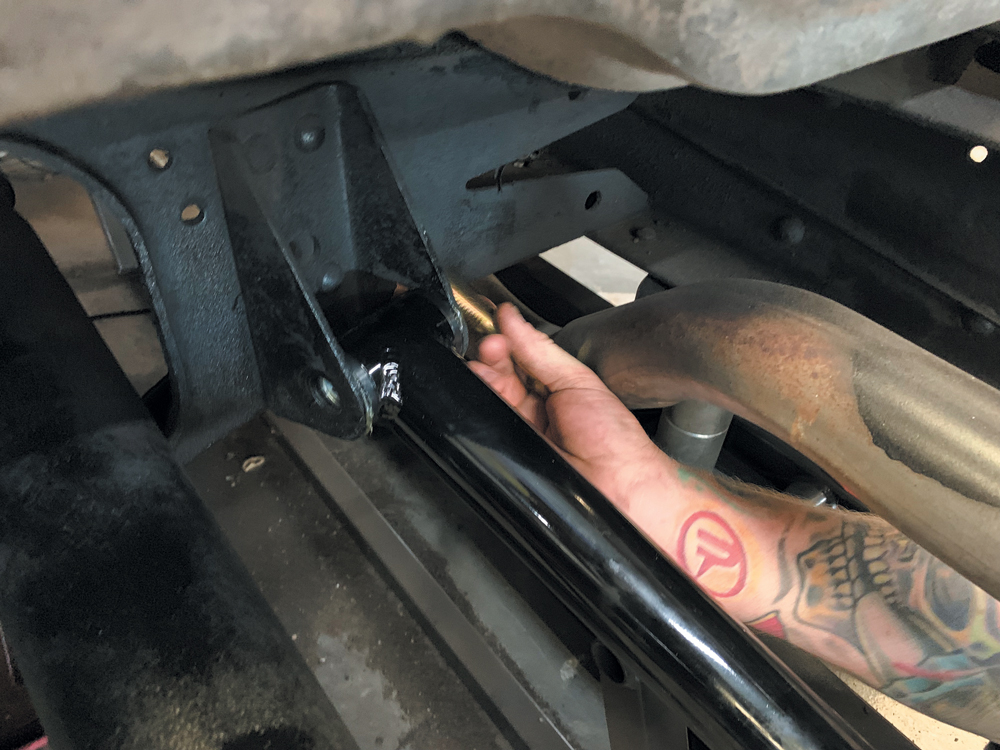
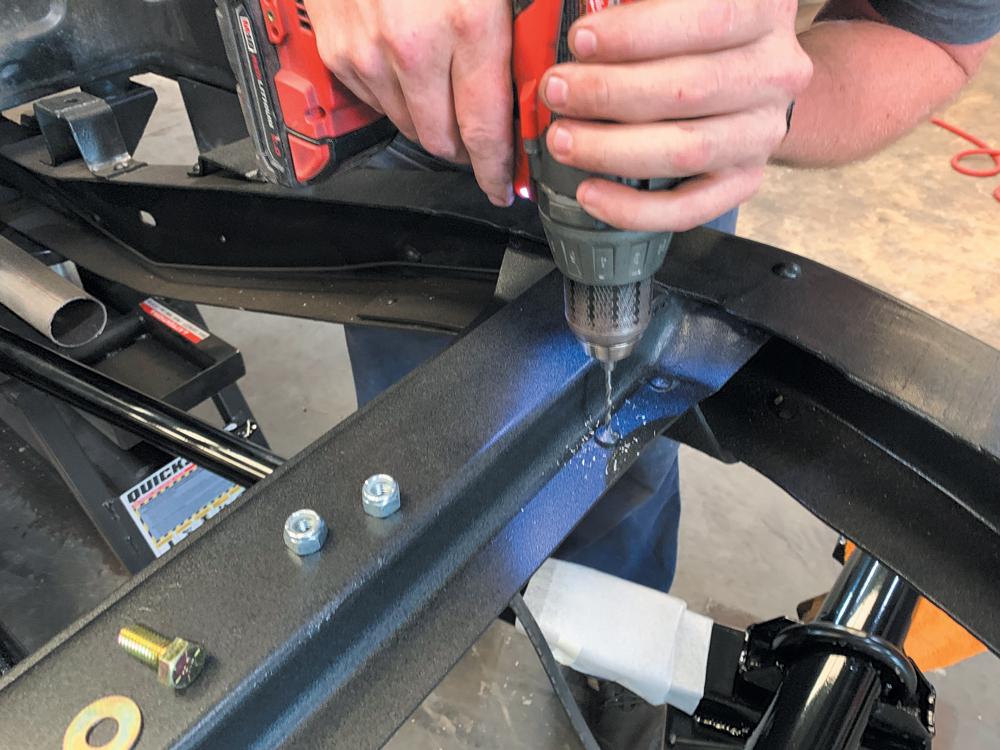
The axle brackets have built in mounting holes for the coilovers for a smooth and painless installation. These coilovers include dual adjustable shocks with separate adjustments for compression and rebound.To install the upper coilover mounts, it’s a simple process of drilling out the factory rivets and reusing those holes for the upper shock mounts. Bolt the brackets in place and the coilovers are secure. What a cool design!The axle will need to be centered correctly in order for the link bar to function properly. Using a steel carpenter square gives Dallas the ability to measure both sides from frame to flange to ensure both sides are equal.
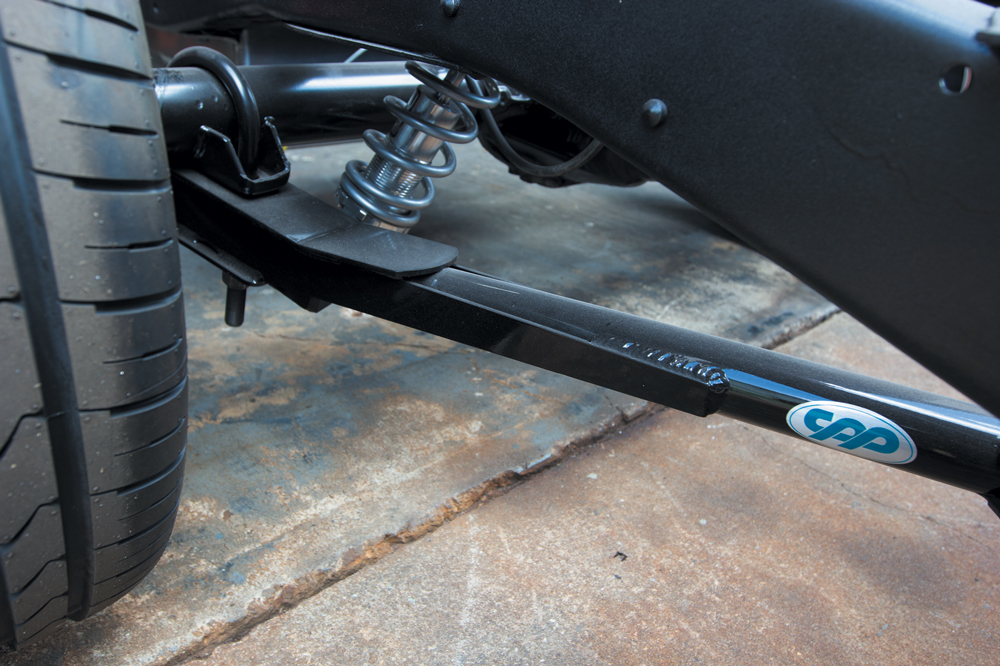
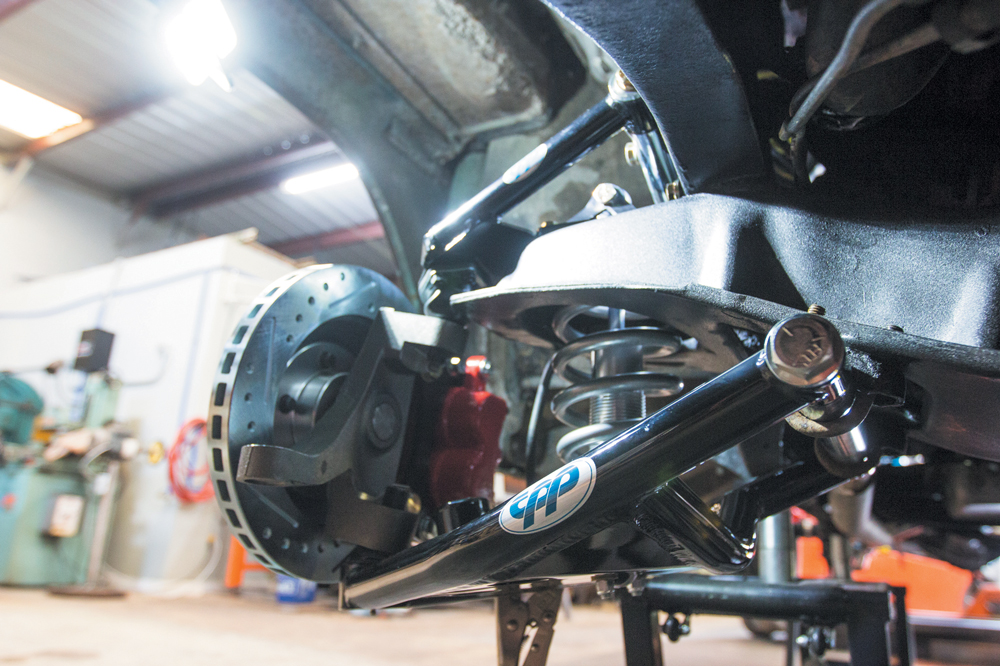
With the coilovers, trailing arms and Panhard installed correctly, you can appreciate how well this system is engineered.With the back finished, we bolted on the wheels and basked in the glory of the brakes installed. It’s so nice!!Moving to the front of our ’65 Chevy, the first thing to do is remove all the factory components. We simply removed the tie rod ends and unbolted the upper and lower control arms to remove it altogether.In order for there to be clearance for the upper coilover mounts, the factory spring perch needs to be slightly modified. Using a pneumatic punch, Tyler was able to remove the original brace and grind off the old studs. The new CPP upper CNC-bent and laser-cut spring pocket bracket has the appropriate-sized hole already cut into it and all the hardware mounting holes as well.
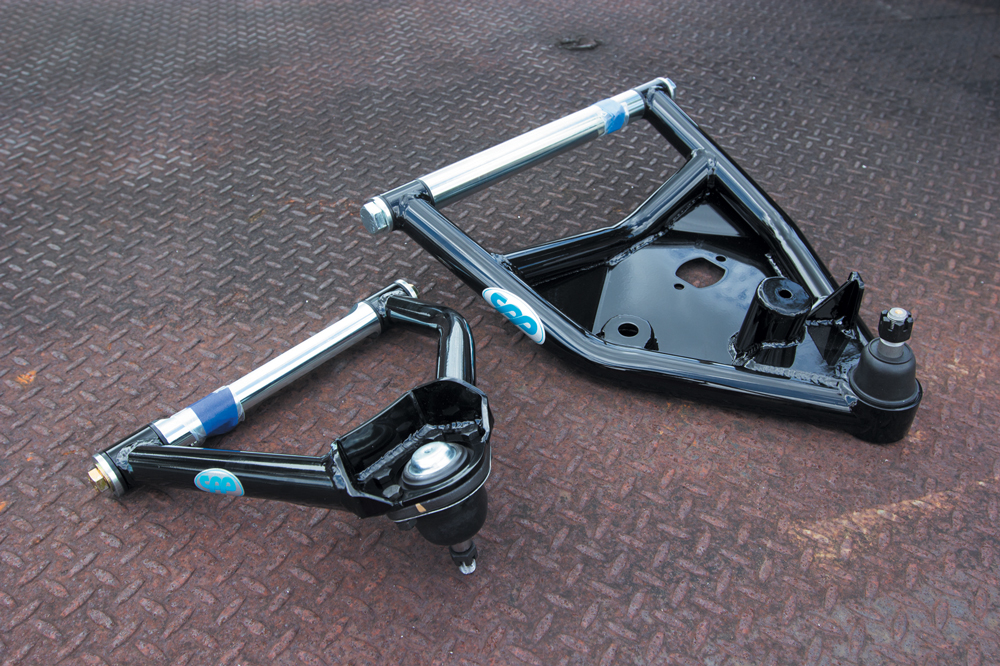
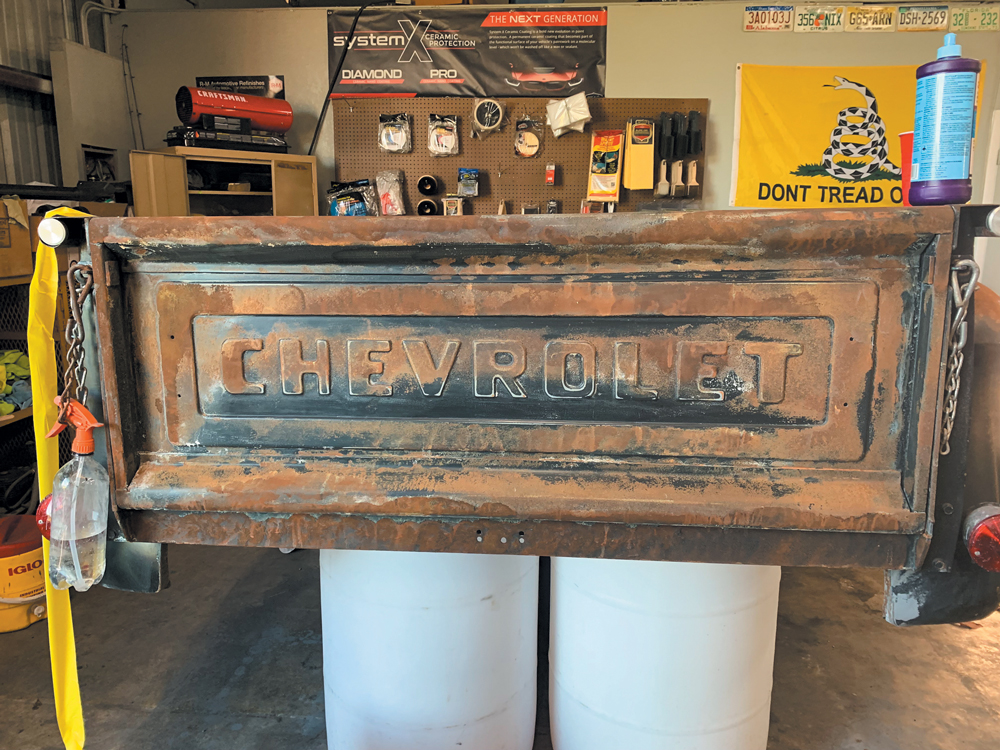
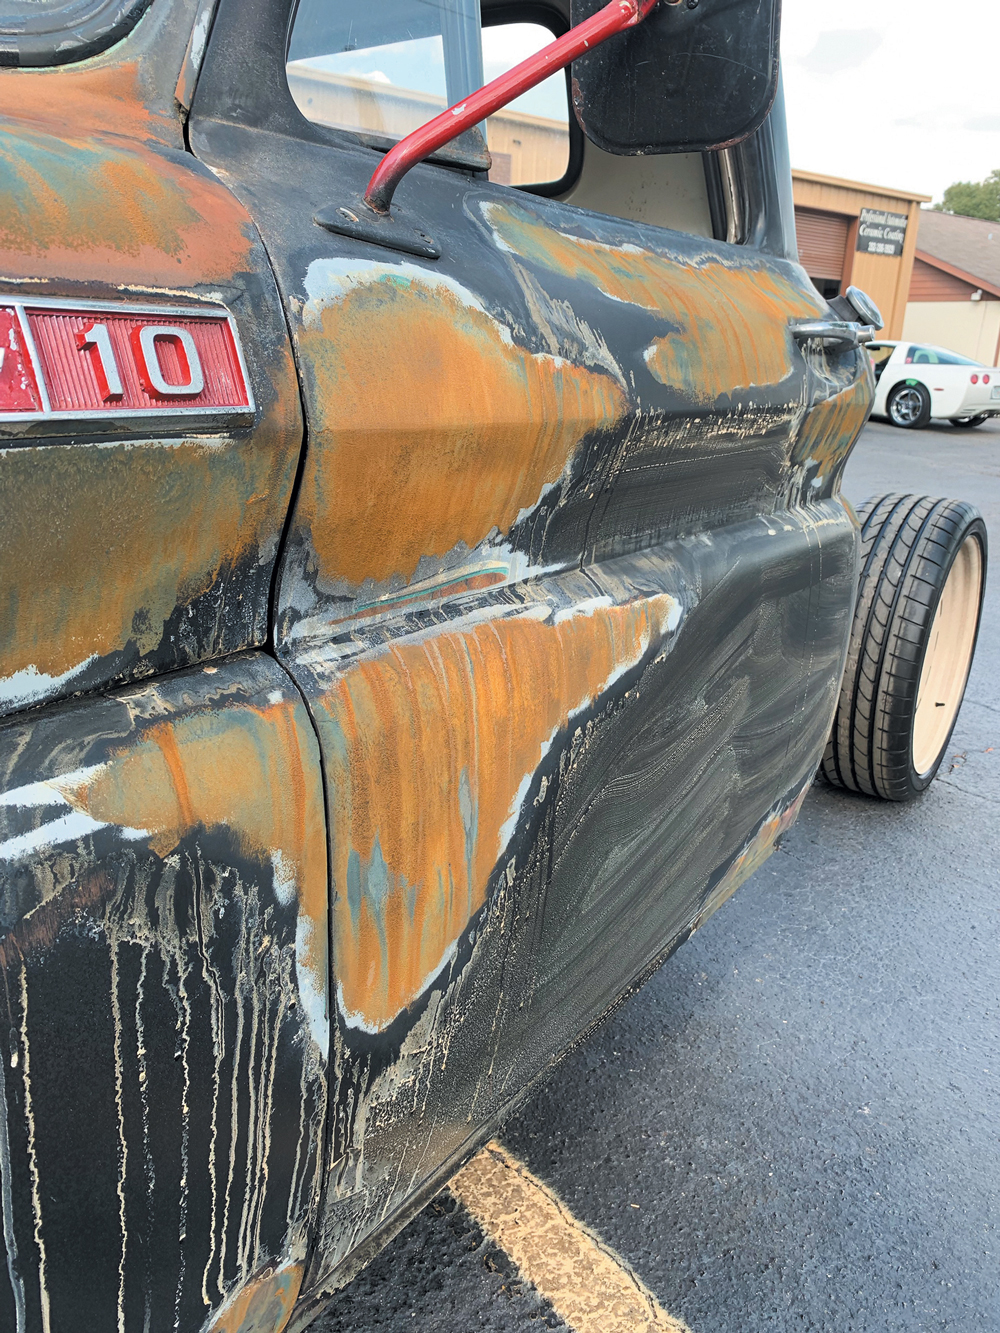
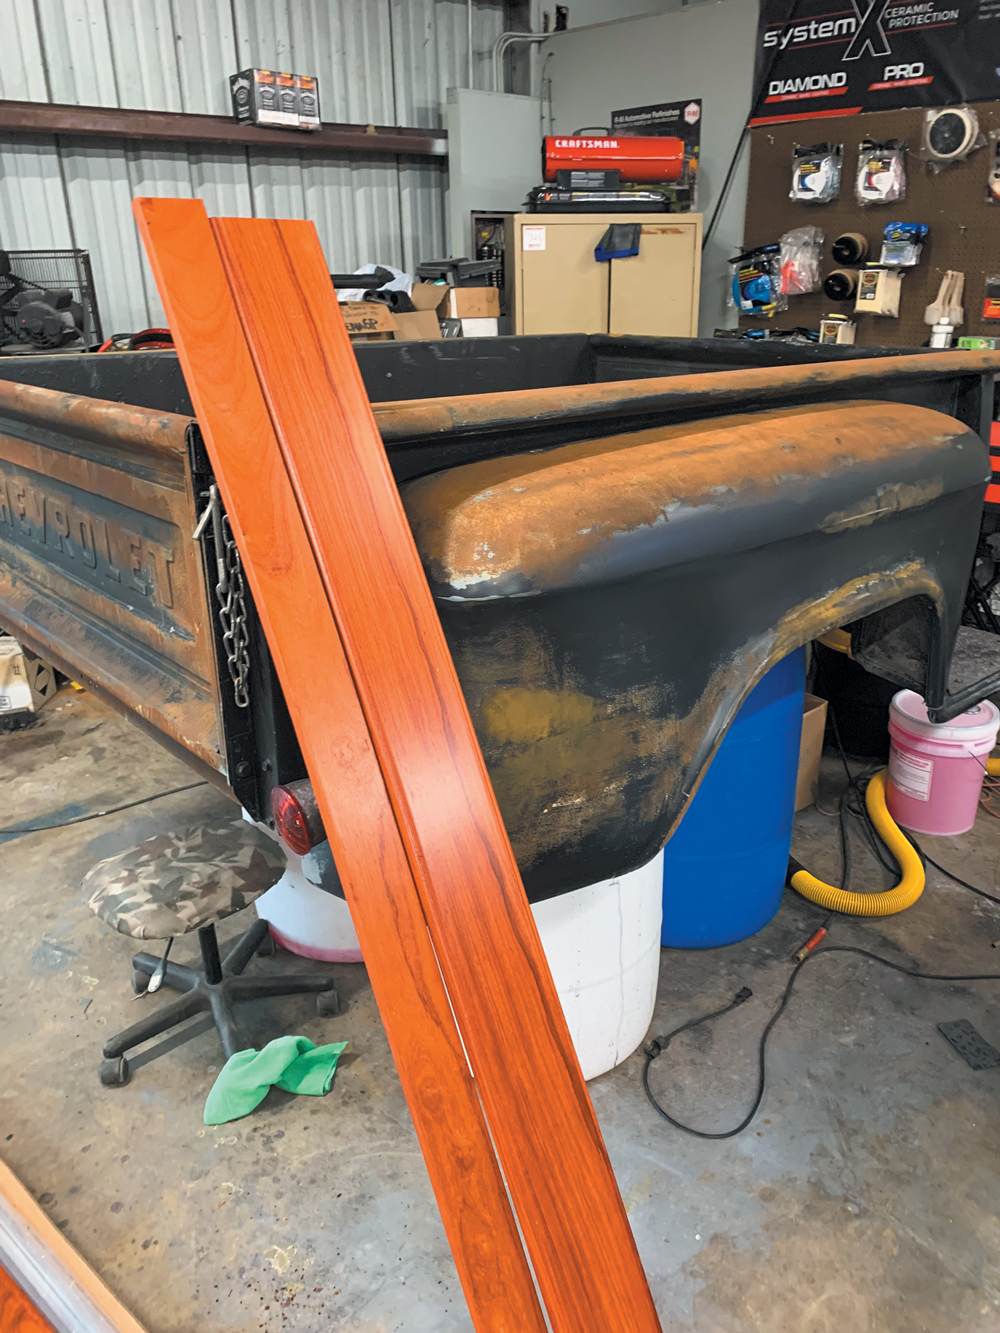
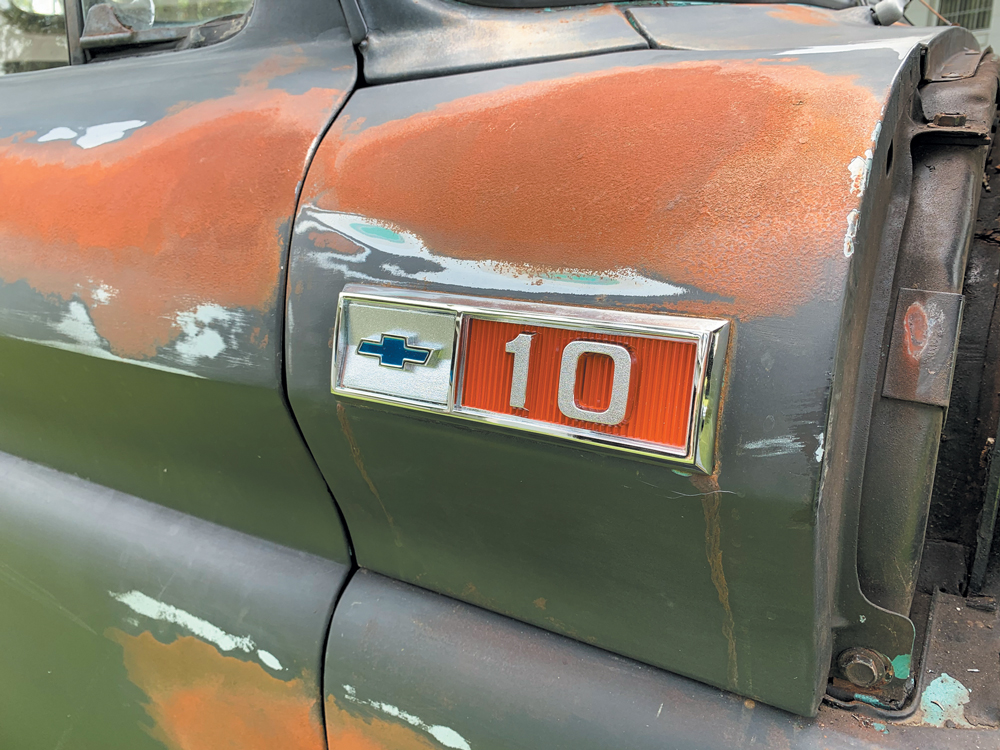
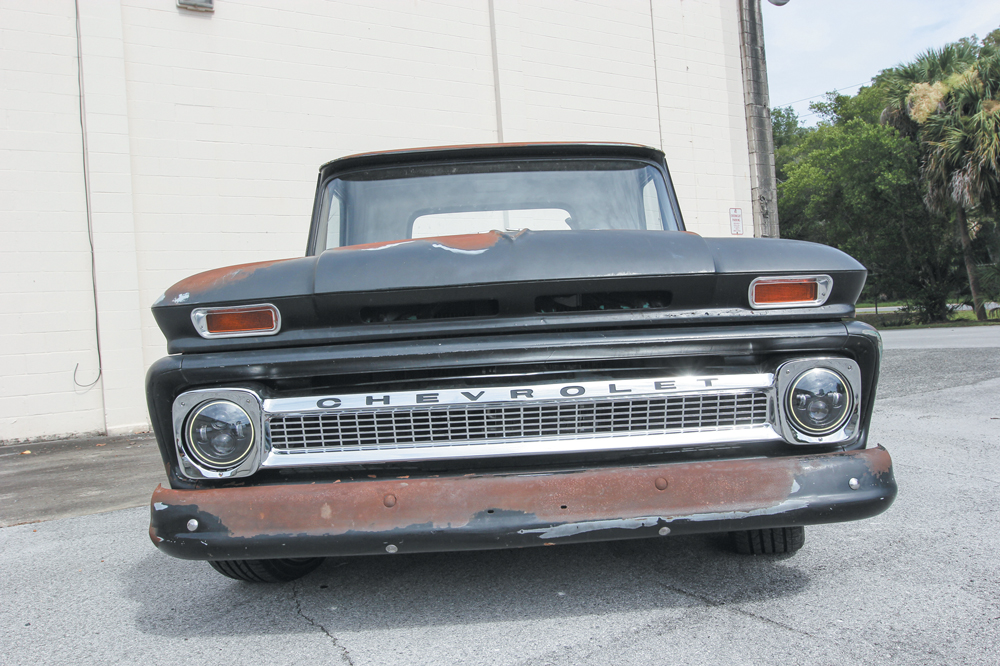
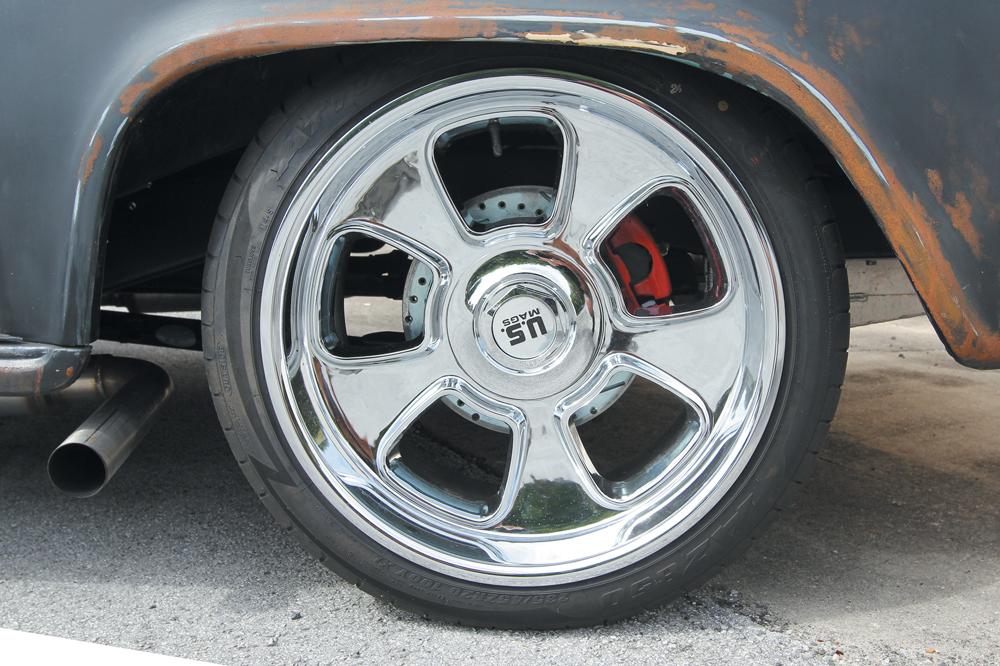
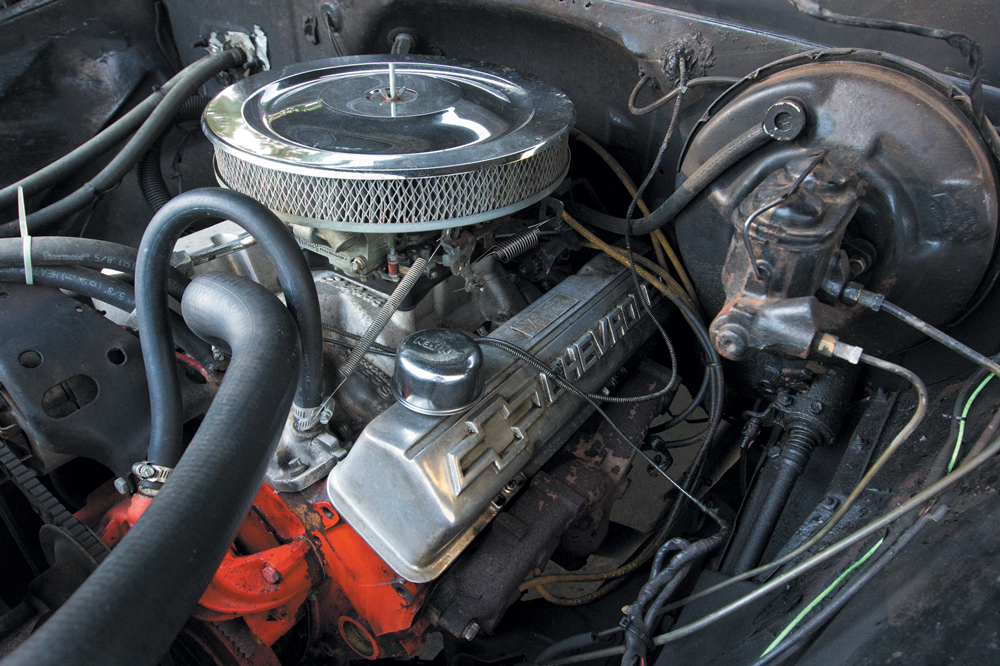
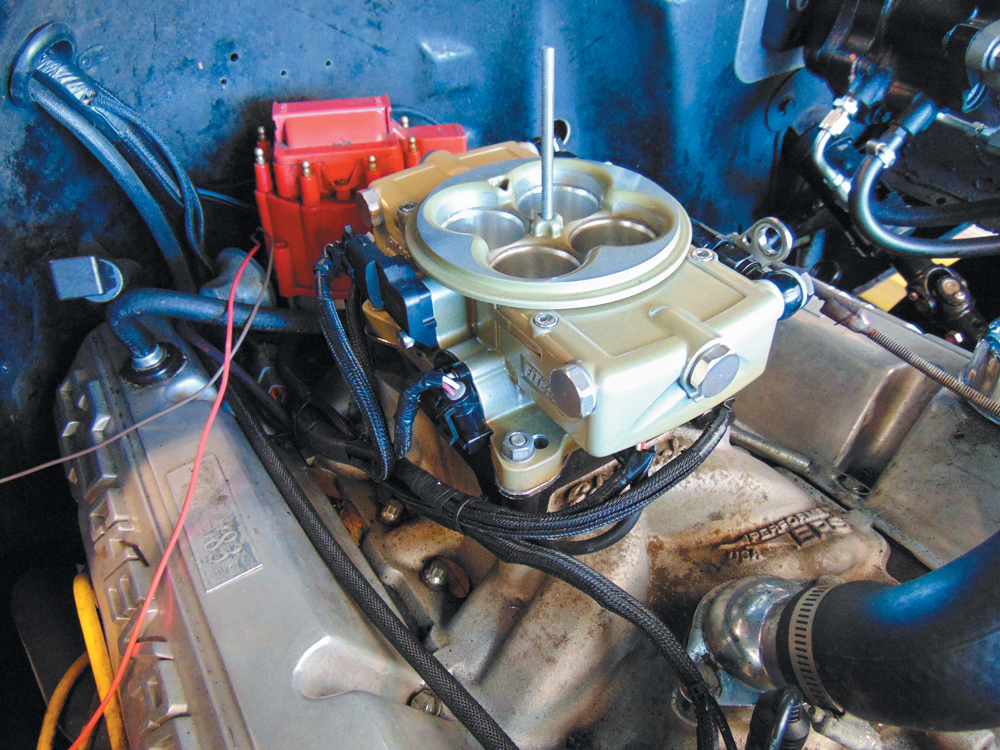
On this build we will be testing out Classic Performance Products all new Totally Tubular control arms and coilovers for a static yet adjustable suspension. After installing the lower control arms, upper control arms and coilovers, you can get a real feel for how well this system was designed. Fully adjustable, incredibly strong and engineered with a DIY mindset.CPP’s 6-piston brake calipers are a two-piece forged caliper design with six cross bolts for added strength. The piston sizes are staggered to minimize tapered pad wear, and it uses the same pad as the ’97-’12 Corvette for an easy-to-find, cost-effective pad replacement.Before we can put the bed on, we have to take care of this old crusty bodywork and paint. The options include a fresh new paint job, which is way out of our budget, or a cool forced patina finish that is very much in style nowadays. Luckily for us, Jeff Lagasse of Gen One Customs happens to be right next door and he is a master of faux finish disaster.Jeff’s unique technique is a bit of an industry secret so we can’t get too detailed, but if you call him up, he can explain the whole process. Just look at how amazing this tailgate looks now that it’s covered in real surface rust! No rust holes, no sharp edges, just a chemical reaction on original steel panels.After installing our new Auto Metal Direct hood and fender, Jeff moved onto the front of the truck to carry the patina throughout. When you know what you’re doing, forced patina is an art form all of itself, and we love it!The final step of stage one is the installation of our Bed Wood and Parts wood bed floor. This kit is ordered specifically for this year’s truck and style of bed. It’s all pre-engineered with perfectly cut wood and metal slats.While we are upgrading the bodywork, we decided to swap the factory badges for these new OEM replica pieces from Brothers Truck Parts. The entire panel comes off and the badge is simply bolted in. It’s also a great time to clean out the bird’s nest under the factory panelsNext on the list is to swap out that original grille for a new OEM replacement from Brothers Truck Parts. This is another simple task that makes a big impact.The taillights that came with this 50-plus year-old truck were basically trailer lights—rusty metal exterior, dual filament bulbs and a plastic red lens. They gotta go! These 3-inch hotrod-style billet LED taillights from BlueSteel Customs have integrated marker lights that are perfect for the Raven.To match the bling that’s reflecting off the new chrome grille, we bolted up these 20-inch U.S. Mag wheels. Since this truck is a driver, a 20-inch rim will give off more room for a thicker tire, which will in turn make the truck ride much better.The wood we choose is called Padauk for its moderately heavy, strong and stiff properties along with its exceptional stability. Padauk wood has a very unique reddish-orange coloration that will go amazing with the forced patina. Bed Wood and Parts predesigned and engineered this kit specifically for our body style.The truck already has a rough-running 350c.i. small-block in it so we will simply add a new FiTech electronic fuel injection system to make this bird chip all day.
Along with the new suspension, we upgraded the factory brakes with hydraulic brake assist and hydro-boost, also from Classic Performance Products. A high-quality, direct bolt-in hydraulic brake assist system is mandatory on any daily driven classic truck and Classic Performance Products has designed its systems to include everything you need to install into your vehicle. Most hydraulic brake installations can be accomplished in an afternoon, using common hand tools, with average mechanical skill levels. Using all new parts, this unit puts out an amazing 1800psi at the wheels!We are loving the look of this all new Go EFI Classic in the classic carburetor gold finish from FiTech EFI. This revolutionary fuel injection system allows you to maintain the classic carburetor look while eliminating cold start issues, hesitation, vapor lock and flooding. This innovative classic design hides the injectors and has an externally mounted ECU so it can be mounted wherever you want to ensure a true carburetor look is maintained. The Go EFI Classic is a self-tuning fuel injection system rated for up to 650hp. The more you drive the more it adapts to your personal style. So, it is perfect for this hopeful everyday driver.
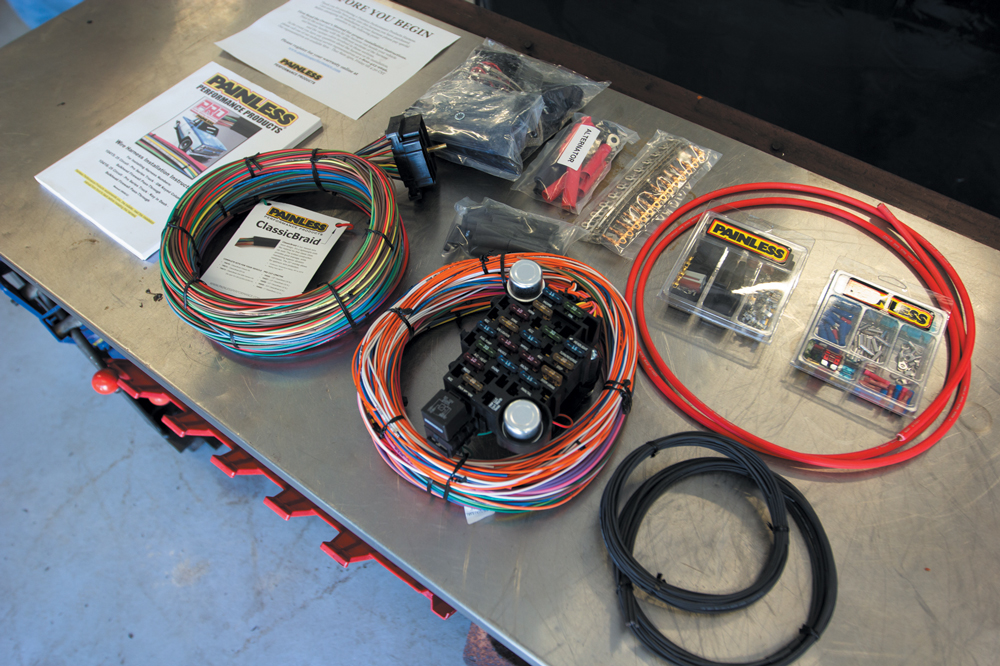
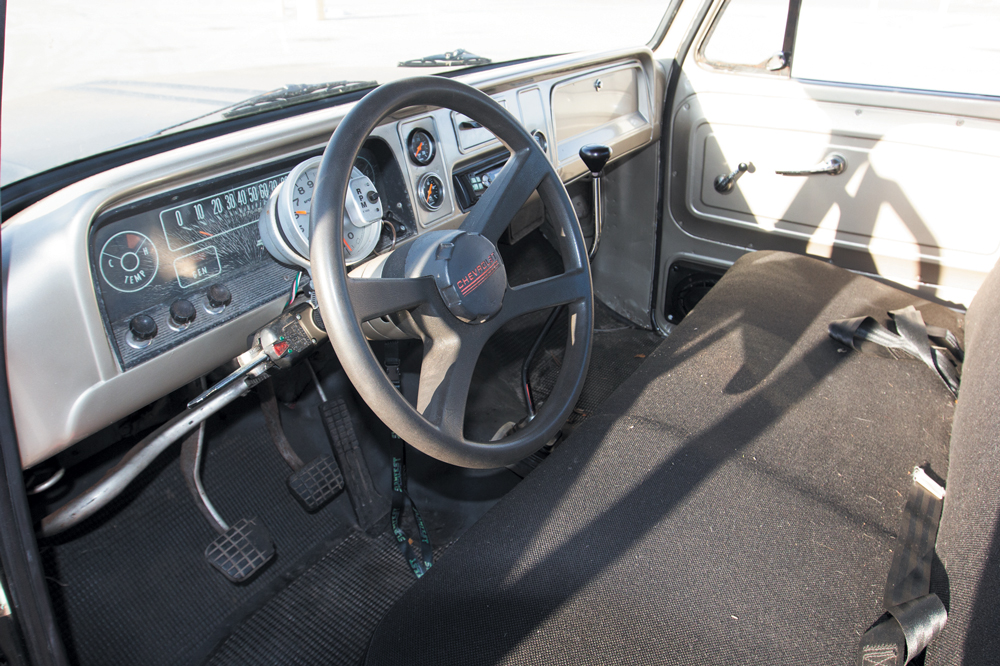
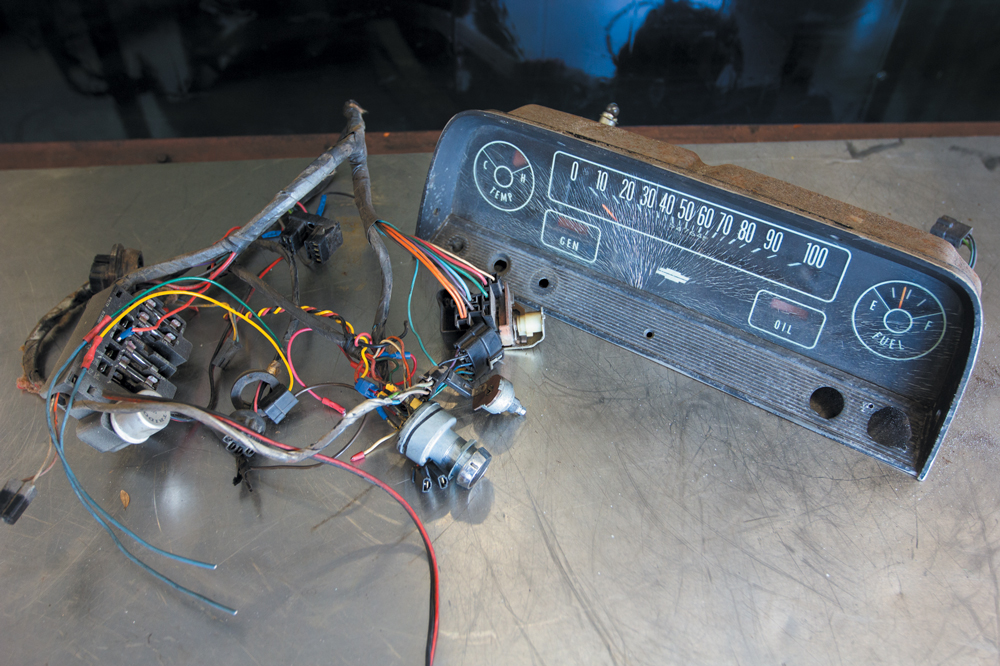
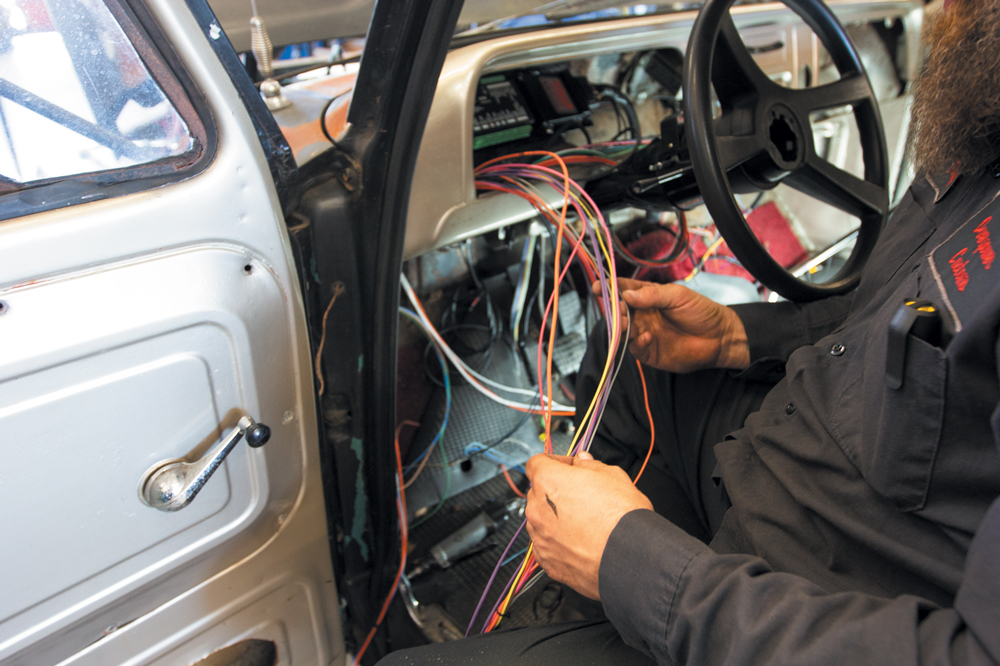
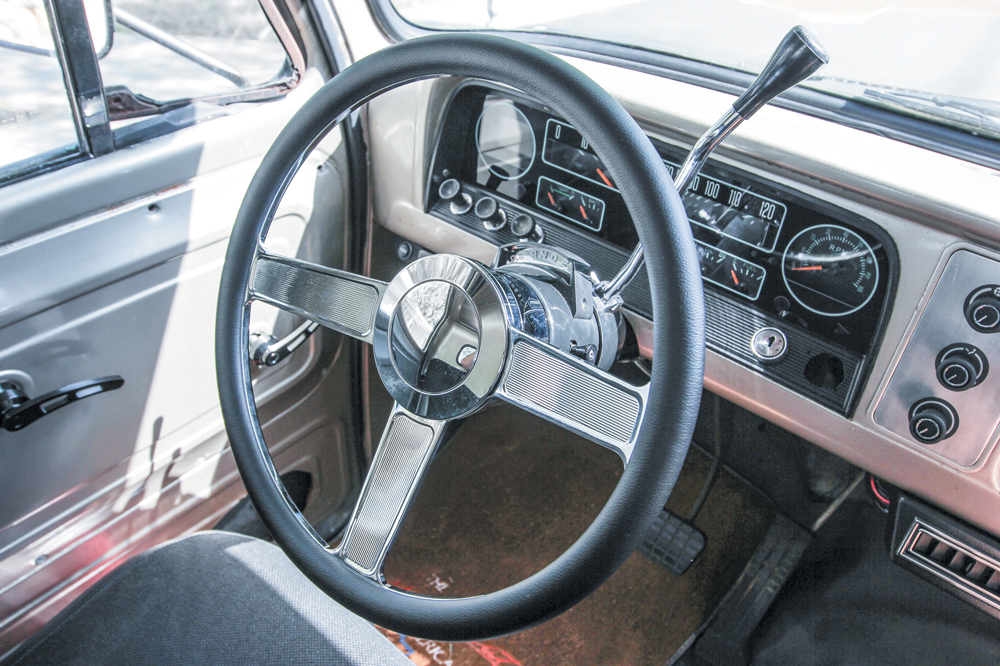
The interior and electrical system of our C10 is all original and extremely worn out. We will be replacing the dash components, audio system, door hardware, all the wiring and interior fabric. This Painless Products harness is designed with a bulkhead connector and rubber bushings to protect the wiring from getting cut on the sharp metal. The first task on the list is to remove all the existing wiring. Everything is getting replaced, so no need to be gentle here.This new Dakota Digital RTX-64C-PU digital dash offers a vintage look with modern capabilities. A 2.4-inch TFT message center and an analog tachometer lets you keep an eye on everything. The small display in the center contains a simulated tumbler odometer, too.
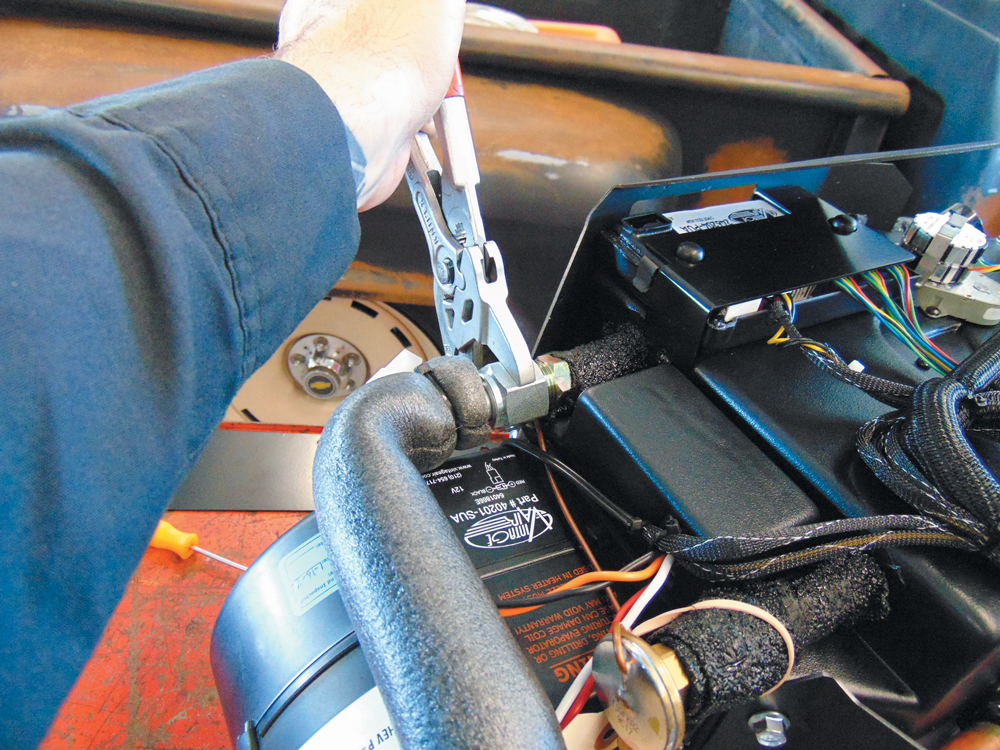
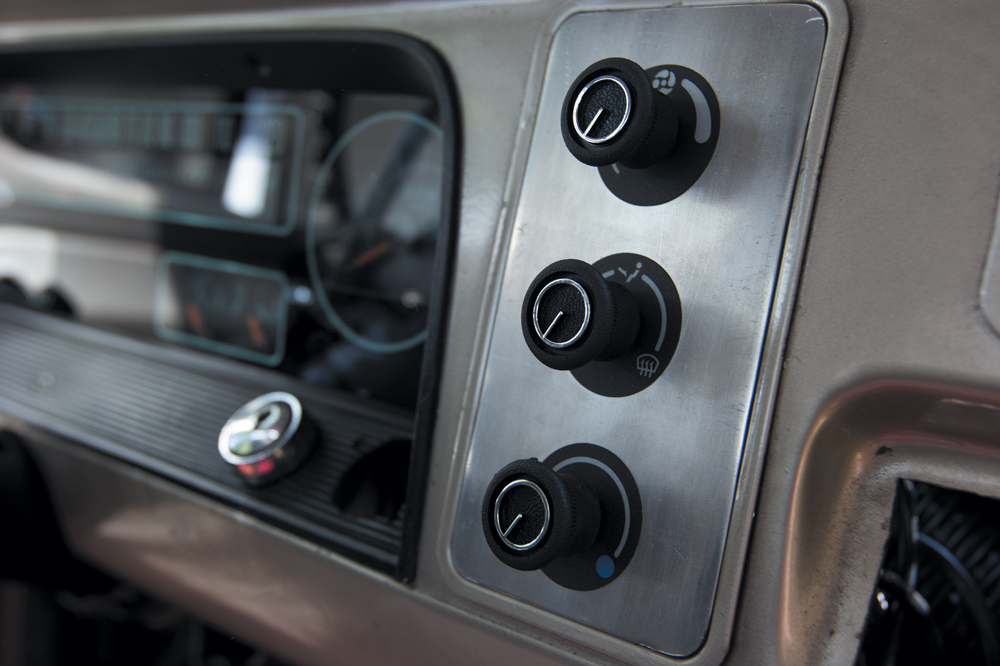
Vintage Air is a must in any classic truck. It’s designed to be installed in a weekend and work for a lifetime. On a workbench, we installed the evaporator rear bracket using hex bolts and hardlines with properly lubricated O-rings. The completed unit can now be set inside the dash behind the glovebox. The A/C control unit has three knobs that handle the temperature, fan speed and air direction.Finally, we will replace the ’90’s style steering wheel that someone bolted on before we picked it up last year. A new Eddie Motorsports steering wheel is the icing on the cake.
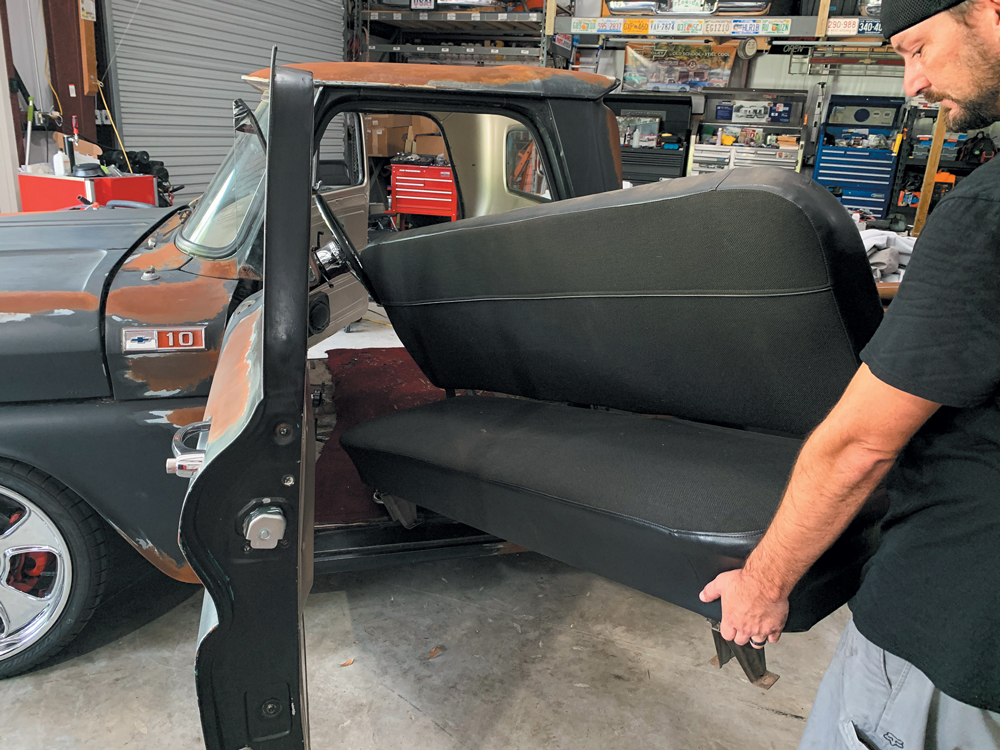
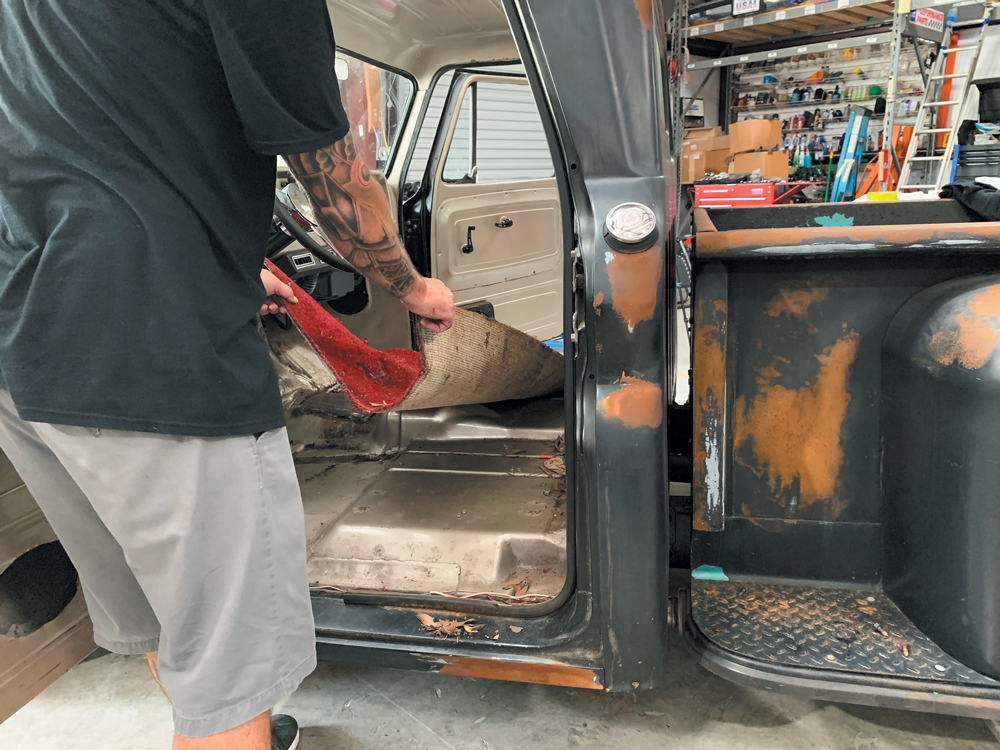
After having out good buddy CJ to weld up the shifter hole in the floorboard, it was time for the old interior to come out. With the 8-seat bolts removed we can slide the bench seat out to reveal what’s underneath. Never know what you will find under the seat of a 50-year old truck. Yanking out the carpet is easy but stressful. What if we reveal a bunch of rust or really bad repairs? Not on this truck! It’s clean and complete.
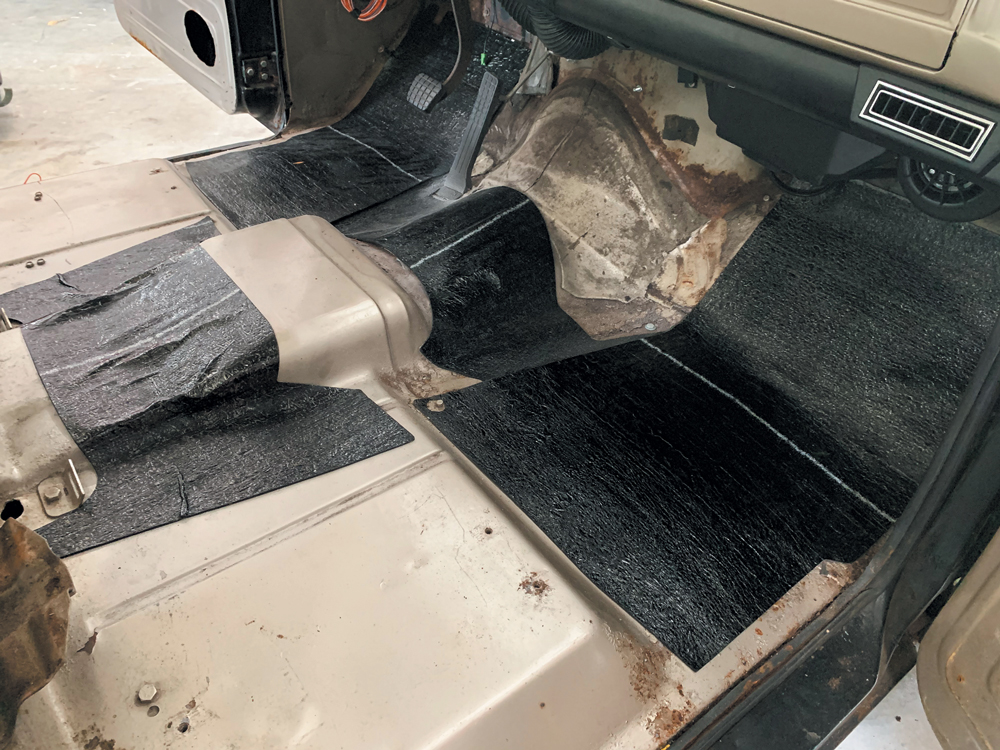
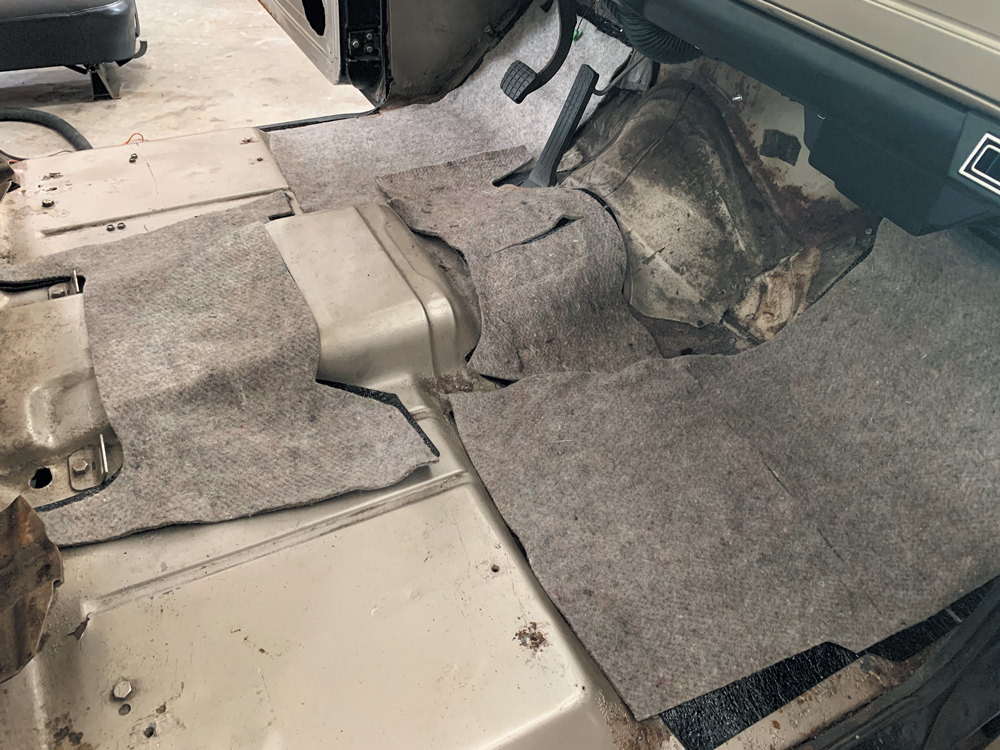
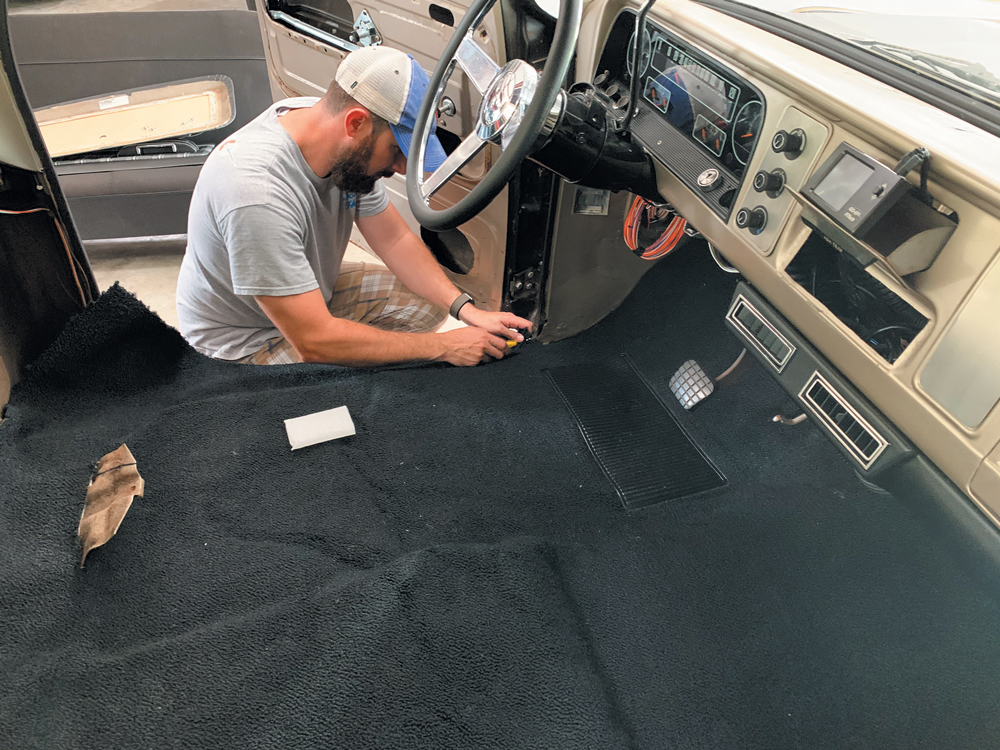
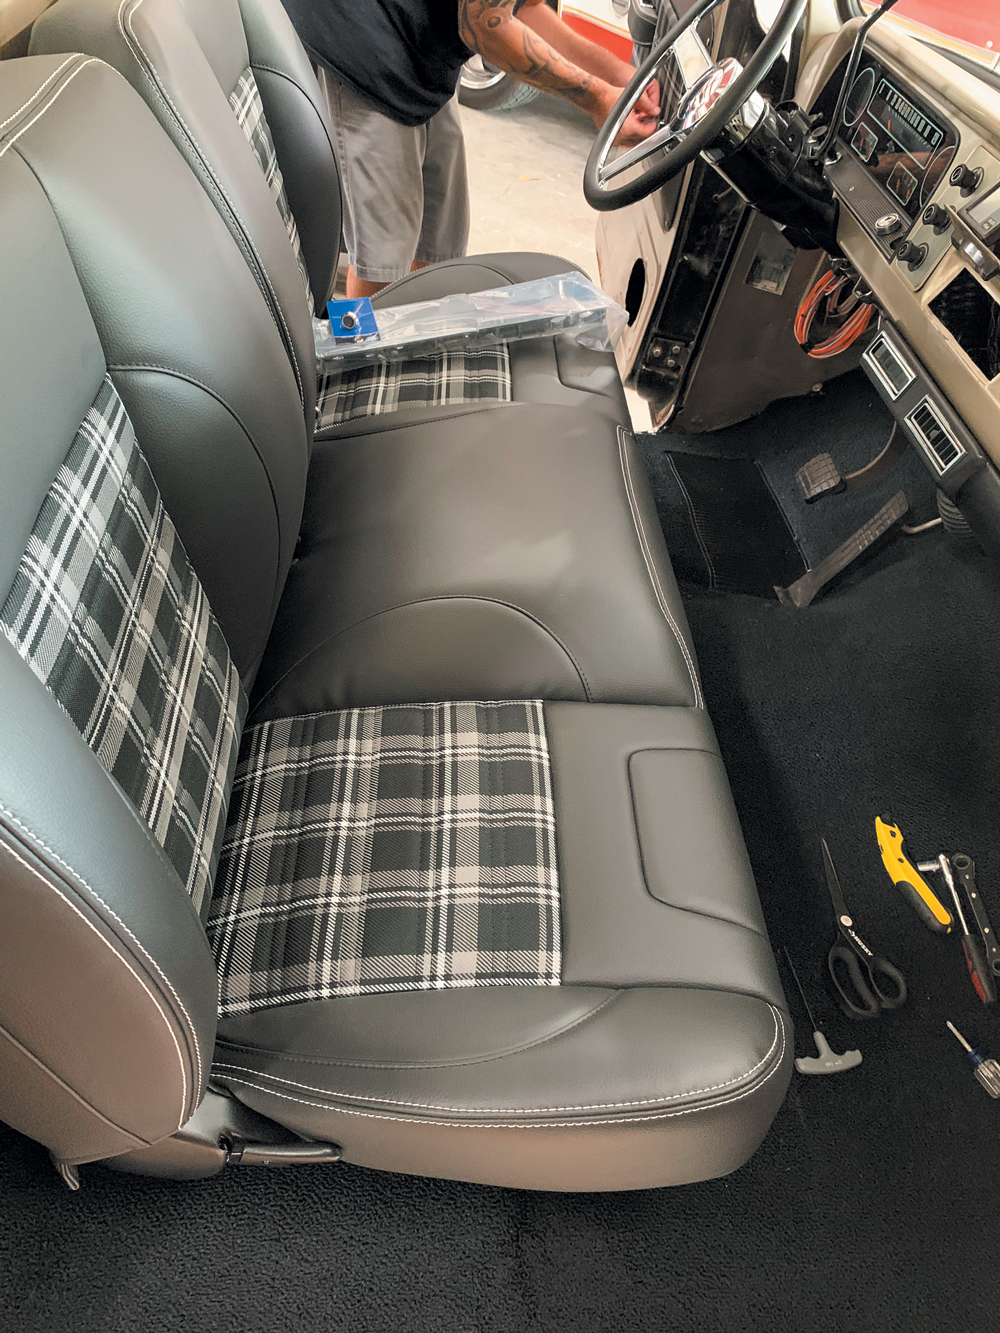
Brothers Tucks Parts offers custom cut sound and heat deadening material and carpet padding for your Chevy C10 truck. This kit comes with four pieces that are bonded to the floor with spray adhesive. This goes under the carpet to smooth the transitions and make the carpet softer.This carpet kit from TMI Products is very high quality and sewn on the seams. Some minor trimming on the edges gives us a perfect fit.
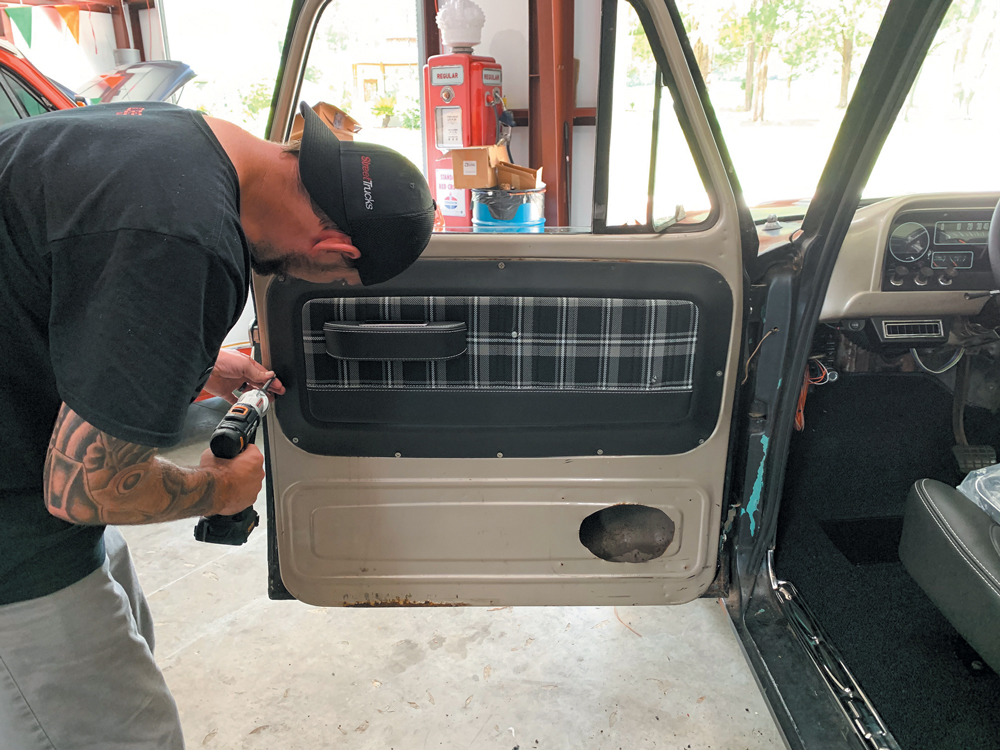
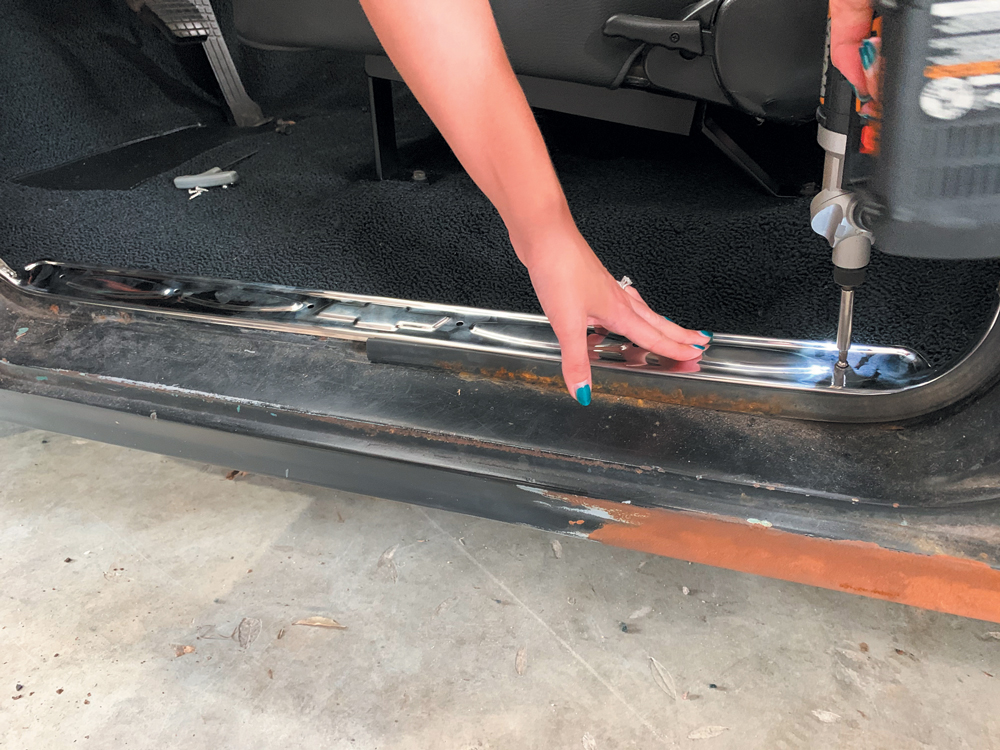
TMI Products makes high-value interior automotive components like seating, interior consoles, floor coverings, door panels, convertible roof assemblies, headliners and integrated electronic systems. The quality is exactly what most classic truck guys demand, and the customer experience is second to none. They work directly with you on style, colors and design so you get exactly what you expect. Installation is a breeze thanks to their made in-house seat brackets and maintenance is simple since they use such high-quality materials.The original door sill plates will need to be replaced as well. Luckily Brother Truck Parts has an affordable set we can order.
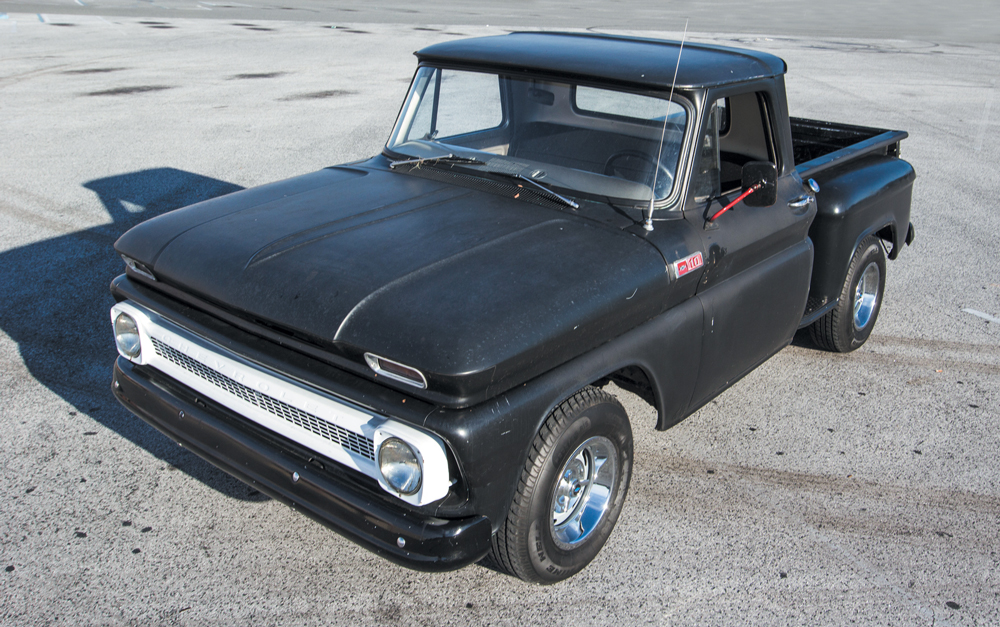
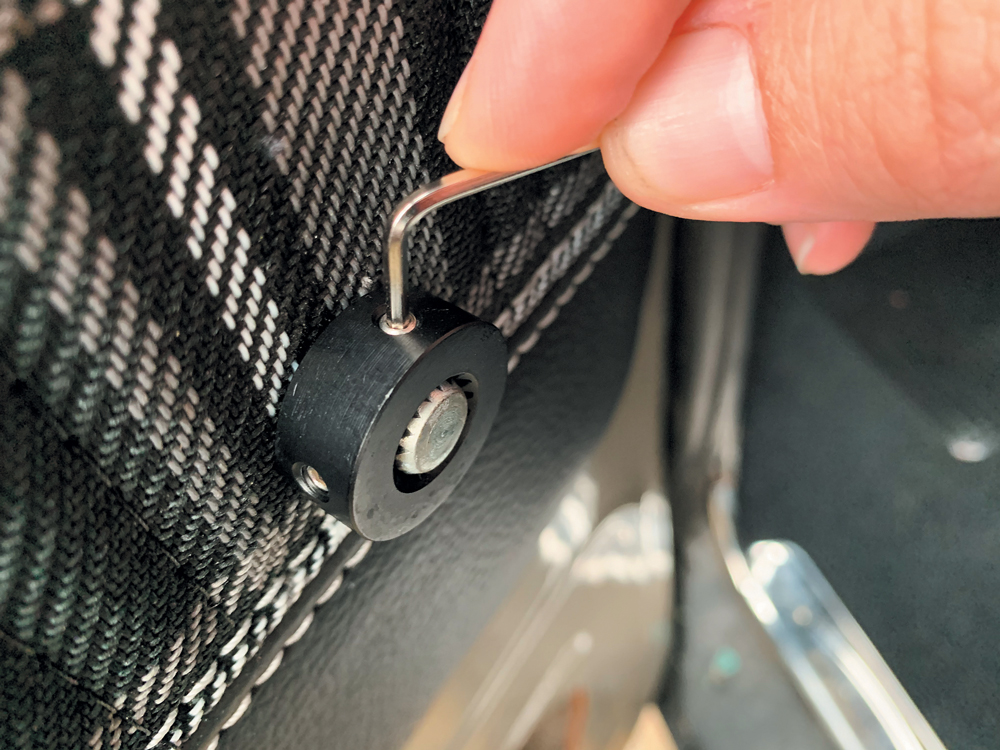
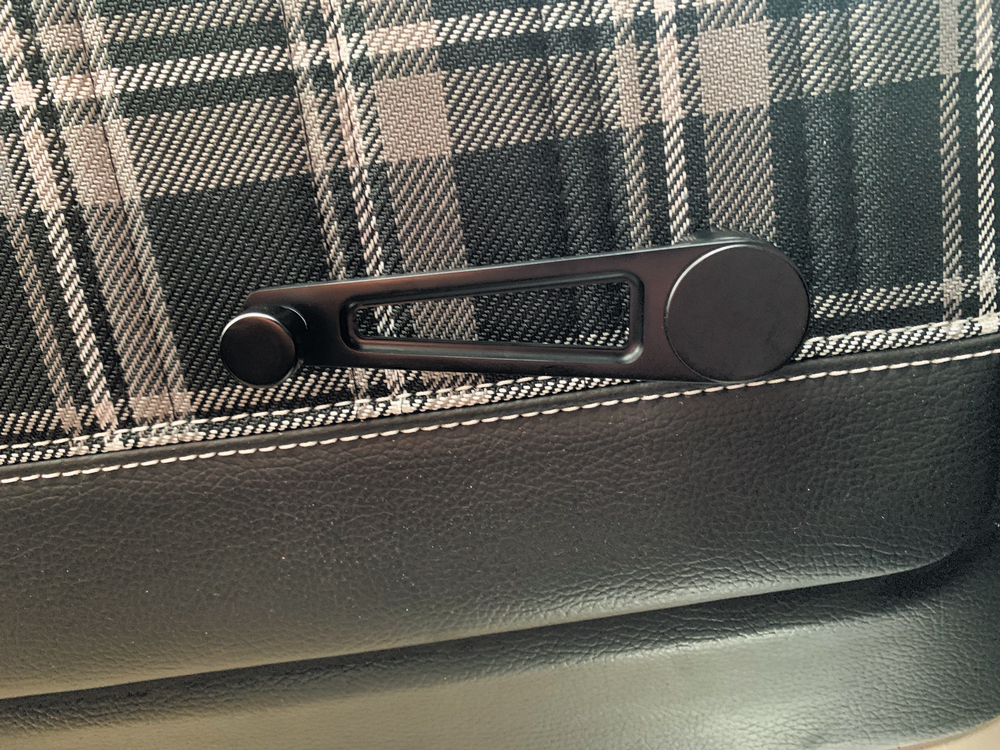
The last step is to install these new window cranks and interior door handles from Forever Sharp. Now that is a clean interior! We love the plaid pattern combined with the billet!The Raven looks great and performs better around town now thanks to the weight loss and cooler brakes. Now time to go test this street machine out!
Chris Hamilton is an automotive journalist, editor, and lifelong truck enthusiast with extensive experience covering custom truck builds, fabrication, performance upgrades, aftermarket products, and a ...
We use cookies to enhance your browsing experience, serve personalized ads or content, and analyze our traffic. By clicking "Accept All", you consent to our use of cookies. Visit our Cookie Policy for more info.


Share Link