KEVIN TETZ . December 17, 2021 . C10 Builders Guide.
Share Link
Save ArticleLogin to save it
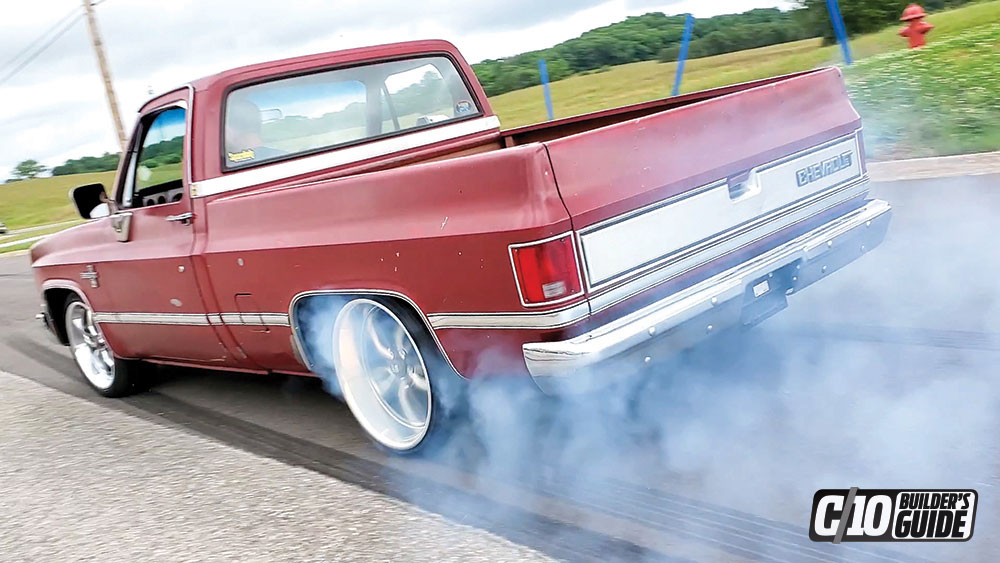
Just to remind you, Gary Faust has a great looking patina’d Squarebody C10, and he has his sights set on building a badass truck with style, comfort and muscle—a true triple threat! On top of that, he decided to go against the current trend of LS-ing his truck. Instead, he’s keeping the traditional crate ZZ3 small block, which was fresh when he acquired this project a year or so ago. Challenge accepted!
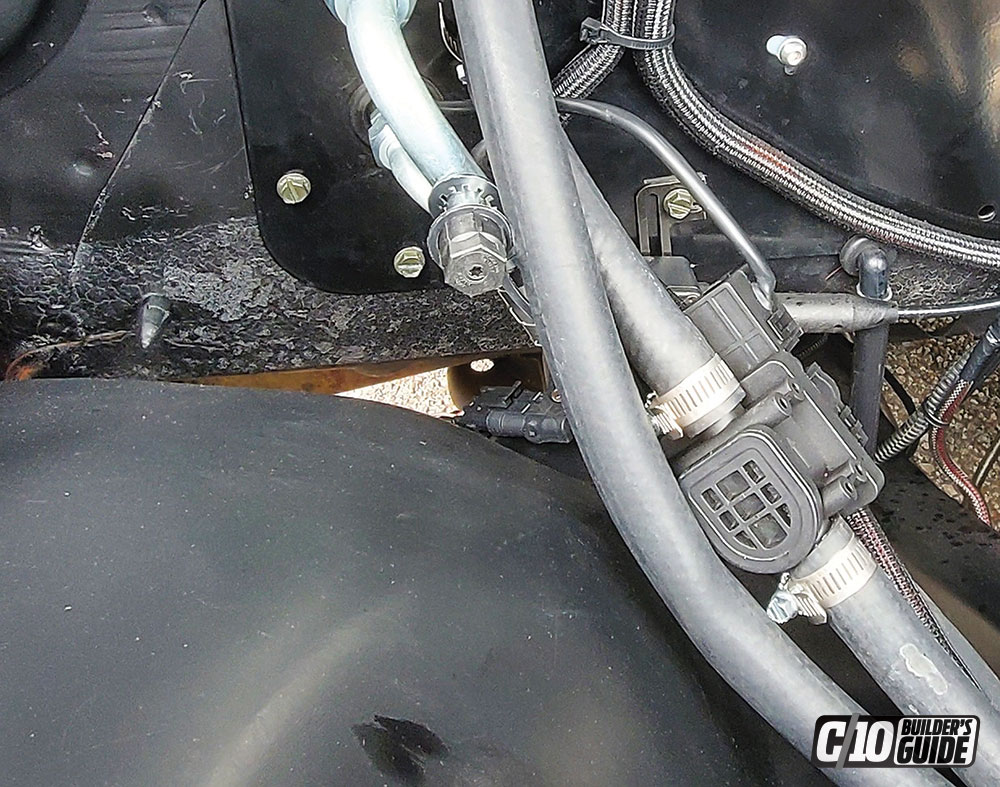
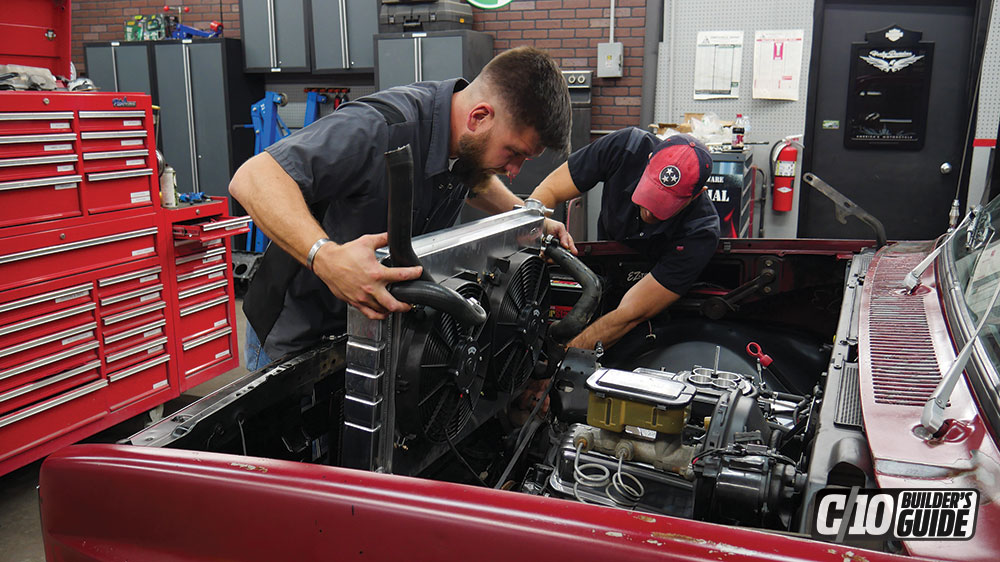
Part one of this story a couple issues back was setting the foundation for forced induction on a high compression engine and preparing for the extra demand that extra atmosphere puts on the entire drivetrain. We upgraded the engine cooling to a Coldcase radiator and E-fan setup, the interior HVAC to a Vintage Air direct fit system, and opened up the exhaust with Dynatech-coated longtube headers and a Flowmaster 2.5-inch exhaust. We also beefed up the fuel delivery with Holley Performance bolt-in tank and fuel pump upgrade, which is the perfect companion to the Super Sniper throttle body EFI that can either act as a vastly more efficient improvement to the carburetor or as a blow-through setup for the centrifugal supercharger that was coming soon.
Sniper’s self-learning capability is amazing, and Gary had the truck up and cruising NA in no time, which allowed him to shake down the rest of the mods, test for reliability and upgrade his gauges to Dakota Digital communication. Now, it’s time for turning up the wick and making more power with the solid foundation. To state the obvious, there are many options for power adders for a GM V-8 engine of any generation, so Gary had his choice of several strategies to achieve his power goals.
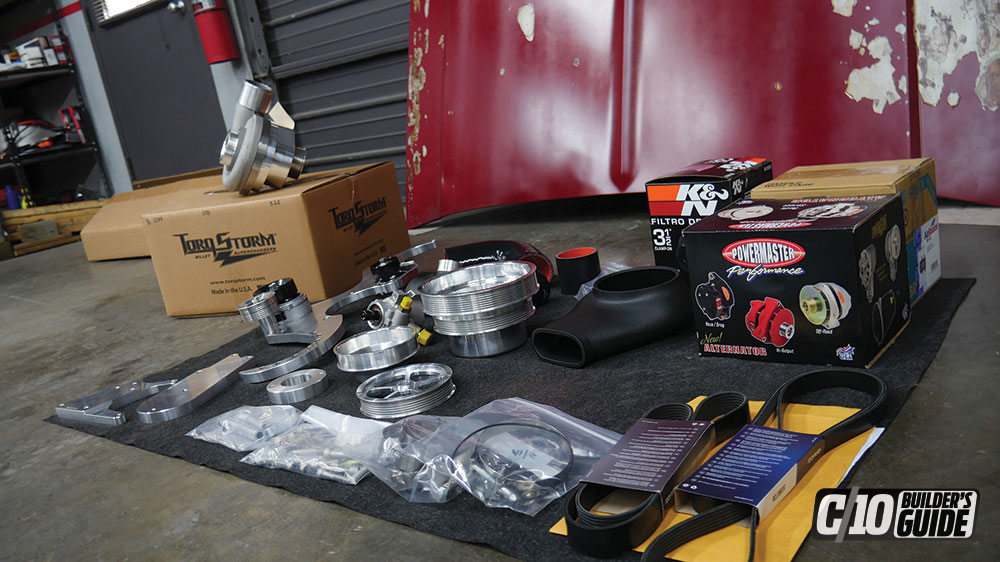
Accelerated Racing Products LLC, the parent company for TorqStorm, says all its products are made in-house in Wyoming, Michigan (yes, it’s a city in Michigan). The company was formed out of necessity, responding to customer demands and a market that had a need for finely machined products for a variety of applications and a proven record of reliability. Its unique billet impeller is a key product in the TorqStorm system and is the product of years of testing and improvements. All of this means that the Single Charger Plus blower kit that Gary spec’d out is tested, reliable and affordable. Excellent technical support also helped Gary make the decision to go with torqStorm, and we’ll show you the finer points of installing this system that claims between 40 and 50% power gains. We’ll keep them honest, and keep you informed with a verified Dyno session at DBR High Performance after installation.
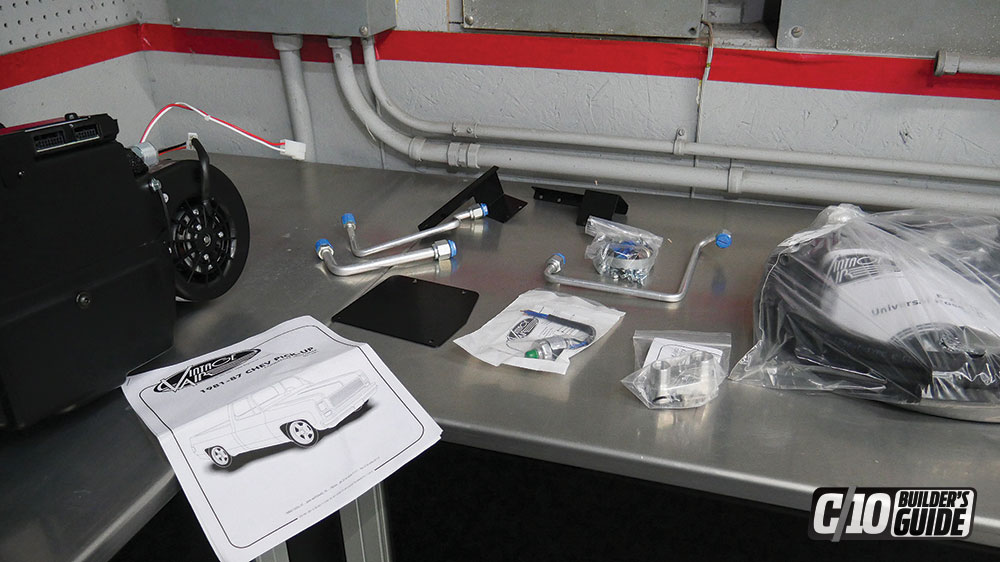
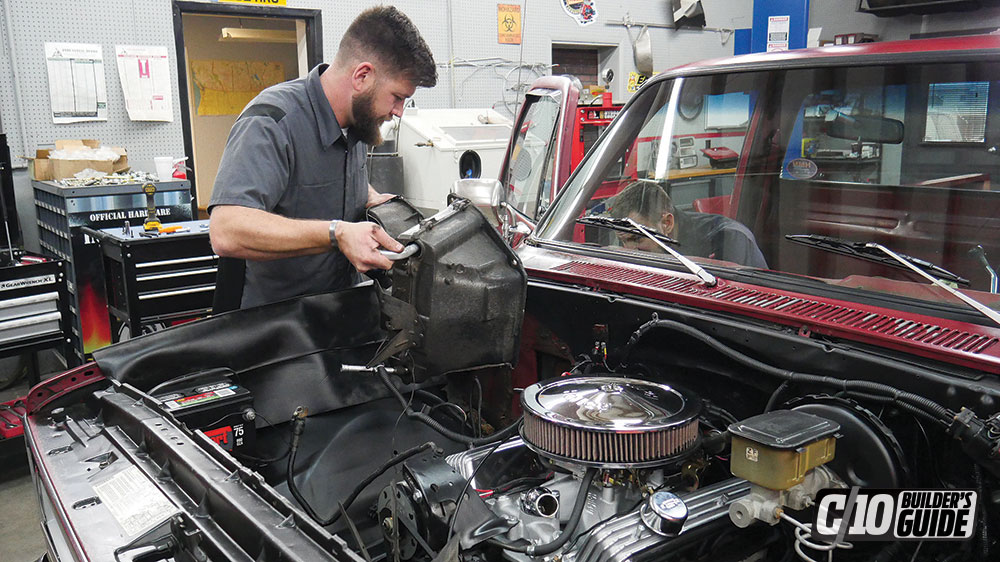
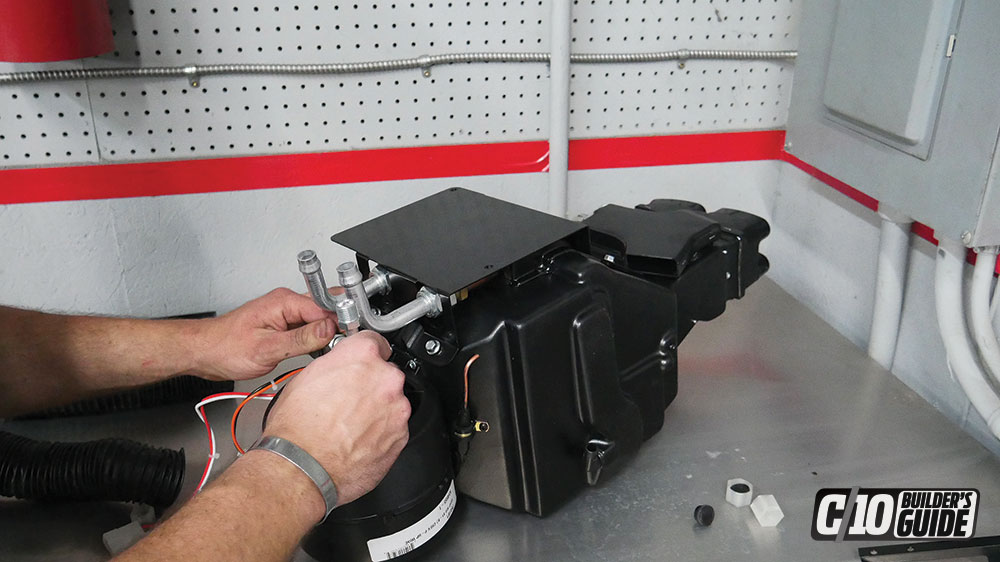
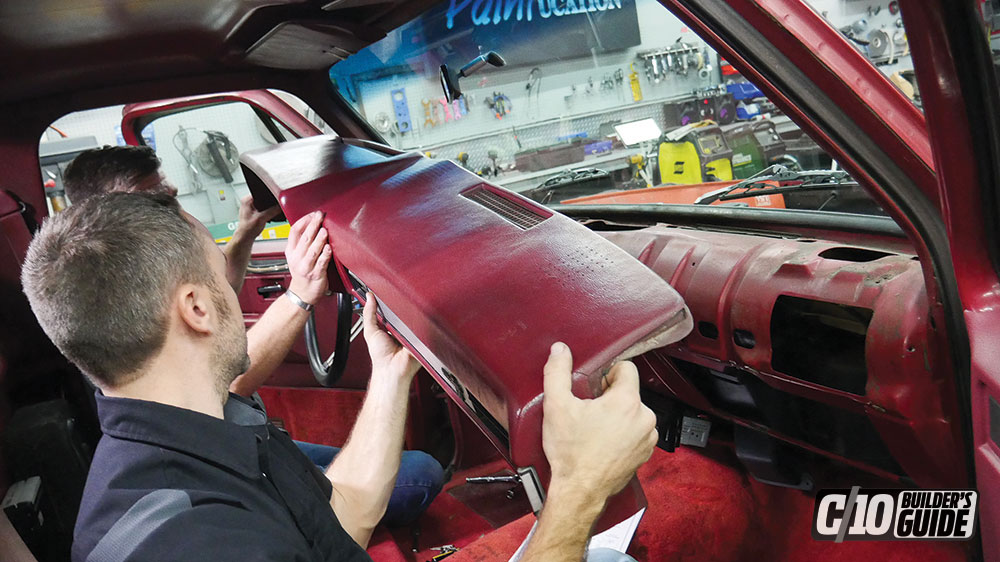
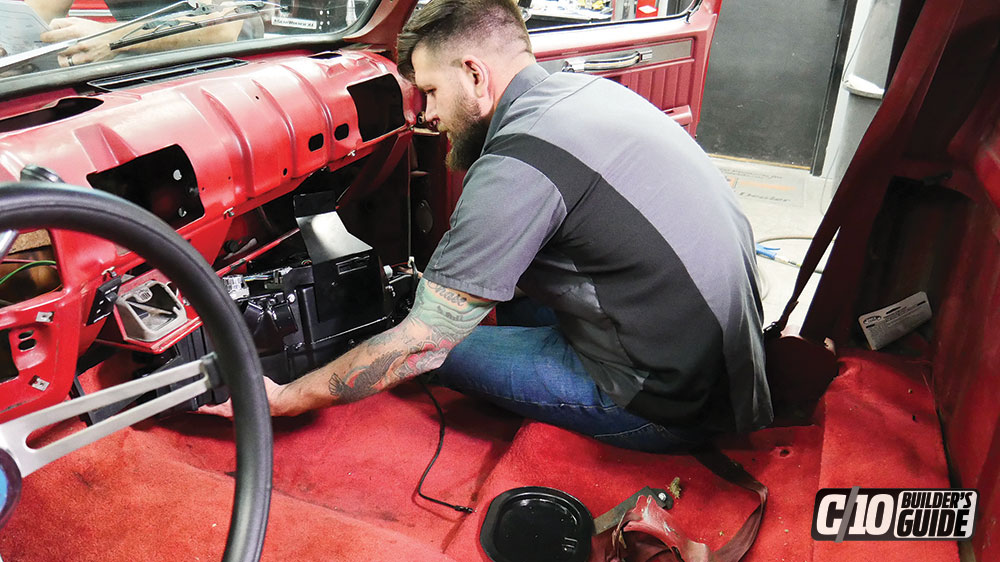
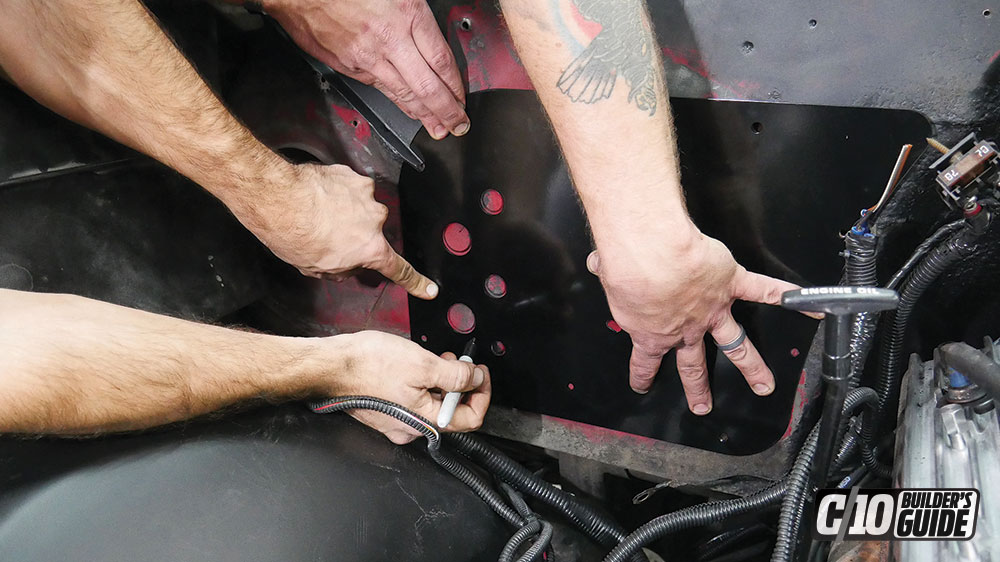
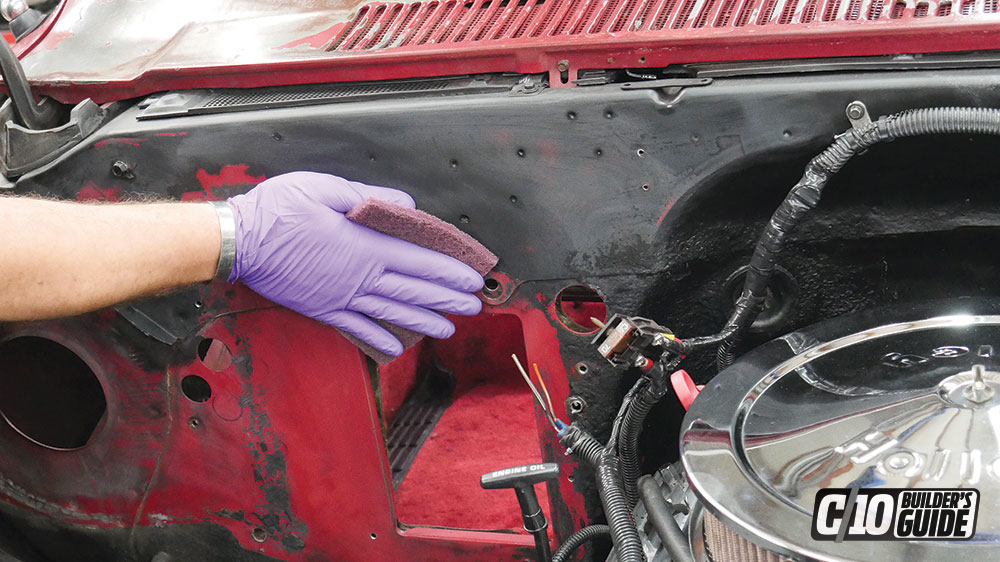
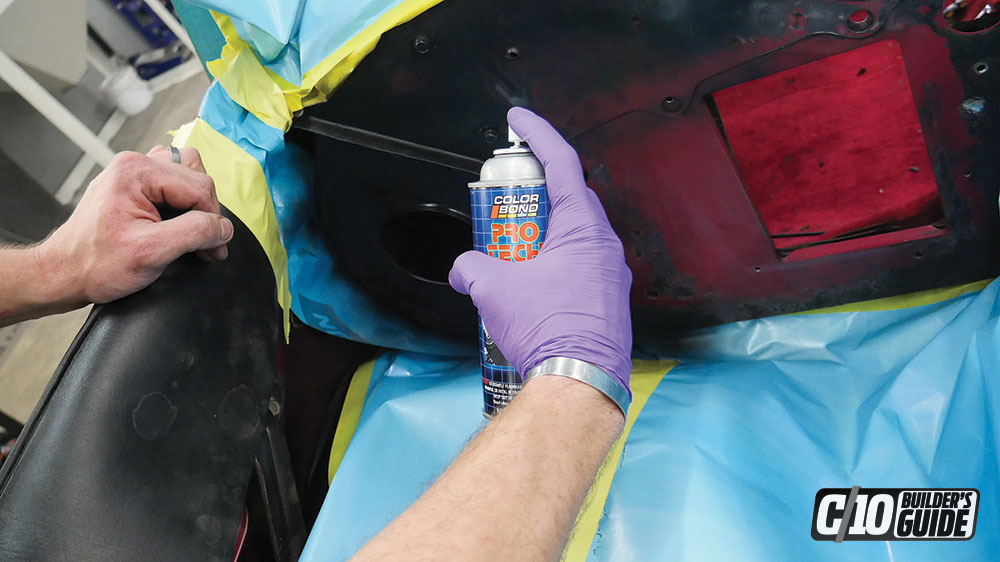
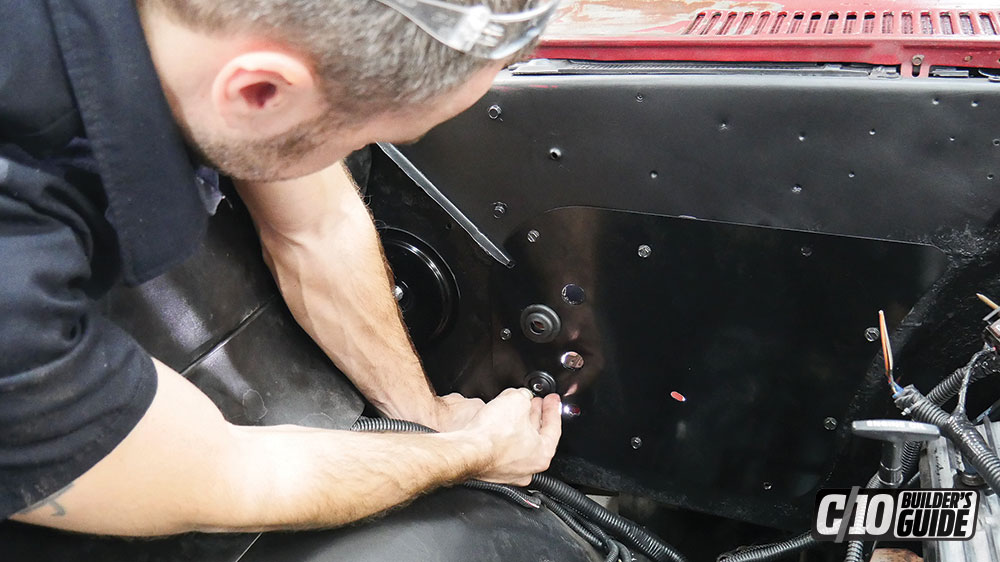
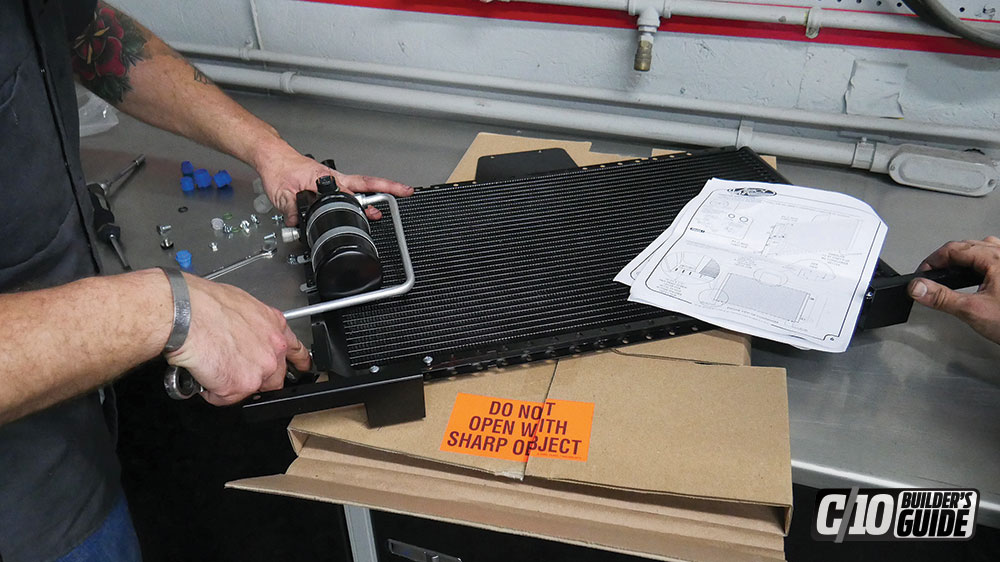
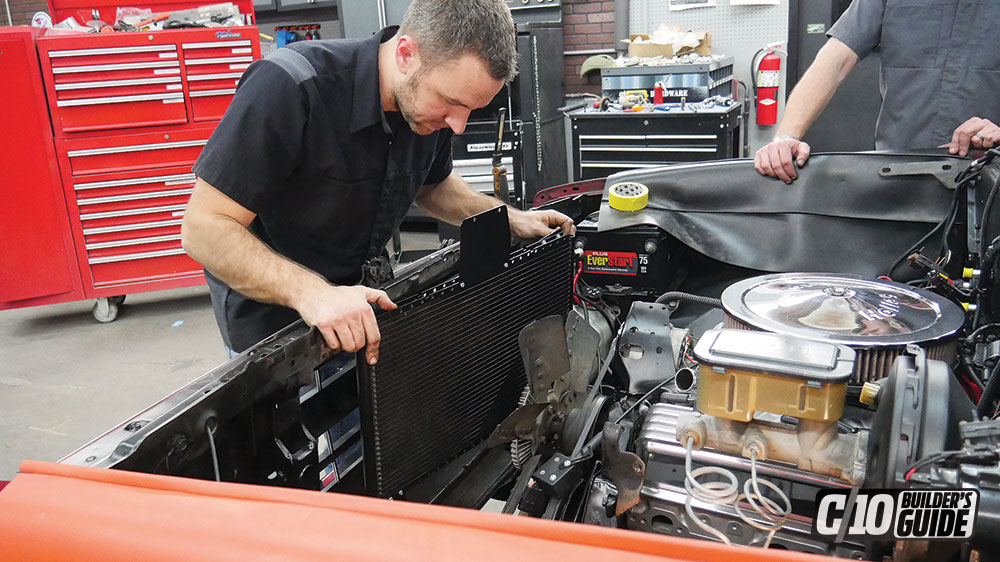
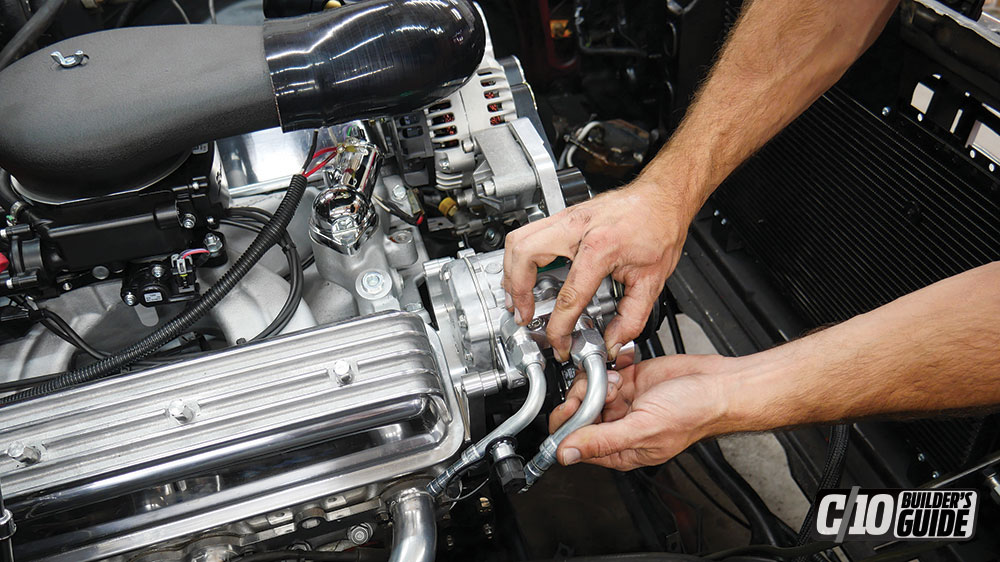
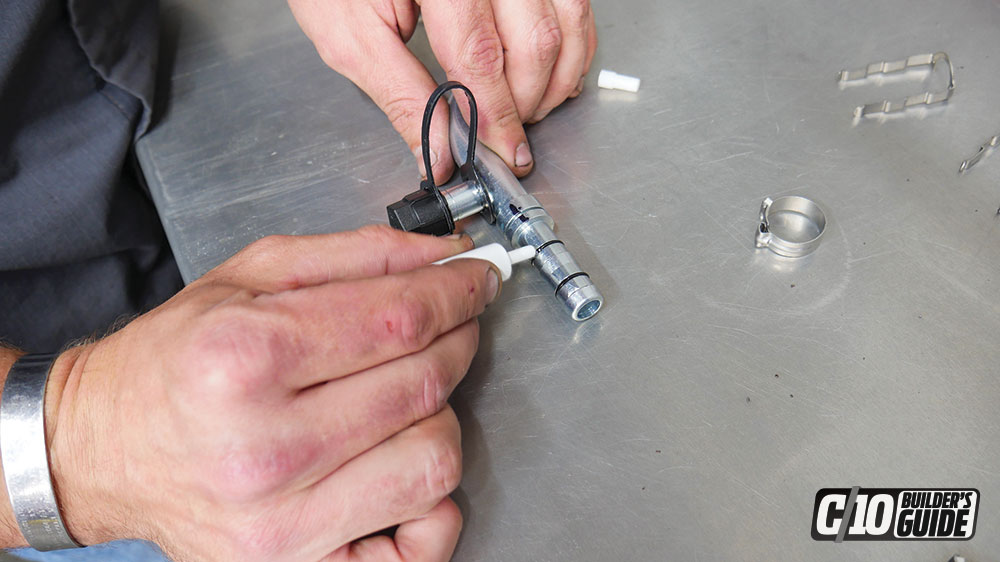
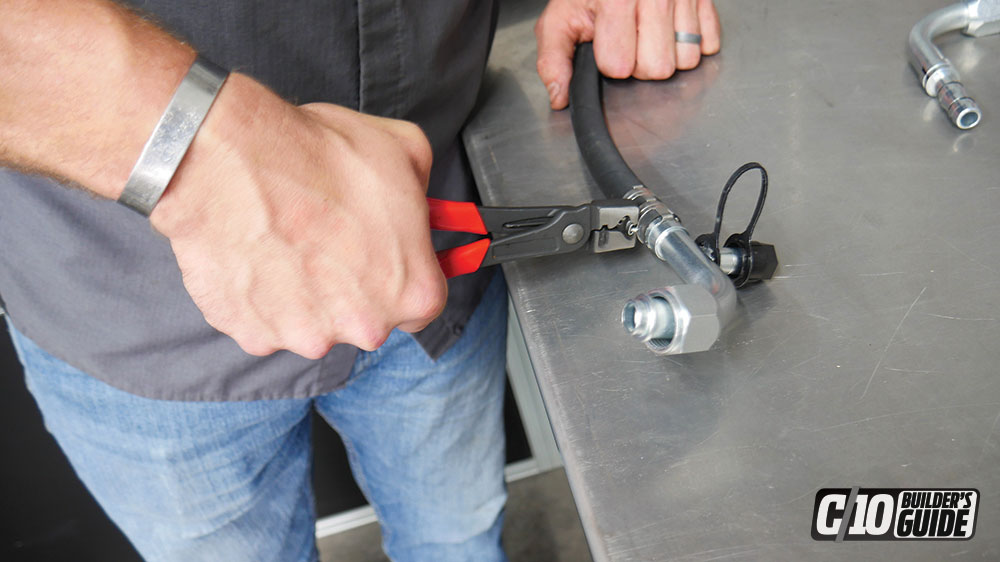
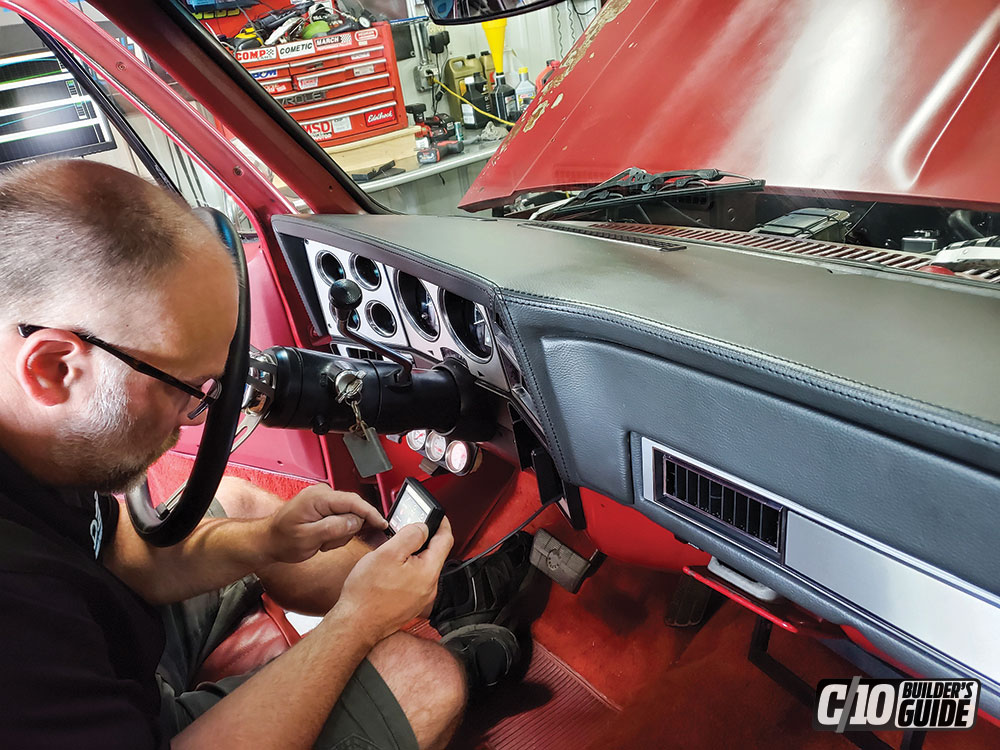
The TorqStorm kit is complete with a Sanden modern A/C compressor, so a great companion to that is the Vintage Air Sure fit (Part #944175), which clears a lot of space in the engine bay and modernizes the tired and outdated original HVAC system. We talked to Rick Love at Vintage Air, and he explained that using a hybrid of the existing evaporator and under-dash system combined with a new condenser and compressor is asking for issues. Different refrigerant grades and a mix of new and old components are rarely compatible and reliable, so we chose the complete system, which comes with easy-to-read manuals and clearly labeled parts.Gary pulled out the remaining parts of the OE system from in the engine bay and under the dash.The main case is pre-assembled before fitting to the interior under the dash. Clear instructions and excellent tech help are one of the reasons Gary chose Vintage Air.The original dash was cracked and hacked up, so we’re refitting it with a new TMI unit that bolts in place.The Sure-Fit systems are designed to bolt into existing holes and take up less space than the original system.The supplied block-off plate gets marked for new hole to be drilled for hard lines and heater hoses.Gary wanted satin black in the whole engine bay. Paint prep includes a thorough cleaning and scuffing before applying coatings.Colorbond Underhood black paint comes from LMC Truck and looks great on the firewall. Gary applied three medium-wet coats for full strength and even sheen.With the new firewall plate installed (with supplied screws and bolts), Cory Schuette installs grommets and seals.The new condenser and dryer are pre-assembled on the bench before installation, along with a new trinary switch.The condenser has brackets to hold it in place in existing holes in the upper and lower core support, making installation simple and quick.Gary also installed an new transmission cooler for the 4L60 where it will do the most good—right behind the grille.Rather than having lines crimped at a hydraulic shop, we opted for the Vintage Air EZ-Clip line kit, which allows us to make our lines on the spot. Fittings are installed on the pump, firewall and condenser/dryer, then hoses are routed and cut to fit.PVC cutters work great for cutting the EZ Clip hoses, which are smaller diameter than conventional and easy to rout.Once your hose lengths are established, connection to the plated fittings is simple. They use a double O-ring seal combined with a barbed end fitting and clamps. Supplied lubricant is applied so the O-rings don’t move when the hose is installed.An outer cage places the two clamps directly over the O-ring, giving a clamp-load that will safely withstand the high pressures of the new HVAC system.New lines are assembled in minutes and look great installed. EZ Clip lines are flexible yet strong enough to facilitate nearly 90-degree bend, making them easy to hide and a way to clean up engine bay.Heater hoses and the supplied control valve are installed from the firewall to the intake manifold and water pump.The TMI dash fits perfectly and is a big improvement over the stock crusty dash pad that Gary inherited.
TORQSTORM
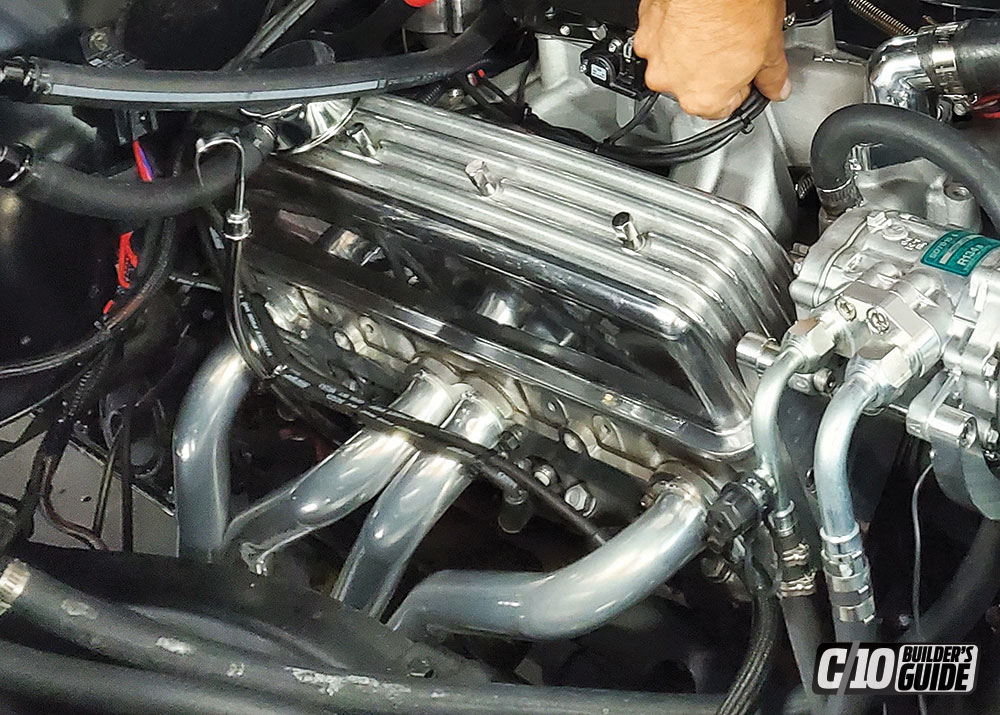
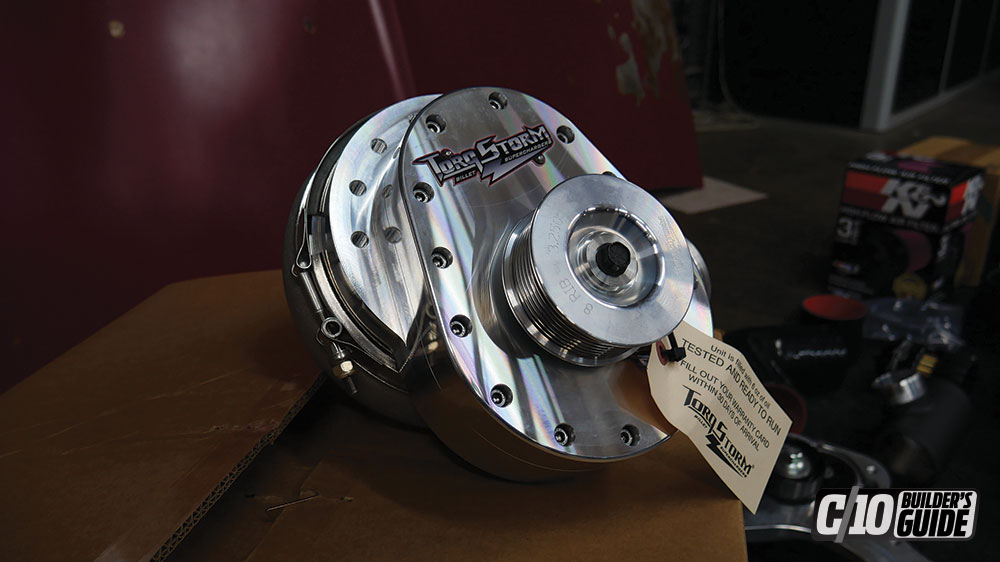
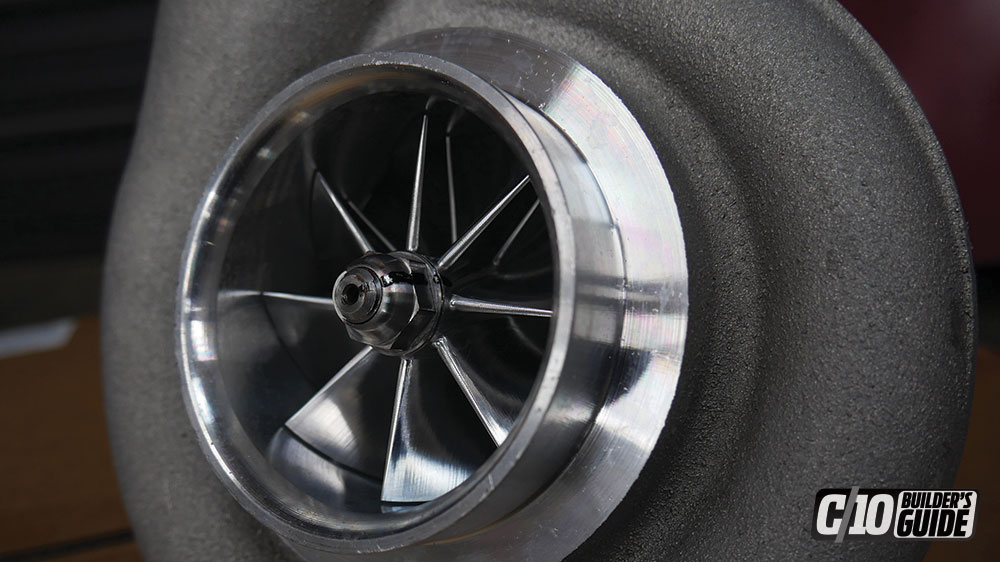
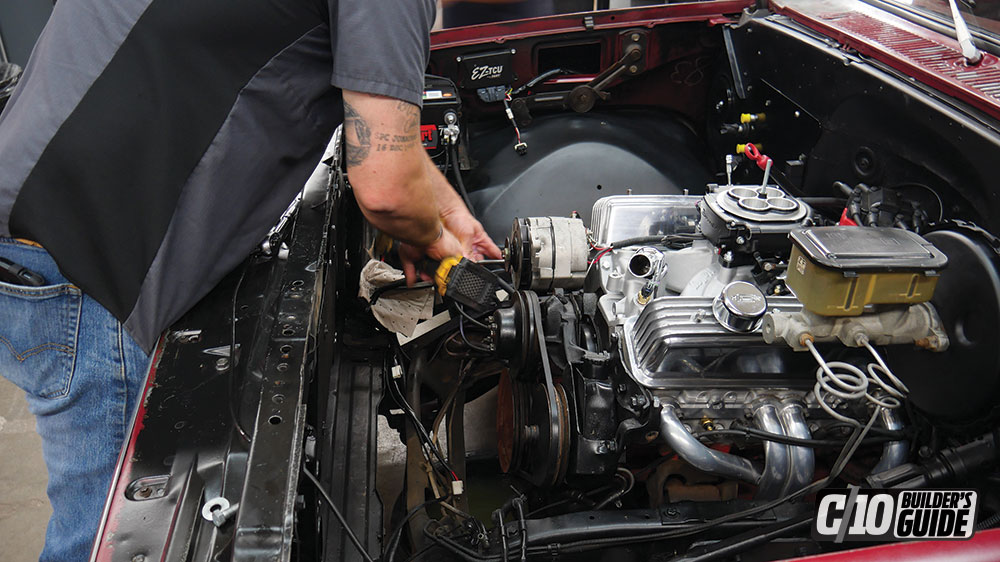
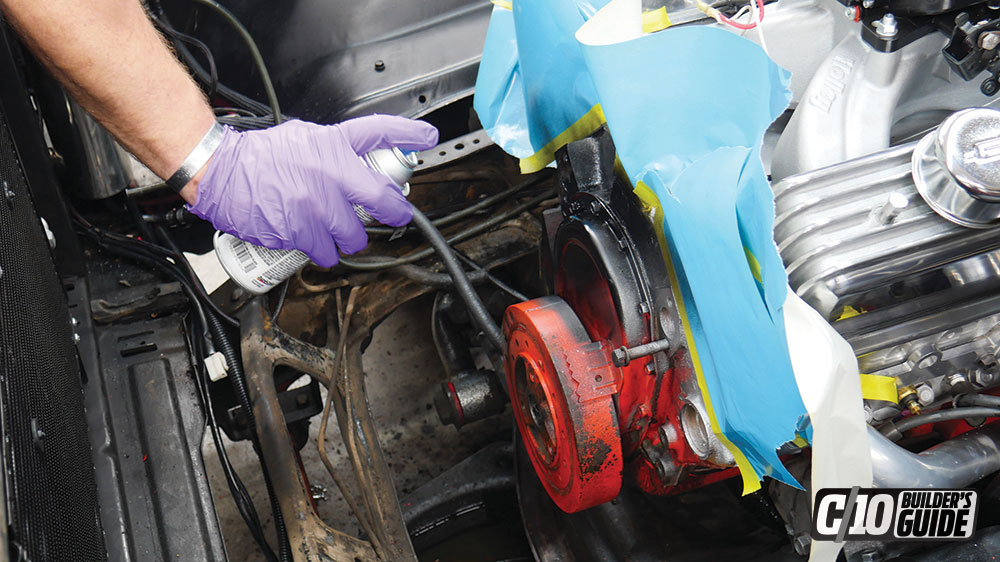
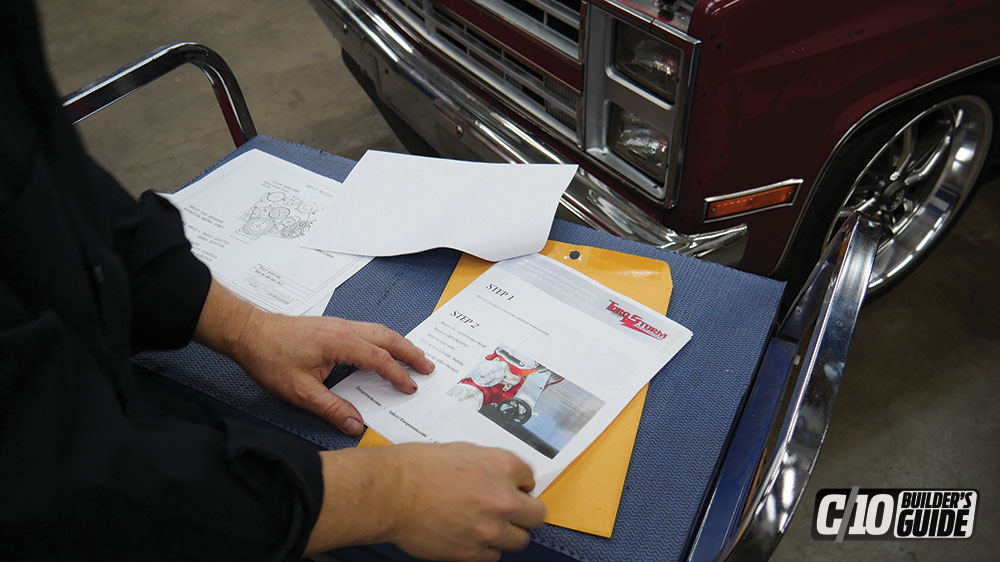
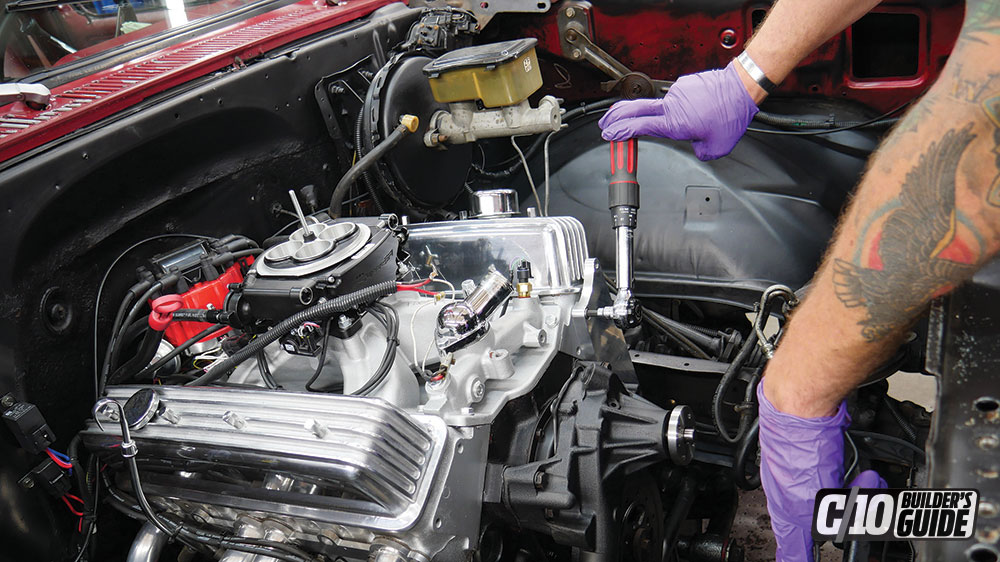
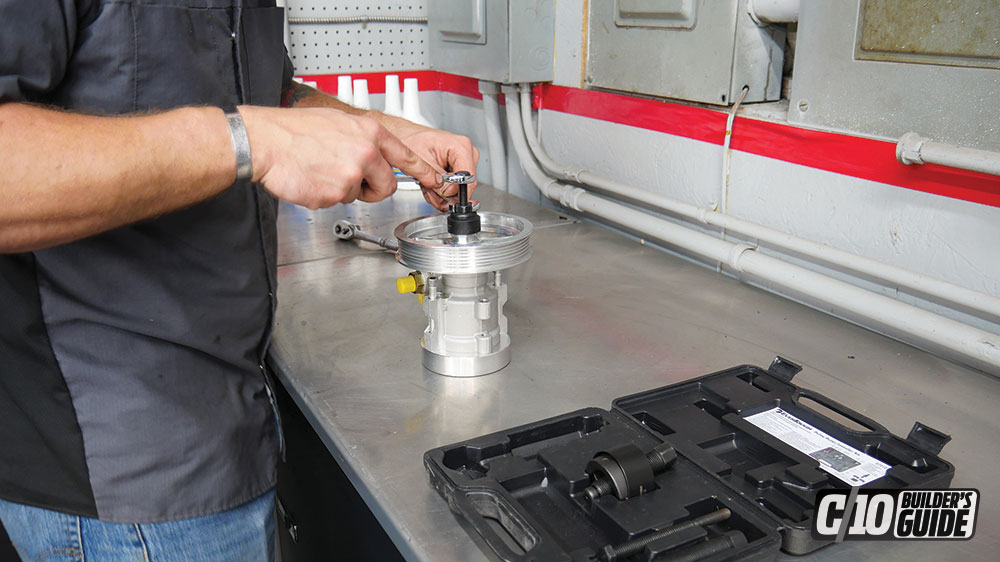
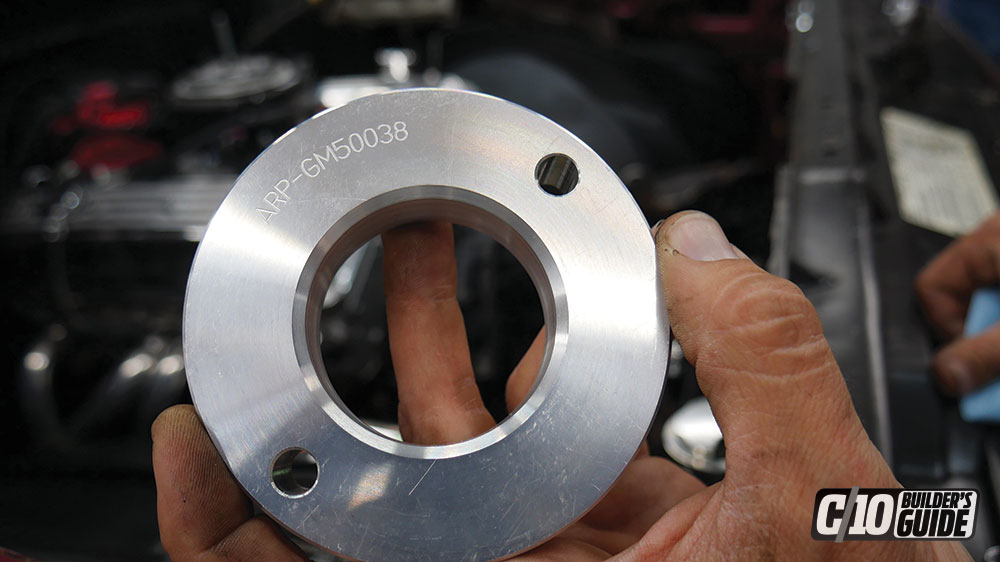
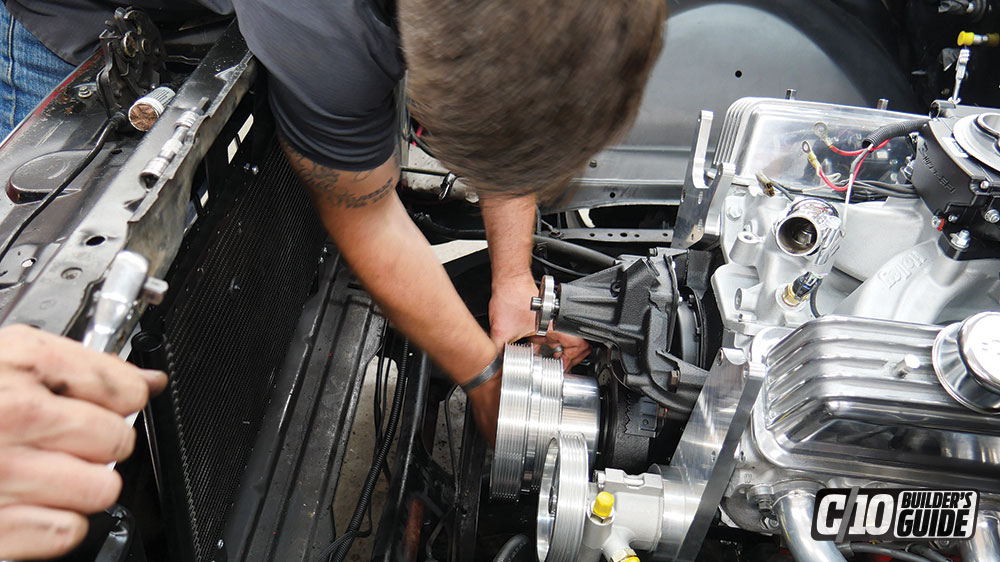
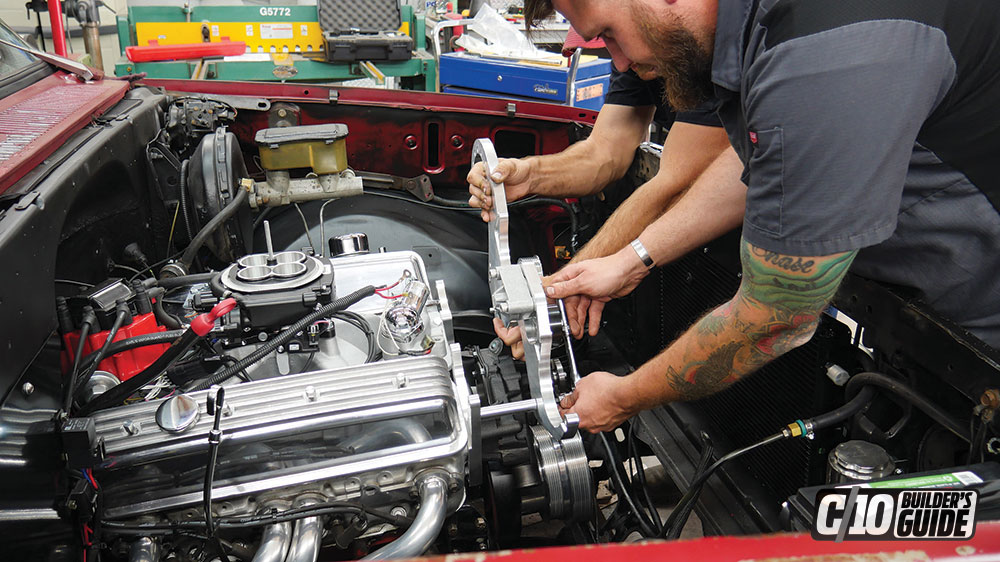
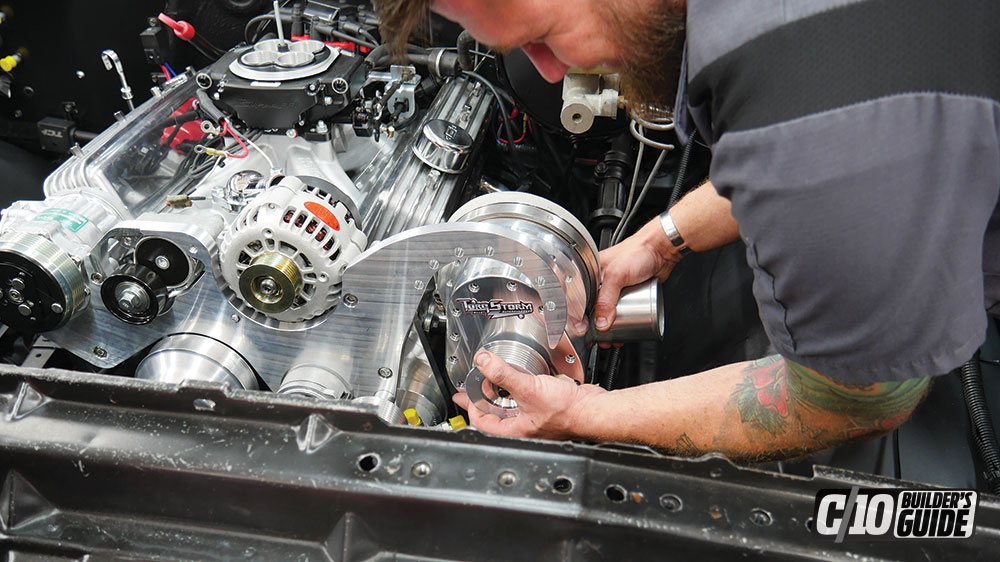
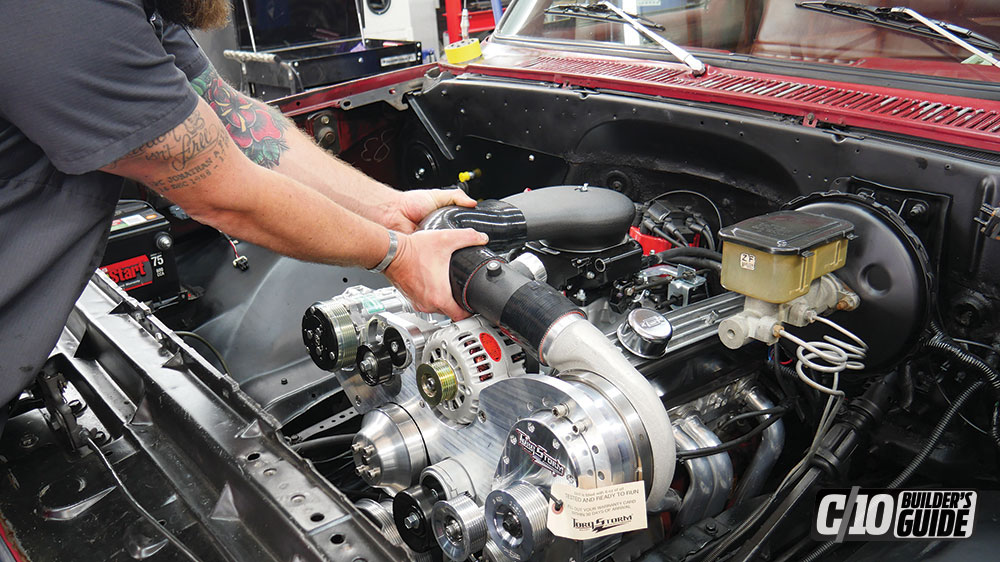
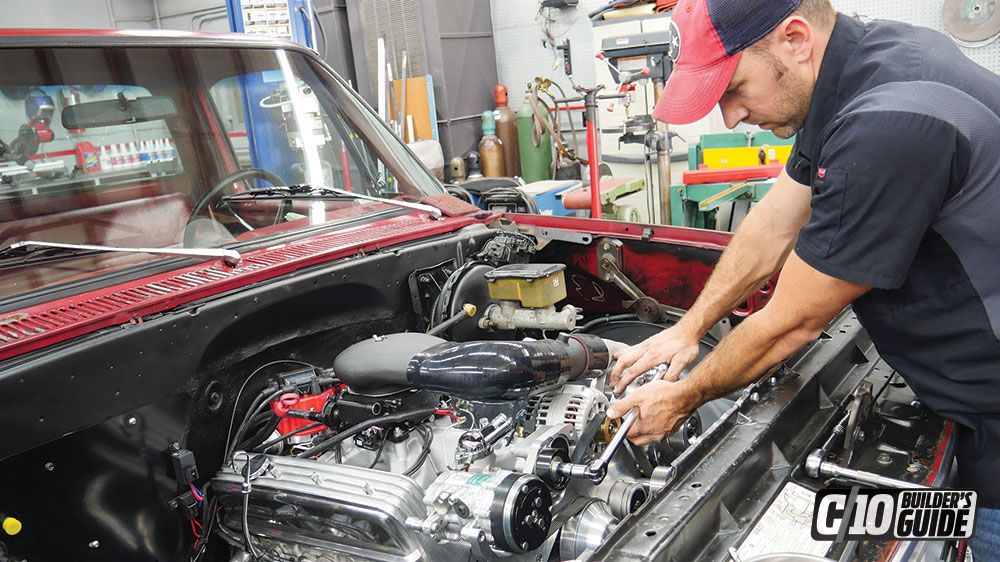
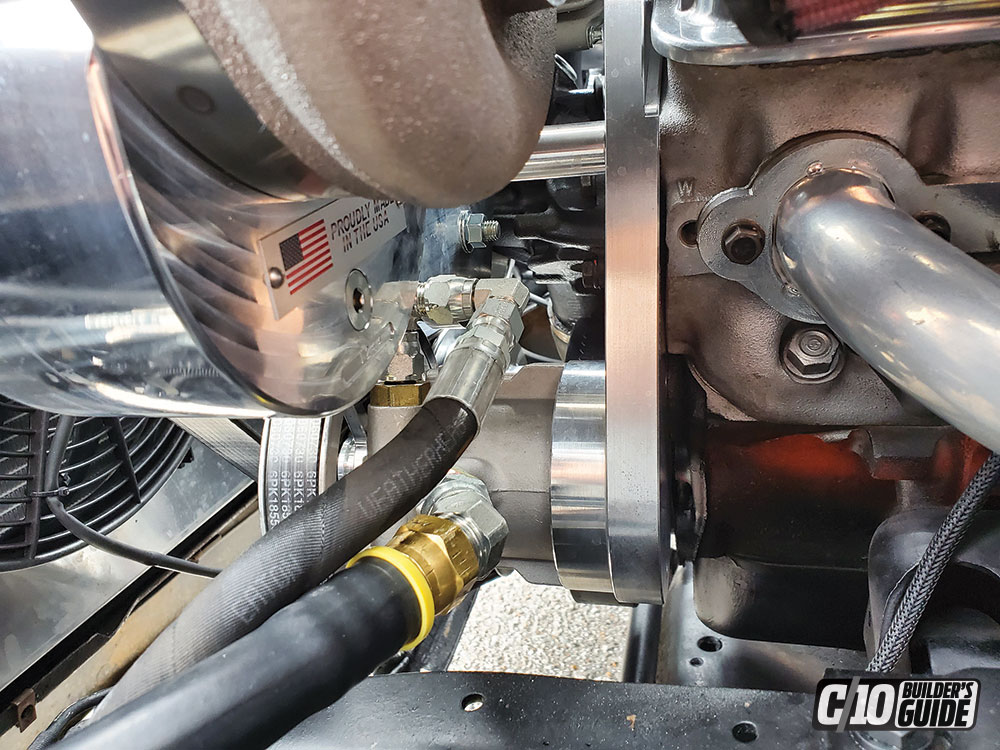
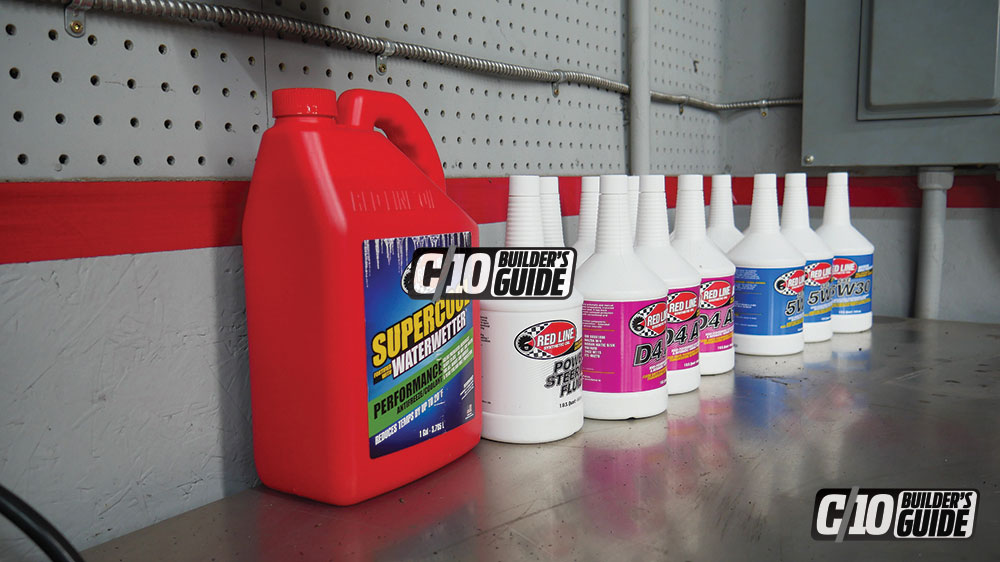
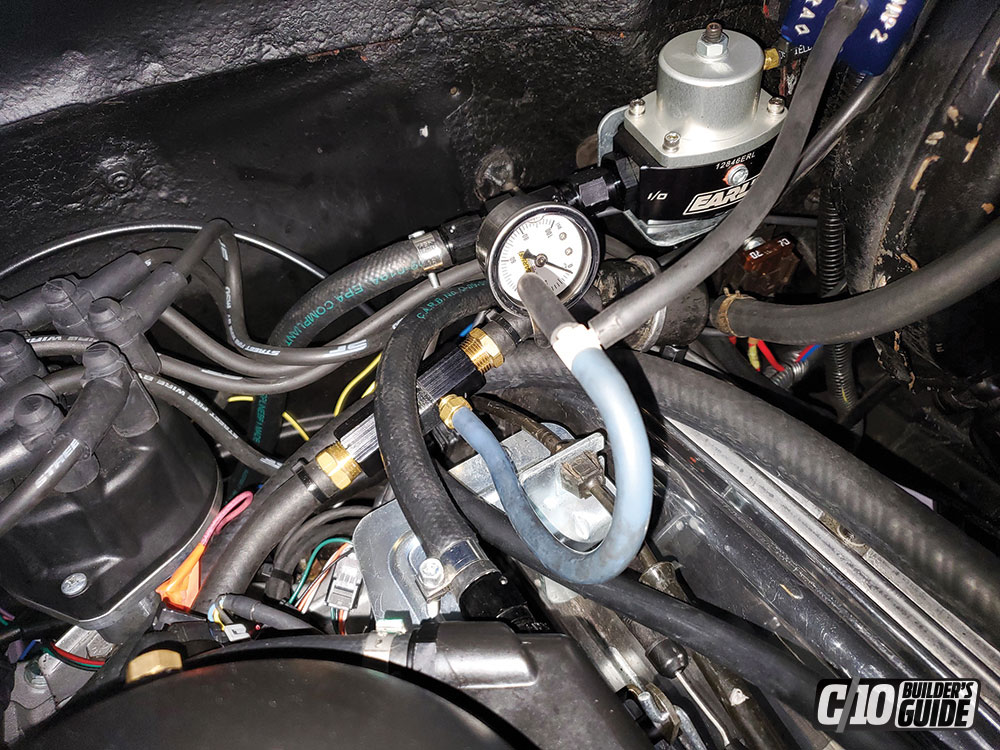
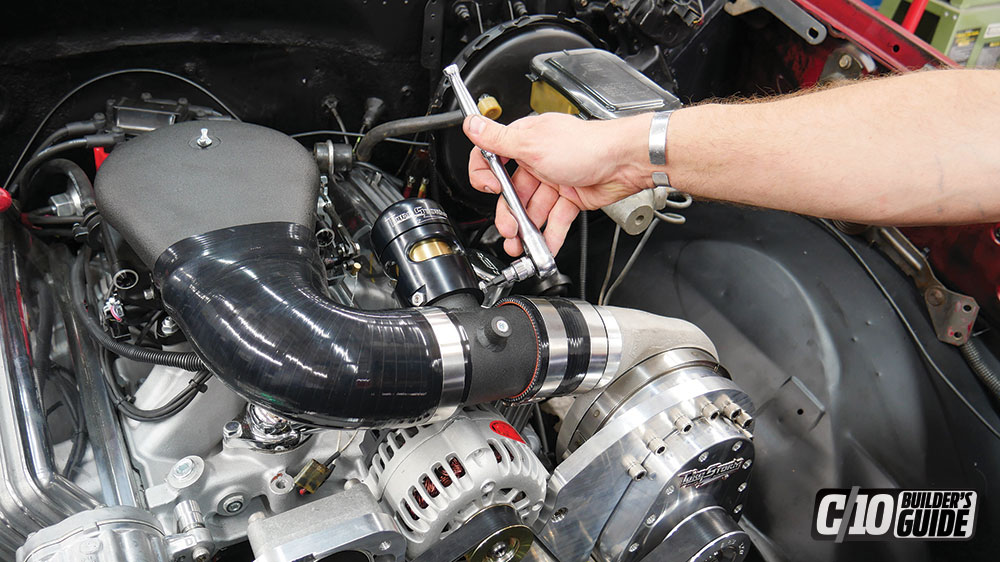
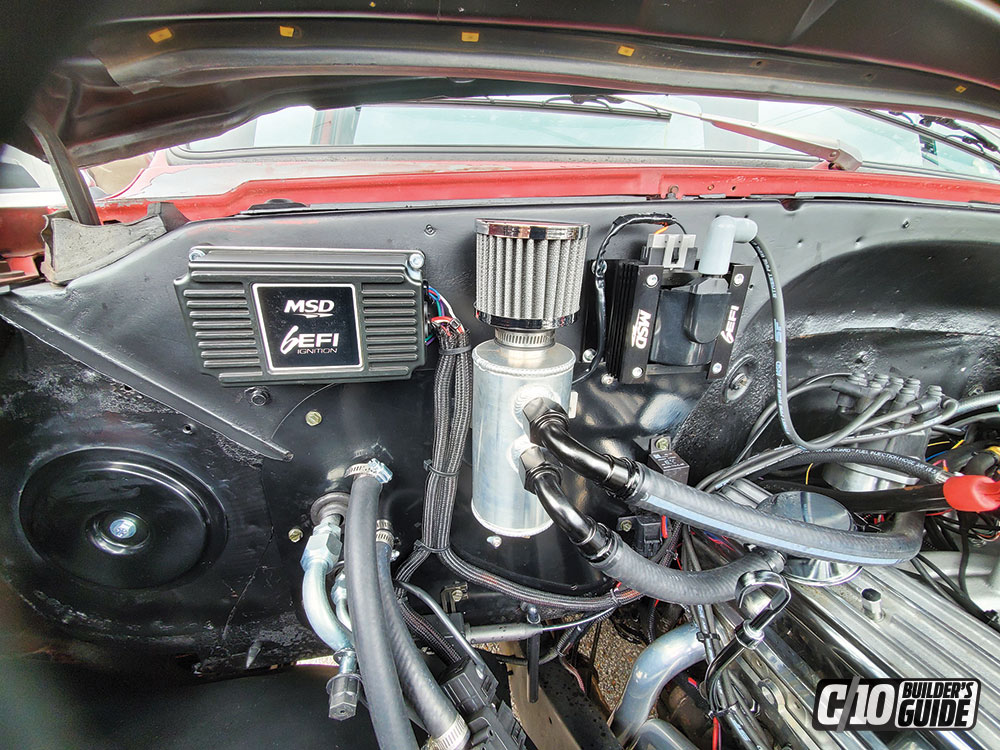
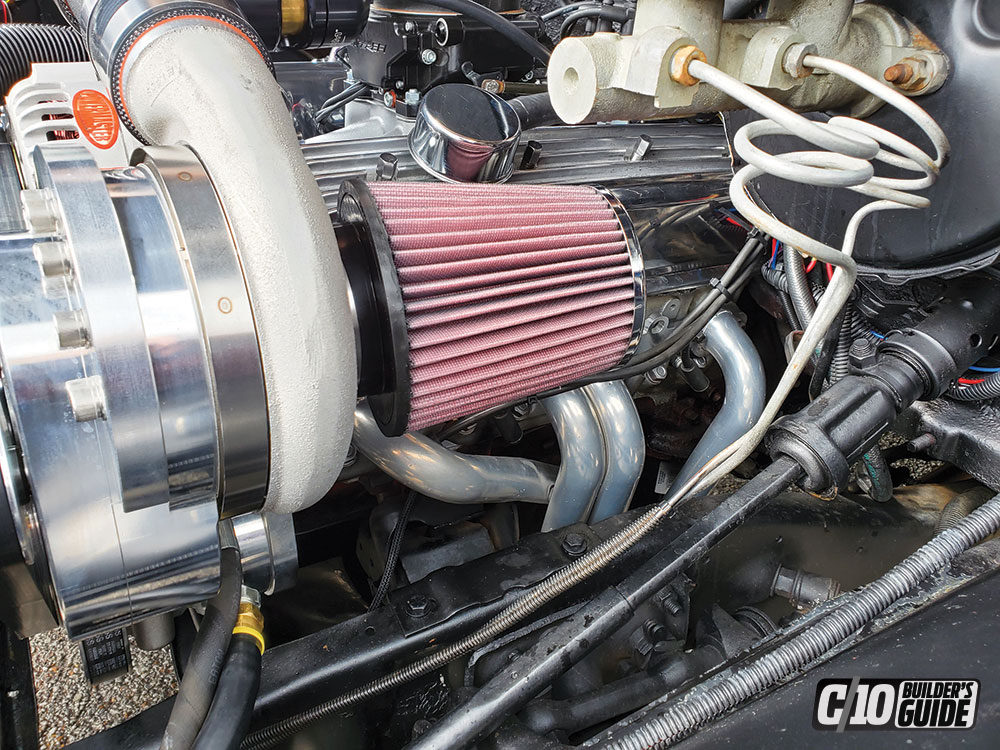
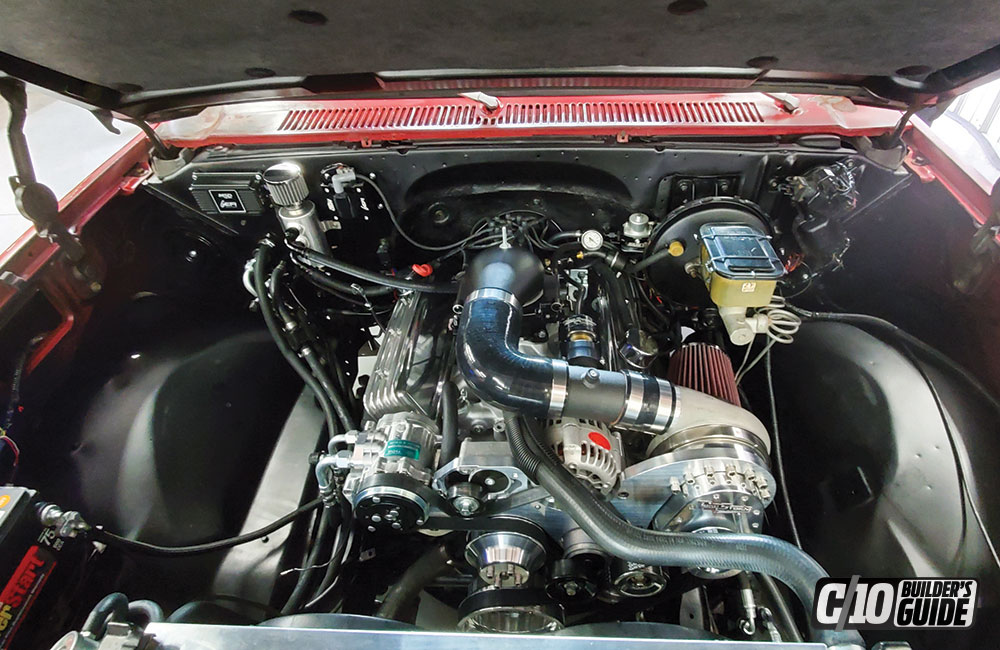
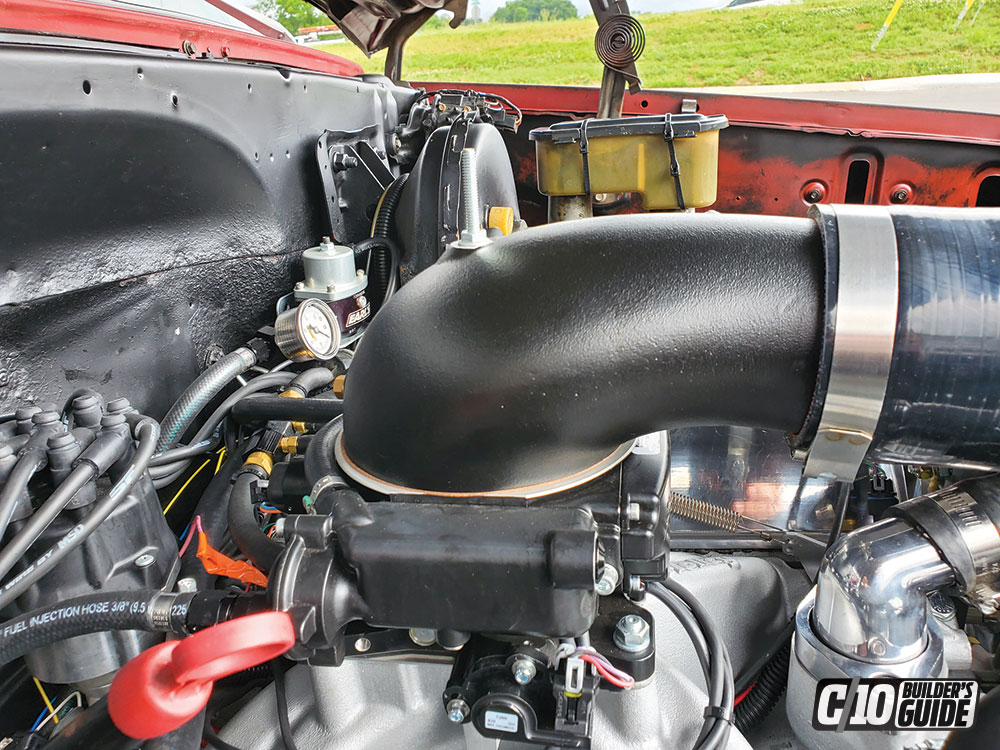
Unboxing this system was a real visual treat! Who doesn’t love finely machined billet? The organization and labeling of every component really help lay this system out for organized assembly.TorqStorm gives the option of natural billet or a black finish on all components, including the head unit. Gary already had a theme of polished aluminum under his hood, so he went with natural. The supercharger comes pre-filled with oil, but TorqStorm offers replacement oil when it’s time for maintenance.The eight-blade Impeller design is unique to TorqStorm, and like all the billet parts in this system, is machined in-house which gives the company tight control over quality.Removing the original accessory drive is easier with the radiator out of the way.Gary loves a visual upgrade, so replacing and upgrading the stock accessories will improve reliability with a modern appearance as well.After a scuff and some masking, the front of the block and balancer gets a few coats of Underhood Black just for good measure. Talking pride in the appearance of your project is worth the time investment!Before bolting on any parts, be sure you have a clear understanding of procedures and directions! Read through your manual several times and familiarize yourself with all the steps.TorqStorm recommends installing a high quality (reverse rotation, long) water pump, such as an Edelbrock Victor series unit, for best fitment and reliability.Head plates and mounting brackets are three-quarter-inch billet, giving great support with no chance of shifting or flexing under load.Installing the ribbed pulley onto the new power steering pump is easy, but you need the correct tool.! Your local parts store can loan you one if it’s not already in your toolbox.Every part in the kit is clearly labeled, as seen on this pump spacer.Here you can clearly see the inner six-rib accessory pulleys compared to the eight-rib blower pulley. This ensures minimal slip with the belts under load.The main FEAD bracket gets installed but not torqued down yet. Gary fully assembles everything to check alignment before torquing to the supplied specs.The supercharger is installed on the bracket, then the housing gets clocked to the correct position and torqued down.The boots, blow off valve manifold and intake hat get installed and checked for fit without clamps at first, just to check alignment and adjust.After confirming torque settings, the inner and outer belts get installed. It’s common for them to feel abnormally tight at first. Belts tend to stretch with use, and ours felt perfect after a few miles.Gary got fittings from Summit Racing and had hoses made at a local shop for the power steering system. AN ends make this a super clean installation. We kinda dig the Tag on the blower too!We’re using Redline Synthetic Fluids in everything, including the radiator with Redline’s Waterwetter fortified blend coolant.Gary added an Earls Fuel Pressure Regulator (Part #12846ERL) to dial up accurate pressure and give a boost reference for his gauges.After the blowoff valve was clocked and installed, Gary found a vacuum source at the power brake booster.With newfound real estate from the Vintage Air system, Gary mounted his ignition system and catch-can on the firewall passenger side. PCV on each side is routed to the reservoir.Filter location is temporary, but Gary didn’t want to drive it without a filter. He’ll re-rout it later to a better and cooler place, well away from the headers. He has plans for a Ram-air induction under the bumper for much cooler IATs.This engine compartment is super-clean! Gary took the time to relocate wiring harnesses and neatly rout any A/C lines or hoses.
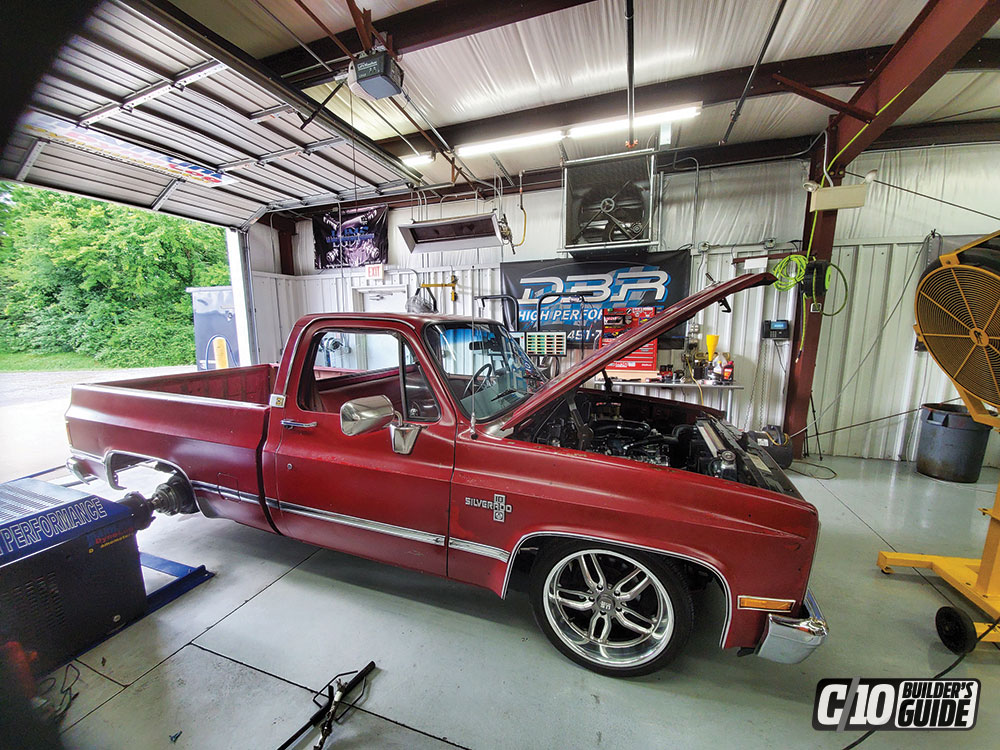
DYNO TUNE
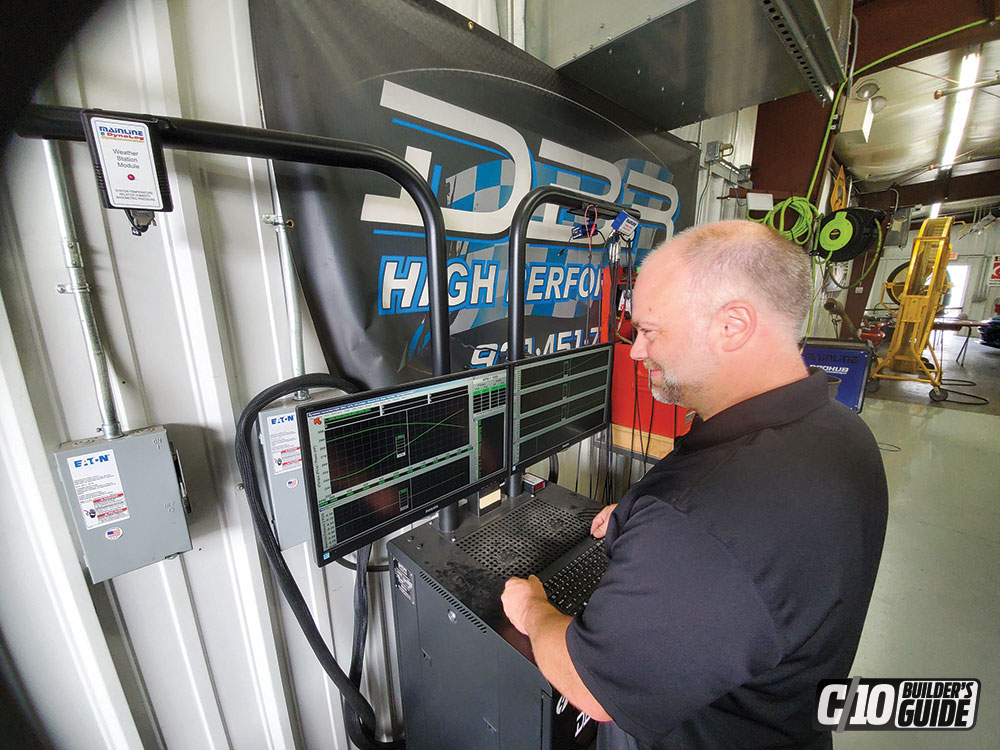
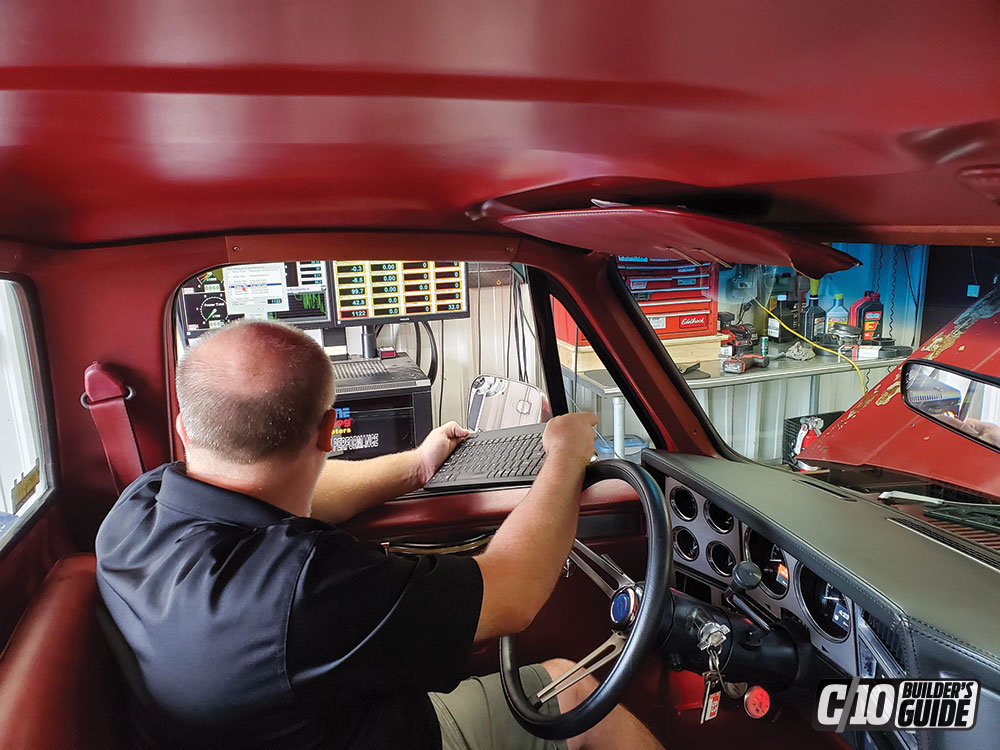
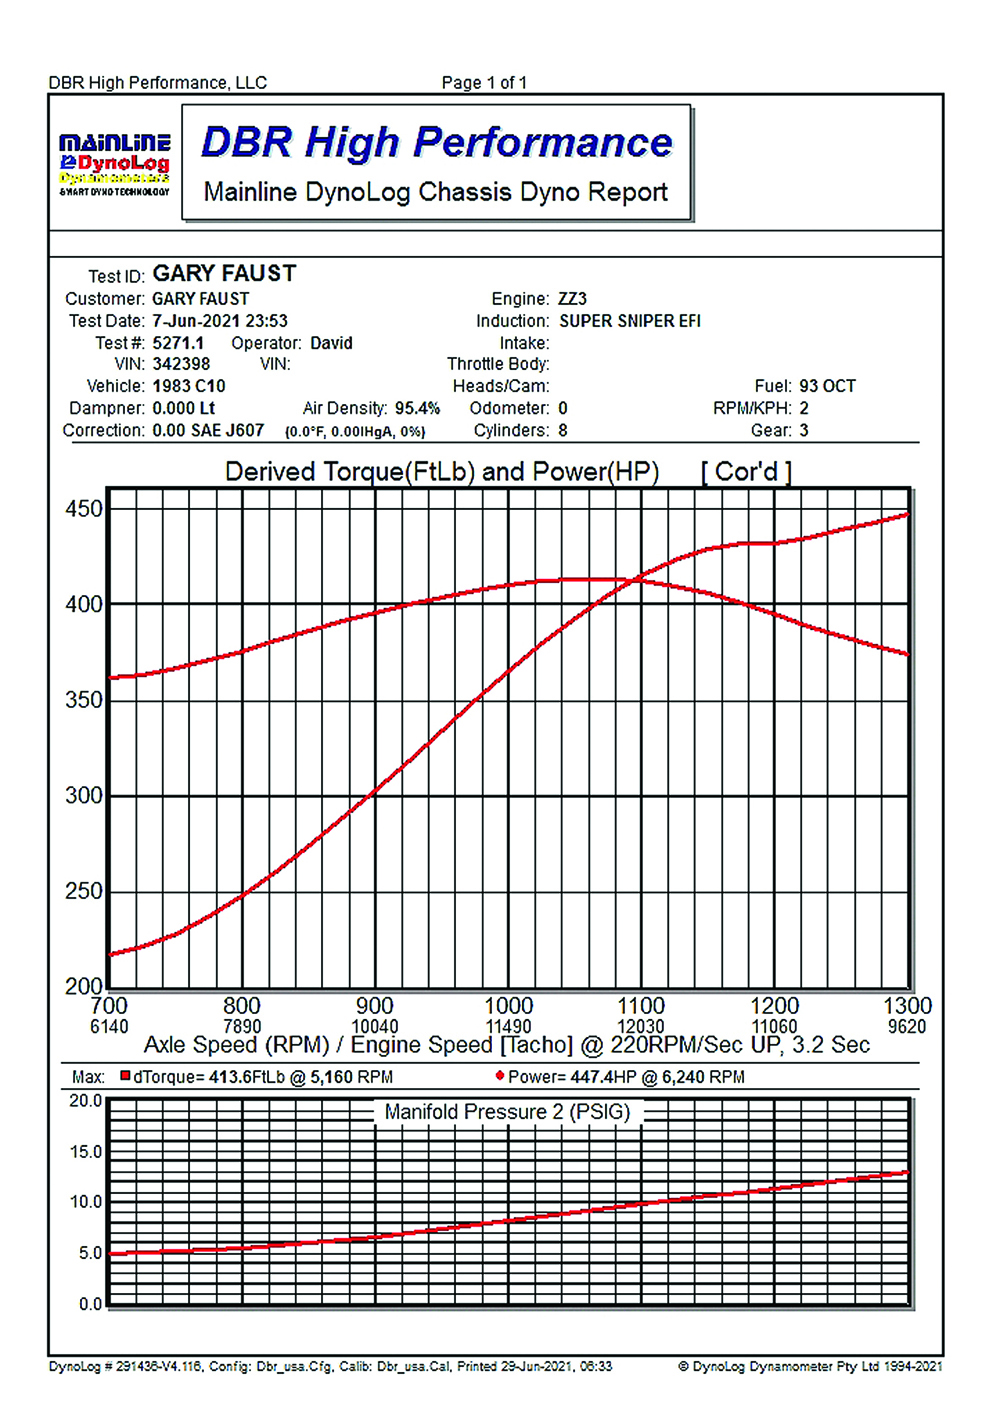
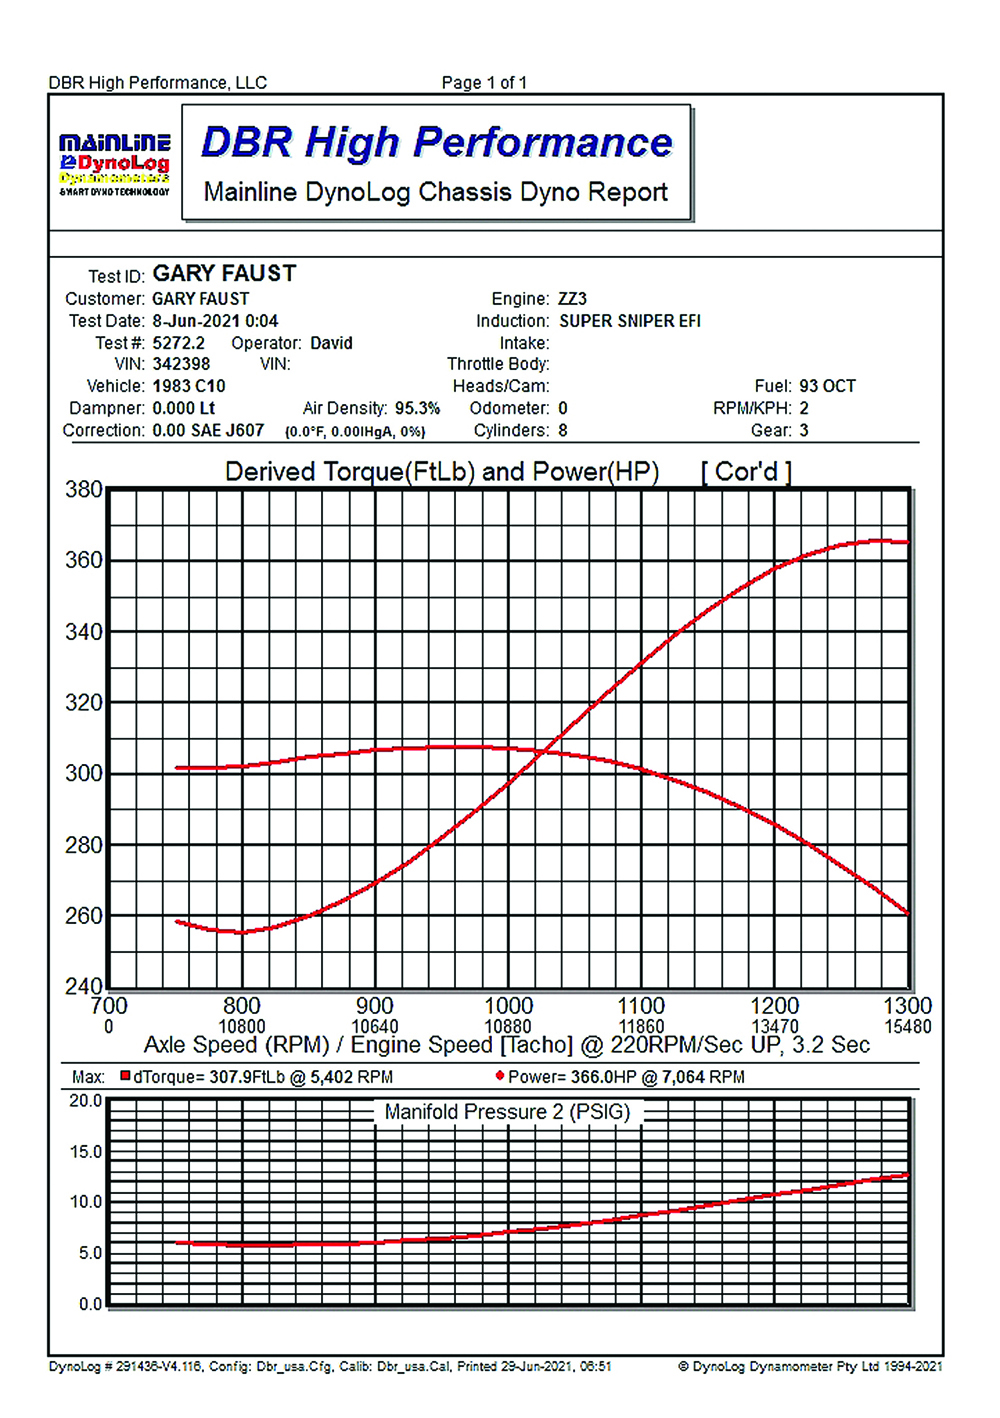
When we verified NA power on DBR Performances Eddy Current hub dyno, the truck made 270 hp to the wheels. Not bad—and more than expected, due to the headers, exhaust and efficient EFI! Cool temperatures didn’t hurt either. This time, we locked the truck down again to see the result of a few added atmospheres. Our temps were 78 degrees, and the truck was warmed up as well.Gary saw the writing on the wall with the factory driveshaft and joints. He upgraded to heavier 1350 billet universal joints and a larger diameter shaft.Gary also changed out the fuel hat to one from Summit Racing that gives more airflow to the back two blades. This wouldn’t make a difference on a blow-through carburetor, but TorqStorm tech support advised that the more open hat may make a difference under load with EFI.David Branson changed the information to match the upgrades, and verified he had all the correct inputs for an accurate reading.On the first pull, the sound was amazing! Nothing sounds quite like a centrifugal supercharger at top RPM. The results were amazing, but actually too good to be true.The truck made an impressive 448 hp at 6,000 rpm, which is a gain of almost 180 HP. The cause and the problem is that the timing had not retarded under boost. This created a lean condition that squeezed out lots more power in a very unsafe way!After resetting the timing to retard with added boost, we let the truck cool down for a few minutes. Thankfully David caught this before we burned any pistons or suffered any catastrophic damage. This is why we go to DBR! Their goal is to create an optimized calibration that is safe to play hard with as well as drive daily.On the second pull things were much better balanced with no lean condition, but we still weren’t seeing the peak numbers we wanted. We ran out of fuel at about 4,500 rpm and fell short of our power goals with 366 rwhp, which is just under 100 hp improvement over natural aspiration. This is still nice power! And when you factor parasitic losses from driveline, Gary’s conventional small block was making almost 450 hp at the crank but fell short of the 500 rwhp range Gary was hoping for. David advised stepping up from the 340 gph pump to a Walbro Hellcat 525 and be done with it. That, of course, involves dropping the new Holley Fuel tank, swapping out pumps and doing another calibration to make things safe. In the meantime, Gary is thrilled with the power on tap! He can break the tires loose in three out of four forward gears and the blower-scream stands his hair on end. Gary also knows that there is a lot more power left on the table with a simple fuel pump swap. He’s going to drive out this season with the current calibration, and over the winter, do his fuel upgrade that will most likely give him the numbers he envisioned. Building a truck is a process, and this could have ended badly if it wasn’t for keen eyes and ears and an experienced dyno shop. As it stands, Gary is stoked! His truck is a head turner on the outside and under the hood, and it makes excellent power! His family appreciates the added comfort of Vintage Air, and you can bet he’ll be driving this triple-threat C10 with a huge grin on his face until the next upgrade!
We use cookies to enhance your browsing experience, serve personalized ads or content, and analyze our traffic. By clicking "Accept All", you consent to our use of cookies. Visit our Cookie Policy for more info.
 KEVIN TETZ
.
December 17, 2021
.
C10 Builders Guide
.
KEVIN TETZ
.
December 17, 2021
.
C10 Builders Guide
.


Share Link