Whether you have a huge 8-foot truck bed on a dually or a small 4.5-foot truck bed like the one on the new Ford Maverick, having it set up to function correctly for your needs is important. A lot of times, larger trucks with larger beds may have stuff like a ladder rack, a 5th wheel connection, or an array of toolboxes. Smaller trucks like the Maverick generally don’t need large components to make them functional. For a lot of people, a smooth, factory-painted bed or even a spray-in bedliner will be more than enough. Others like myself prefer a more car-like bed that can safely haul around luggage and camera gear, while keeping it all out of prying eye’s view and securely locked into the bed. I know what you’re thinking. “Why not just buy a car?” Well, it’s still nice to have the utility of a truck bed when needed, but also have it double as a large trunk when needed.
For decades, smaller trucks like the S-10, Mazda B-series trucks or even the Tacoma were perfect for people who didn’t need the massive size of a full-size truck for daily needs, but still wanted something they could use to pick up a dryer, haul a dirt bike to the track, or take their mountain bike to the trails. It seemed the compact pickup truck was a thing of the past, until Ford released the new Maverick in 2022. Ever since that release, the buzz has been crazy about these little trucks, which has made them hard to find. That, coupled with production issues on the manufacturing side, turned them into hot commodities the past couple years. Fortunately, I was able to get my hands on one recently, and I plan to do a slew of upgrades to show our readers, starting with the bed upgrades you are currently reading about. I picked up an XL trim package, which is a stripped-down, bare bones base model Maverick. The base model eliminates some of the creature comforts that the higher trim levels have but after adding a few upgrades, it can still function like a higher-end truck.
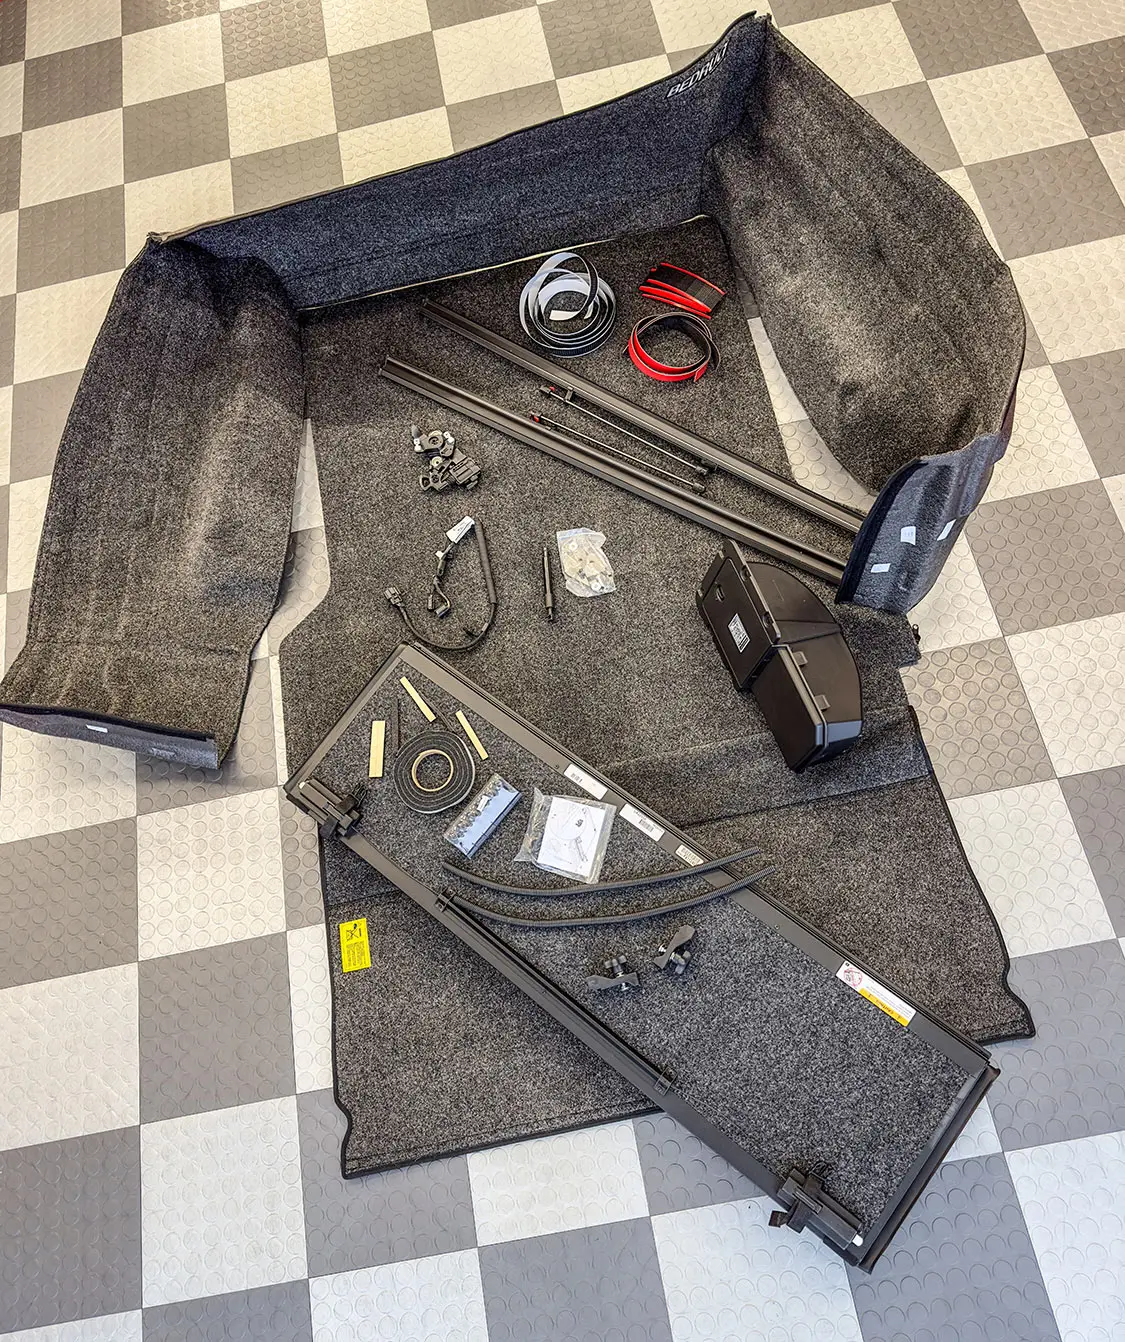
For the perfect bed setup for my needs, there were only a few parts I had to get. The main part of this project was the Undercover Ultra Flex bedcover (Part #UDC-UX22032) with a $1,112 retail price. This tri-fold tonneau cover allows access only when the tailgate is open so when it’s locked, the bed cannot be accessed. The next item that was added was a tailgate assist strut that gives the tailgate the easy drop that higher-end trucks have. Essentially, it keeps the tailgate from slamming down when opened. This was a $22 part on Amazon—nothing that will break the bank, yet will make the tailgate perform like a much more expensive truck.
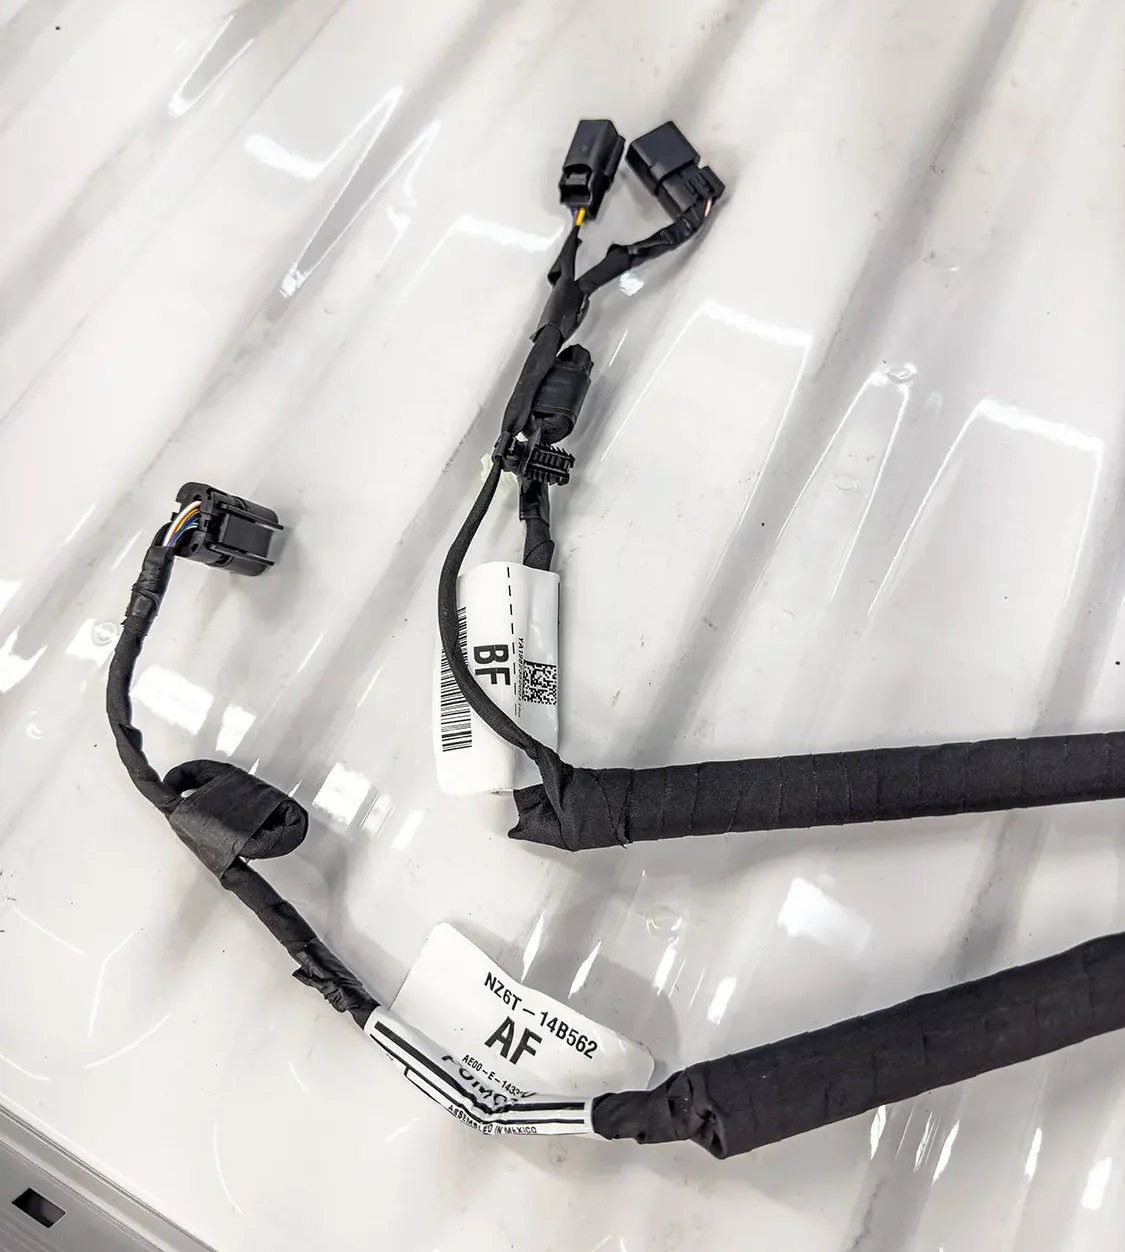
With my base model, the only way to lock or unlock the tailgate was to physically use the key, so adding an electronic lock that controlled the tailgate with the key fob buttons was important to me. To do this, I went to the local Ford dealer and picked up two parts. The OEM electronic lock (Part #JB3Z-9943170-A) at $109 replaces the manual tailgate lock assembly, and the OEM wiring harness to control it (Part #NZ6Z-14A412-C) with a $112 retail cost. The wiring harness replaces the factory wire that plugs into the backup camera inside the tailgate and plugs into the harness above the spare tire.
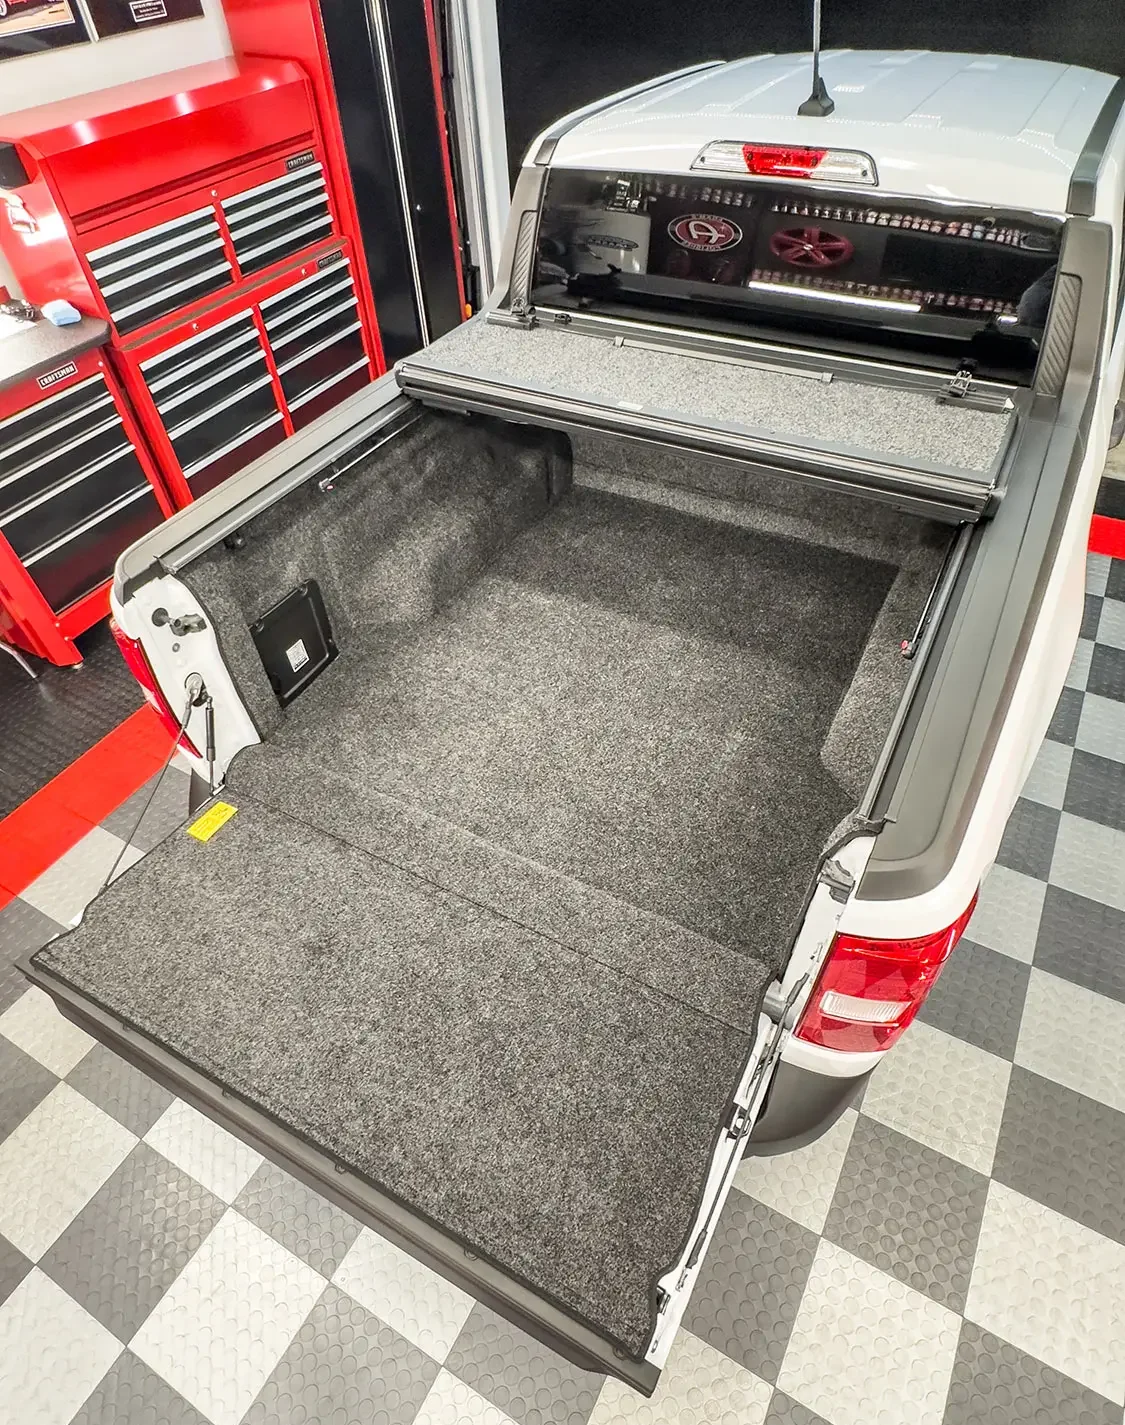
I also added a full Bedrug Classic Bedliner (Part #BRI-BRM22SBK) that goes for $480 retail. This full carpet kit lines the entire bed, including the tailgate and creates a trunk-like feel and look. This is perfect for what I use the truck for, but if I decided to get a load of mulch, it simply rinses out with a pressure washer like a spray-in bedliner would. Having this liner in the truck keeps luggage, bags, etc., from sliding around as well. The Maverick also has an option that comes on the higher trim models to add bed storage—the bed cubby (Part #NZ6Z-60286A72-A), which retails at $46. Adding this part creates a storage place built into the bed to store straps, a hitch, or whatever you need to stash to keep from sliding around the bed.
The install for all these parts only took a couple hours with the help of a buddy, so it’s something you can do on your own with simple hand tools to not only add function to your truck but also make it match what the more expensive models can do. Follow along as all the parts are installed.
BedCover
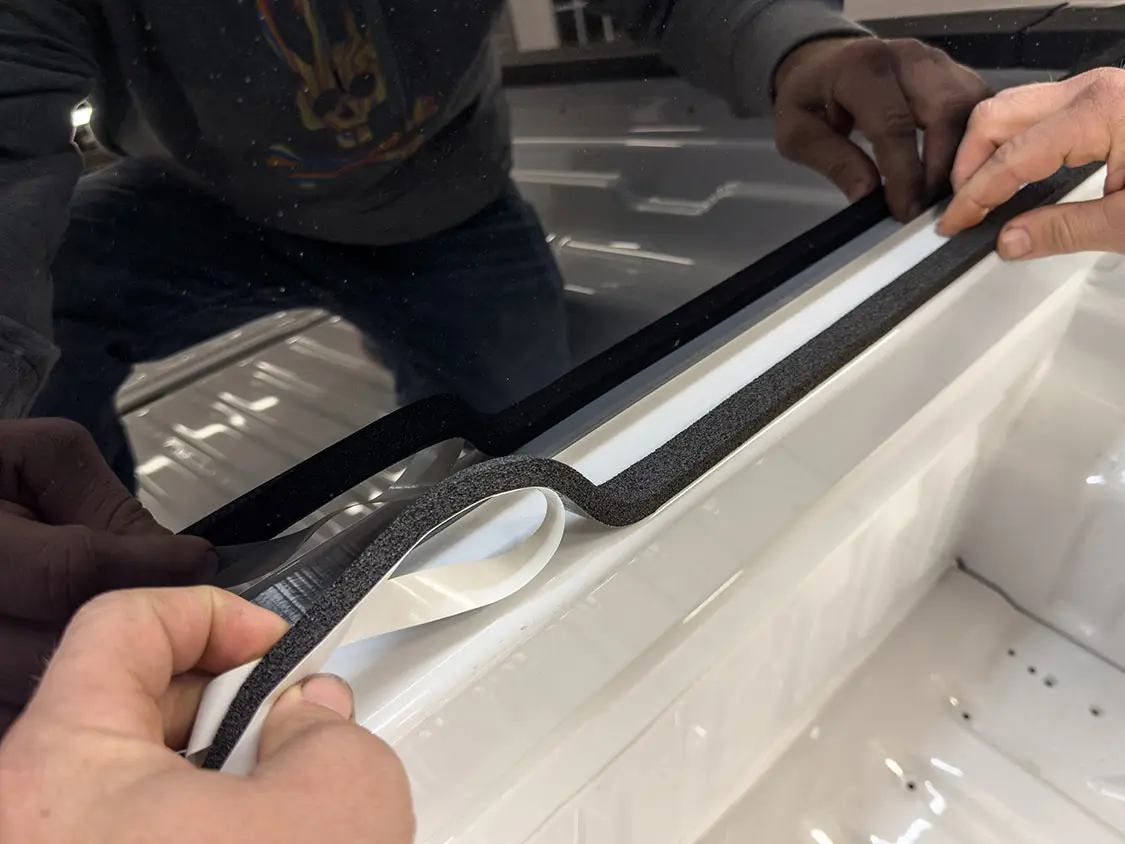
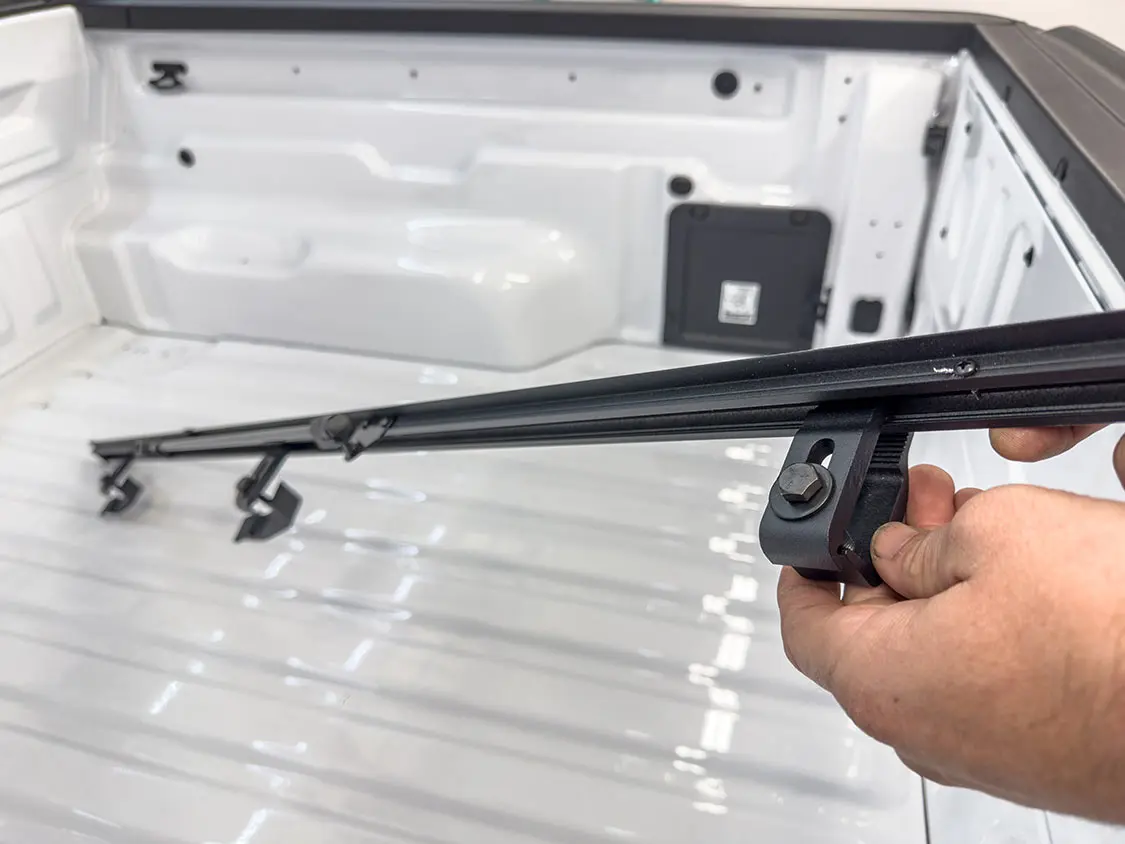
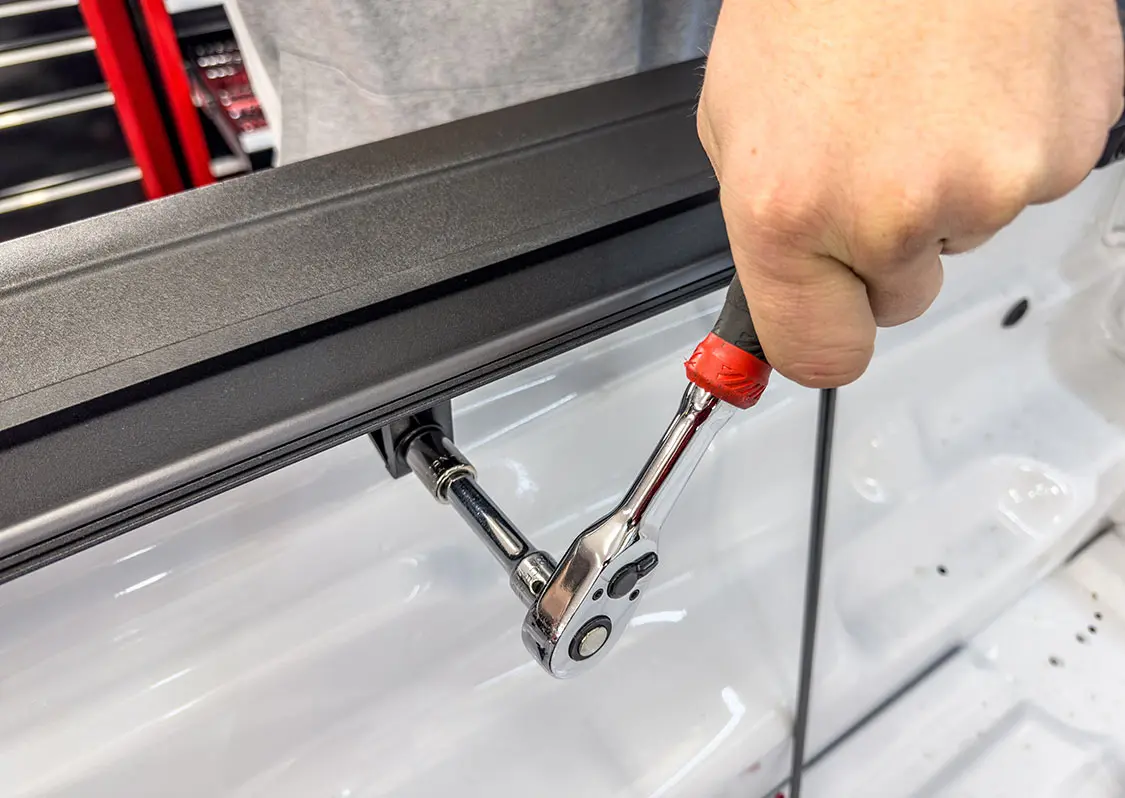
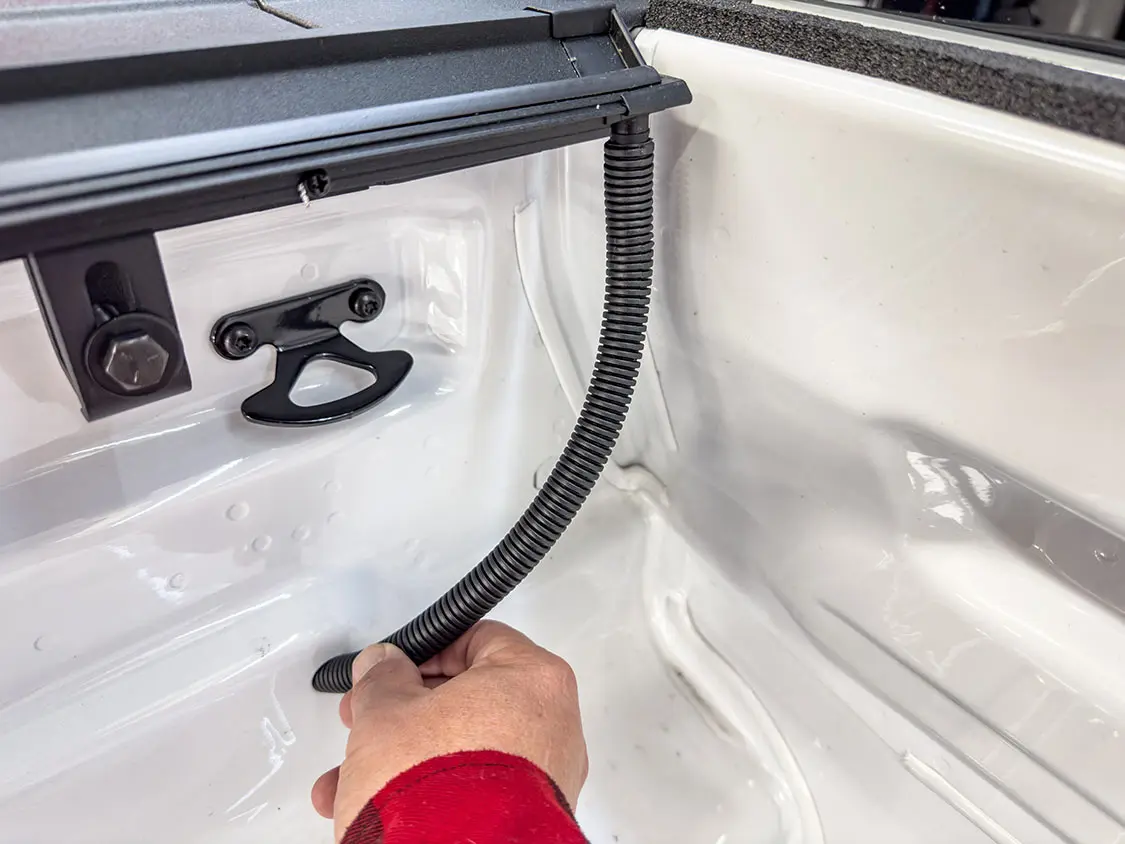
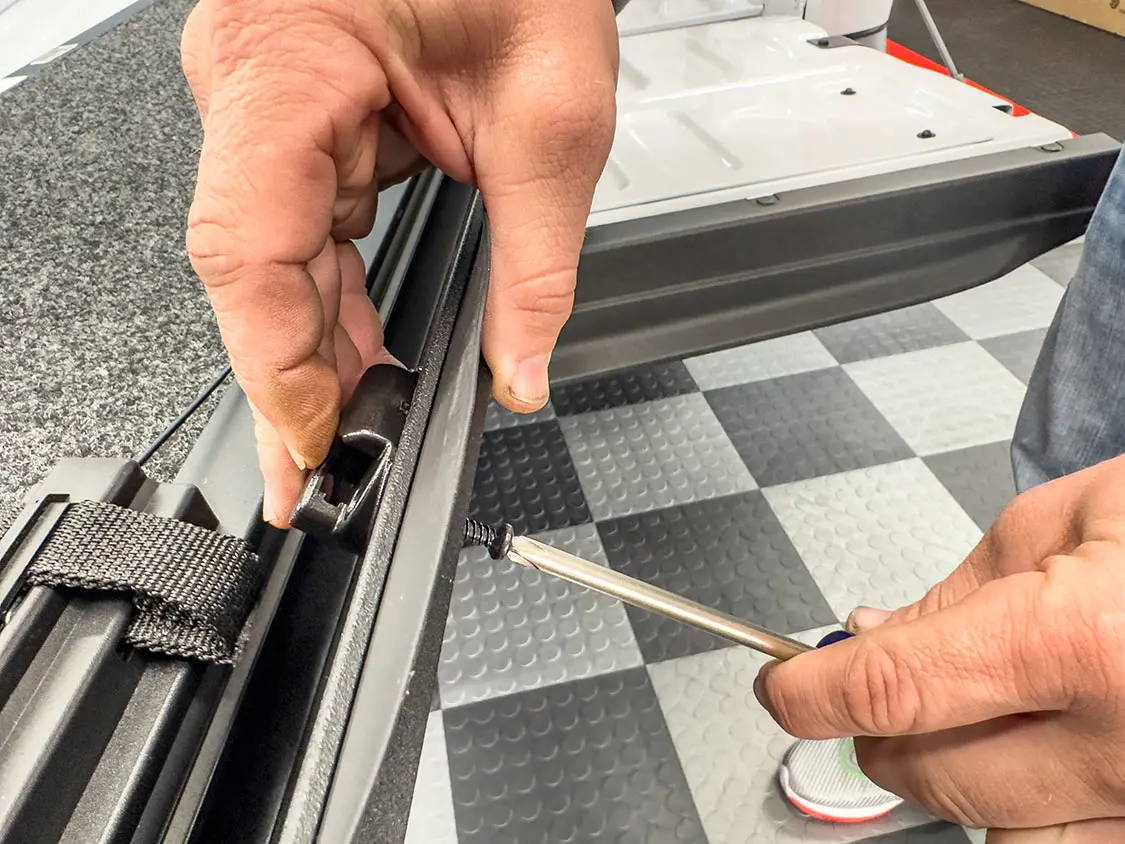
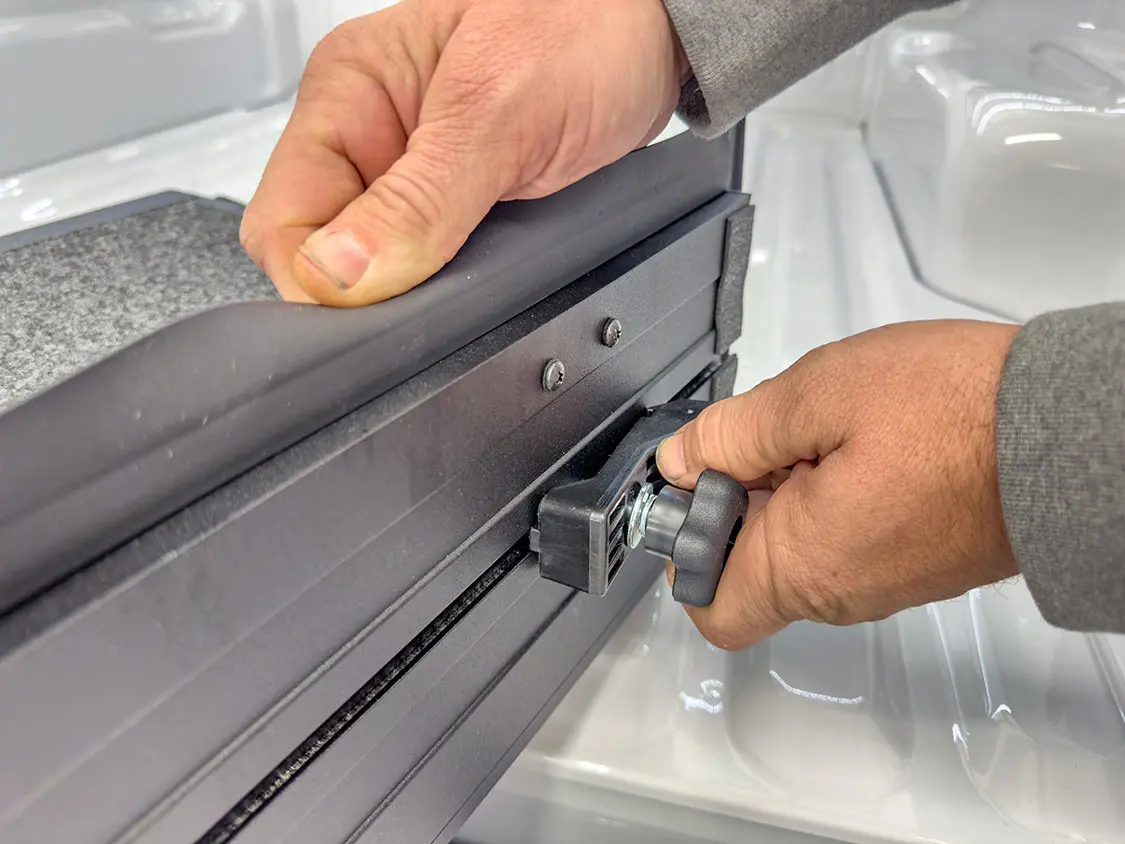
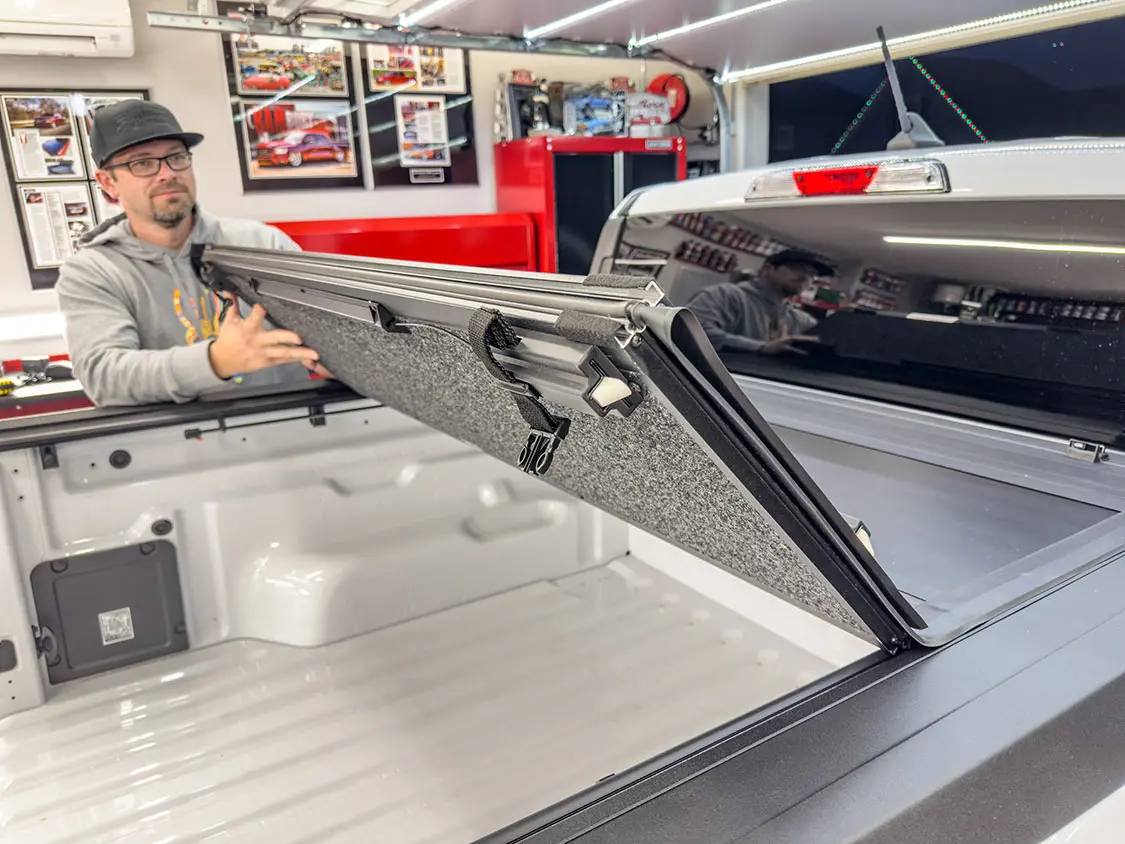
01. Start by applying the supplied foam seal to the header panel of the tailgate. This keeps water from getting in under the front of the bedcover.02. Slide three clamps into each bedrail. These secure the bedcover rails to the truck.03. Evenly space the clamps and tighten them, ensuring the bedcover bedrails stay flush with the factory bedrail.04. Connect the bedrail drain tubes and route them through the bed floor or wall to allow water to drain. In this case, we used a factory hole.05. Attach the buckle clips to the bedcover header panel. This lets you securely strap the cover partially open if you only need part of it open while driving.06. Slide both retainer clips into the underside of the bedcover header panel. These are what secure the cover to the bedrails at the front end of the cover.07. Set the bedcover on, and then align it so it’s square and even. Test its opening and closing functions to make sure it locks on the truck evenly. Adjust as needed.
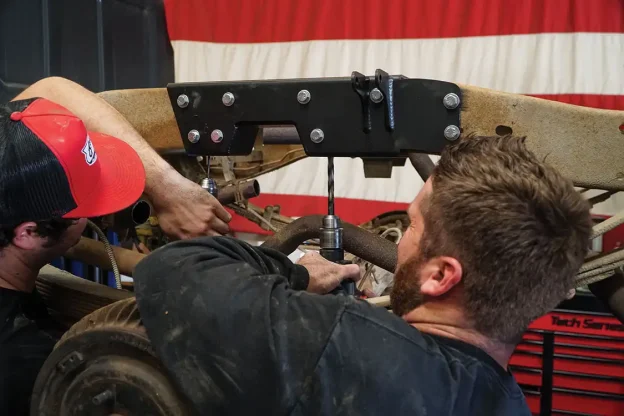
Tailgate Assist Shock
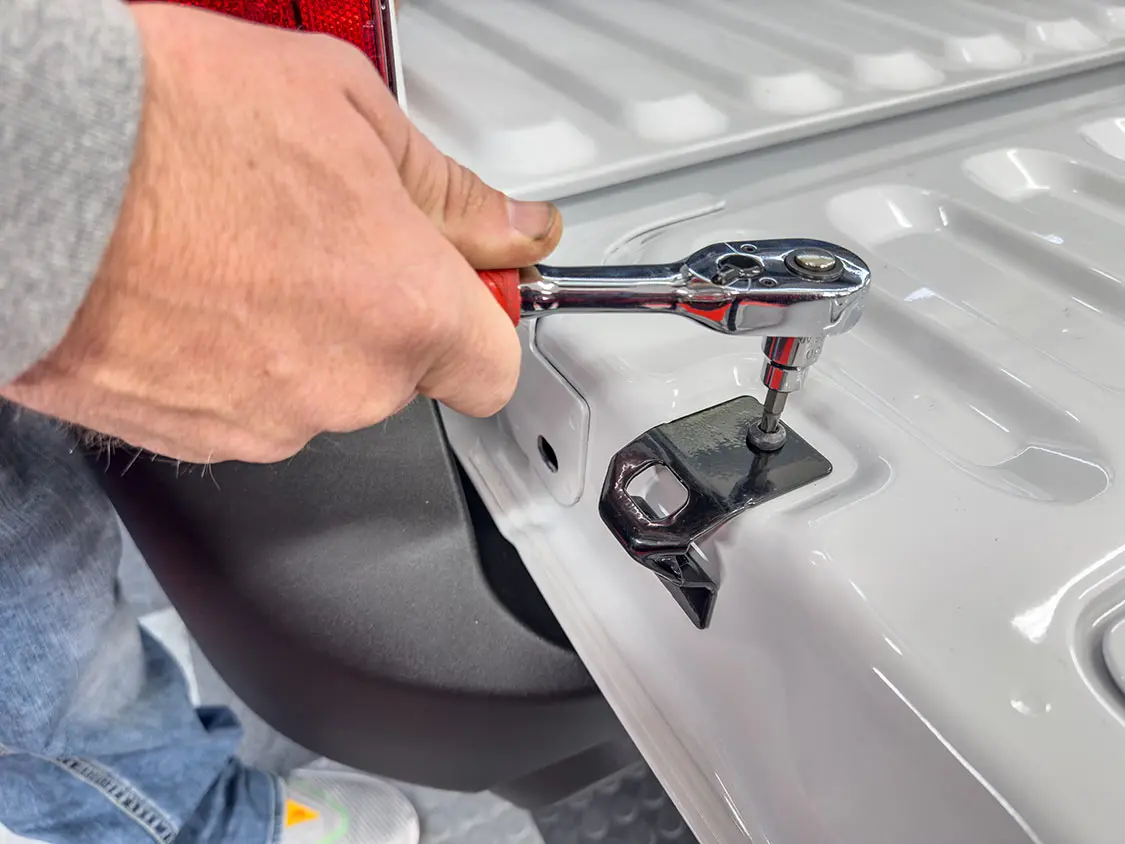
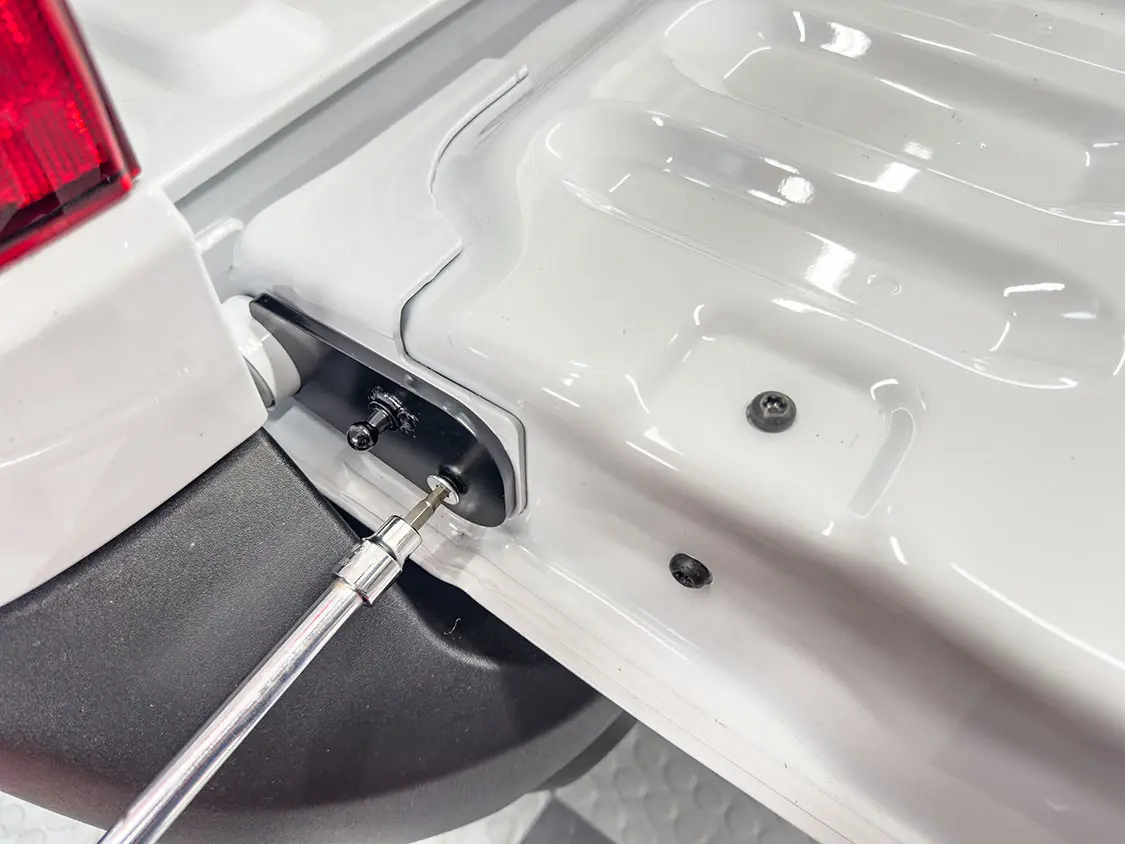
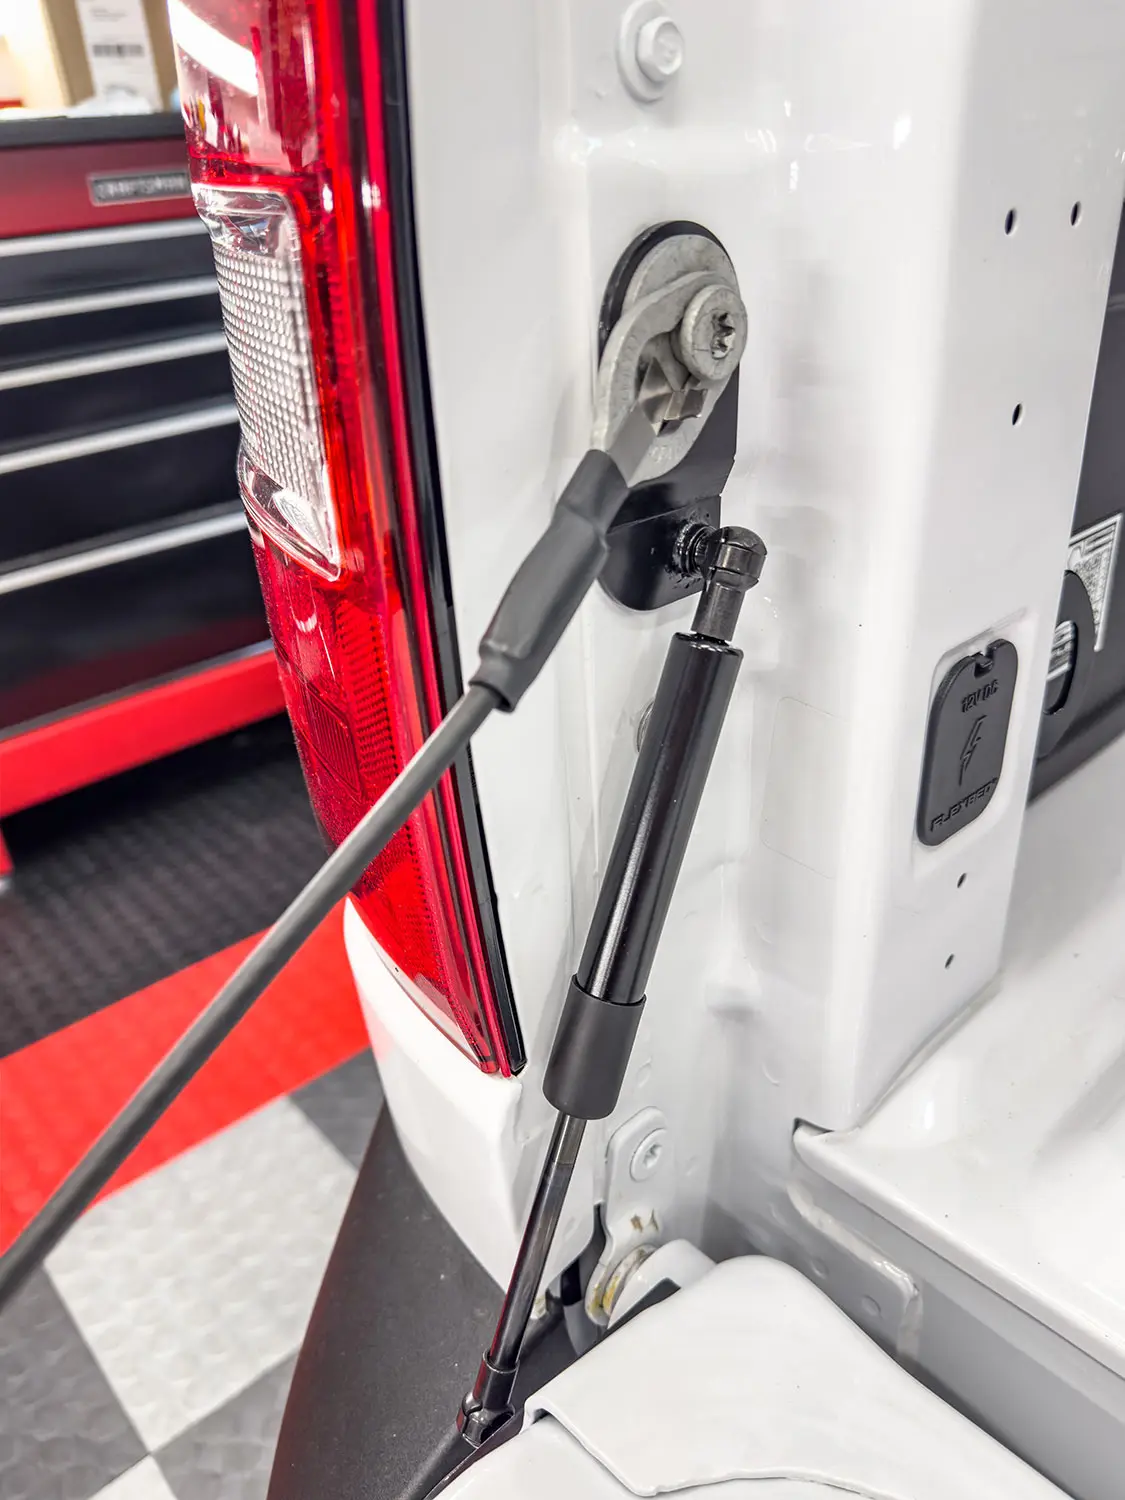
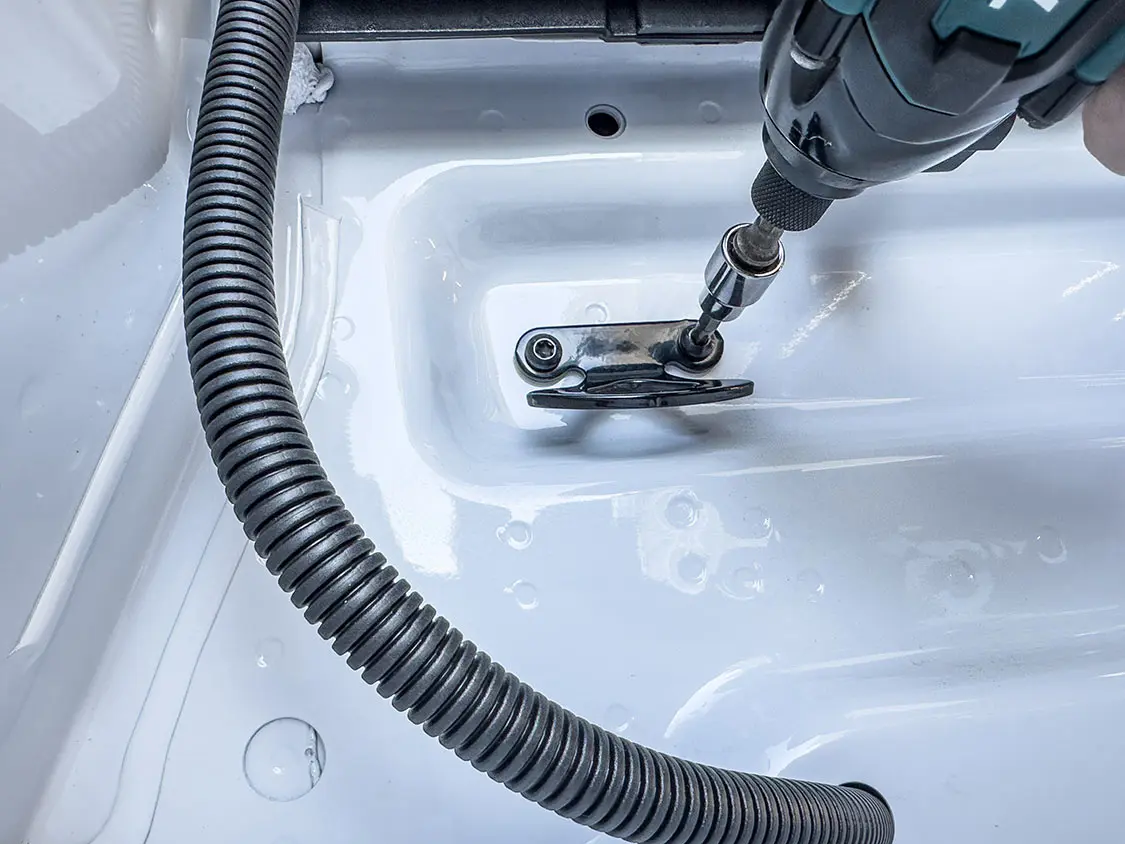
08. Unhook the driver-side tailgate cable from the bedside and remove the cable bolt. Install the supplied ball mount plate with this factory bolt.09. Remove the driver-side L-bracket (bottle opener) from the tailgate. This will be in the way of the shock once installed.10. Install the tailgate bracket that secures into a factory hole.11. Clip the shock onto both installed brackets and reinstall the cable to the bedside.
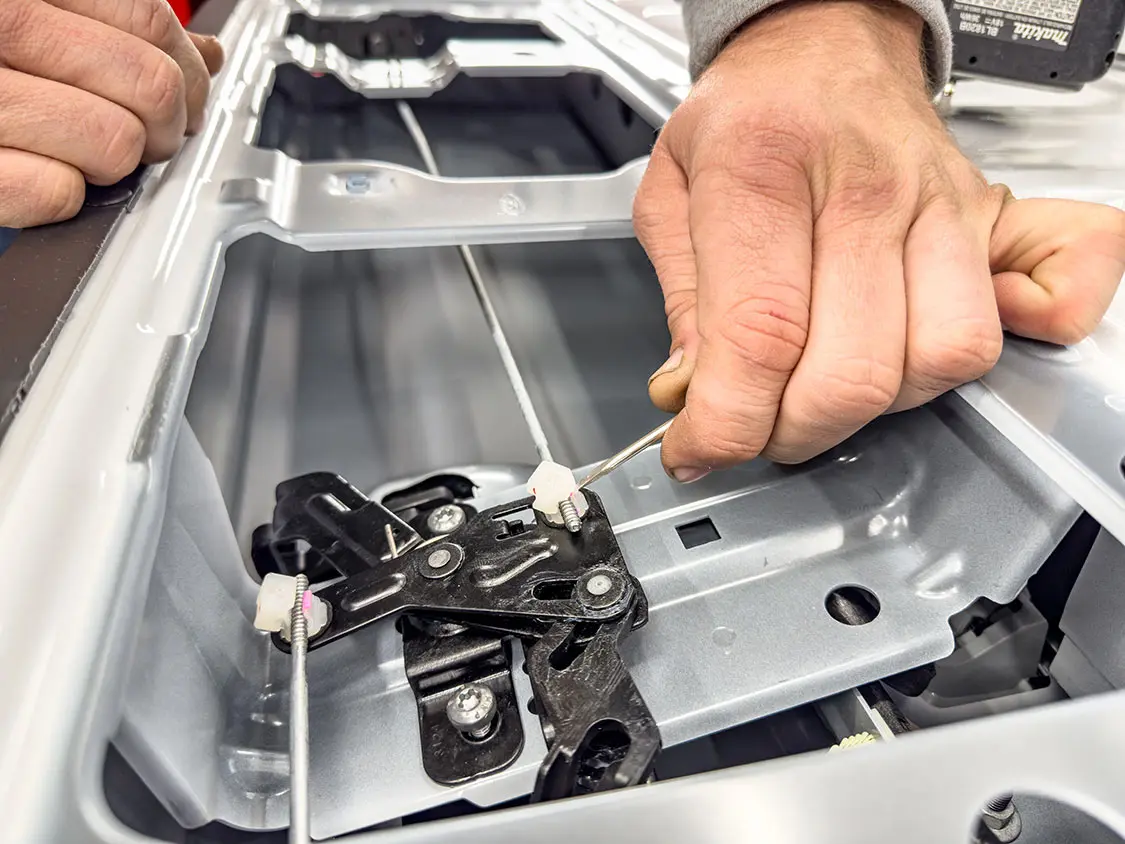
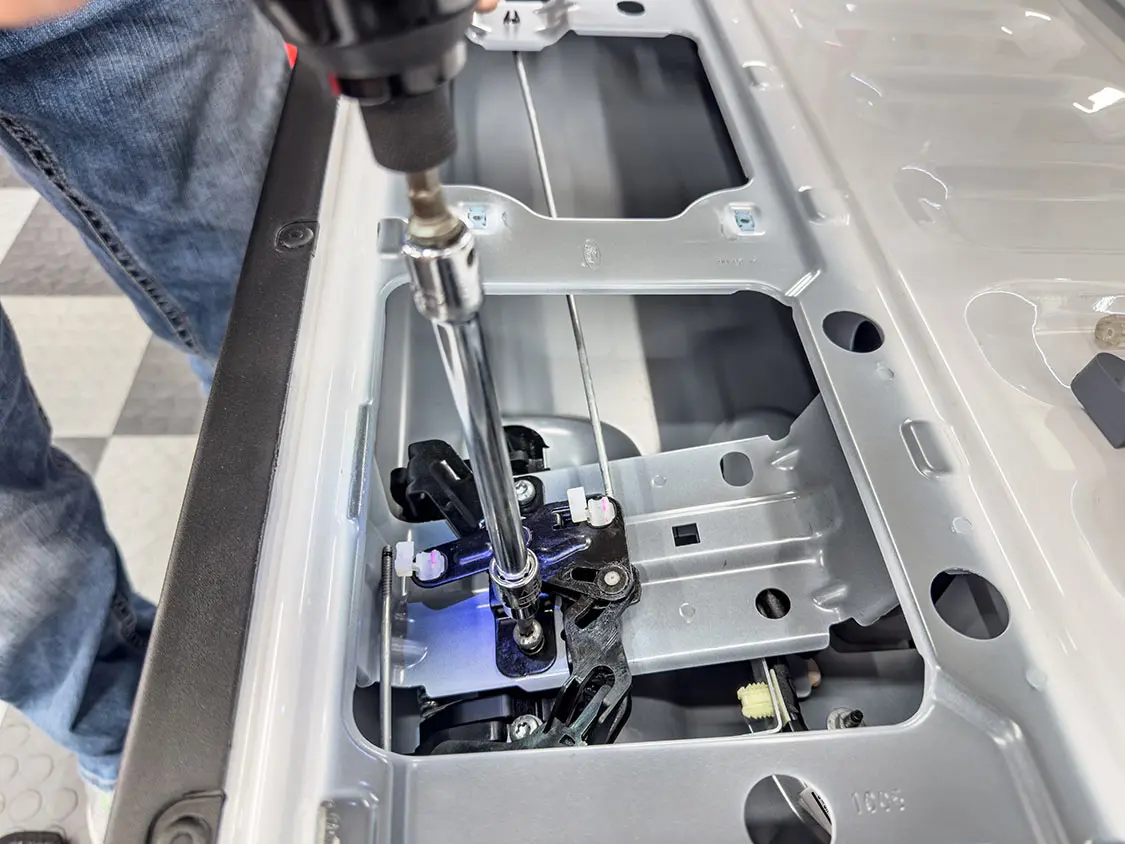
Electronic Tailgate Lock
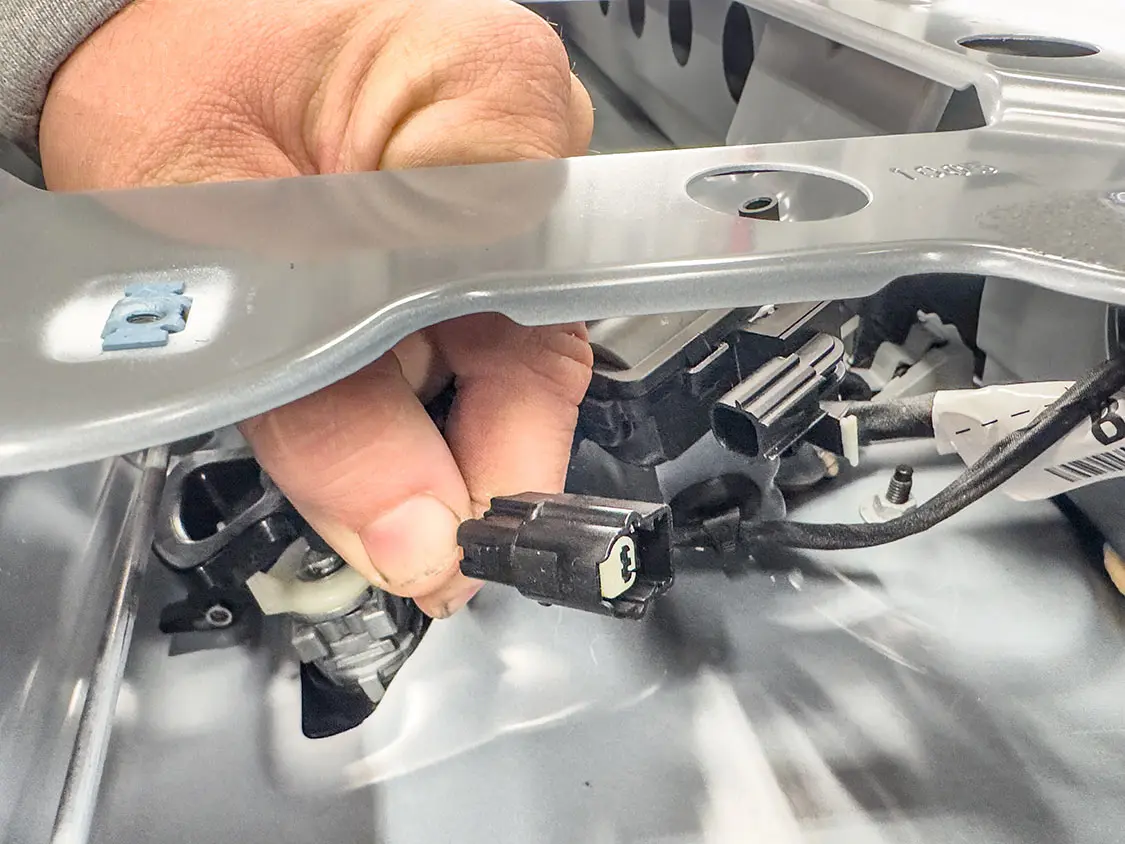
12. Open the tailgate and remove the cover panel from inside the tailgate.13. Unclip both lock connecting rods from the factory lock mechanism.14. Unbolt the factory lock mechanism and remove it. Be careful; the tailgate handle is held on with the same bolts so it will come out as well. Replace this mechanism with the new electronic mechanism and install it the same way it came out, reversing the steps.15. Remove the factory wiring harness that runs through the tailgate. This wire on this trim level truck only has a plug for the backup camera (bottom cable). The new cable (top cable) has the backup camera plug as well as the plug for the new electronic lock. Route the new cable the same way the original cable was run and connect it to the same plug under the truck. If your truck has the full-size spare, you will have to drop the spare to access the plug under the truck. My truck had the compact spare, so I was able to access it without doing that.16. Plug the new harness into the new electronic lock mechanism as well as to the backup camera.
Bed Rug
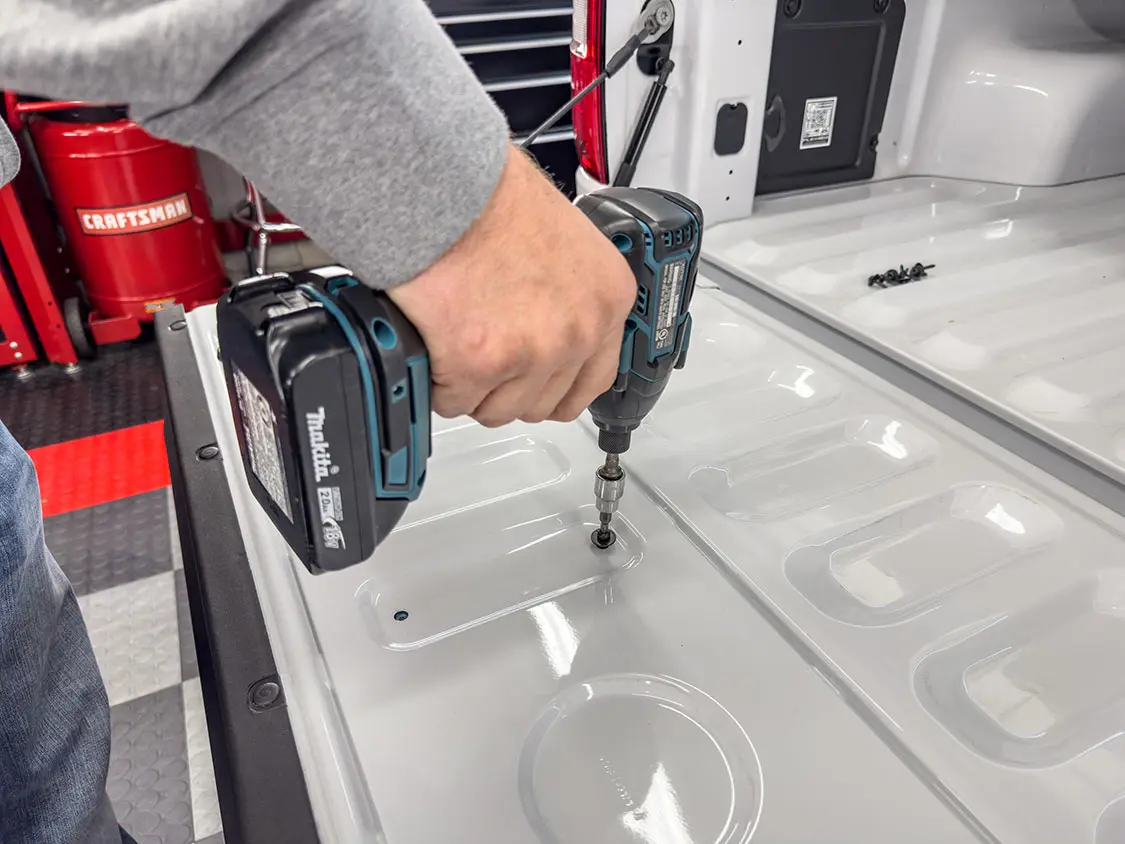
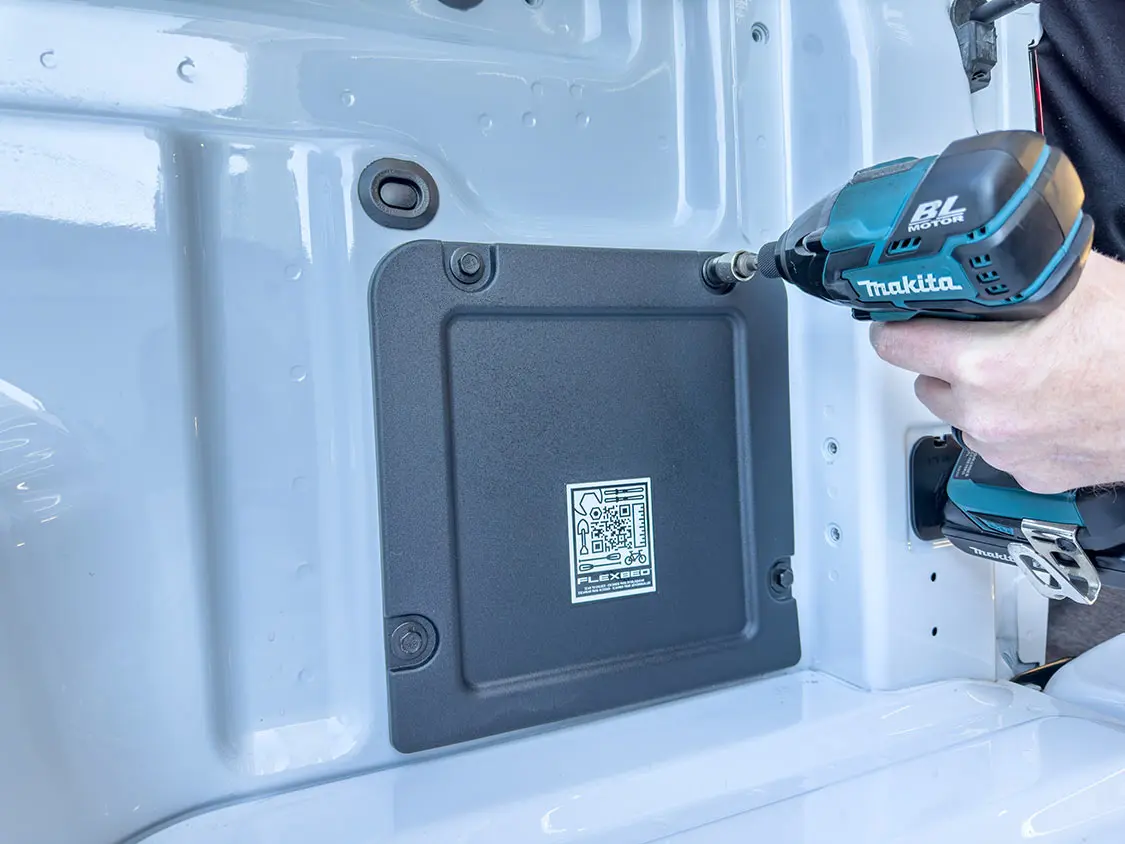
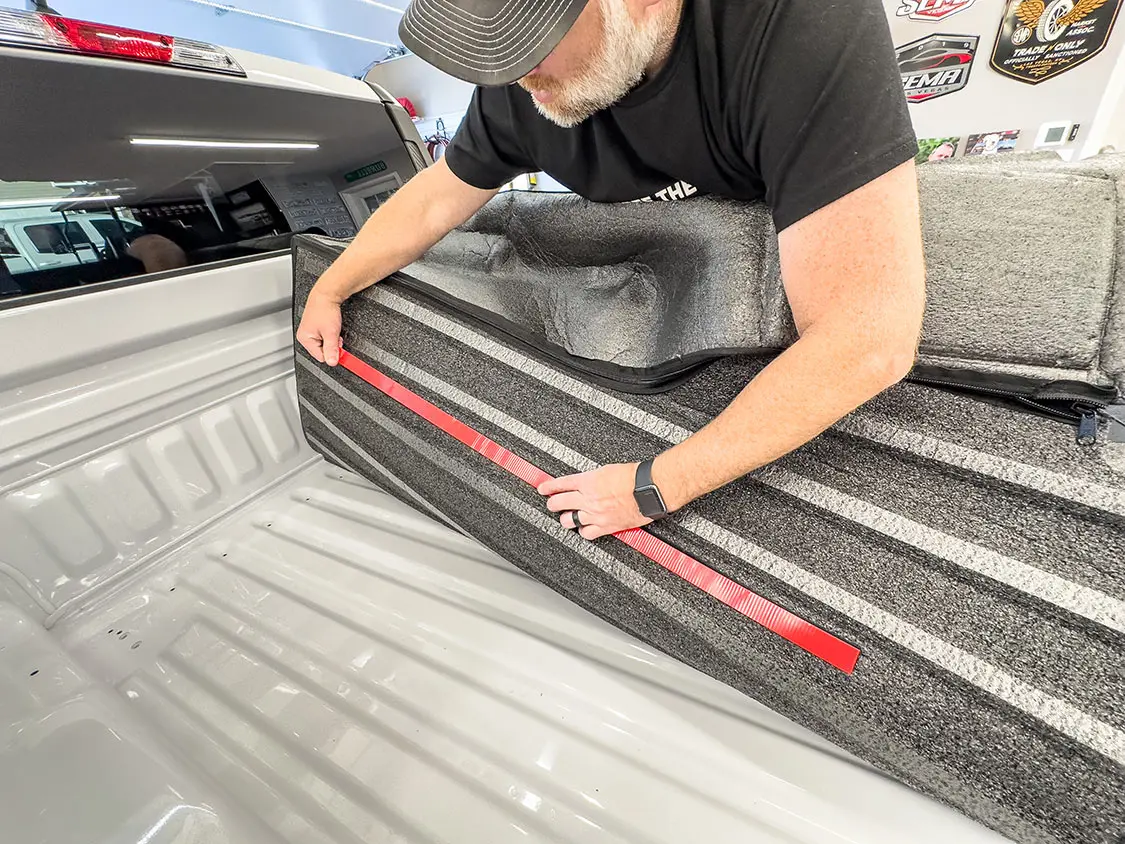
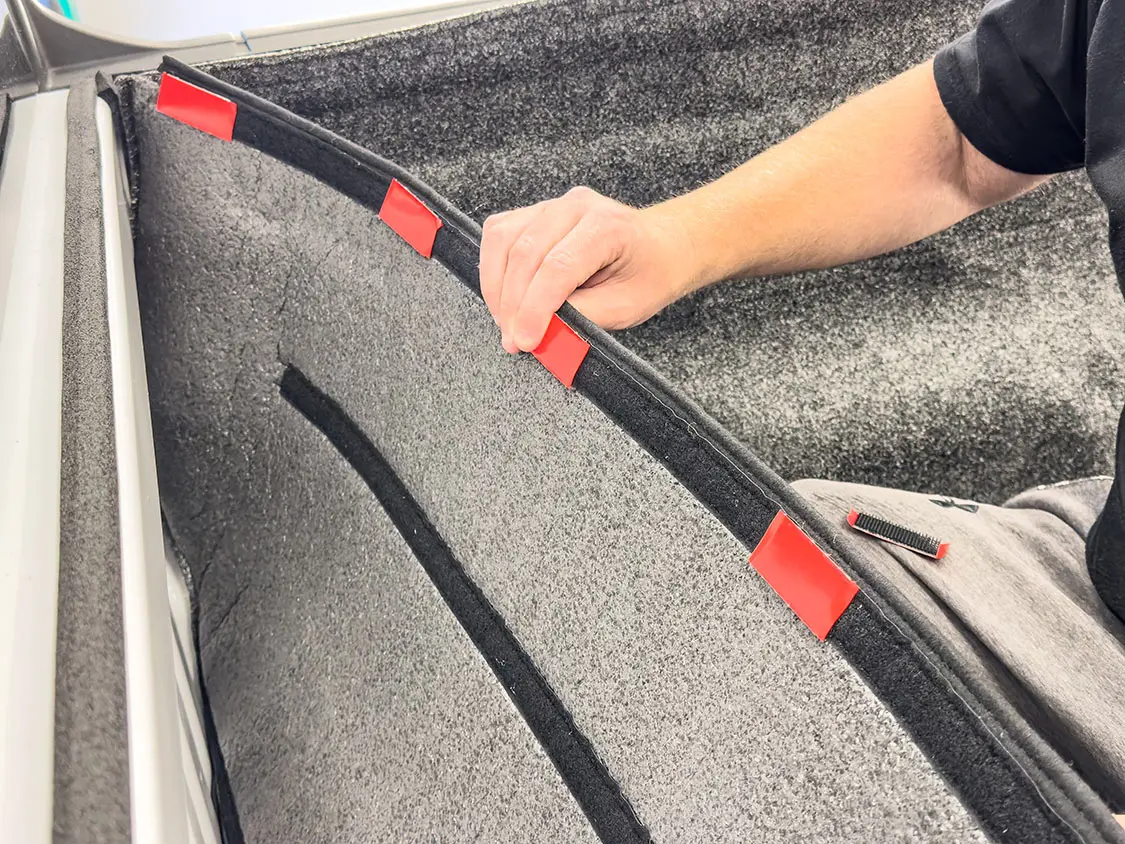
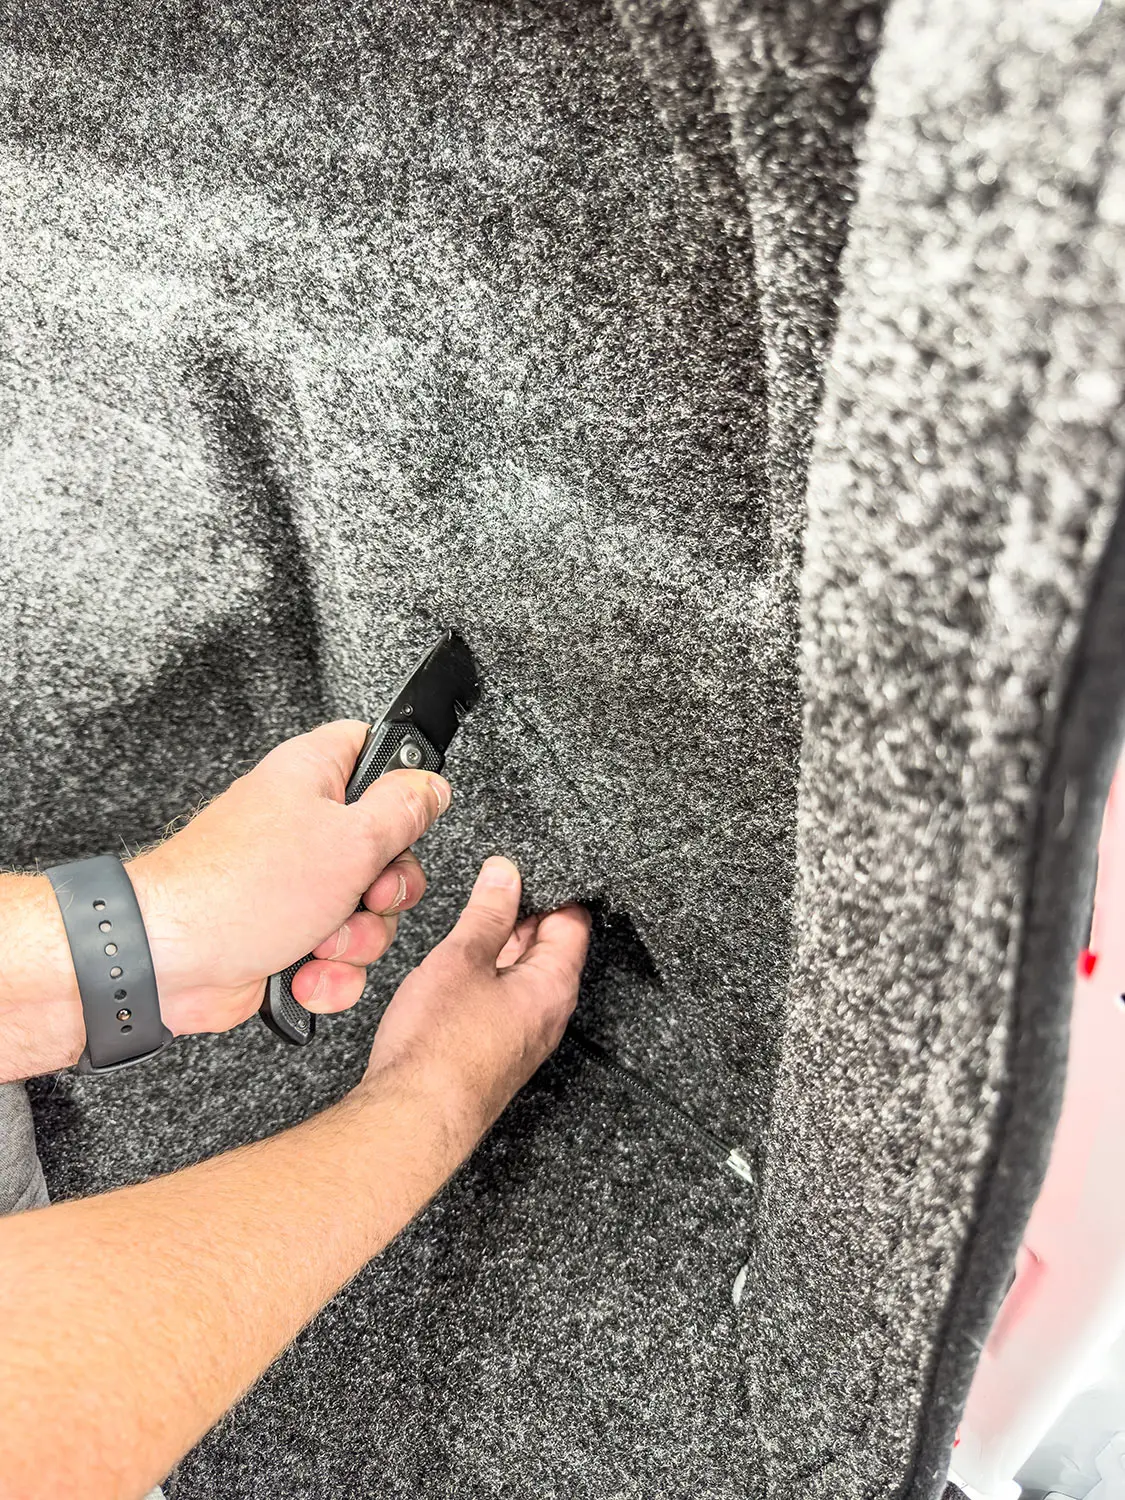
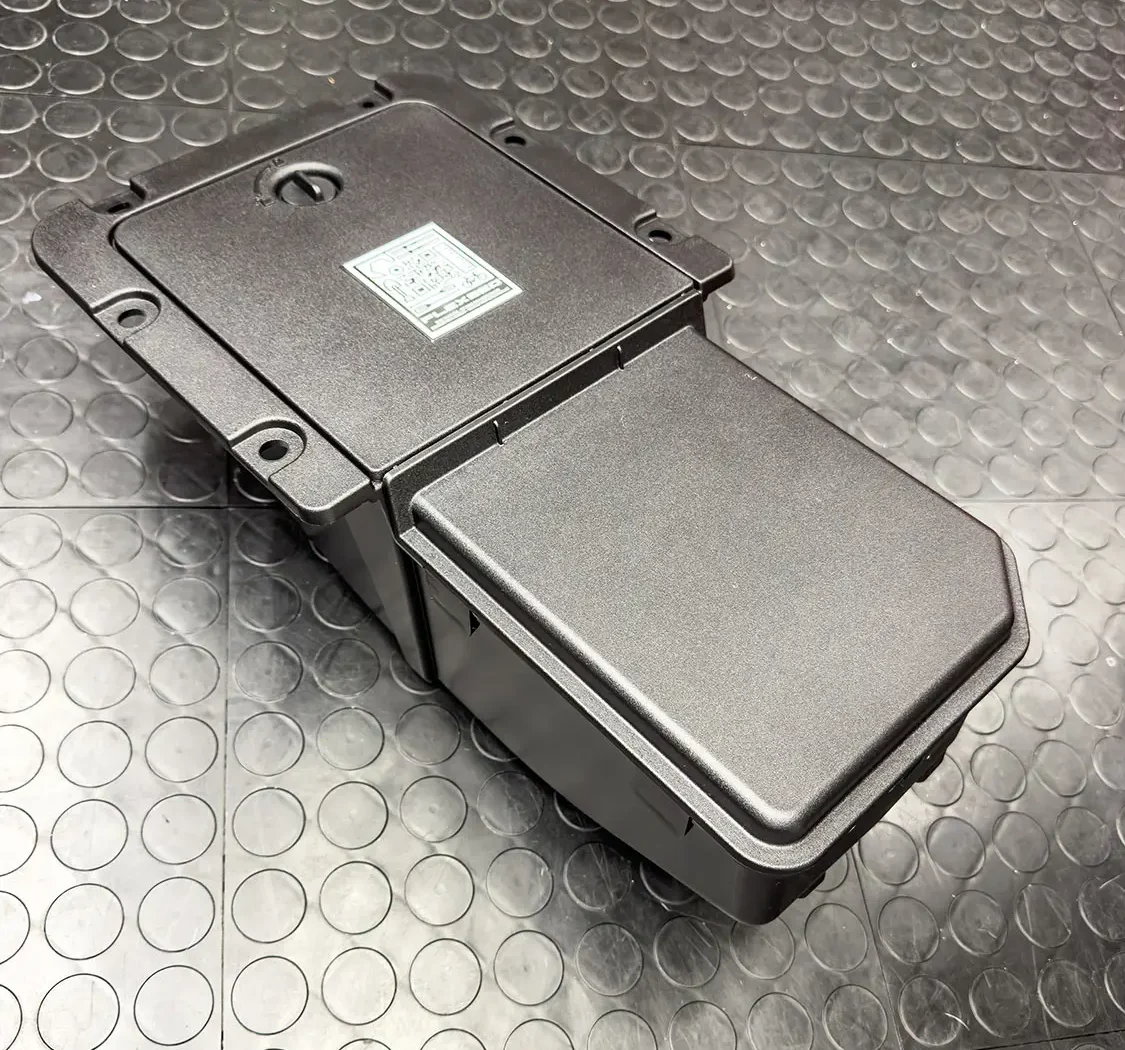
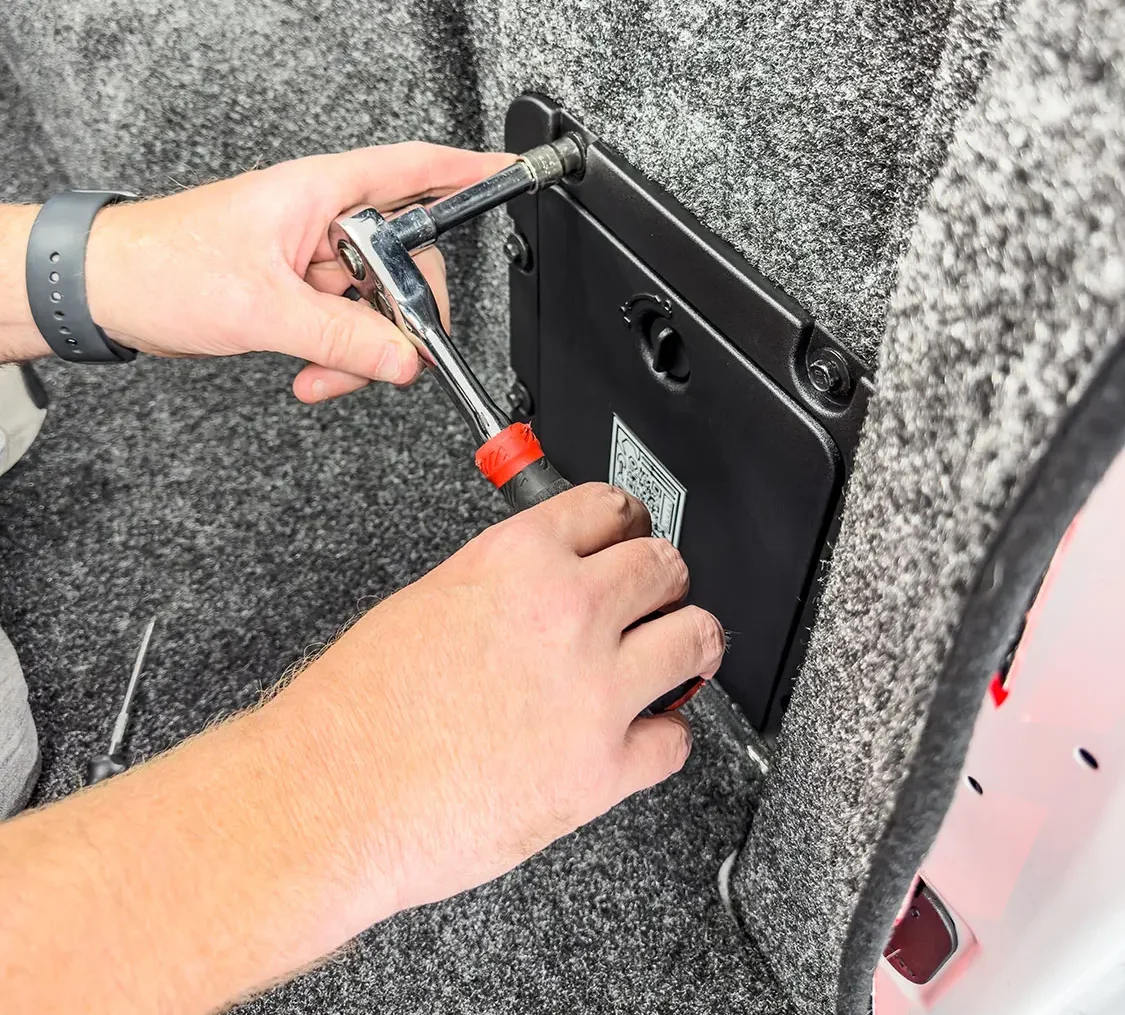
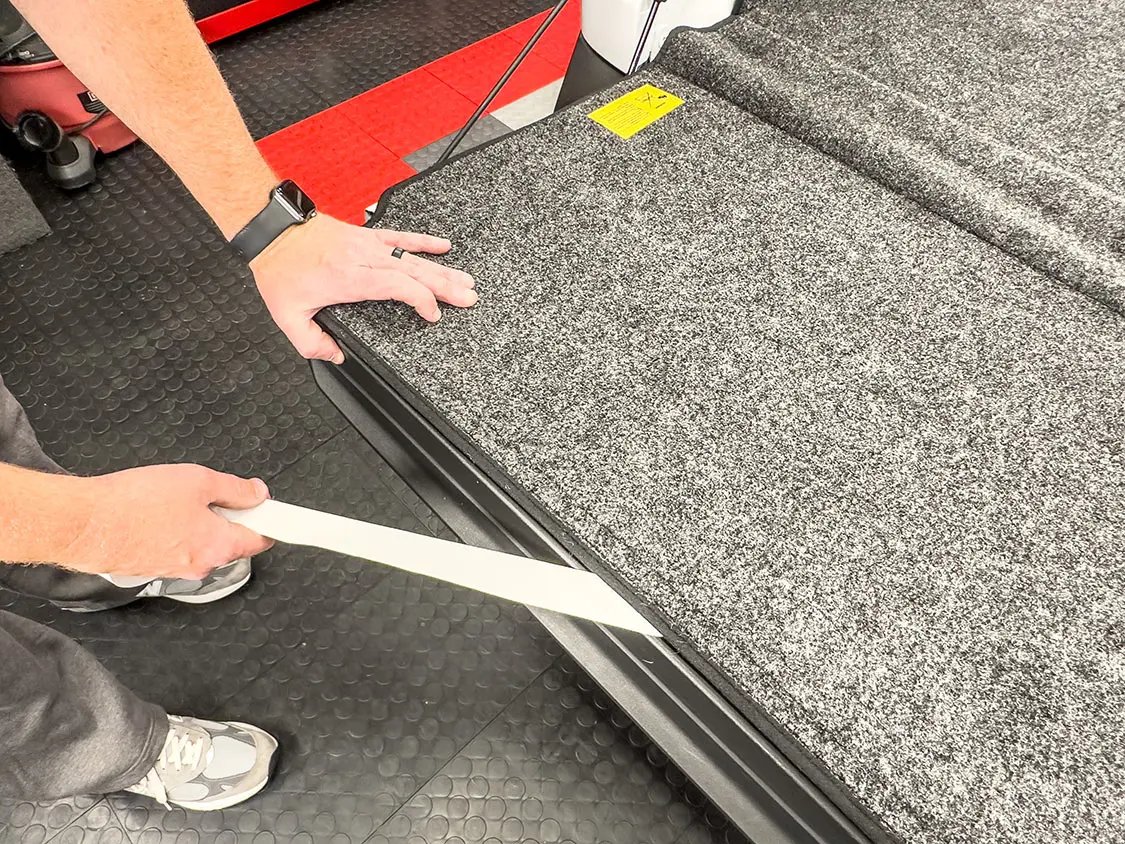
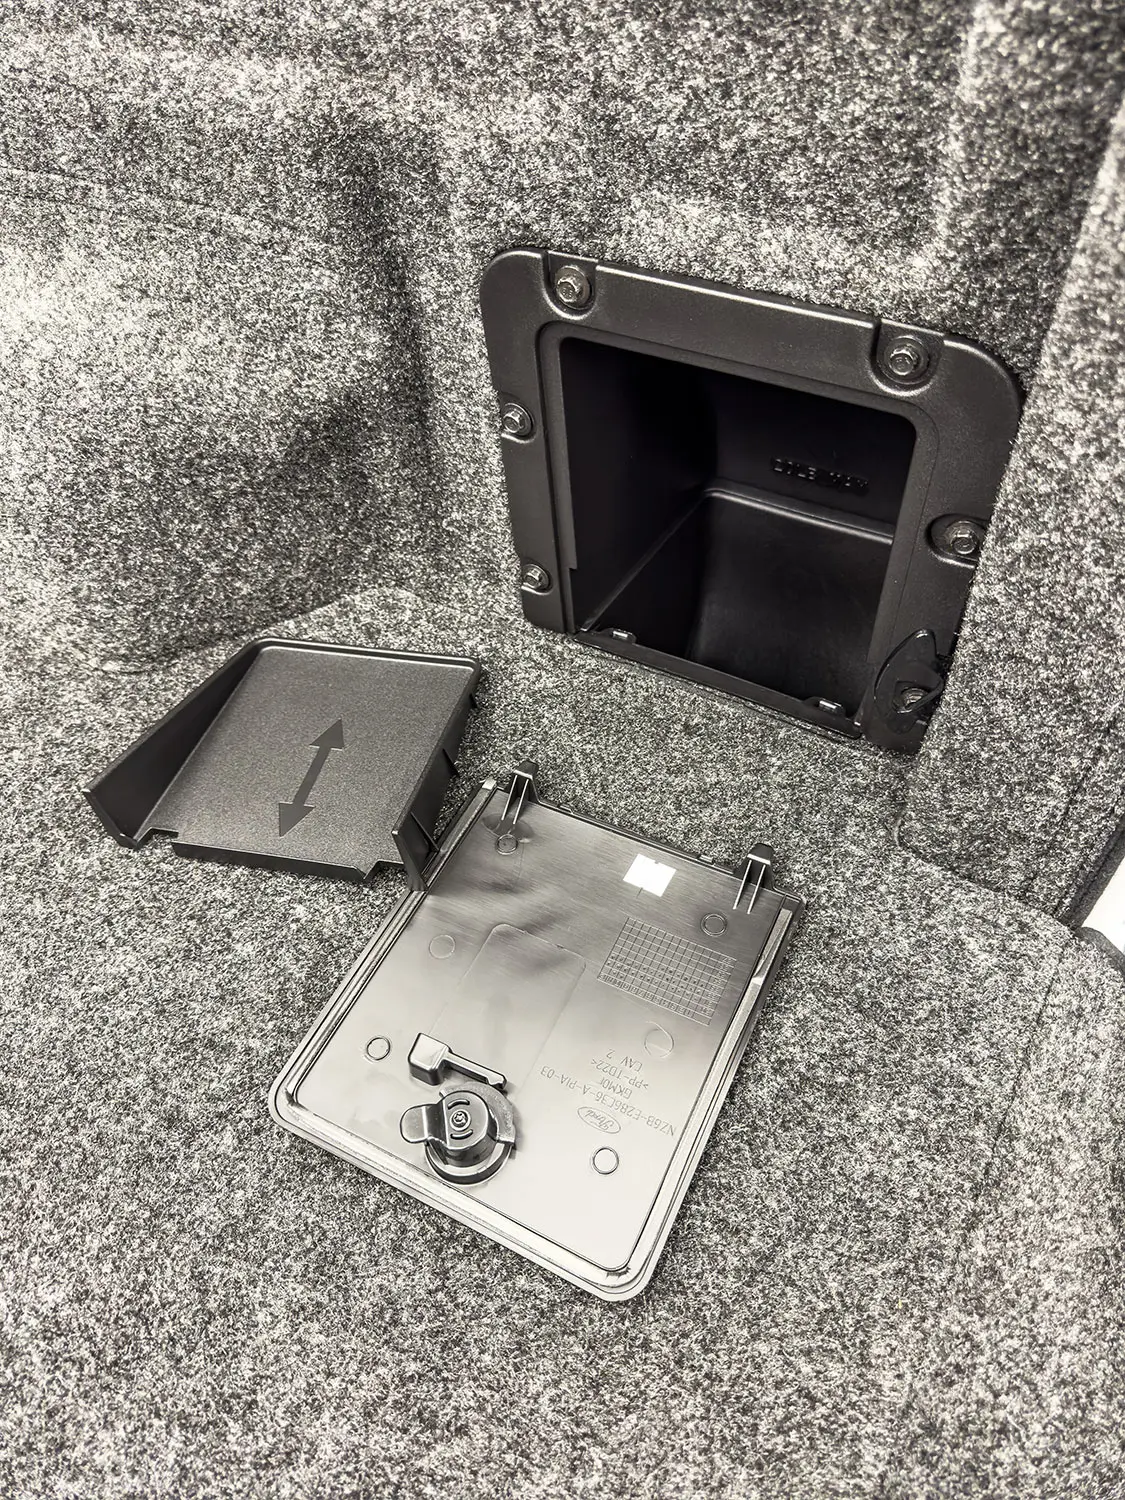
17. Remove all your bedside hooks and set them aside to reinstall later.18. Remove the plastic rear bed panels from both sides.19. After zipping the bed rug sides to the bottom, set it in the bed and ensure it is centered and pushed into all corners. Pull the bed rug to one side and attach the Velcro strips to the Velcro on the bottom of the bed rug. Making sure to clean the area of the bed floor the Velcro will stick to and attach it to the bed floor. Switch sides and do the same for the other side.20. Attach the Velcro strips to the front wall first, evenly placing them. Clean the area of the bed they will attach to and secure the bed rug to the wall. Repeat this process for both sides.21. Once the bed rug is attached, cut the opening from where the side bed panels were removed.22. This is the factory Ford bed cubby that we are adding to replace the passenger side panel. If you wish, you can add this cubby to both sides for even more storage, but I only needed the one.23. Place the cubby into the newly cut opening and secure it with the factory bolts that hold the side panel in. Then reinstall the other side panel.24. Attach the Velcro to the tailgate panel, clean where it will go, and remove the 3M backing to stick it to the tailgate. The bed rug is done.
Final Look
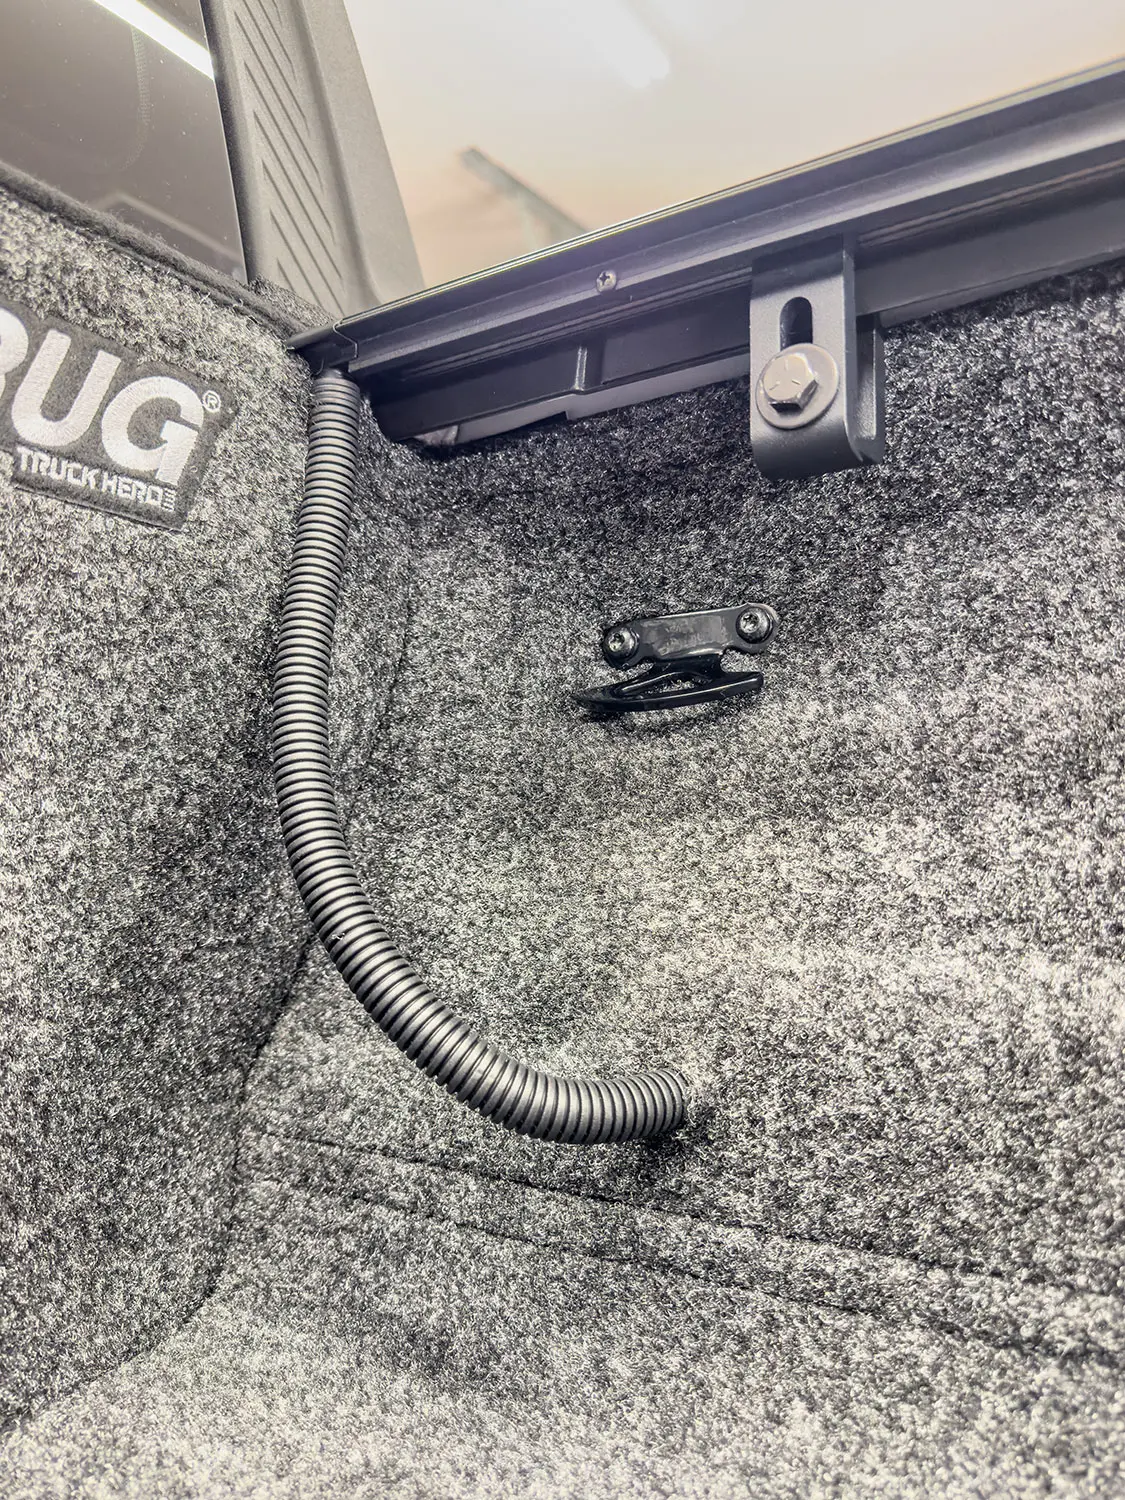
25. The newly installed bed cubby opens to allow you two different levels of storage. Adding this keeps small items like straps out of the way until you need them.26. All bedside hooks were reinstalled, and we routed the bedcover drain tube on the inside of the bed rug to ensure it wouldn’t be smashed and keep water from properly draining.27. The finished product not only looks good, but will function exactly like we planned—as a larger trunk that is securely locked when the truck is locked. Adding a few simple parts like this can make a cheaper, base model truck look and perform like a higher-end truck, proving you don’t need to spend a fortune to have a cool truck.
Chris Hamilton is an automotive journalist, editor, and lifelong truck enthusiast with extensive experience covering custom truck builds, fabrication, performance upgrades, aftermarket products, and a ...
We use cookies to enhance your browsing experience, serve personalized ads or content, and analyze our traffic. By clicking "Accept All", you consent to our use of cookies. Visit our Cookie Policy for more info.


Share Link