 JEREMY RICE
.
February 07, 2020
.
HEADLINE
.
JEREMY RICE
.
February 07, 2020
.
HEADLINE
.
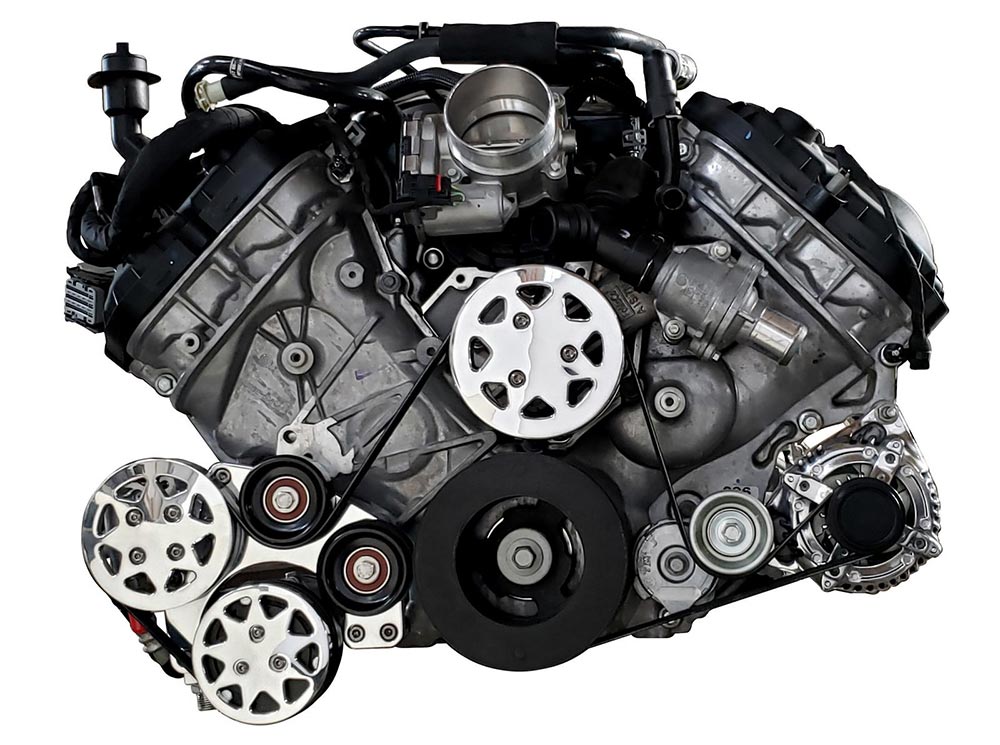
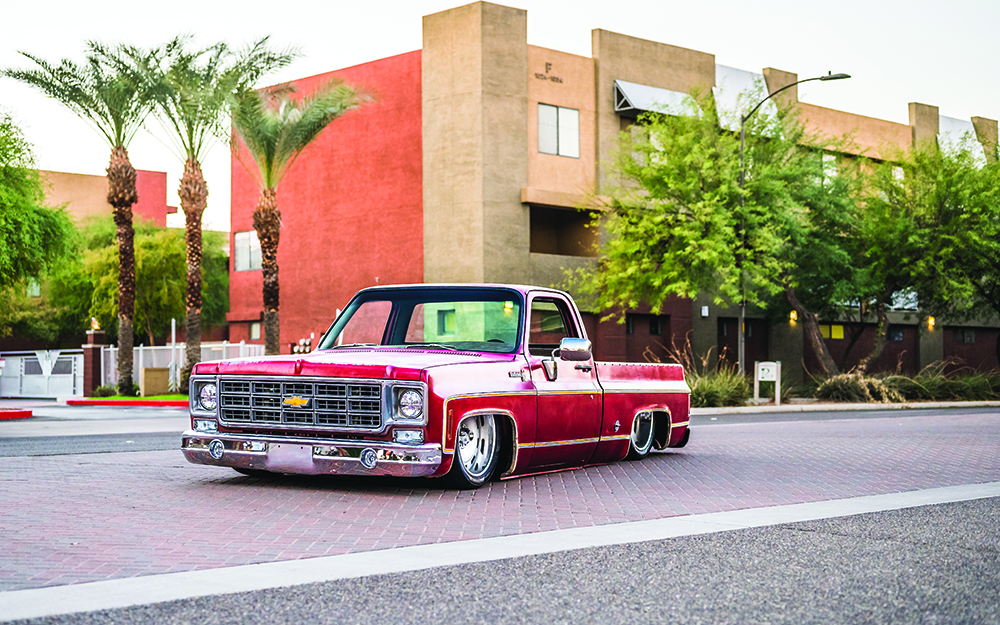
By now, I’m sure most of you have seen our ’79 C-10 square-body project. We have highlighted the complete build in Street Trucks Magazine, starting all the way back with getting the engine running and shining like new. We continued by walking you through suspension, steering, brakes, exterior additions, new glass and weather seals, new gauges, and even revamping the stock interior. Just when we thought we were done with the truck and ready to start cruising, we started thinking about adding a more custom interior. Sure, the refreshed stock interior is great and most people would have been completely happy with it; however, we like to do things a little more custom around here.
We’ve admired the TMI Products seats that were released for the truck market a few short years ago, and we’ve even used the company’s universal seats in a few previous projects. When we decided to change the interior of our C-10, we knew TMI would build us an awesome setup. The company has been around for more than 20 years, and it’s taken that experience and used it to expand its offerings in the truck market.

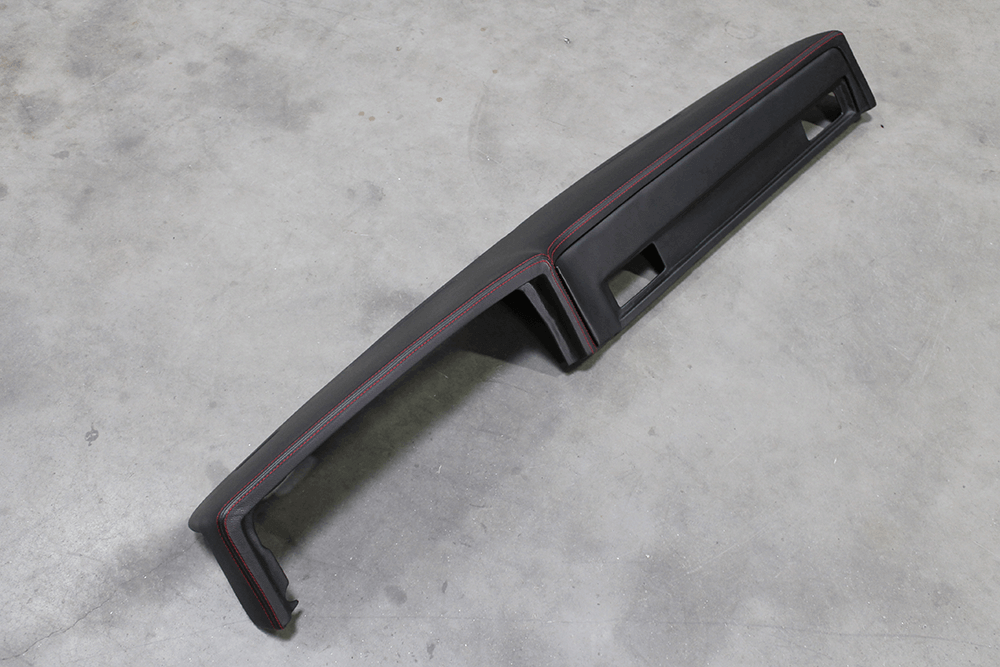
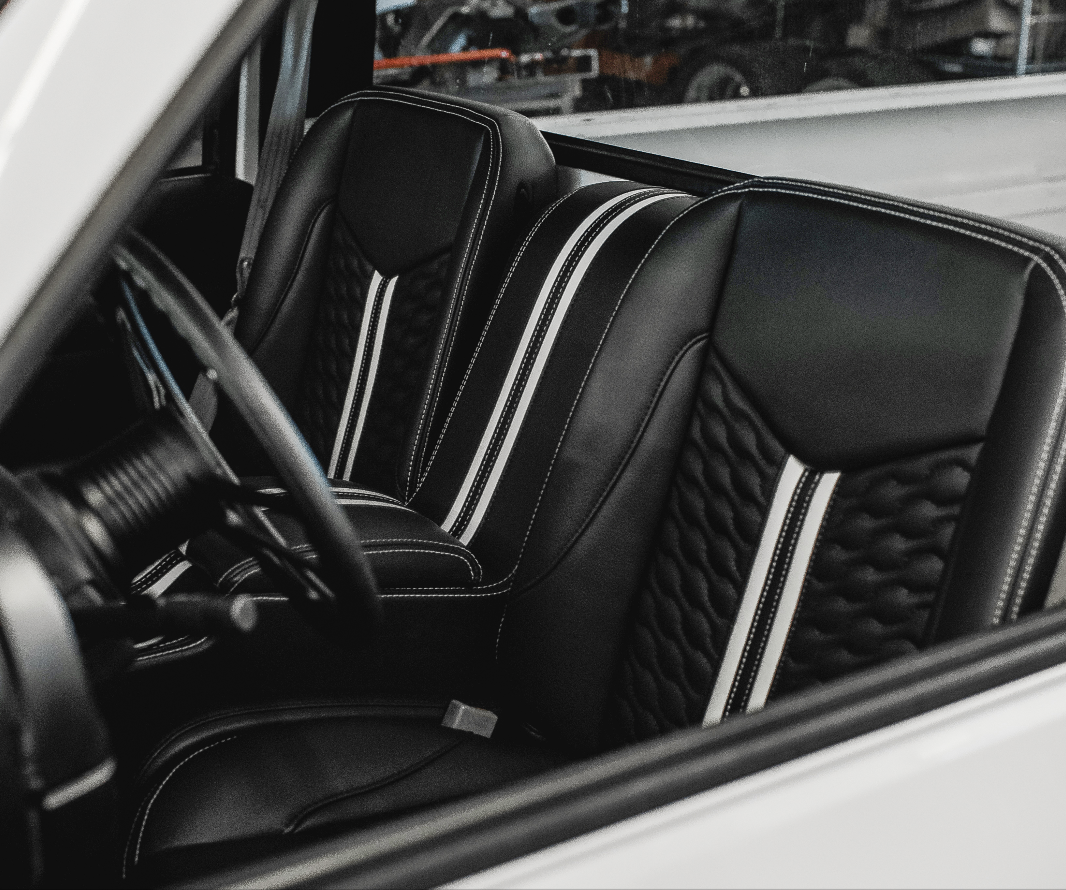
As TMI Products grows, it continually offers new products. In addition, TMI also has a plethora of different materials, stitch patterns and colors to choose from. We wanted an interior that would pop against the gray-and-black exterior. We decided to go bold with a red-colored bucket-seat package with perforated black inserts. Black rivets add a further custom touch to the seats. A center console is included as part of the seat package. We also picked up a set of TMI’s door panels wrapped in matching colors. Rounding out our new interior order was a new dash pad. TMI’s dash pad is radically different from the original version. It has a raised passenger’s side that gives the dash pad a unique look. Red accent stitching adorns all of the package components, but it really stands out on the black vinyl dash pad. Once all the products were delivered to the shop, we were ready to get started on the installation of our custom interior from TMI Products.
Sources:
TMI Products
888.460.0640
Tmiproducts.com

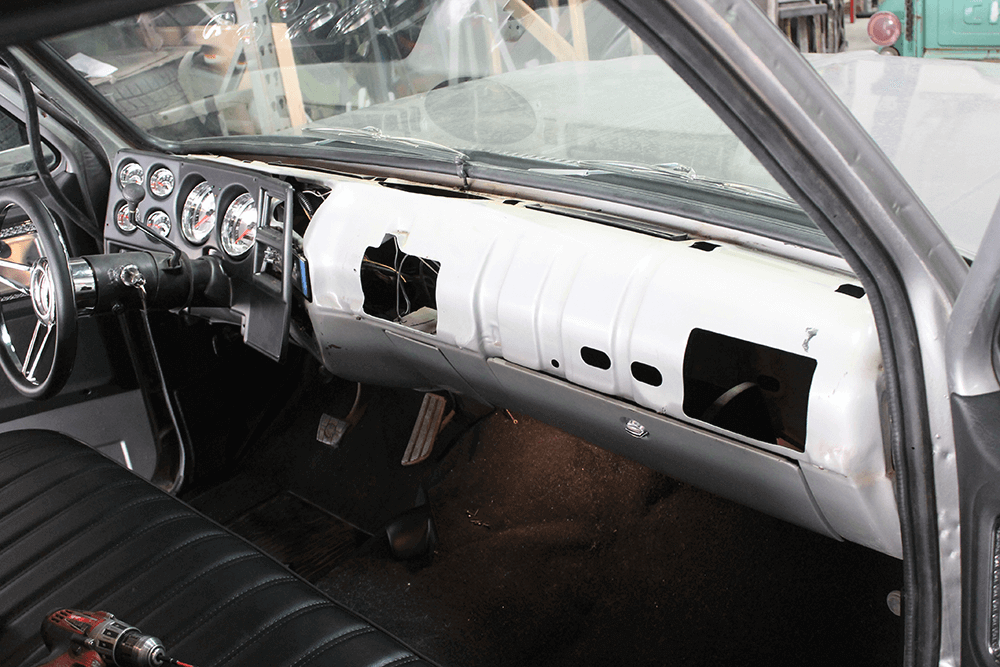
Here’s a look at the interior before we got started. Keep in mind that this truck sat in the Arizona heat, baking in the sun, for about five years.
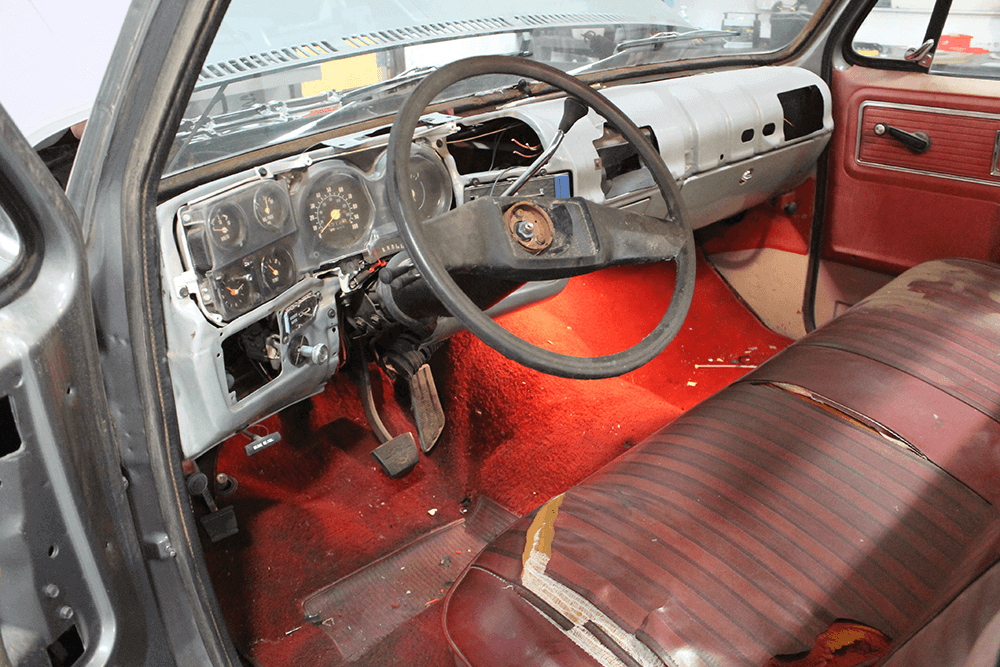
For some reason the dash pad had already been removed. Maybe someone intended to replace it, but never got around to it.
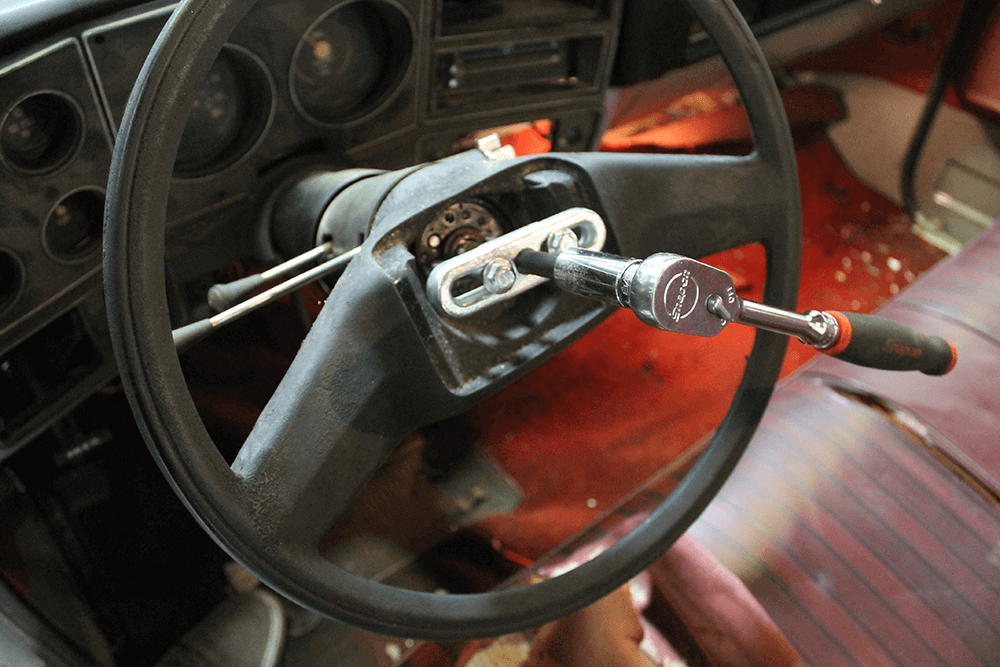
Although it might not be the obvious starting point, we removed the steering wheel first. It gave us more room to remove the seat.
We unbolted the four seat-mounting bolts next and took out the seat.
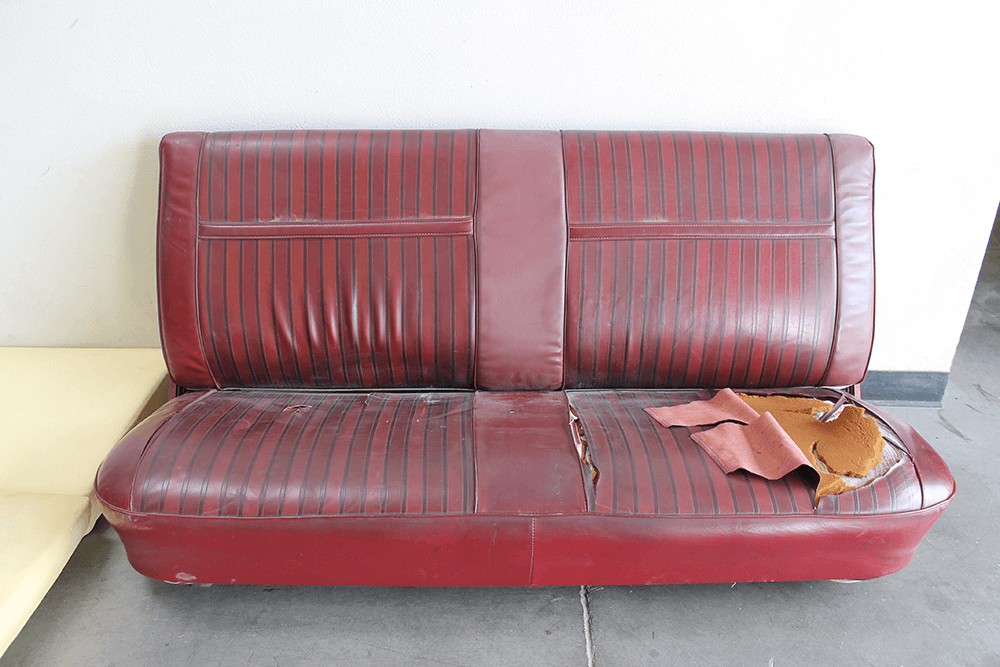
We set aside the factory seat. With our new TMI interior, we wouldn’t reuse any part of it.
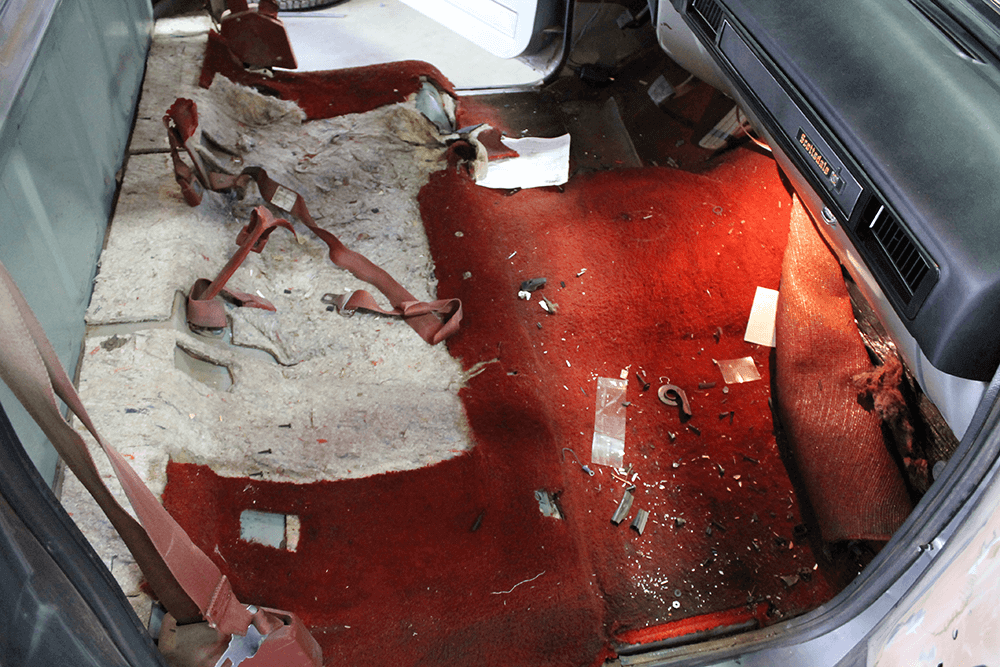
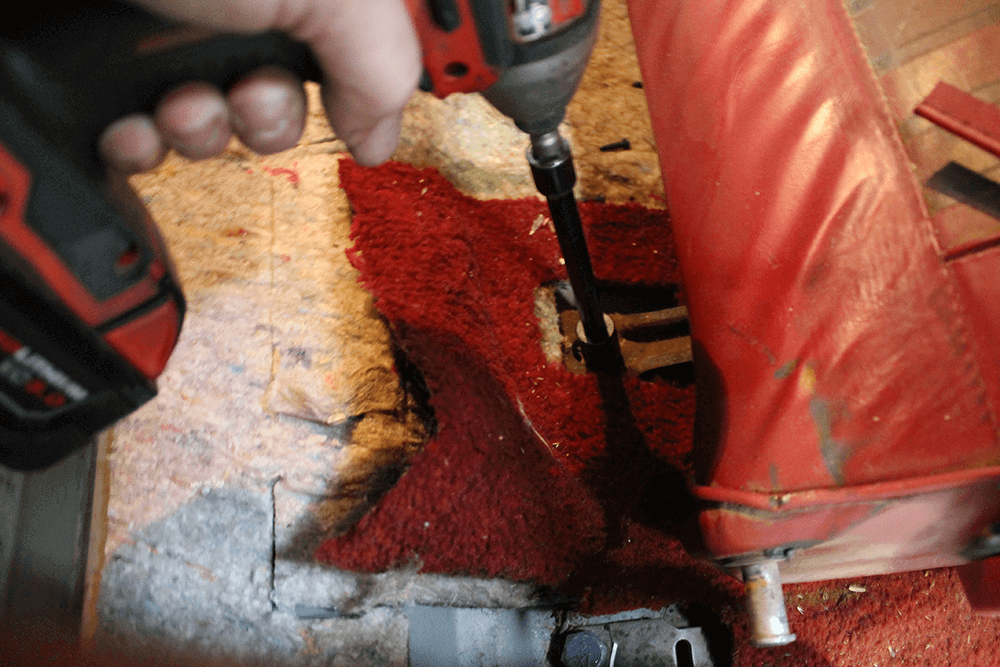
The seat belts, carpet and moldy carpet pad were removed next. Make sure to use some gloves when doing this, there’s a lot of grossness to be found under the carpet of a truck that’s been sitting this long.
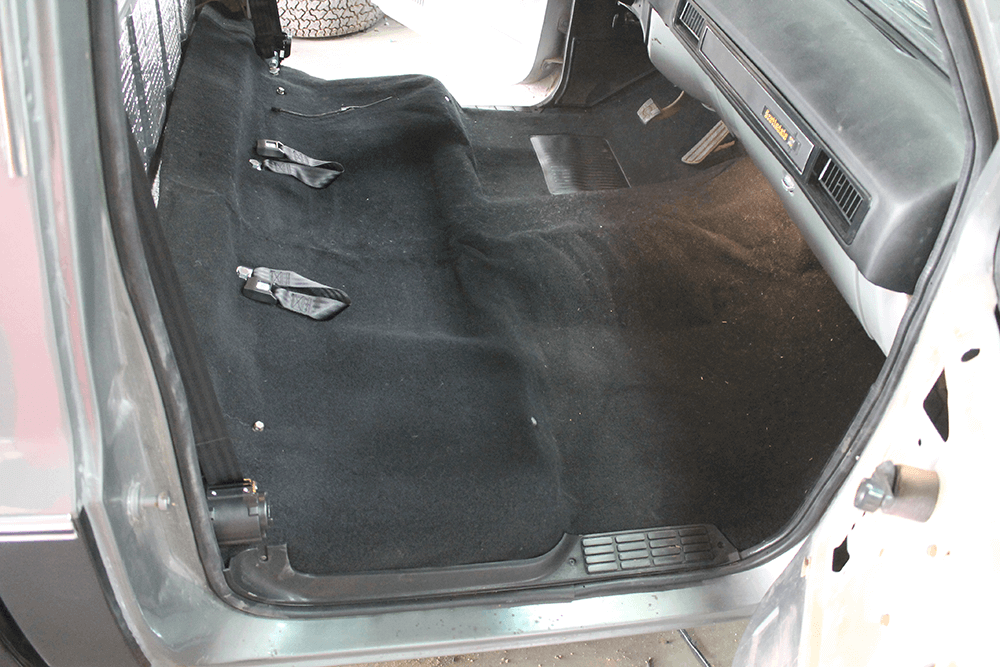
As we noted in the intro, we tried out a factory-style interior first, so we’ll fast-forward a couple of steps. We installed sound-deadening material on the floor once the old carpet was out. Then we fit a new carpet kit and a new set of sill plates. It’s amazing how much newer a truck can look with nice carpet installed.
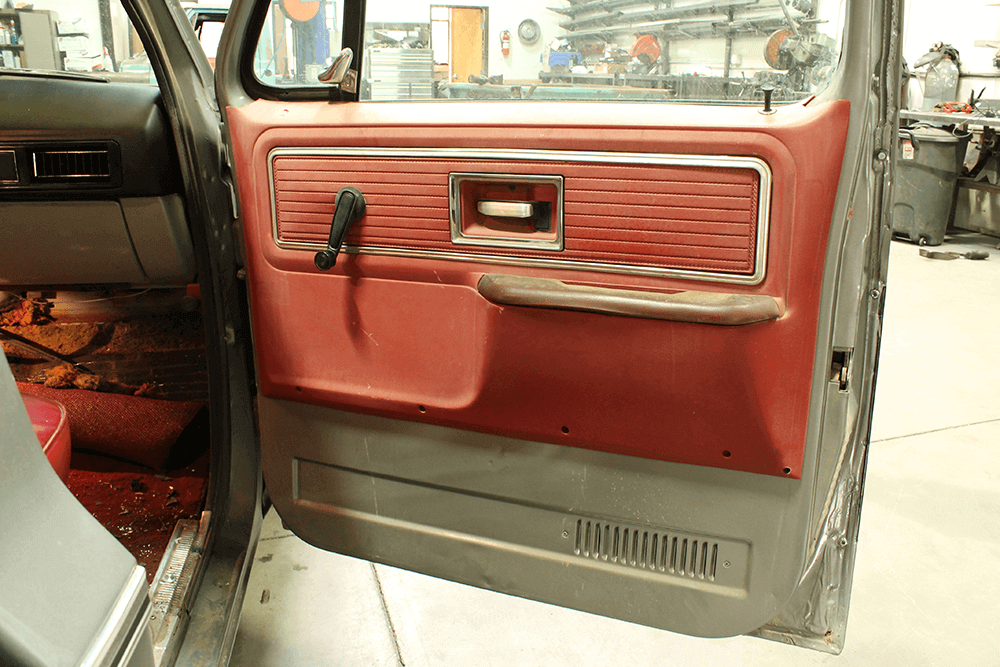
Here’s a look at the door panels that were in the truck when we got it. It was strange because the design of the driver and passenger’s door panels didn’t match, but they were color-matched. Oh well, we removed them both anyway.
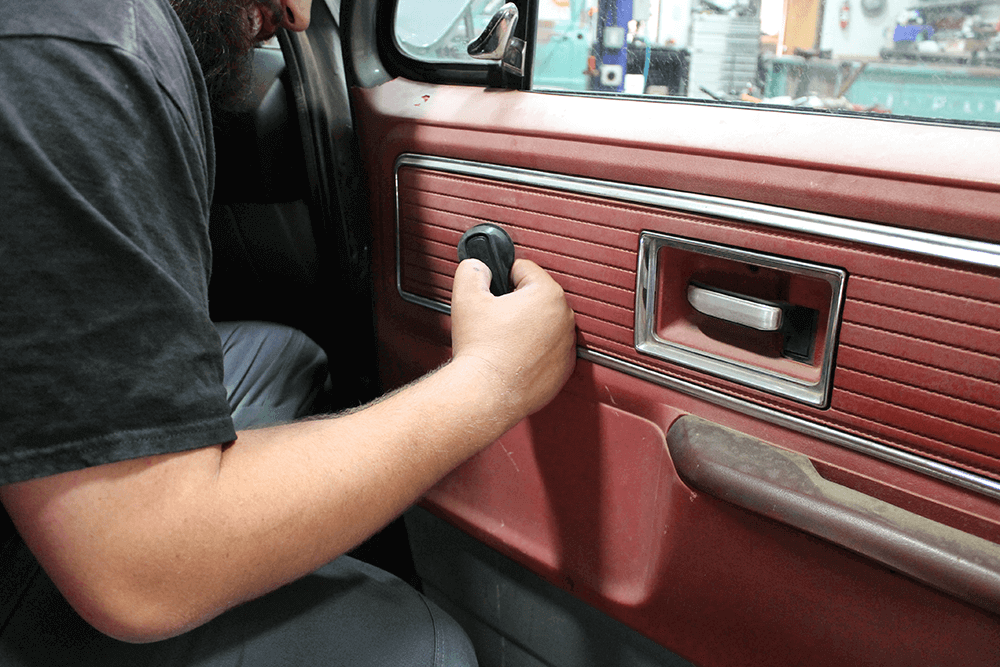
We started the removal by unclipping the window cranks. There’s a special tool for this, but you can easily access the clip using a pick tool.
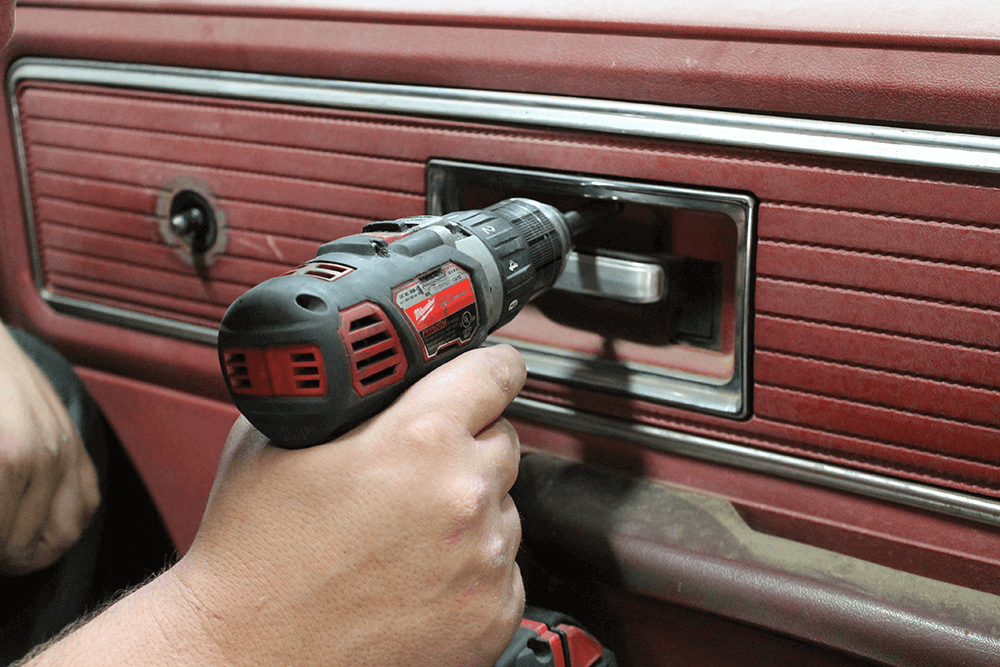
There are screws in a few areas in the door that must be removed to take off the entire door panel. We removed one from behind the door handle and two from the armrest. There are also several across the bottom of the door.
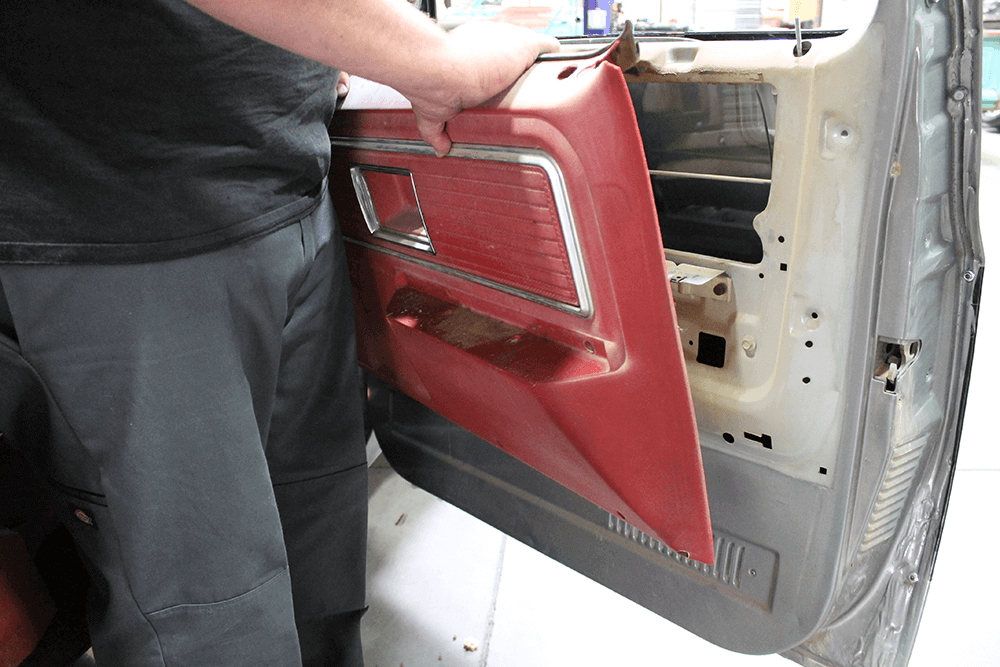
Once all of the screws were removed from the door, we lifted it off around the door handle and tossed it into the trashcan.
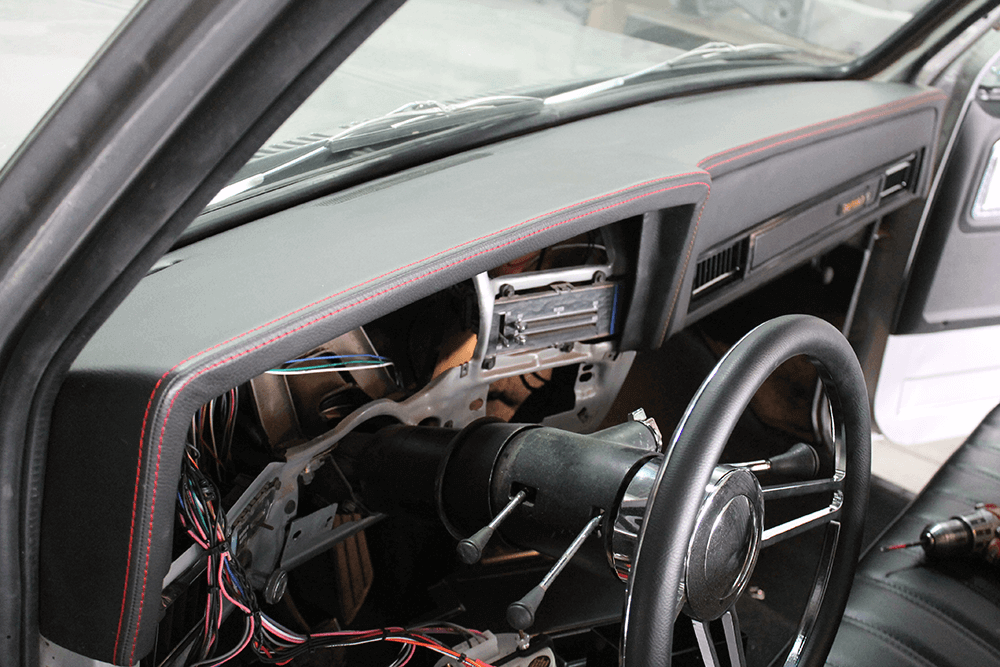
Now that we had everything out of the interior, it was time to start prepping parts for installation. We started with the TMI Products dash pad.
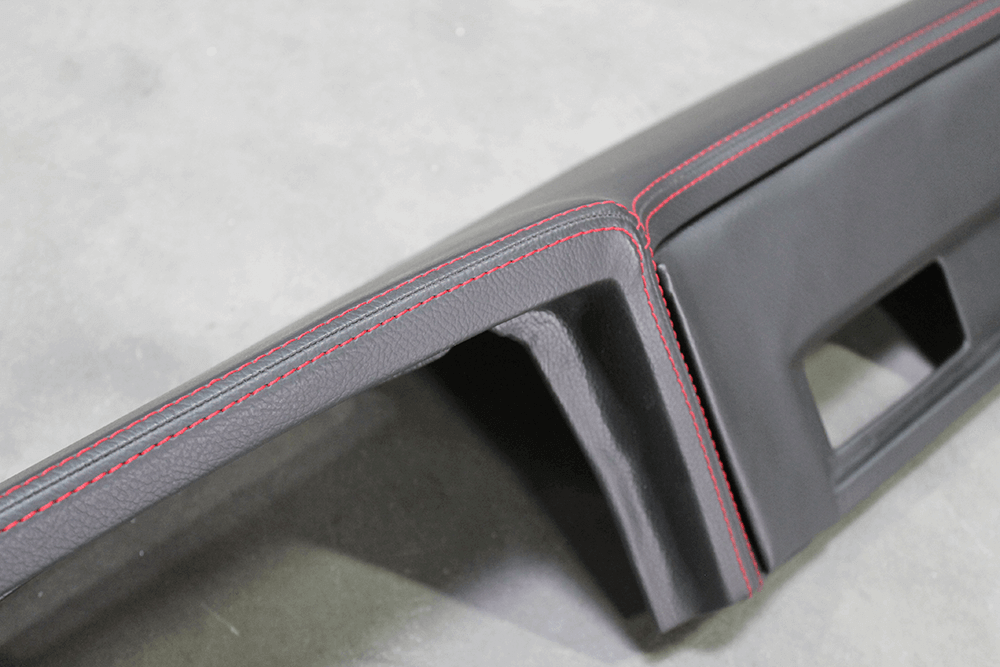
Here’s a detailed look at the red accent stitching on the dash pad. It really enriches the feel of the interior.
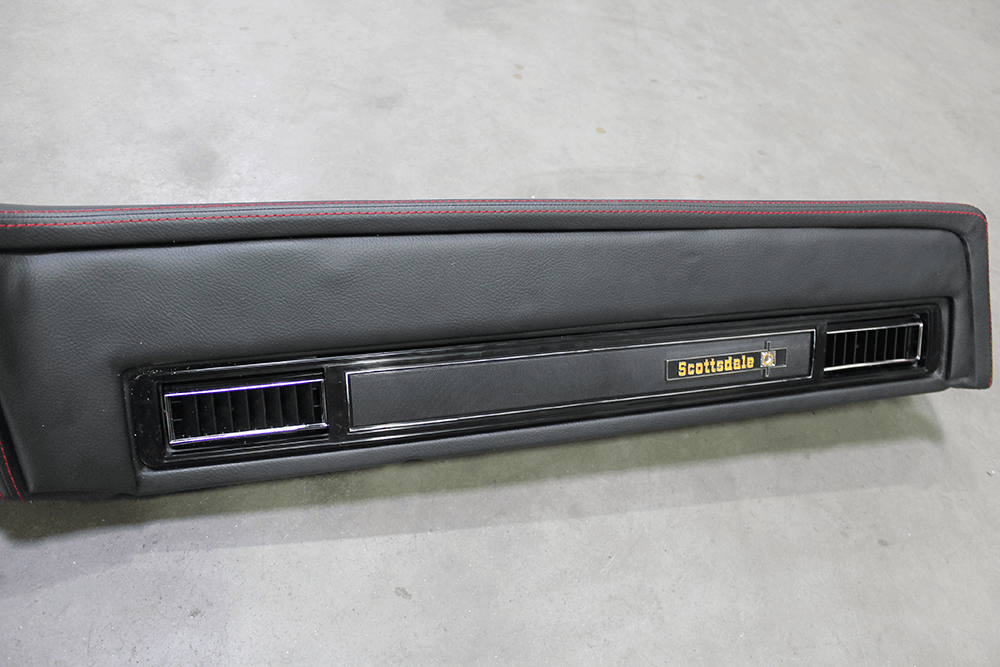
Before installing the new dash pad into the truck, we installed the factory dash piece that houses the AC vents.
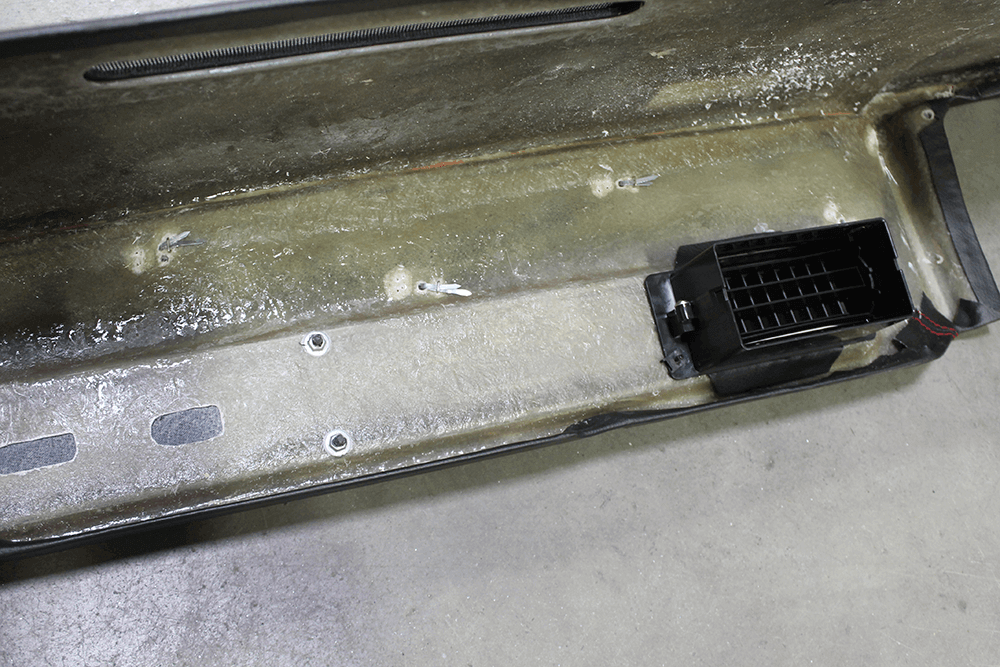
To secure the piece to the dash, we reused the metal nuts and screwed them down over the plastic pegs.
We cleaned up the top of the dash area before laying the new dash pad in place. You can also see the new gauges and cluster that we’d installed previously.
The new dash pad simply slid onto the dash and was retained like the original—if we’d had an original.
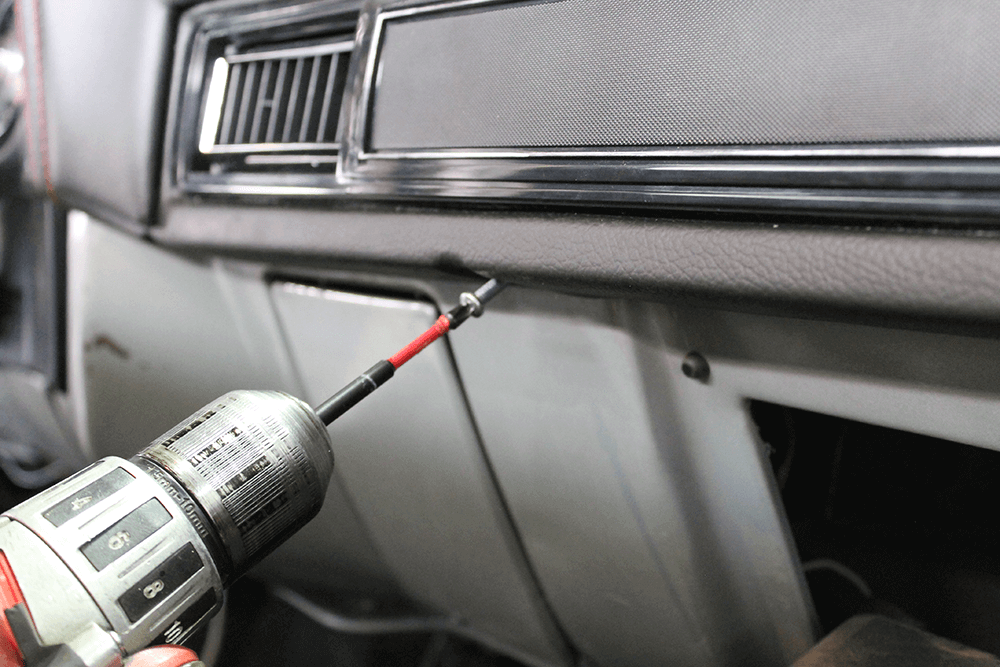
Screws go along the bottom of the new dash pad into the factory plastic clips. These clips are known to crack and break, but replacement versions are easy to find.
Since we had an aftermarket gauge cluster and gauges, the installation around them was a little tricky. We got creative and used screw clips and longer screws to secure the new dash pad.
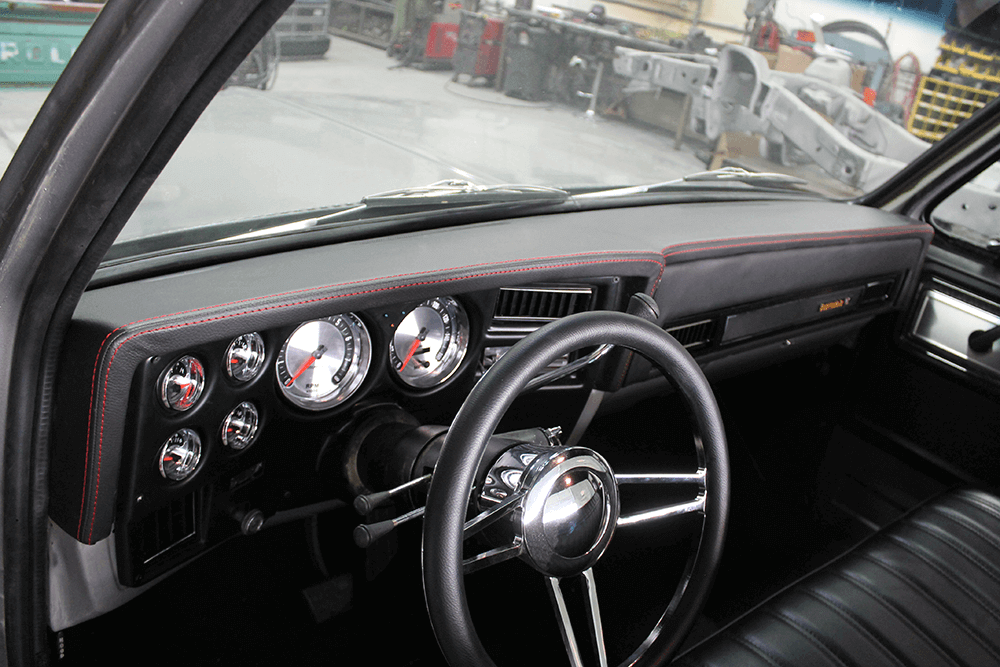
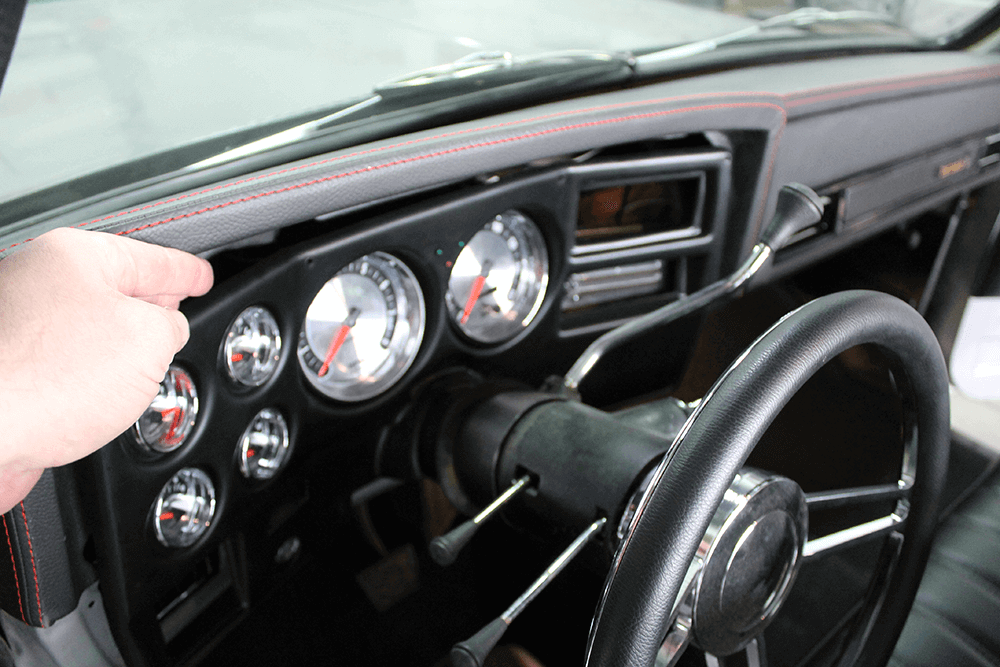
Here’s a look at the new dash pad fully installed. Although we didn’t have the factory one to compare it to, we’re pretty confident that this is an improvement over a stock cracked and weathered dash pad. The TMI version definitely looks better than what we had before.
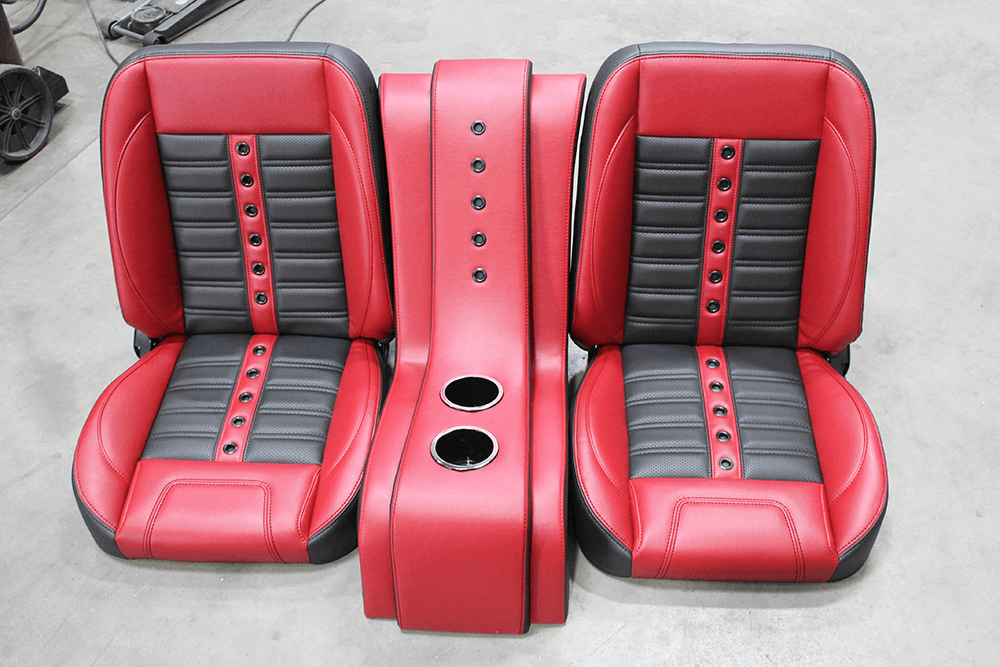
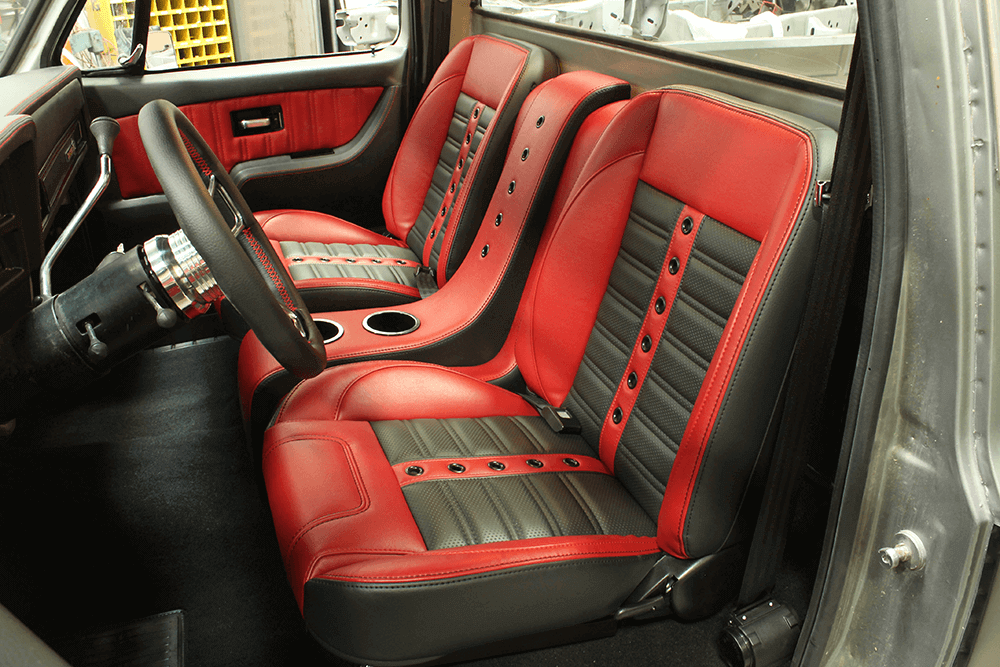
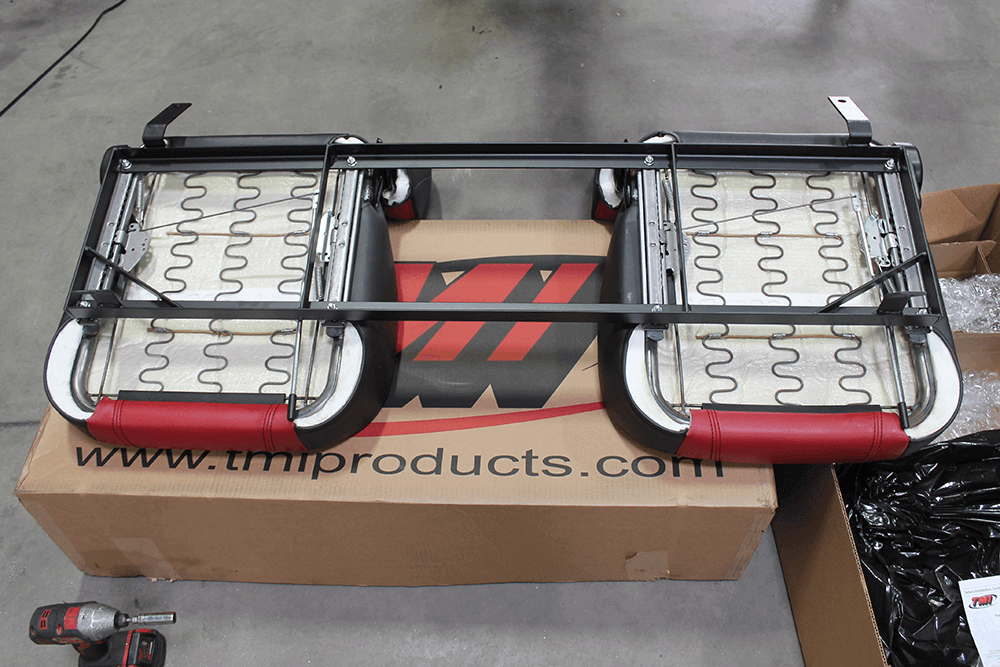
Turning our attention to the new seat and center console, we laid them out to make sure we had everything we needed. TMI Products includes a seat base, seat sliders, seats and matching center console. We opted for the Sport-X-style seat, which comes with grommets.
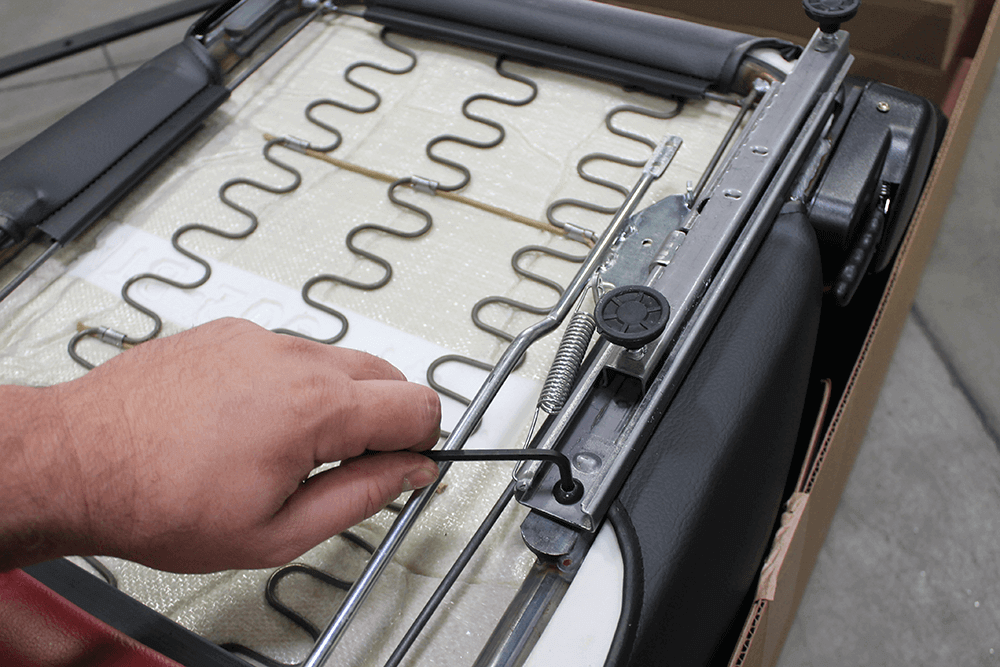
The seats do not come ready to bolt in, so there was some work to do before we installed them in the truck. We began by installing one side of the seat sliders.
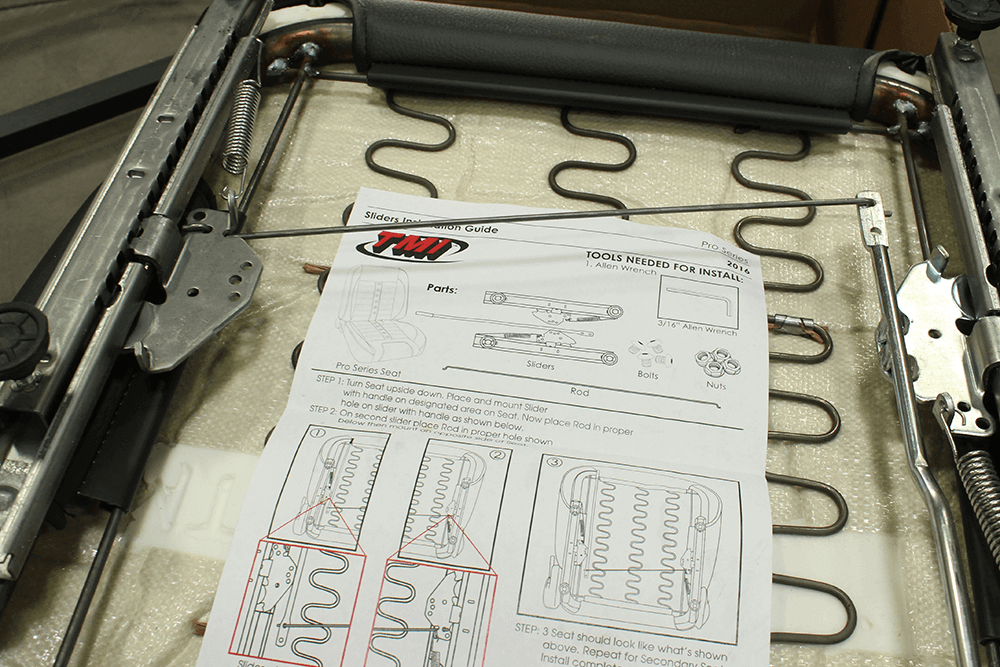
The instructions for this process are pretty easy to follow, but make sure you do, or else you might be removing the other track in order to get the rod from one to the other.
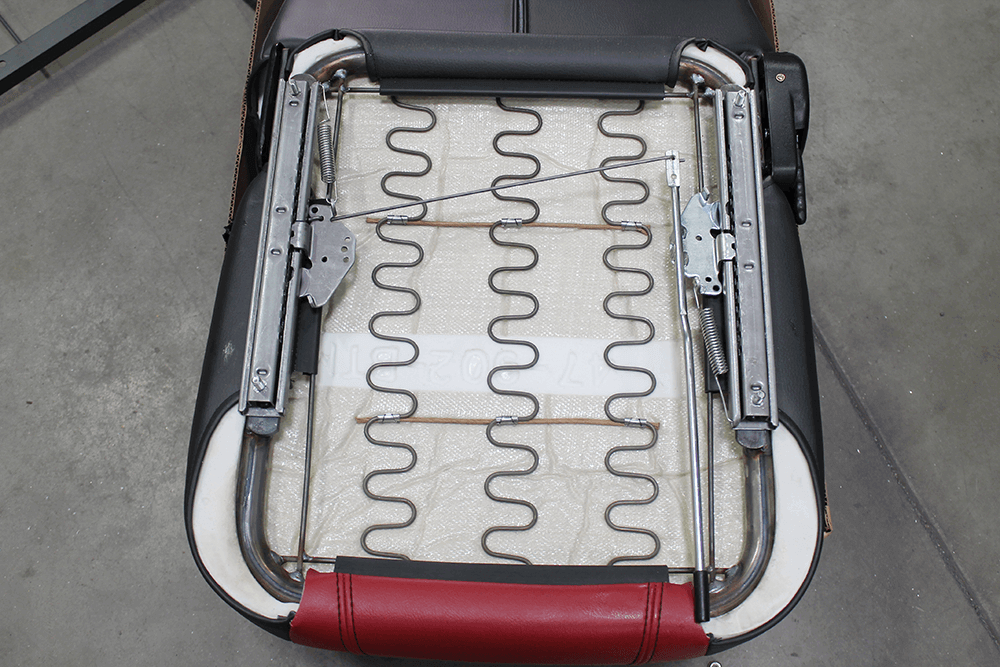
This is how each seat should look after both slider tracks have been installed. The positioning of the connecting rod is crucial for smooth operation.
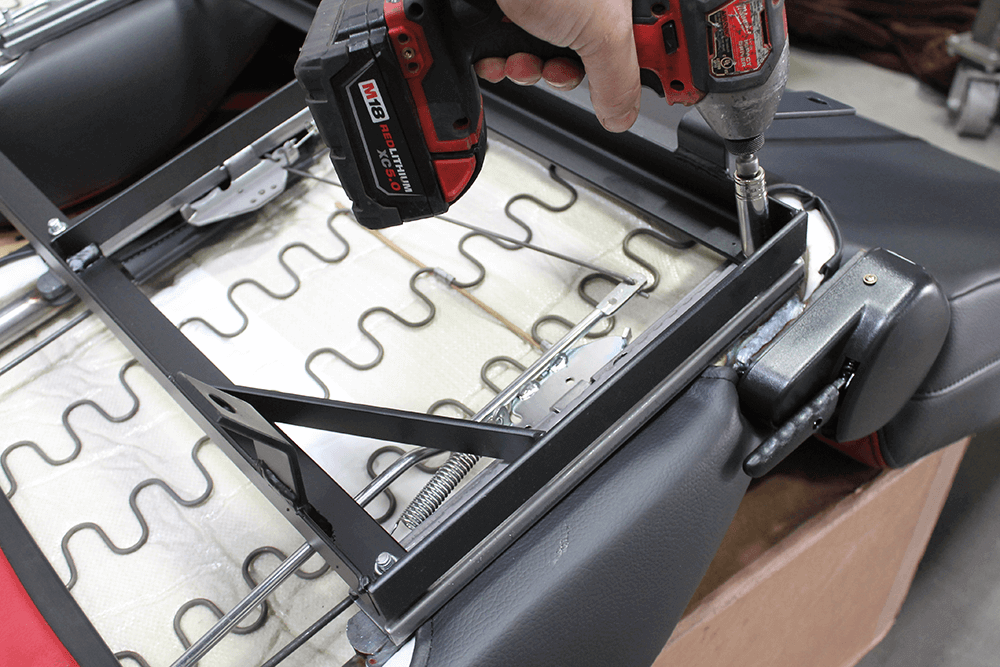
Before installing the seats into the truck, the new seat base provided with the kit must be attached to the seats. Doing this outside of the truck makes getting the seats into the truck pretty darn easy.
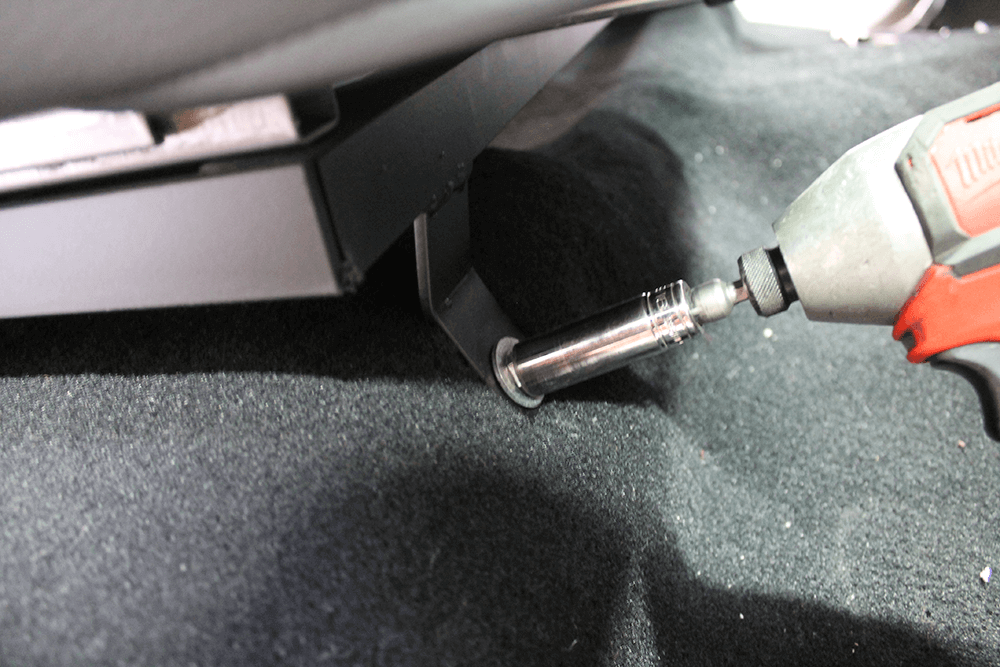
Once everything was bolted up outside of the cab, the assembly dropped into place and was secured to the cab floor in the stock locations. Since the stock hardware was rusty and unattractive, we grabbed some new hardware and bolted the seat in for good.
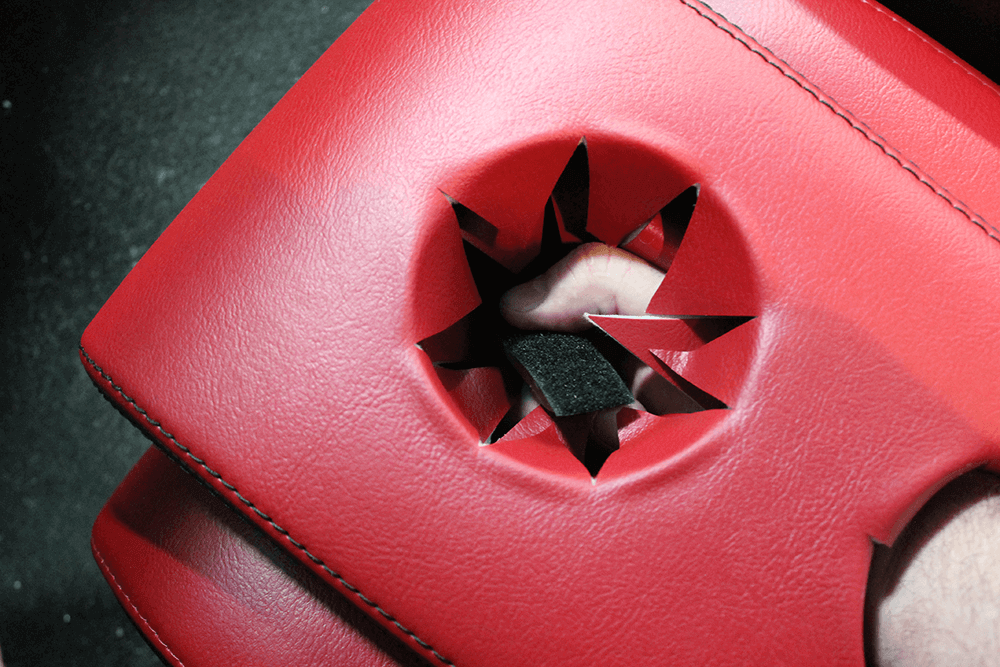
The center console was up next. TMI builds the center console so that it fits tightly to the seat frame. A single hook-and-loop strap is used to hold the center console to the frame.
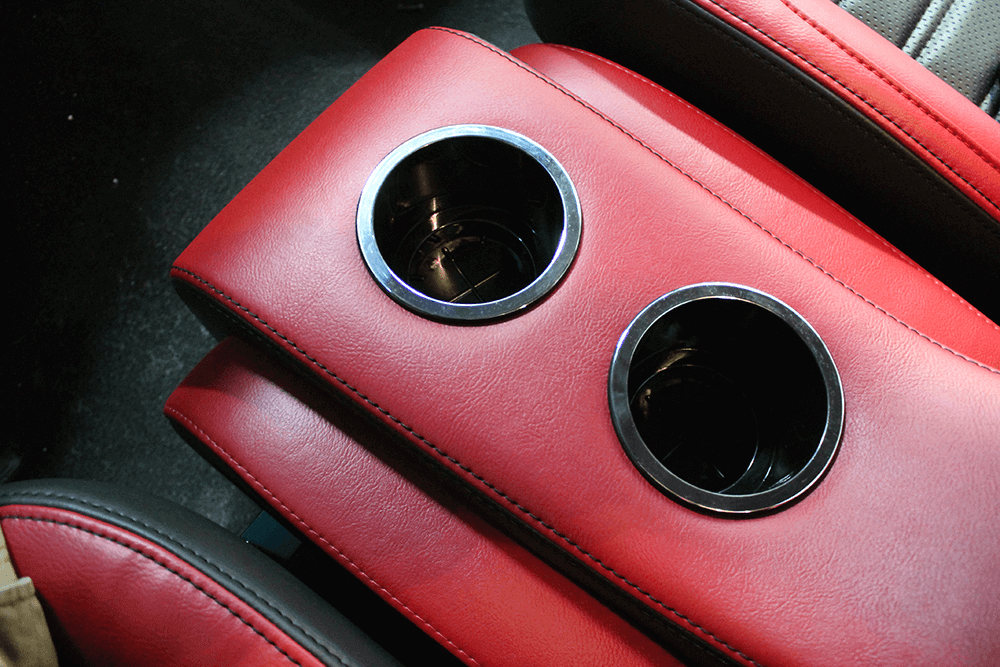
Once the hook-and-loop strap was pulled tight and secured, the cup holders were dropped into place and the seat package was complete.

Changing the seats sure made the interior look more customized. The added benefit of having bolsters in each bucket seat to keep the driver centered behind the steering wheel is a nice touch.
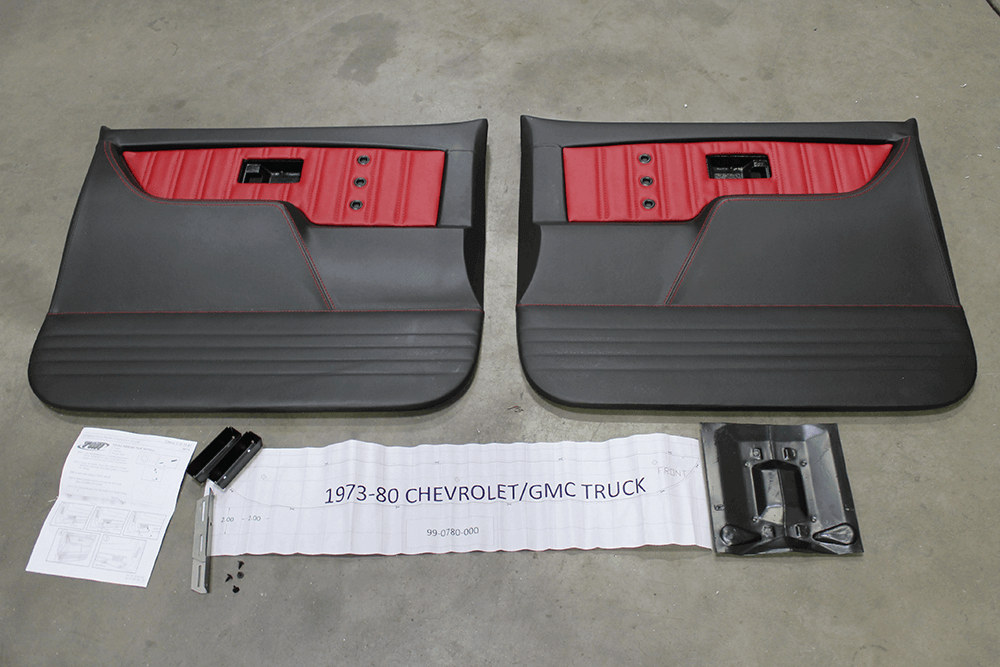
The last step in our interior transformation was installing the TMI door panels to match our new seats and dash pad.
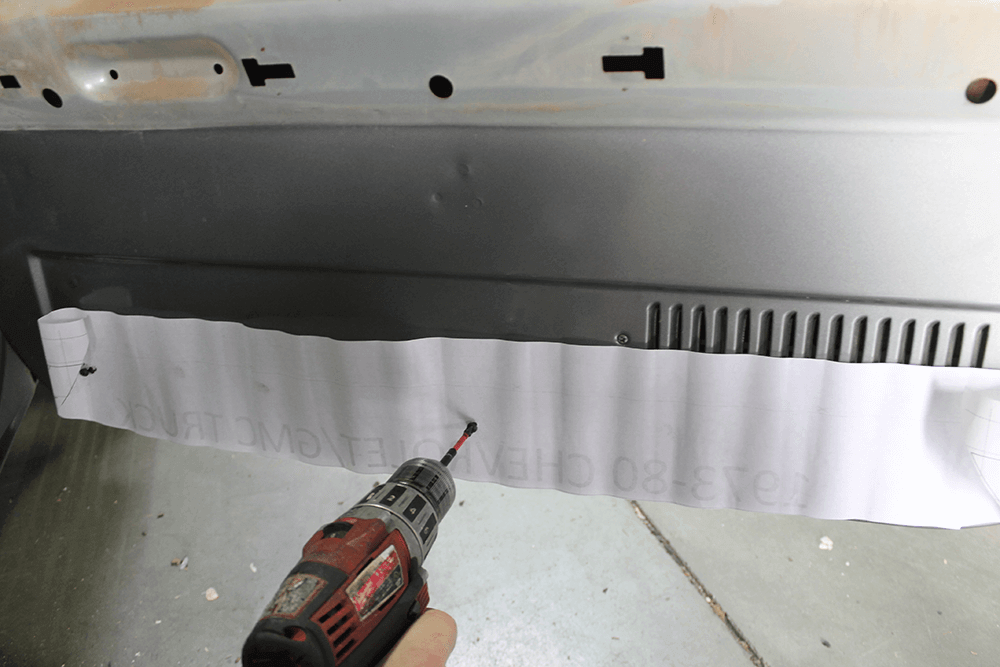
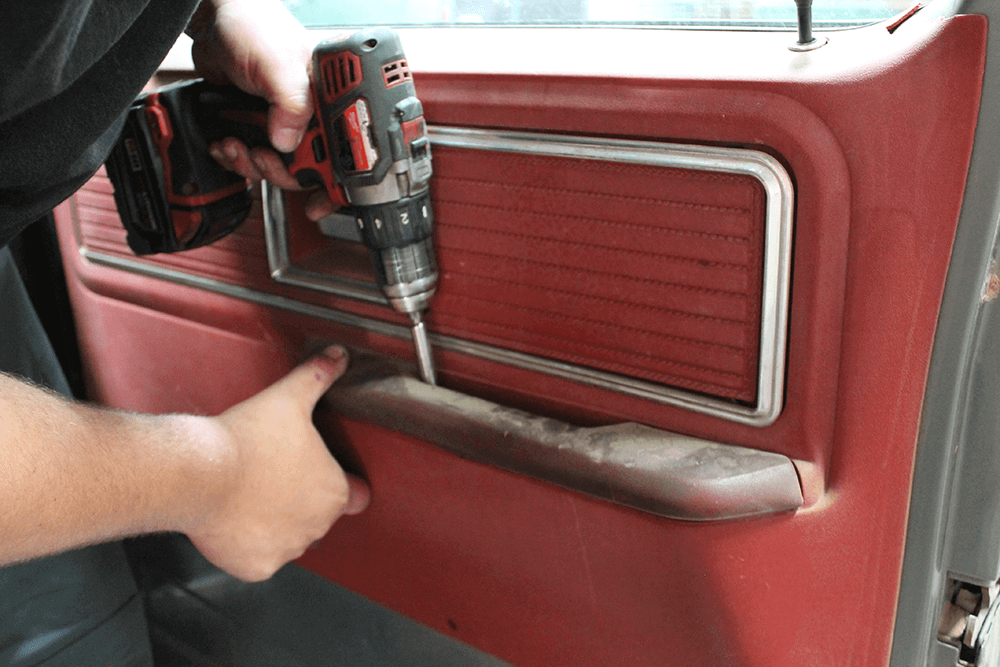
A template is included with the door panels to help lay out where new holes must be drilled. These holes will mount the bottom end of the door panel. Rather than center punching the marks to transfer the holes, we used small self-tapping screws to hold the template in place as we moved along.
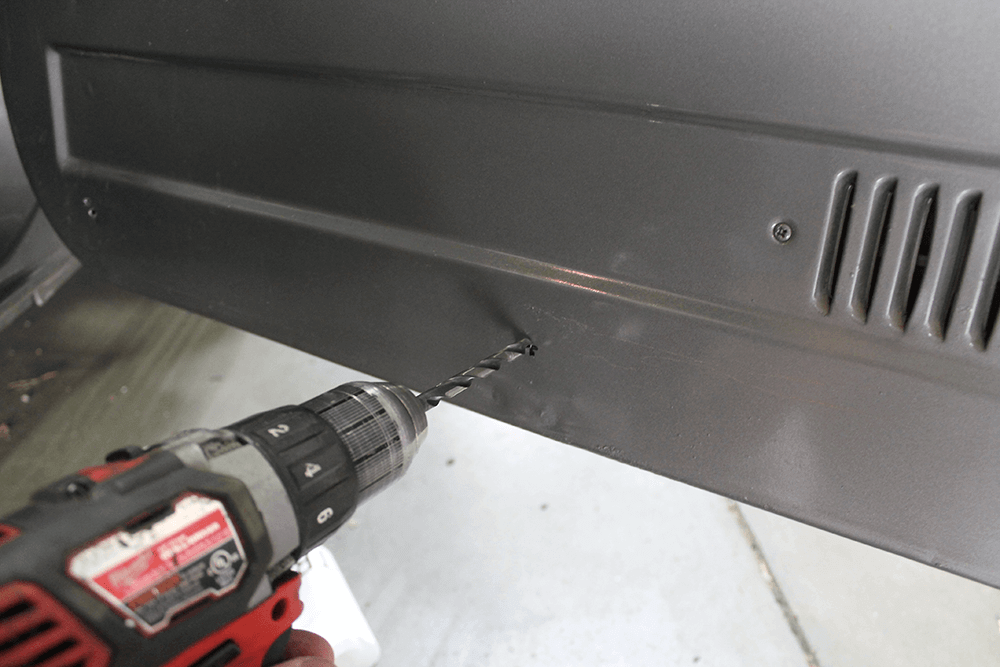
After we checked the alignment of the holes, we used a larger drill bit to increase the hole size to the diameter specified in TMI’s instructions.
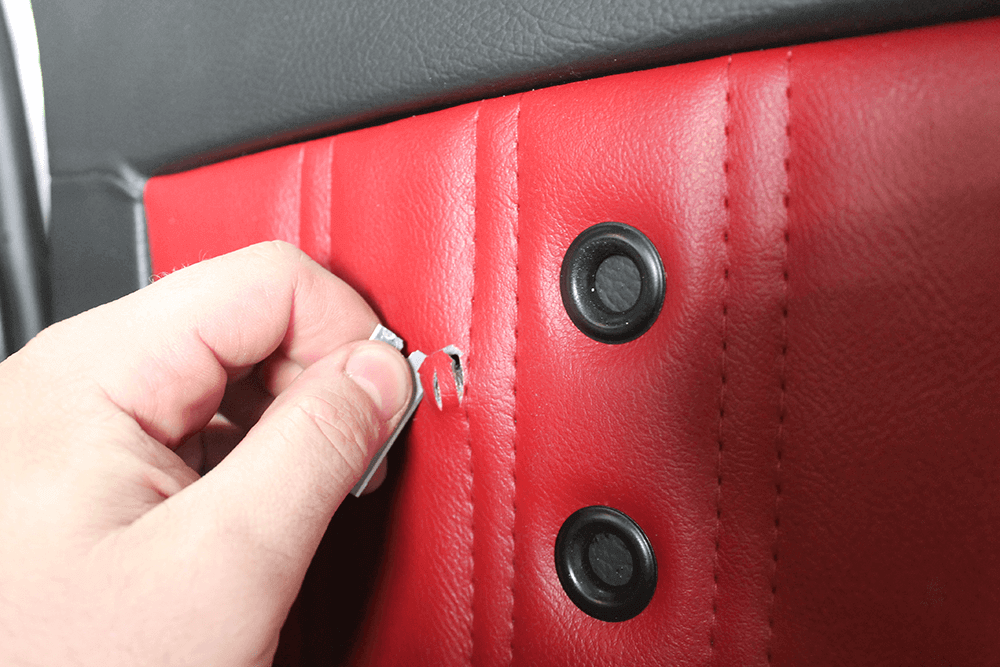
Then we slid the new door panel on and begin fitting that to the door. The first step was slicing the vinyl to allow the window crank to come through. Then we pressed the crank on using a C-clip to hold it in place.
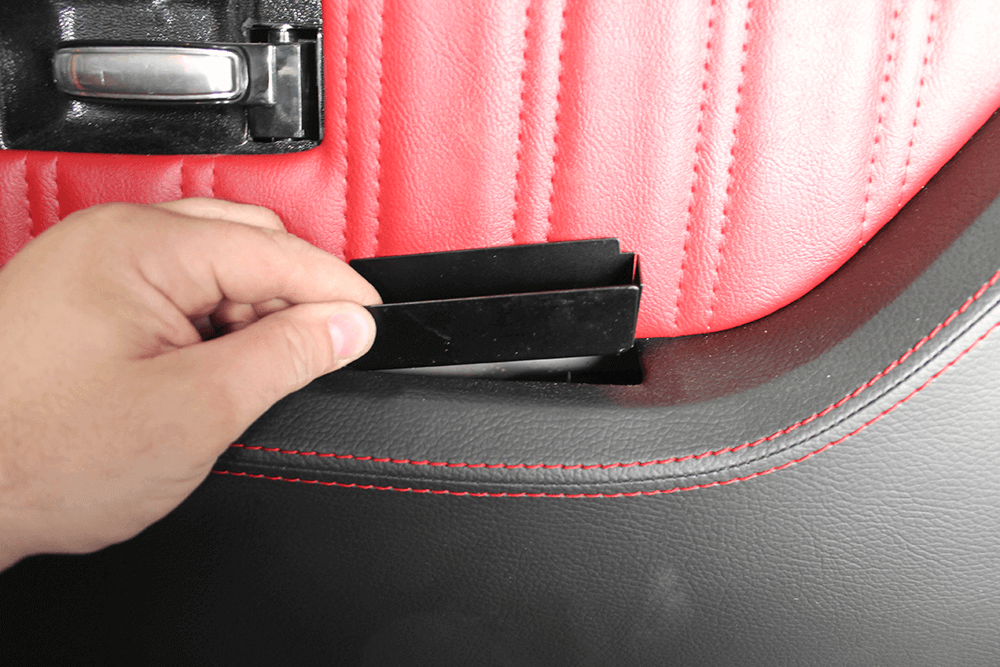
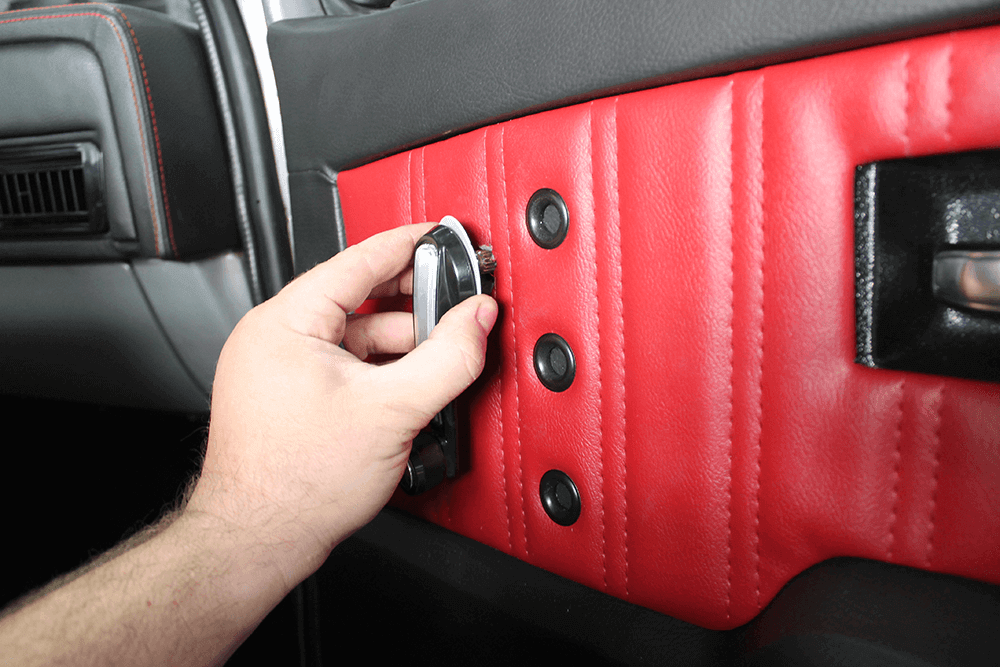
TMI also provided a door pull that drops into the pocket in the door panel. This piece secures the door panel to the door with the two screws that go down through the door pull.
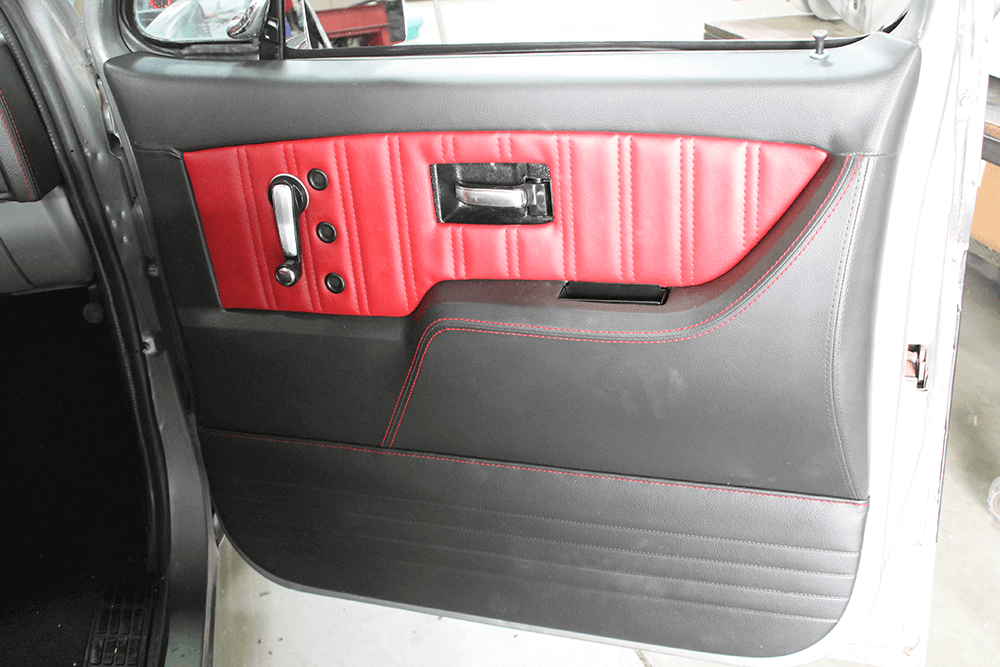
The last screw goes in behind the door handle in the stock location, and the door is finished. We simply repeated these steps on the other side to complete the installation of the new TMI door panels.
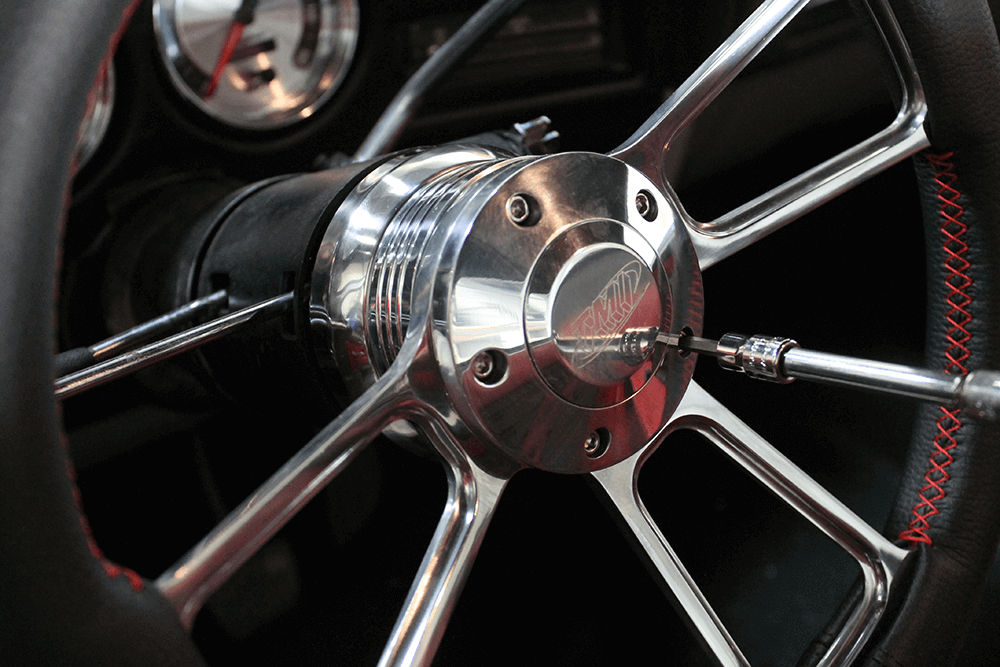
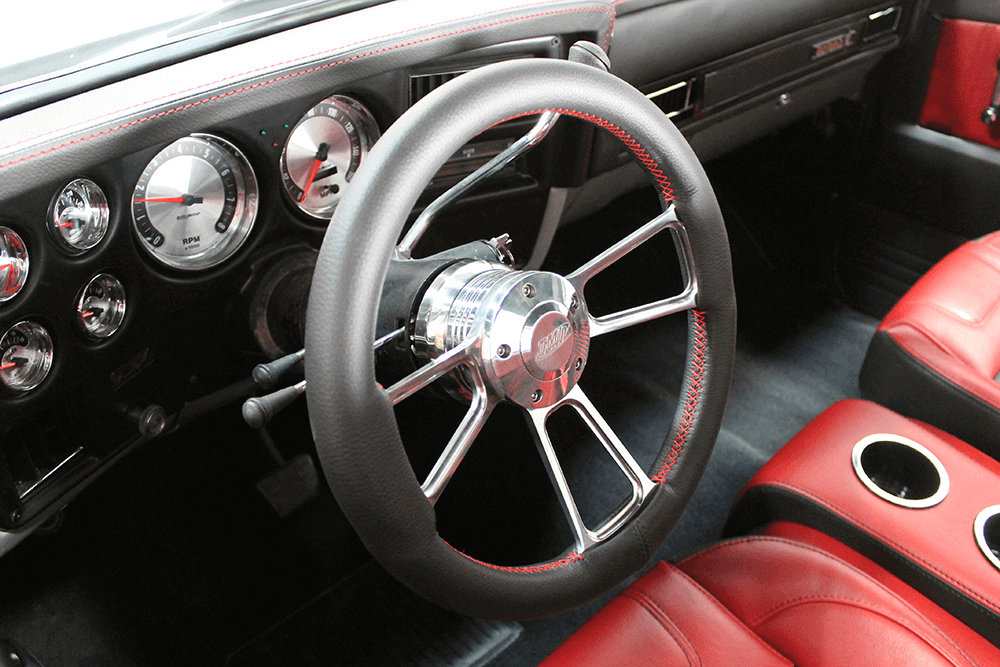
A small finishing touch to our new interior is a billet steering wheel that TMI wrapped and stitched in matching materials. The adapter and horn button were included with the steering wheel, so it was a direct bolt-on item and only took a few minutes to do. Since we’d removed the stock steering wheel at the beginning of the job, it only made sense that this was the last step.

C10 Builders Guide
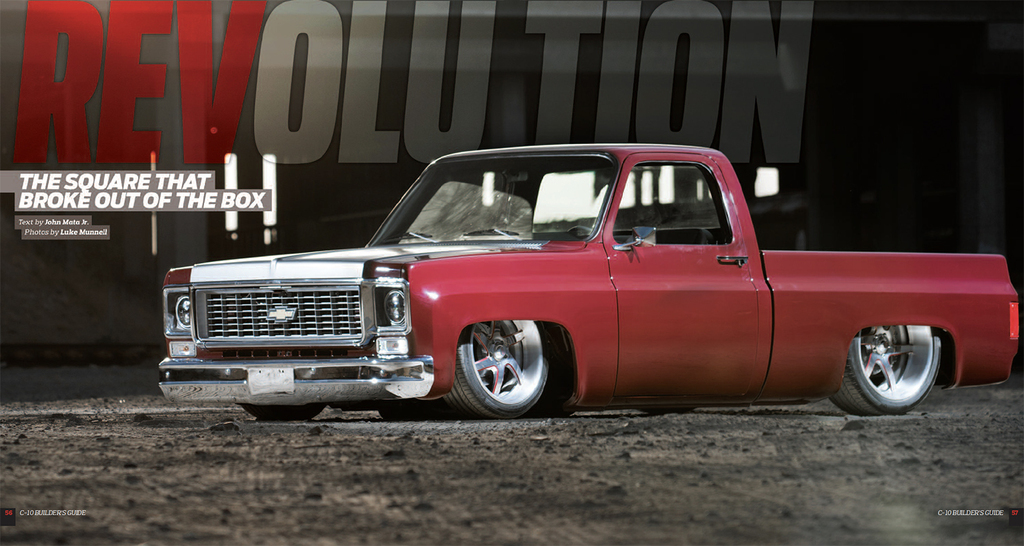
Evolution is in our nature. For those who aspire to dream bigger, there are always new opportunities. All it takes to discover them is the… Continue reading
Chris Hamilton . December 11, 2019
COOL GEAR
Ford built its trucks to meet a certain standard back in the F-100 days. Now that we have all raised the bar on what we… Continue reading
SOLOMON LUNGER . June 08, 2022
Industry News
CORONA, California, June 1st, 2020 –TMI Automotive Products Inc., the industry-leader in Restomod and OE Match replacement interiors, released their custom interior line for the… Continue reading
Chris Hamilton . May 31, 2020
c10
Brian Wojcik is the lucky owner of this killer patina-clad ’77 C10 Scottsdale, as well as half-owner of the very shop that built it. Brian… Continue reading
John Mata Jr. . January 31, 2022


We use cookies to enhance your browsing experience, serve personalized ads or content, and analyze our traffic. By clicking "Accept All", you consent to our use of cookies. Visit our Cookie Policy for more info.


Share Link