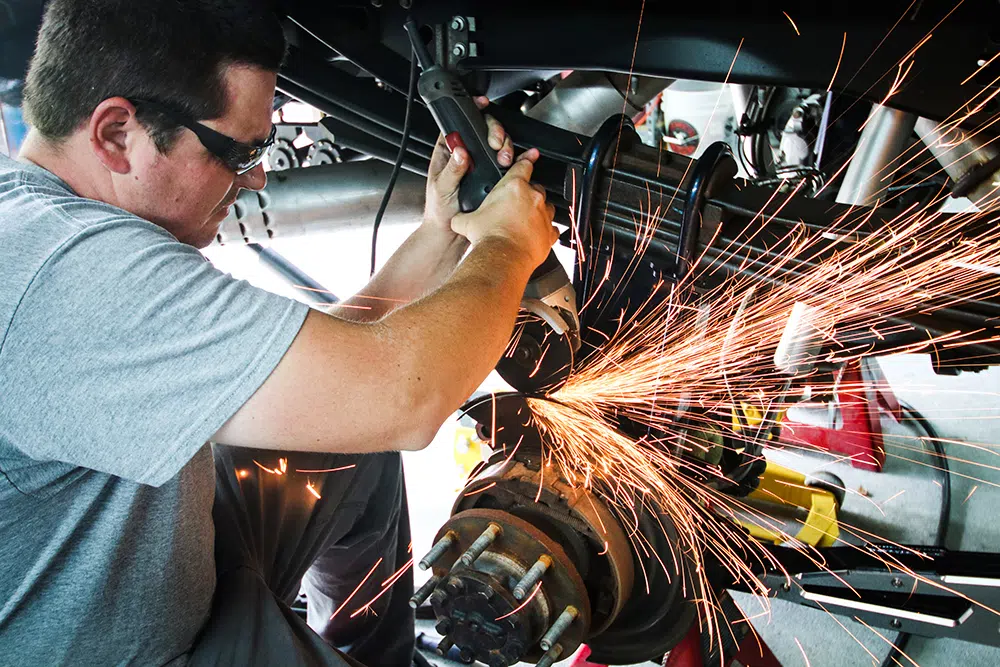
When it comes to driving a big truck or pulling a trailer down the road, ensuring that you can stop in the event of an emergency is important. Yeah, the stock brakes on modern trucks are good and get the job done, but let’s be real. Most of us prefer putting aftermarket parts on our trucks to make them perform better in all situations. For this article, we partnered up with a local truck owner and Wilwood Disc Brakes to show you not only the benefits of a larger performance brake kit, but also to show you how simple the installation is. If you have basic wrenching knowledge, a few hand tools, and a floor jack (or lift), you too can upgrade your full brake system to something much better than stock.
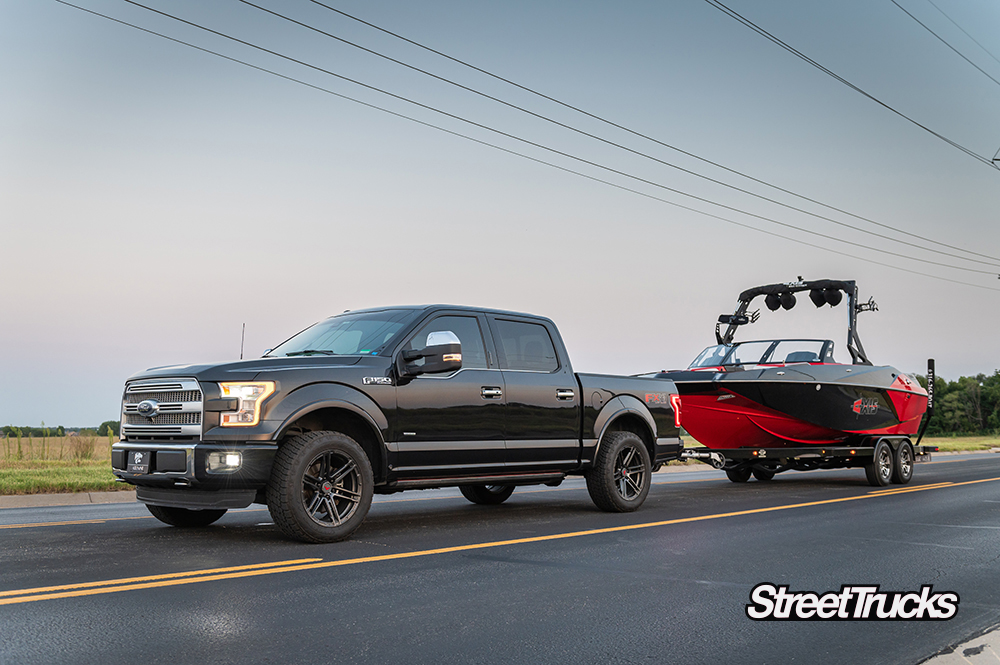
We started with a 2017 Ford F-250 XLT. The truck already had a 10-inch Stryker lift with a set of 40×15.50-26 tires on some 26×16 TIS Wheels, so this install will be perfect for it. With the extra weight of the lift and extra rolling mass of the huge wheels and tires, adding performance brakes will make a noticeable difference in the stopping aspect of the truck.
Whether your truck is lifted like this one, you pull trailers regularly, or just want the extra piece of mind of having more stopping power, this upgrade is something you should look into. Follow along as we start at the rear of the truck and work our way to the front. If you have tools and a friend or two, you can knock out this installation in a day, so it’s not out of the reach of many of our DIY readers.
Whether your truck is lifted like this one, you pull trailers regularly, or just want the extra piece of mind of having more stopping power, this upgrade is something you should look into.
REAR
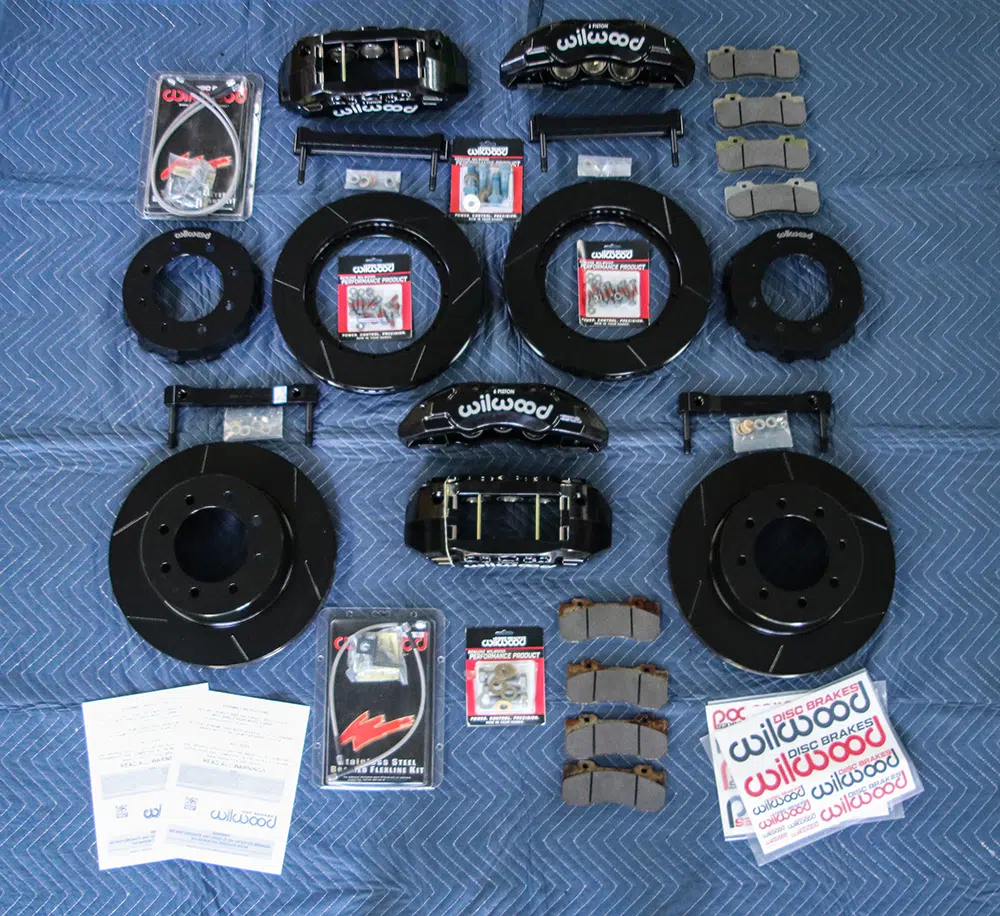
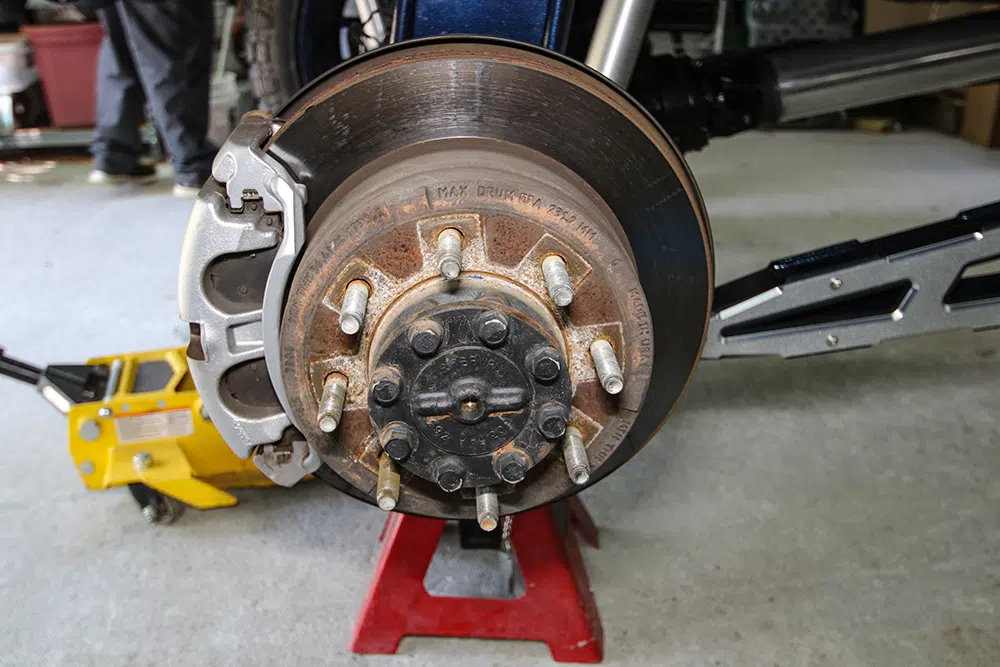
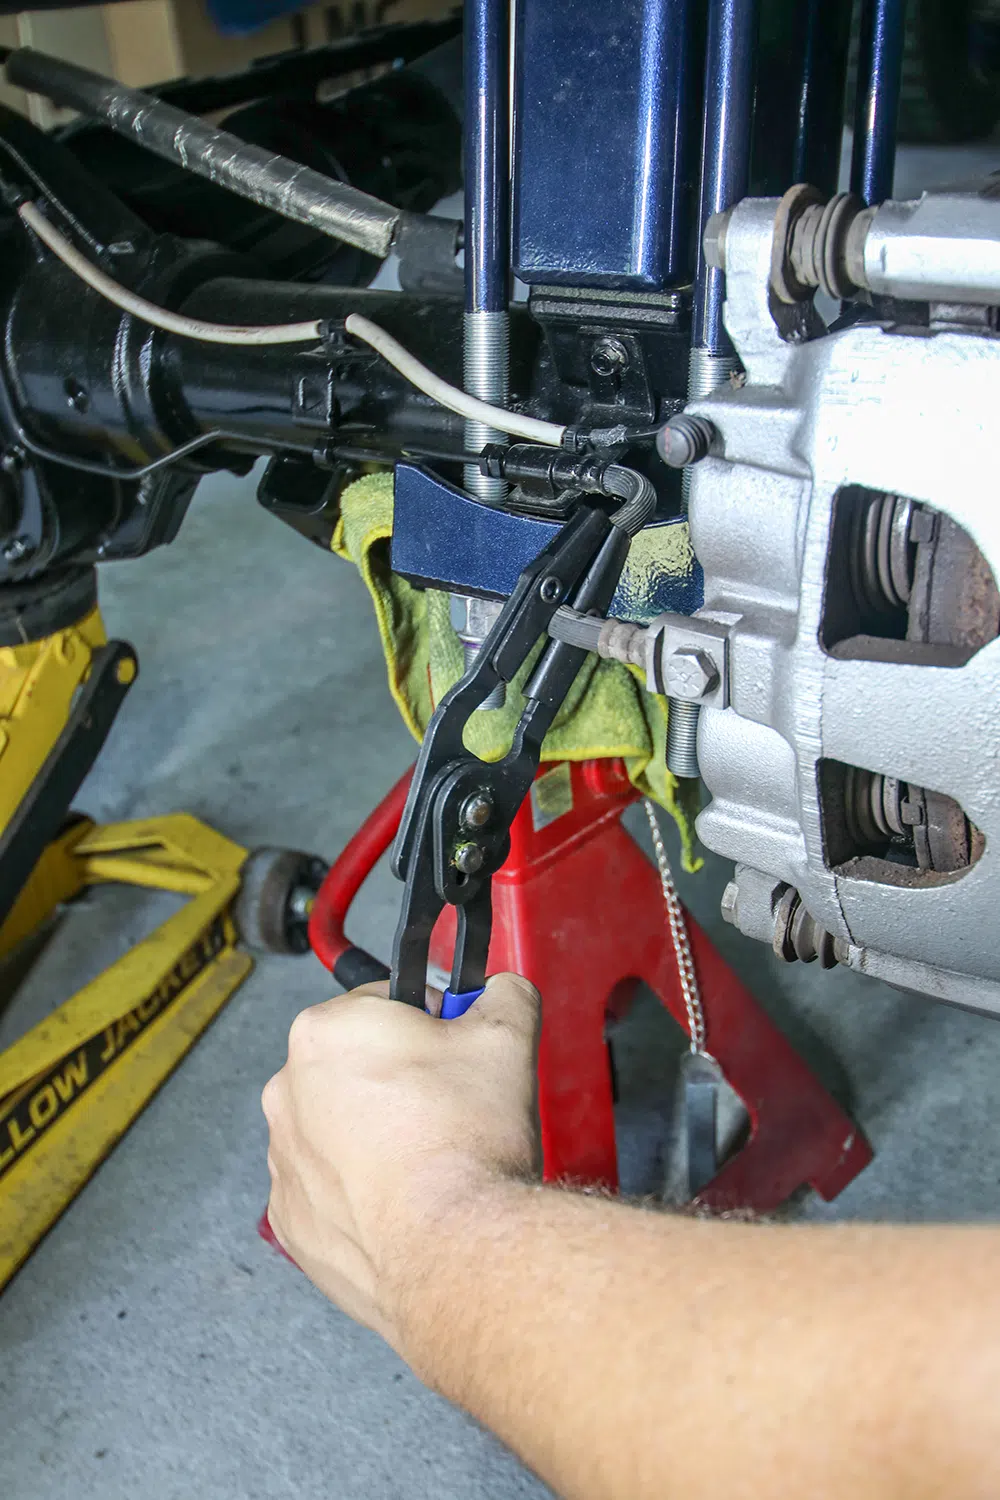
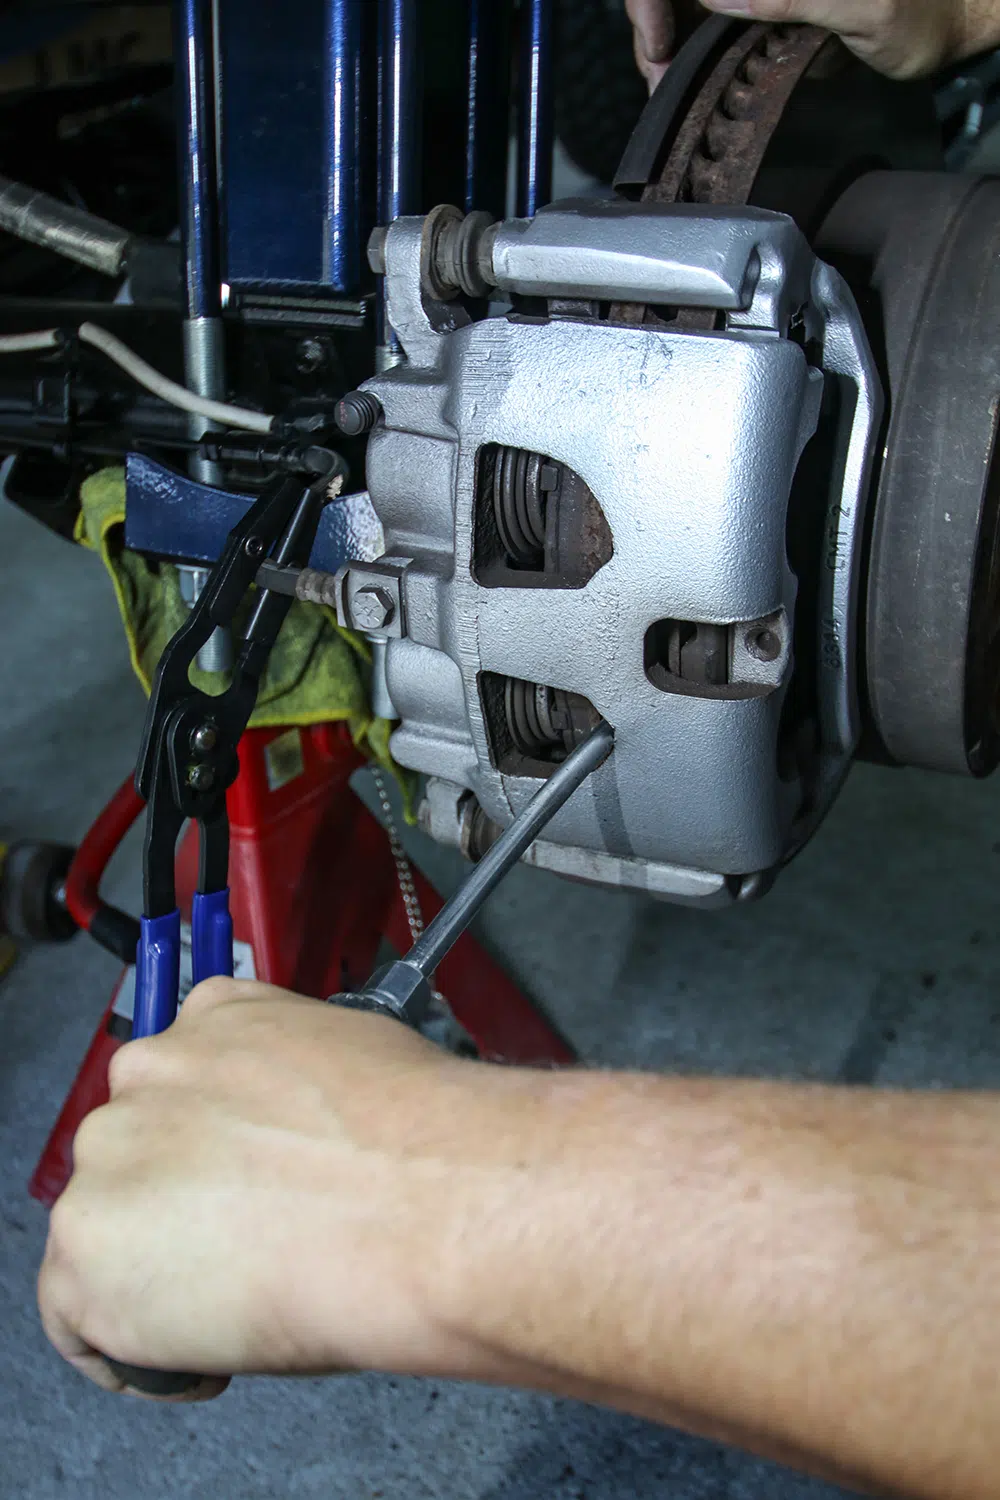
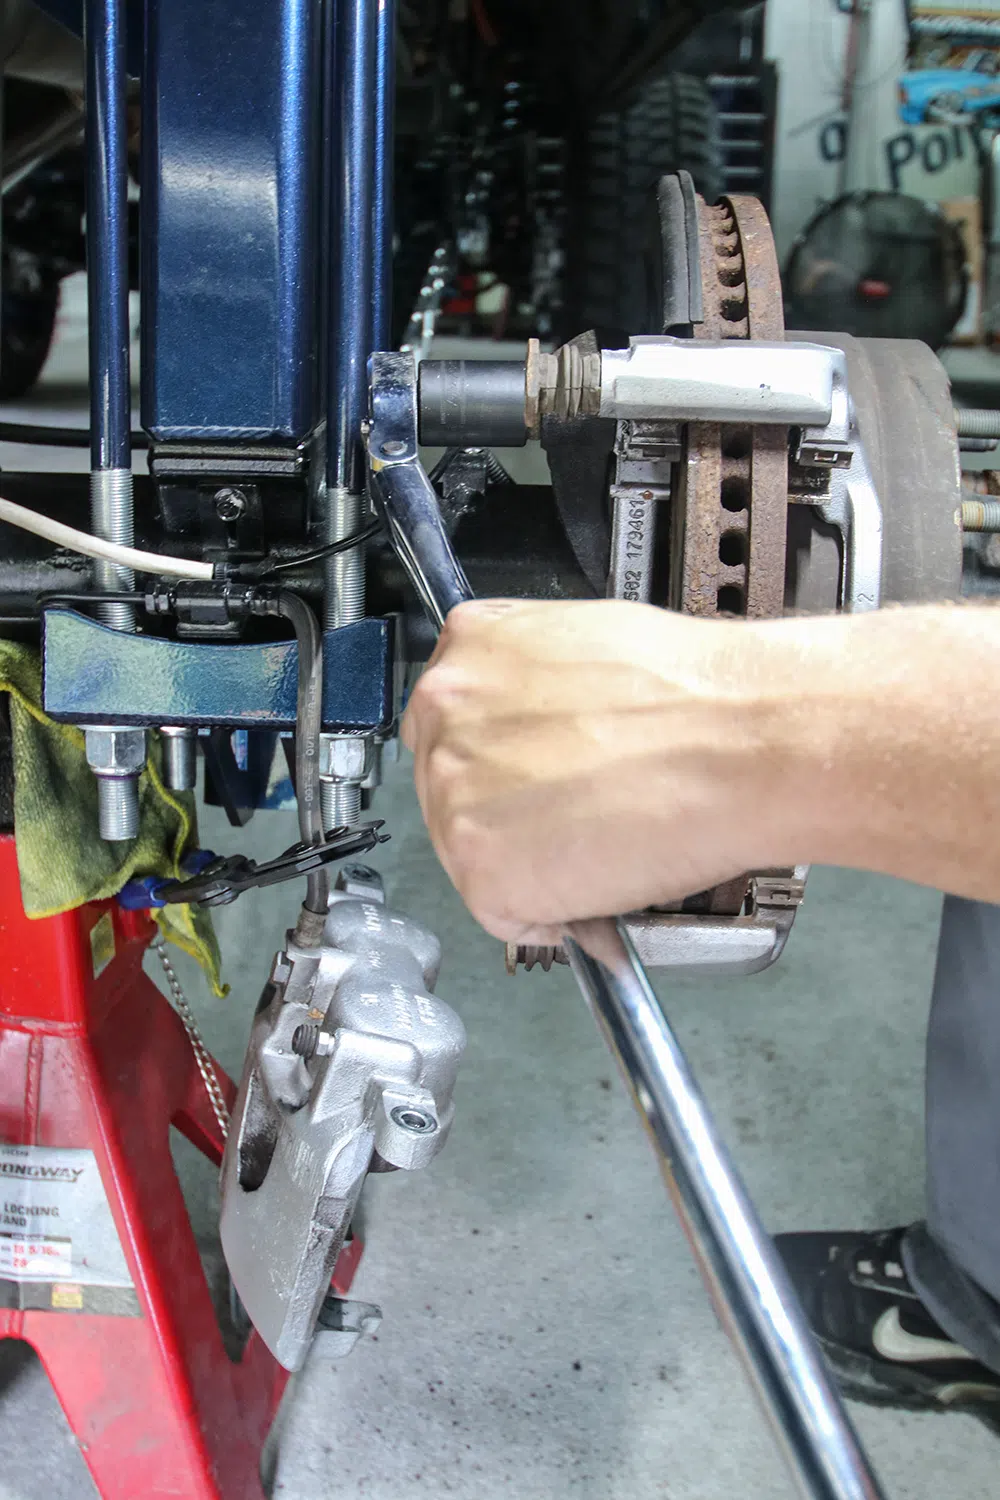
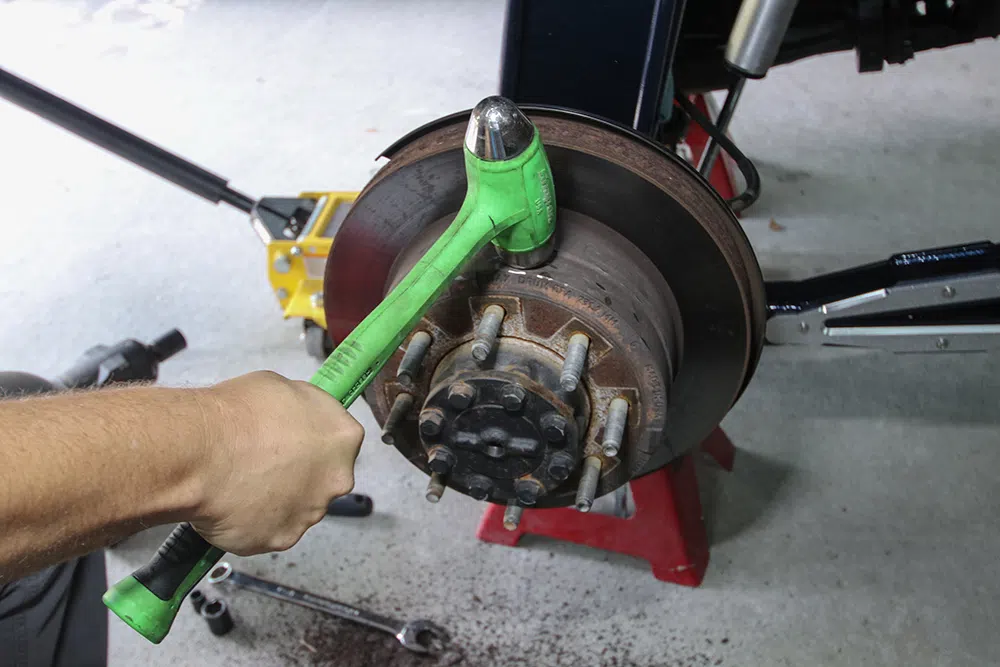
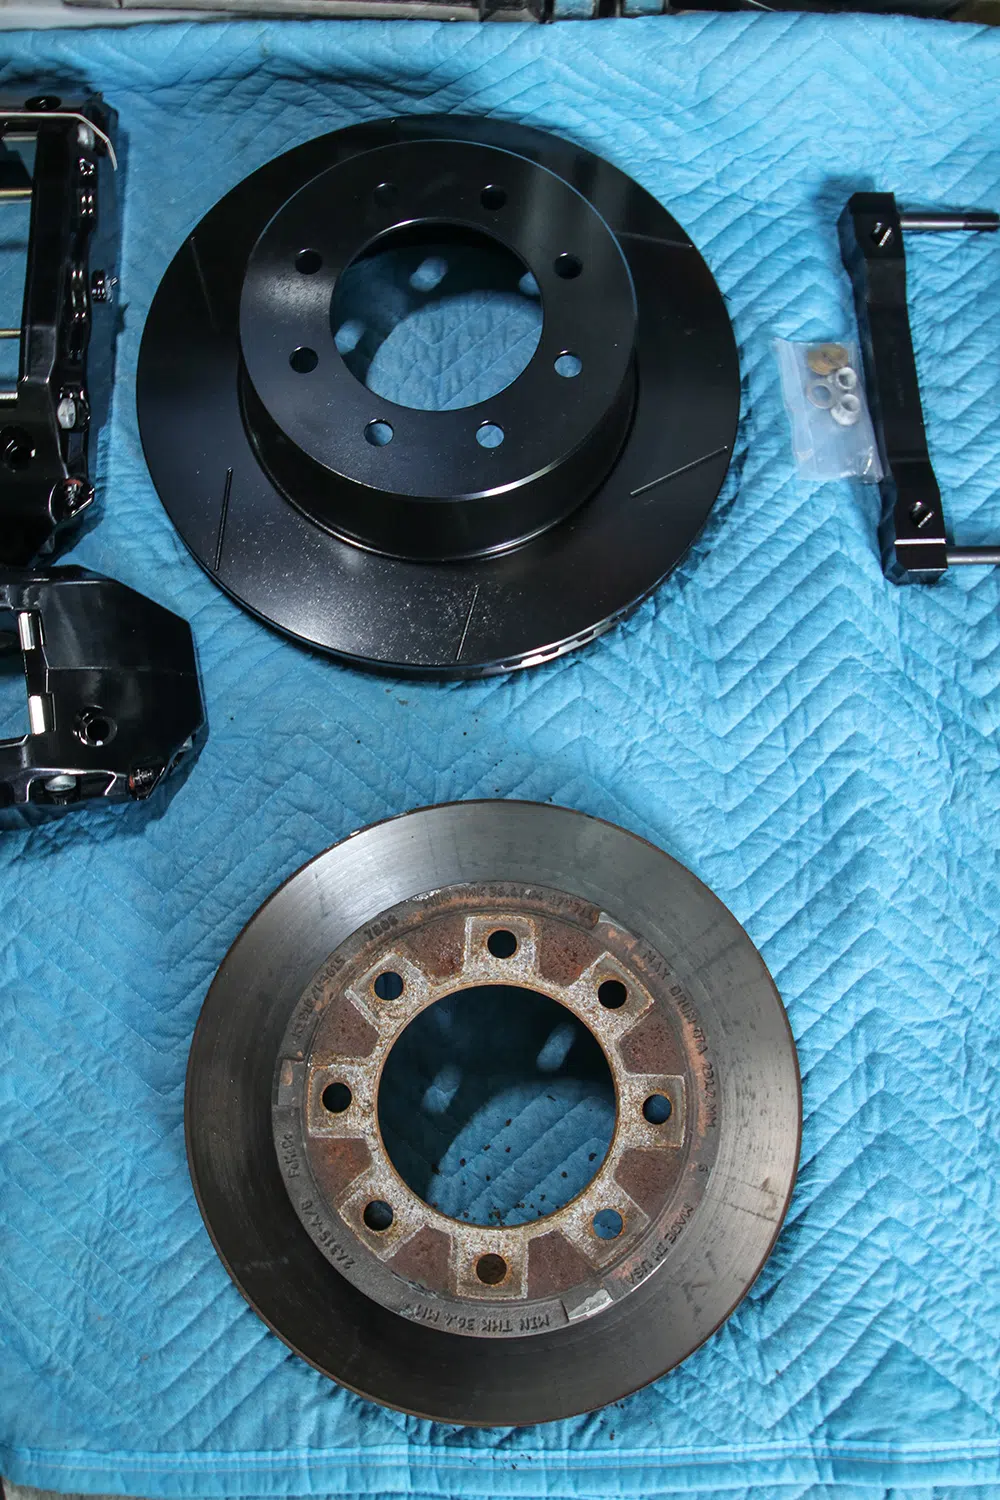
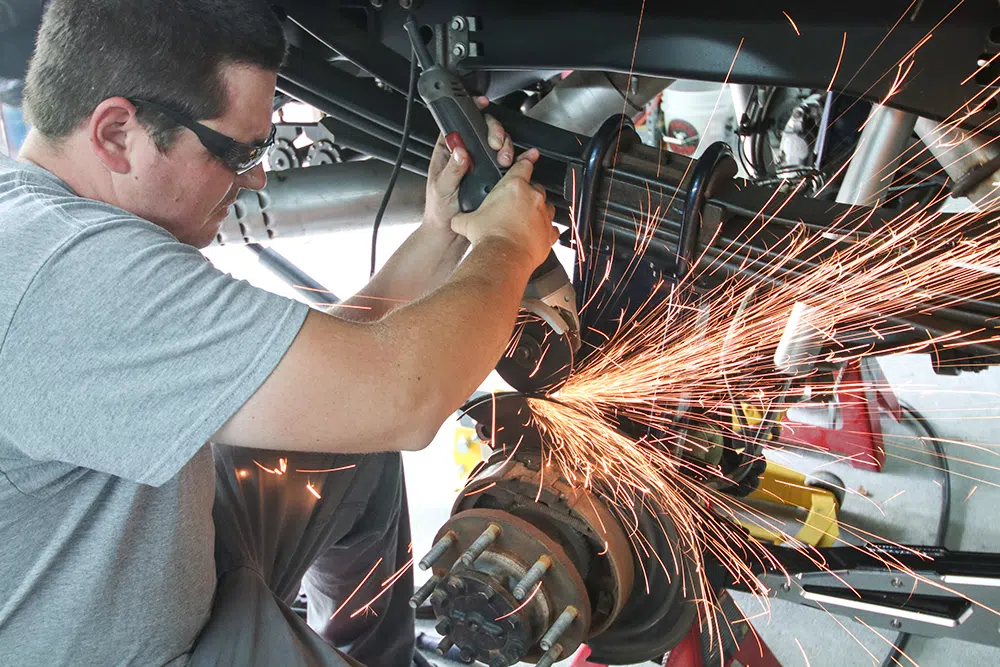
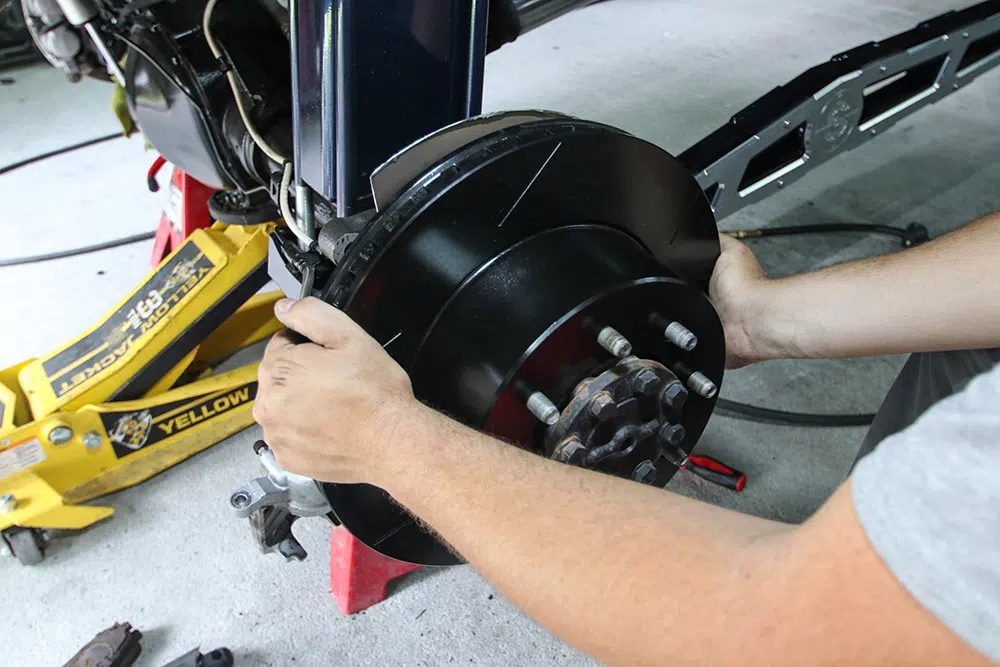
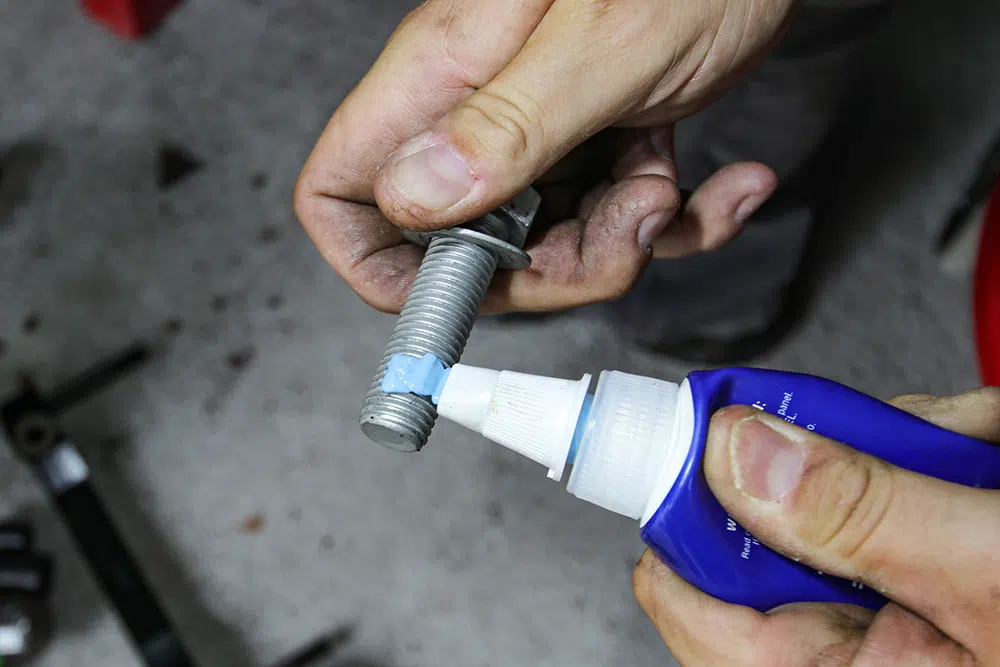
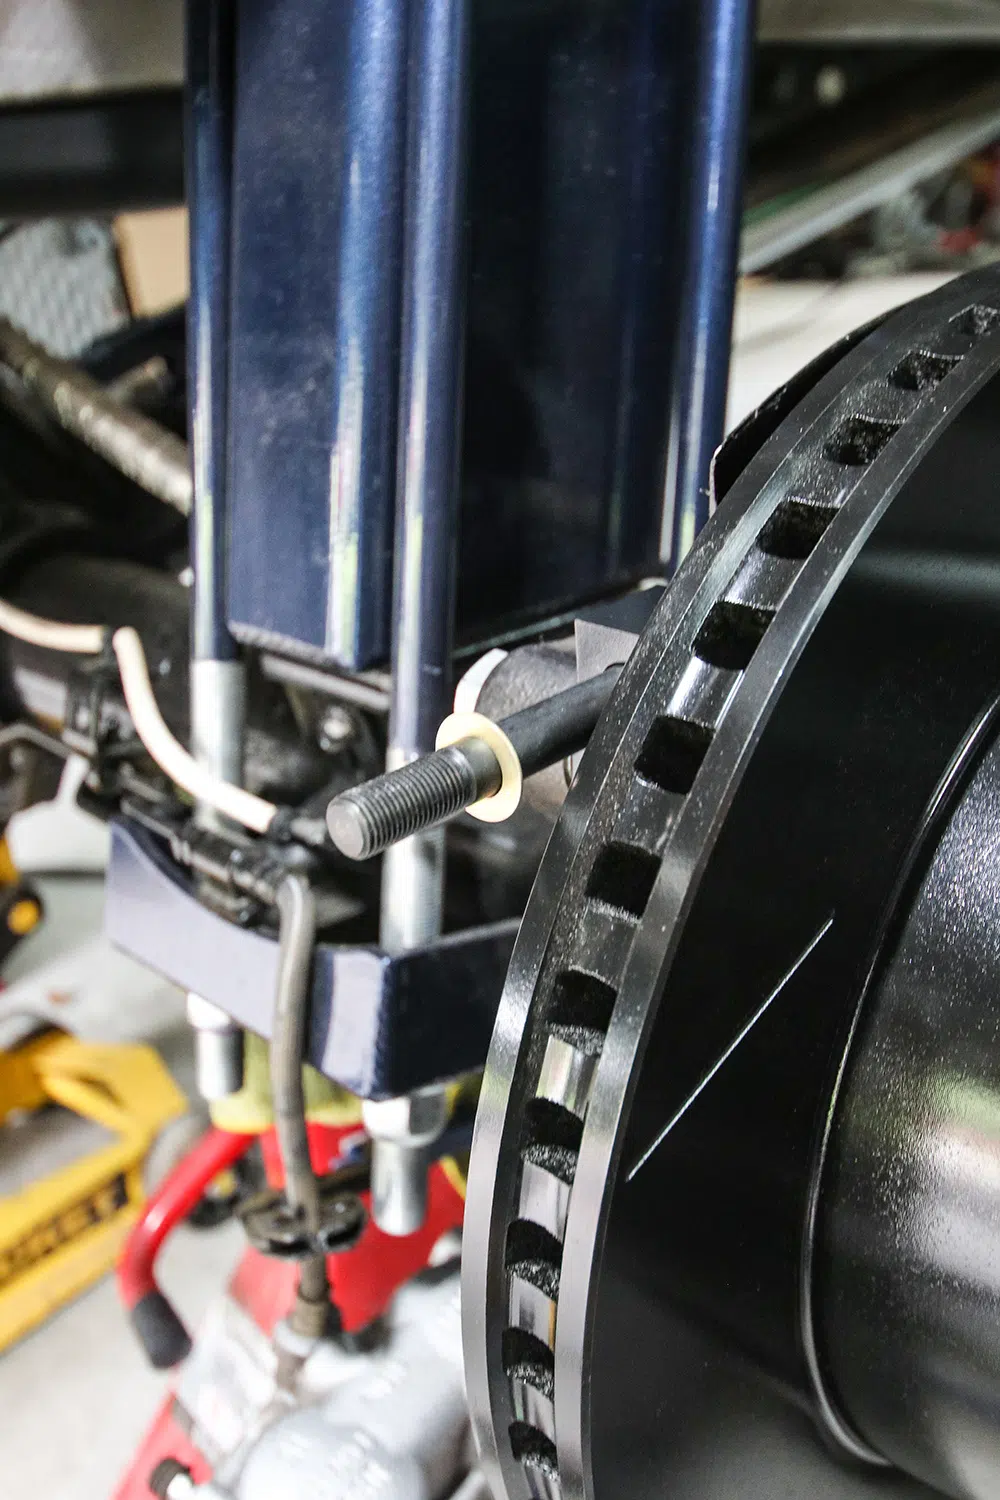
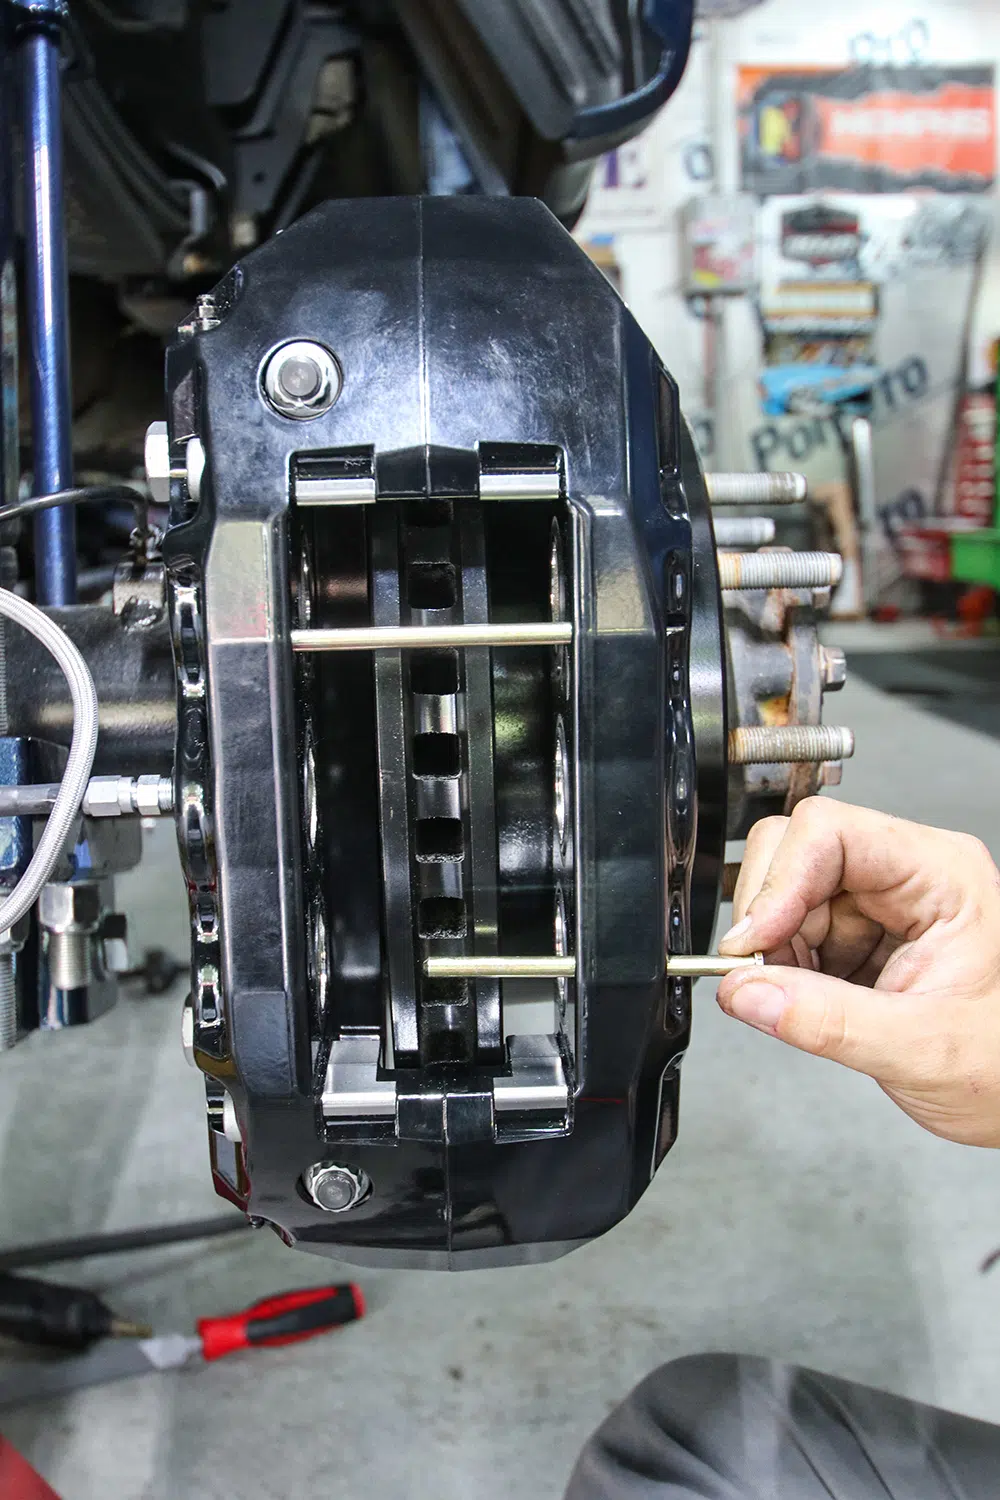
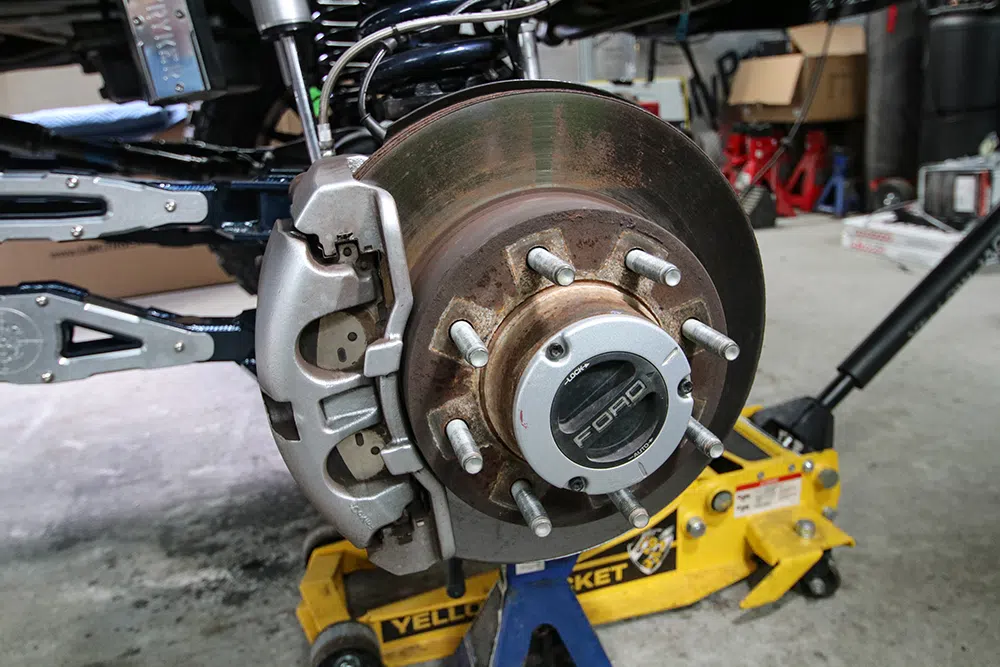
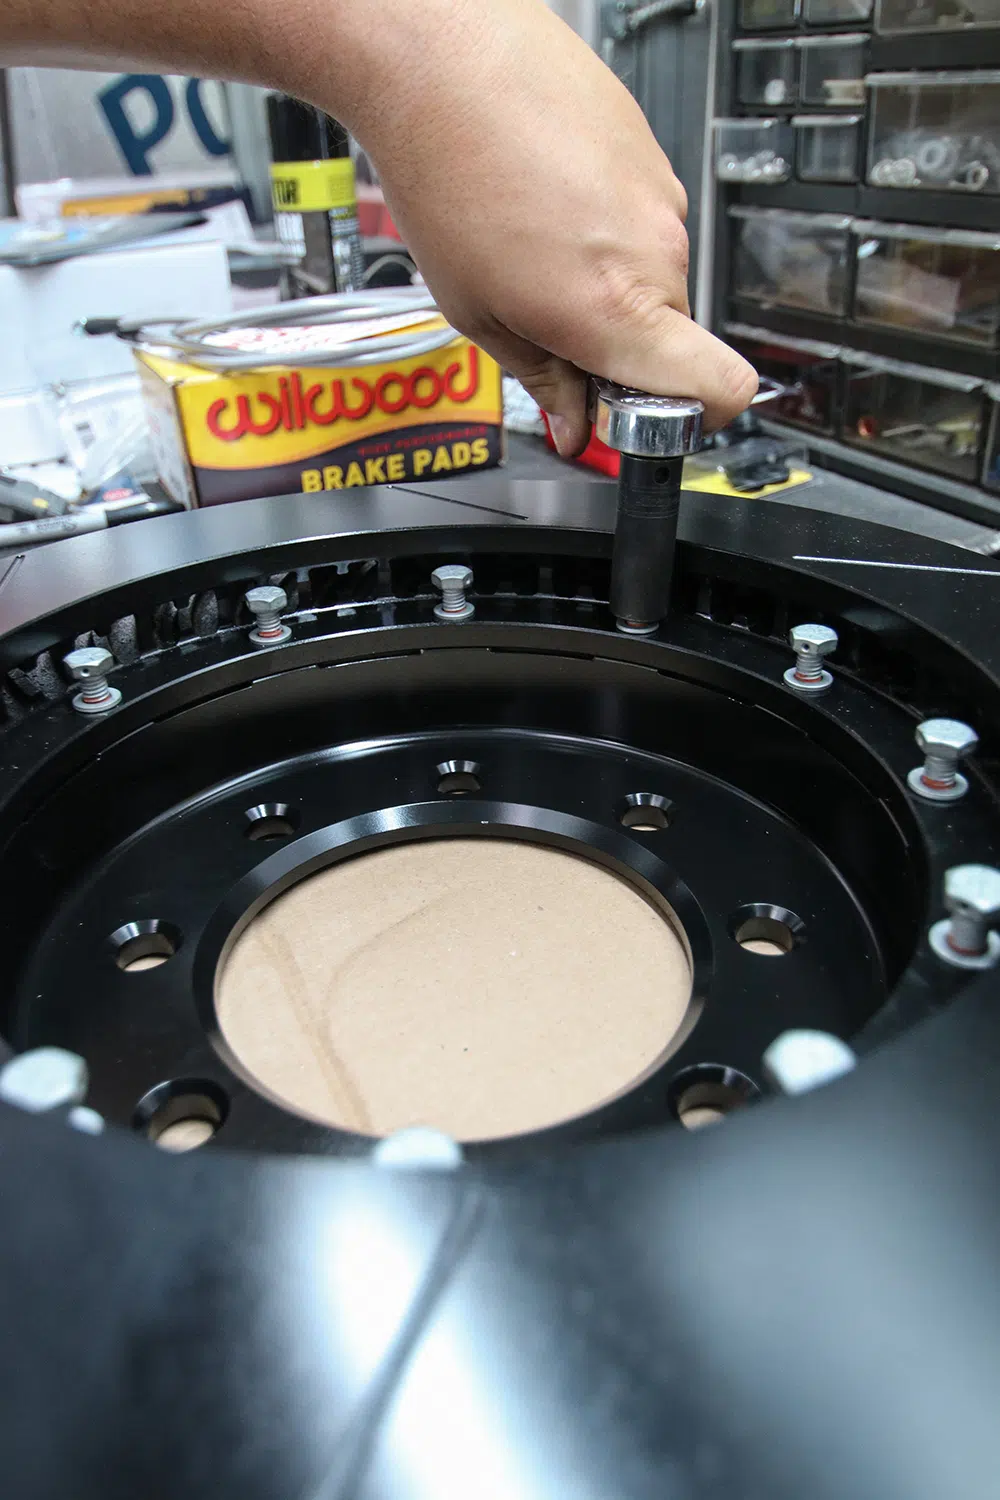
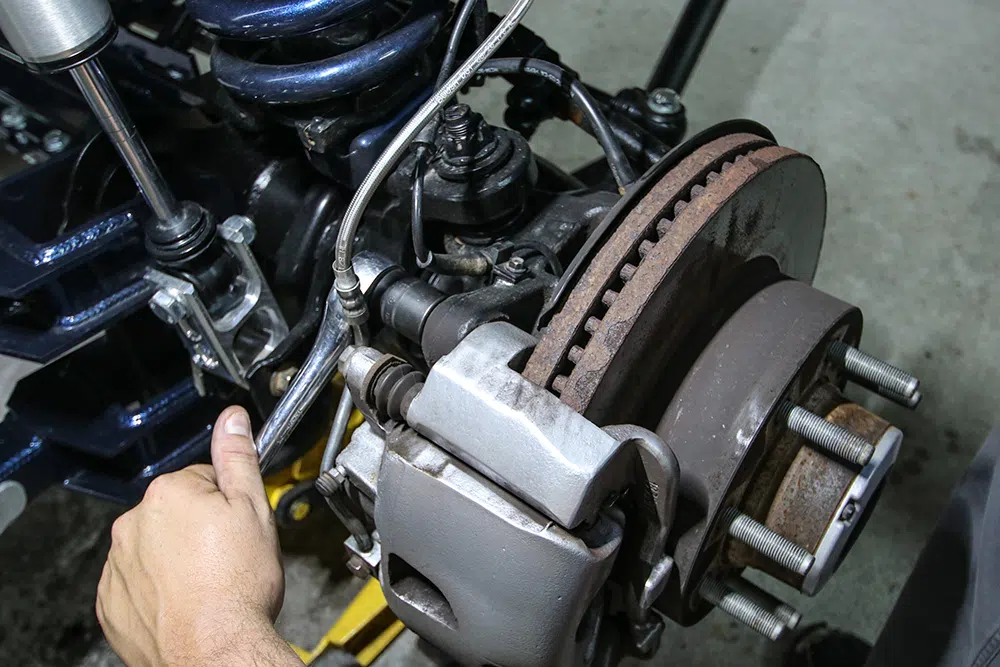
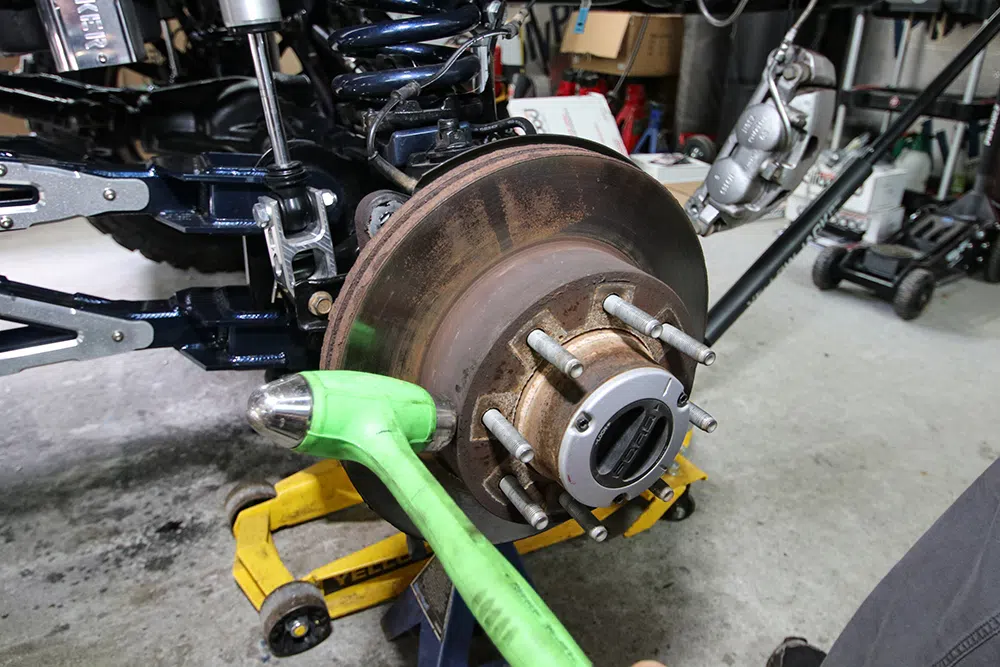
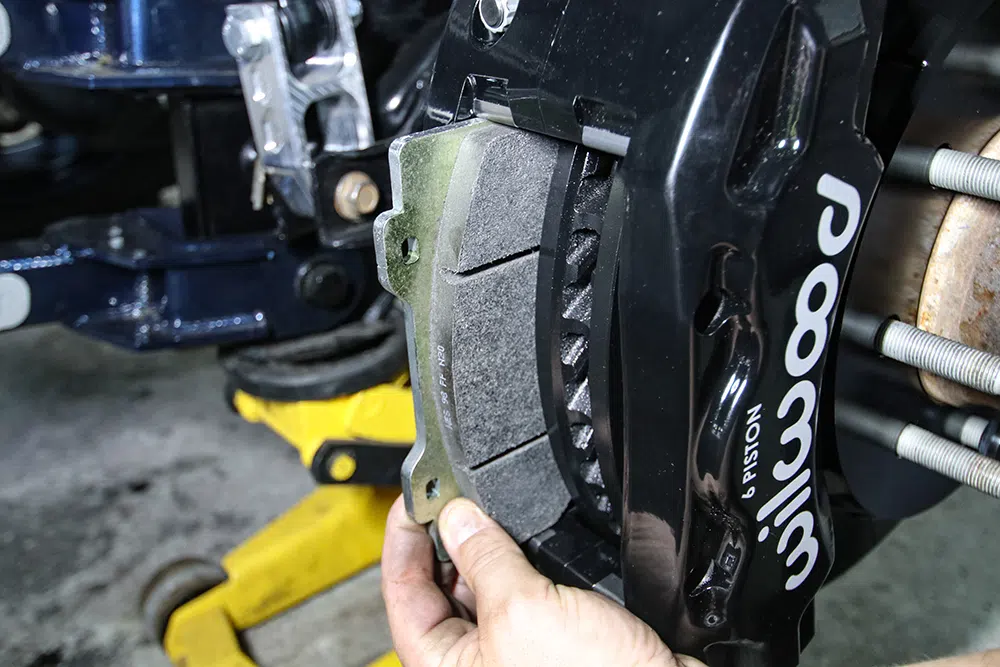
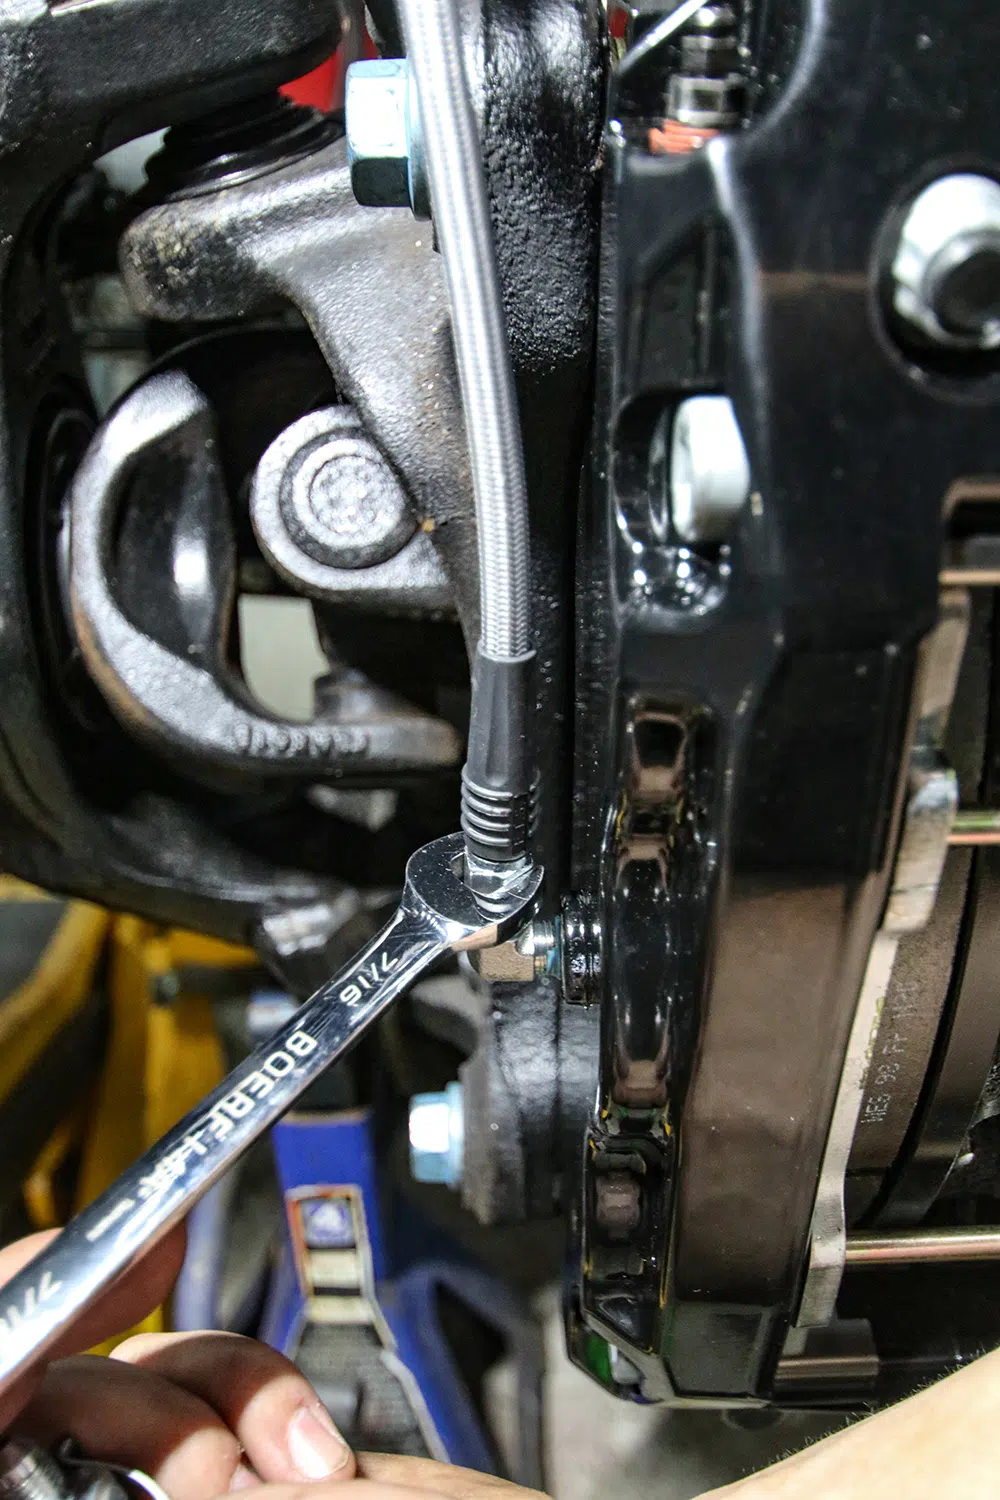
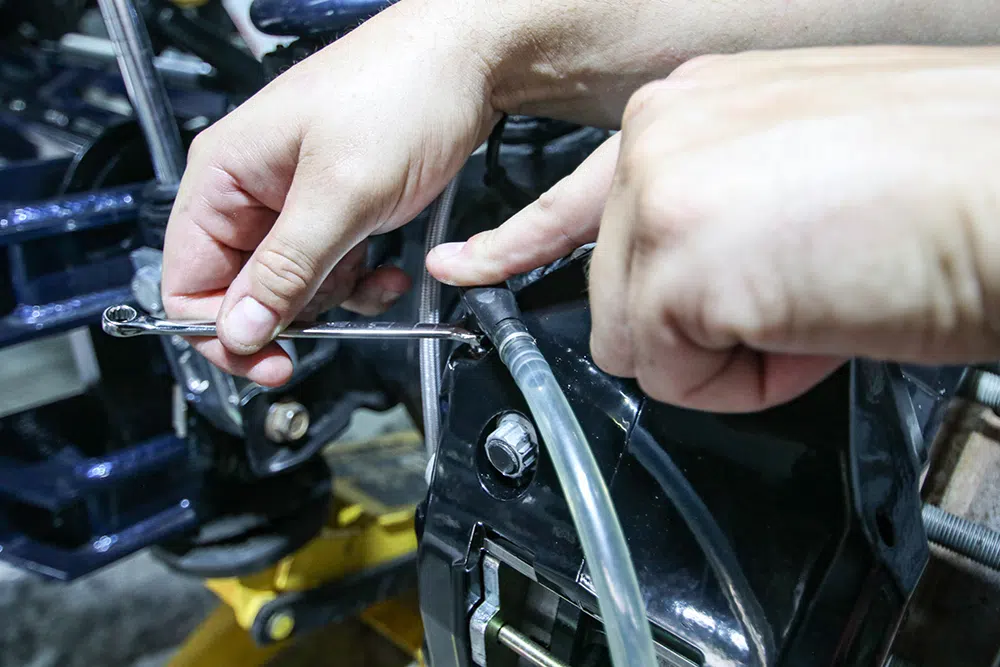
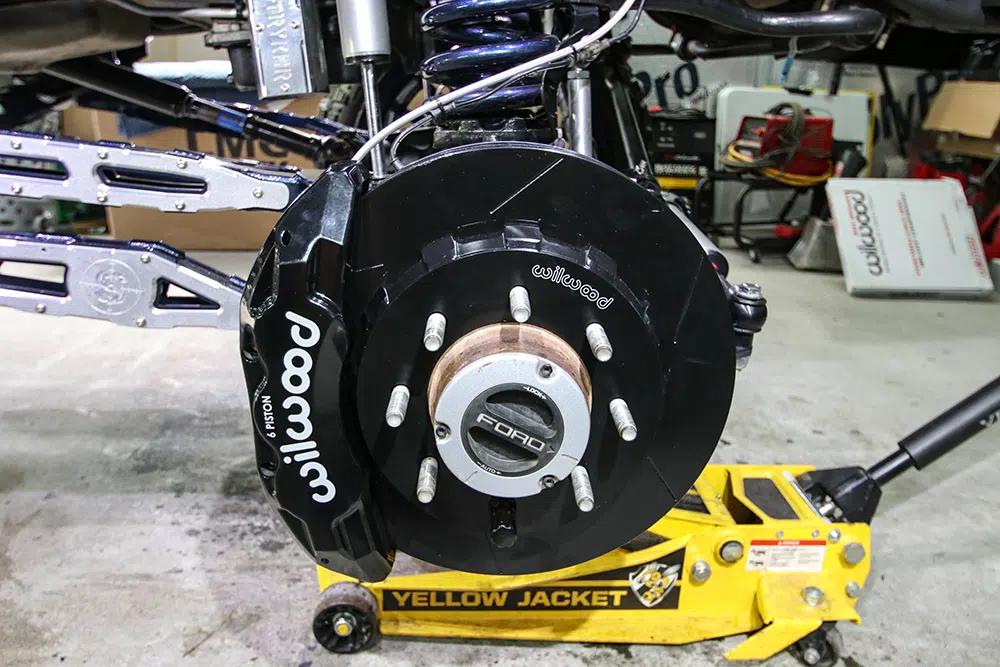
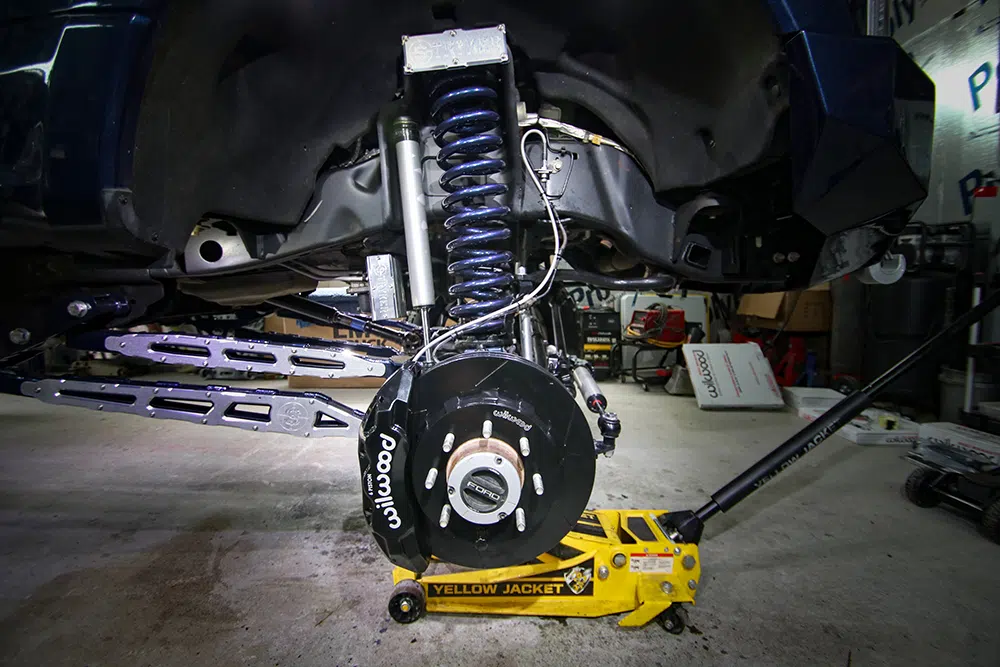
As you can see, the full front and rear kit comes with everything you need for the installation. The front rotors are two-piece for this vehicle, and you get four calipers, all the brackets, new brake lines, hardware, and all-new brake pads.The factory rear brake setup is usually rusty as you can see here, so replacing this with the Wilwood kit makes what you see through the wheels even more eye catching.Clamping off the flex brake will prevent you from losing a ton of brake fluid. It will also make bleeding the brakes easier while creating less of a mess.You can put a flathead screwdriver in the caliper opening and push the factory rotor over to compress the caliper pistons and make removing everything a little easier.After you remove the factory caliper, the caliper bracket needs to be removed.The rear rotors require a few knocks with a hammer to get them to release from the axle.As you can see, the factory rear rotor looks a bit rough compared to the Wildwood one. The coating not only protects the rotor from rust, but it also makes it look even better.For this kit, Wilwood requires some of the factory dust shield to be trimmed. This allows better clearance for the larger diameter rotor.Once the dust shield is trimmed, the new rotor just slides into the factory spot.Applying a thread-lock sealant to the caliper bracket bolts ensures they wont back out due to vibration.The new Wilwood caliper brackets bolt directly to the factory caliper bracket holes.The brake kit comes with several thin washers (shims) to space off the caliper from the rotor just enough. Start with one per bolt and add accordingly to allow the caliper to clear the rotor.The supplied nuts bolt the caliper to the caliper bracket. Snug them up while adding and removing shims to ensure proper caliper placement.Once the caliper is spaced correctly, use Red Loctite and tighten the nuts to secure the calipers to the caliper bracket.Unbolt the factory brake line from the axle where the hard line meets the flex line.Connect the supplied steel-braided brake line to the hard line and secure it to the axle. Also connect the other end of the brake line to the back of the new caliper.Remove the pad retaining pins from the calipers to allow room to install the new pads.The supplied brake pads slide into the caliper from the outside. This also makes changing pads down the road easier than a stock set of pads.Once the pads are in and you reinstall the pad retaining pins, lock in the pins with the supplied clips.Once both rear brakes are installed, bleed the brakes to ensure no air is trapped in the lines.As you can see, the new Wilwood rear brakes are not only larger than the factory setup, but they also look better.
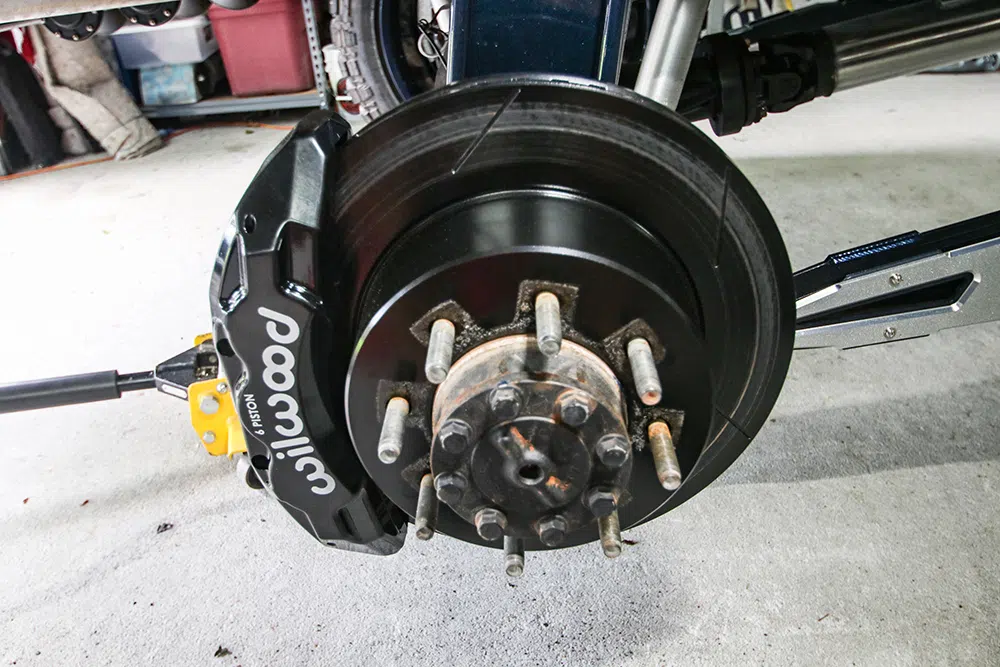
FRONT
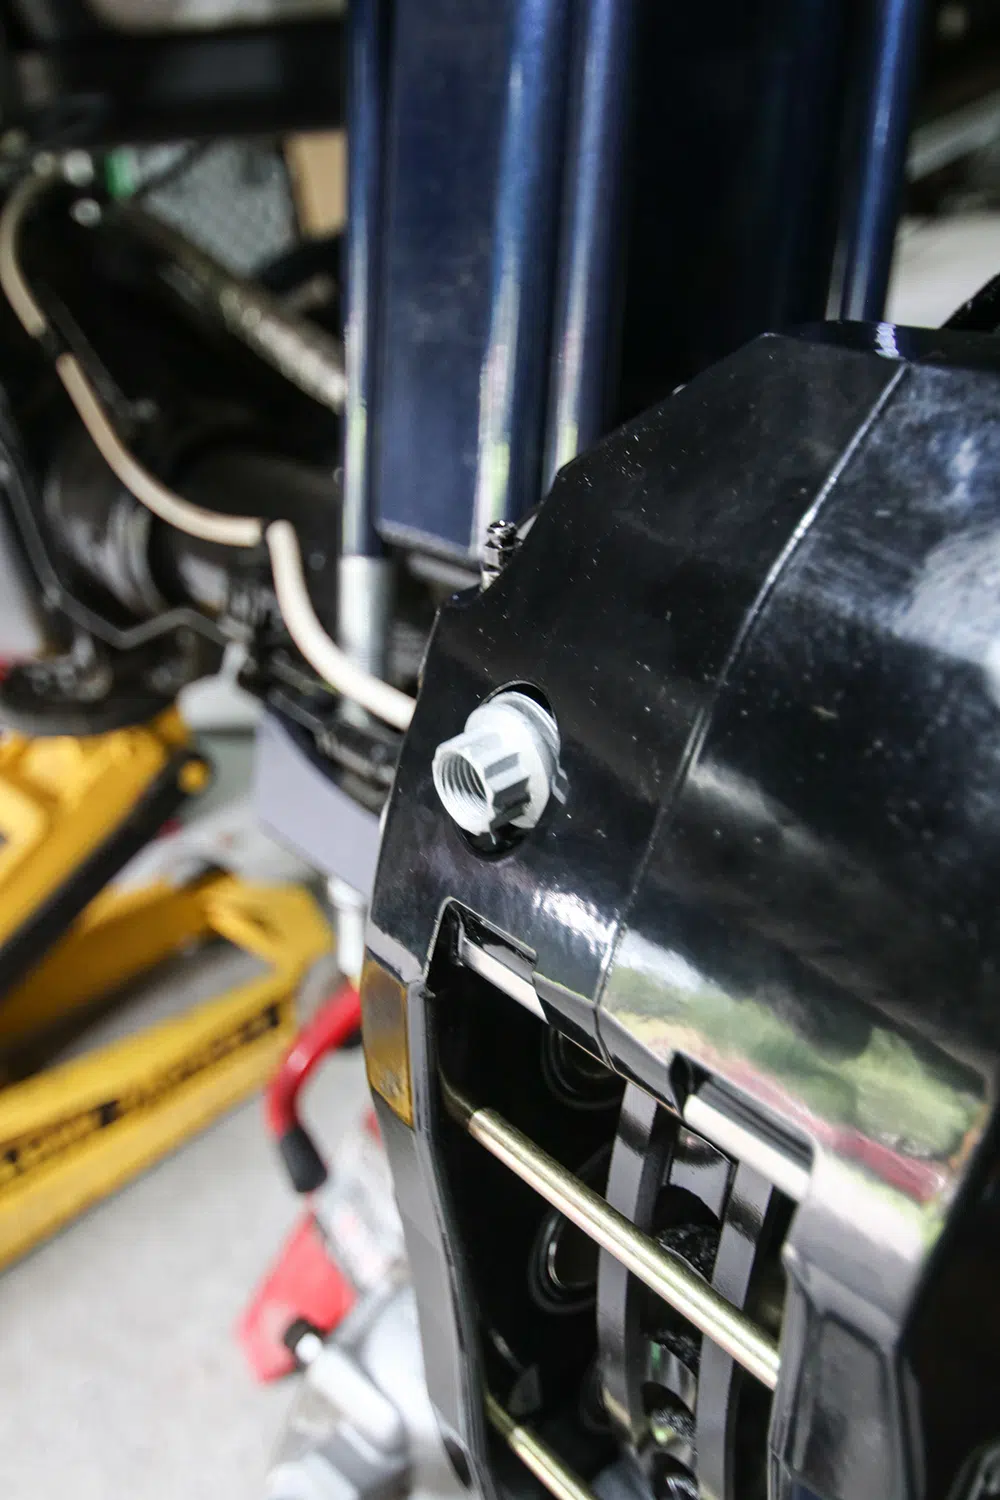
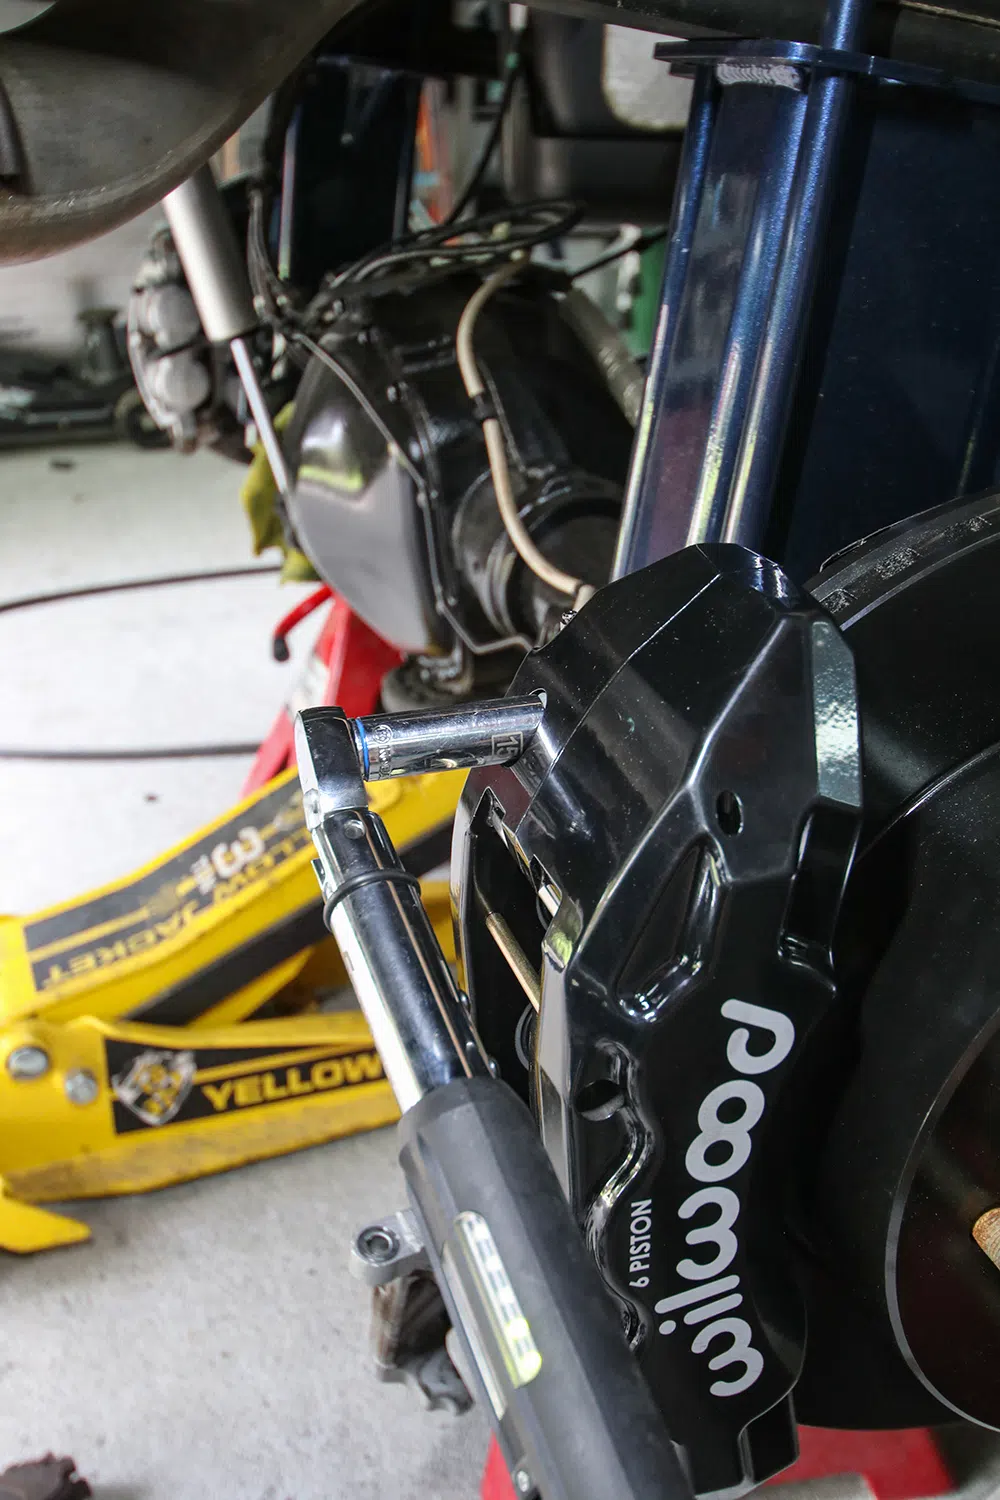
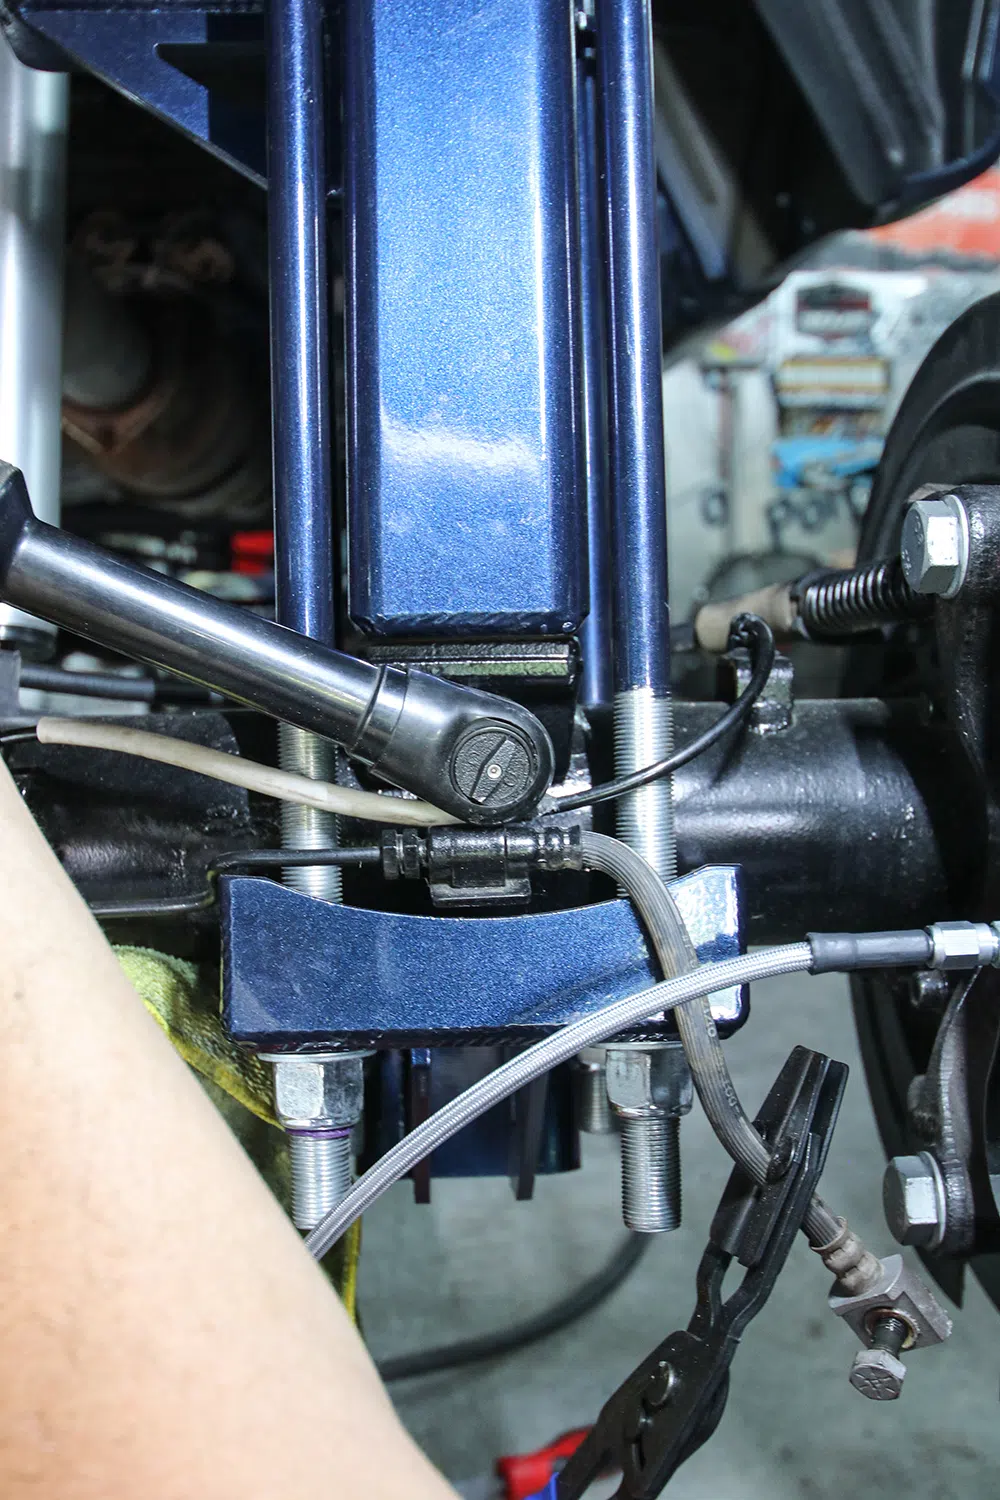
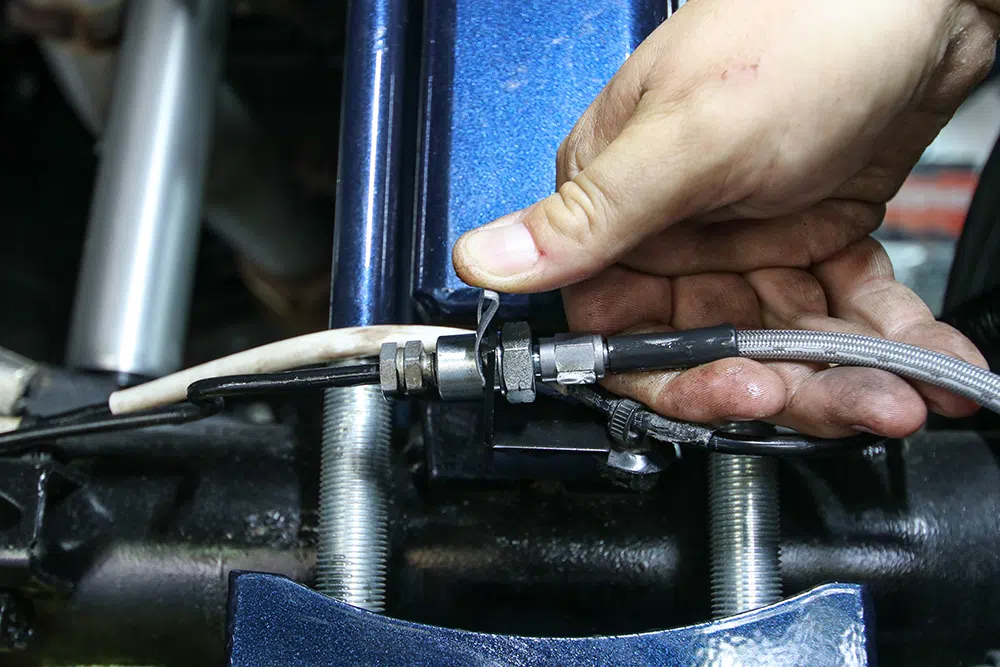
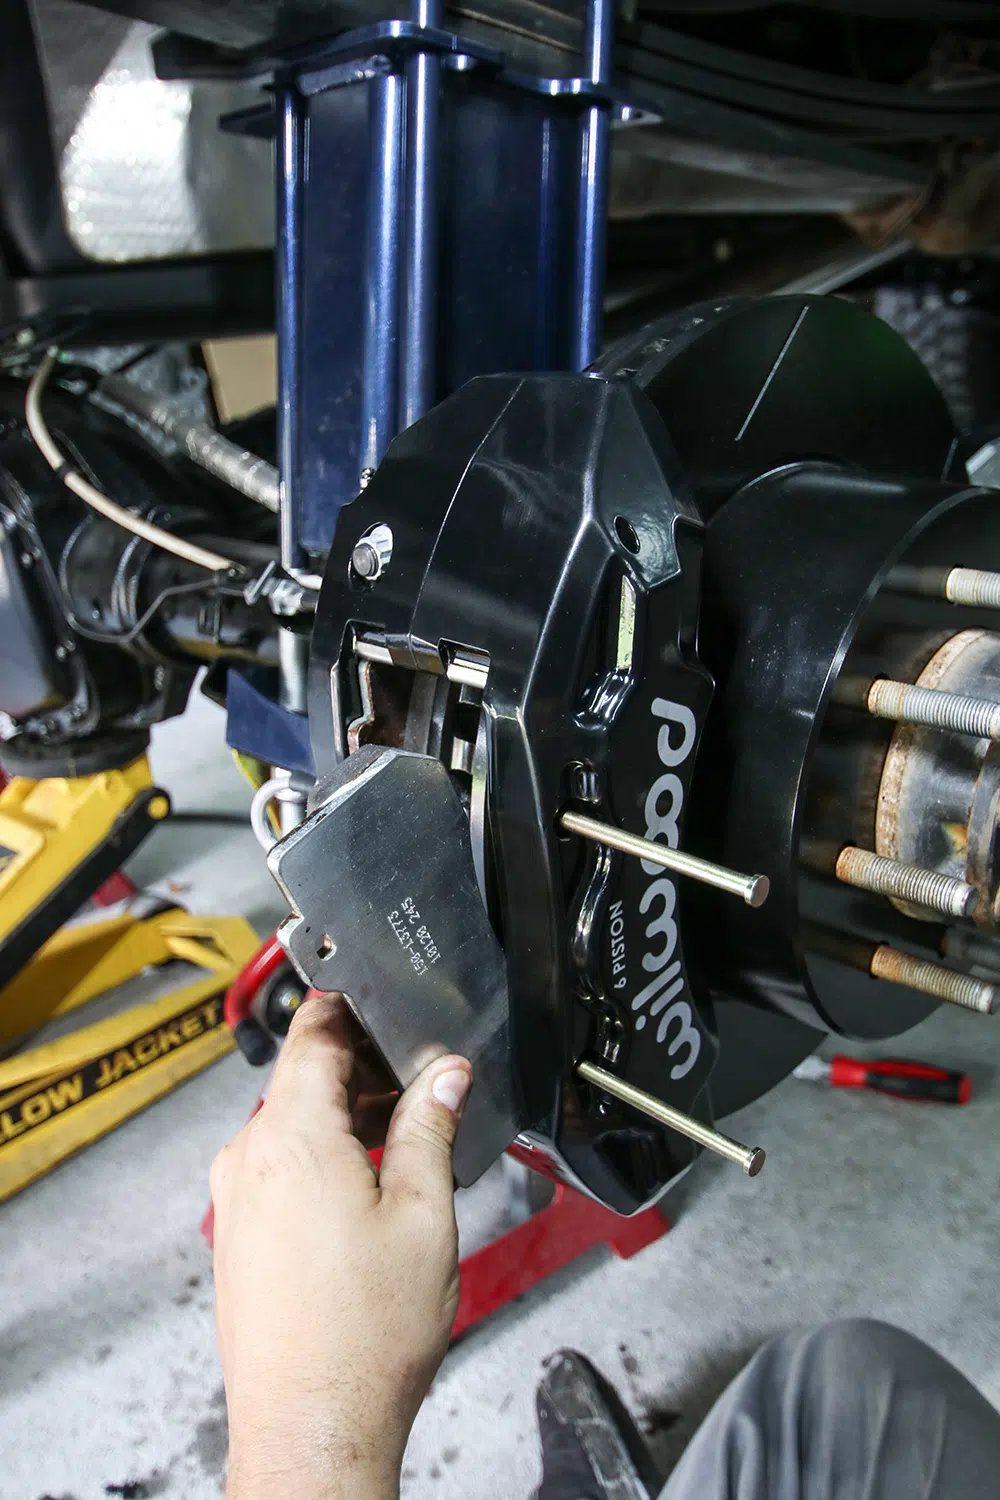
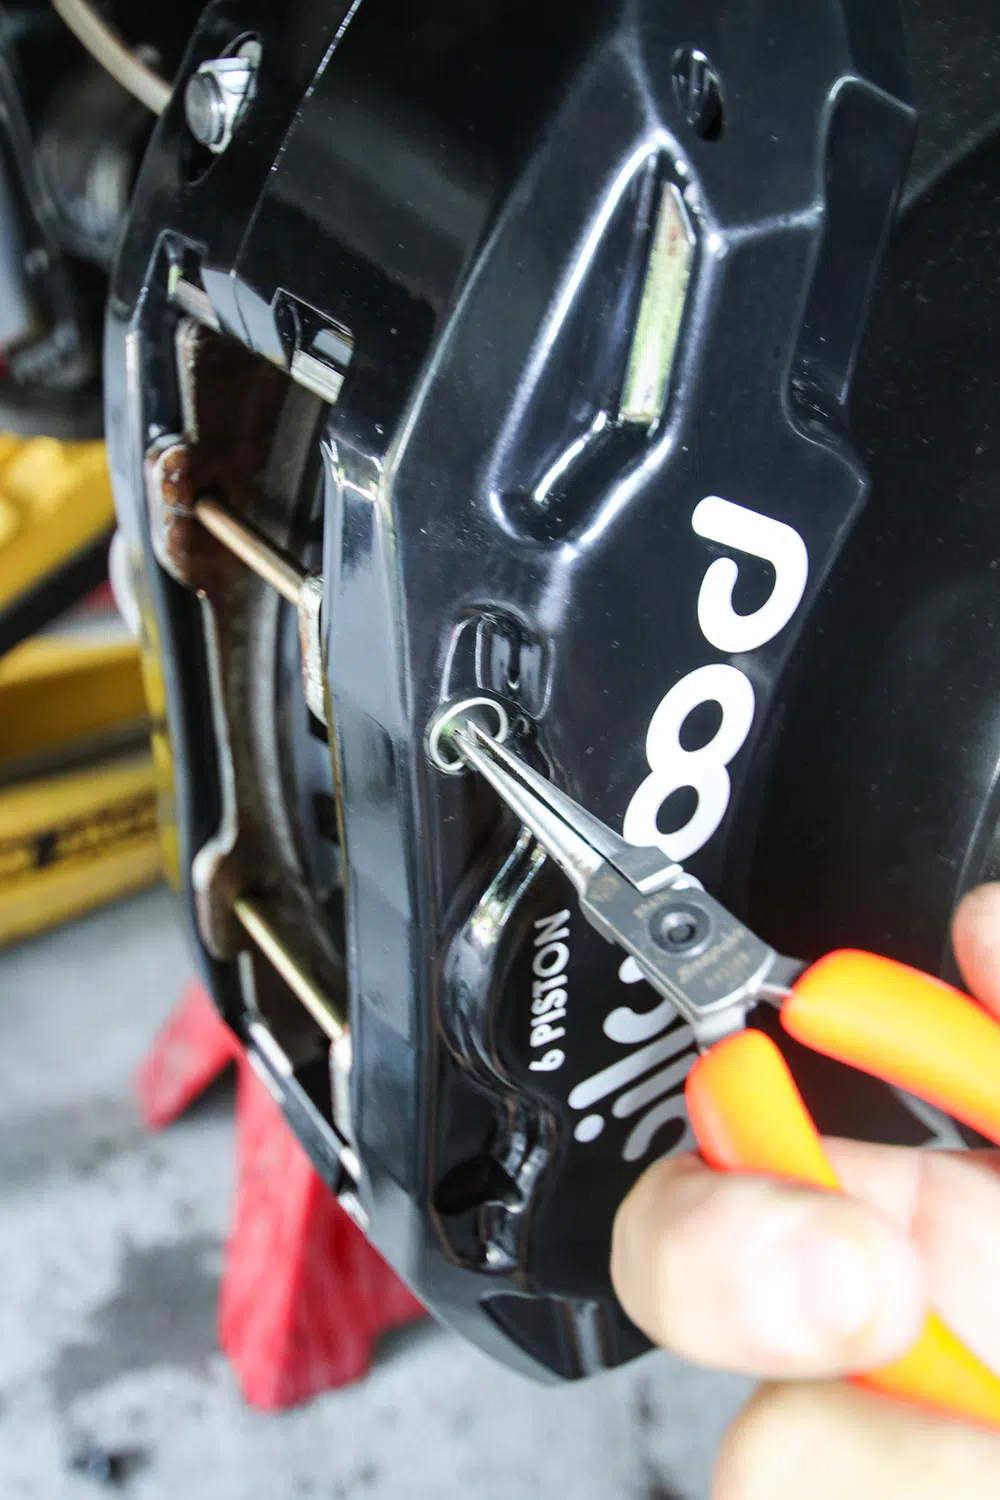
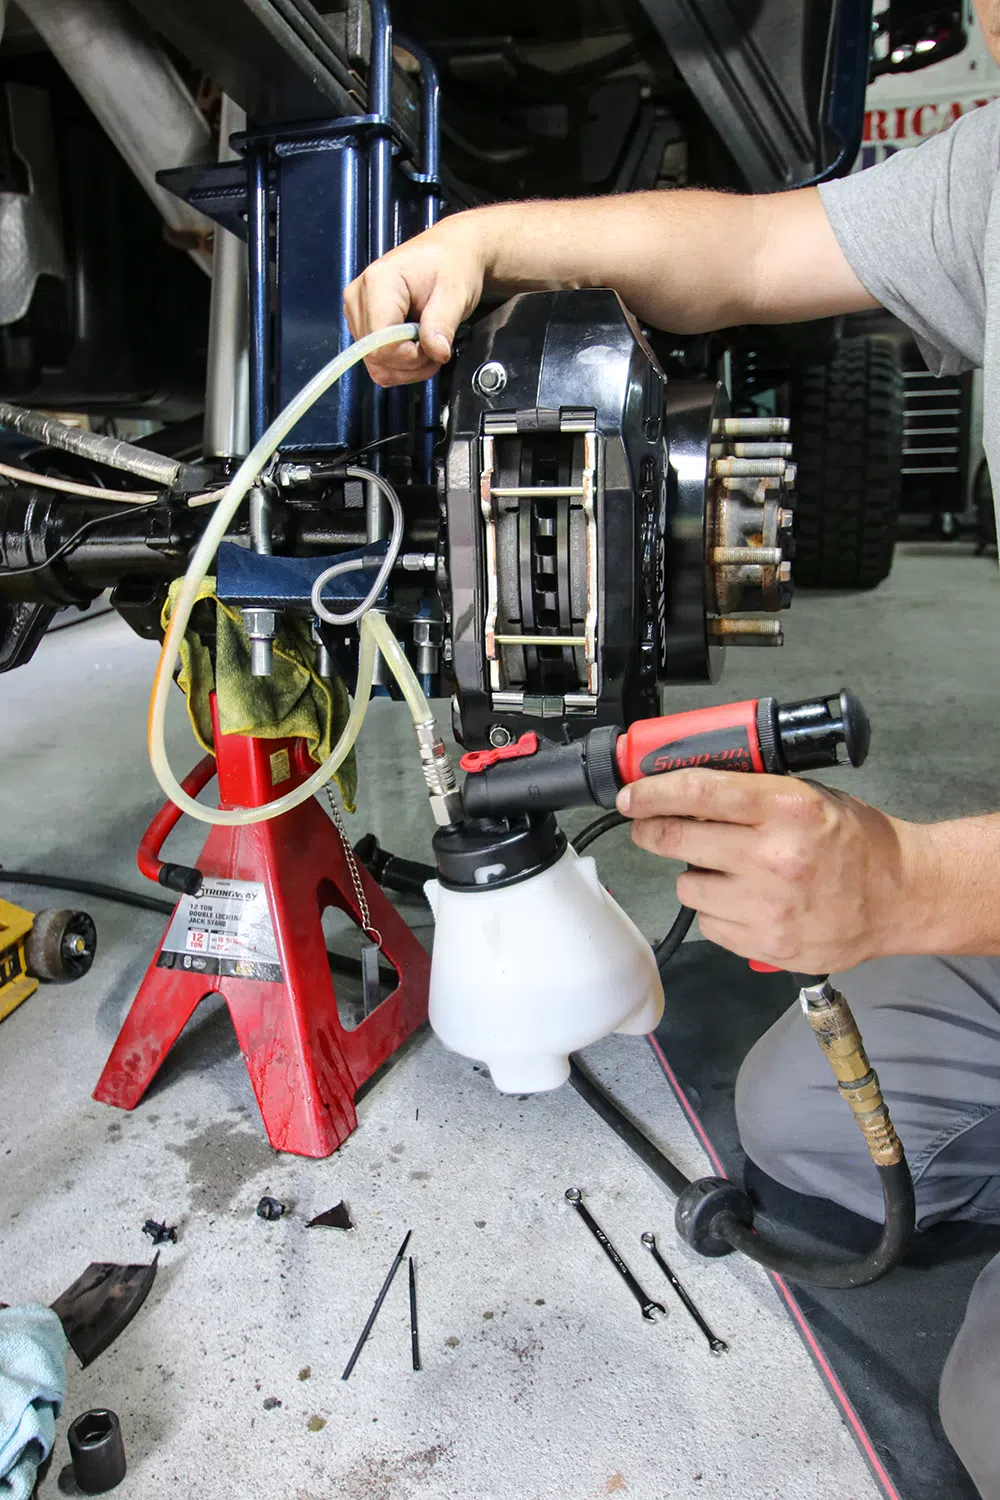
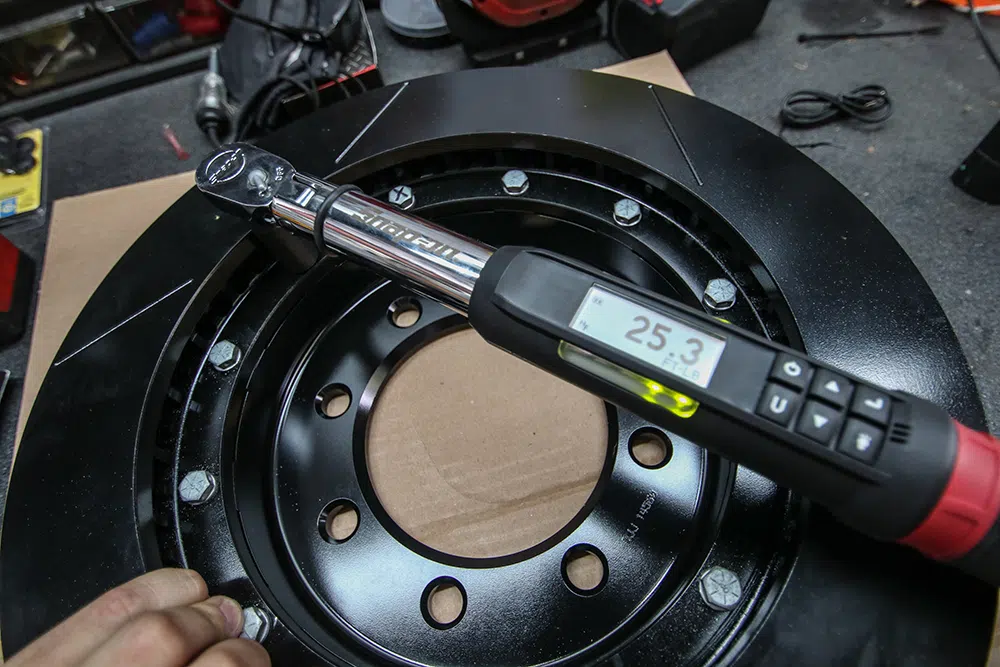
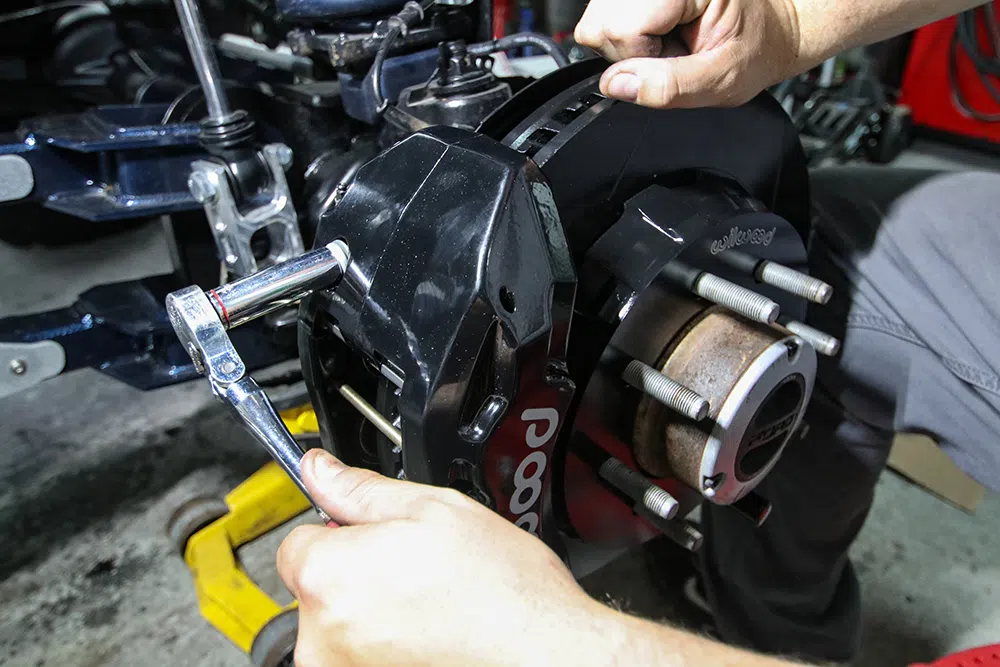
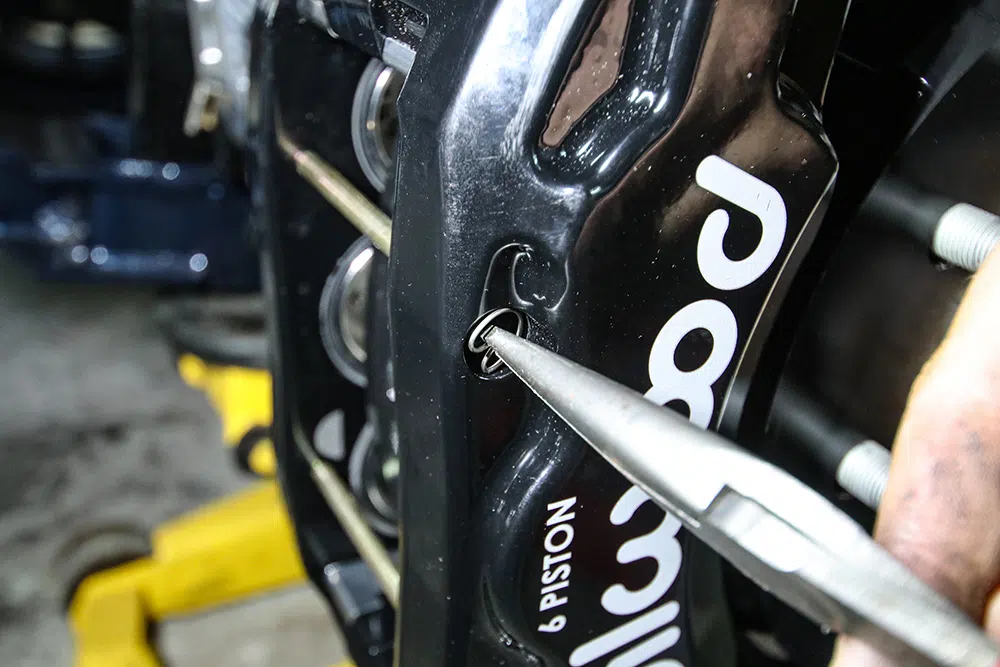
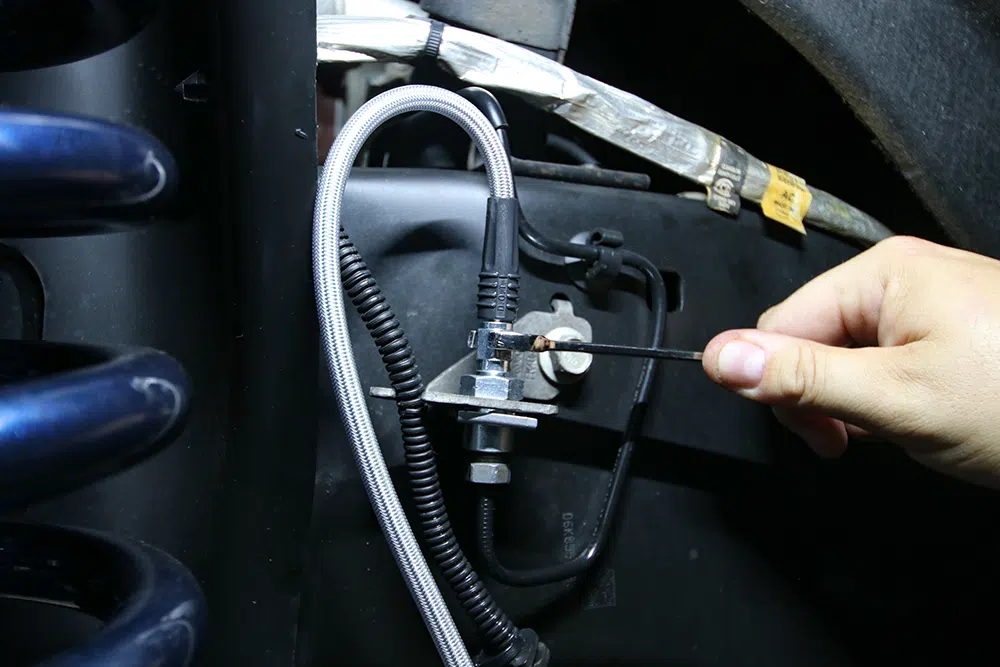
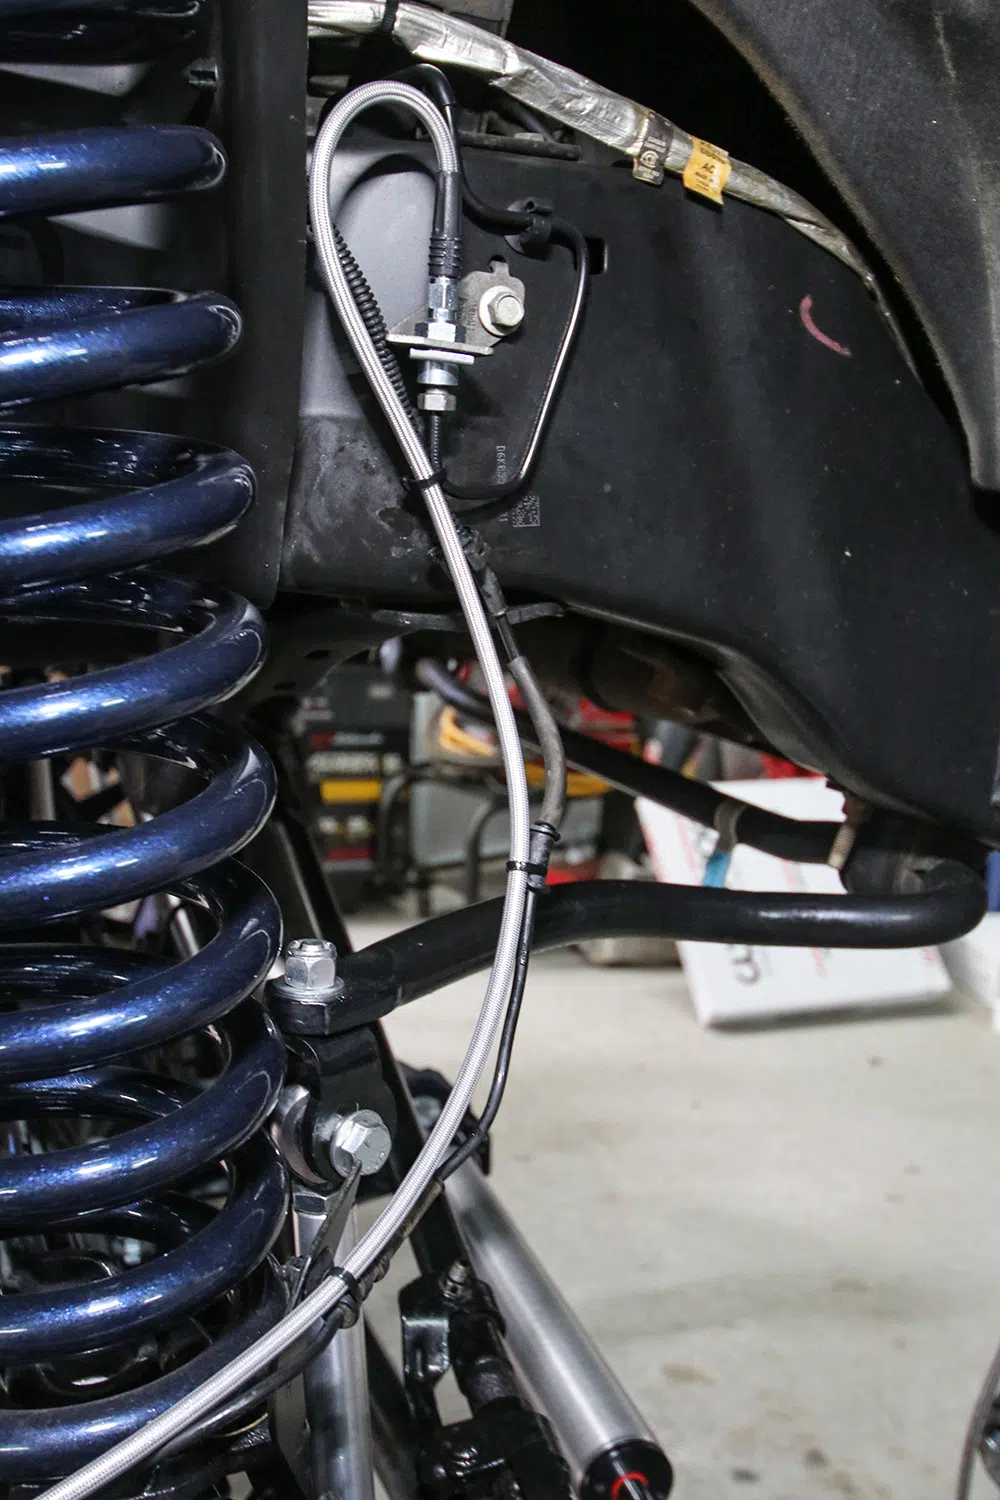
The factory front brakes are just as rusted as those in the rear, so getting rid of them for the better-performing and better-looking Wilwood Big-Brake Kit will be a huge upgrade for this truck.The front Wilwood rotors are two-piece, so the rotors and rotor hats need to be bolted together.For this application, the company calls for the rotor bolts to be torqued to 25 lb-ft. Make sure to alternate around the bolt pattern when tightening to ensure even torque.Remove the caliper bolts from the caliper bracket and remove the factory caliper. Just like the rear, clamp the brake flex line to prevent losing brake fluid while the caliper is off.Using a hammer, tap the factory rotor to free it from the spindle.With the factory rotor and caliper removed, you can bolt the supplied Wilwood caliper bracket to the factory caliper mounting points.Slide the Wilwood rotor onto the spindle and bolt the new caliper to the caliper bracket just like you did the rear.The pad retainer pins and retaining clips need to be removed to allow access to install the pads.Slide the new pads into the caliper and reinstall the pad retaining pics and clips to secure the pads.Connect the supplied steel-braided flex line to the back of the caliper. (For this application, we had to order longer lines due to the 10-inch suspension lift, but for a stock-height truck, the supplied lines work perfectly).Attach the other end of the steel-braided flex line to the hardline connector on the frame.Secure the line to the ABS line but make sure the line has plenty of travel for turning and suspension articulation. Make sure nothing is in a bind.Once both sides are installed and tightened down, make sure to bleed the brake lines on both sides.
As you can see, the new front big brake system looks 100 times better than the rusty stock system.
Chris Hamilton is an automotive journalist, editor, and lifelong truck enthusiast with extensive experience covering custom truck builds, fabrication, performance upgrades, aftermarket products, and a ...
We use cookies to enhance your browsing experience, serve personalized ads or content, and analyze our traffic. By clicking "Accept All", you consent to our use of cookies. Visit our Cookie Policy for more info.


Share Link