Installing Project Raven’s Suspension, Brakes, Steering, Wheels and Tires
Chris Hamilton . January 23, 2020 . C10 Builders Guide.
Share Link
Save ArticleLogin to save it
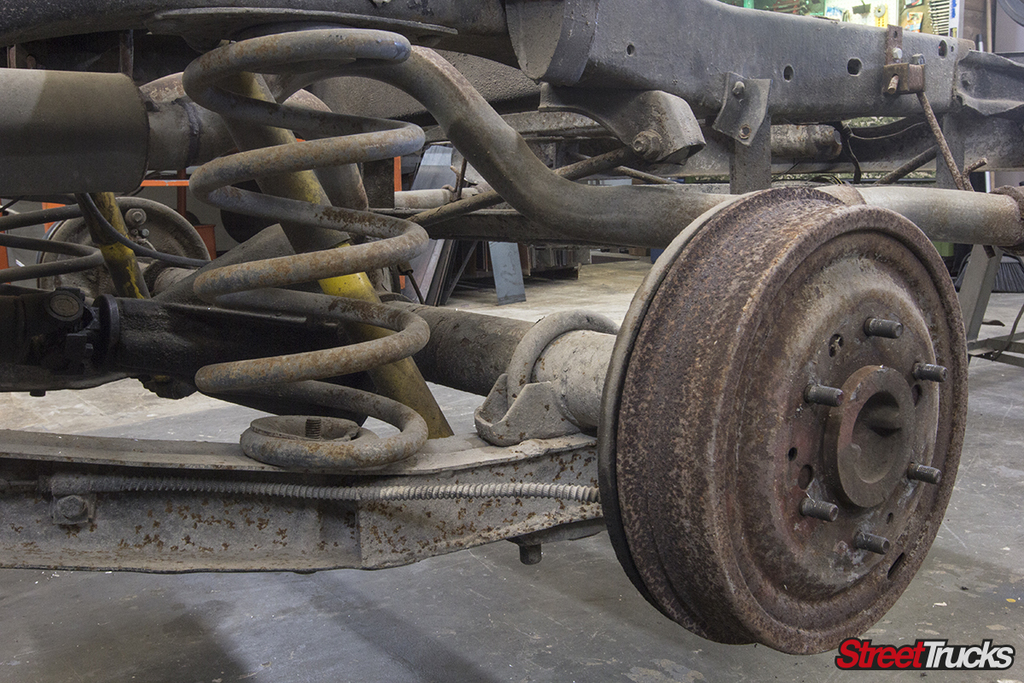
If you have been following along closely, which we hope you have been, you remember from the last issue that we stripped the rear frame rails of all the factory parts and installed a new Performance Online full cell on Project Raven. This will give us the ability to remove to factory gas tank in the cab to gain a little more legroom as well as evenly distributing the weight of the fuel towards the rear of the truck. That part of the project went smooth as expected, but now its time to get a little more technical. The original coil spring suspension on these trucks worked as good as expected back in 1965. They were able to haul a large load and absorb the bumps in the road without bouncing the driver all around the cab. Practical and purpose built was the name of the game back them, but with today’s standards of ride quality and performance, that old technology just doesn’t cut it.
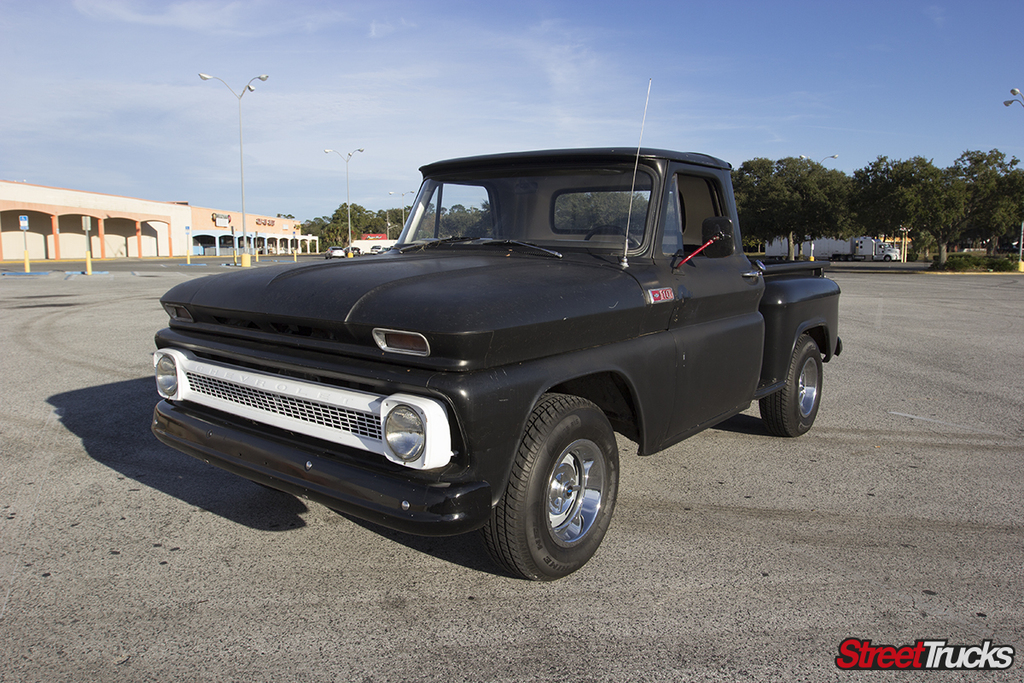
If you remember from previous issues, our 1965 Chevy C10 was a clean-running and driving classic full of body flaws and a rusty undercarriage. But that’s all about to change.
Typically in the past guys would have to make major modifications and perform intense feats of engineering to upgrade the complete suspension of their classic. They would transplant suspension from more modern vehicles into their grandpas old hay hauler and pray that it all lined up like their buddies said it would. Sometimes it worked, sometimes you were left stranded on the side of the road with an upset wife waiting for a tow. Luckily those days are gone and engineering masterminds have solved the scenario. Now you can simply call up your favorite suspension company and tell them your year make and model. They give you a few different options from coilover suspension to air ride to choose from. Once you have a plan in place, a simple swipe of a credit card is all it takes to be on your way to a modern suspension makeover for your classic C10 truck. In our case with project Raven, we turned to the experts at Classic Performance Products, and we couldn’t be more impressed with this amazing company.
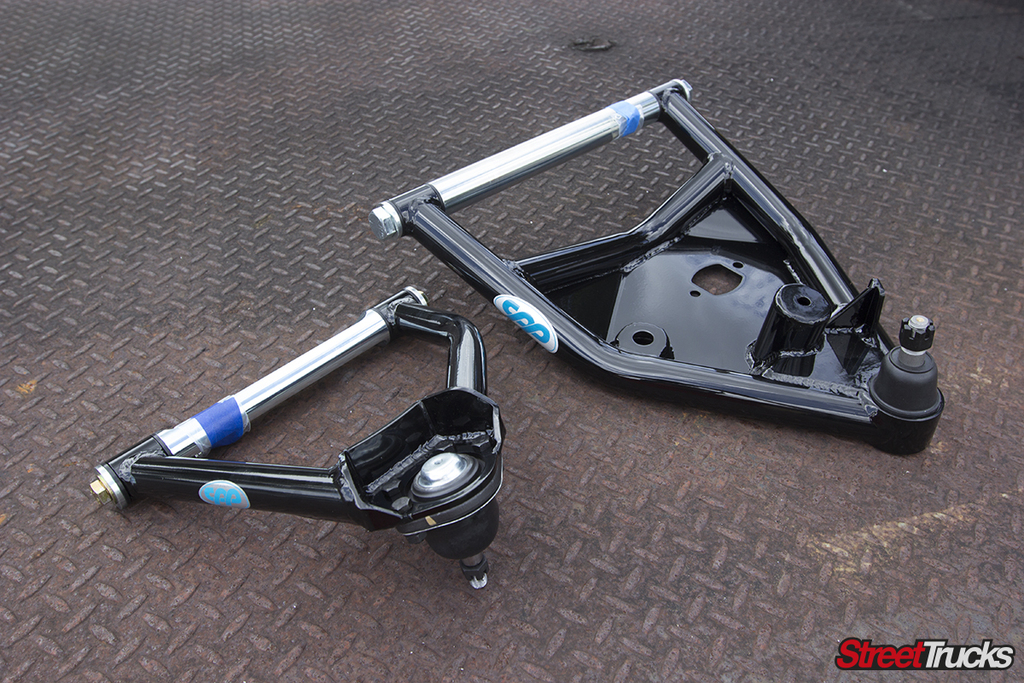
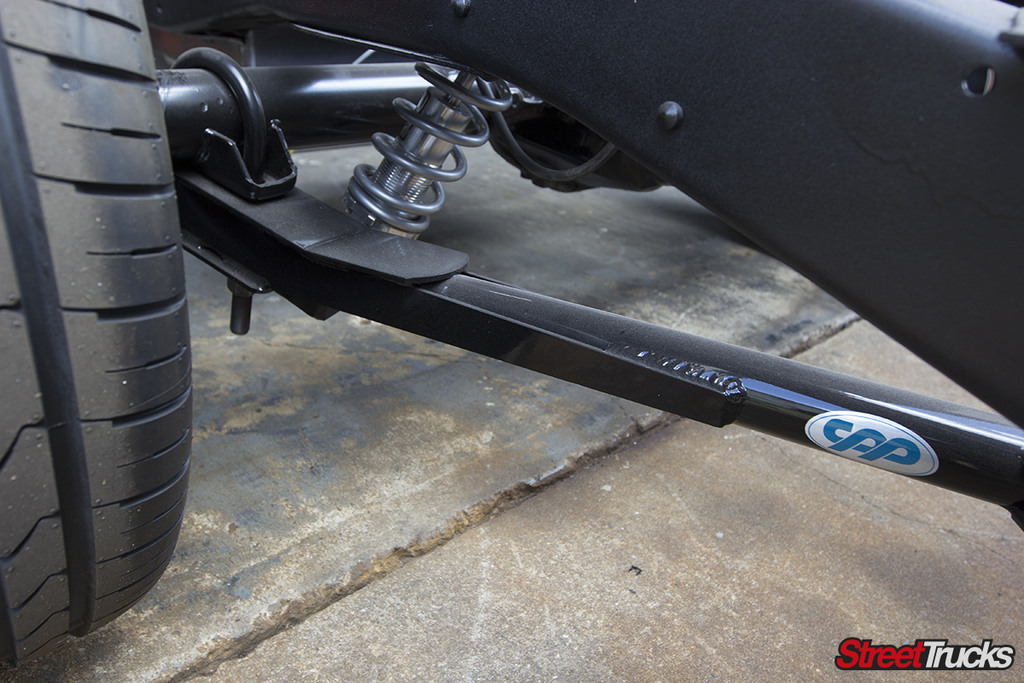
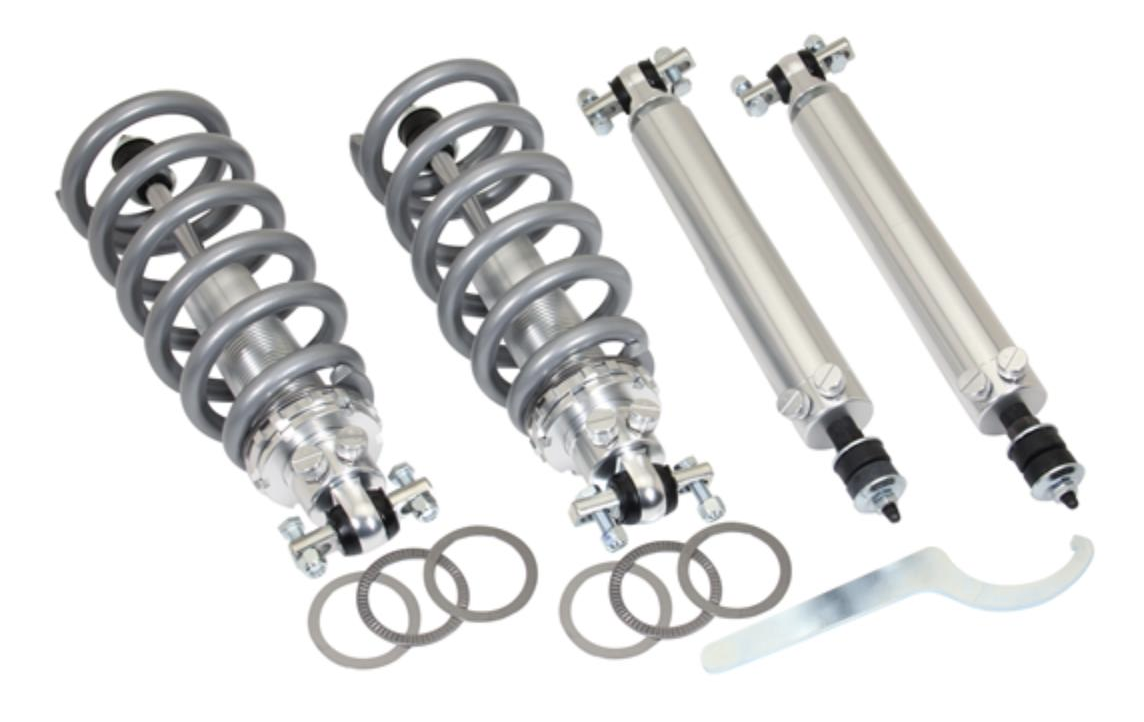
We went with CPP’s front coilover conversion that is fully adjustable from standard ride height to a 3-inch drop. Being combined with the CPP Modular Drop Spindles we are able to get a full 5-½-inches of drop without sacrificing ride quality. CPP also offers tubular control arms that are designed to make adding coil-overs easy. CPP’s rear C-Notch kits paired up with CPP Totally Tubular™ Trailing Arms are the perfect rear suspension package. Both kits include necessary mounting hardware and are available as an upgrade to CPP’s popular Pro-Touring and Complete Performance Package Kits in either black or silver powdercoat. Installation only requires standard hand tools and no major fabrication, provides a clean look, maximum clearance and consistent performance.
Totally Tubular Upper and Lower Control arms made from strong DOM steel tube, TIG welded and feature CPP’s patented D-spec bushings. The lower control arm has been redesigned for the best coil over conversion fit. Arms include ball joints specific for your 1963-70, 1971-72, or 1973-87 Chevy truck applications.
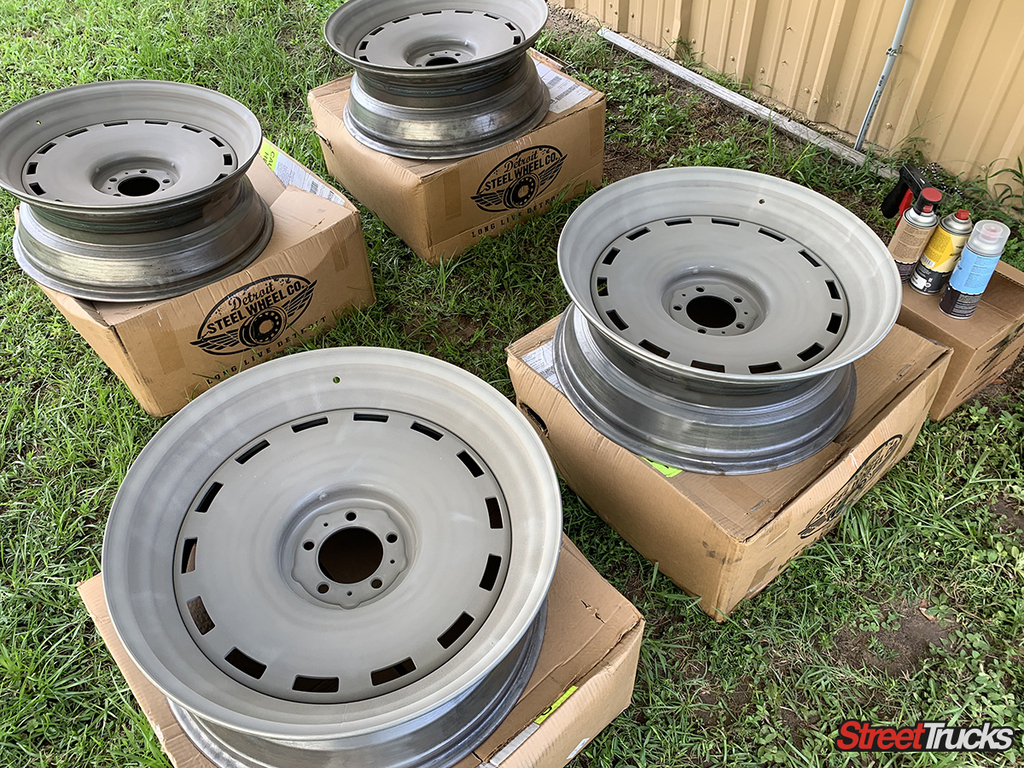
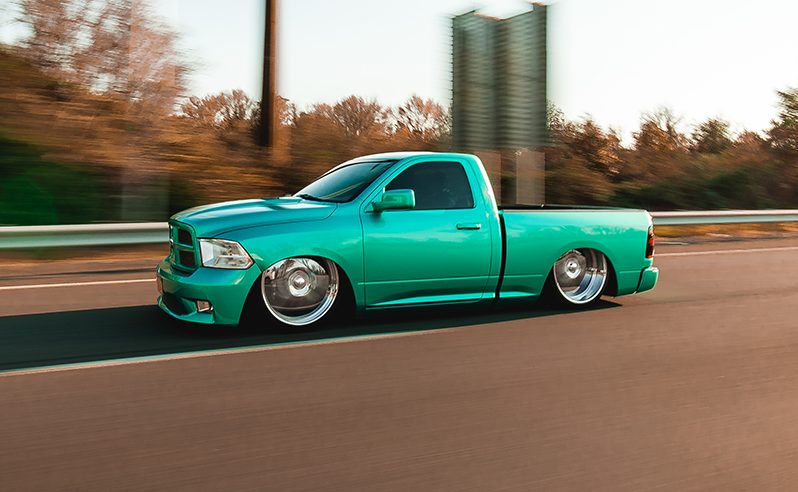
Pairing this suspension with a set of 22-inch Delray wheels from Detroit Steel Wheels is the perfect combination of old-school look and modern performance standards. MobSteel manufactures large-diameter steel wheels for classic and modern truck right in the heart of Detroit, MI. Their formula for success is simple: hardwork. Through building the highest quality product, and keeping to a blue collar budget, their goal is to raise the standard for modern day street machines without breaking the bank. Long live Detroit!
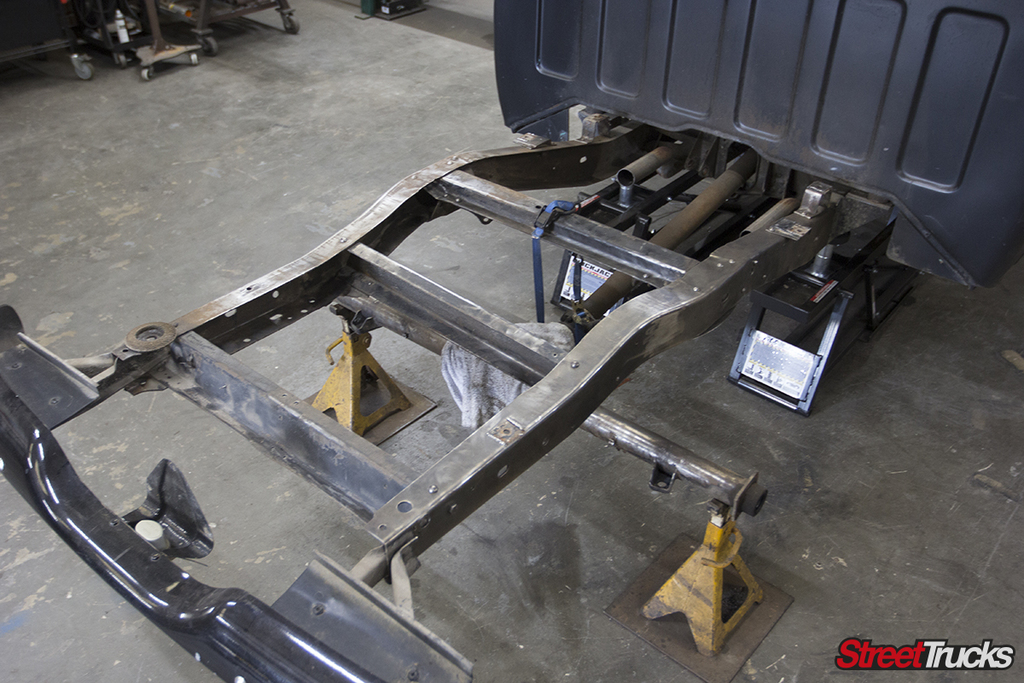
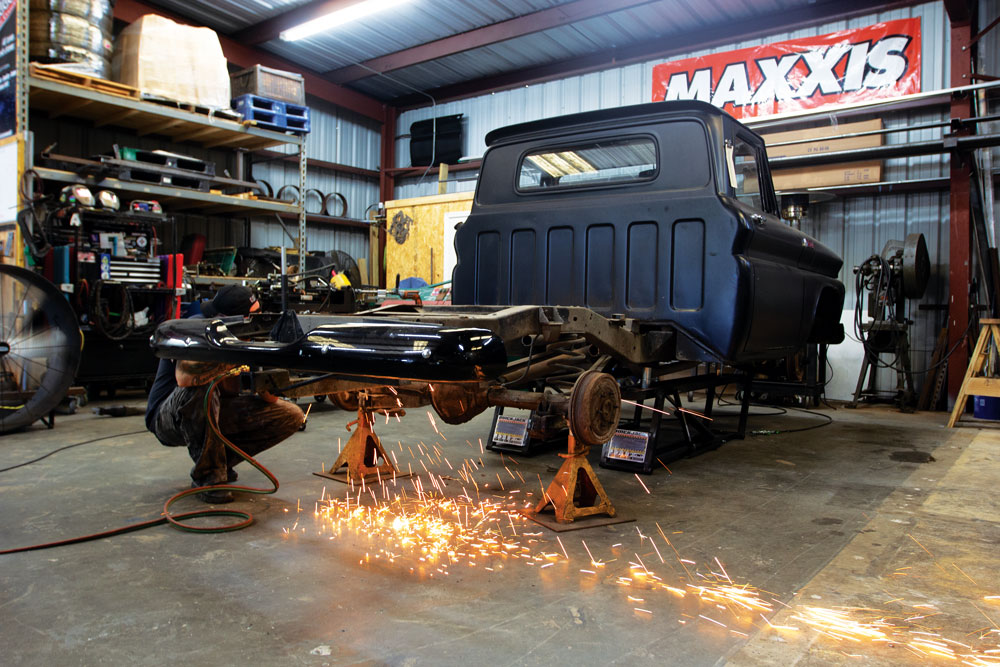
Now that we have the truck inside the bays at Full Pen Fabrication in Ocala, FL., it’s put onto our QuickJack lift and the bed is removed. Time to get to work!
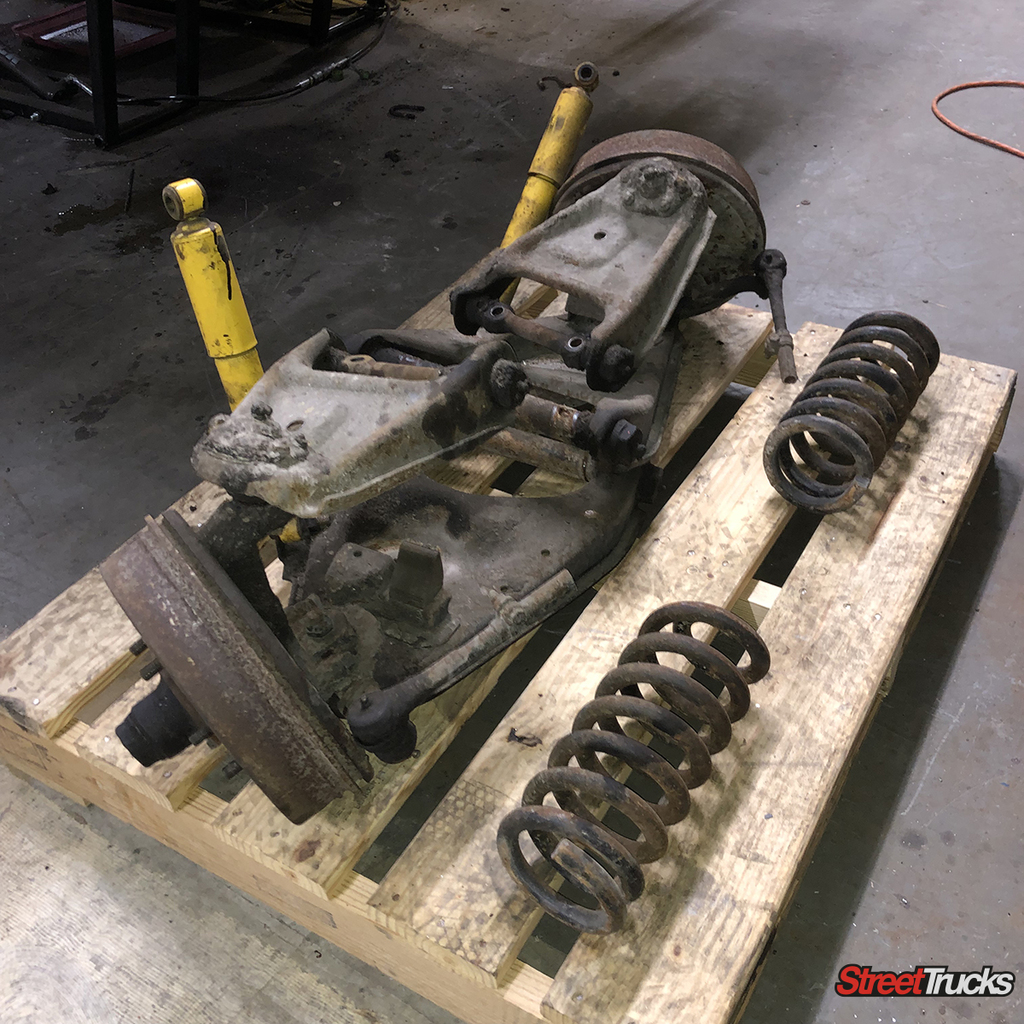
First thing on the list is to remove the factory rear suspension pieces and any other unneeded items attached to the frame rails. Grind it all down to bare metal and give it a nice coat of black gloss undercoating.
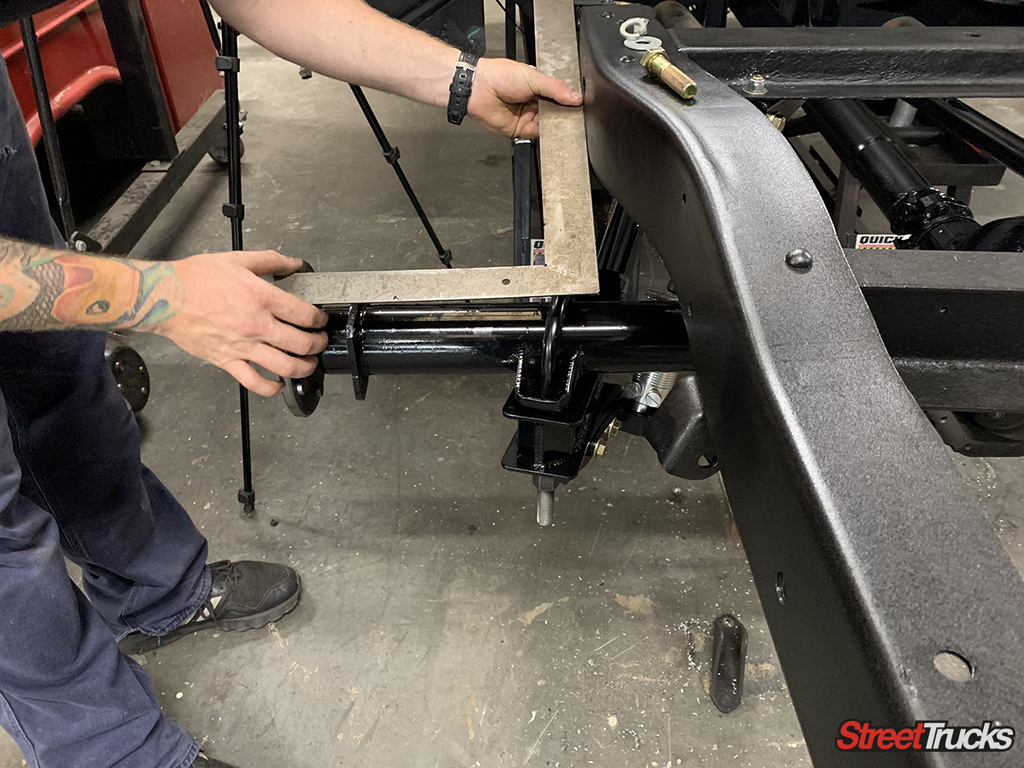
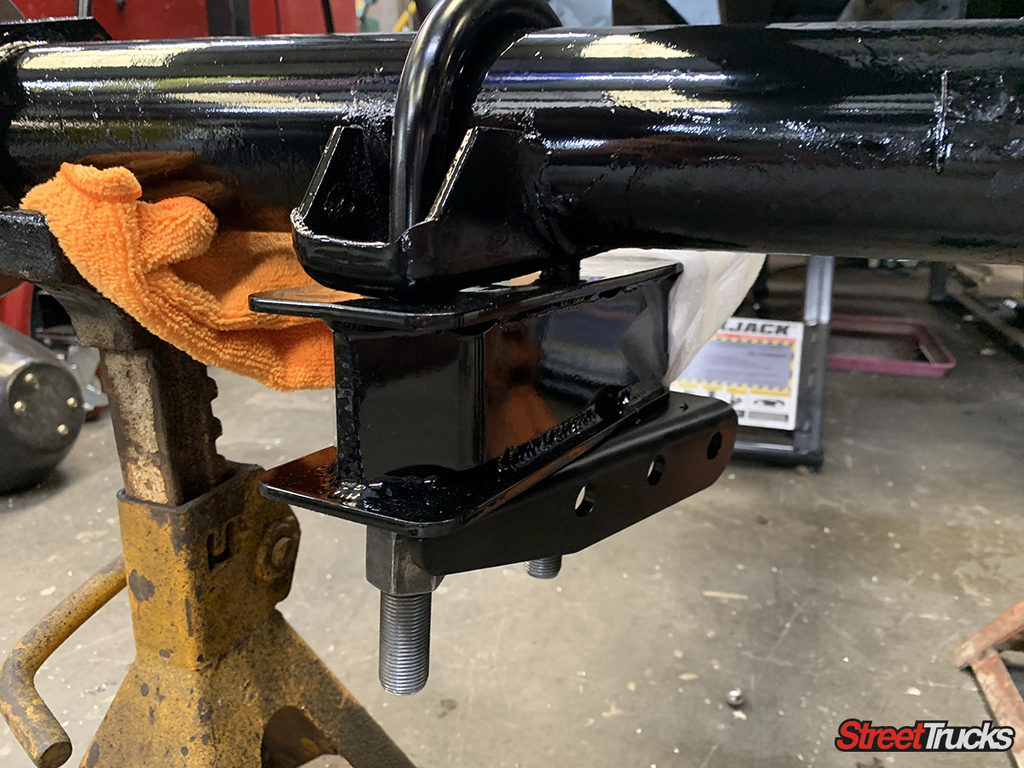
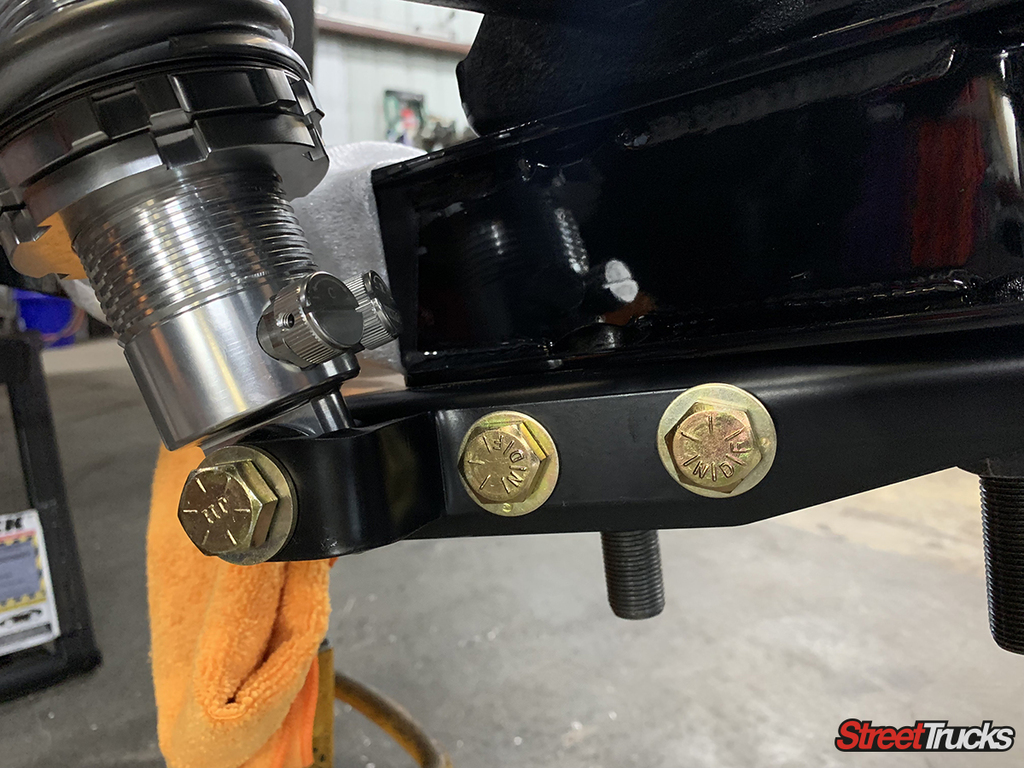
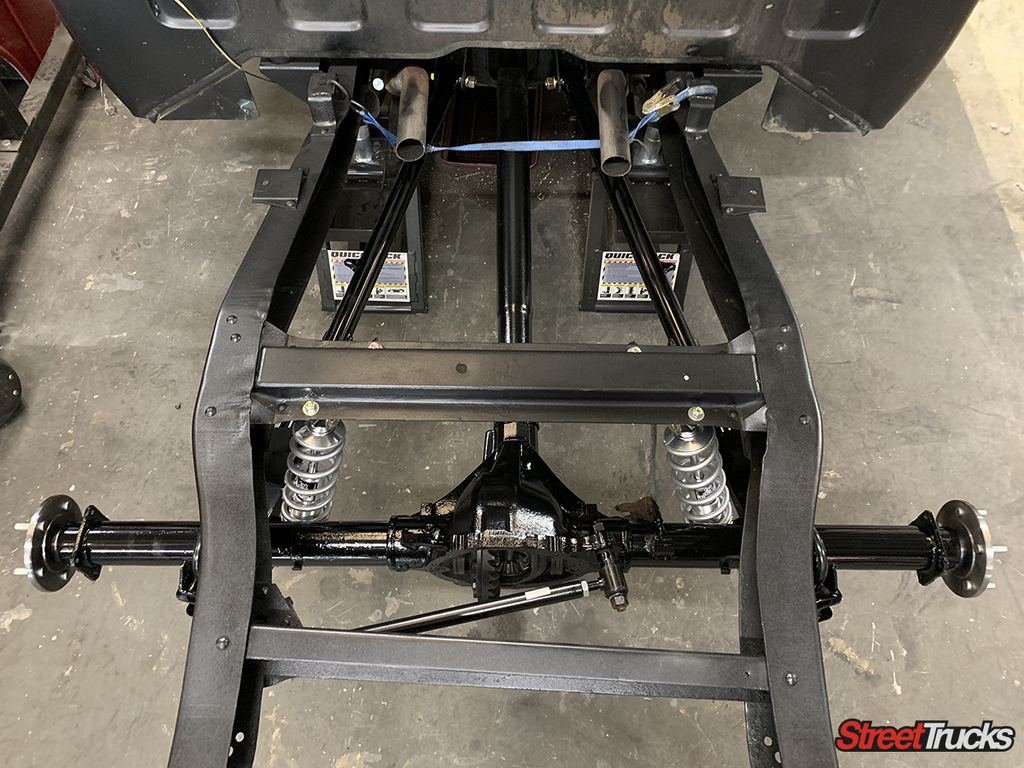
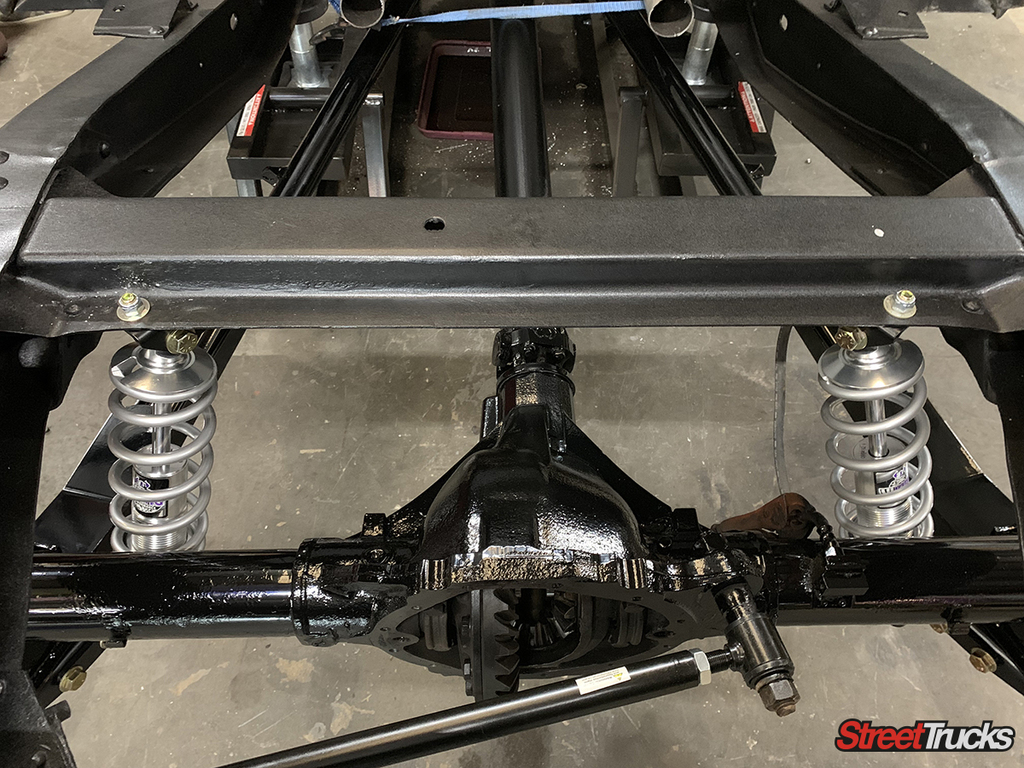
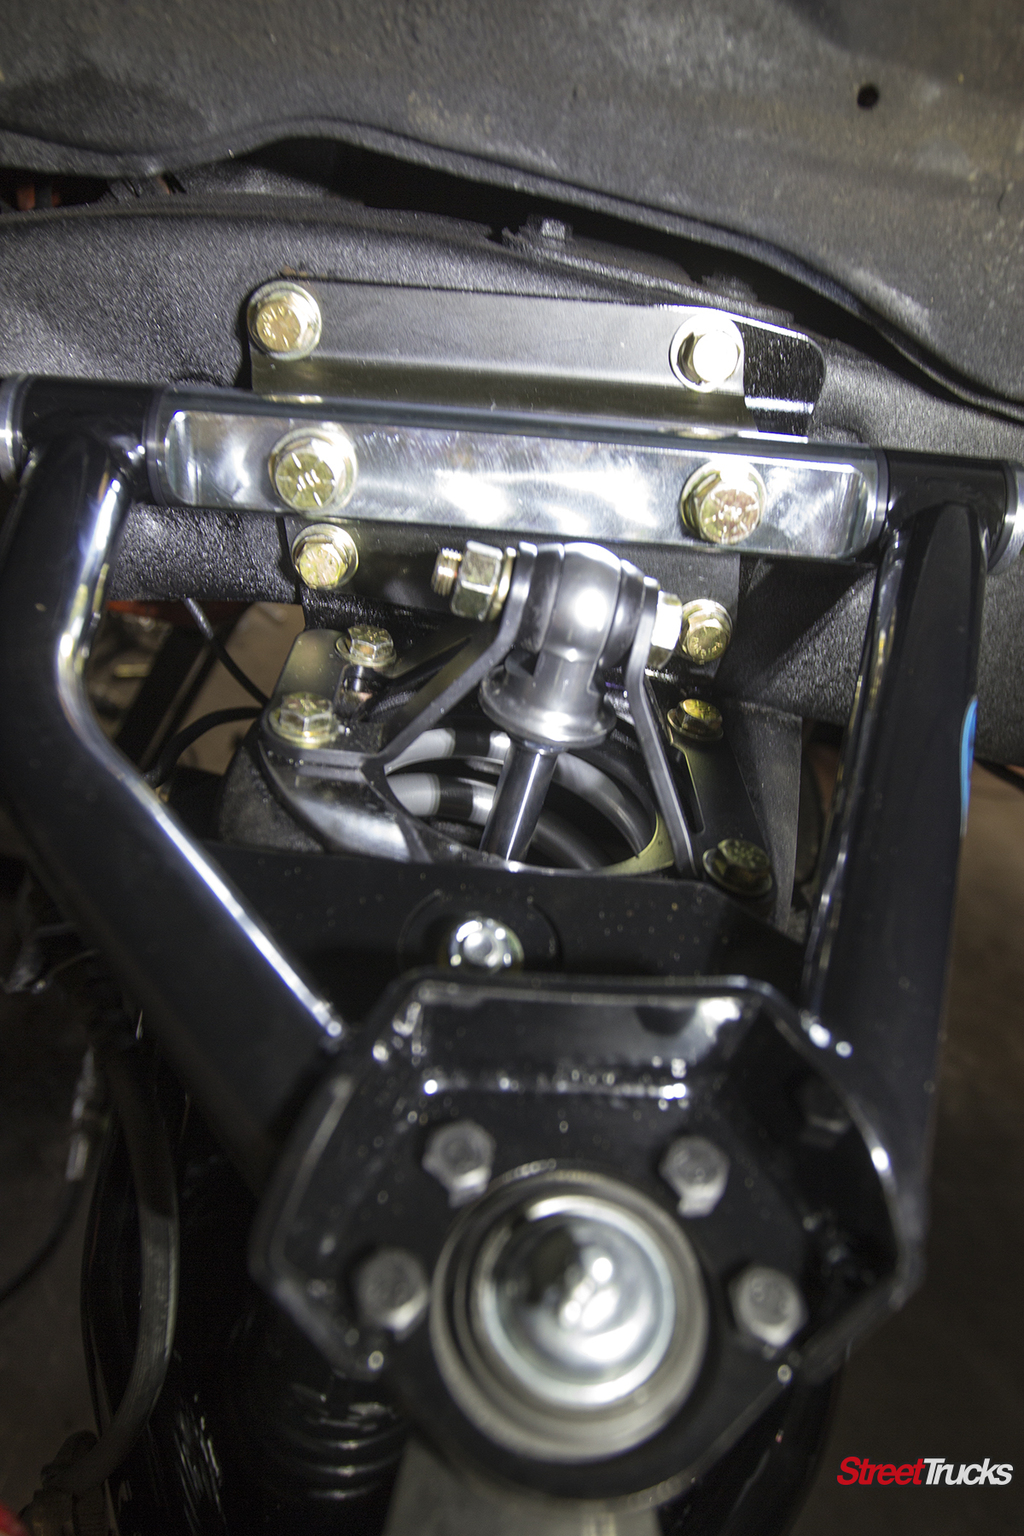
With the frame cleaned and painted, we can start installing the CPP rear axle coilover mounts and tubular trailing arms. The CNC-Bent & Laser-Cut Mounting Brackets along with grade-8 hardware make for a simple bolt-on installation
The axle brackets have built in mounting holes for the coilovers for a smooth and painless installation. These coilovers include dual adjustable shocks with separate adjustments for compression and rebound.
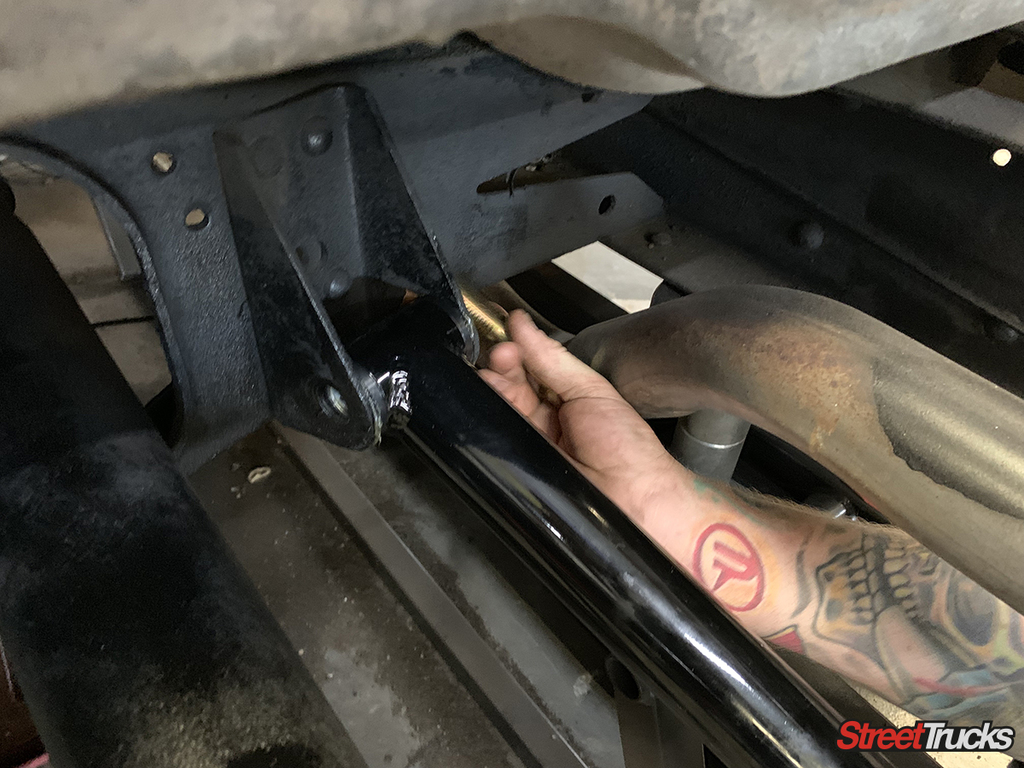
To install the upper coilover mounts it’s a simple process of drilling out the factory rivets and reusing those holes for the upper shock mounts. Bolt the brackets in place and the colovers are secure. What a cool design!
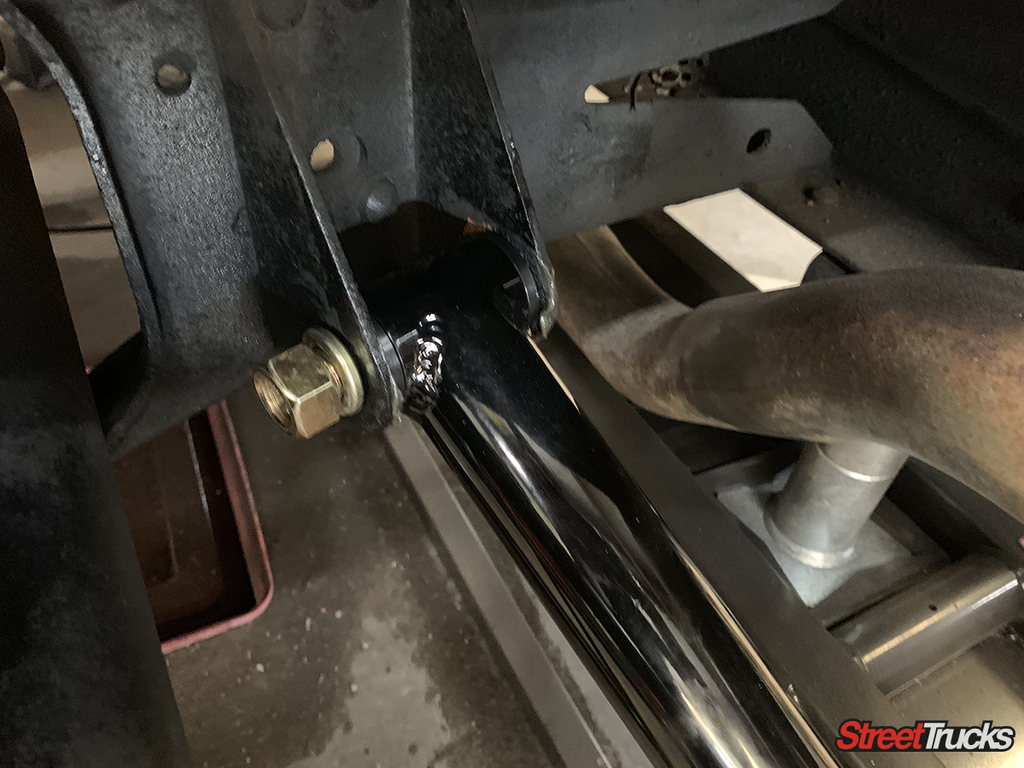
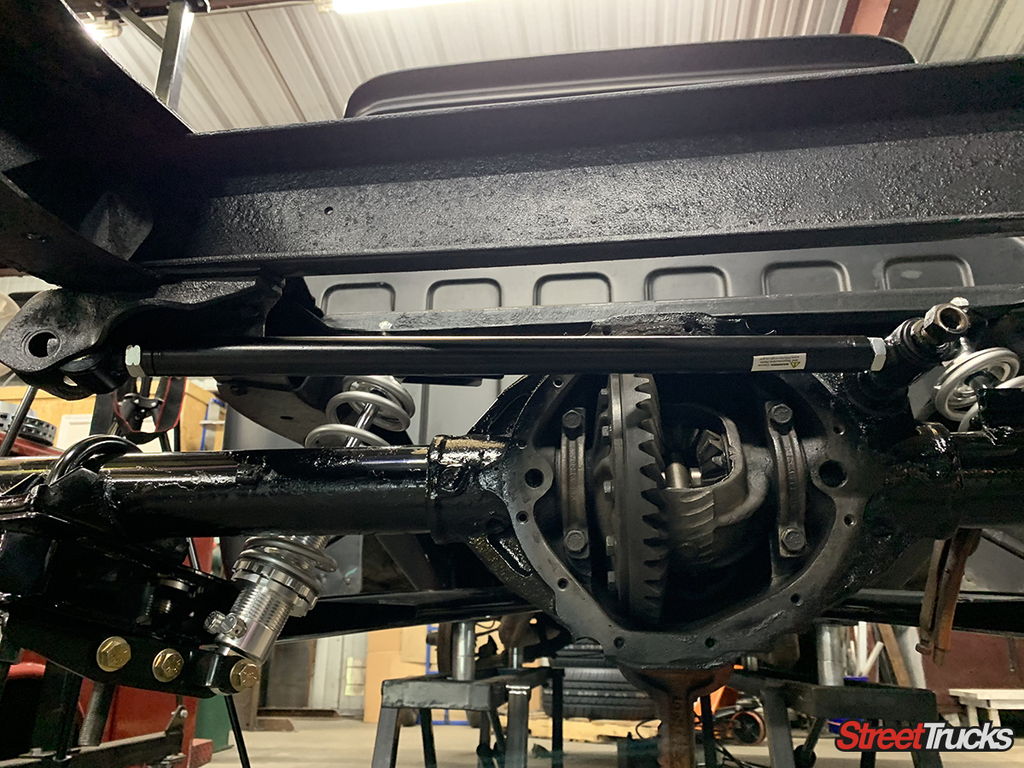
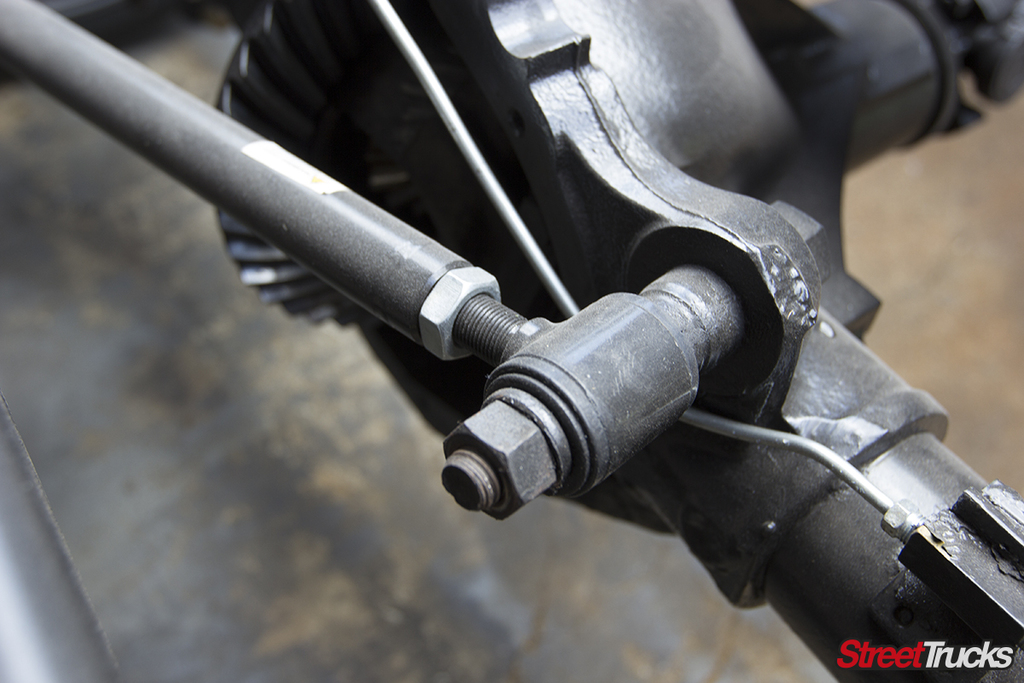
The new CPP panhard bar replaces the factory equipment using the same mounting brackets. A Panhard bar is the suspension link that provides lateral location of the axle and is used to limit the axle movement from side to side
With the coilovers, trailing arms and panhard instilled correctly, you can appreciate how well this system is engineered.
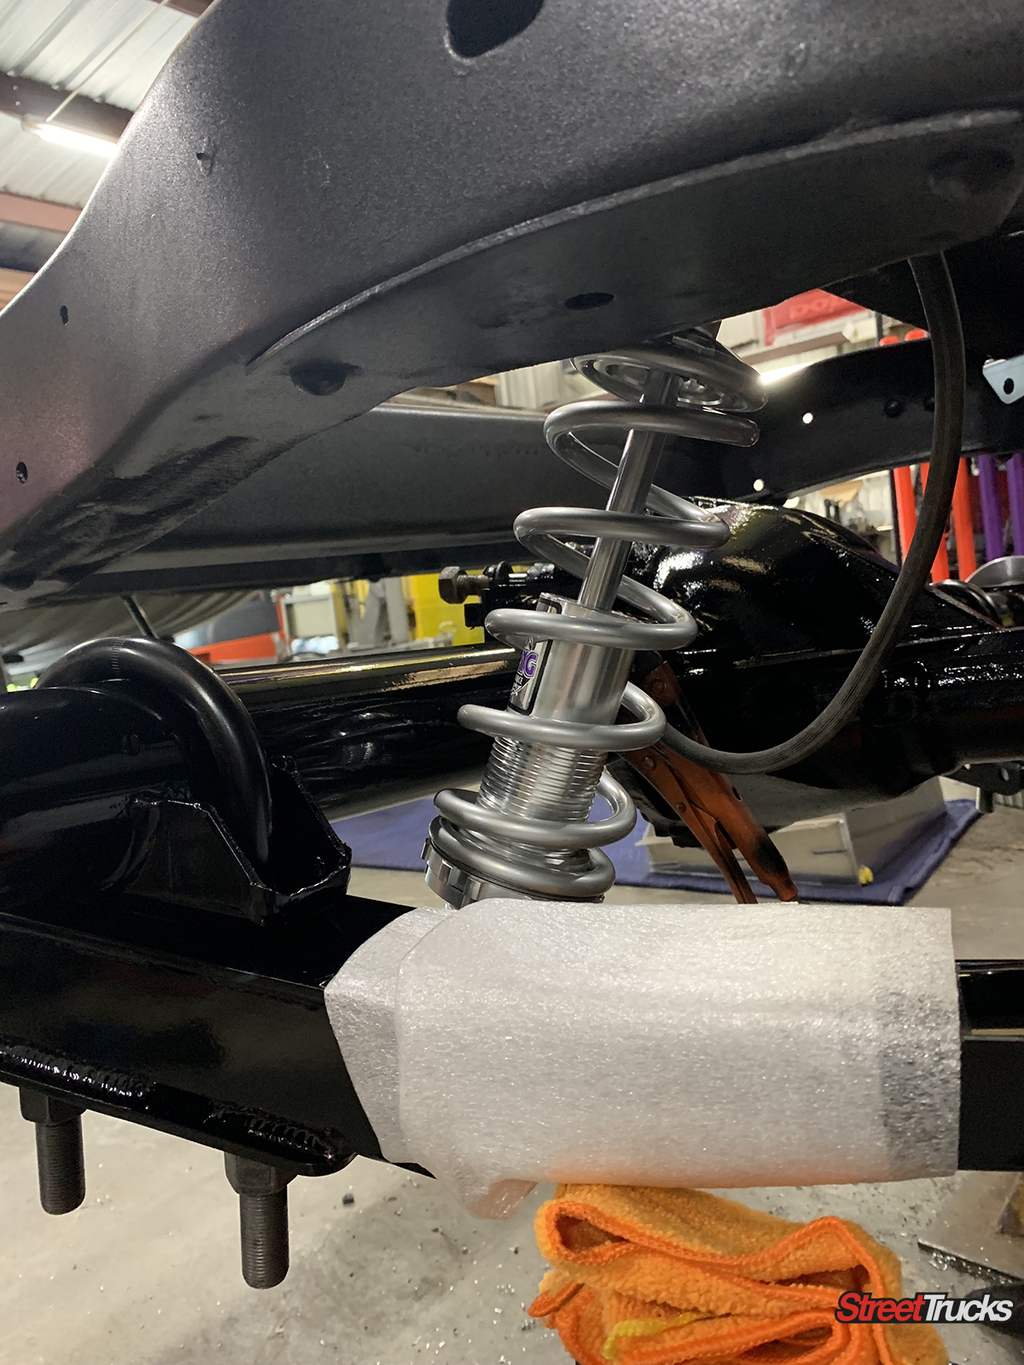
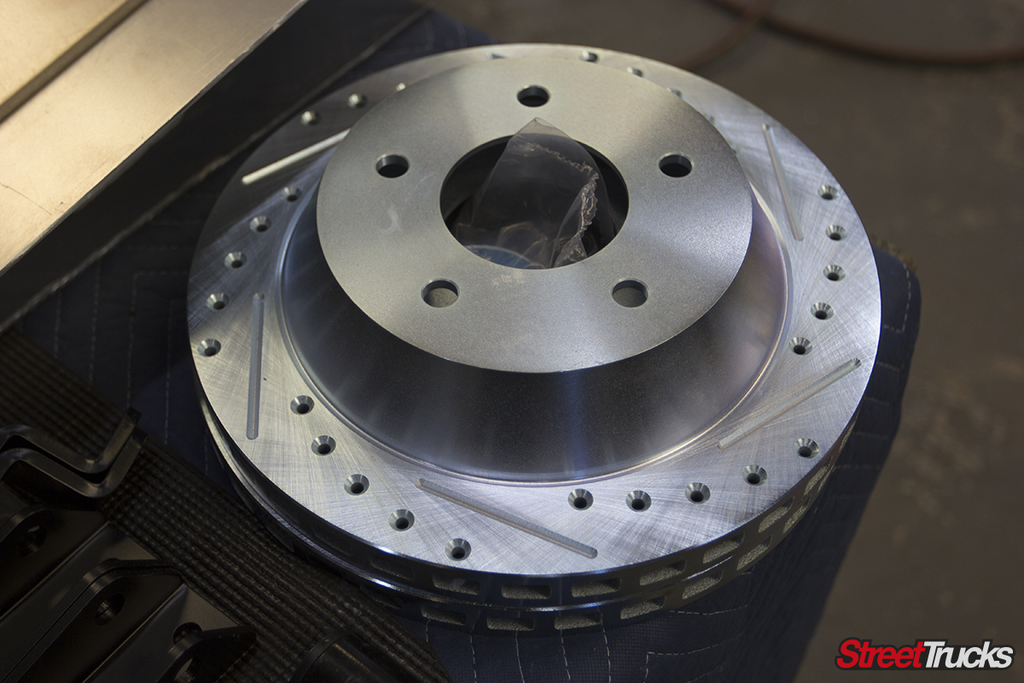
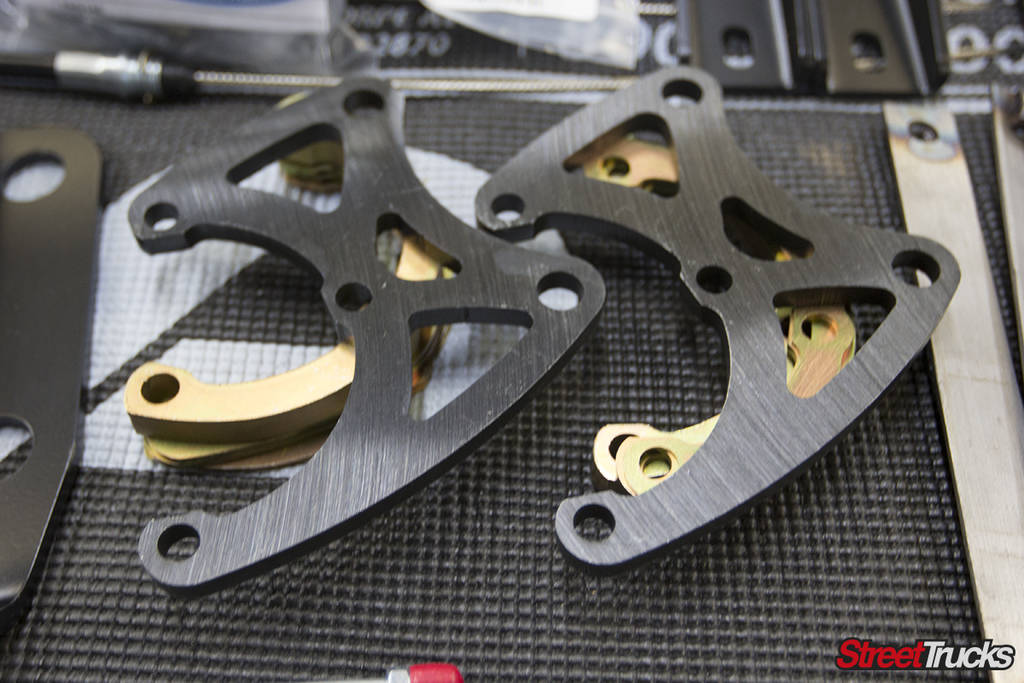
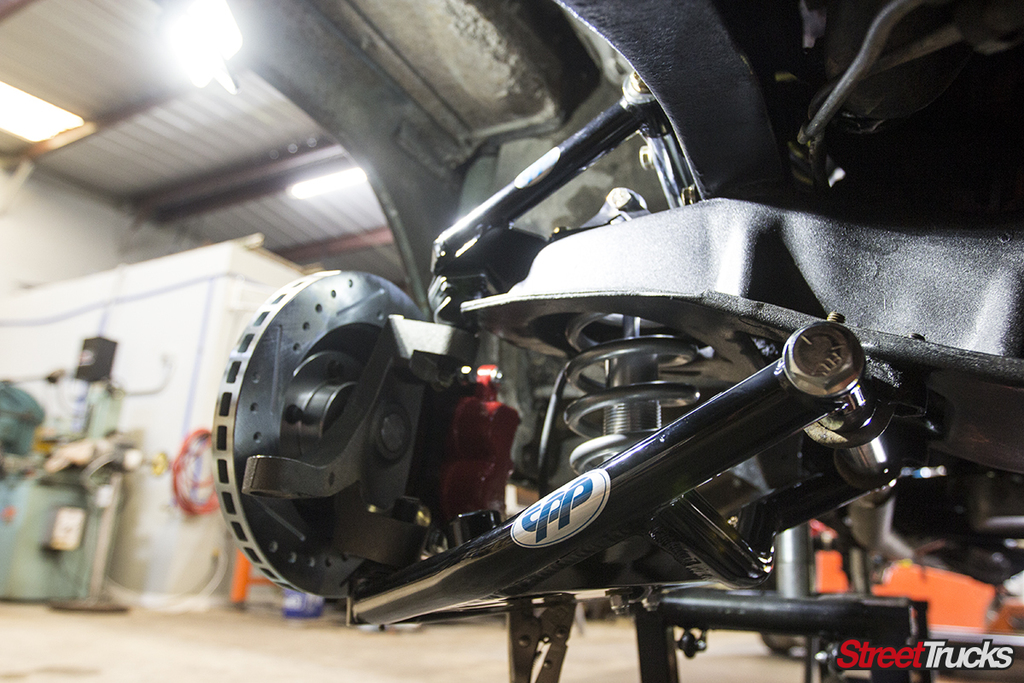
To complete the back we installed CPP’s 5-lug axle shafts, brake brackets, rotors and calipers for a killer clean look. The custom-made caliper bracket is designed to mount directly to the backside at the axle flanges of the rear end using the provided hardware.
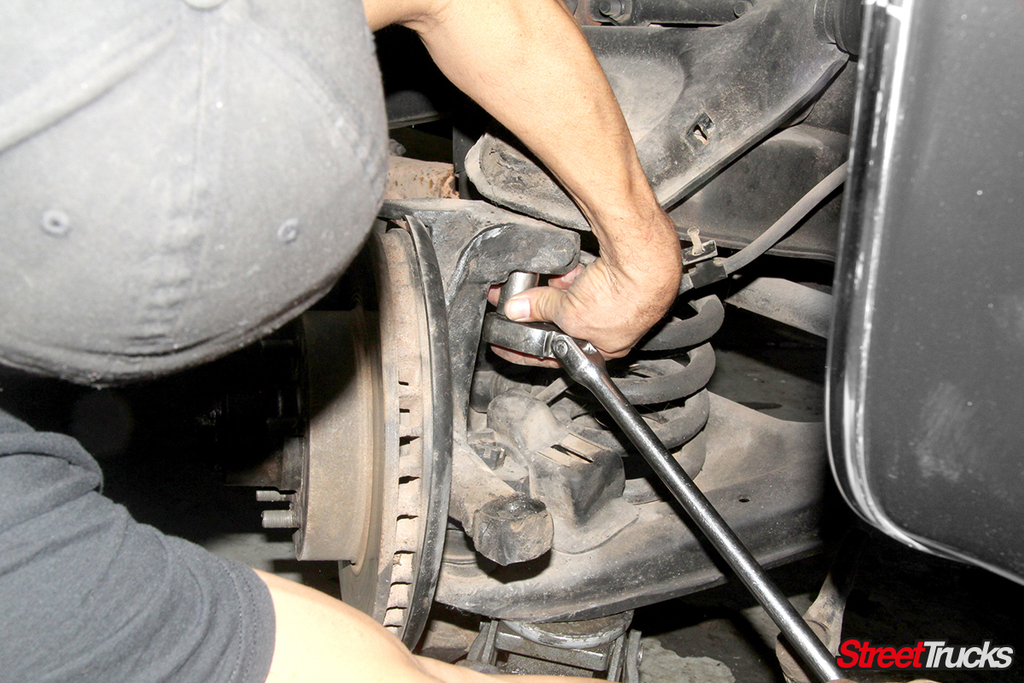
Moving to the front of our ‘65 Chevy, the first thing to do is remove all the factory components. We simply removed the tie rod ends and unbolted the upper and lower control arms to remove it all together. No point in dissembling it if it’s all coming out right?
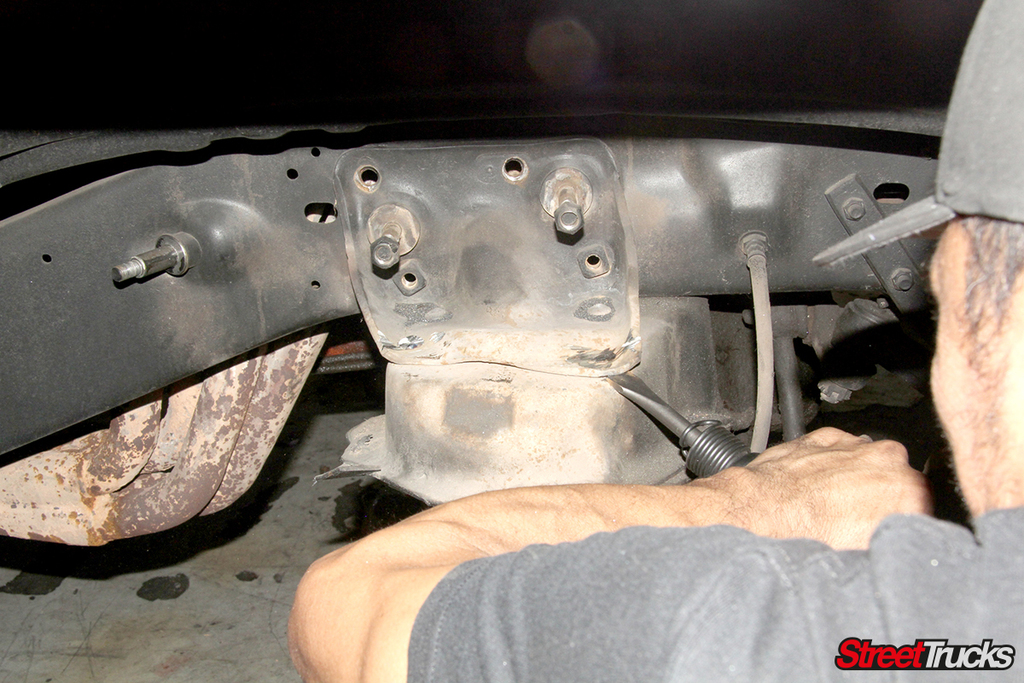
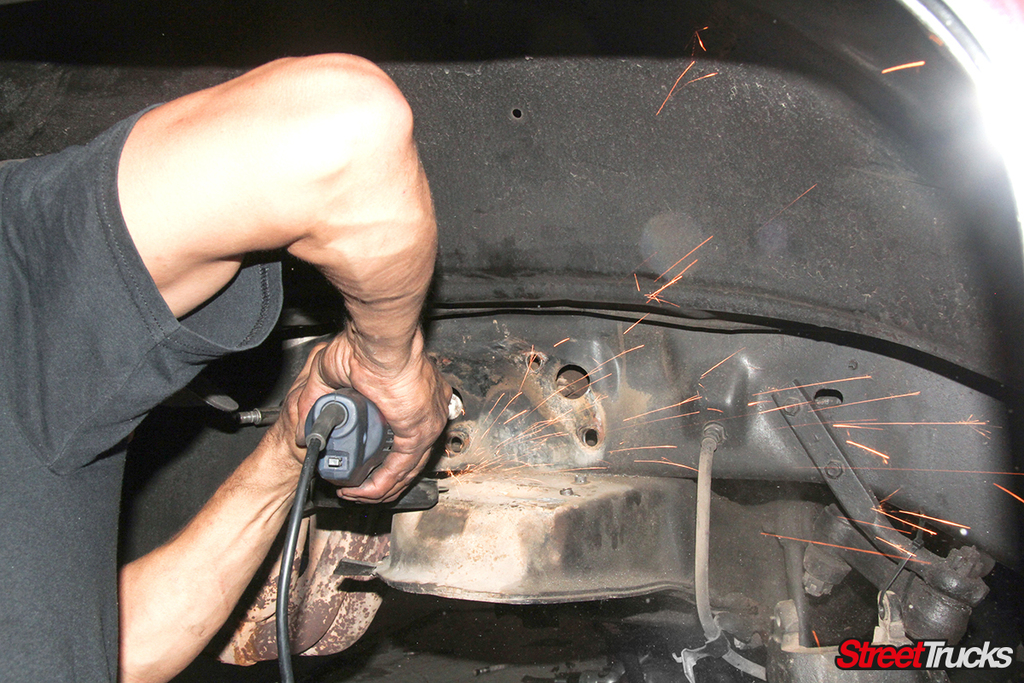
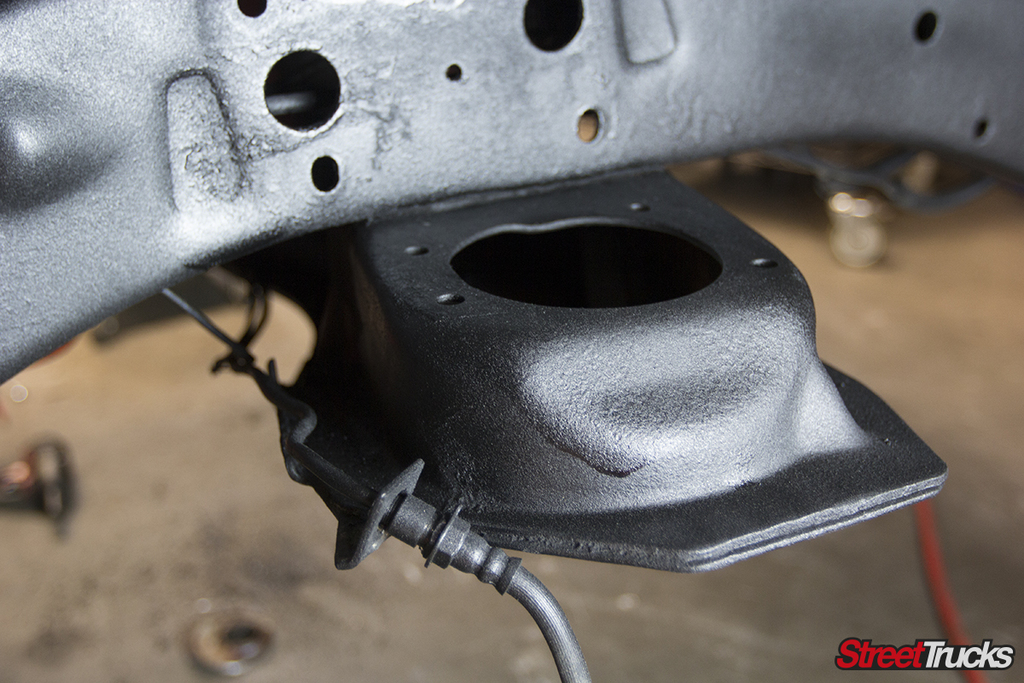
In order for their to be clearance for the upper coilover mounts, the factory spring perch needs to be slightly modified. Using a pneumatic punch Tyler was able to remove the original brace and grind off the old studs.
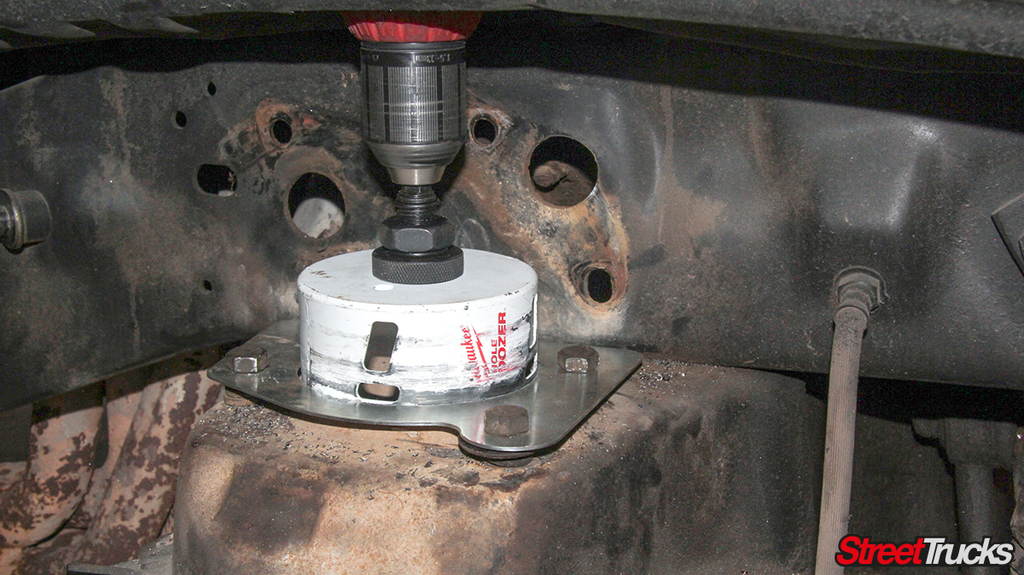
The new CPP upper CNC-bent and laser-cut spring pocket bracket has the appropriate sized hole already cut into it and all the hardware mounting holes as well.Simply line up the new bracket, use a hole saw to cut the factory spring pocket and reassemble. This is also a great time to add some black undercoating.
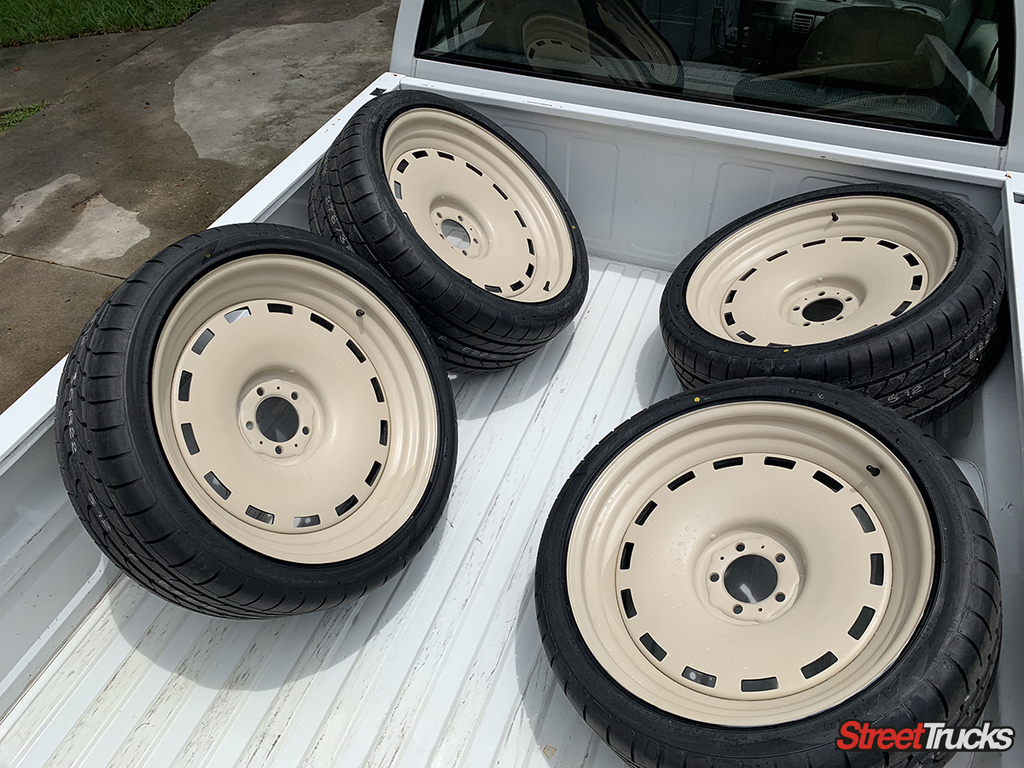
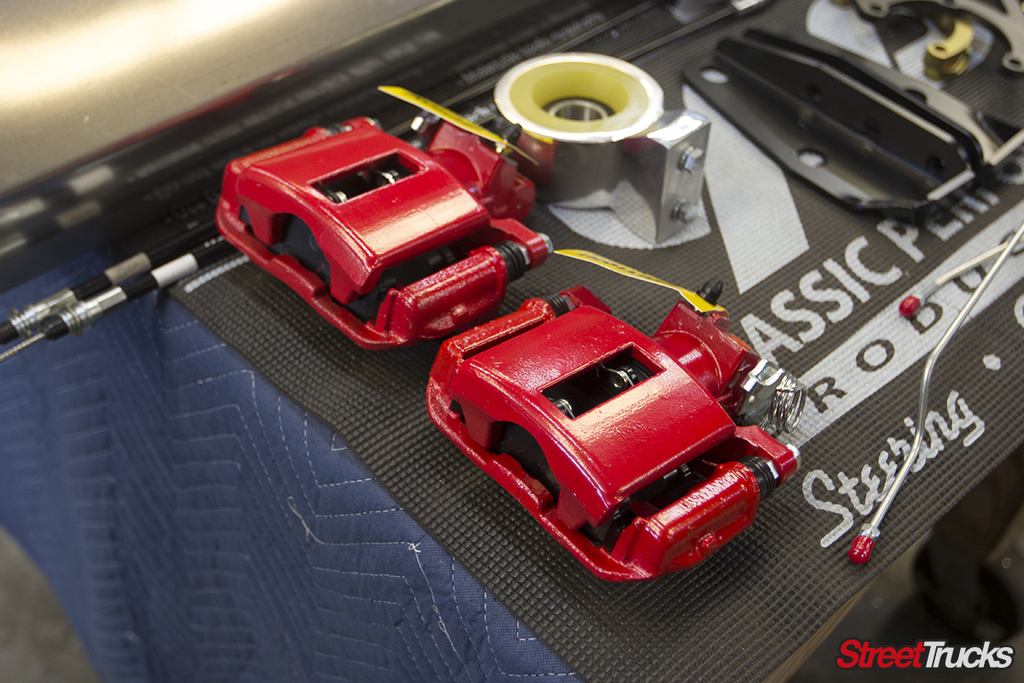
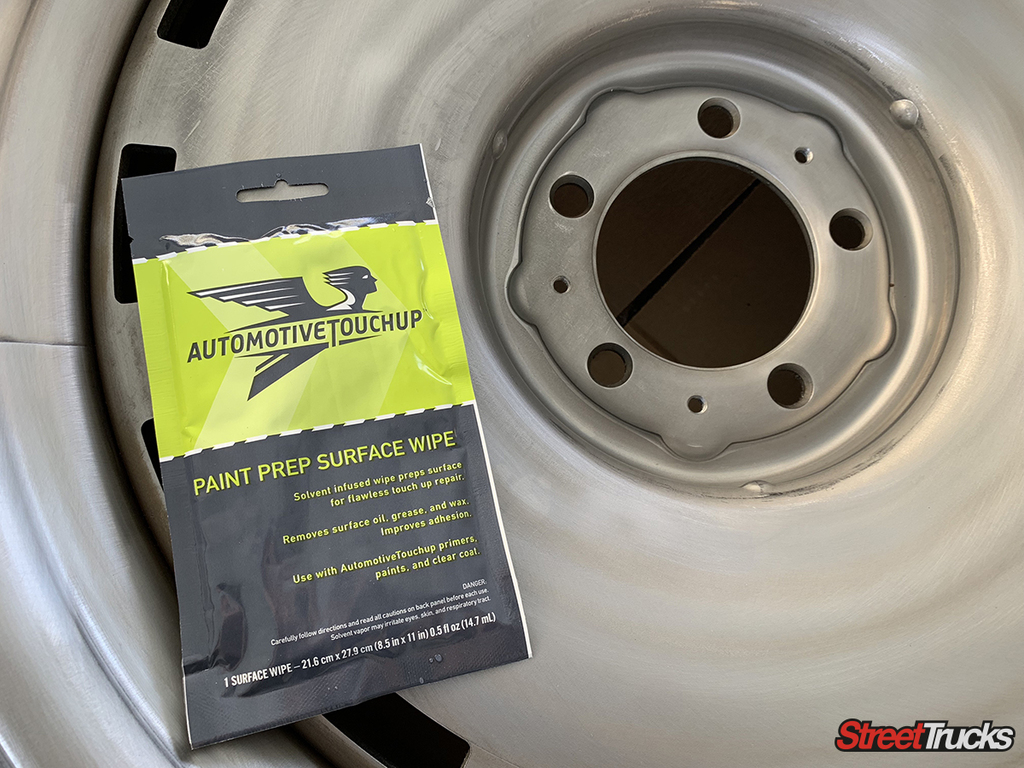
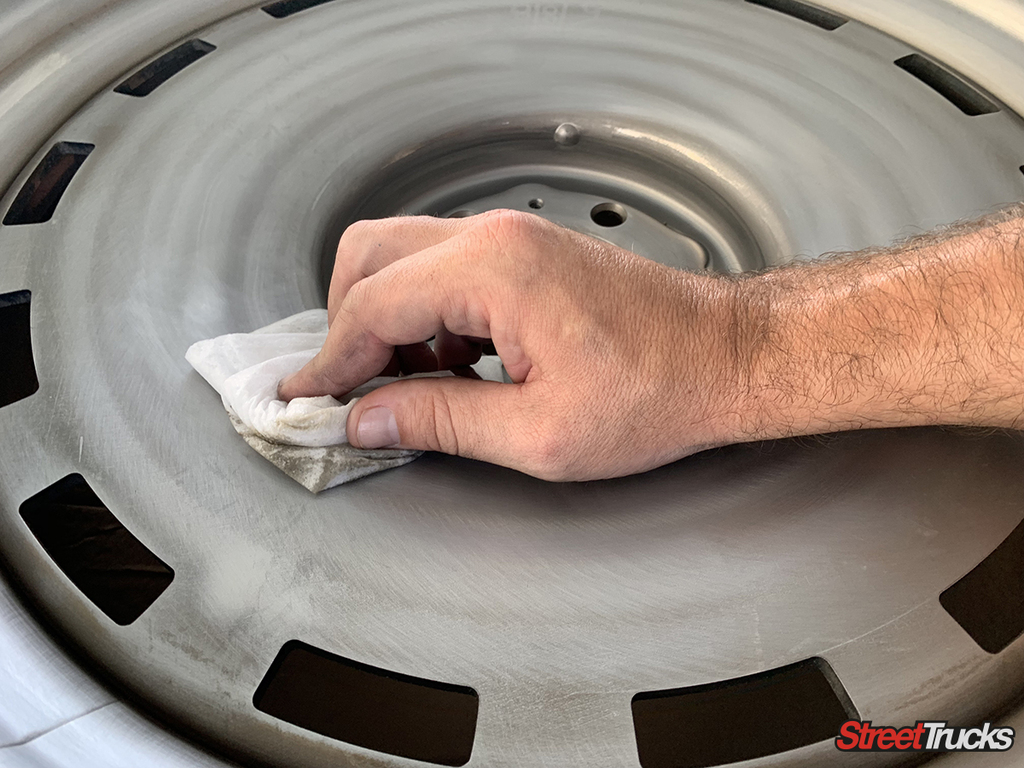
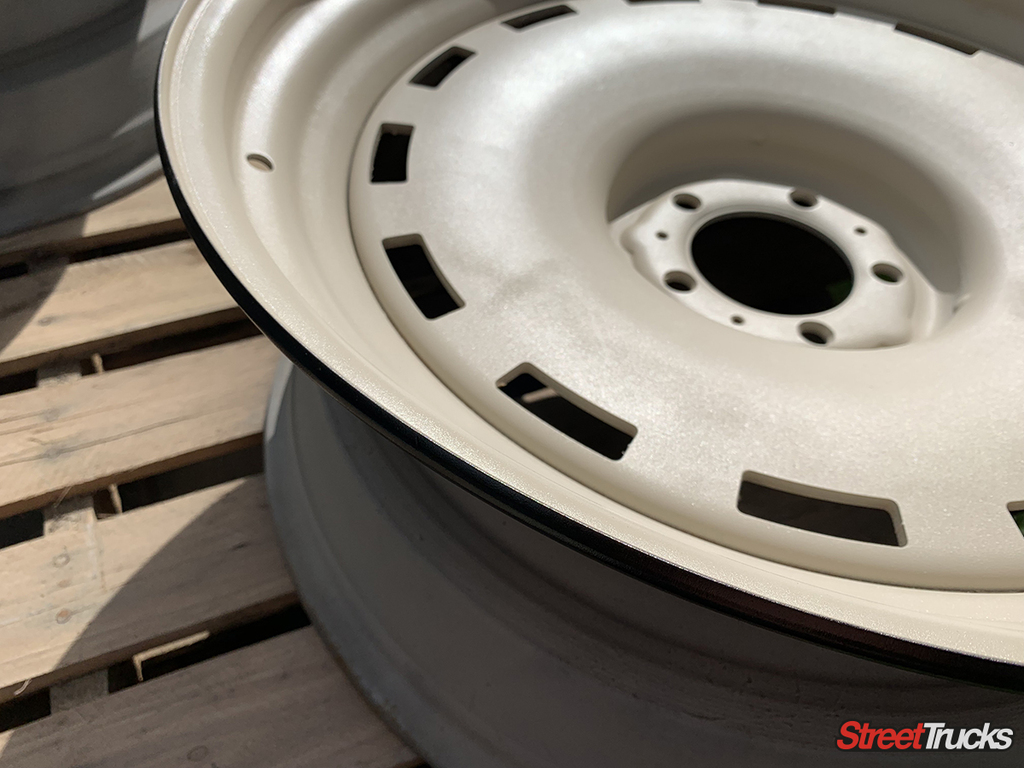
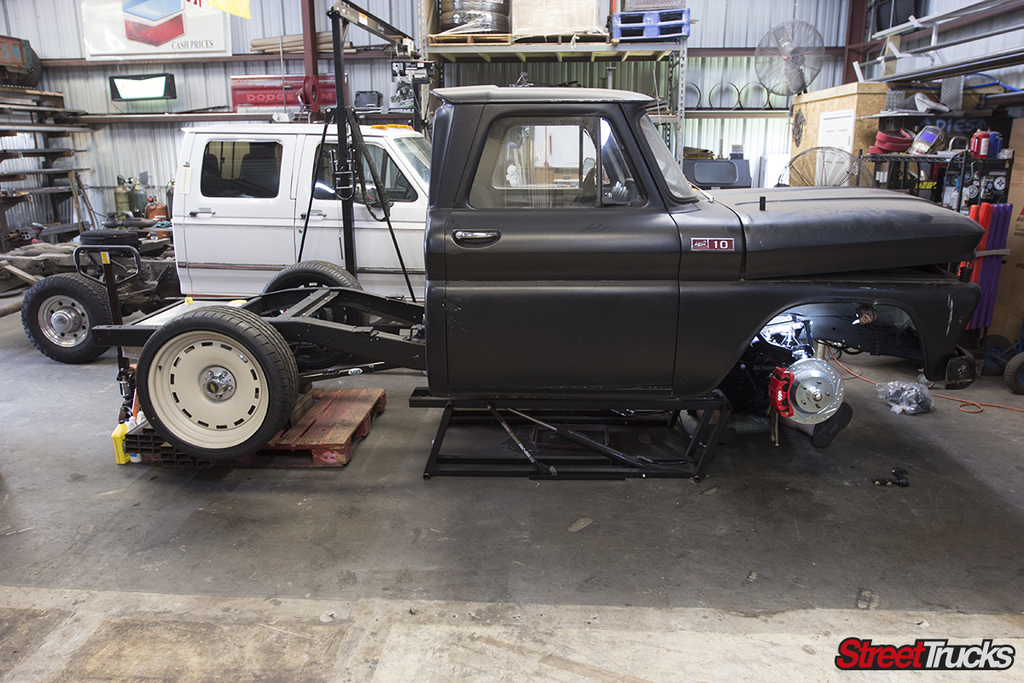
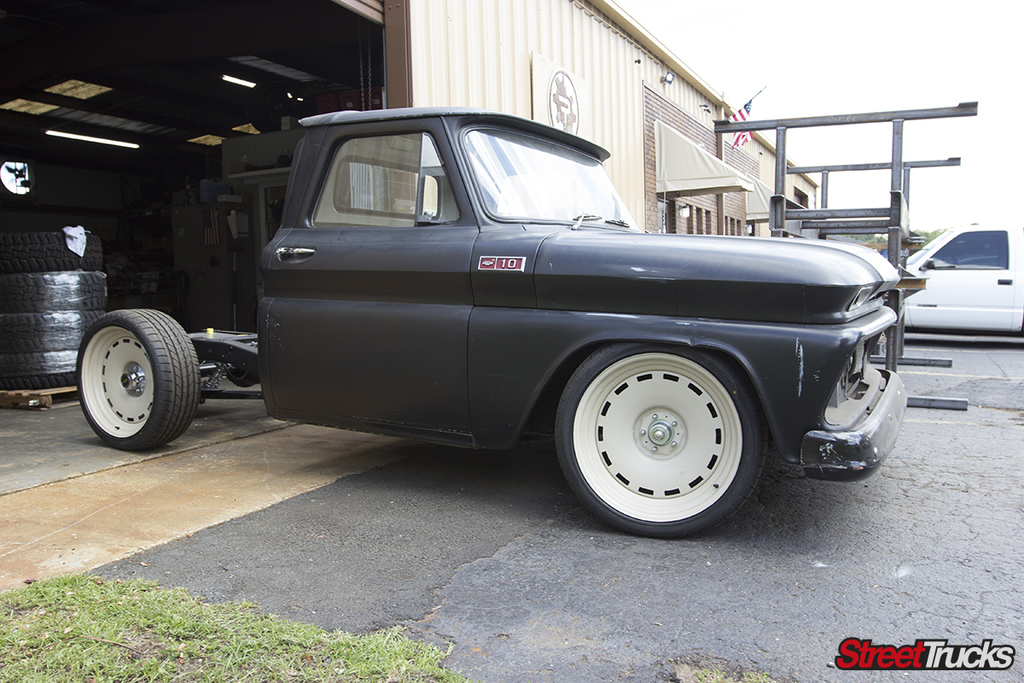
After installing the lower control arms, upper control arms and coilovers yo can get a real feel for how well this system was designed. Fully adjustable, incredibly strong and engineered with a DIY mindset.CPP’s 6 piston brake calipers are a 2-piece forged caliper design with six cross bolts for added strength. The piston sizes are staggered to minimize tapered pad wear and it uses the same pad as the C5 (1997-2004) and C6 (2005-2012) Corvette for an easy-to-find, cost effective pad replacement. Kits include stainless steel pistons, abutments, noise suppression springs and dual seals to meet DOT specifications.With the front and rear suspension complete its time to mount up our news Detroit Steel Wheels. We ordered these 22-inch wheels raw so we can add a custom color, although MobSteel offers them in a powdercoated version as well.To match the interior of the truck we called up our friends at Automotive Touch Up for some cans of Fawn colors automotive paint. Automotive Touchup products make is easy and affordable to match your trucks factory colors thanks to ATU’s precision touch up paint technology. We were able to avoid the expensive body shop by ordering our OEM factory matched paint and spraying it ourselves.First we used ATU’s pre-prep cleaning wipes to clean the oils off the rims that Detriot Steel Wheels uses to make their clean cuts.
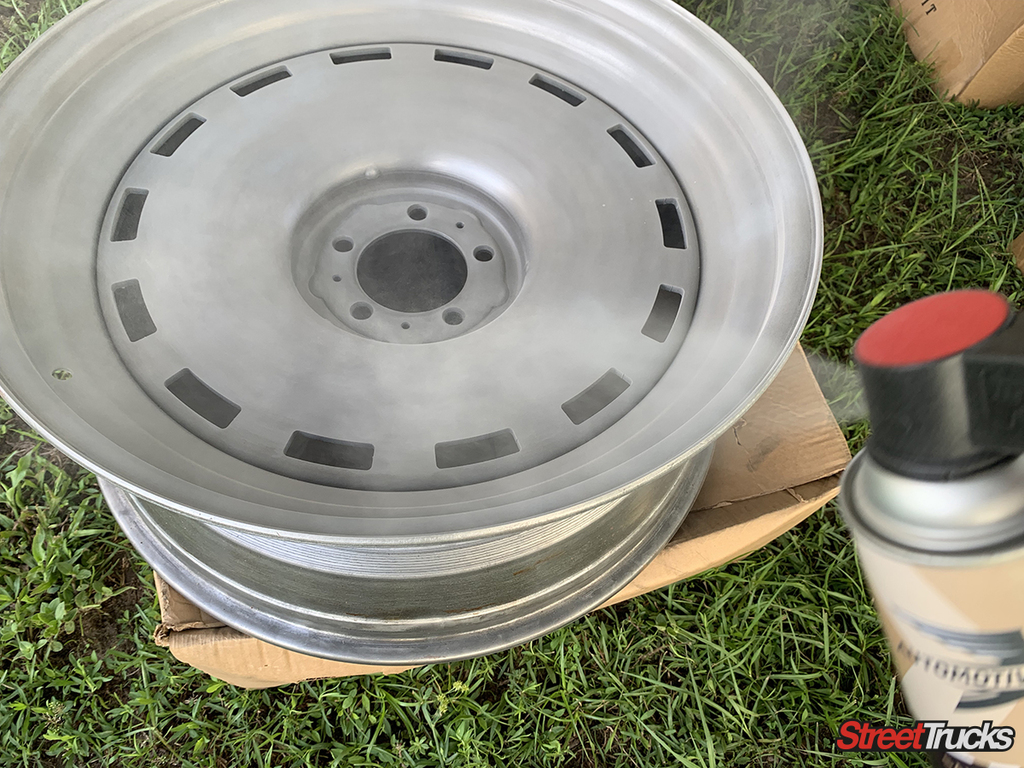
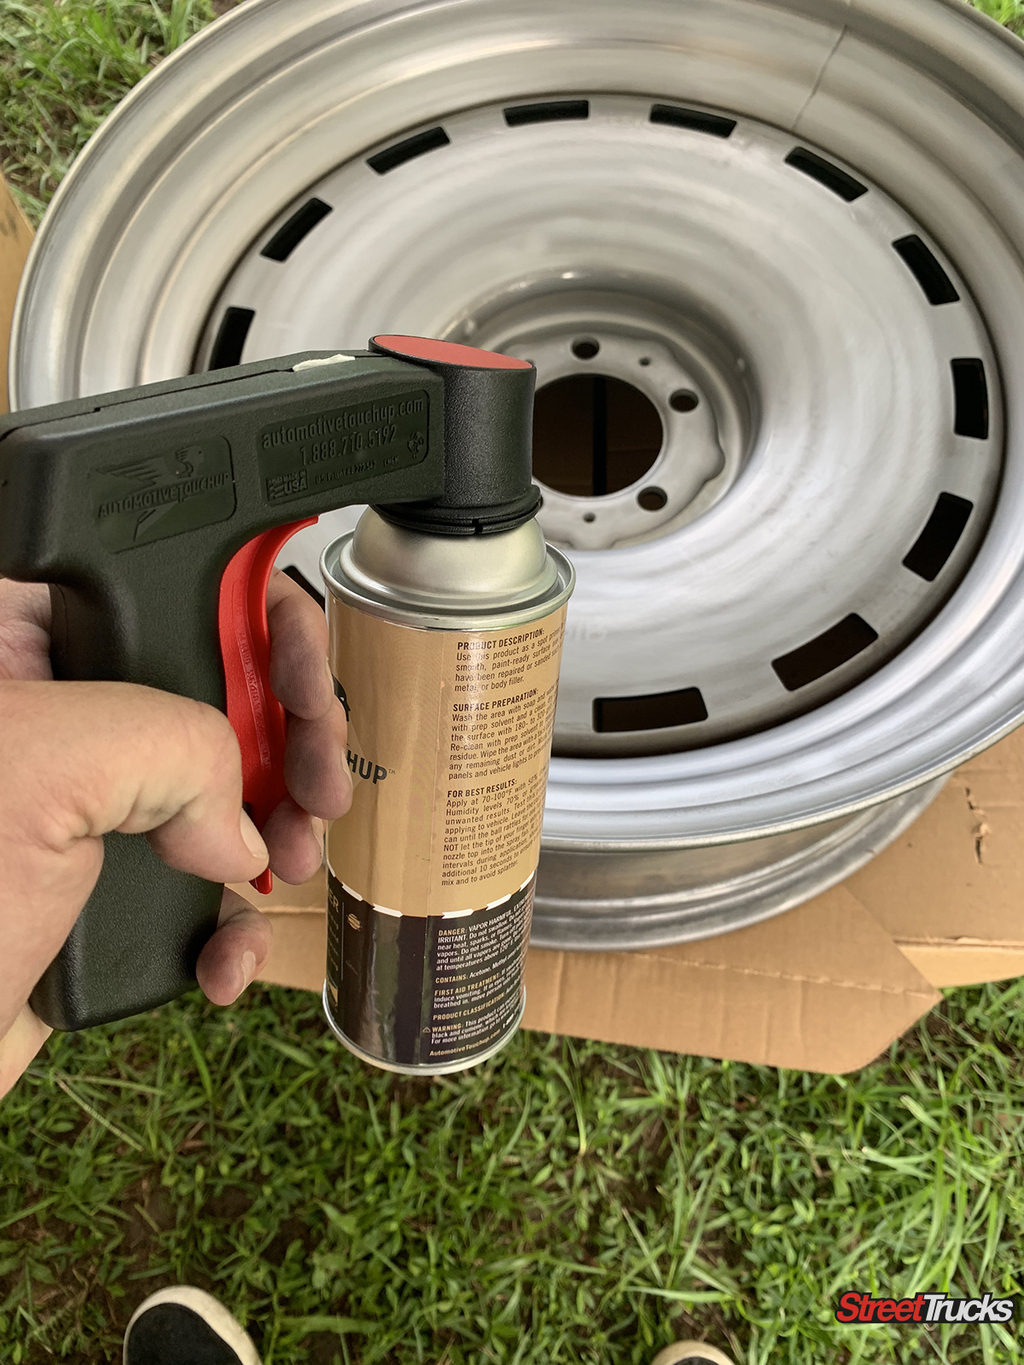
ATU also supplies a handle from their spray cans so you get an even clean coat. Primer, base coat and clear coat go one one at a time with a little patience in between. If you take your time you will be incredibly impressed with the finish you are able to get.
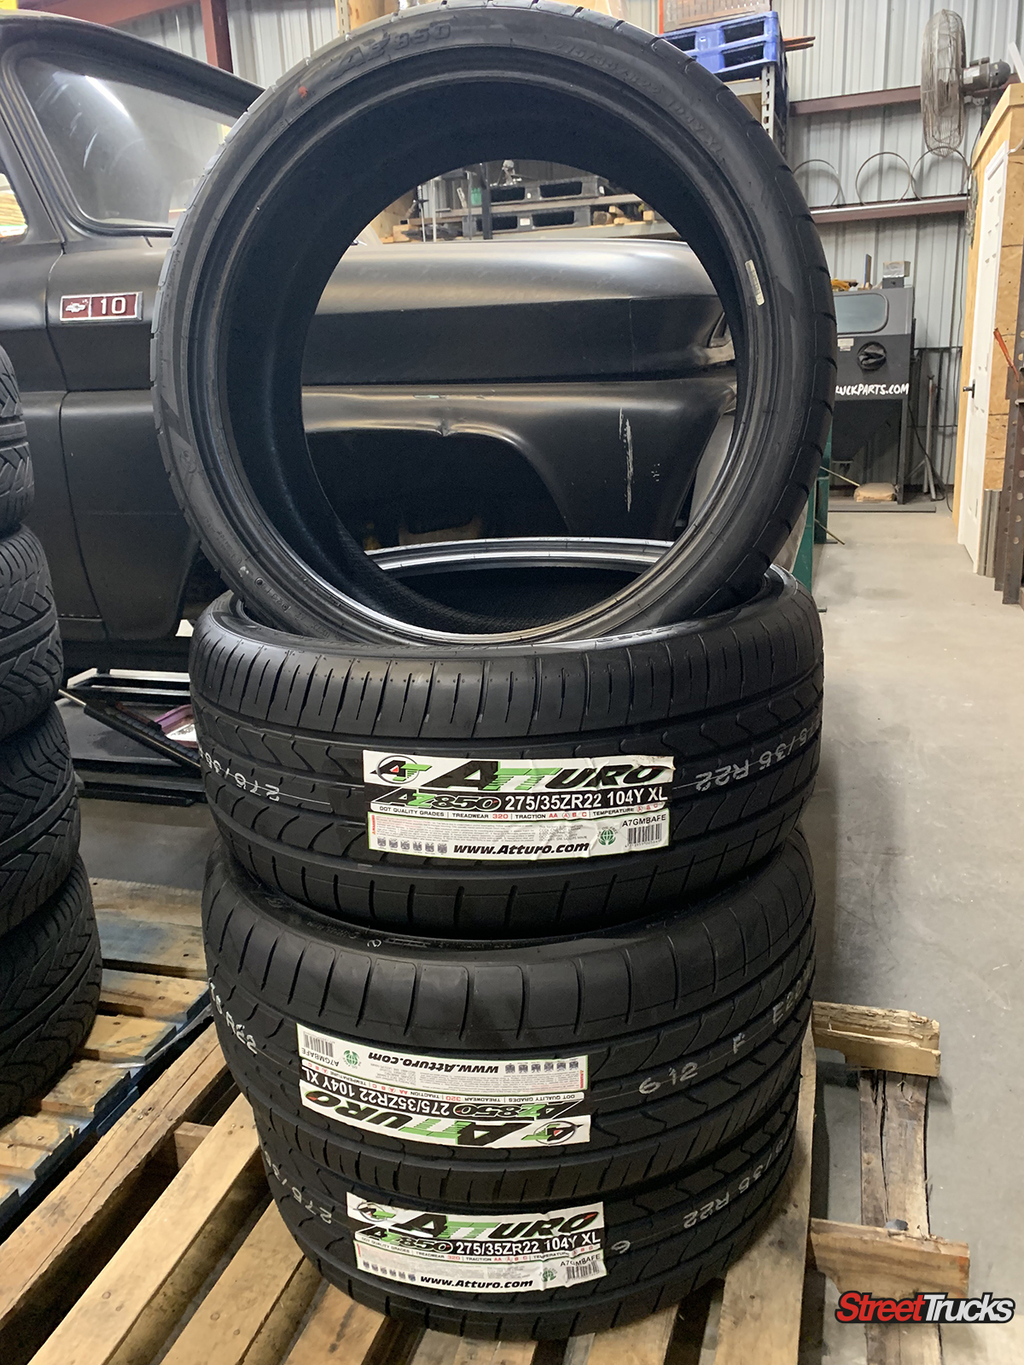
Now that the wheels are complete its time to mount the tires. We chose a set of 265-35-22 Atturo AZ850 tires for the build to maintain a budget without sacrificing ride quality. The unique compound and tread design of the AZ850 were specifically engineered for the contemporary performance utility vehicle. The result is a rubber compound that helps reduce rolling resistance, which, in turn, allows the tire to run cooler at high speed.
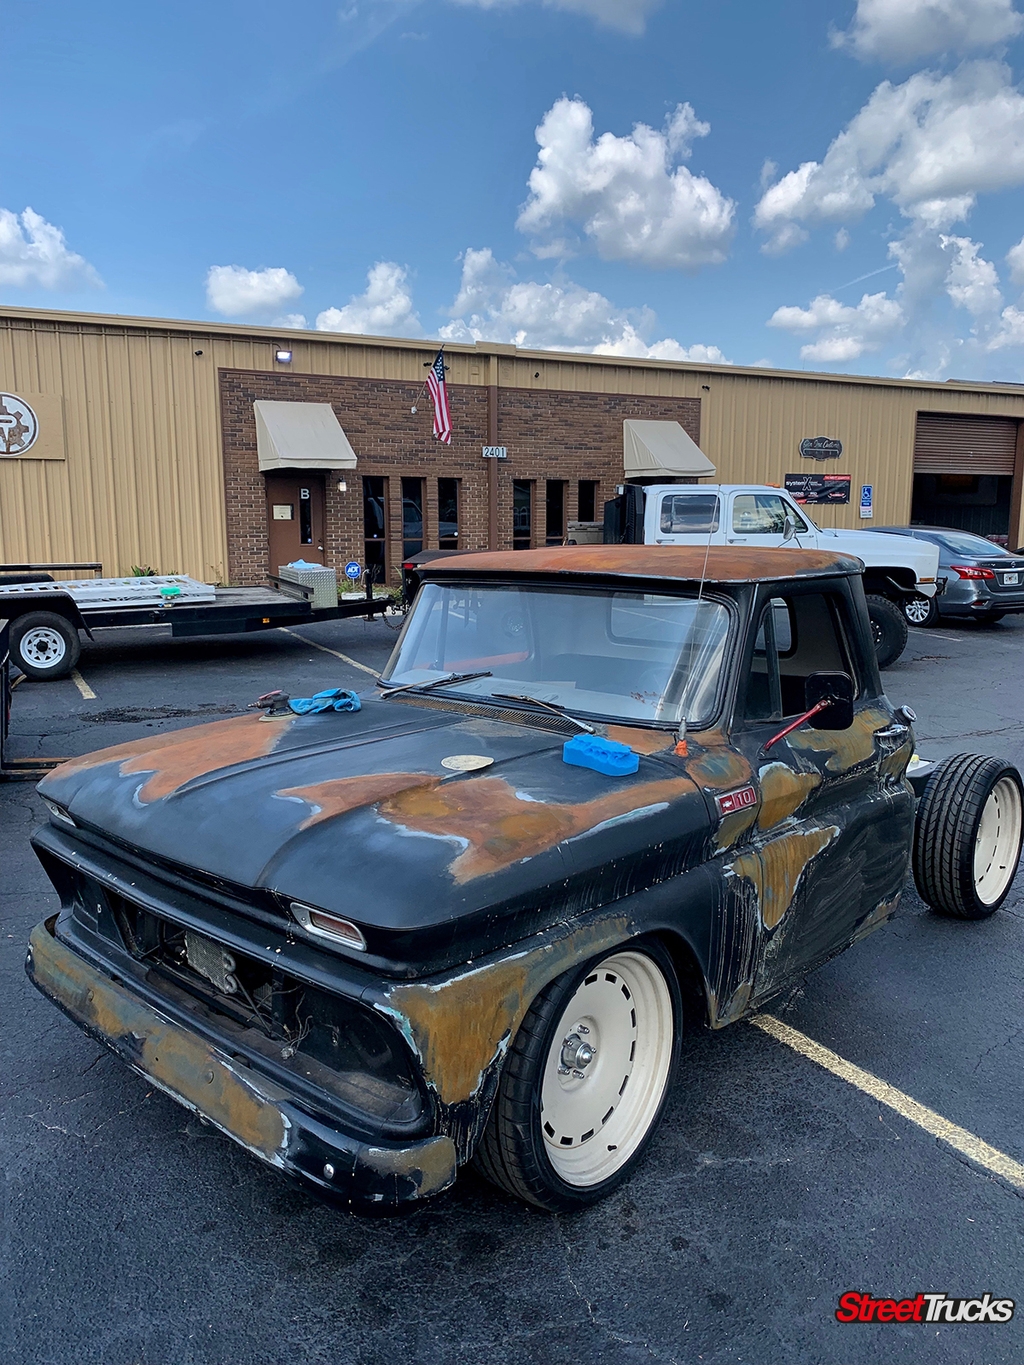
Mounting the wheels and setting the truck on the ground is one of the best moments in any truck builders life. You finally get a real look at the truck sitting on its own weight. Looks better and performance like never before, the perfect combination!
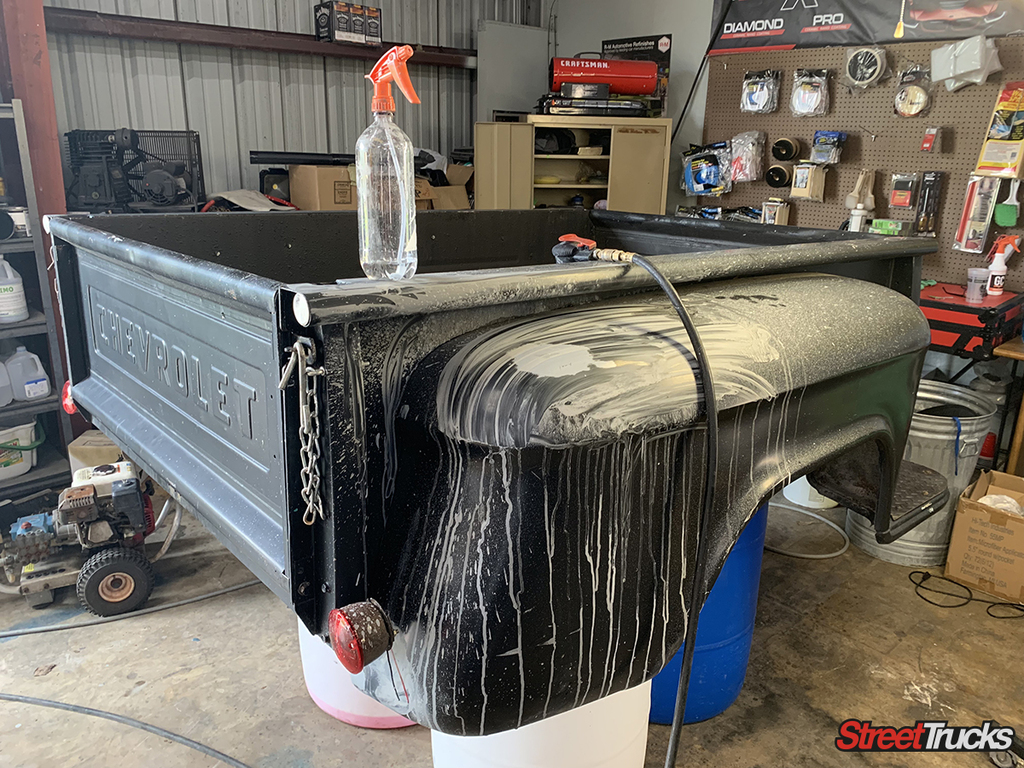
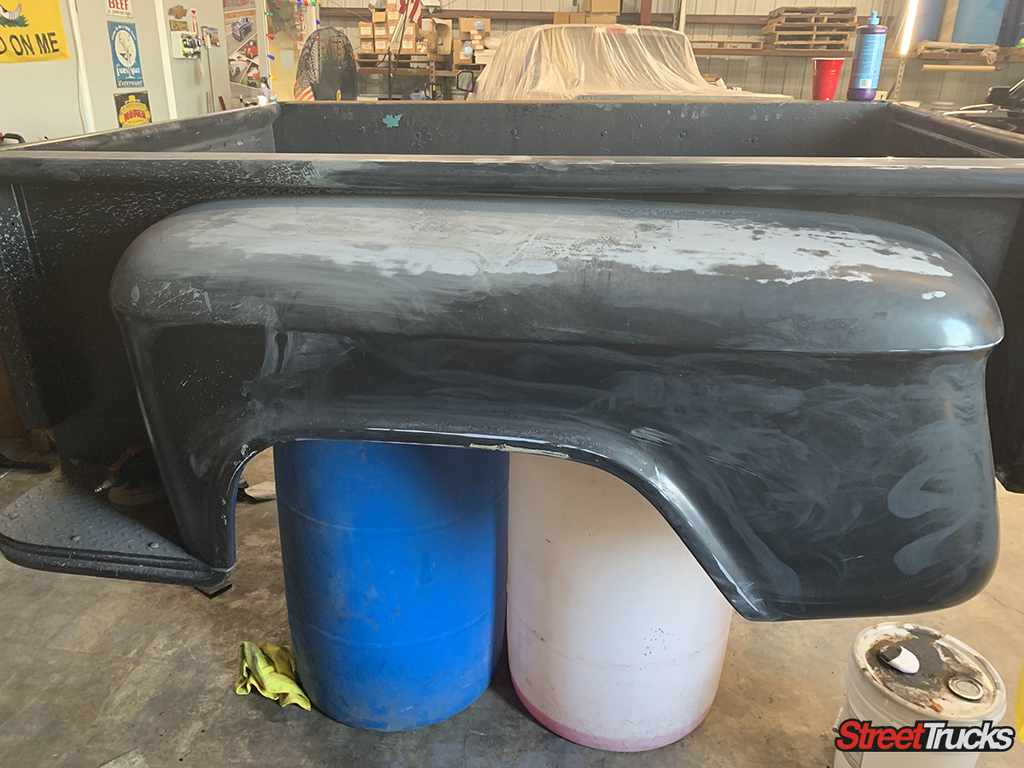
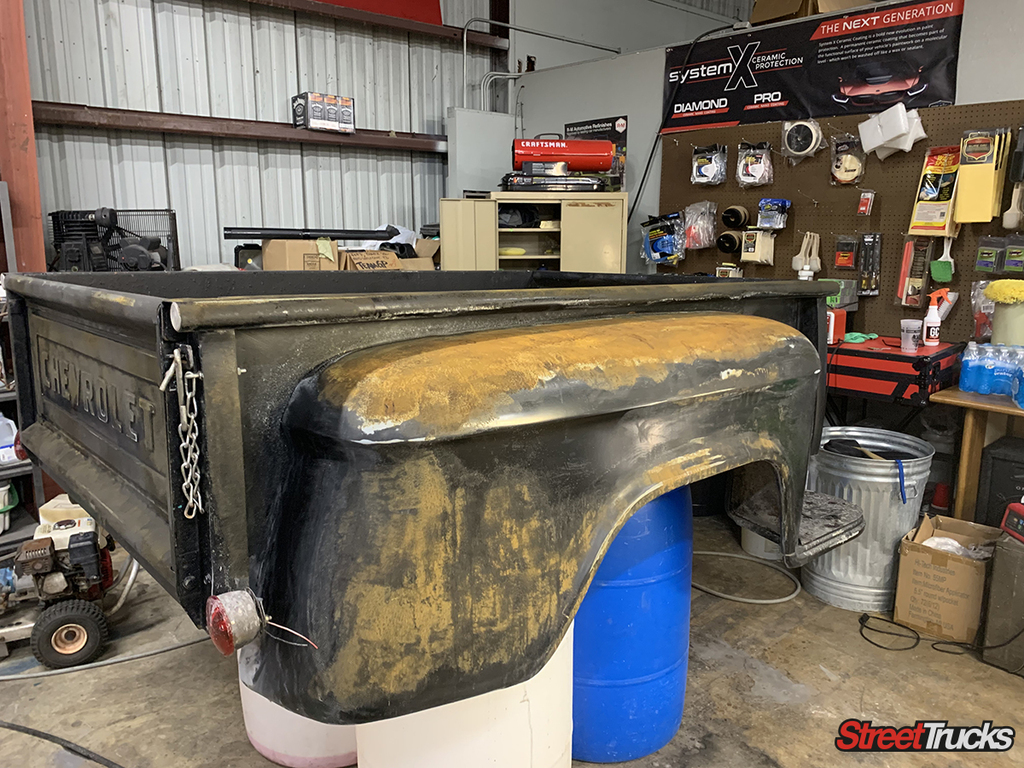
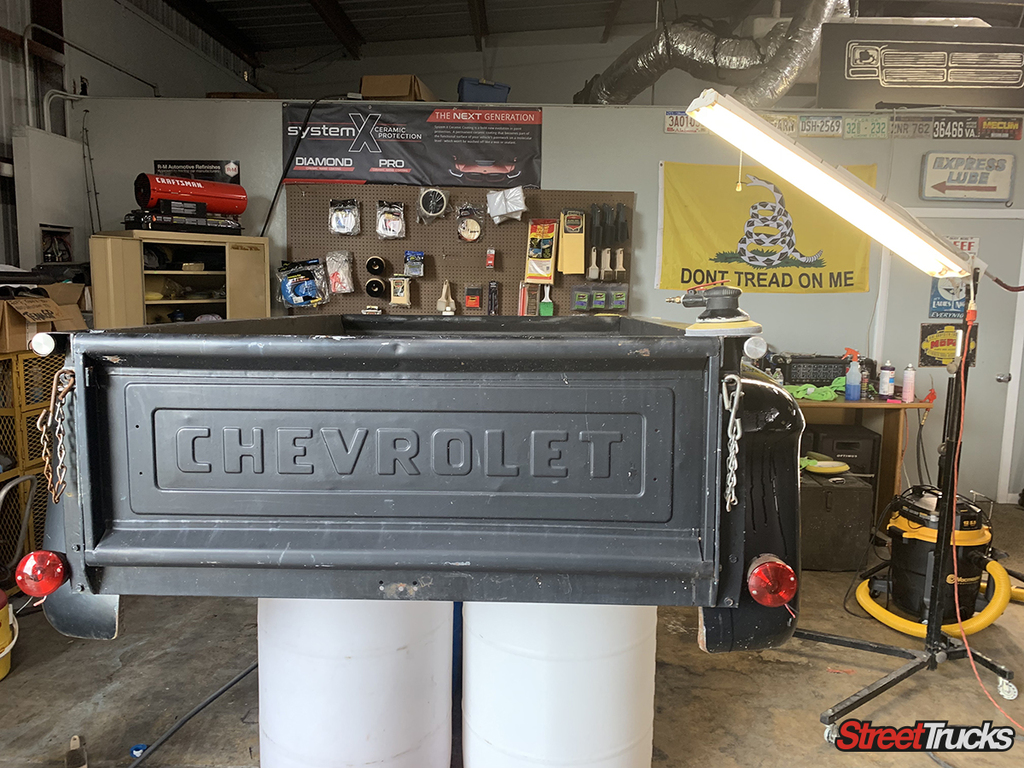
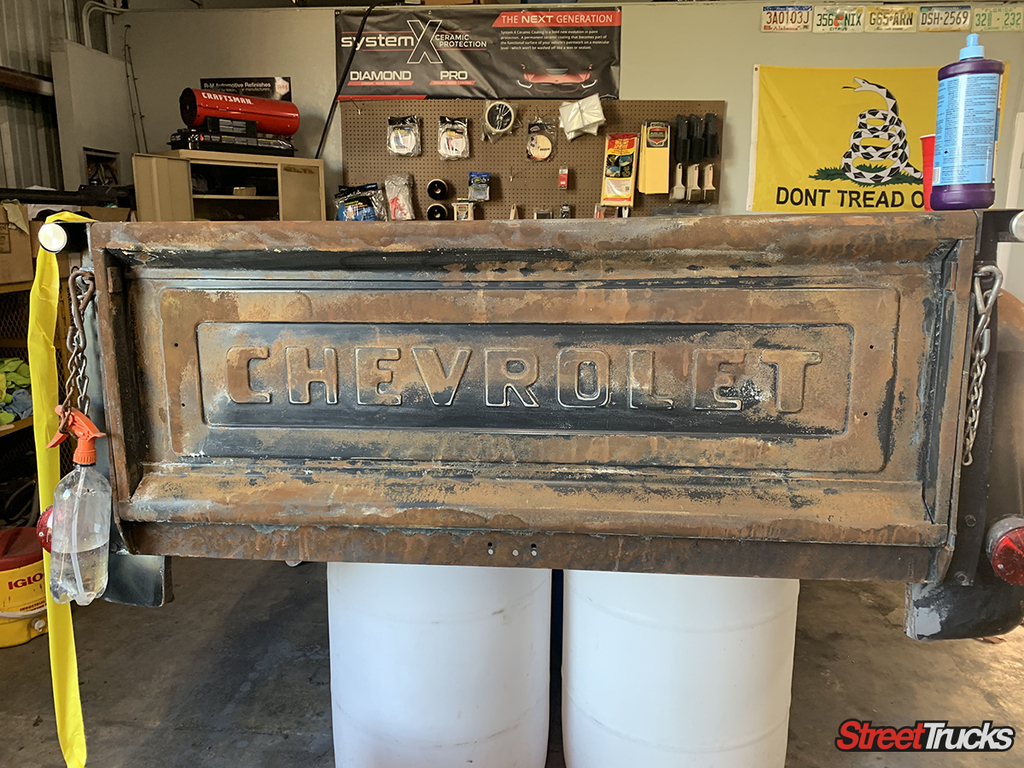
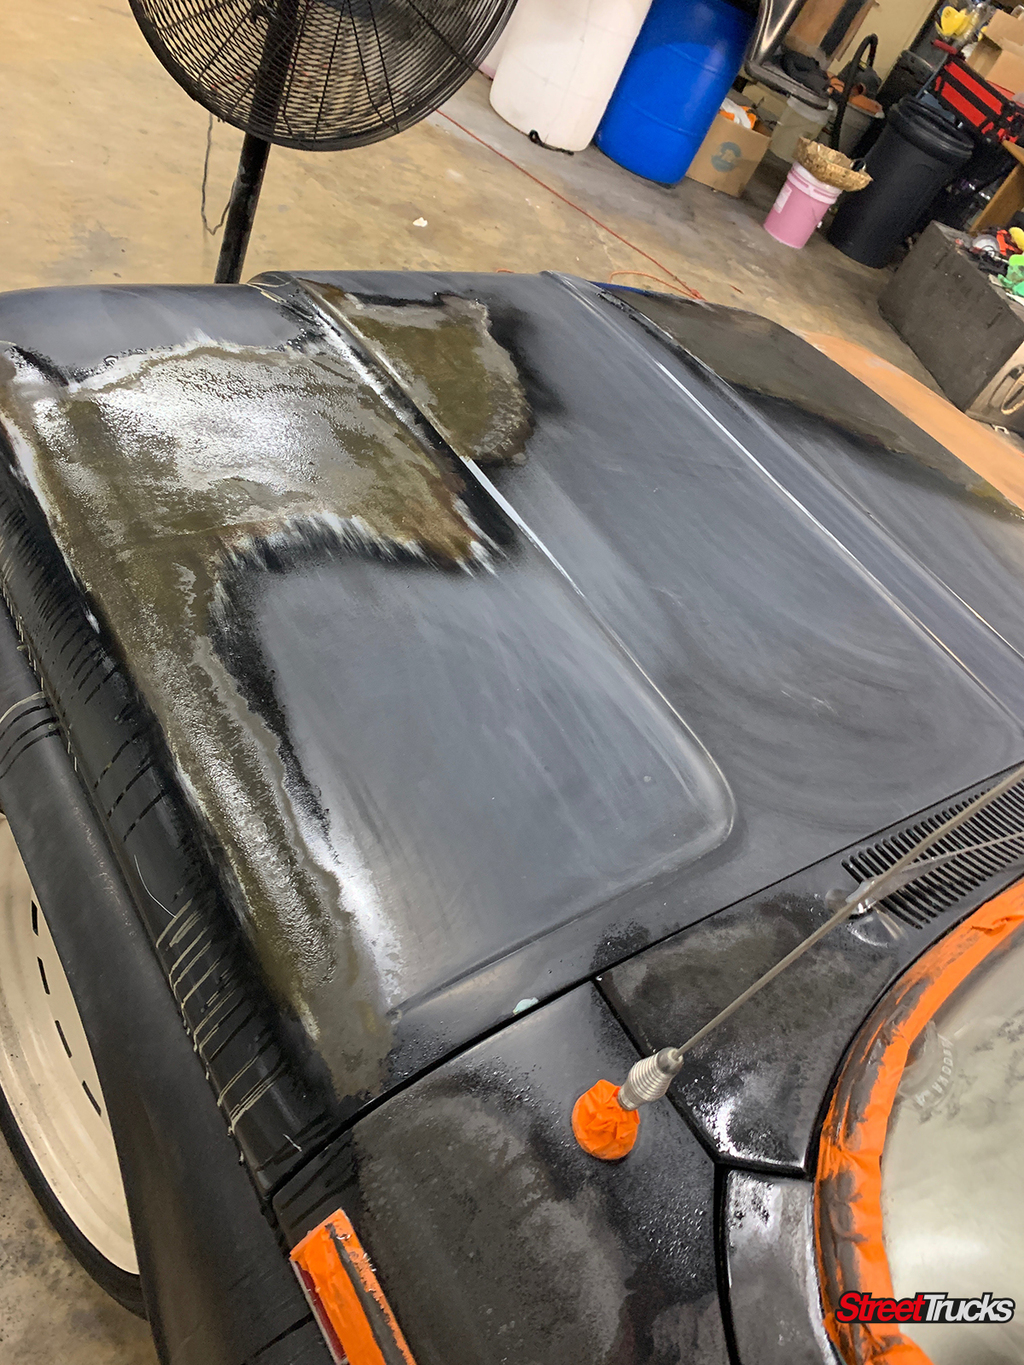
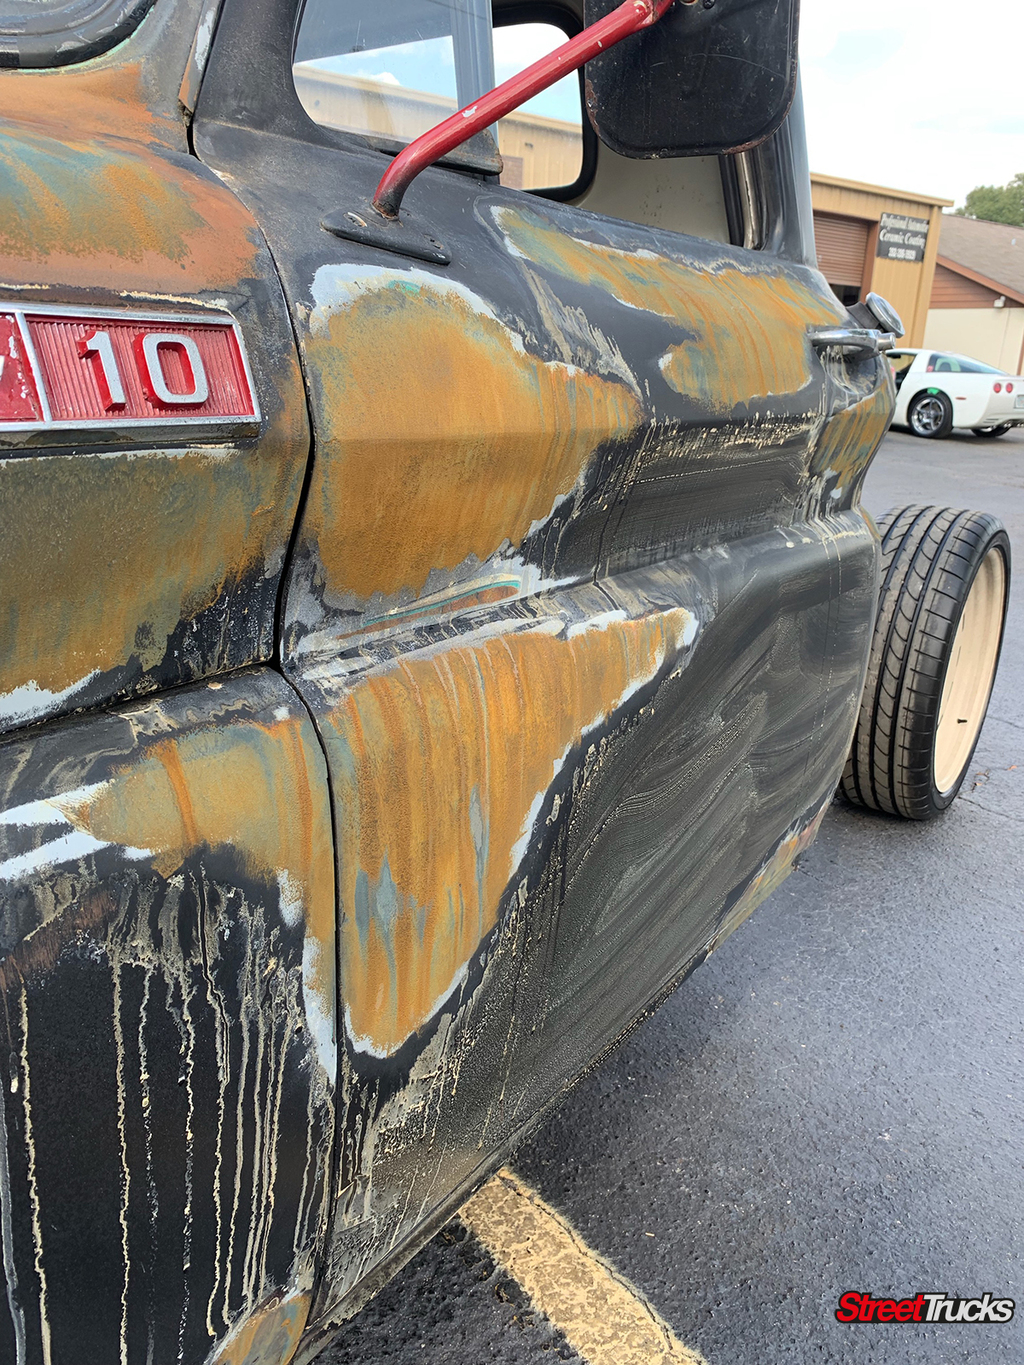
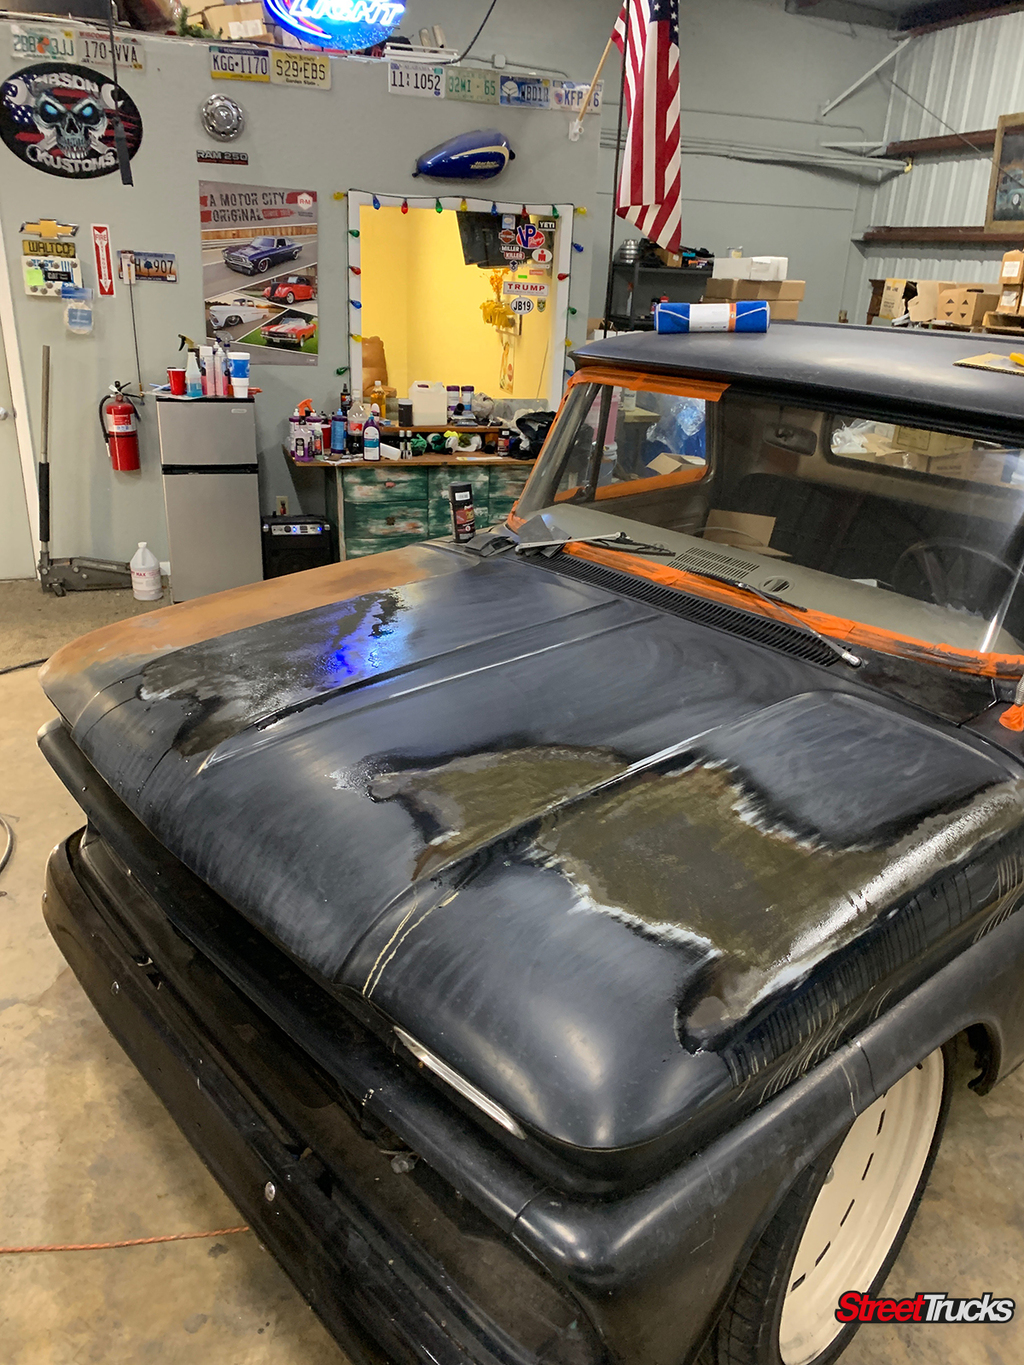
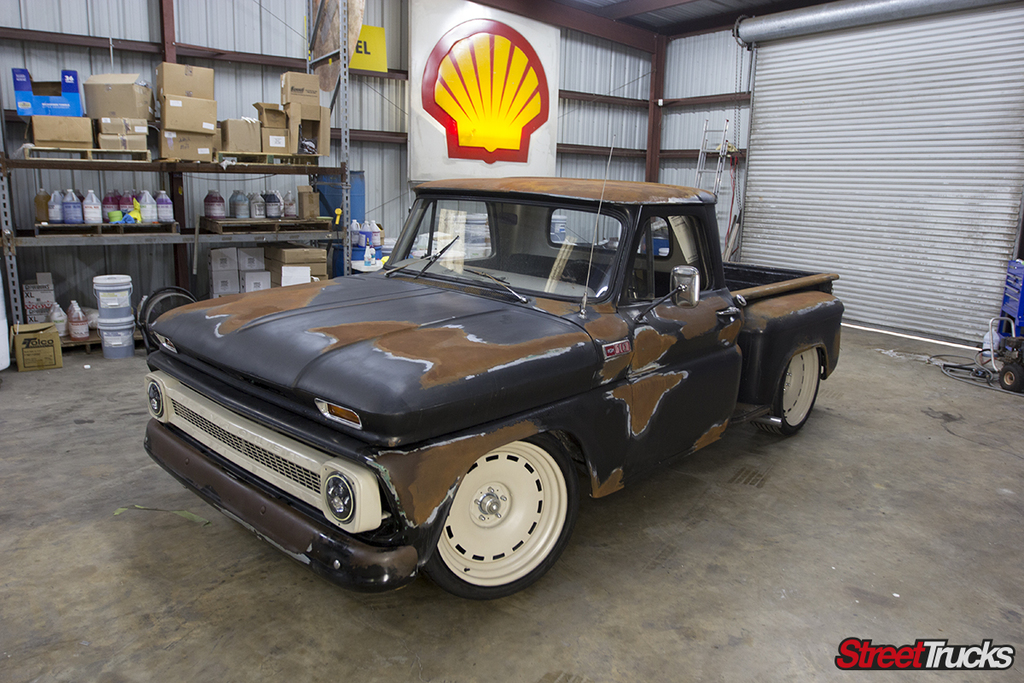
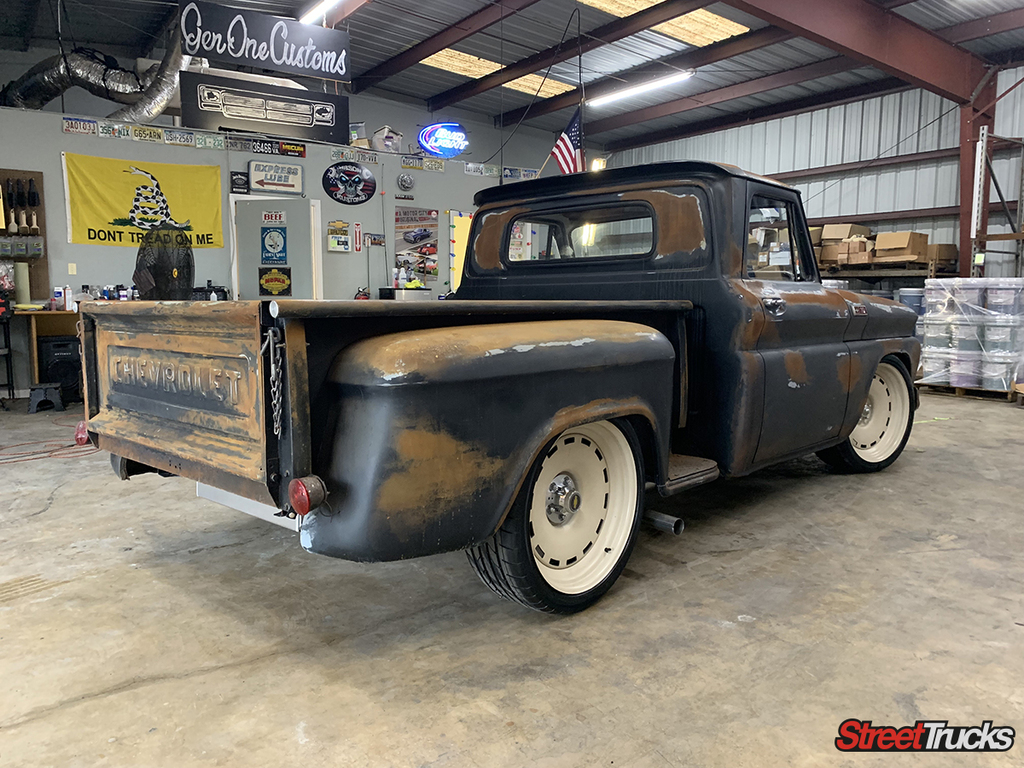
Before we can put the bed on we have to take care of this old crusty body work and paint. The options include a fresh new paint job which is way out of our budget or a cool forced patina finish that is very much in style nowadays. Luckily for us, Jeff Lagasse of Gen One Customs happens to be right next door and he is a master of faux finish disaster.Jeff’s unique technique is a bit of an industry secret so we cant get to detailed but if you call him up he can explain the whole process.Just look at how amazing this trailgate looks now that it’s covered in real surface rust! No rust holes, no sharp edges, just a chemical reaction on original steel panels.After installing our new Automotive Metal Direct hood and fender, Jeff moved onto to the front of the truck in order to carry the patina throughout. When you know what you’re doing, forced patina is an artform all of itself, and we love it!
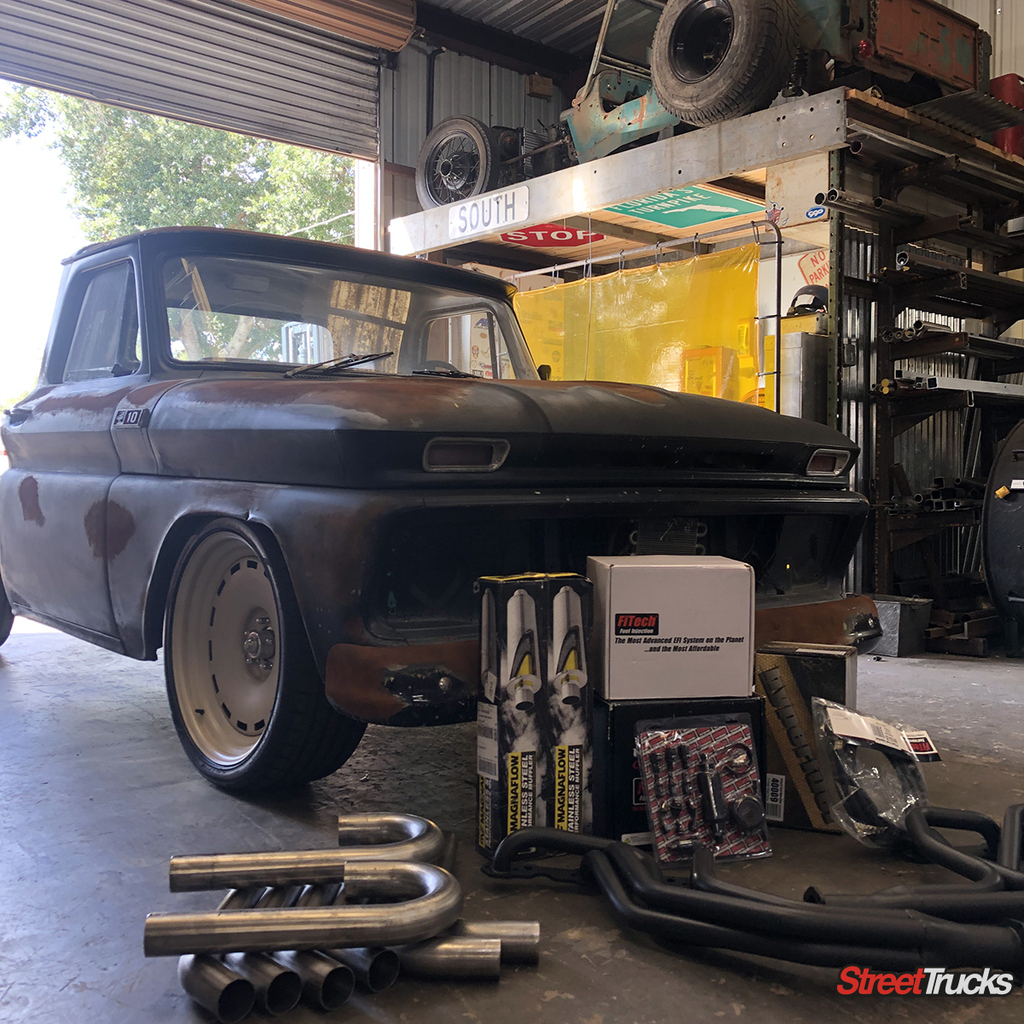
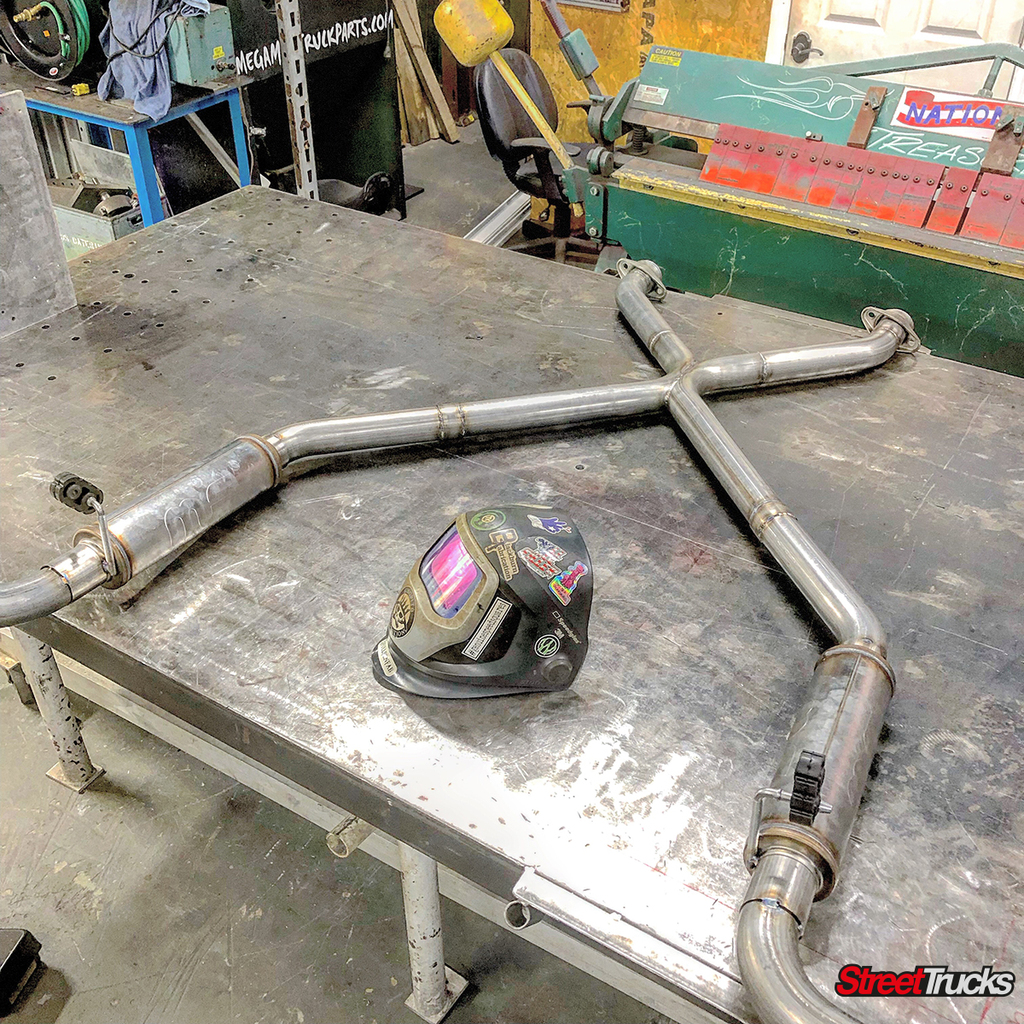
Before bolting the bed on Jeff moved it out into the sun to finish the finish. This also gave Dallas a window of opportunity to knock out the exhaust before finally mounting up the bed.To complete the exhaust work we ordered a universal Magnaflow dual exhaust kit along with Hooker Headers for our SBC 350. Some masterful tig welding and meticulous pipe bending was all Dallas needed to accomplish for a trick look and amazing rumble. Wait till you hear this thing on our youTube channel!
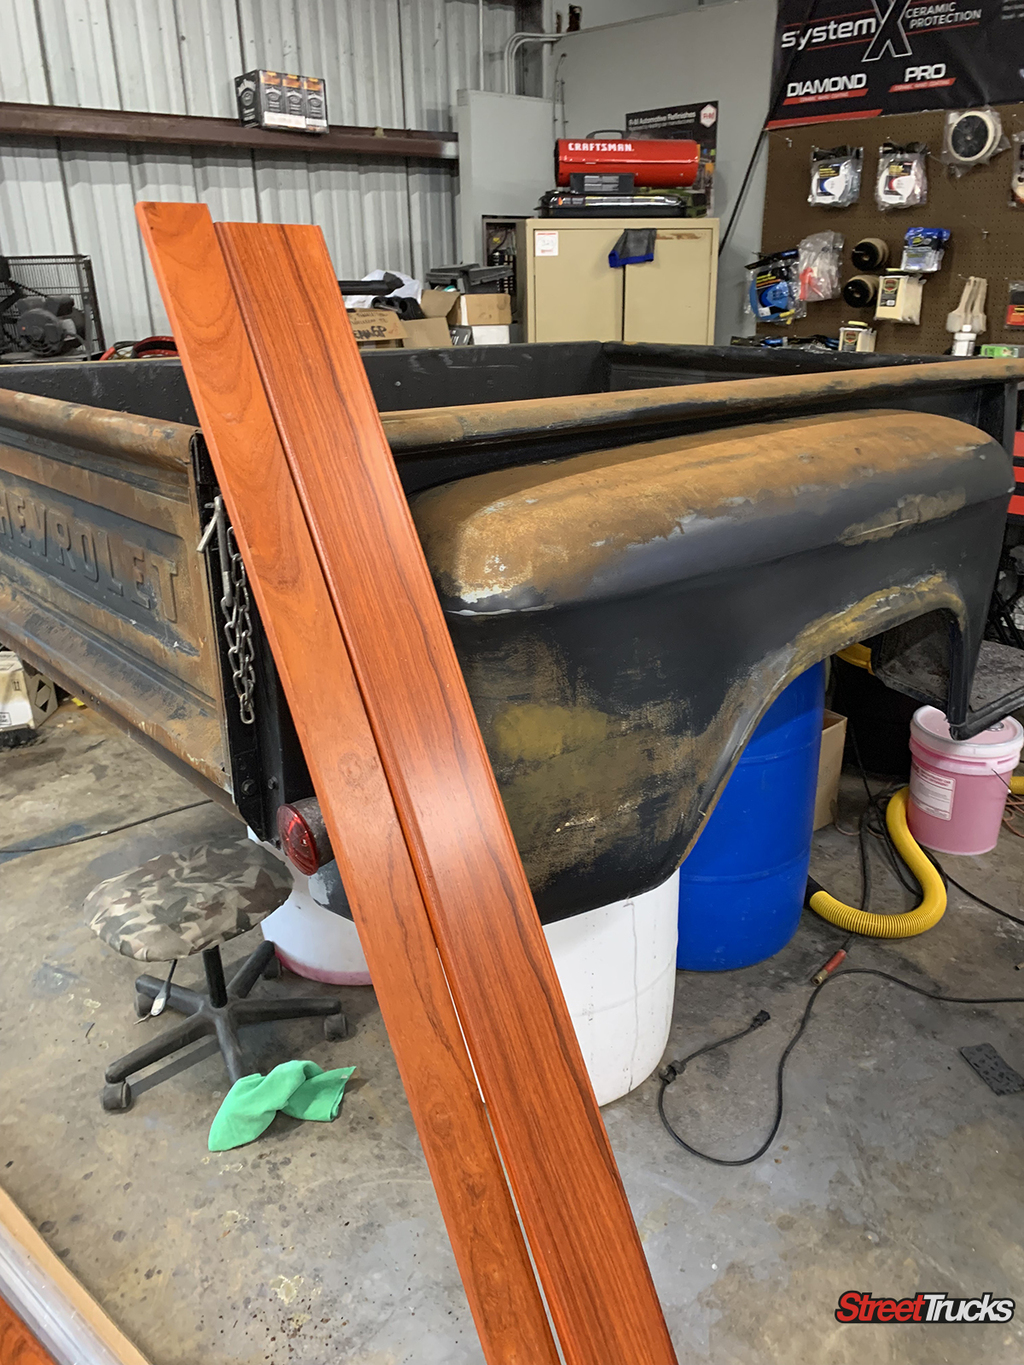
The final step of stage one is the installation of our Bed Wood and Parts wood bed floor. This kit is ordered specifically for this year truck and style of bed. Its all pre engineered with perfectly cut wood and metal slats. Stick by us with the next issue to see just how easy it is to install this beautiful kit.
Stage 1 Complete! Here is a final look at this truck and its really something to take it. From the patina finish to the perfect stance and those massive steel wheels, we can’t image a better look for ths truck. Stage 2 of this build will be an interior overhaul with TMI interiors, new wiring thanks to Painless Performance and a fuel injection swap using FiTech gear. Stay tuned!!
We use cookies to enhance your browsing experience, serve personalized ads or content, and analyze our traffic. By clicking "Accept All", you consent to our use of cookies. Visit our Cookie Policy for more info.
 Chris Hamilton
.
January 23, 2020
.
C10 Builders Guide
.
Chris Hamilton
.
January 23, 2020
.
C10 Builders Guide
.


Share Link