 Chris Hamilton
.
October 25, 2019
.
C10 Builders Guide
.
Chris Hamilton
.
October 25, 2019
.
C10 Builders Guide
.
Have you been scouring the market for a first-gen C-10 with a big factory panoramic-style rear cab window? Then you know these things are getting much more difficult to find, and if you do locate one, the price tag is substantially higher than its smaller counterparts.

If you happen to track one down that’s a reasonable price, jump on it. For those of us who haven’t been so lucky, there is hope. Be advised that a big-window conversion requires the attention of a seasoned fabricator, though.
The key to this transformation is finding a big window panel for the inside of the cab to pair with the larger window. Surely you’ve noticed that the exterior of the cab has already been designed for this conversion.
That excess sheet metal surrounding the small window opening (but inside of the big window surround) was designed to be punched out by the factory in case an order for a big window came through.
Aside from the inner panel, the only materials needed for the job are a larger window (obviously) and new weather stripping. The rest is skilled labor.
We got a call from Josh Freeman at Freeman Fabrication in Santa Ana, California, informing us that Martin Segovia’s ’64 C-10, aka Red Fox, was going to be rolling into his shop for just such a conversion.
In the bed was a new-to-us big window inner cab panel, a fresh panel of larger glass, seals and weather stripping from Precision Replacement Parts.
It was time for this truck to get a better perspective on where it’s been with a larger line of rearward sight. Follow along and watch how you too can help your C-10’s cab achieve big window glory.
Sources
Freeman Fabrication
Freemanfabrication@gmail.com
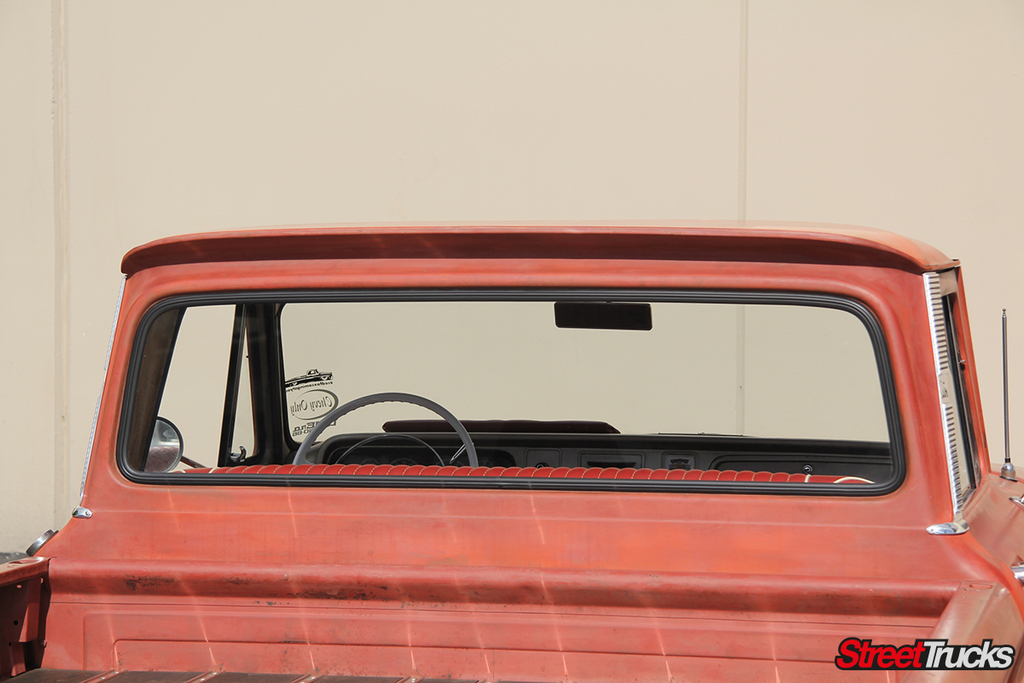
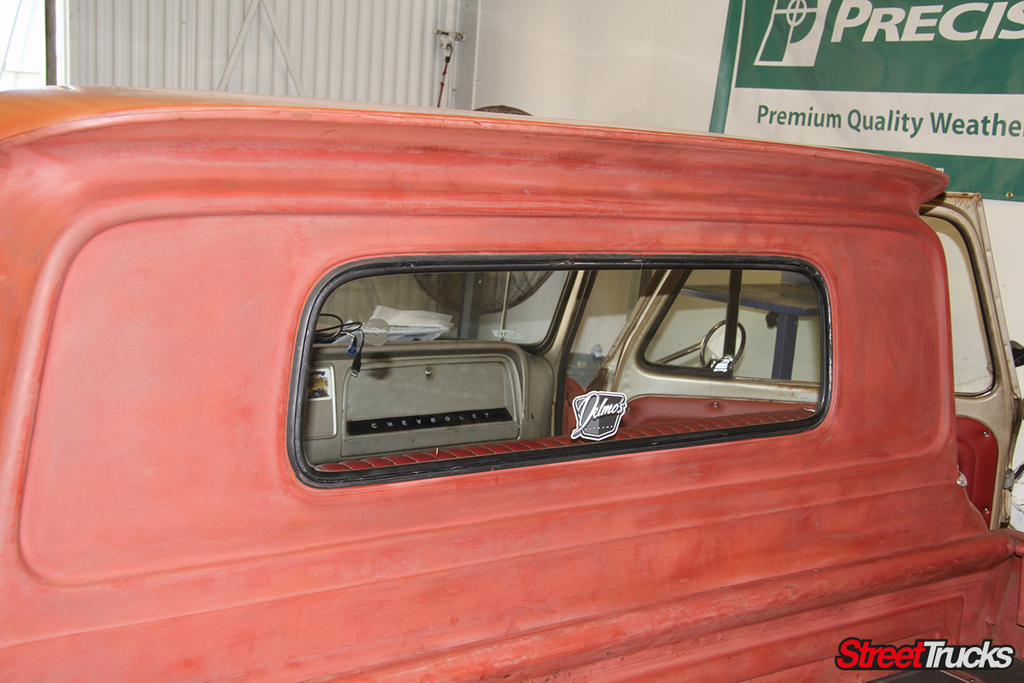
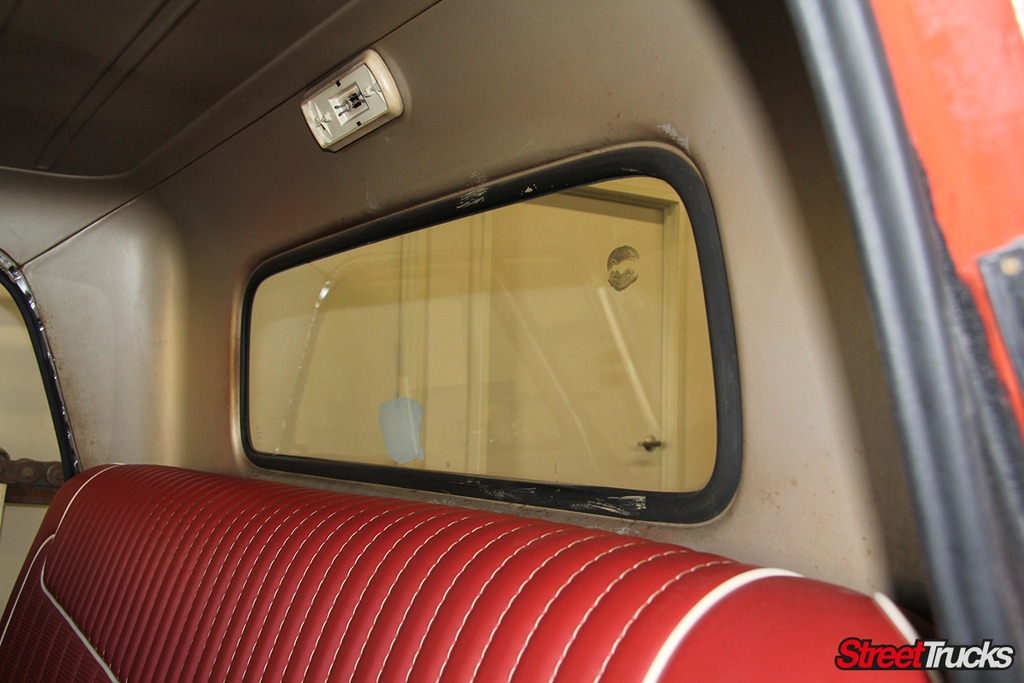 Here’s an inside and outside look at the small back window. It’s likely an all too familiar sight for most of you, but it’s the last time this truck will look like this.
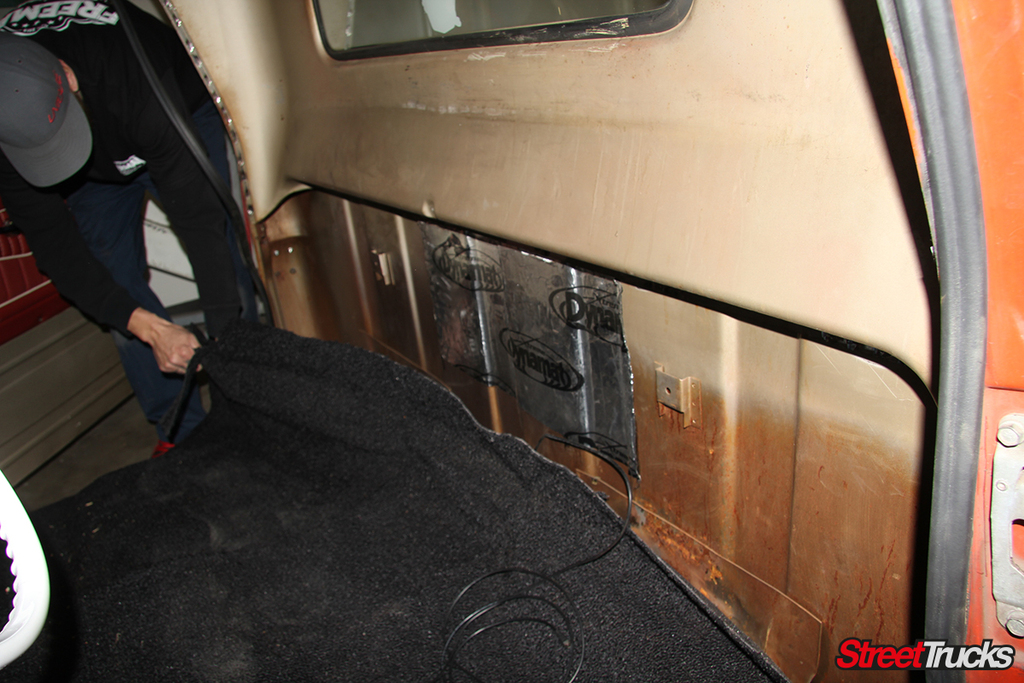 To start, Josh removed the bench seat from the cab. The upholstery work is too nice to subject it to the inevitable sparks that are soon to fly, but every inch of interior space will be necessary to get the job done.
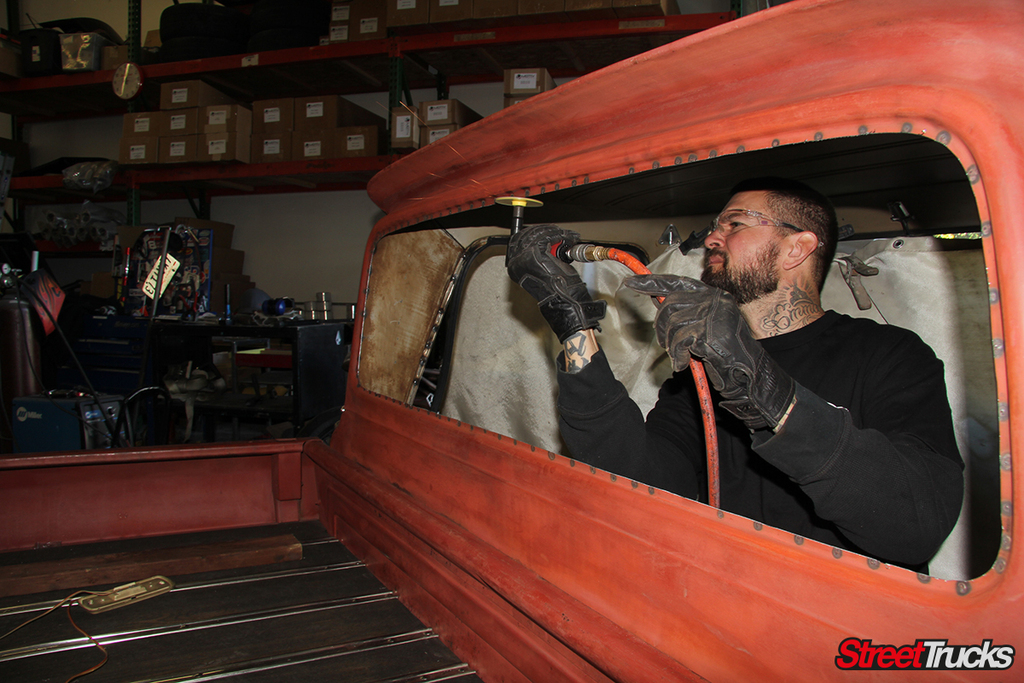
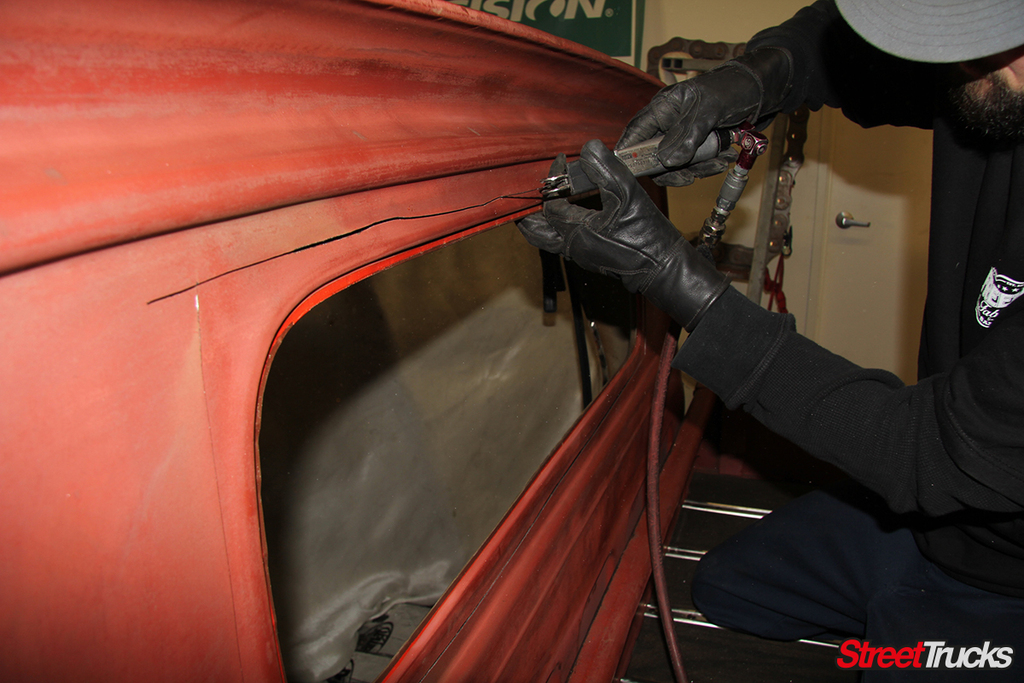
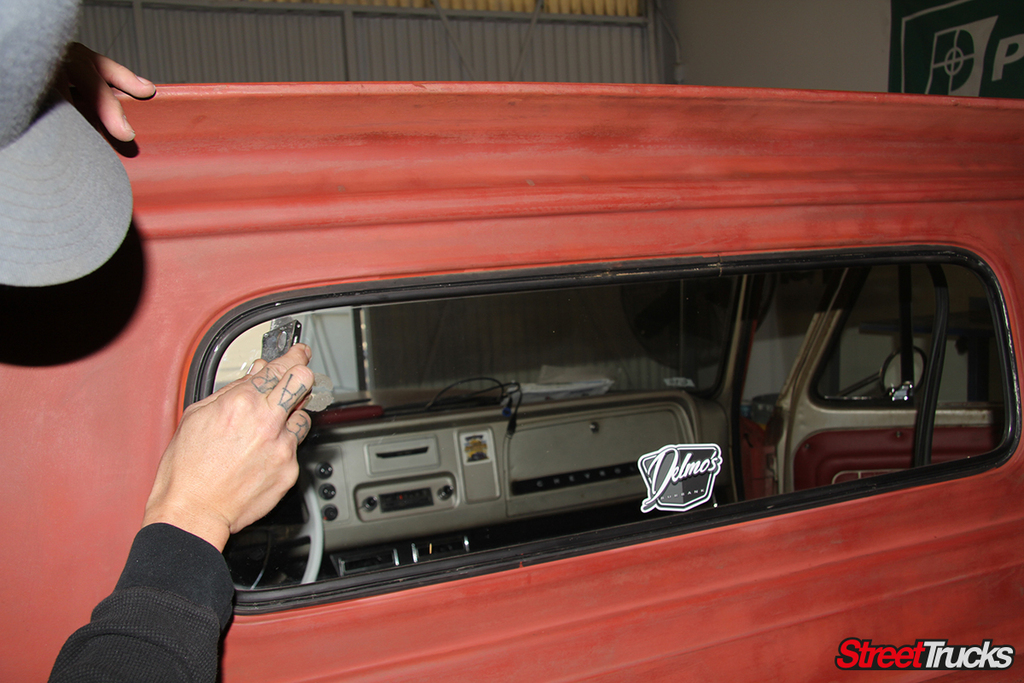 To start the actual process of removing the rear window, Josh sliced into the outer rubber and began to slowly pull it out.
 The rubber seal is what keeps the window locked into position. Before too much of the seal was removed, a pair of helping hands was enlisted to catch the window as Josh pushed it out from inside the cab. After the window was removed, the rubber was removed completely.
Read More: A Bucket List 1966 C-10 Built From the Heart
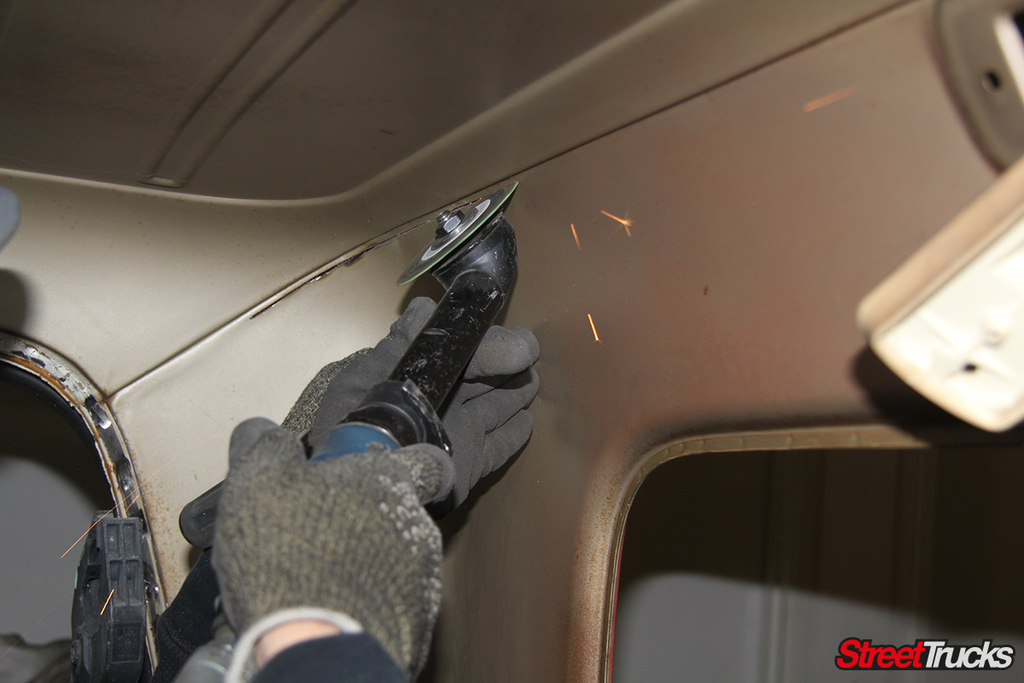
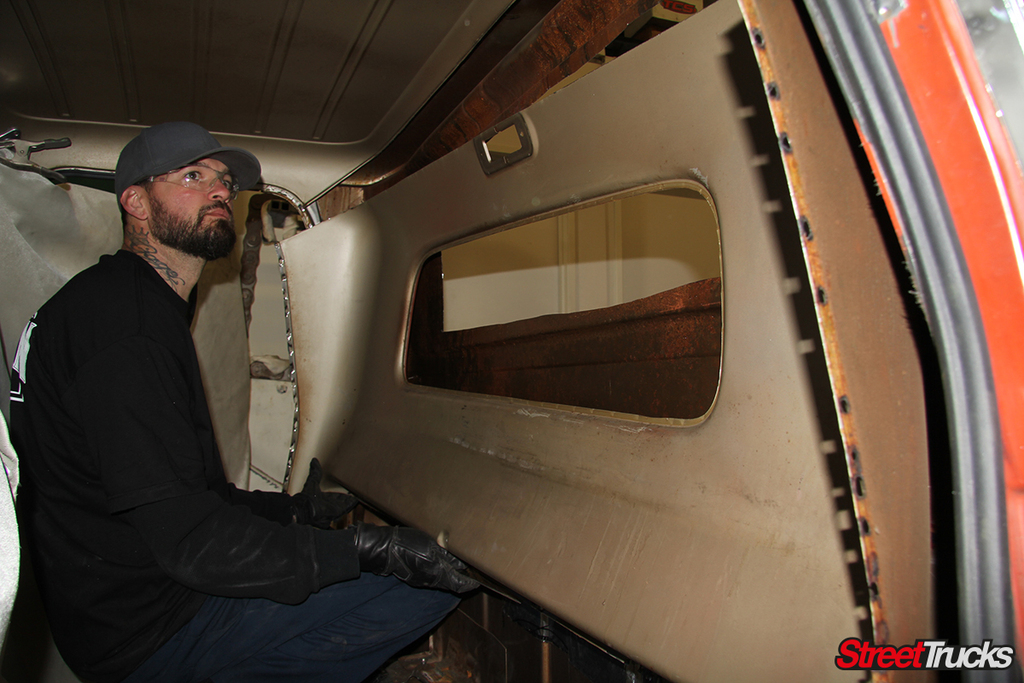
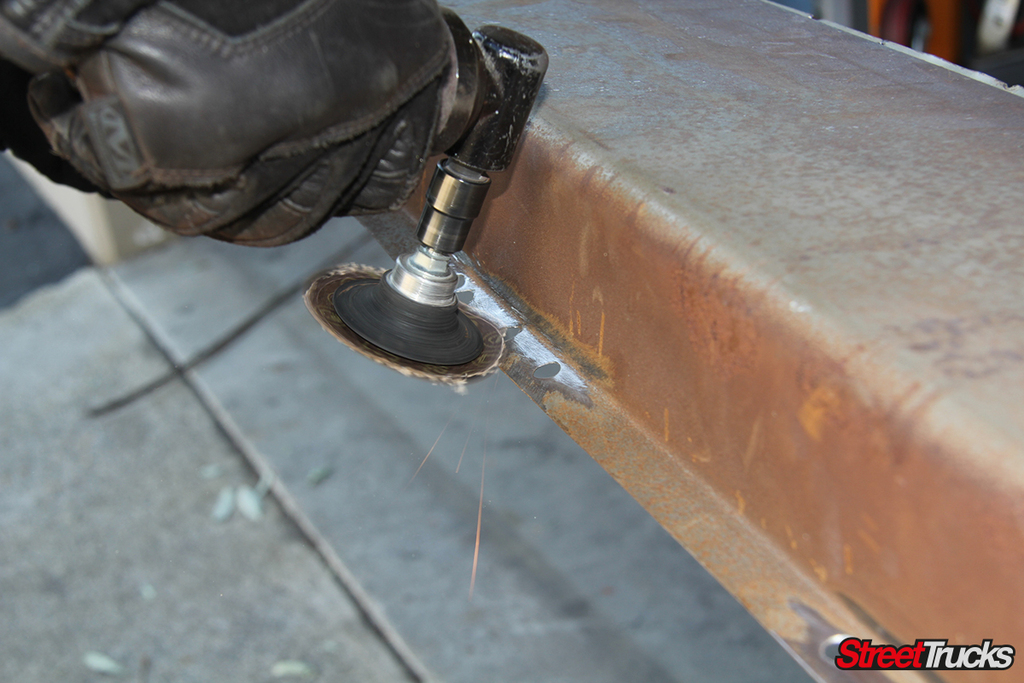
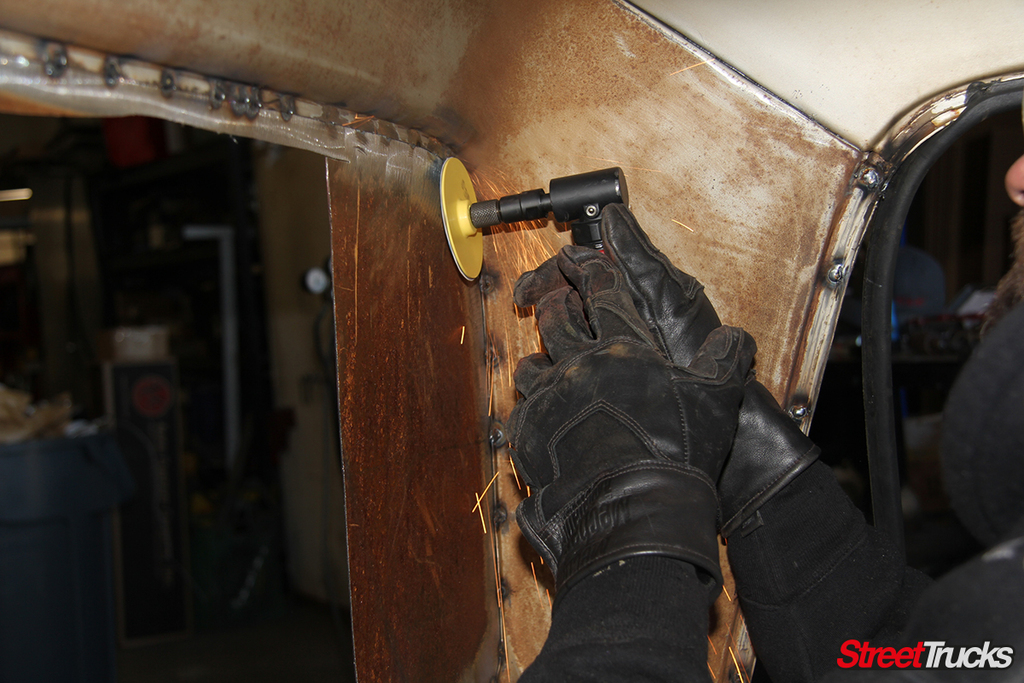
 Next, Josh stepped inside of the cab and began prepping the back of the inner cab panel for removal. He started by grinding down the welds on either side of the panel stripping.
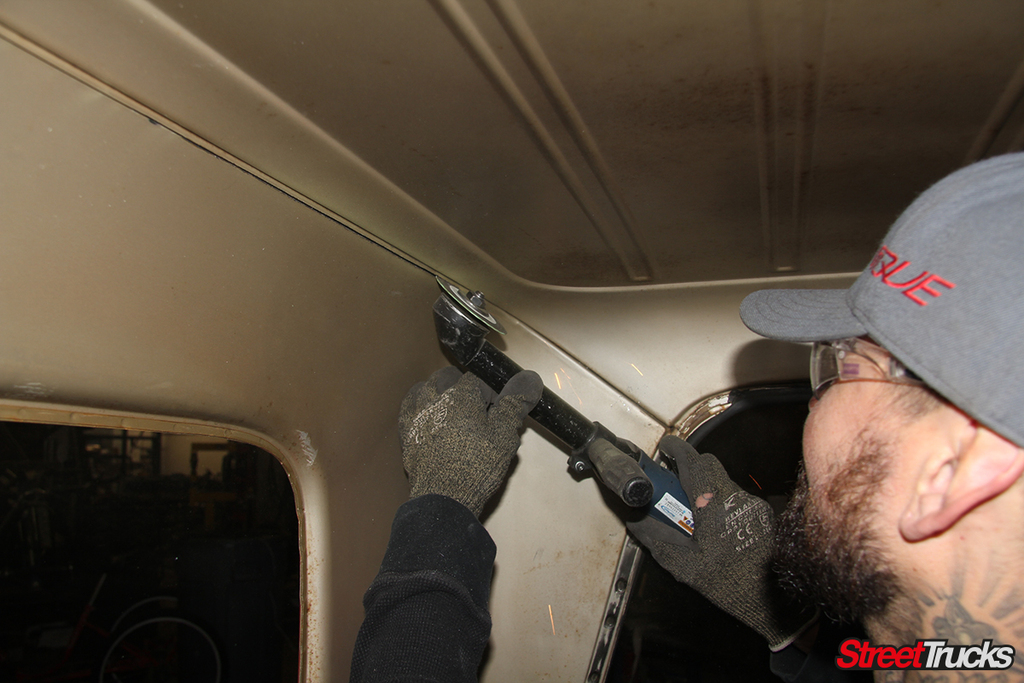
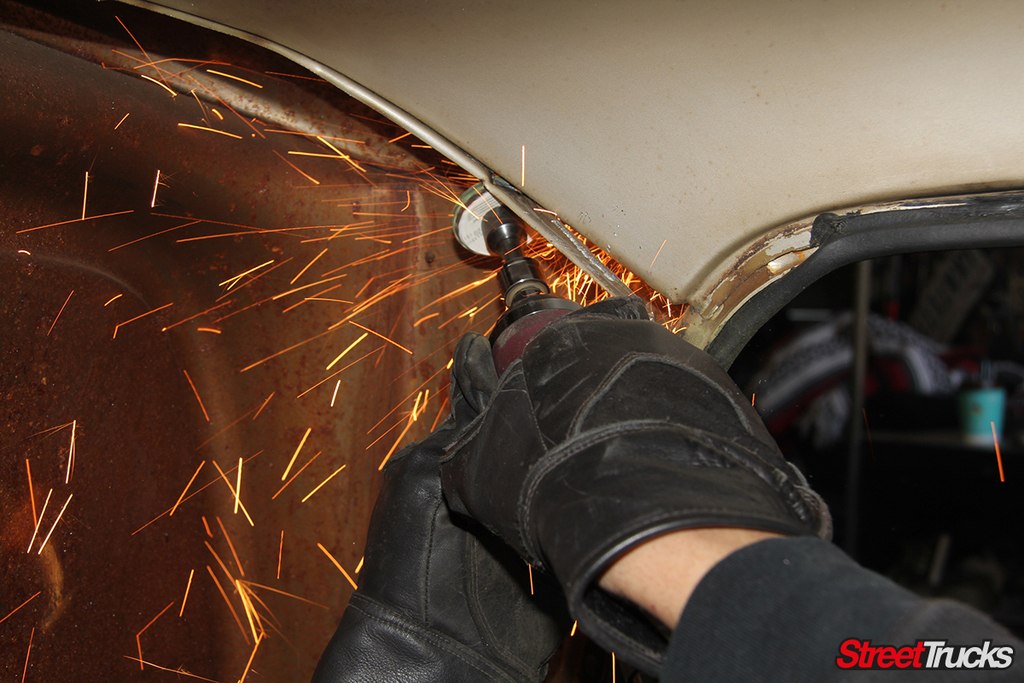
 With a steady hand, Josh grabbed a cutoff wheel and followed the upper seam of the cab panel from the passenger to the driver’s side.
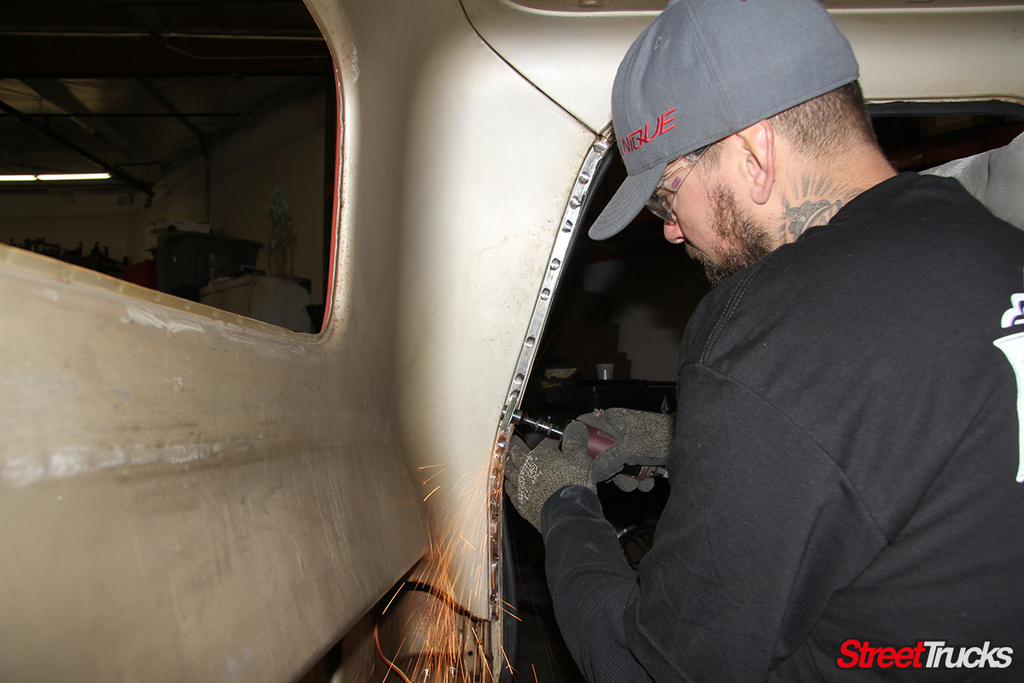
 Next, Josh moved to the outside of the cab, made a pilot cut with the grind wheel and used a saw to cut out the small window opening from the panel. The cuts weren’t precisely made here since these weren’t the final versions. Josh just wanted to clear some room to work.
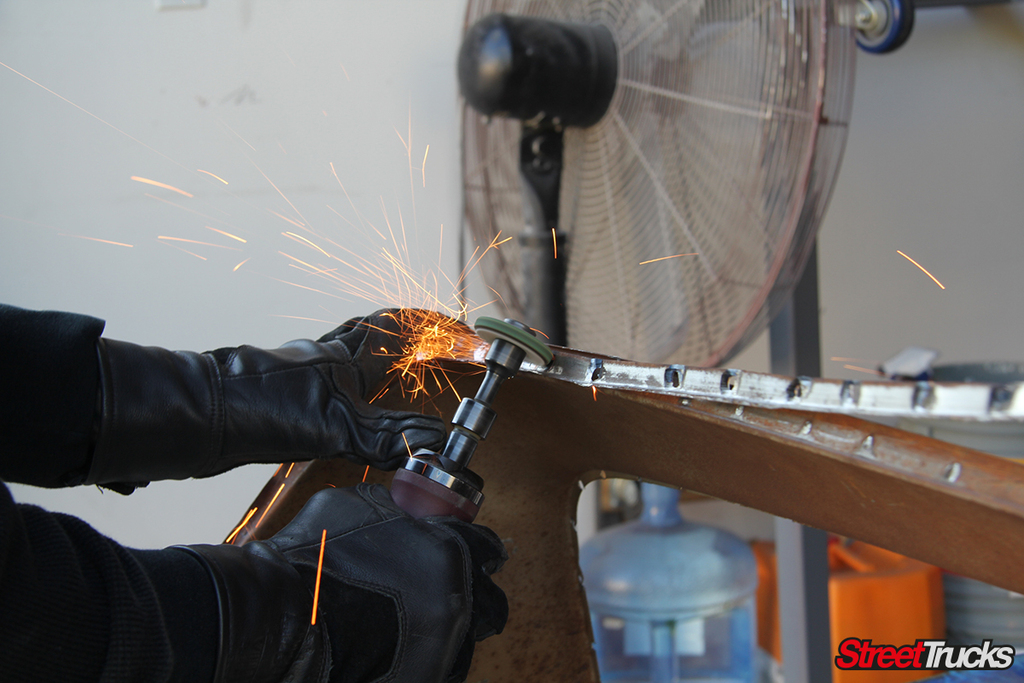
 Once the small window-equipped inner panel was out, it was time to give the donor big window panel some attention. Josh removed the welds holding the stripping in place and peeled it off as he went.
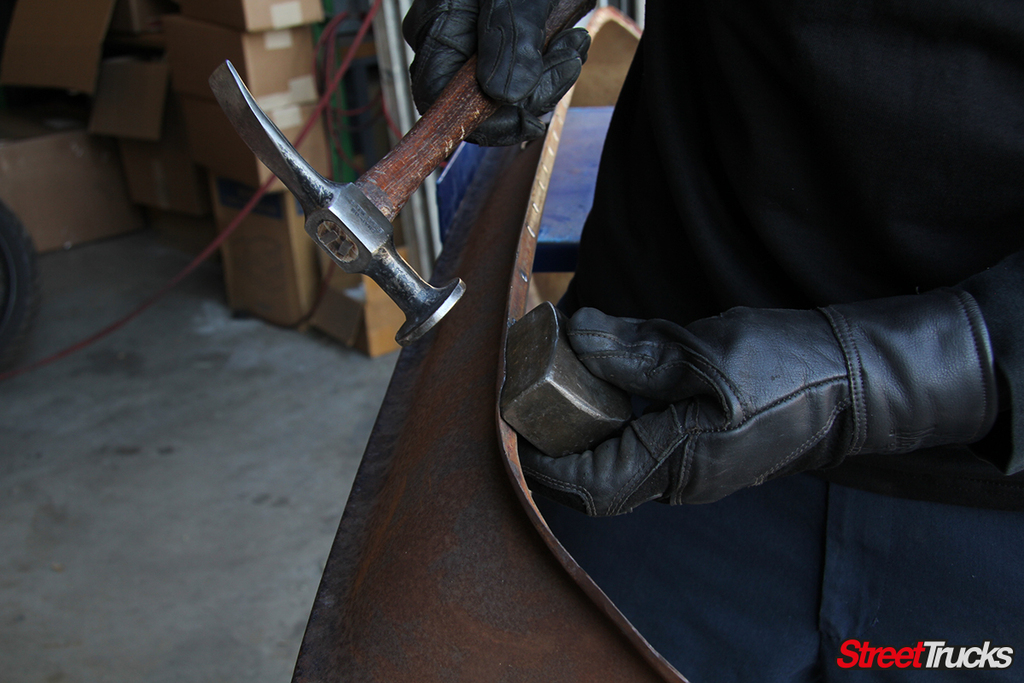
 The edges of the panel were straightened for a better fit.
 Josh cleaned up the points where he would be welding to facilitate a stronger hold. Then the new inner big window panel was ready to play ball.
 Josh removed the last piece of metal from the interior before the new panel was test fit.

 The moment of truth, Josh brought in the new panel to see if any adjustments were necessary, but it fit perfectly as it was. Then he clamped it into place where he wanted it. He used 3M Panel Bonding Adhesive along the top of the panel to hold it to the upper cab wall; otherwise, it would have been necessary to remove the roof panel to access the weld location. The adhesive saves time and trouble.
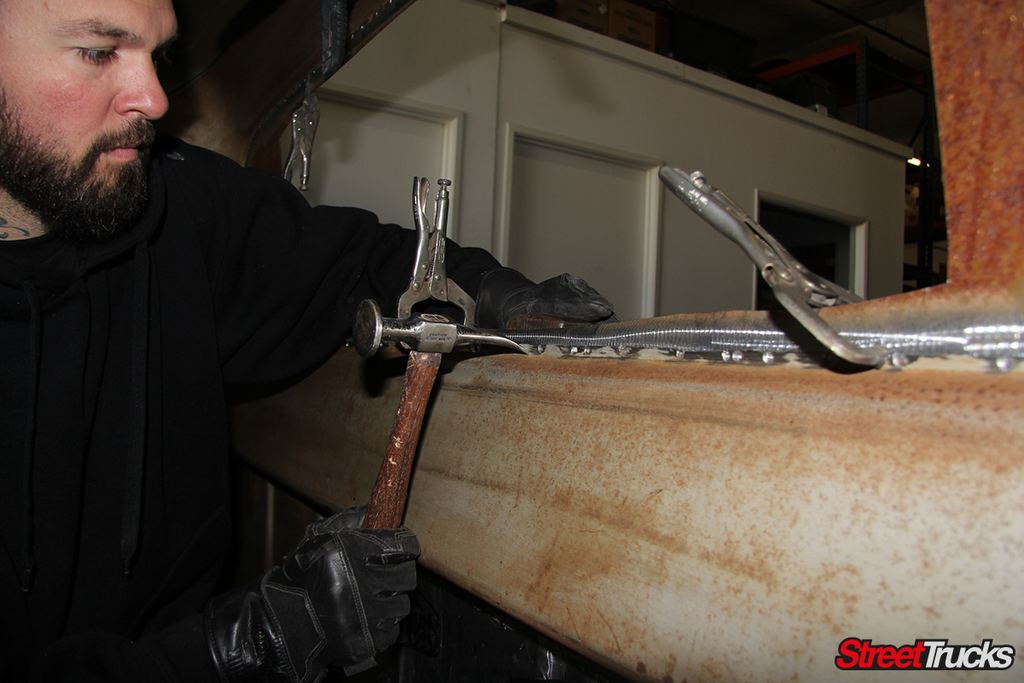 More clamps were added to better hold the panel in position. Then Josh inspected the edge for inconsistencies and gaps, and any weird spots were tapped closer to the cab wall.
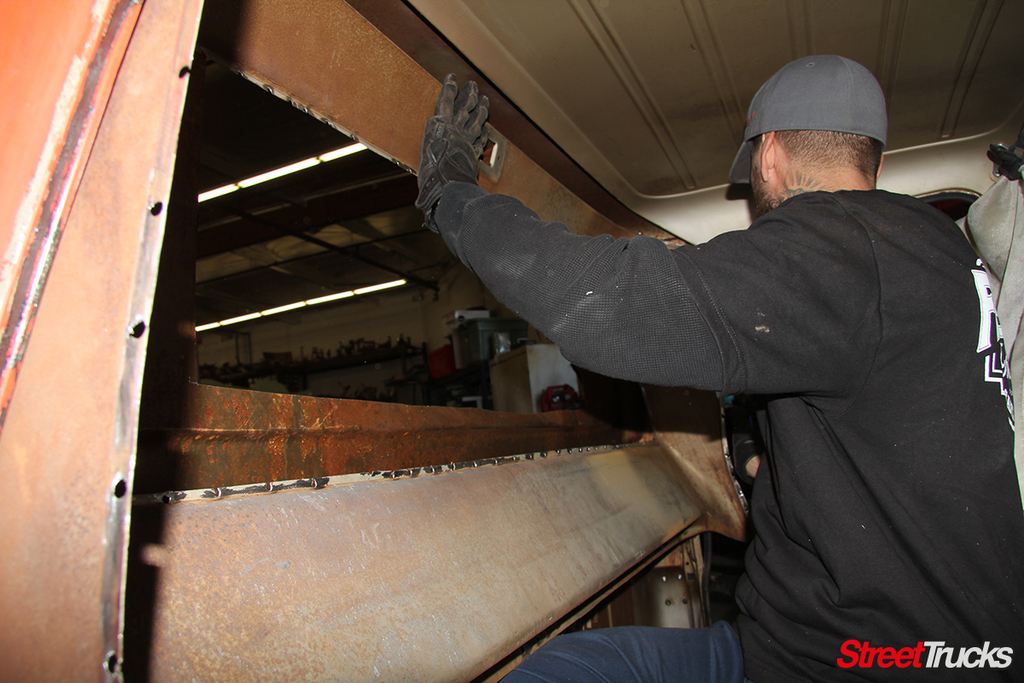
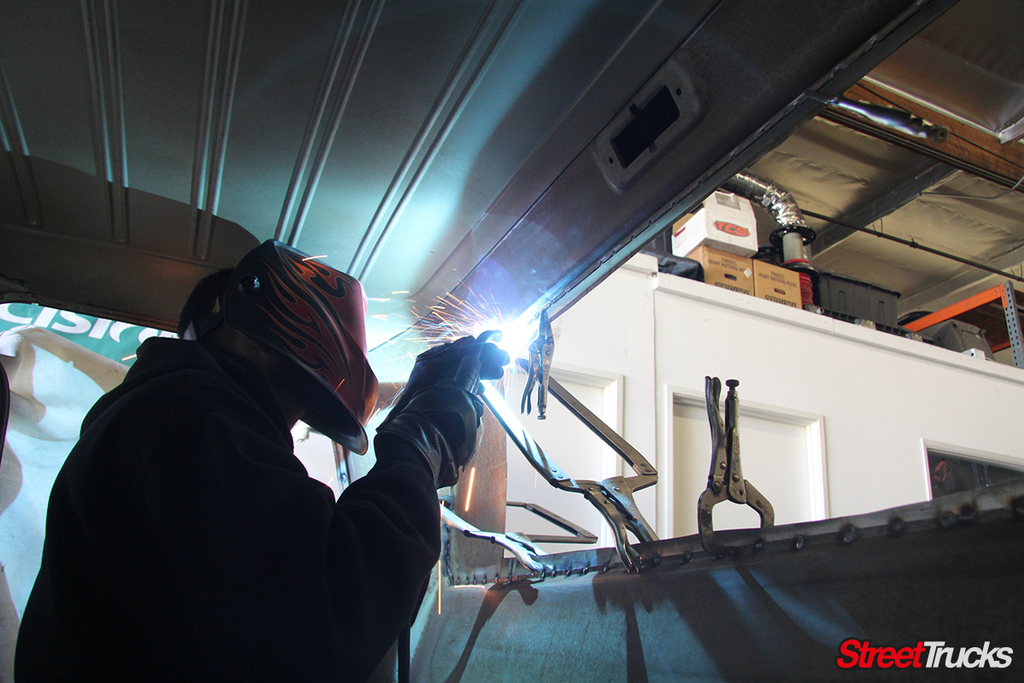 The big window panel was made a permanent fixture inside the cab. Josh spot-welded it into place at every preexisting hole along the panel edge.
 The welding did leave its mark on the opposite side of the metal. This portion of the sheet metal will either be cut out or covered up by the window seal soon, but it was wiped down, nevertheless.
 The welds were taken down and cleaned up inside the cab.
Read More: On The Road Again 1964 Chevrolet C10
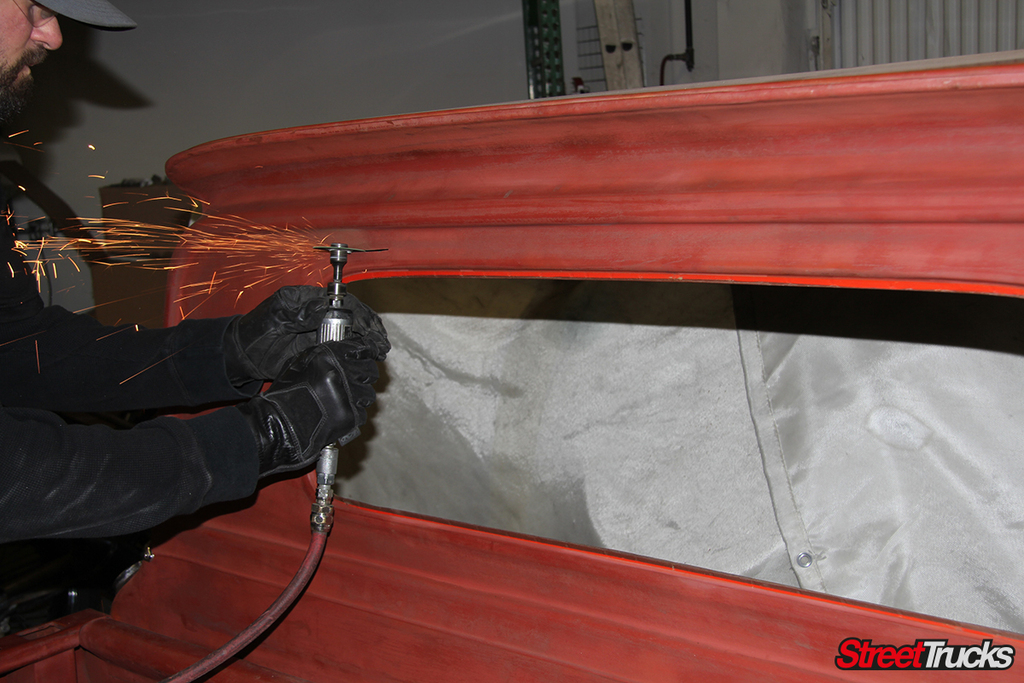
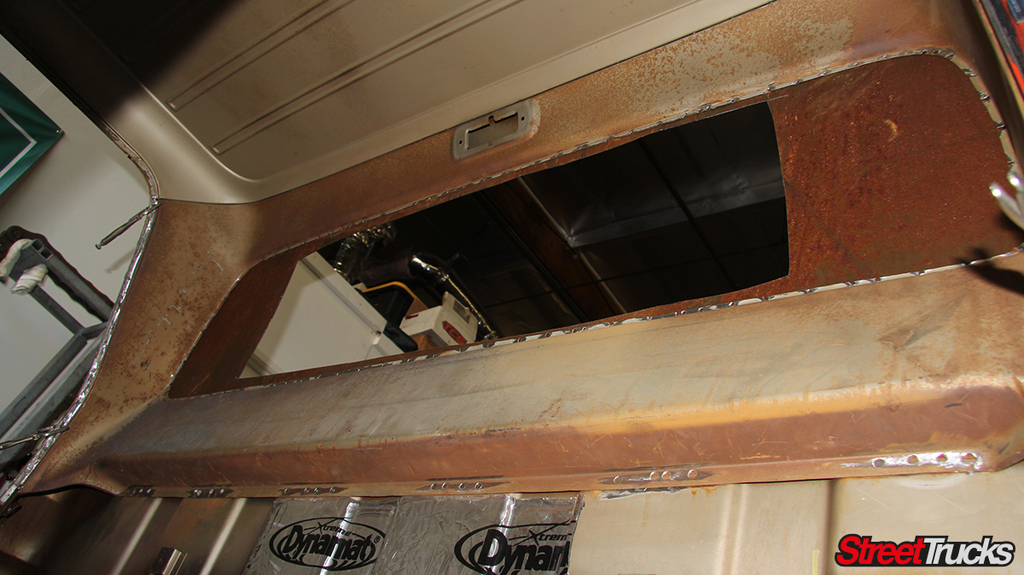
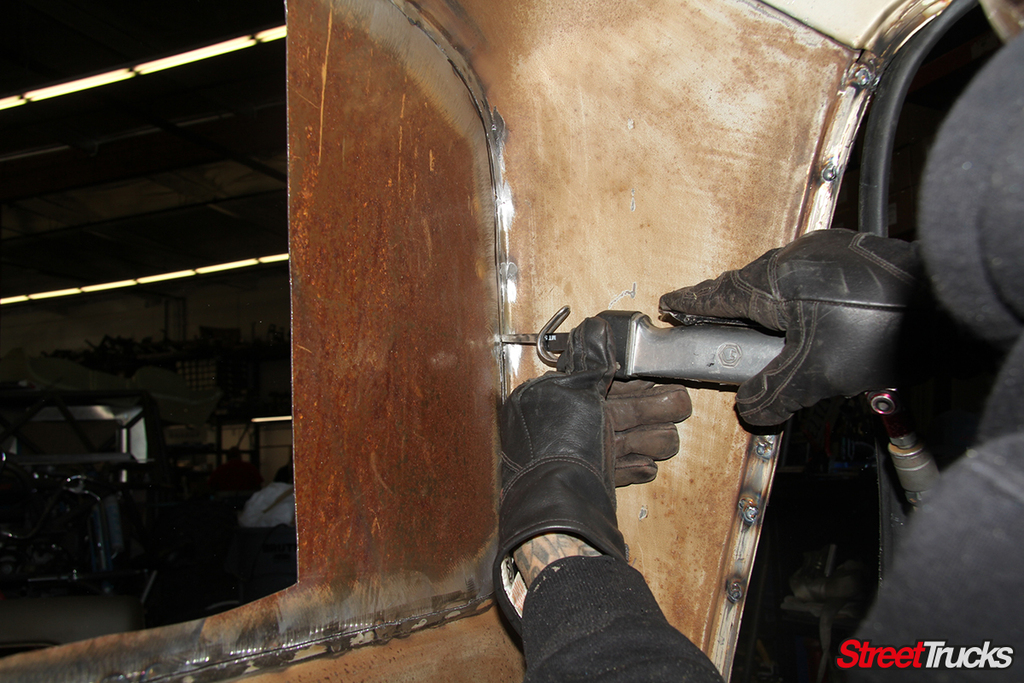 Next, it was time to cut out the exterior cab panel. With the new inner panel in place, Josh simply followed the window opening all the way around and sliced through the metal from inside the cab.
 Just like that, Red Fox has a cabin with a view.
Reaching this point is a rightful cause to pause and take a breather, but not for Josh. He got right on top of prepping the opening for window installation by smoothing out the edges of the panel and the outer weld marks.
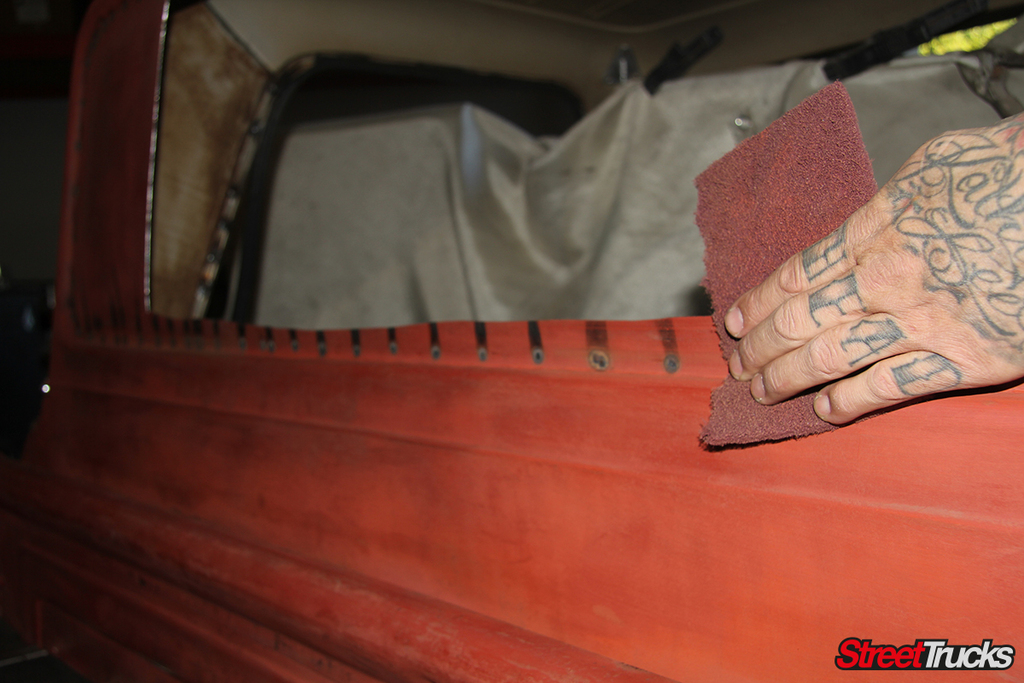
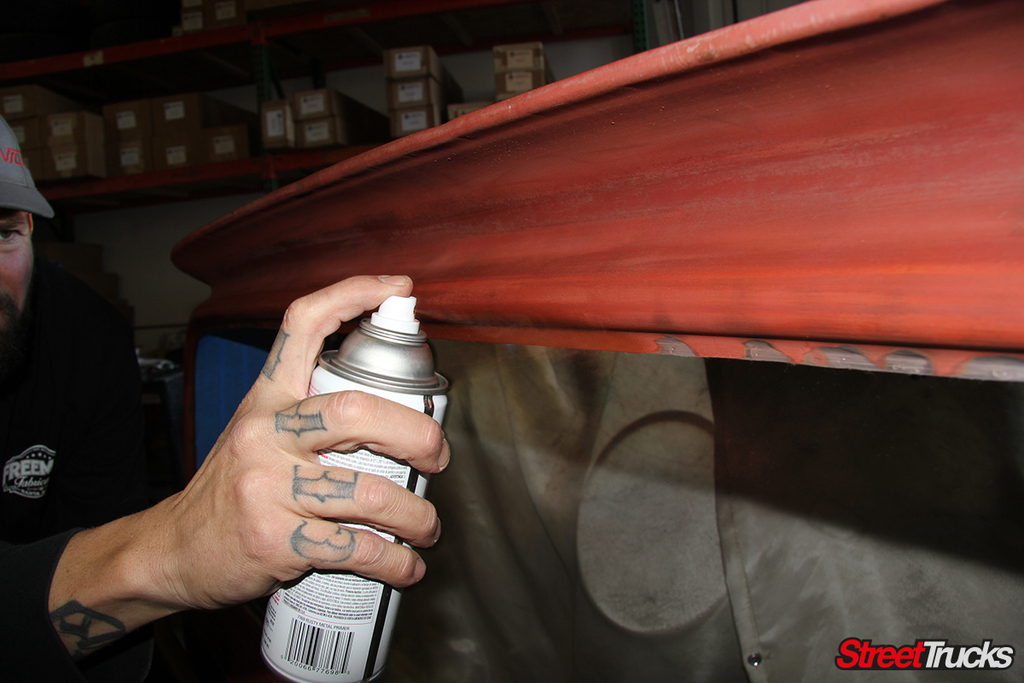 Red oxide primer was the closest match to the truck’s exterior color, so it was used to coat the spots of bare metal made by welding. The paint blended in surprisingly well, but this part may be a little trickier on trucks with a painted exterior.
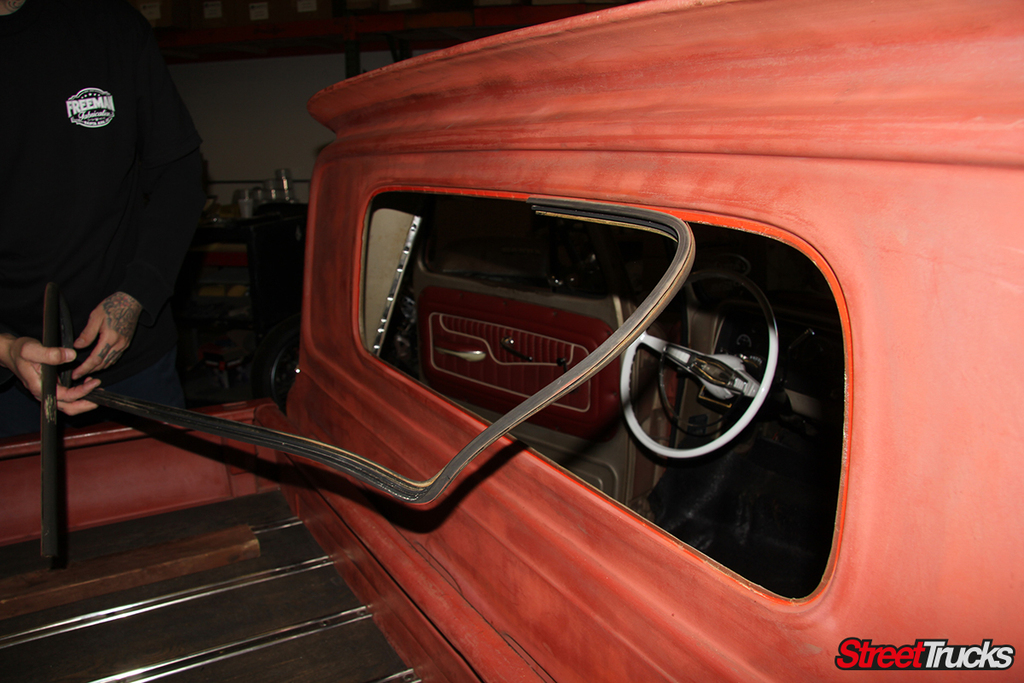
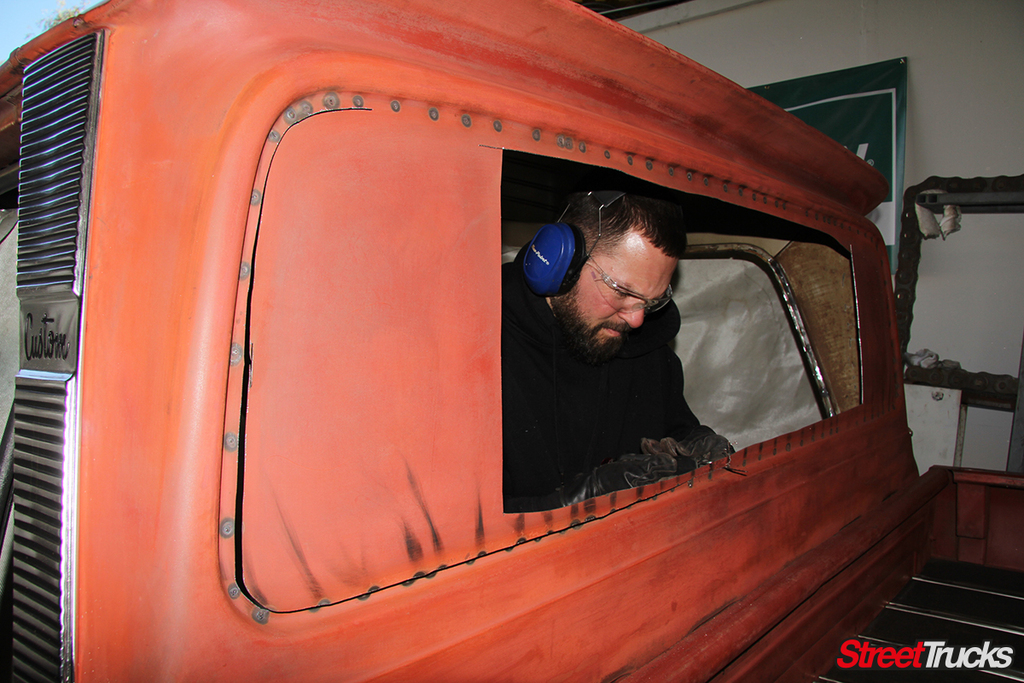
 As he neared the finish line, Josh began placing the Precision Replacement Parts seal around the new rear window. A small mark was made on the glass to show where the end of the seal belongs just in case it moved out of position while they were covering the rest of the window. Josh taped it as he went along to keep it in place.
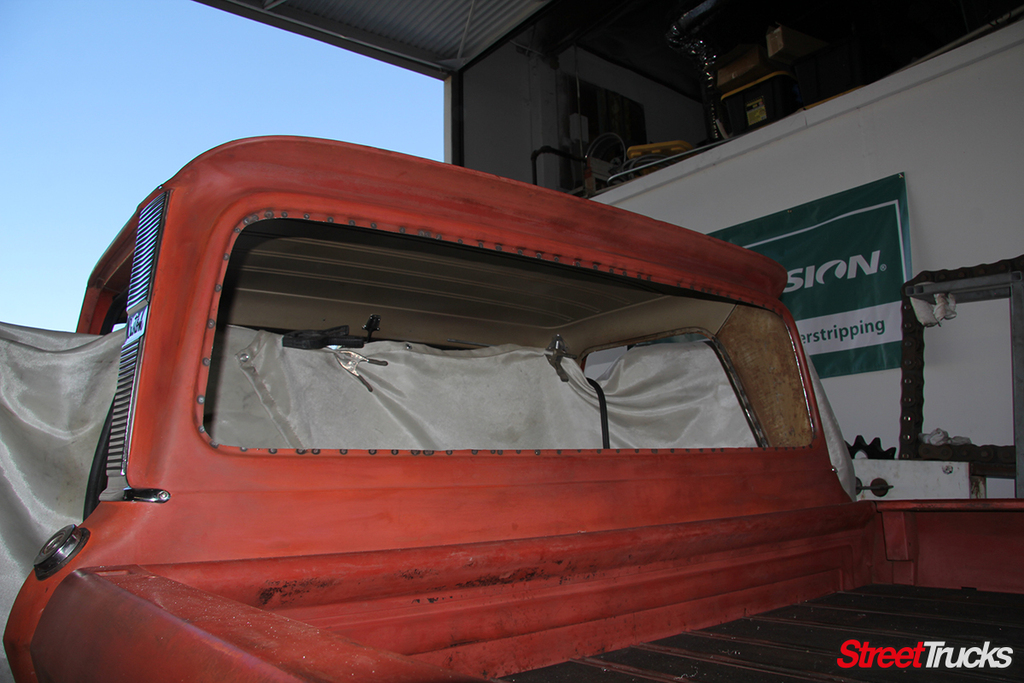
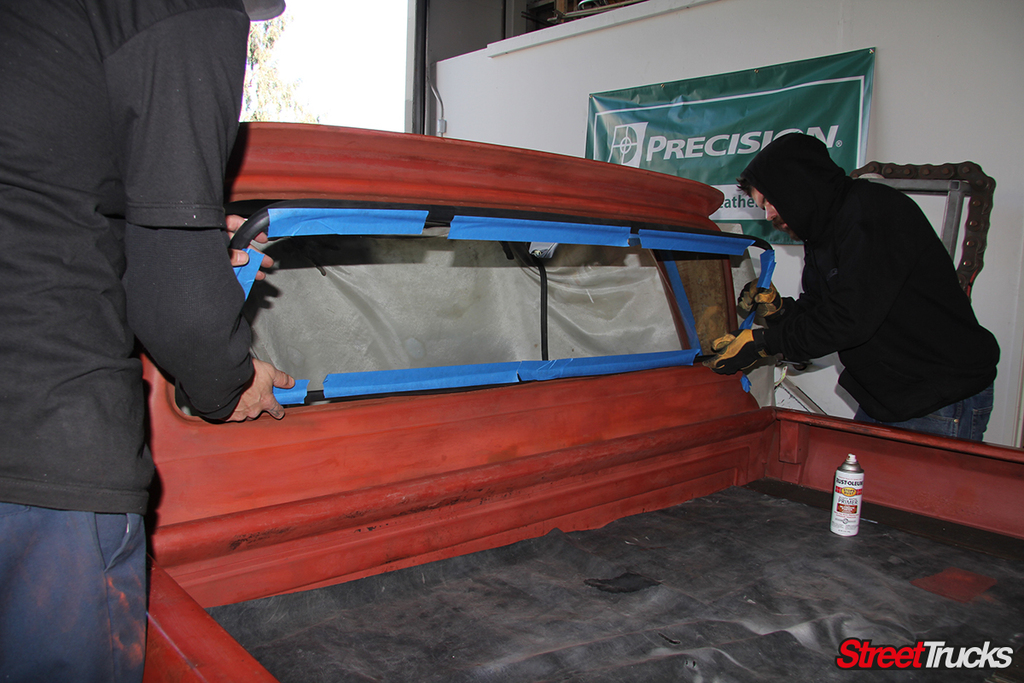
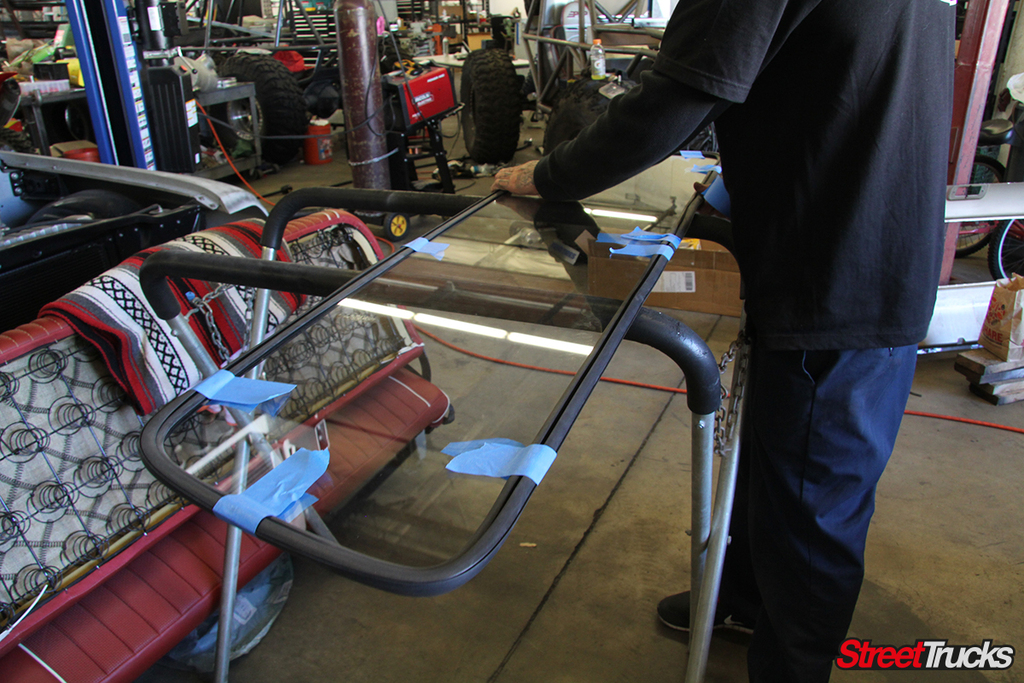 With the seal properly installed, Josh recruited another set of hands to help him place the back window carefully into the larger opening made in the back of the cab. This part is a little tricky, so having a couple of helpers around definitely doesn’t hurt.
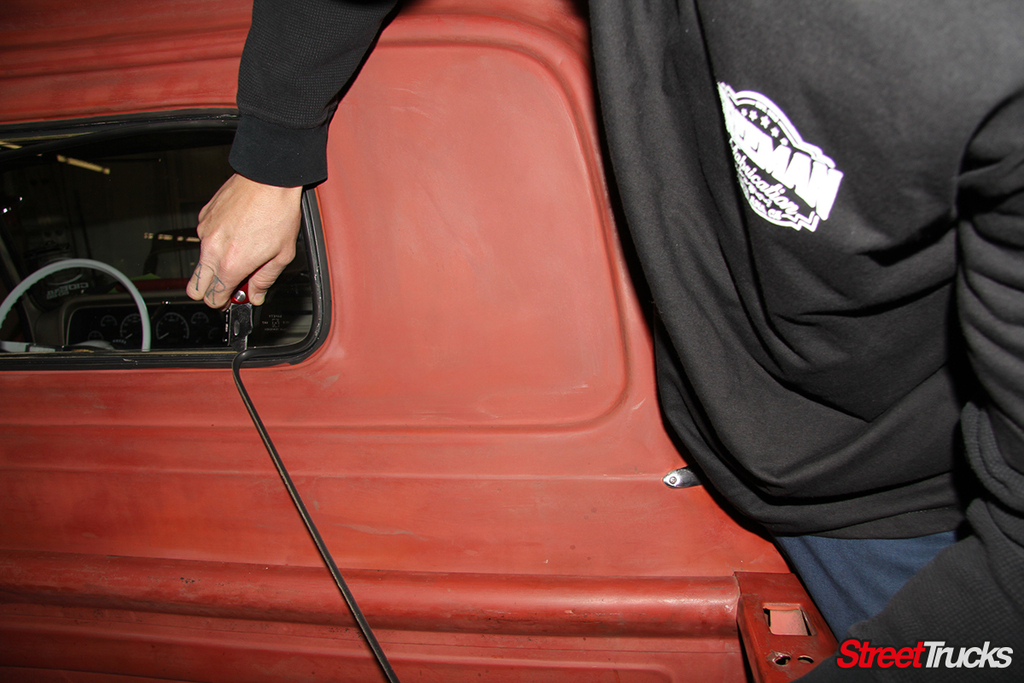
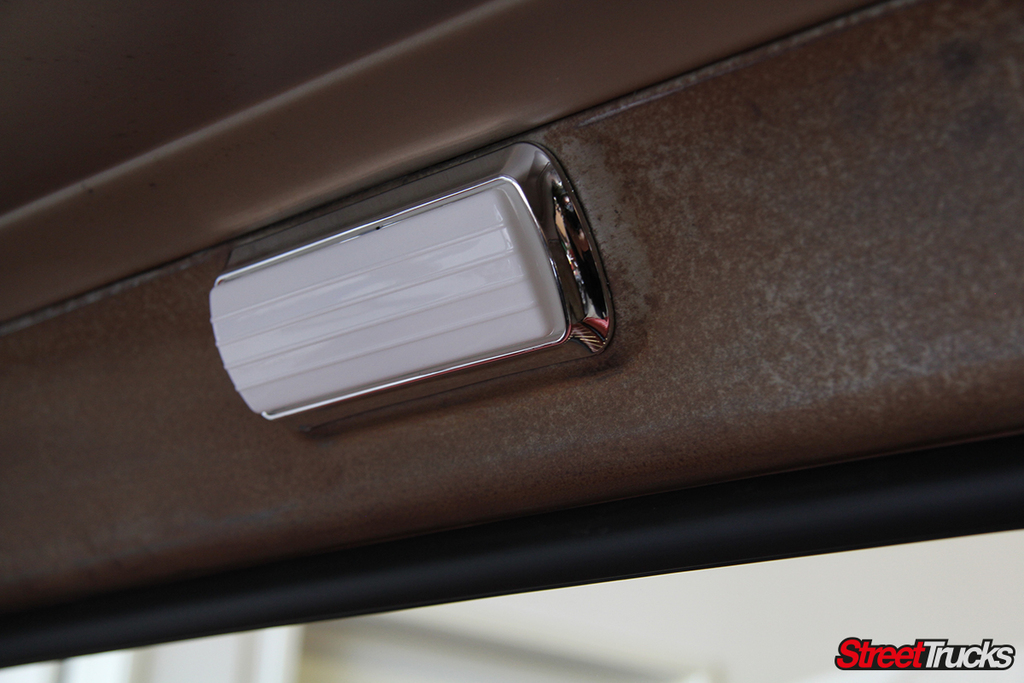 Josh finished up by installing a fresh cab light since the other one was missing—a nice little touch to round out the job.
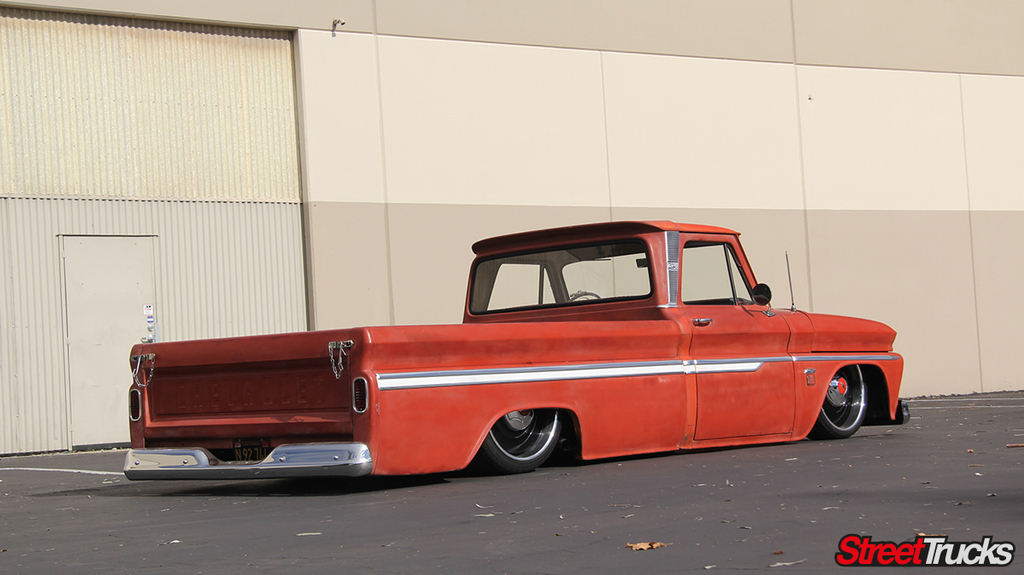
The difference the big window makes is enormous. It opens the cab up to better lighting on a sunny day and makes it easier to keep tabs on your surroundings. The toughest part of the installation was getting the new back window in place.
A glass guy would’ve had an easier time with it, but for the most part, Josh moved at a steady pace, making sure to measure and fit twice before making any hasty alterations to the metal.
While this conversion can be done by the do-it-yourselfer, consult an experienced metal fabricator for quality results.
Read More: Custom 1966 Chevy C10 Built Right!
Yes. The factory cab structure was designed to accommodate both configurations, so every truck in this generation can be converted with the right inner panel and glass.
Used panels surface at swap meets, online classifieds (eBay, Facebook Marketplace), and salvage yards specializing in classic trucks. Reproduction options are also beginning to enter the market.
An experienced fabricator can complete the conversion in roughly 6-10 hours. Add time for paint blending if the truck has a full exterior paint job.
Not easily. Once the exterior cab skin is cut for the larger opening, going back to a small window would require sourcing the original inner panel and patching the exterior. It’s best treated as a permanent upgrade.
No. Using panel bonding adhesive along the upper cab wall eliminates the need to pull the roof panel to access the weld location, saving significant time.
Installing the rear glass into the new opening. Having an extra set of hands or ideally, an auto glass professional makes that step considerably easier.
When done properly by a qualified fabricator, no. The factory cab was engineered for this opening, and proper welding and panel bonding maintain the cab’s rigidity.

C10 Builders Guide
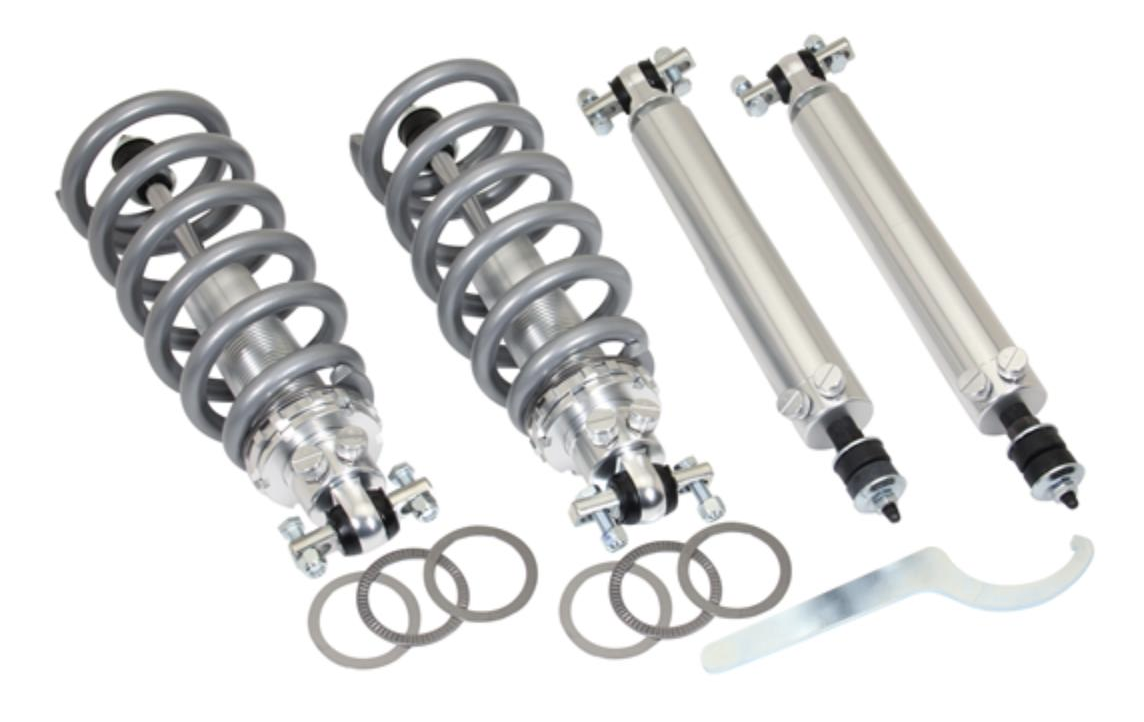
Classic Performance Products (CPP) now offers a complete dual adjustable, bolt-on coil-over front and rear dual adjustable shock system for rear leaf spring applications. Our… Continue reading
Chris Hamilton . August 22, 2019

C10 Builders Guide
Representing the latest electronic dashboard technology for the street rodder, car and truck enthusiast alike, the RTX system combines modern digital electronics with a traditional… Continue reading
Chris Hamilton . February 24, 2020

How to
DIY PAINT MAGIC FROM AUTOMOTIVE TOUCHUP LET’S BE HONEST. I wasn’t expecting much. Before you get it twisted, though, I want to be clear: I… Continue reading
Mike Self . August 02, 2019

C10 Builders Guide
Here are a few extras to kill some time..
Chris Hamilton . March 13, 2020


We use cookies to enhance your browsing experience, serve personalized ads or content, and analyze our traffic. By clicking "Accept All", you consent to our use of cookies. Visit our Cookie Policy for more info.

Share Link