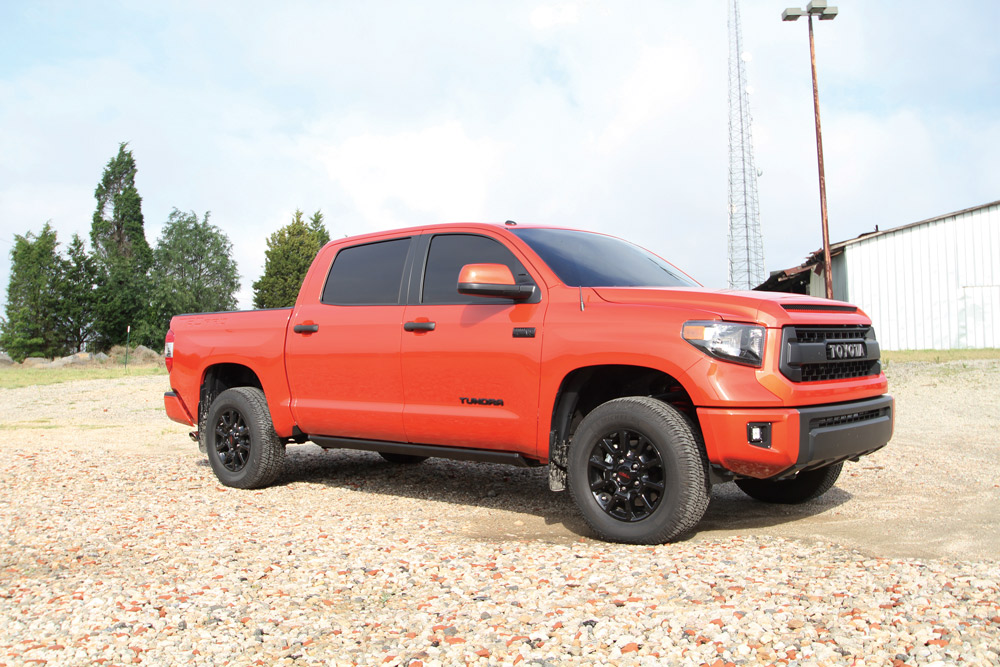
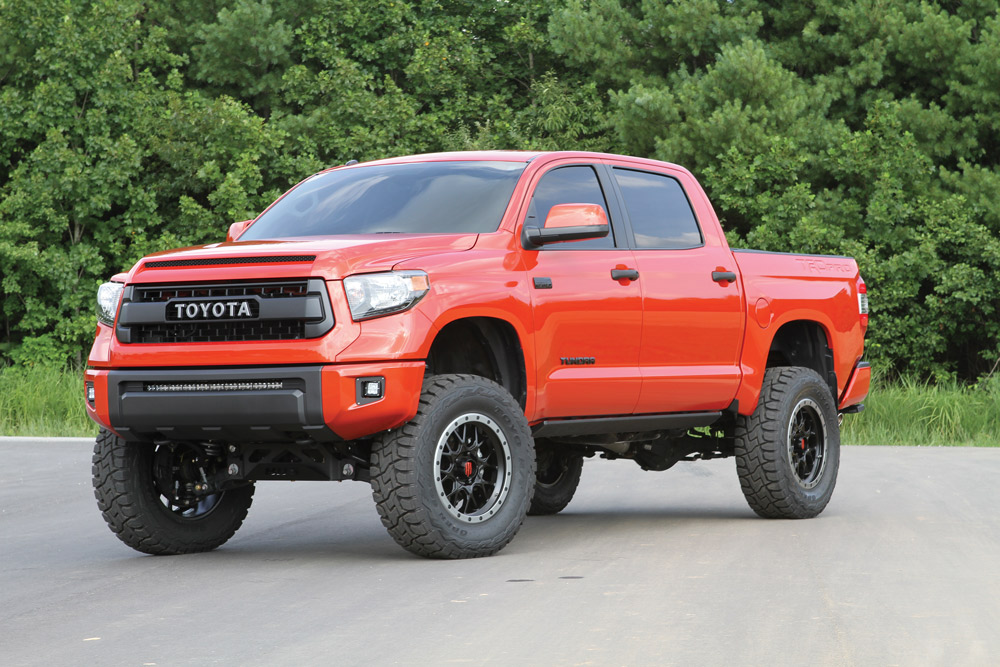
Four-wheel-drive truck owners are known for maximizing their rides to the fullest. Whether they’re hardcore trail riding, deep mud bogging, doing construction work or even displaying their truck at a show, 4WDs do it all. Our particular project truck was purchased as a daily driver, to tow a show vehicle and motorcycles, and to haul landscaping supplies. The owner wanted to change the stance and height of the truck, add a little more presence to it and make it more nimble if he decided to take it off paved roads. This truck already received towing upgrades that we covered in the March 2016 issue (“Towing Improved,” pg. 108), which included rear helper airbags, onboard air and a rear sway bar; so, it would be necessary to work around those parts in order to lift the truck.
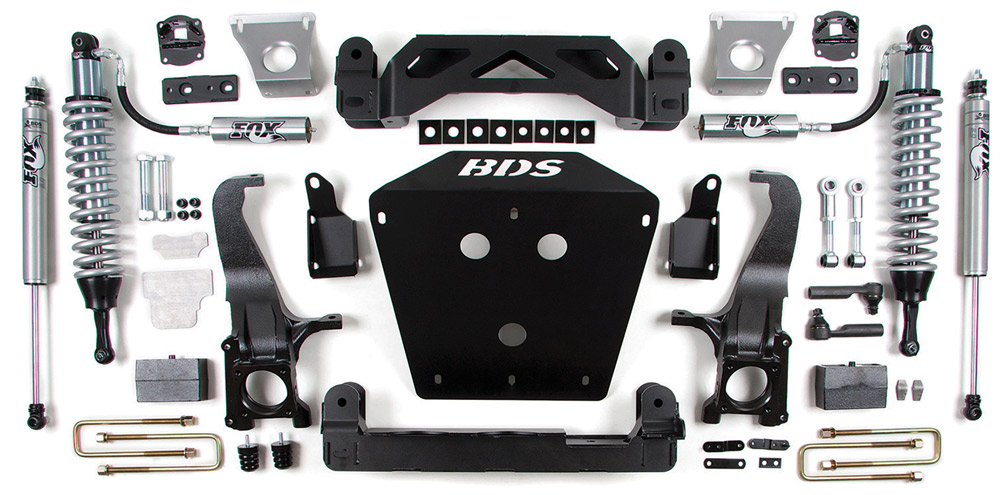
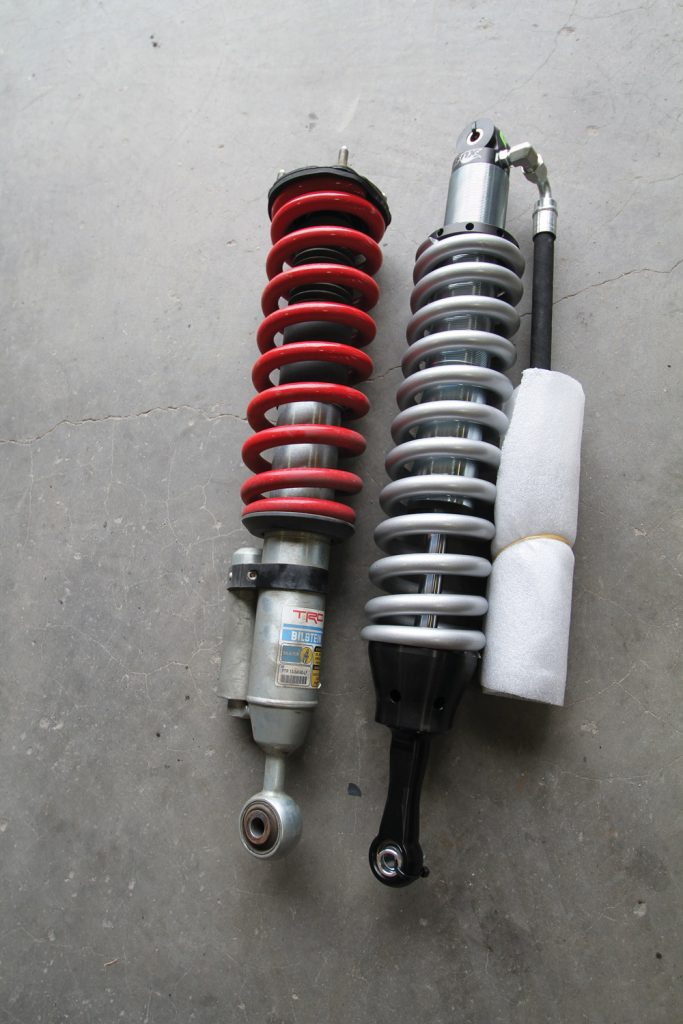
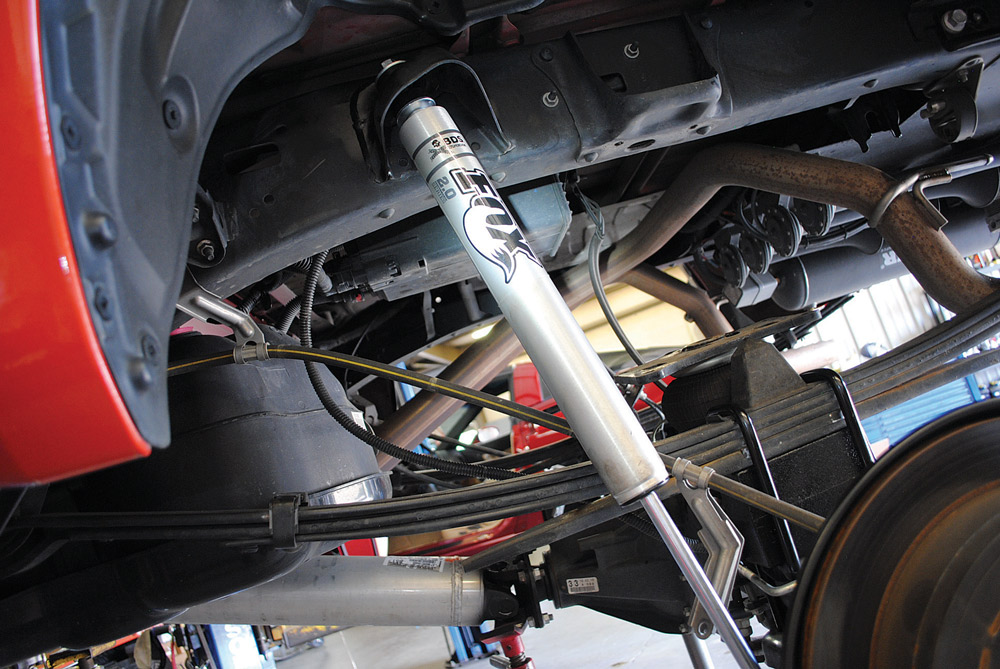
The owner also wanted to retain the comfort and reliability of the stock truck, so we contacted the guys at Rimz One in Mooresville, North Carolina, to come up with a suspension package that would deliver everything the owner wanted. After some deliberation, the crew decided that a 7-inch lift with 37-inch tires would set the truck up perfectly. For this, a call was made to BDS Suspension for one of its lift kits. This truck is a TRD Pro model, so it comes factory with oversized Bilstein front struts and reservoir rear shocks, which means the standard 7-inch lift won’t work. We had to step up to BDS’s 7-inch coil-over suspension system, which includes Fox 2.5- inch coil-over remote reservoir front struts (P/N 818F, $3,876.28). This kit replaces the stock struts with new Fox units, and the rear employs lift blocks and Fox shocks. We also picked up the Coach Builder 7⁄8-inch heim joint steering kit ($375) to strengthen the steering linkage as well as a set of +3-inch full billet leaf spring shackles ($275) to level out the rear and provide an even better ride. Coach Builder also offers a polybushing kit ($45) to smooth the leaf spring shackle flex.
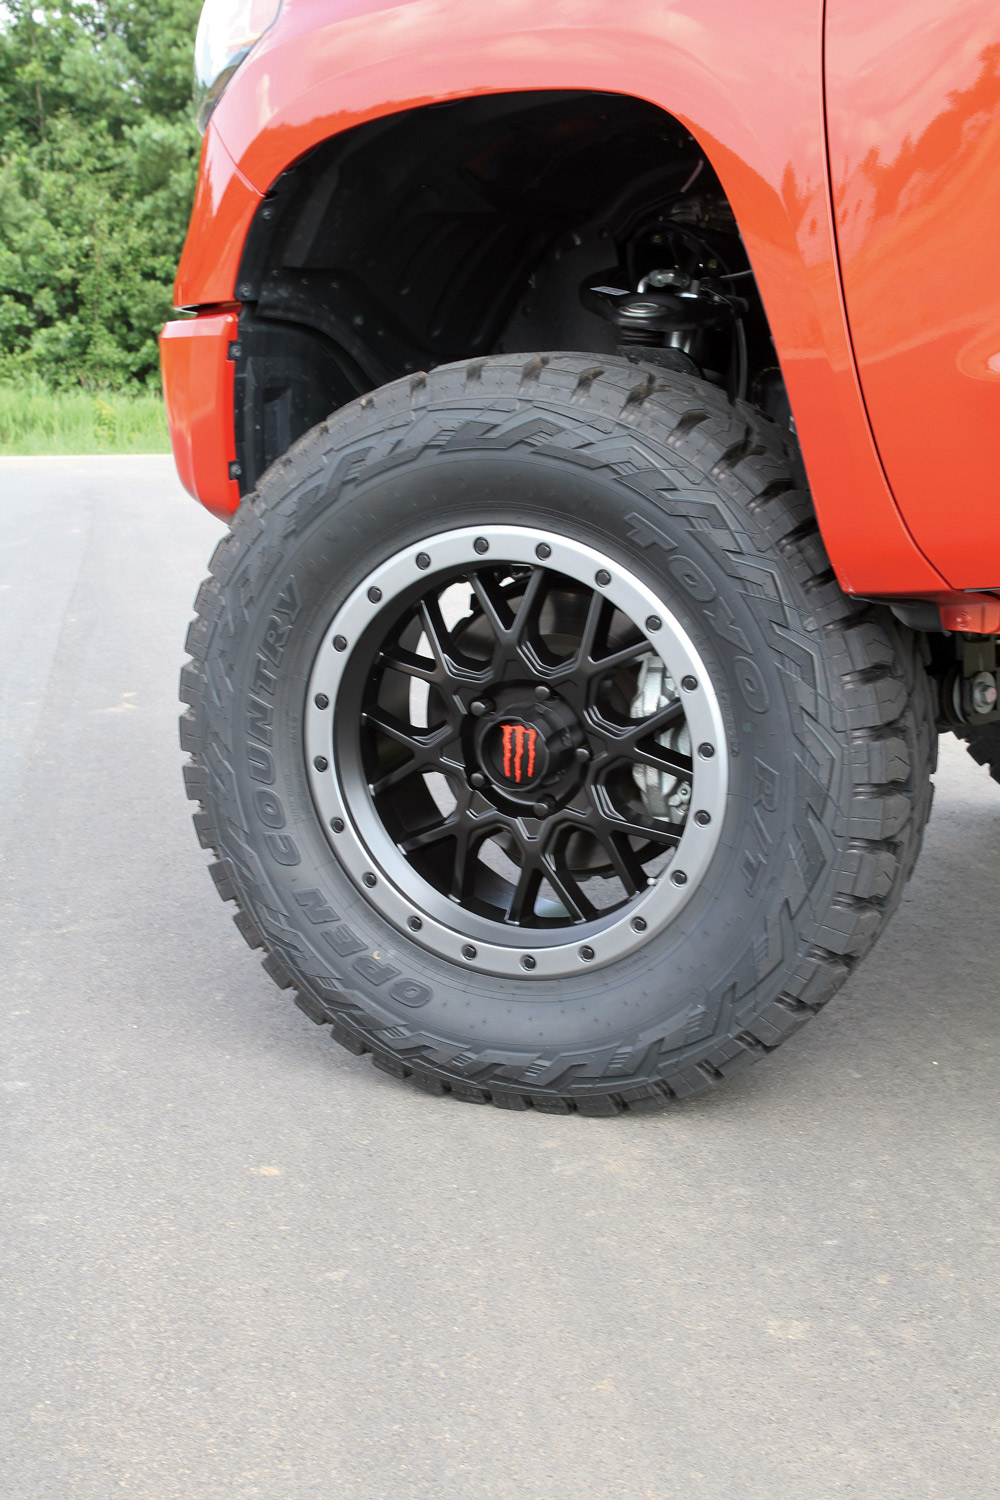
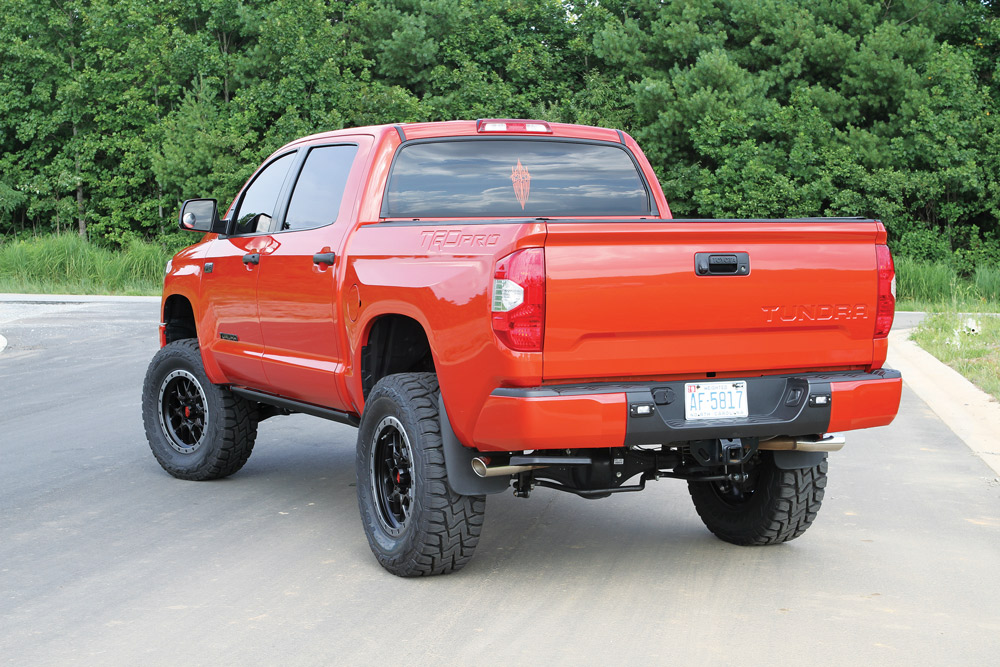
Once we chose the lift and components, it was time to focus on selecting a wheel-andtire package to complement the new look. We contacted Dropstar Wheels and ordered a set of 20×9-inch 649BA wheels ($253 each). We had Rimz One color match the center caps to the truck for a little splash of custom flair. Handling the wet and dry traction are the new Toyo Tires ($403 each). The Open Country R/T has great on- and off-road capabilities, but doesn’t make too much noise on the street. We got them in the 37×12.50R20 size to give the truck some more height.
As soon as the parts, wheels and tires arrived, we booked the installation with the crew at Rimz One and dropped the truck off with them. A job like this generally takes a couple of days to finish with a realignment. Check out the photos to learn how this lift was installed.
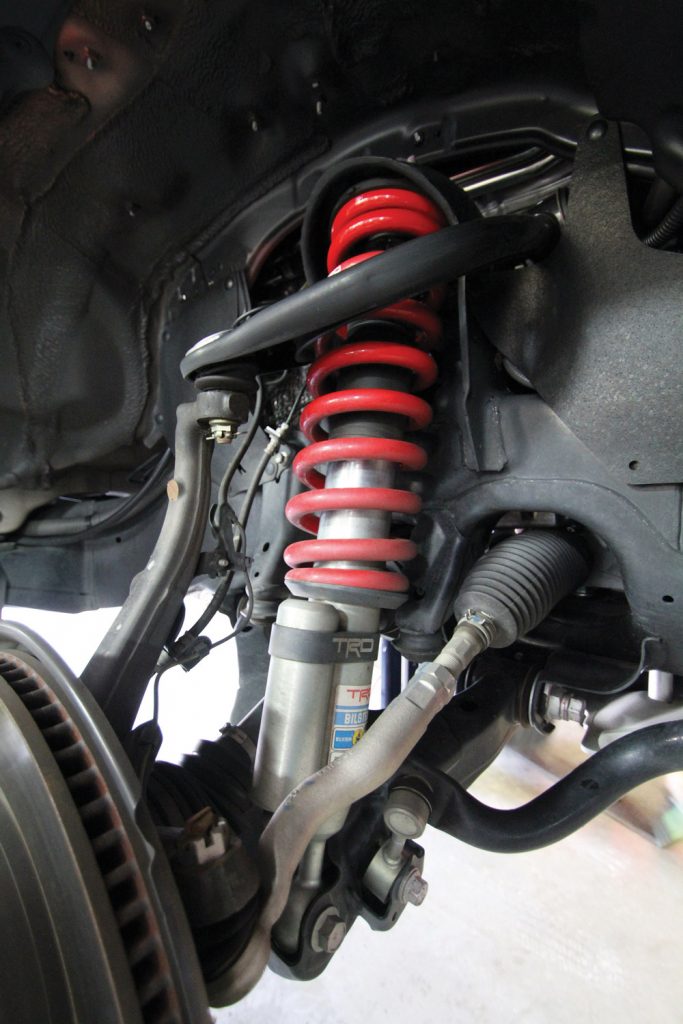
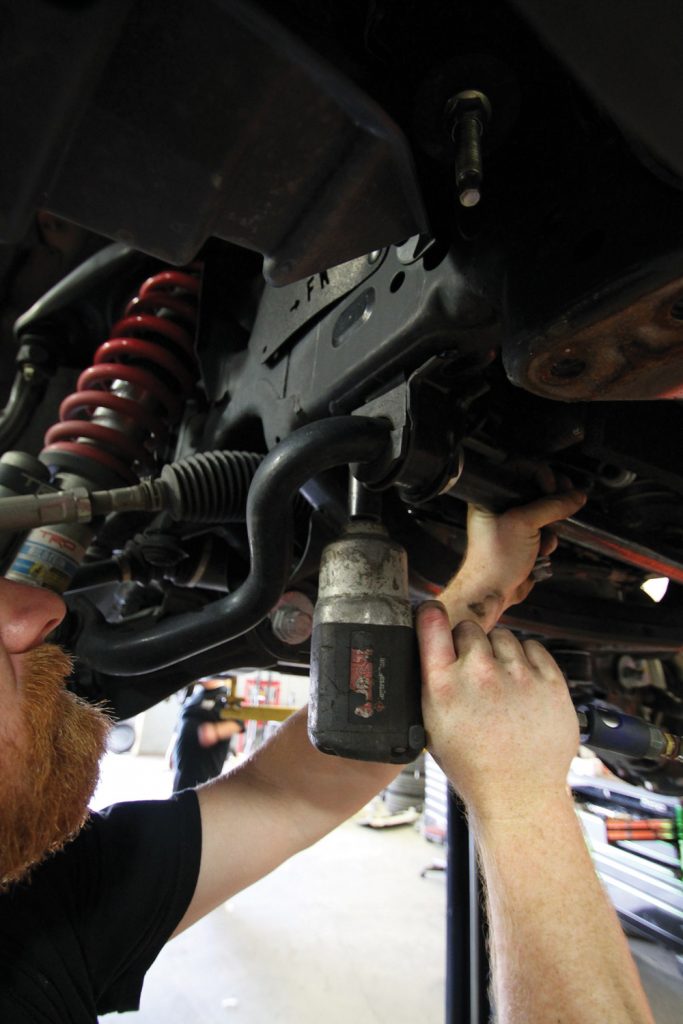
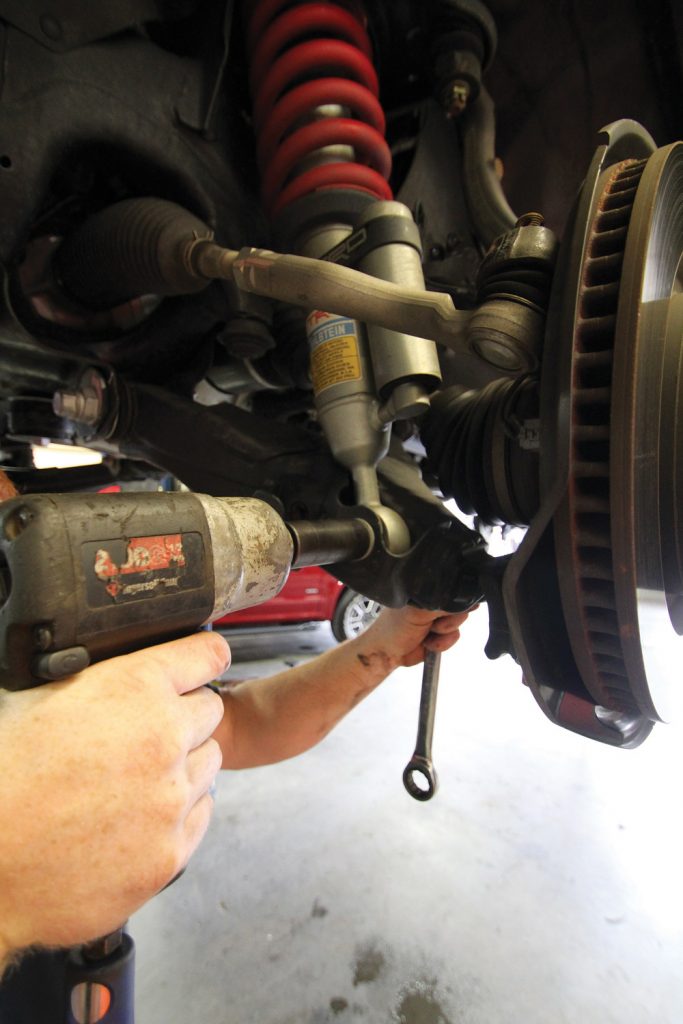
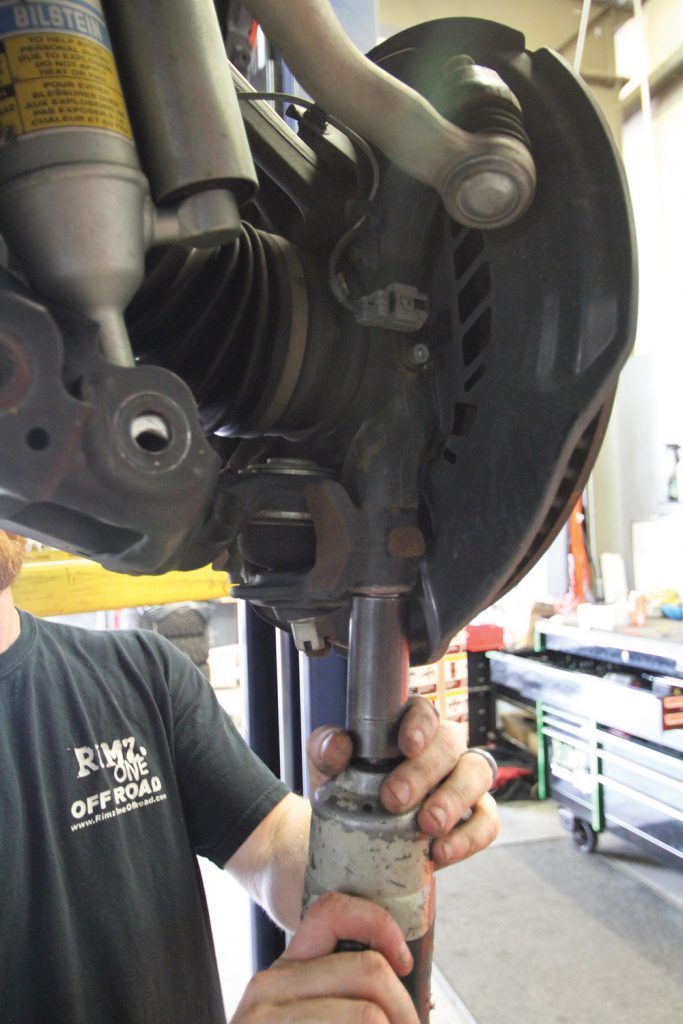
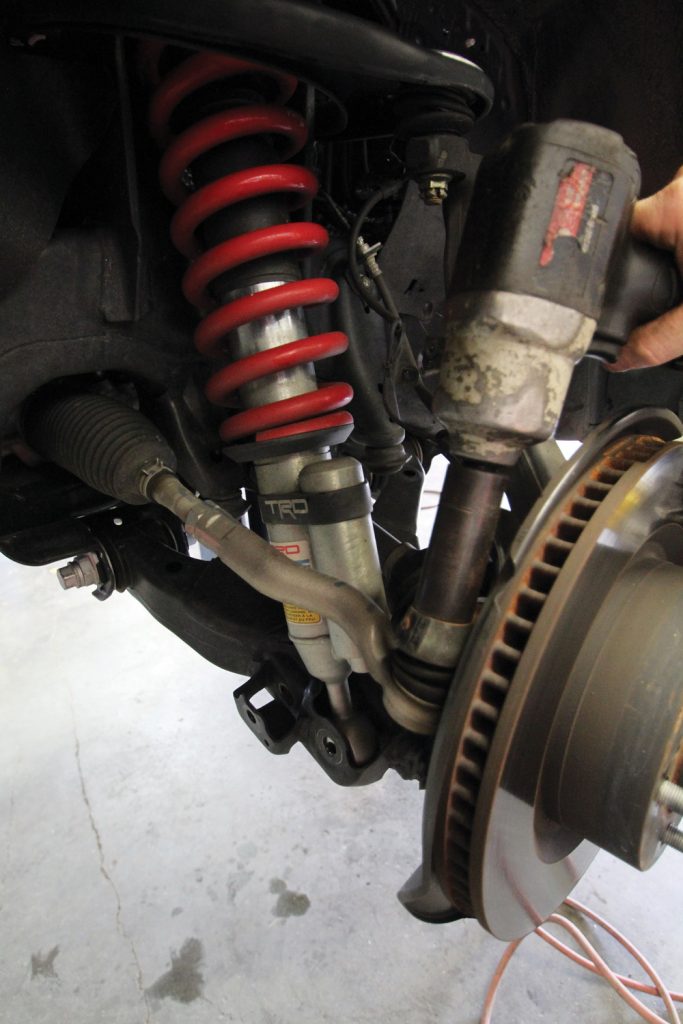
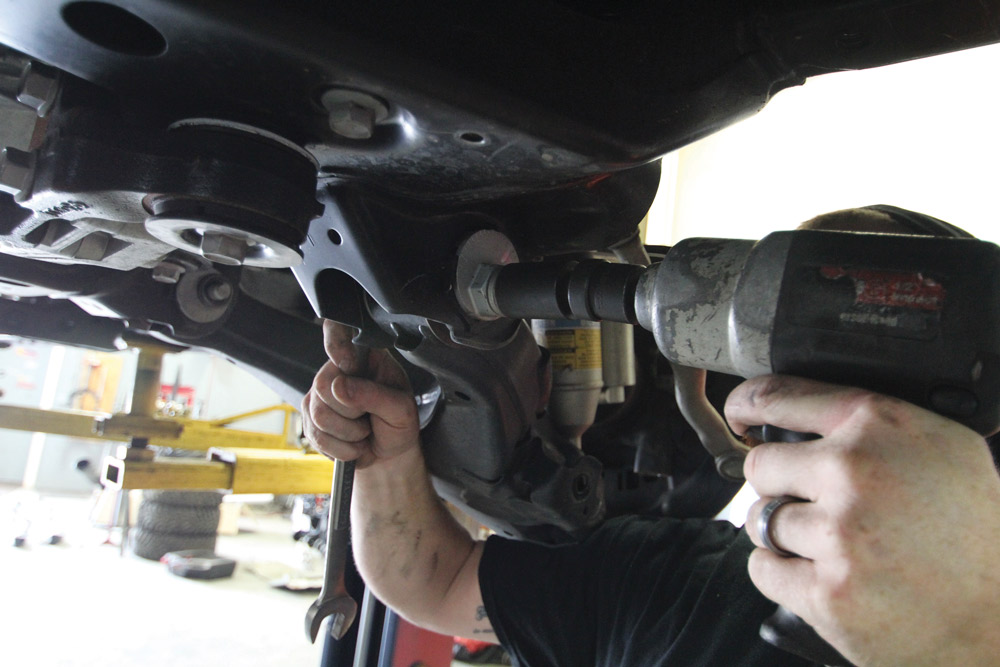
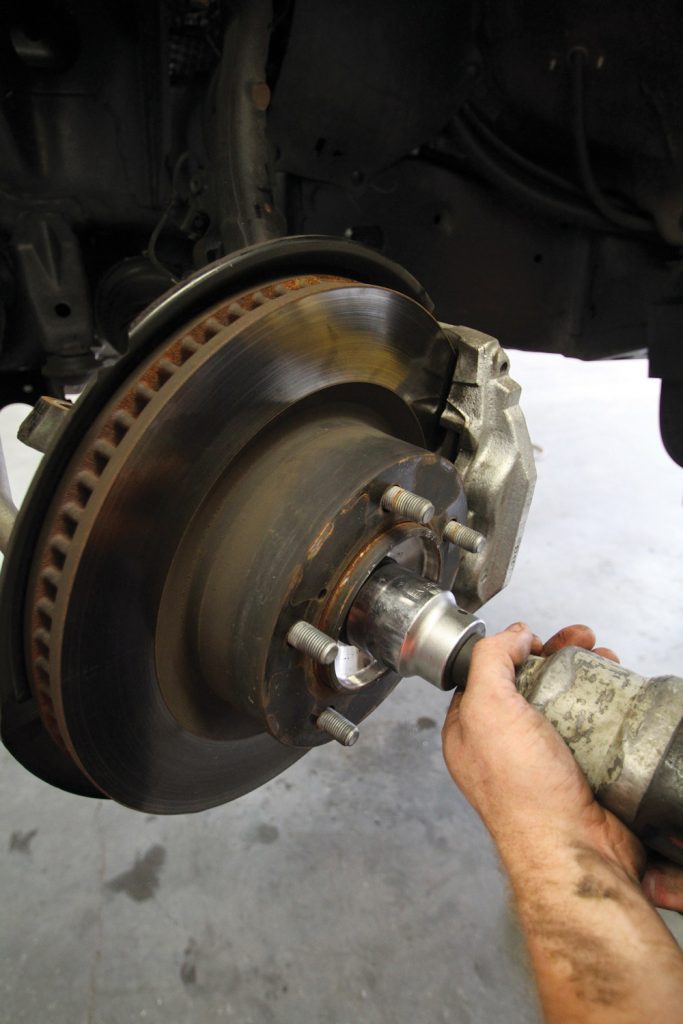
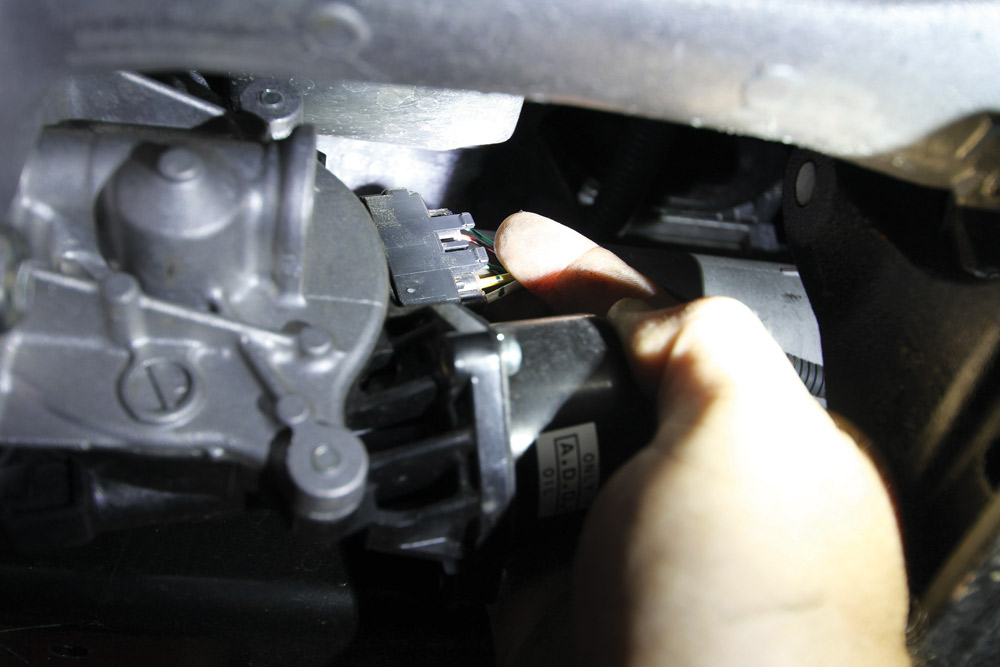
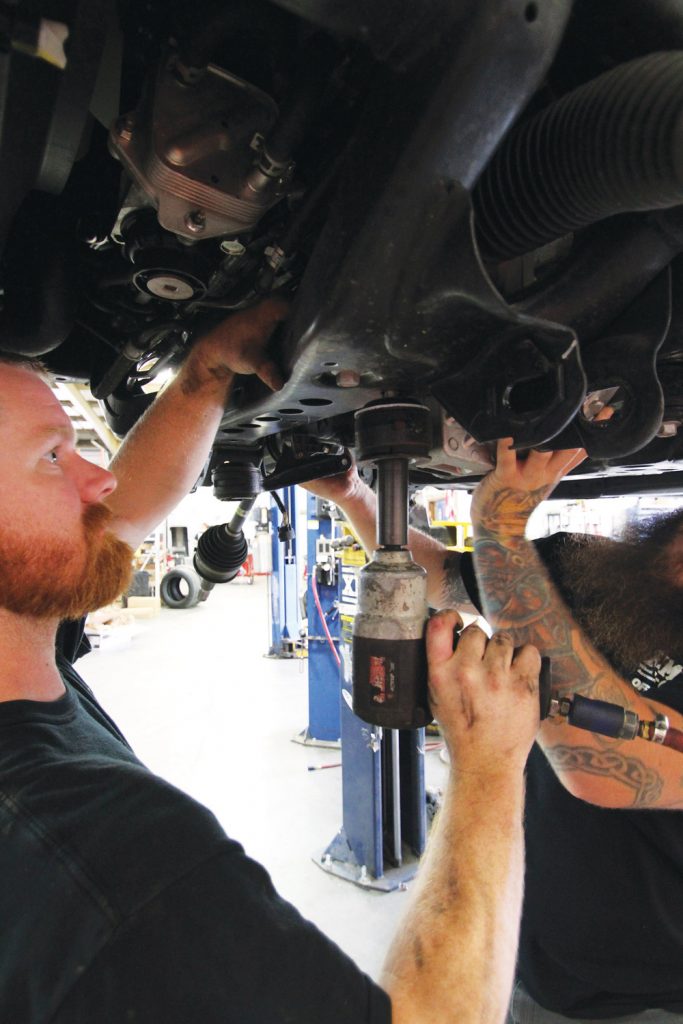
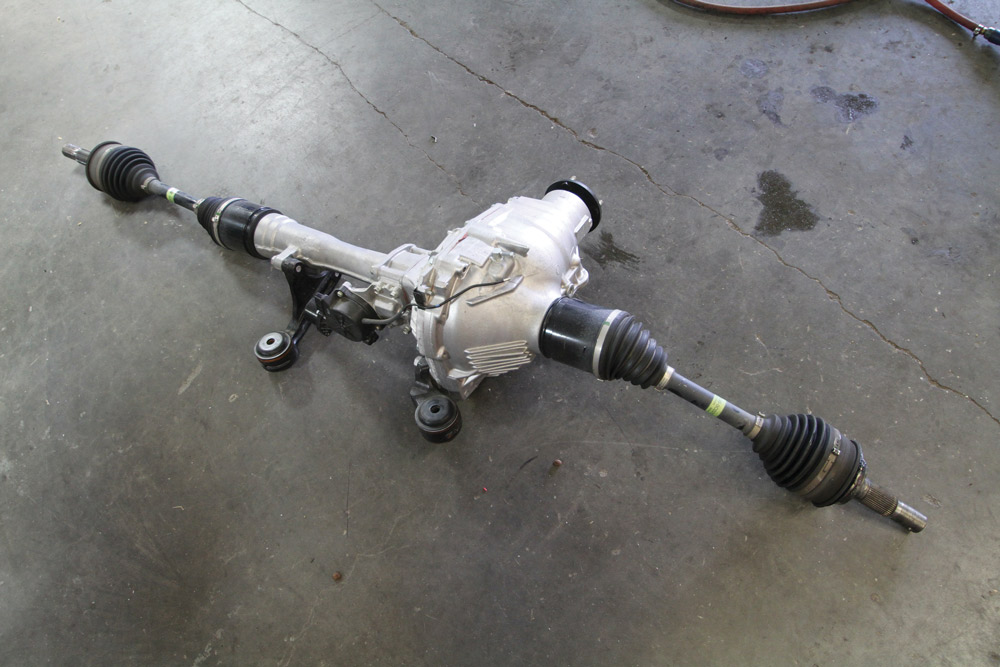
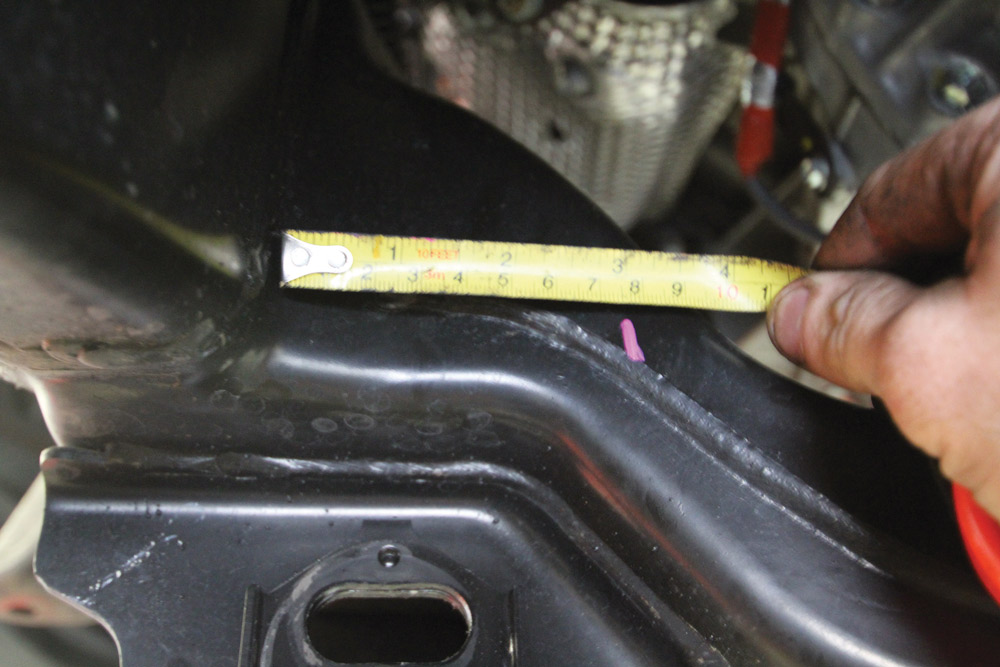
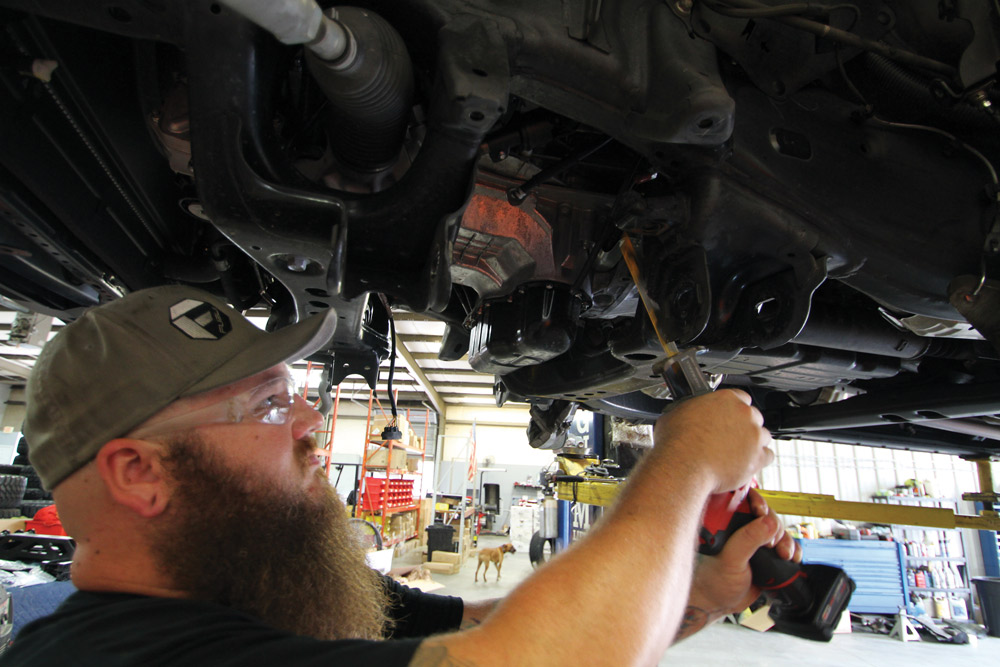
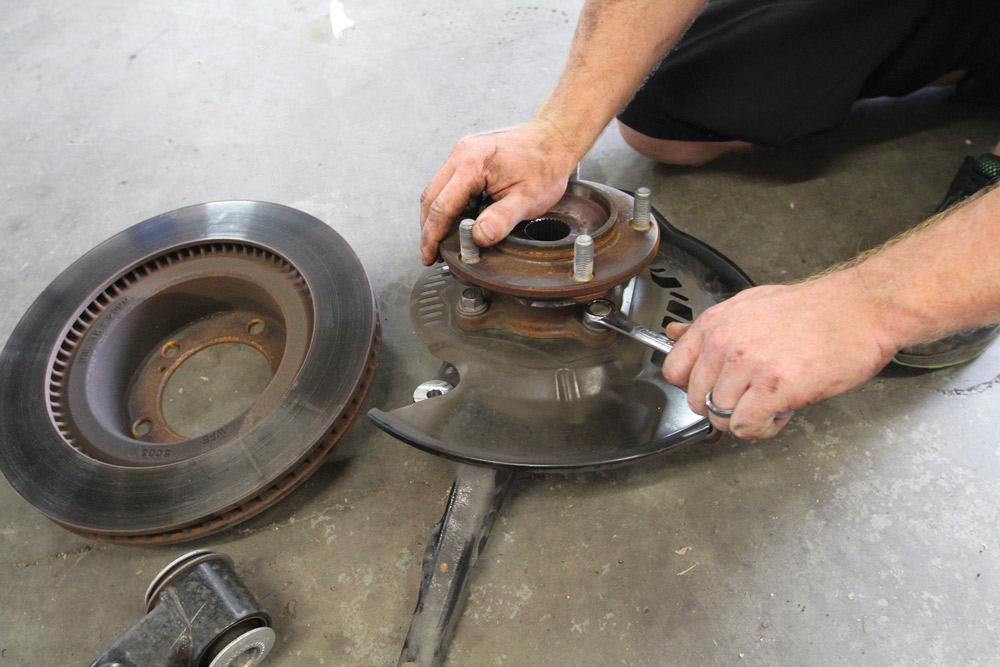
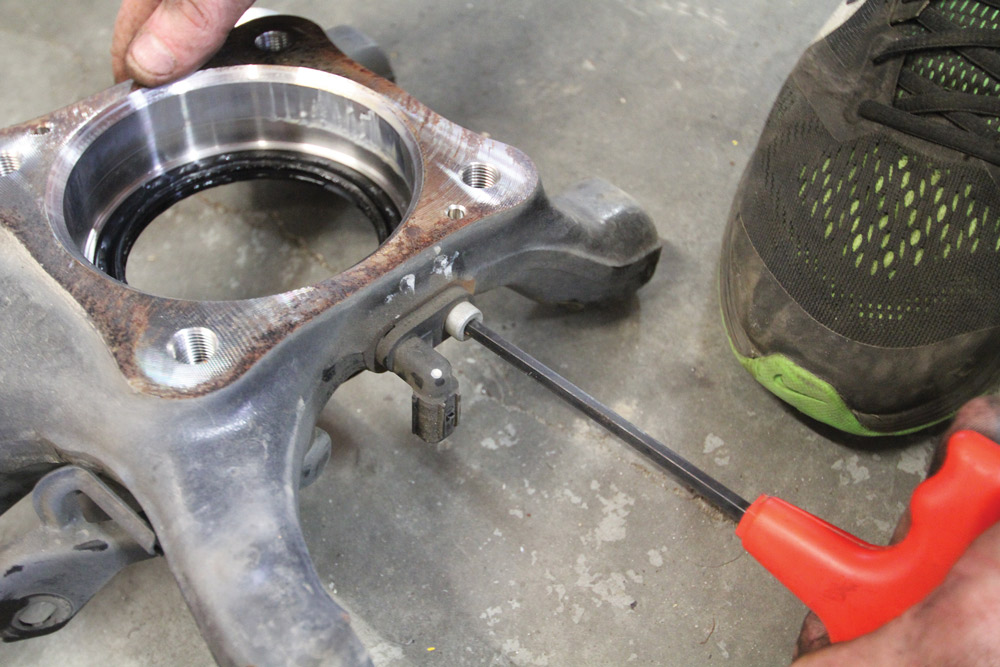
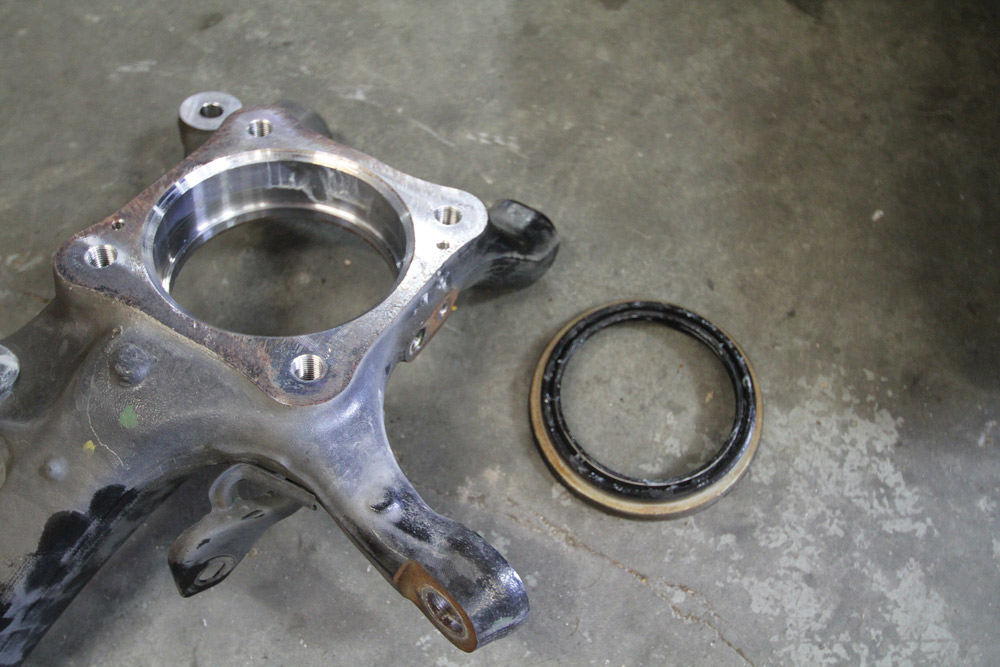
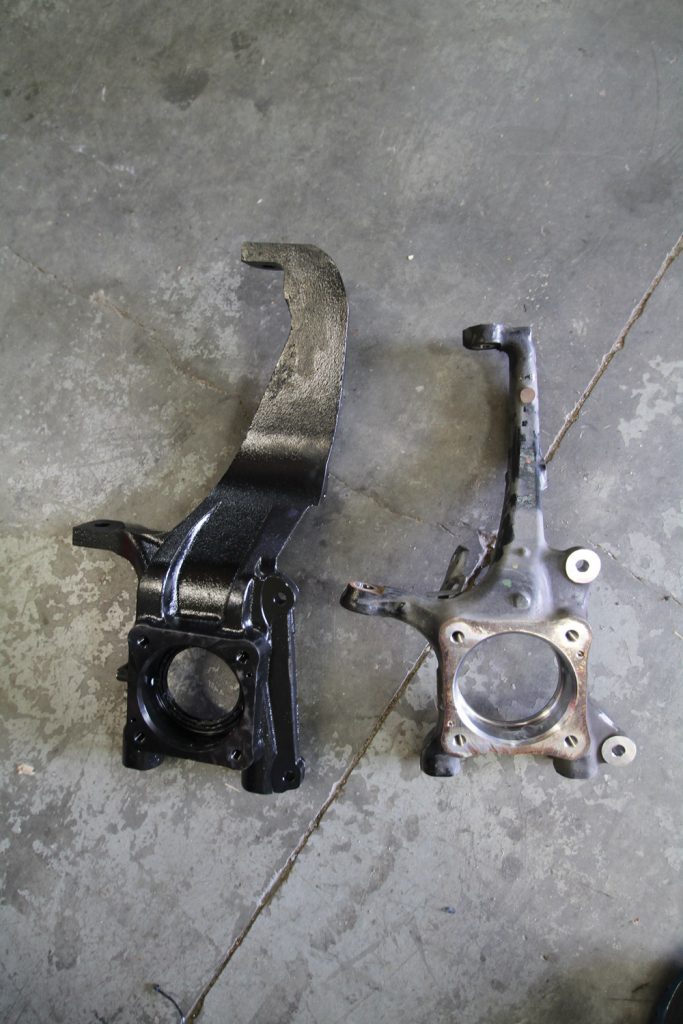
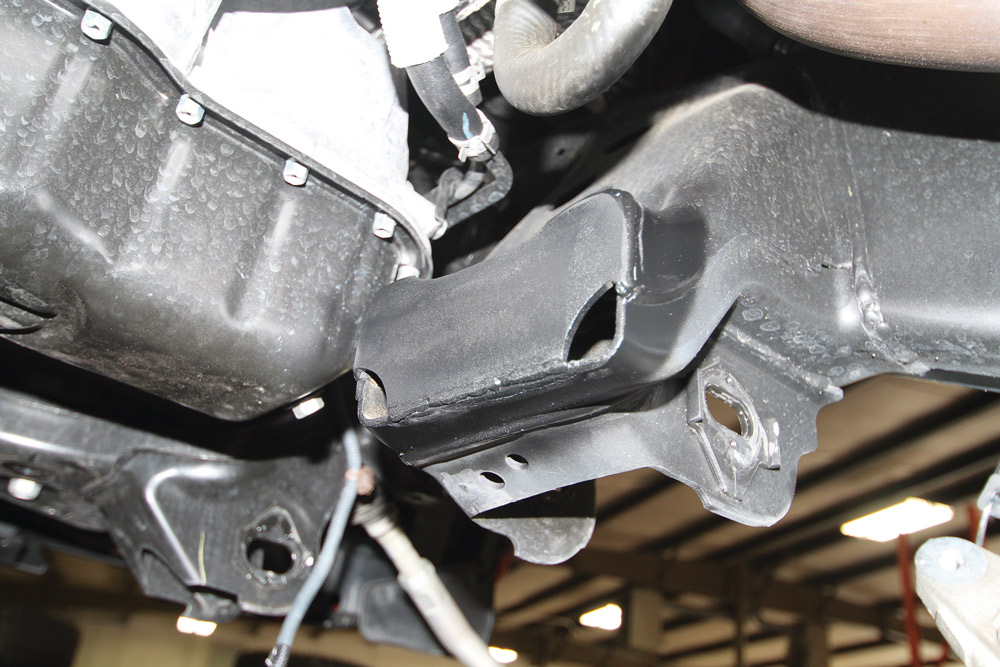
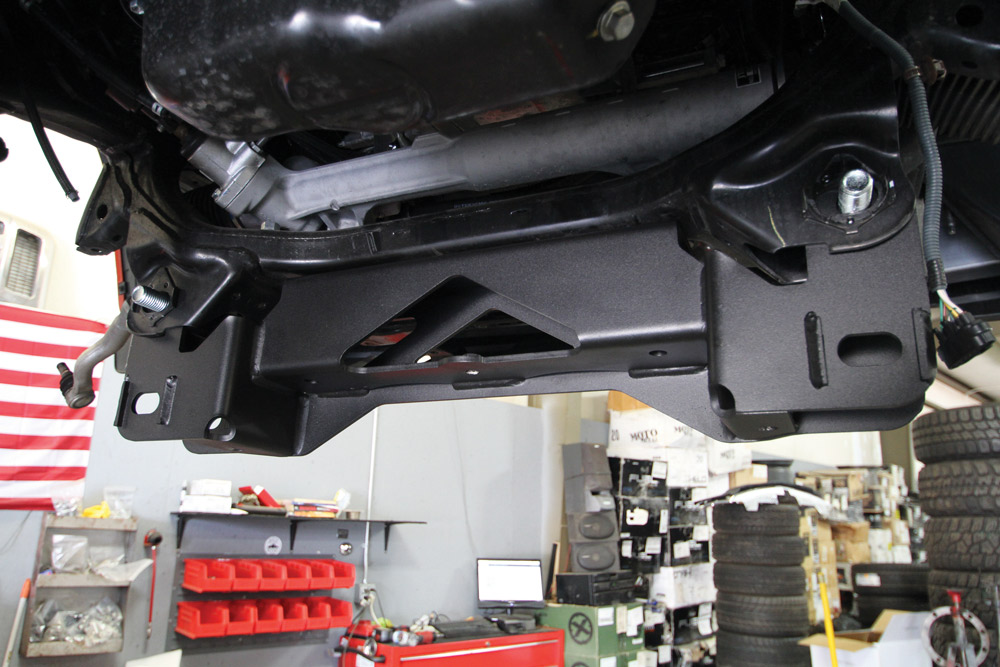
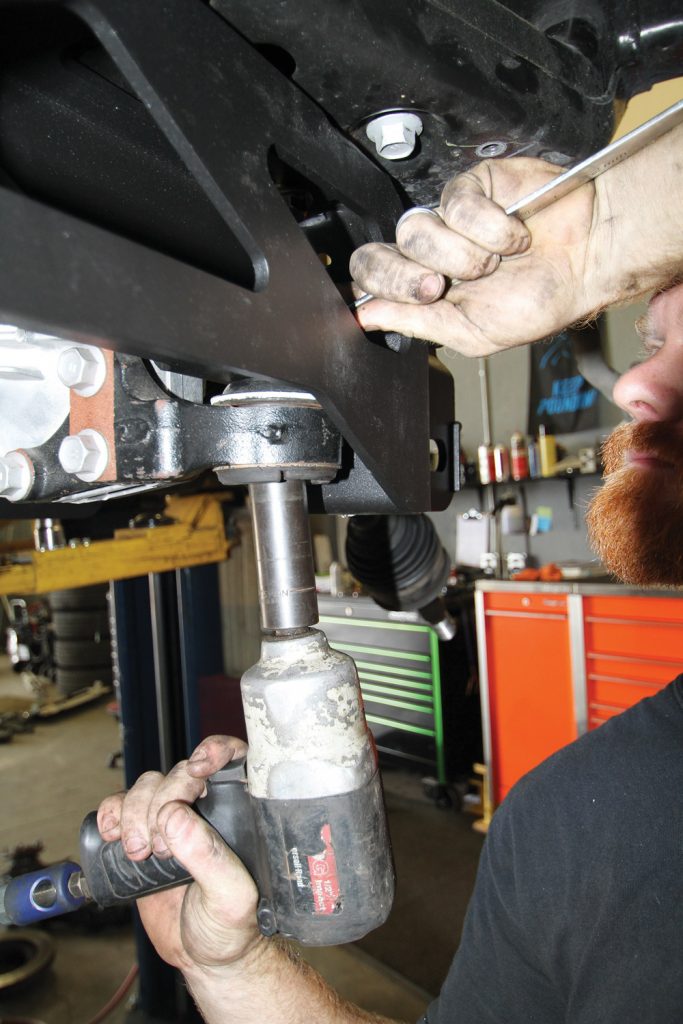
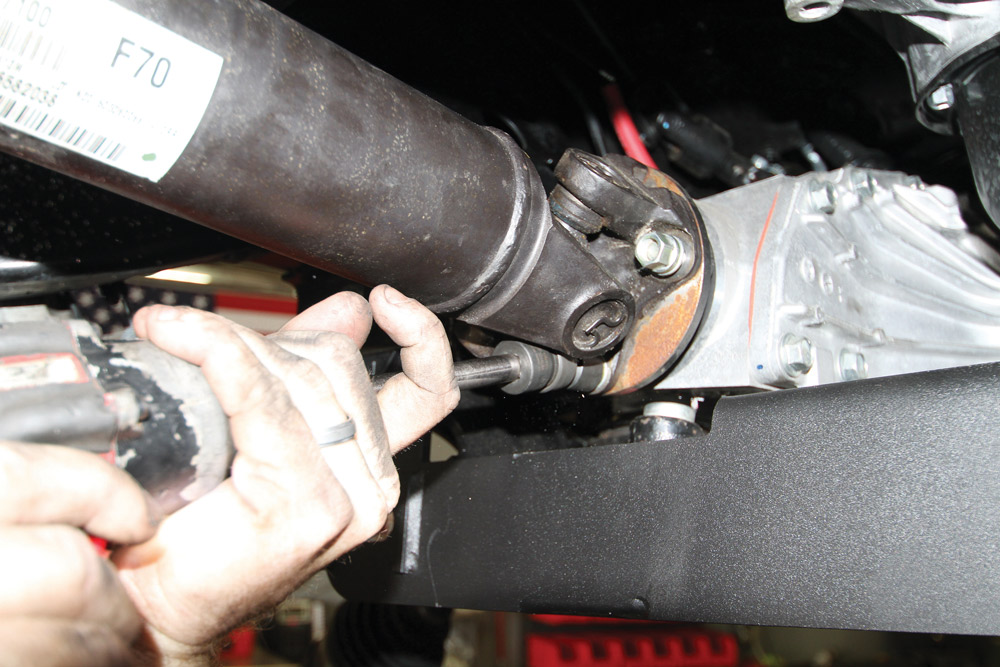
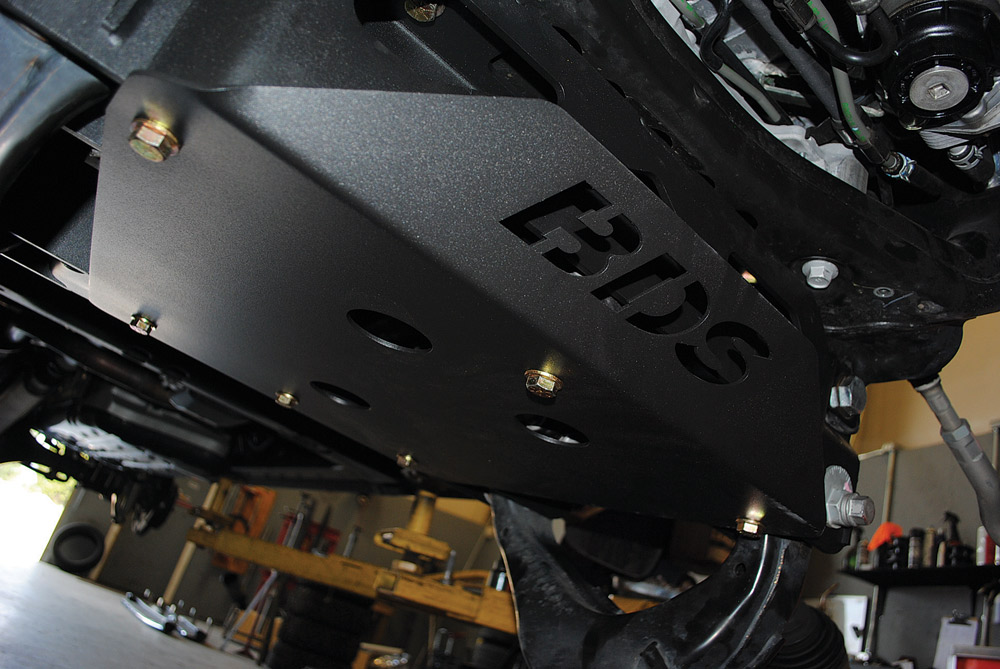
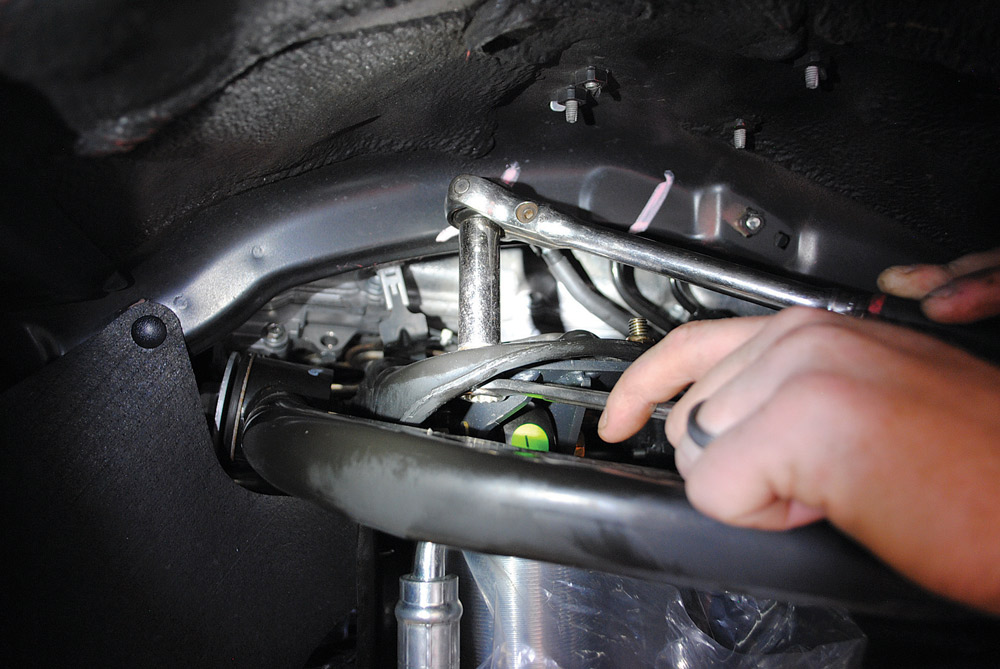
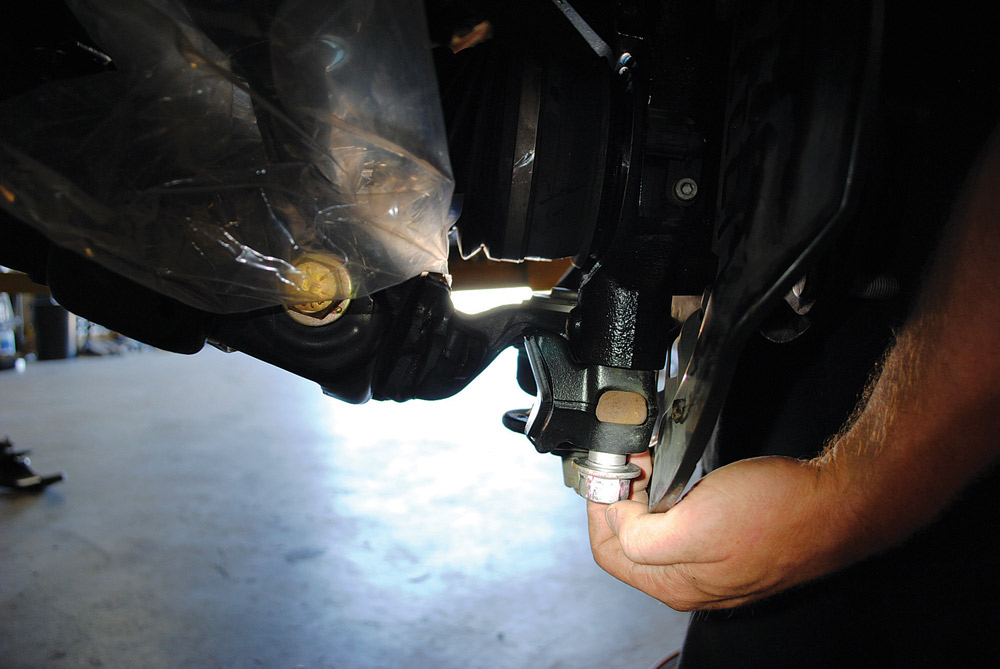
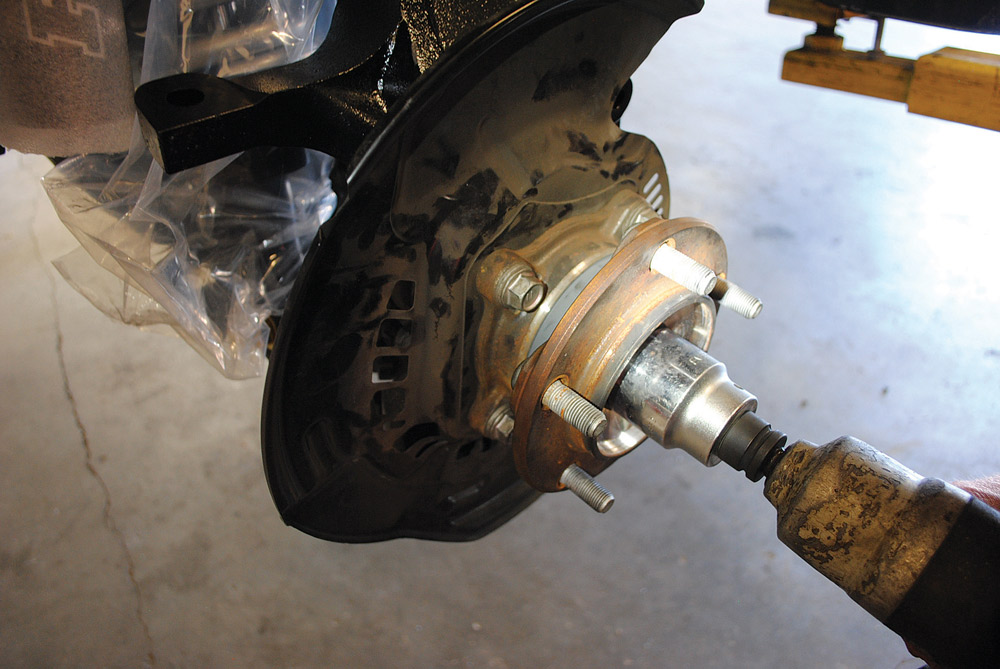
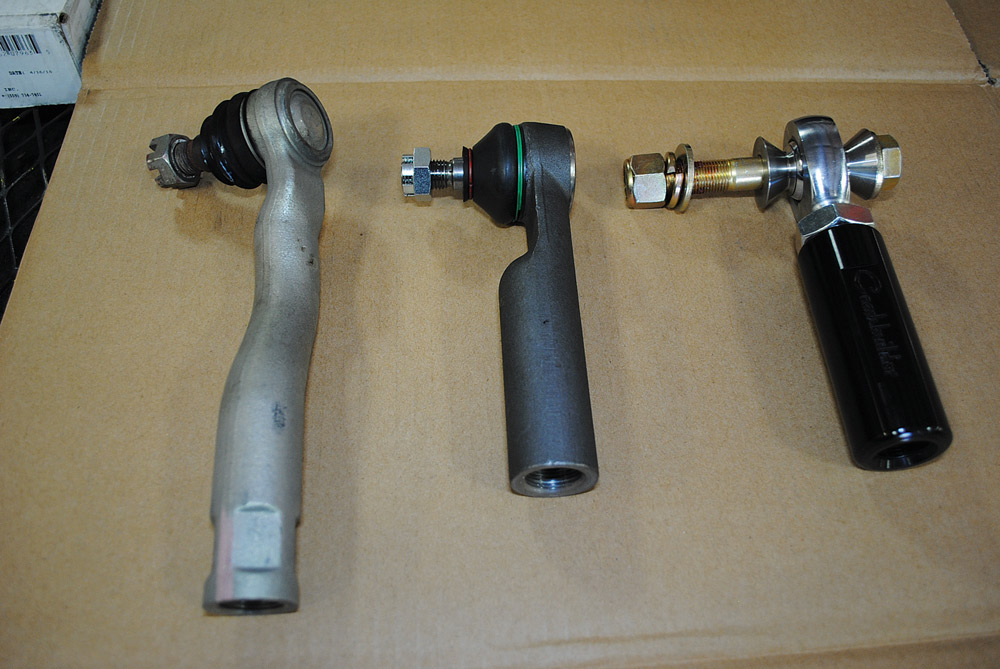
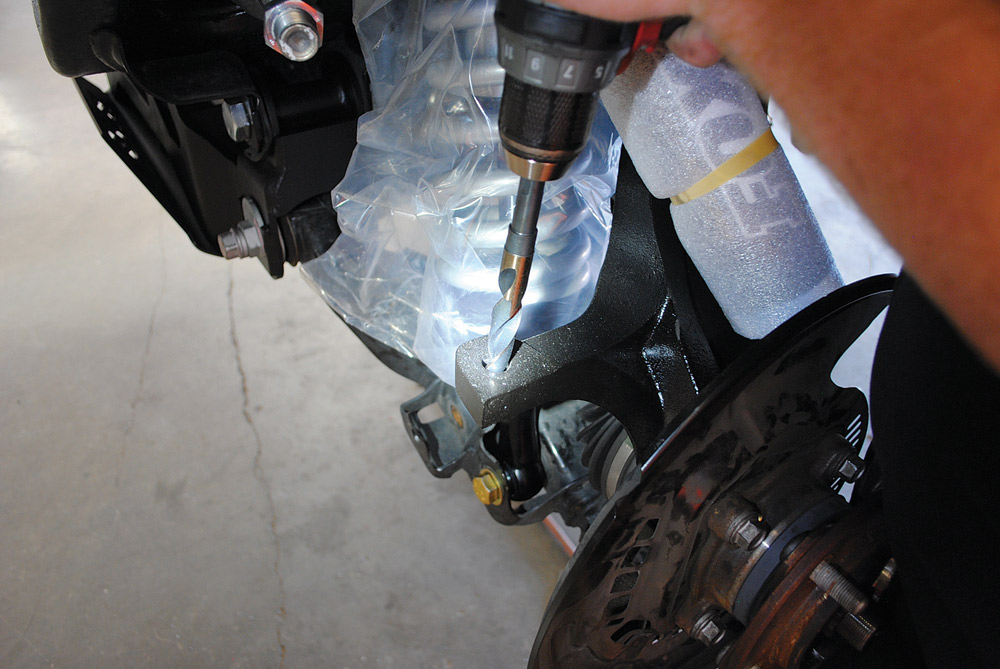
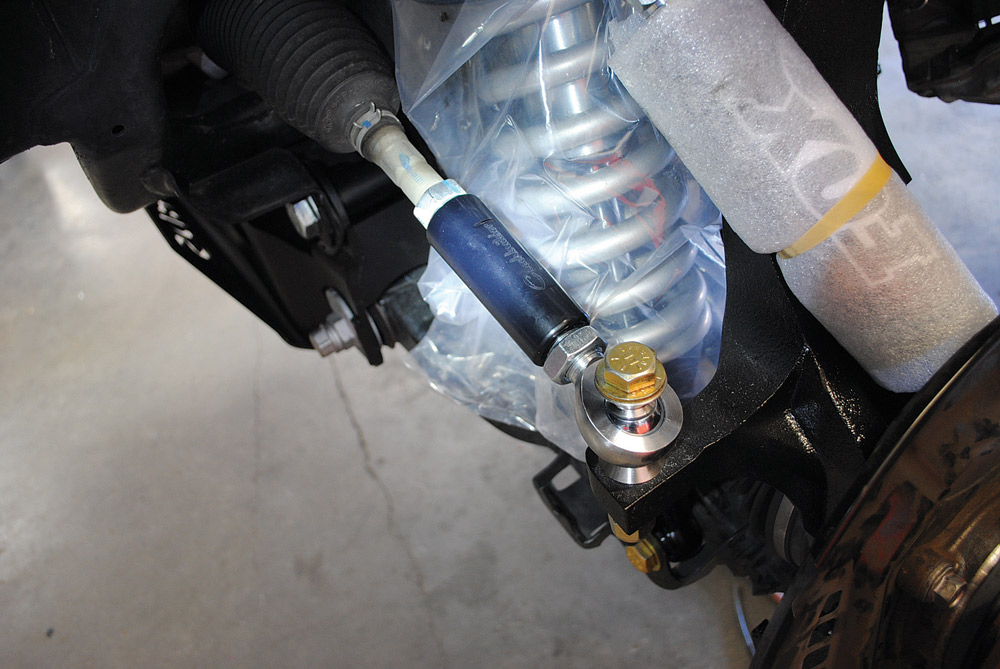
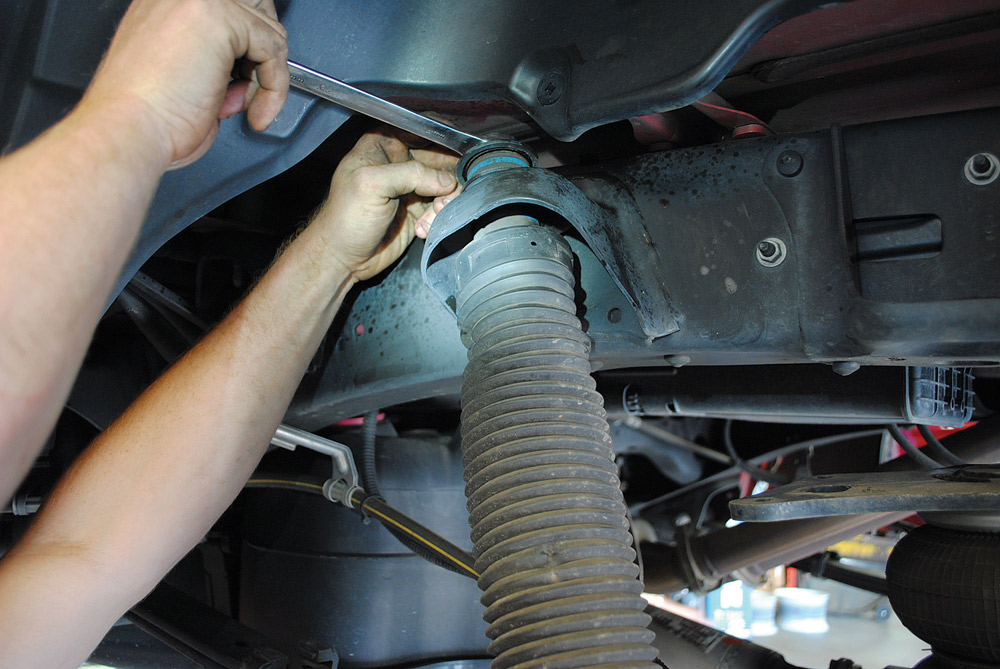
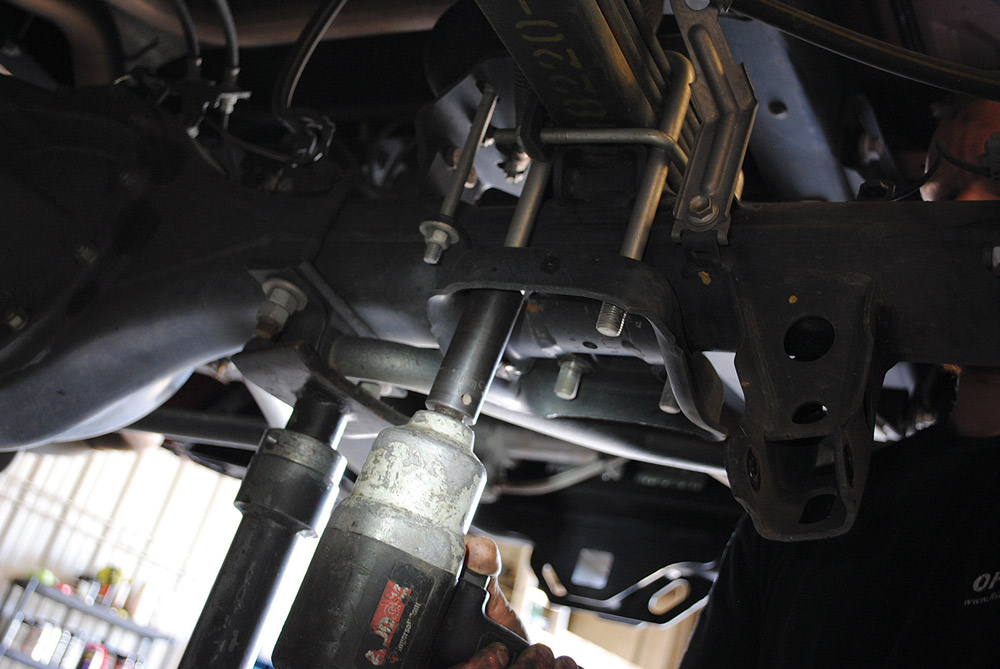
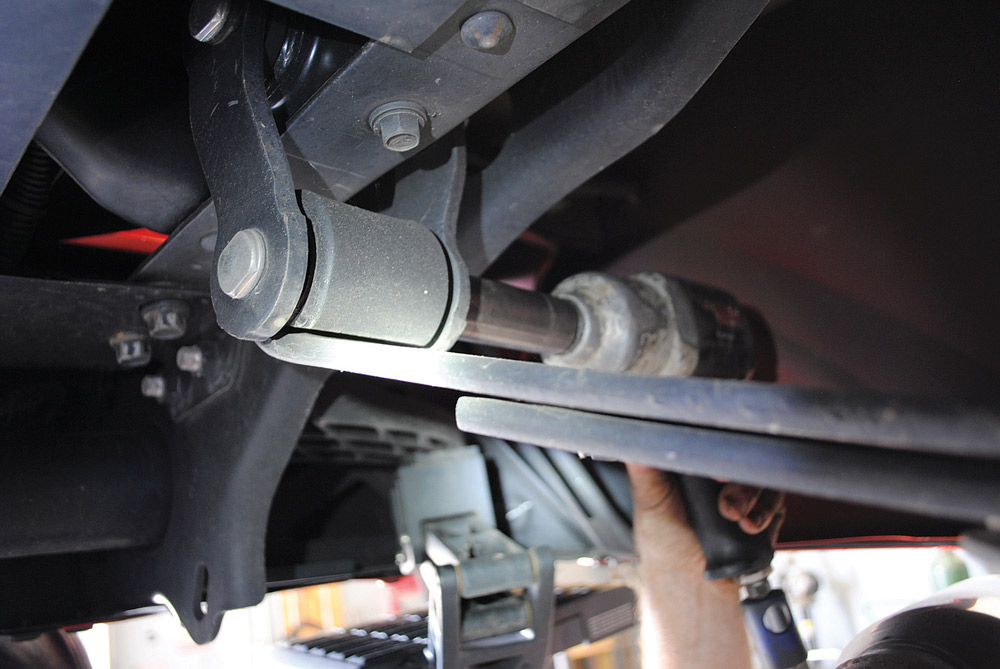
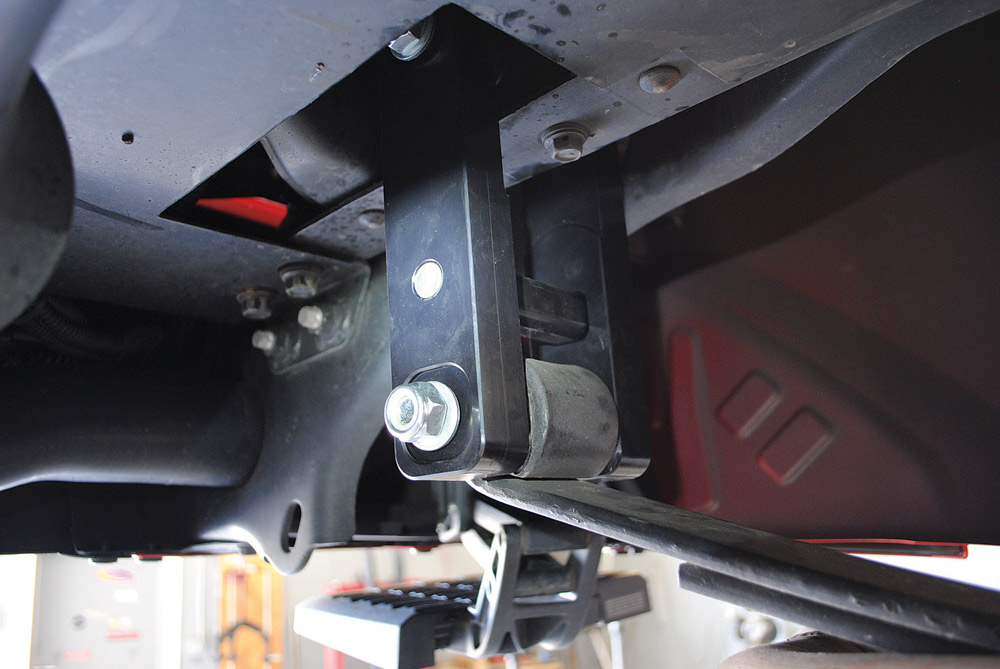
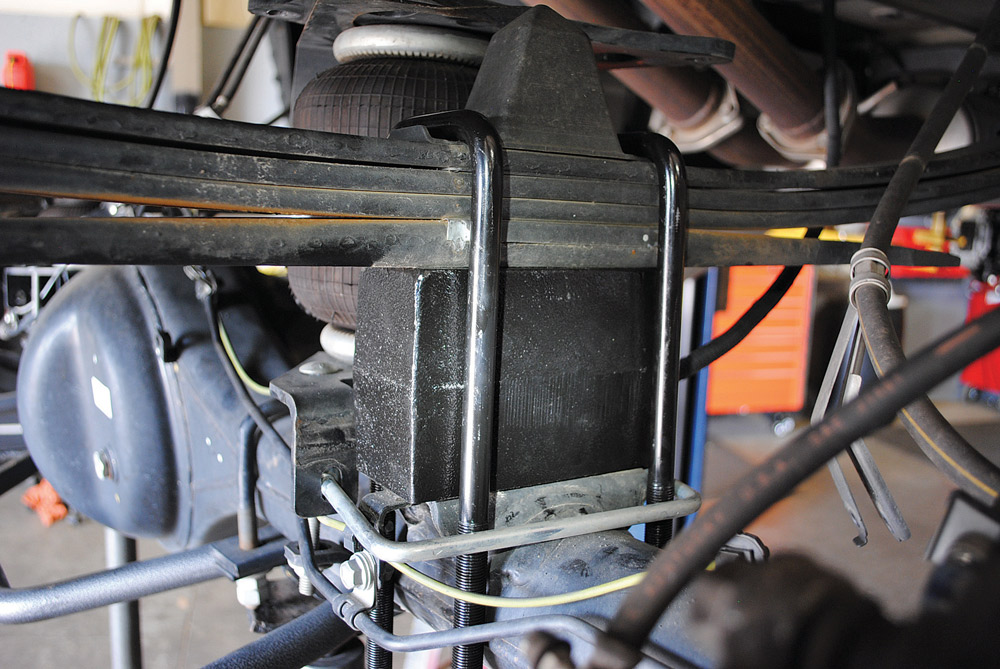
TRD Pro models come with larger front struts that have to be replaced with the 7-inch BDS lift kit. For SR5, Limited, Platinum and 1794 models, you can keep the factory struts.We started off by quickly removing the front sway bar.Then we removed the bolts holding the bottom of the strut to the lower control arms.The lower control arms were unbolted from the spindles, and we hung them out of the way for time being.The steering end linkage was unbolted from the spindle.The inner bolts and the entire control arm were removed. Then, we unbolted the top of the front struts and removed them as well.With one of the factory Bilstein front struts removed, you can see how much better the Fox coil-over 2.5-inch struts with remote reservoirs are. At this point, we left the packaging on the reservoir to eliminate scratches during installation.We removed the dust cap, cotter pin and axle nut from the front spindle. This was a good time to remove the calipers and tie them up safely out of the way.There are wheel sensor plugs on the inside of both spindles and one on the front differential that must be unplugged. There are also two vacuum lines on the differential that must be removed, too.This is where an extra set of hands helps. We unbolted the front differential from all mounting points and unbolted the front driveshaft from it as well.The entire front differential can be removed from the truck in one piece.For this kit, the rear frame cross member must be removed. We measured accordingly on each side using specs from the instruction sheet. We doublechecked our measurements before cutting it out completely.We used a reciprocating saw to cut along the marks we made on the cross member and removed it.While the cross member was being cut out, we disassembled the front factory spindles. We also removed the hubs and dust shields.The ABS sensor bolts were removed from both spindles. These will need to be reinstalled into the new spindles, so we set them aside.We carefully removed the factory hub seals and set them aside to be installed into the new BDS spindles.As you can see with this side-by-side comparison, the new lift spindle is not only larger, it’s also much beefier. All mounting points were retained for a seamless installation.Metal end plates were supplied in the kit to weld up the holes where the cross member was cut out. Once those were welded in and painted, we started the installation of the new drop bracket.The front drop bracket was installed using the factory lower control arm holes with new hardware. Once it’s in and square, we tightened up all of the mounting hardware.The front differential was set back in place and bolted into the new drop bracket.The front driveshaft, vacuum lines and electrical plug were reinstalled.Once the lower control arms were bolted to the drop bracket, the supplied BDS skid plate was installed.The top of the Fox coil-over was bolted into the factory strut mounts using the supplied brackets. Then we bolted the bottom to the lower control arm.The new larger spindles were bolted in top and bottom while we made sure the CV axles were properly installed.The axle nuts were tightened, and the cotter pins and dust caps were installed.Here’s a comparison of the stock steering end (left), BDS-supplied part (center) and the much larger Coach Builder part (right). The new larger end link will ensure the suspension can be punished with zero repercussions.In order for the larger Coach Builder steering ends to mount to the spindles, we enlarged the holes in the spindle using the supplied drill bit.Once the holes were drilled, we attached the steering linkage to the spindles and tightened it down.Moving to the rear, we removed the stock shocks on both sides.With the rear axle supported, we unbolted all factory U-bolts holding the axle to the leaf springs.We moved the factory rear leaf spring shackle and lower leaf springs out of the way.We reinstalled the rear of the leaf springs with the new 3-inch billet Coach Builder shackles for a more level truck and better ride. This added 1.75 inches more lift, and the Coach Builder polybushing kit improved movement.Both supplied lift blocks were installed using the new longer U-bolts, and then they were tightened.The final step was to install the new Fox rear shocks. They can be bolted up in all factory shock locations.
Withthe lift kit attached, the truck gained height and ground clearance. We were able to fit a set of 37×12.50R20 Open Country R/T tires to add more inches to the truck’s stature. Not only did they make the Tundra taller, but they also made it off-road-capable without sacrificing traction on paved surfaces. These tires were attached to the 20×9-inch 649BA Dropstar Wheels from Rimz One.
“NOT ONLY DID [THE TIRES] MAKE THE TUNDRA TALLER, BUT THEY ALSO MADE IT OFF-ROAD-CAPABLE WITHOUT SACRIFICING TRACTION ON PAVED SURFACES.”
We tested the new suspension mods on the road. The truck towered over most other vehicles, and the ride was smoother, thanks to the reservoir shocks. We were happy with the new height and off-road performance.
Chris Hamilton is an automotive journalist, editor, and lifelong truck enthusiast with extensive experience covering custom truck builds, fabrication, performance upgrades, aftermarket products, and a ...
We use cookies to enhance your browsing experience, serve personalized ads or content, and analyze our traffic. By clicking "Accept All", you consent to our use of cookies. Visit our Cookie Policy for more info.


Share Link