Up next We NEVER expected this to happen AGAIN while driving our OBS Published on December 20, 2022 Author F100 BG STAFF Share article Facebook 0 Twitter 0 Mail 0 Aftermarket A/C install on our 1978 Ford F-150 4×4 with Vintage Air Making Aftermarket A/C Easy with Vintage Air Vintage Air has been synonymous with aftermarket air conditioning since the mid 1970s. With the company’s plug-and-play SureFit kits, this job is as easy for a guy doing it in the garage as it is for a professional. Vintage Air makes this setup dummy-proof. 
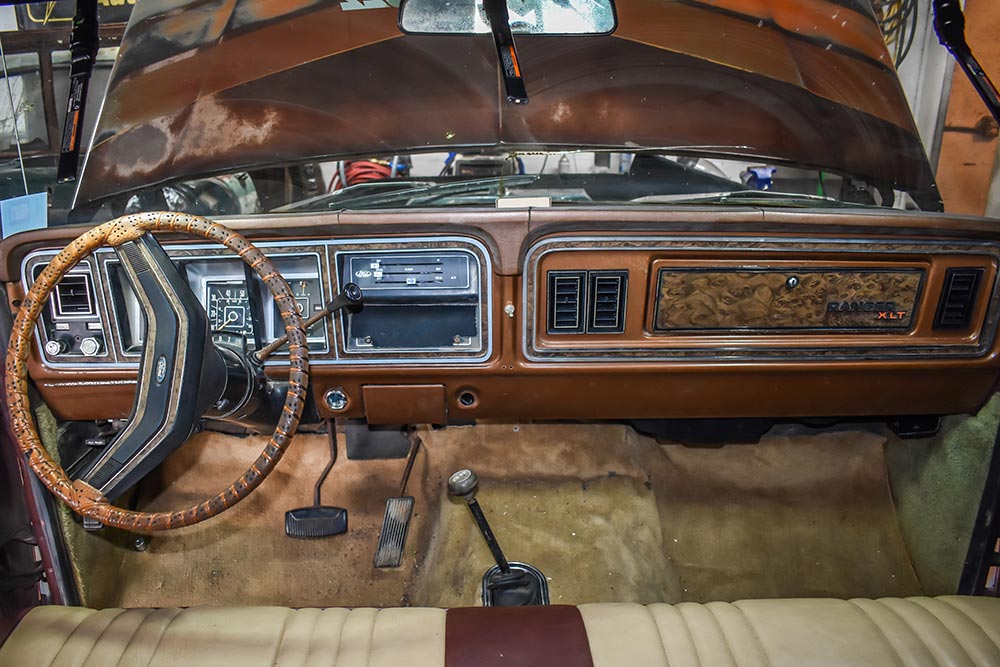
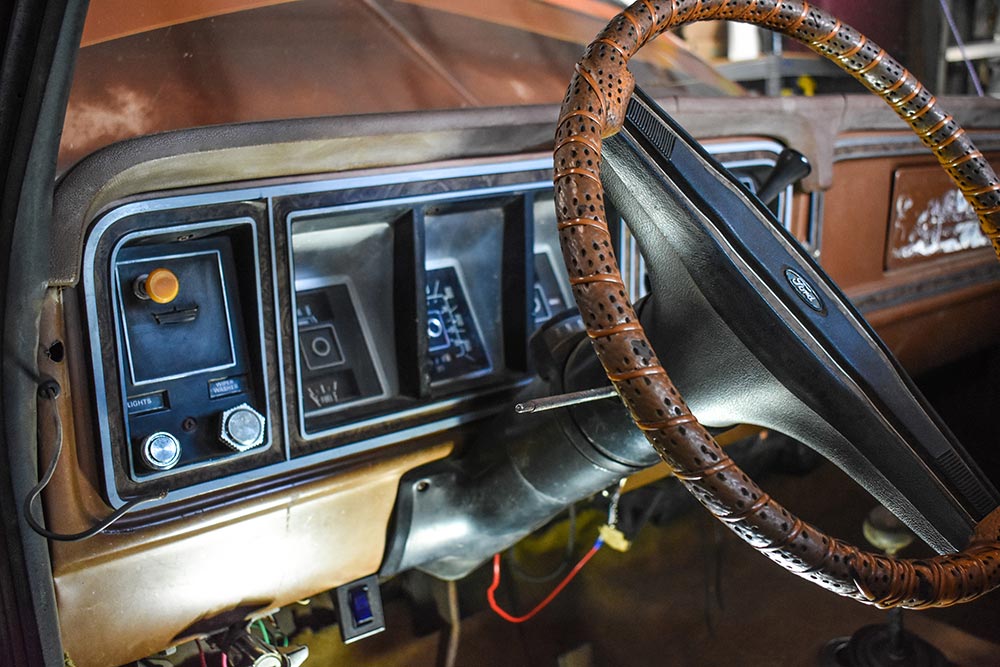
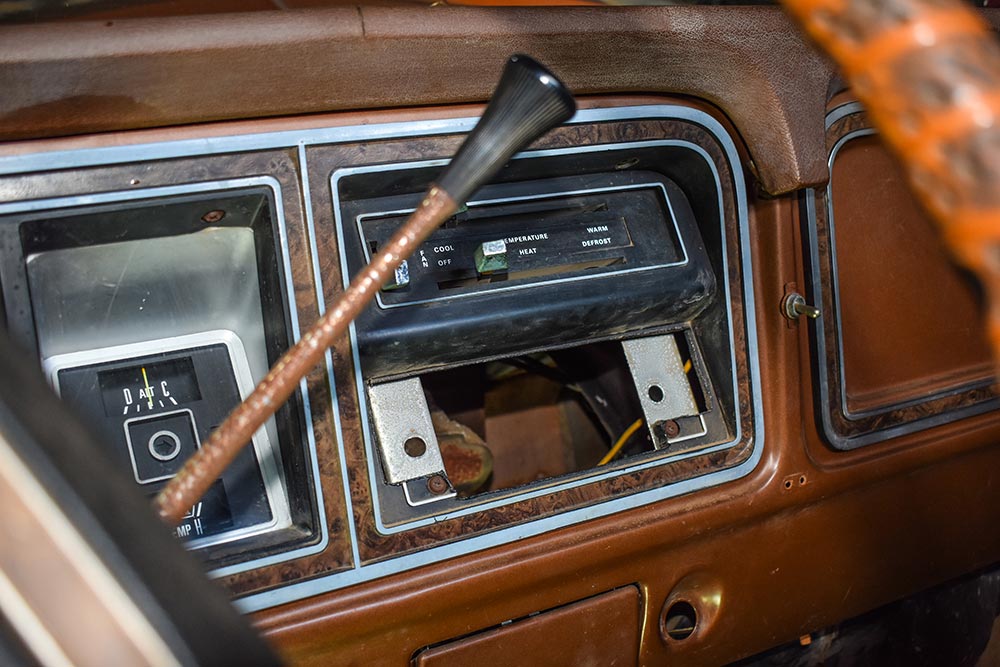
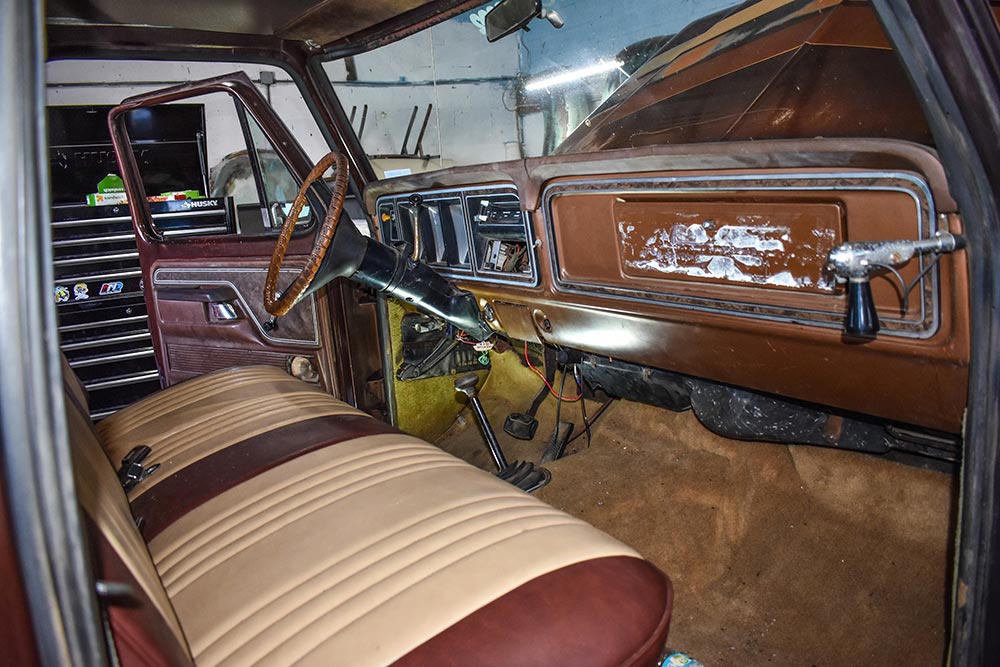
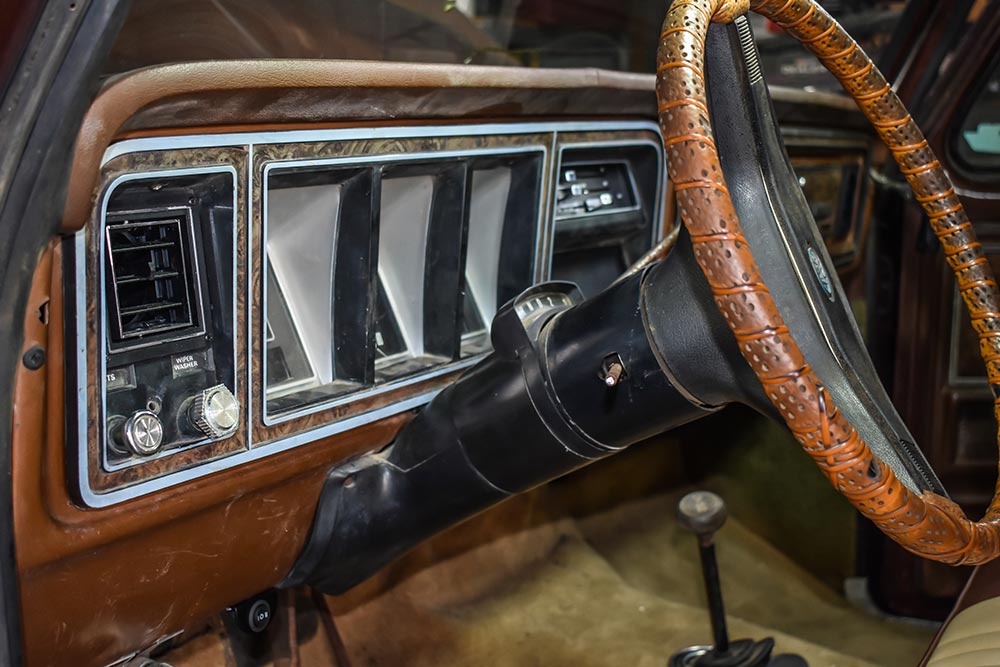
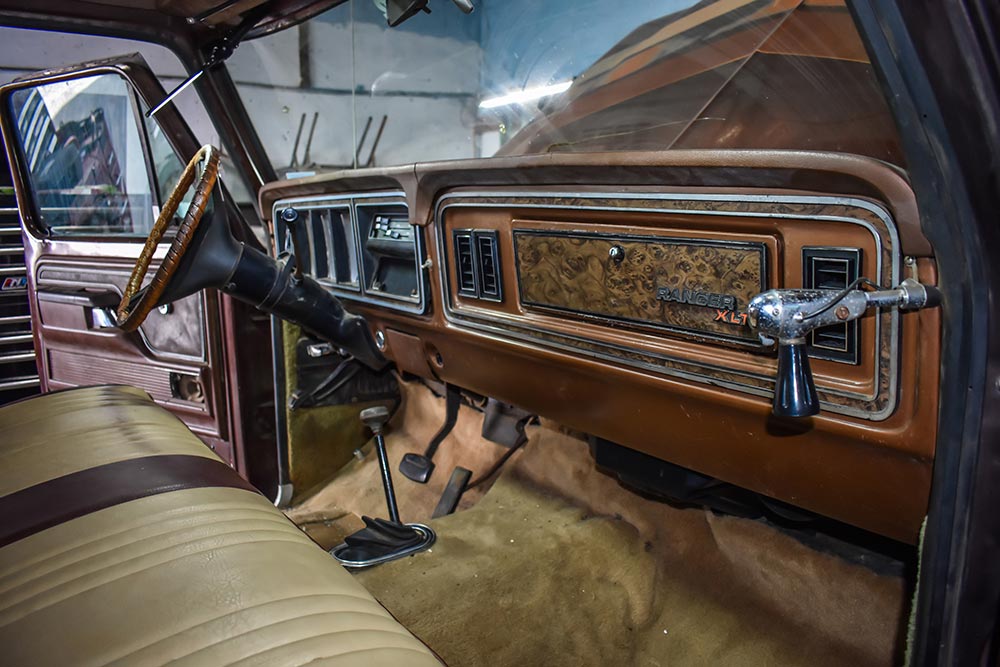
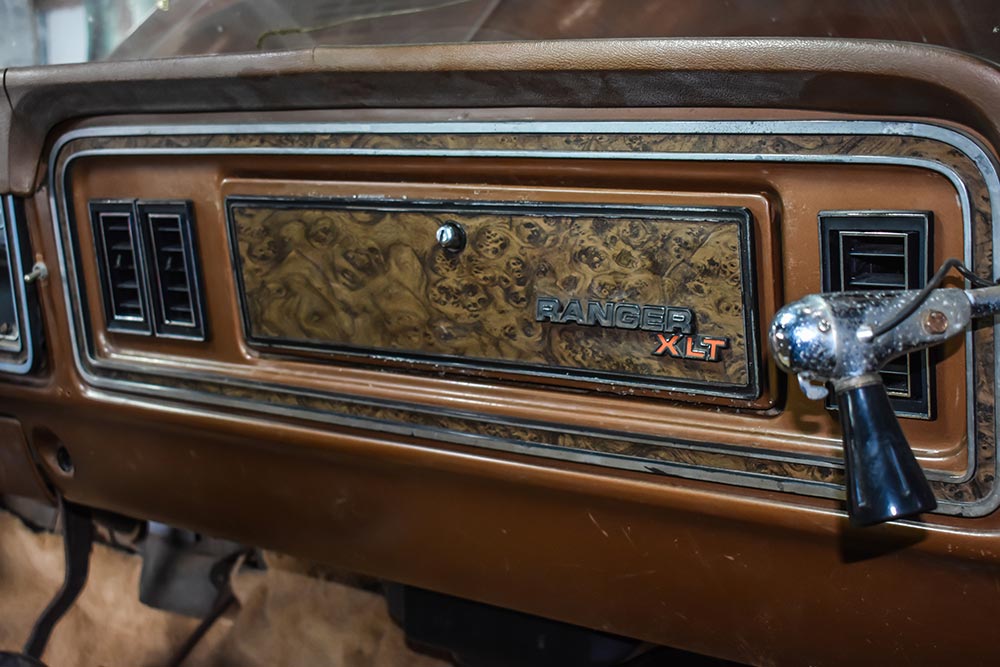
We have Snickers, our 1978 Ford F-150 4×4, that we took on Hot Rod Power Tour. That was a 2,000-plus mile journey in the summer in the south. Let’s just say it was HOT!! One of the first things we wanted to do was add air conditioning to make the truck more comfortable for cruising.Subscribe to our weekly newsletter 
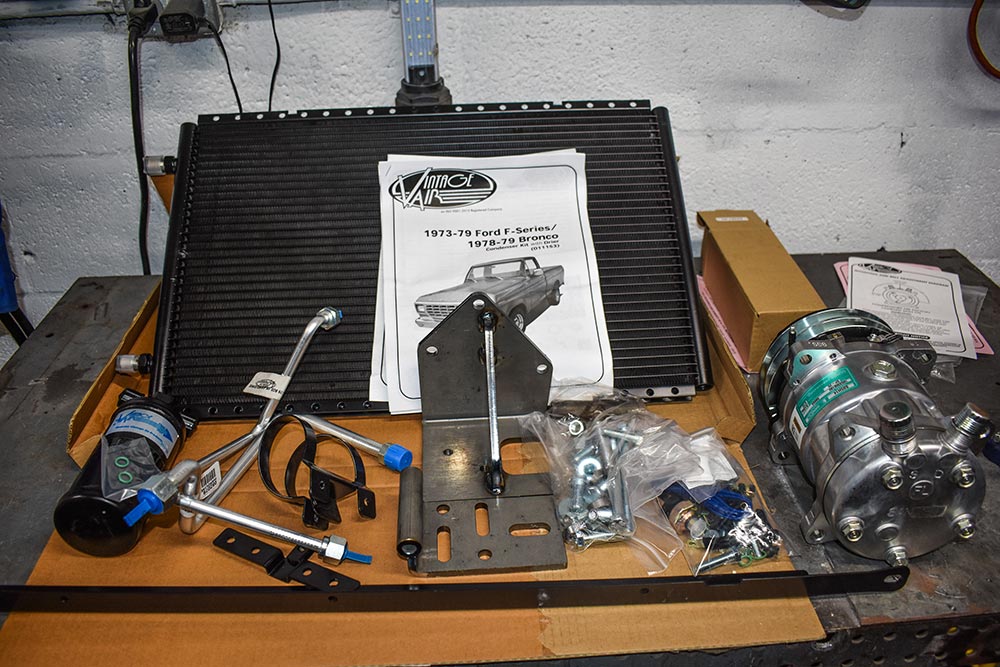
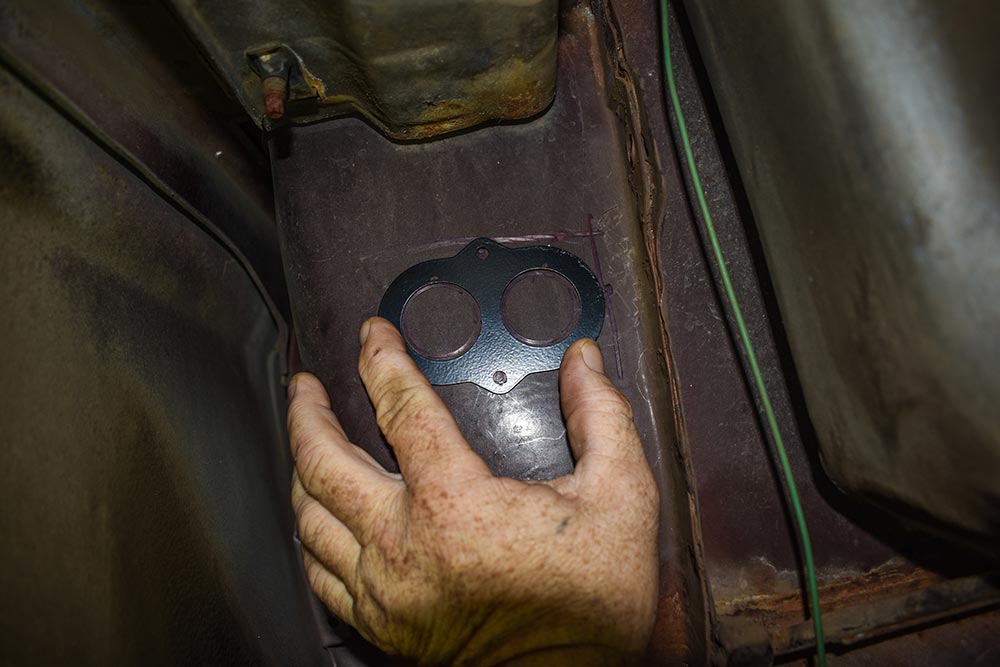
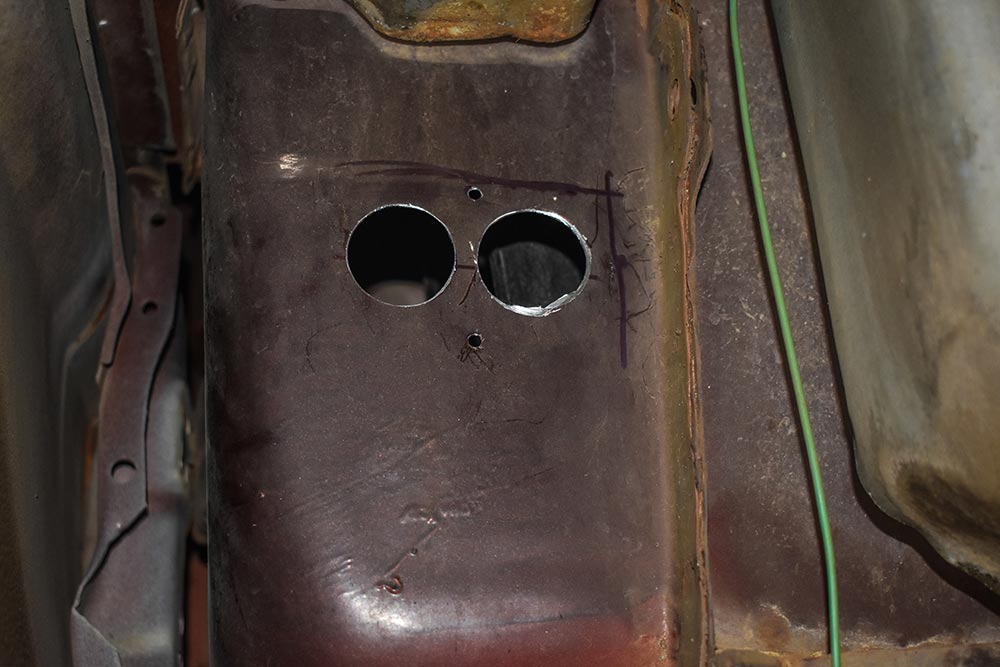
About a year ago, Vintage Air released its 1973-’79 F-Series and ’78-’79 Bronco SureFit kits. So, it was about time we tested it out to give you all a glimpse of the installation process. Because Vintage Air does an amazing job with its instructions, this is not going to be a step-by-step how-to install. It will be more of an overview. We recommend reading the instructions included in your kit. 
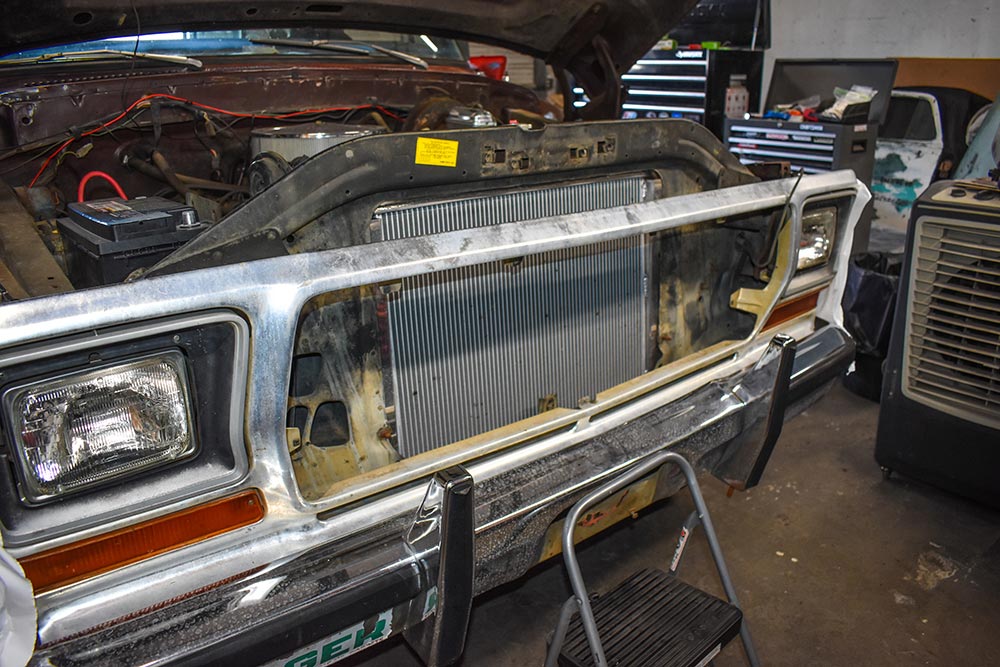
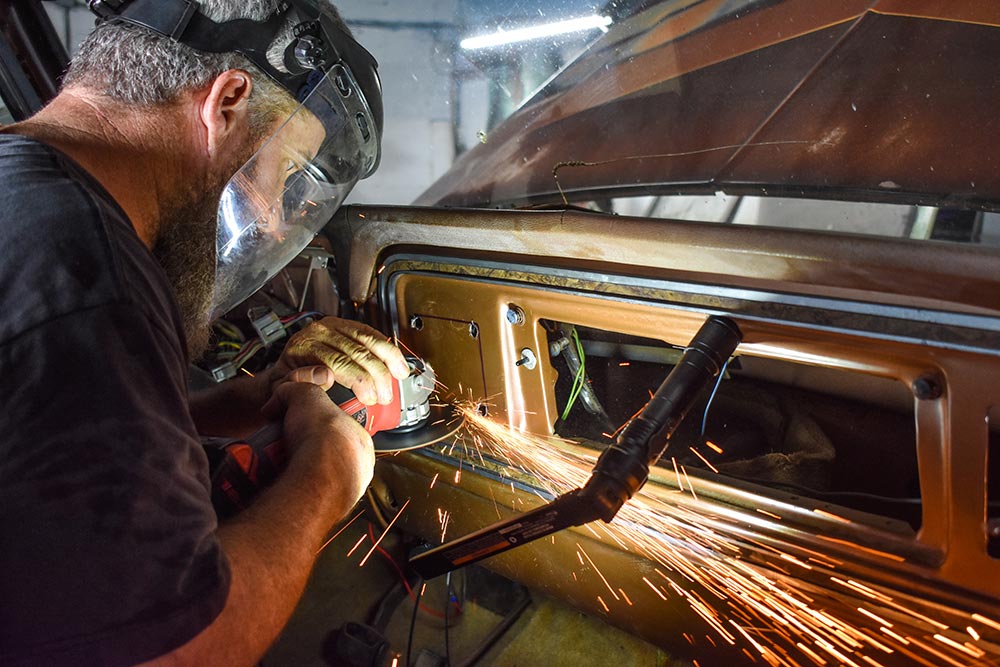
We enlisted the help of our buddy Sean over at Automotive Power Solutions in West Palm Beach, Florida. Sean has been in the automotive field for years and has installed so many Vintage Air setups he has lost count. He told us that the most tedious part of the install is charging the system. All in all, the install took two days with proper planning. Just remember to measure twice and cut once. You also have the added benefit that if you get stuck along the way you can call the tech support hotline at Vintage Air. They will help walk you through any hiccups you might have. 
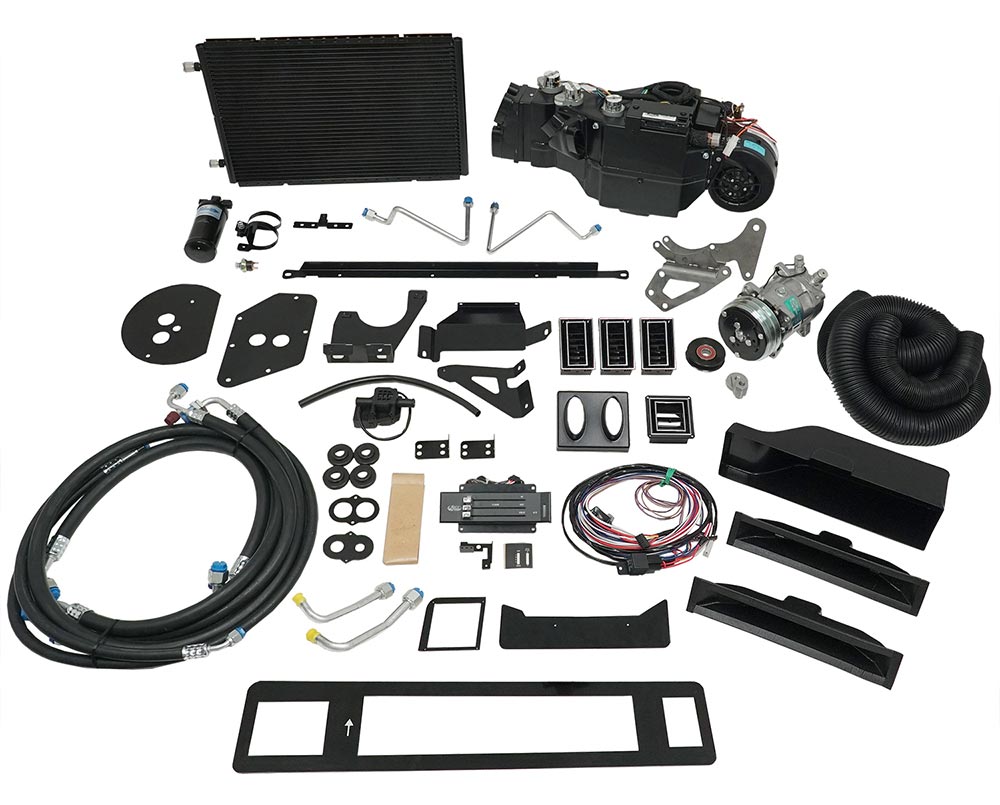
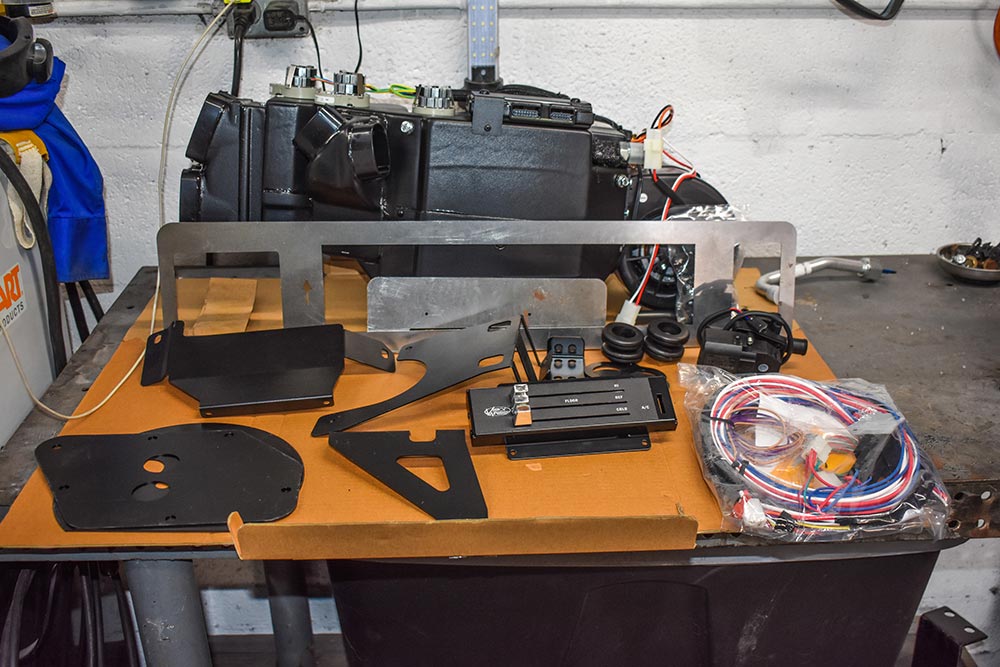
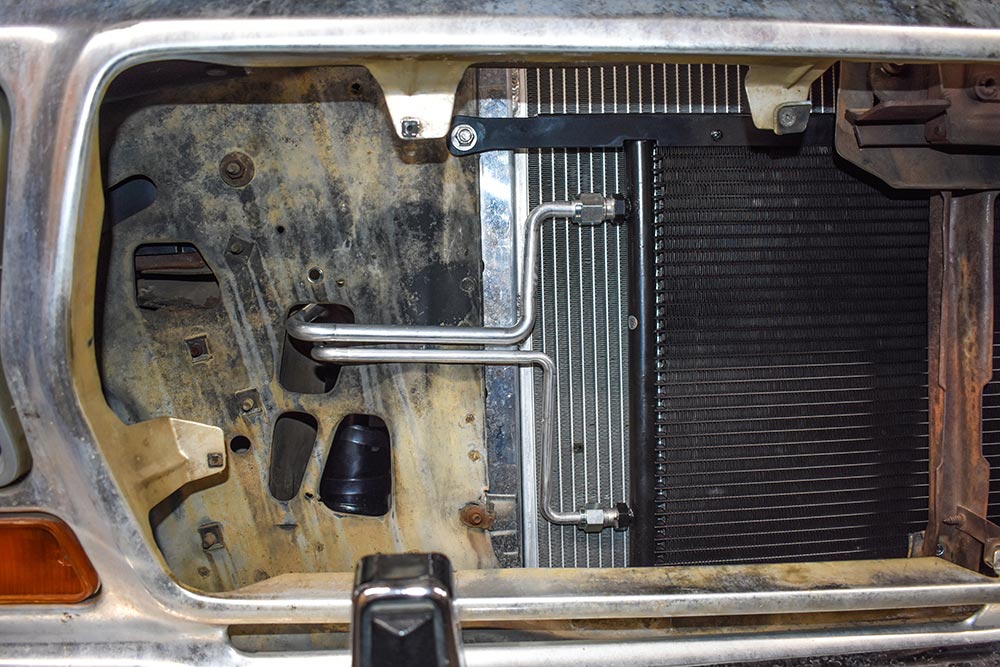
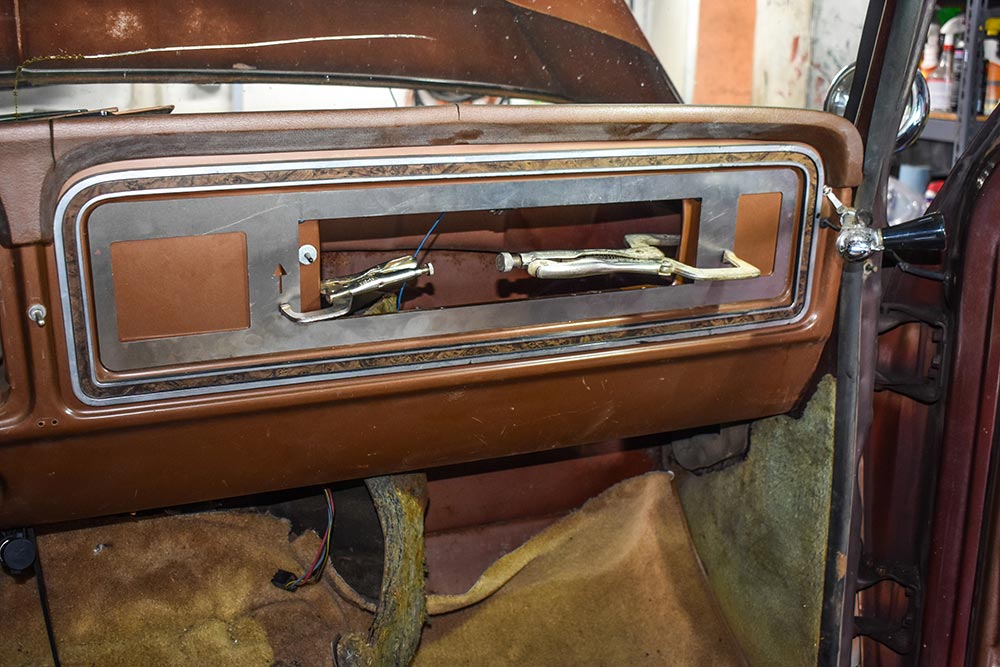
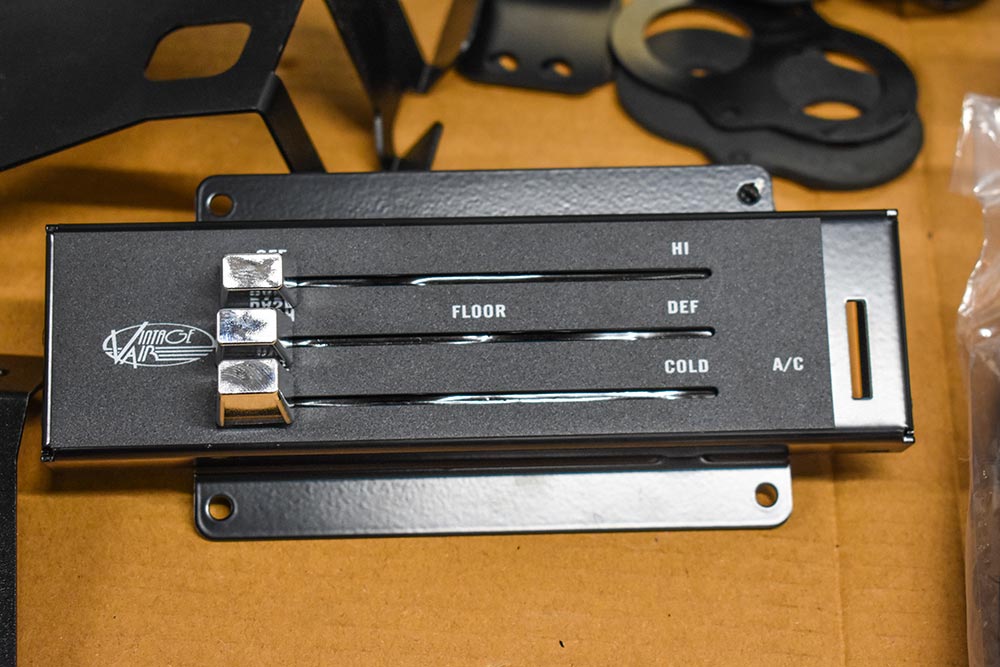
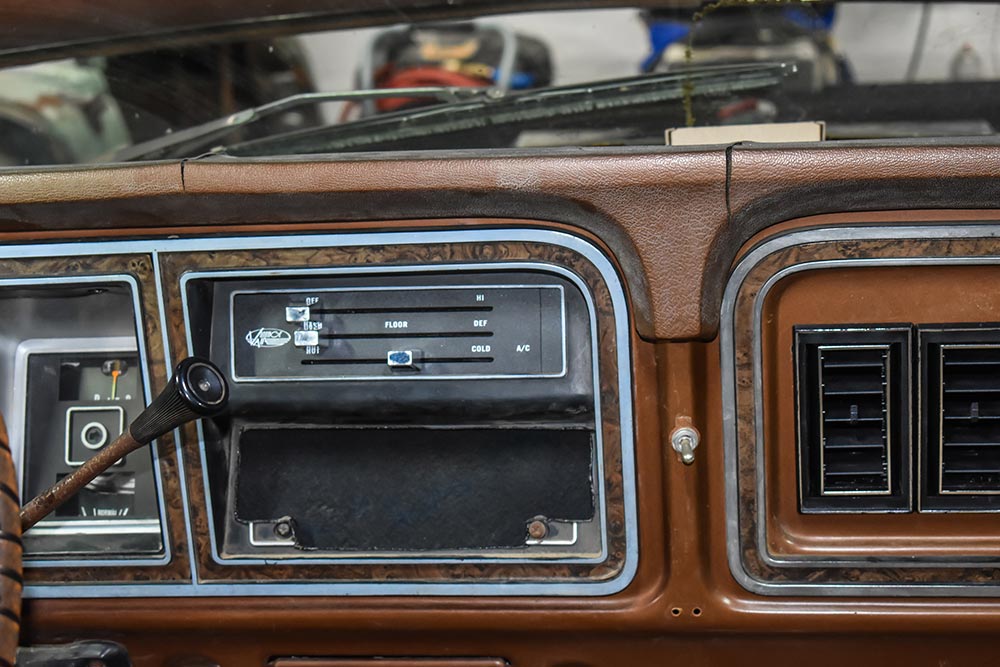
The Gen IV is Vintage Air’s most powerful and intelligent climate control system. The Gen IV uses an exclusive fully electronic microprocessor control system that eliminates cables or vacuum connections. Separate high-capacity copper parallel-flow heat coil and aluminum plate-and fin-cooling coils provide outstanding performance and instant temperature adjustments. Additional features include variable blower speed and dash/floor/defrost blend. 
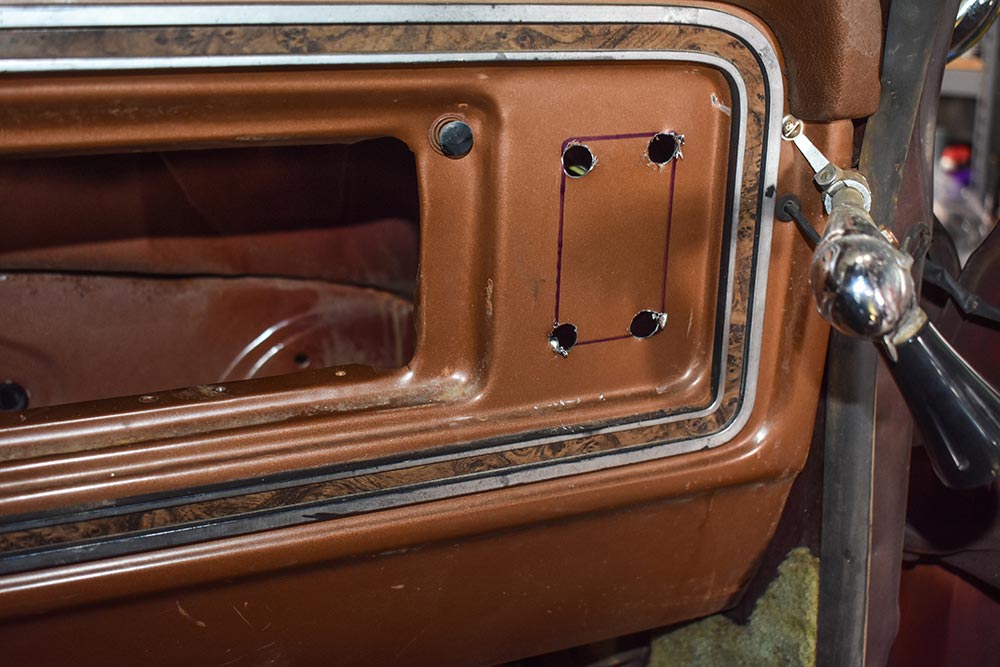
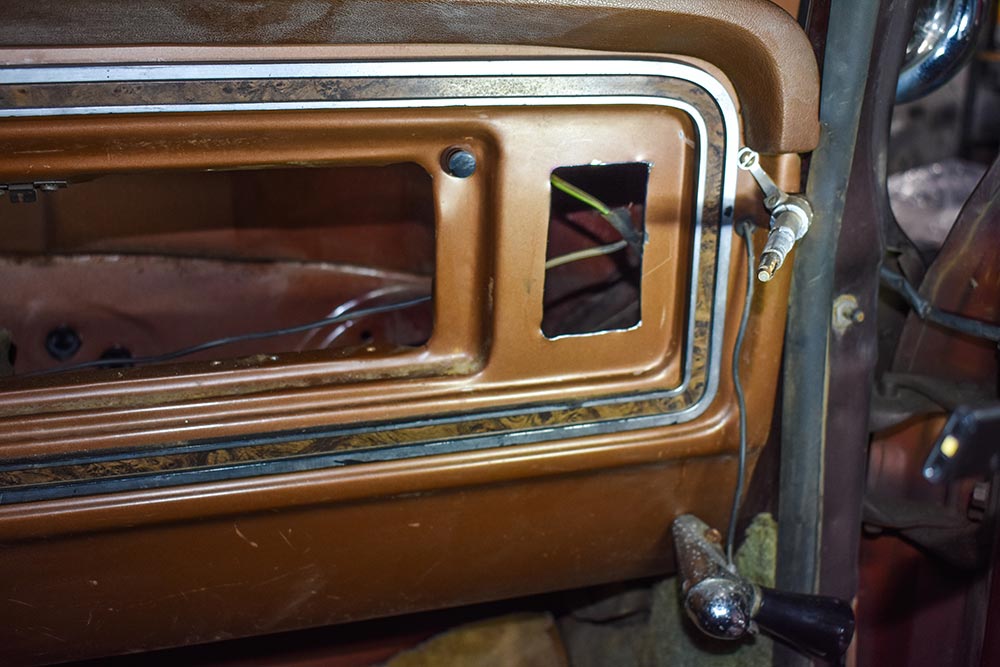
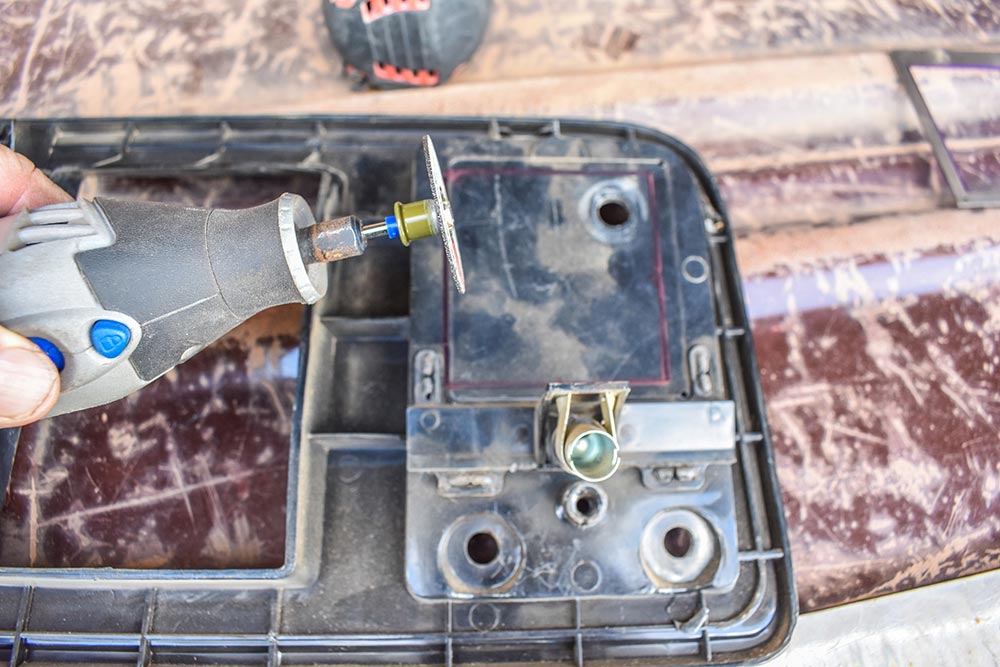
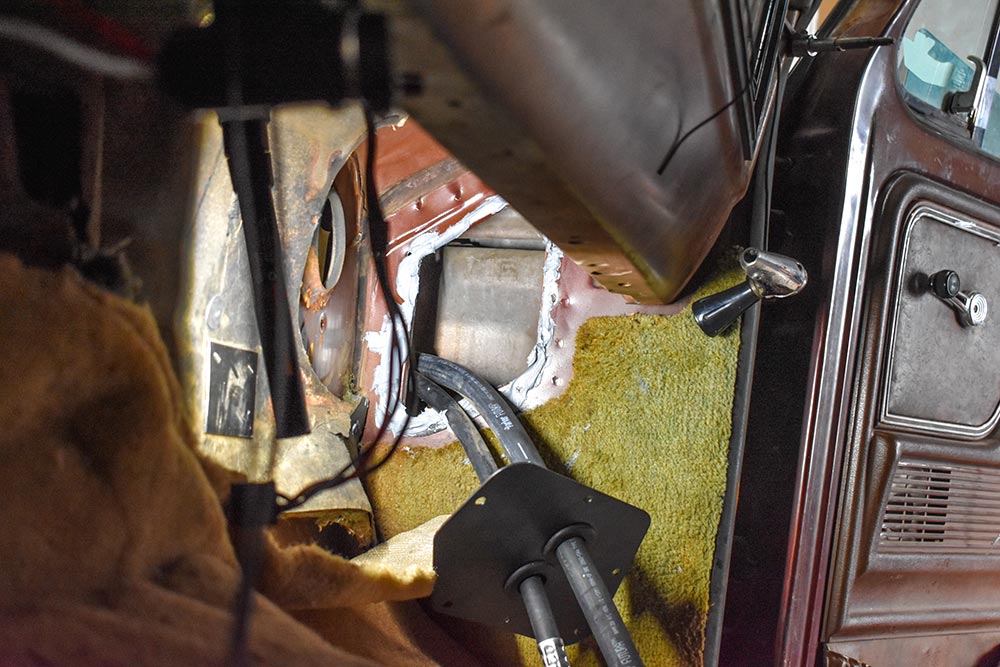
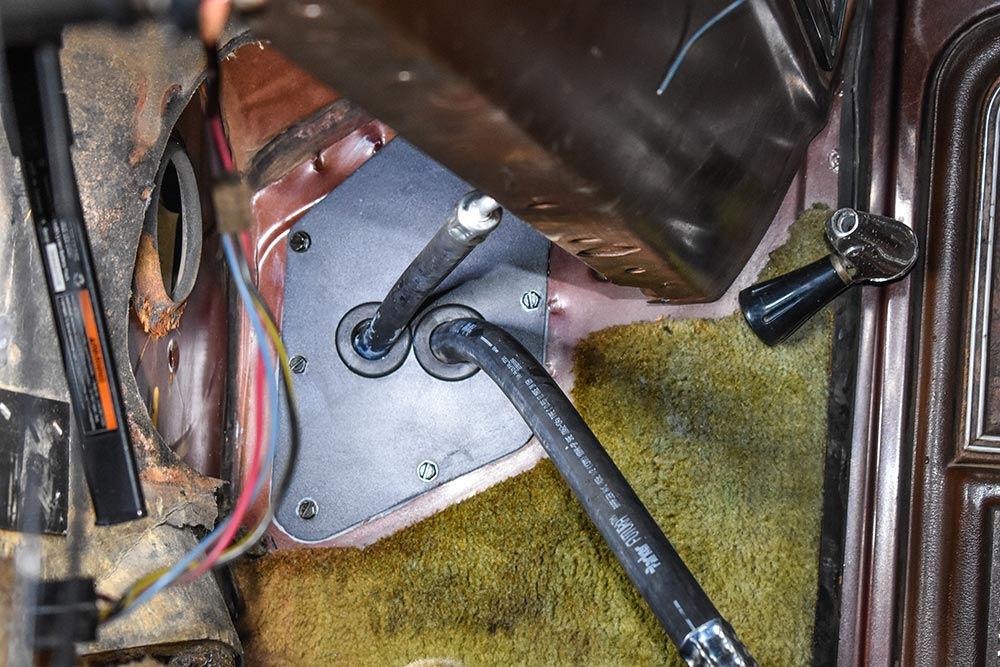
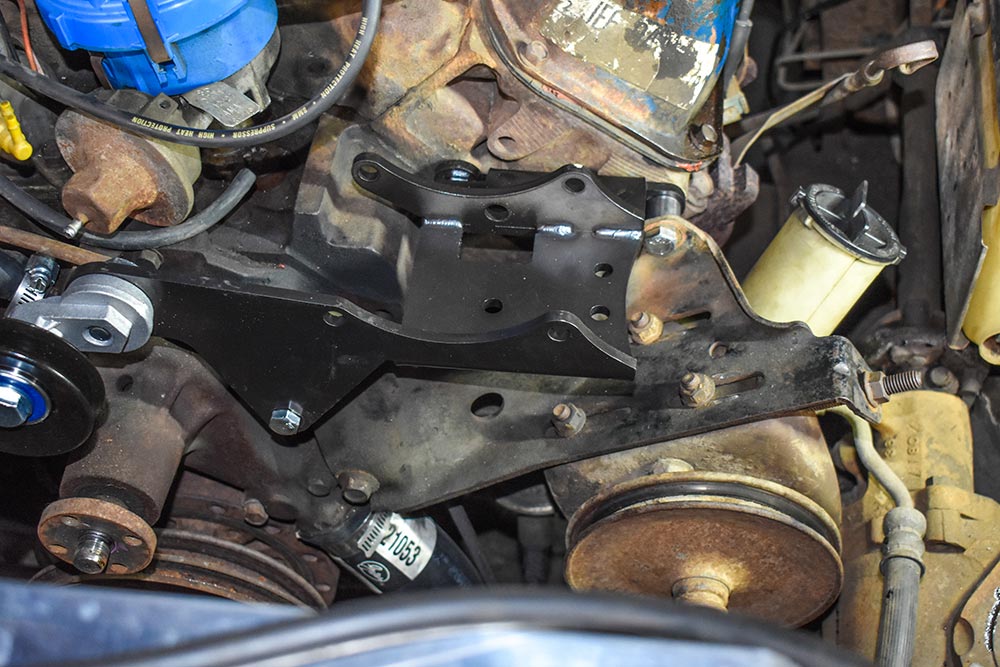
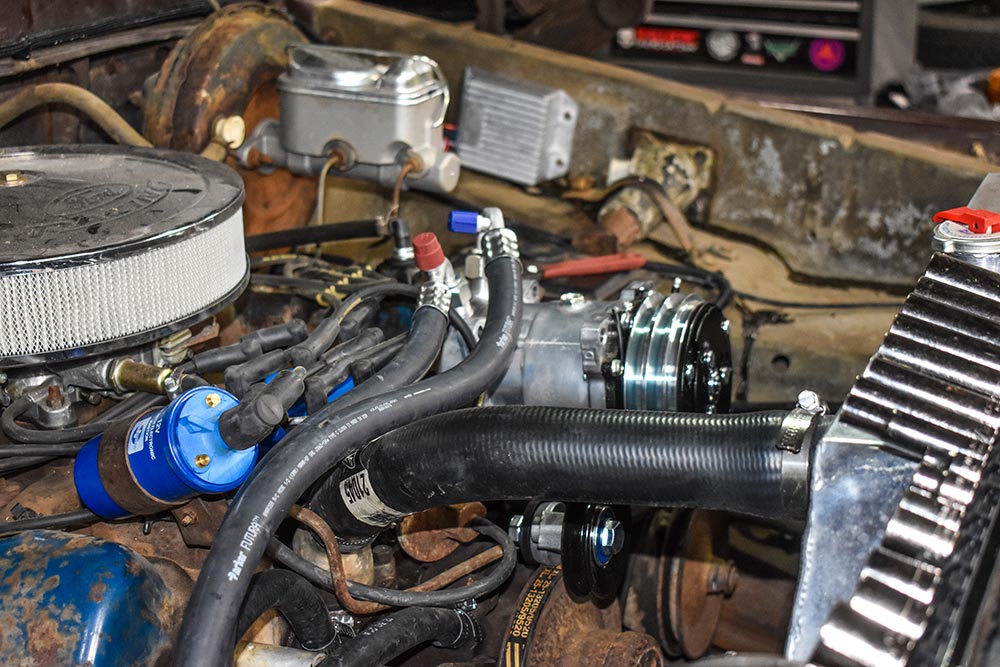
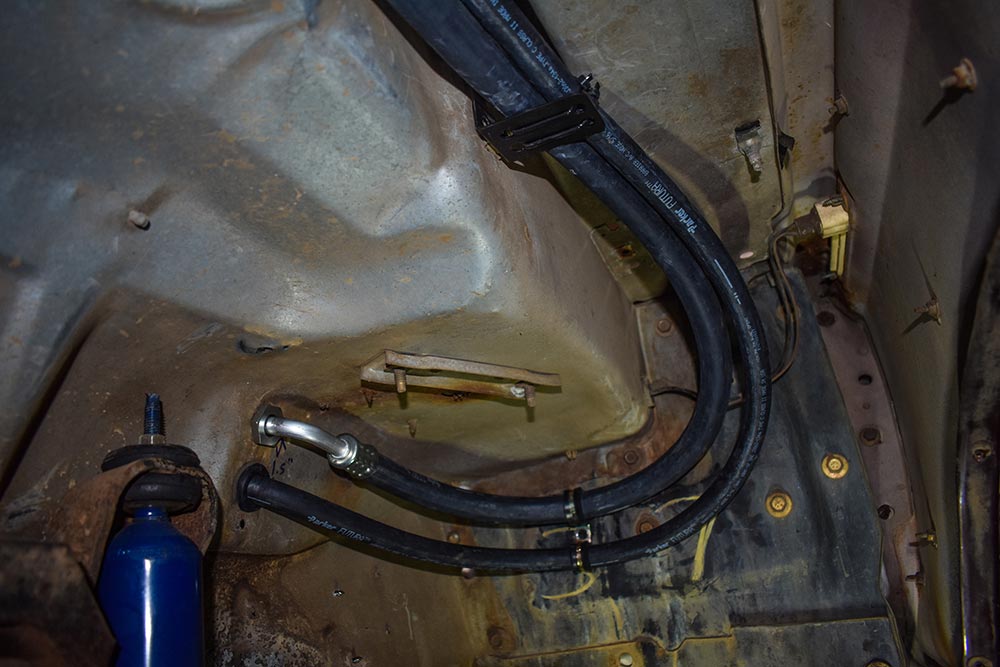
The evaporator kit includes the evaporator unit and mounting brackets, louvers (where required), duct hose wiring harness, new control panel, hardware, and installation instructions, plus all under-hood components such as compressor, engine brackets, condenser with brackets, preformed refrigerant lines, drier, fittings, hardware, and installation instructions. Features include: Raw steel 100% water jet cut and precision welded Adjustable design for even more fine-tuning engine placement Directly bolts to engine block without the need for factory motor mounts Direct fit for Crown Vic swapped F-series Ford trucks These mounts will sit a small block Ford in factory offset position aligning engine with firewall and trans tunnel in cab Adaptable with lift spacers for use of all factory oil pans (front, dual and rear sump) Able to use factory frame shifter linkage three on the tree and factory trans crossmember Taller mounts to fit a front sump truck pan without the need for lift spacers are available 01. Here are the parts included in the kit. 02(a). This is what Snickers’ interior looked like before we installed the SureFit kit. 02(b). This is what Snickers’ interior looked like before we installed the SureFit kit. 02(c). This is what Snickers’ interior looked like before we installed the SureFit kit. 03(a). Before we begin, we lay out all the parts that we will be using. 03(b). Before we begin, we lay out all the parts that we will be using. 04(a). We removed the grille insert and installed the condenser and lines. They all bolt into factory mounting locations. 04(b). We removed the grille insert and installed the condenser and lines. They all bolt into factory mounting locations. 05(a). Use the provided templates to determine where to drill for the lines that go into the cabin. 05(b). Use the provided templates to determine where to drill for the lines that go into the cabin. 06(a). We used the provided templates to cut into the dashboard where the A/C vents will go. We also cut the dash bezel so that it would accept the A/C vent. (Remember: Measure twice and cut once!) 06(b). We used the provided templates to cut into the dashboard where the A/C vents will go. We also cut the dash bezel so that it would accept the A/C vent. (Remember: Measure twice and cut once!) 06(c). We used the provided templates to cut into the dashboard where the A/C vents will go. We also cut the dash bezel so that it would accept the A/C vent. (Remember: Measure twice and cut once!) 06(d). We used the provided templates to cut into the dashboard where the A/C vents will go. We also cut the dash bezel so that it would accept the A/C vent. (Remember: Measure twice and cut once!) 06(e). We used the provided templates to cut into the dashboard where the A/C vents will go. We also cut the dash bezel so that it would accept the A/C vent. (Remember: Measure twice and cut once!) 06(f). We used the provided templates to cut into the dashboard where the A/C vents will go. We also cut the dash bezel so that it would accept the A/C vent. (Remember: Measure twice and cut once!) 07(a). Run the hoses into the cabin interior to connect to the underdash evaporator. 07(b). Run the hoses into the cabin interior to connect to the underdash evaporator. 08(a). Here, we’re installing the A/C compressor bracket and routing in the lines. 08(b). Here, we’re installing the A/C compressor bracket and routing in the lines. 08(c). Here, we’re installing the A/C compressor bracket and routing in the lines. 09. Vintage Air’s factory-looking replacement A/C control panel. 10. The evaporator is mounted and the ECU is ready to plug up. 11(a). The completed install! 11(b). The completed install! 11(c). The completed install! 11(d). The completed install! 11(e). The completed install! Product Information SureFit Complete Kit 1973-’79 Ford F-Series/1978-’79 Bronco without Factory Air Part #951160 MSRP: $1,825
1967 Ford Bumpside Custom Restomod Slow and Steady Transformation of a ’67 Bumpside Growing up in Central Pennsylvania, Brian Boone was always around pickup trucks. Ford trucks were in his […] Adam Johnson November 30, 2021 Department F100 Builders F100 Builders Guide Features HEADLINE Industry News Latest Profiles Reader Rides Truck Reviews Uncategorized
Let's Ride! Editor Chris Hamilton take the QA1 Longbed C10 for a spin... with burnouts! Chris Hamilton from @Street Trucks Magazine took the time to walk around Dave Kass’ 72 C10. Fully equipped with our new crossmember system, full rear […] Chris Hamilton November 15, 2022 c10 C10 Builders Guide Department Editor HEADLINE Industry News Latest Press Release Product Reviews Reader Rides Truck Reviews Uncategorized Videos
WIN $2,000 + Cover of Street Trucks! Showoff Series Stage 2 in Dallas, TX July 17th! Street Trucks Magazine is calling out all the Texas truck owners to come to Show Off July 17th at Lone Star Park in Grand Prairie, […] Chris Hamilton May 18, 2021 C10 Builders Guide Department Editor Events Industry News Latest Press Release Reader Rides Show Uncategorized
Custom Transport Wheels! Paint and Hubcap Clip Installation Tutorial Buy clips from struggle_55 on Instagram or here: https://ls-fab.com/parts-accessories/…Subscribe to our weekly newsletter Here’s a list of some of the parts I mention in my […] Adam Johnson April 27, 2022 c10 C10 Builders Guide Department Industry News Latest Press Release Product Reviews Profiles Uncategorized Videos