 Preston Hawkins
.
October 07, 2025
.
How to
.
PRESTON HAWKINS
Preston Hawkins
.
October 07, 2025
.
How to
.
PRESTON HAWKINS
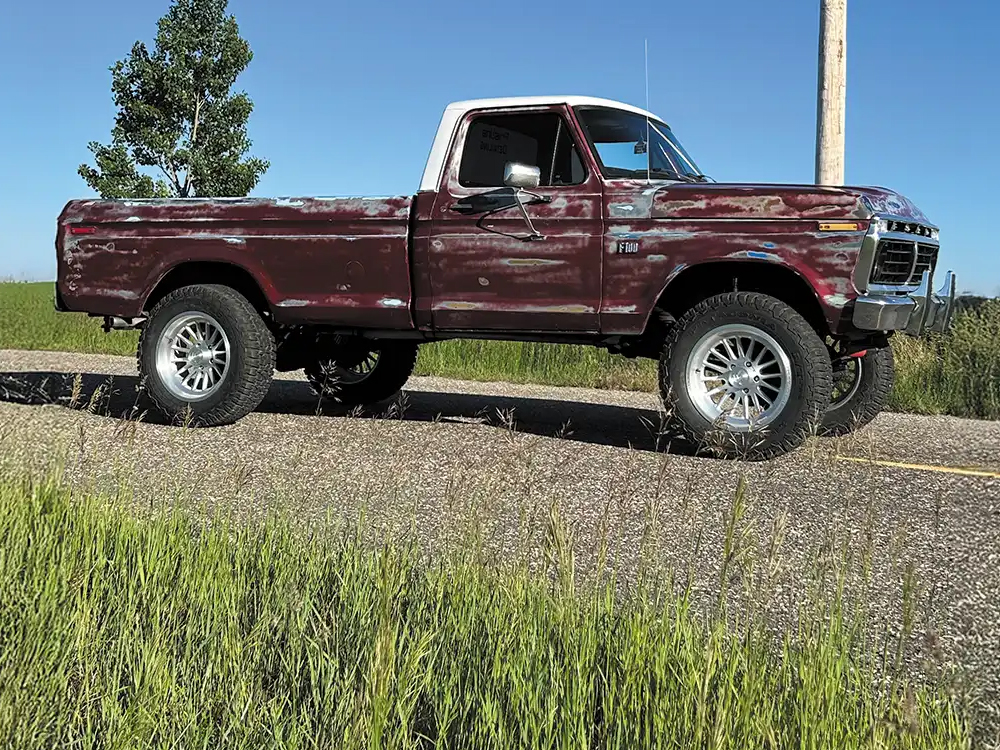
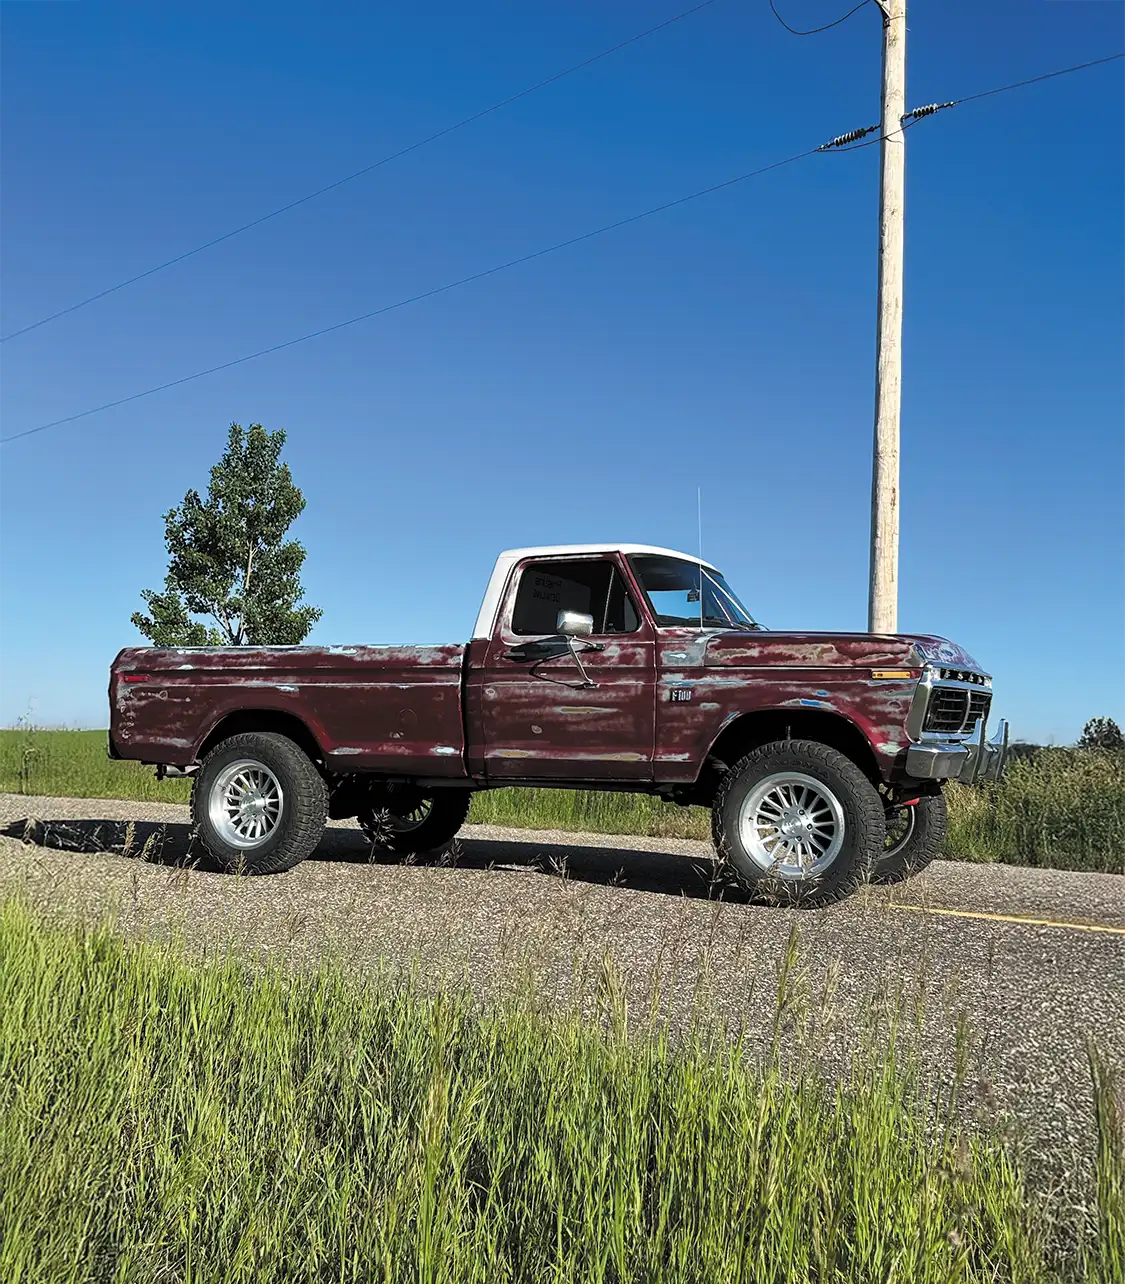
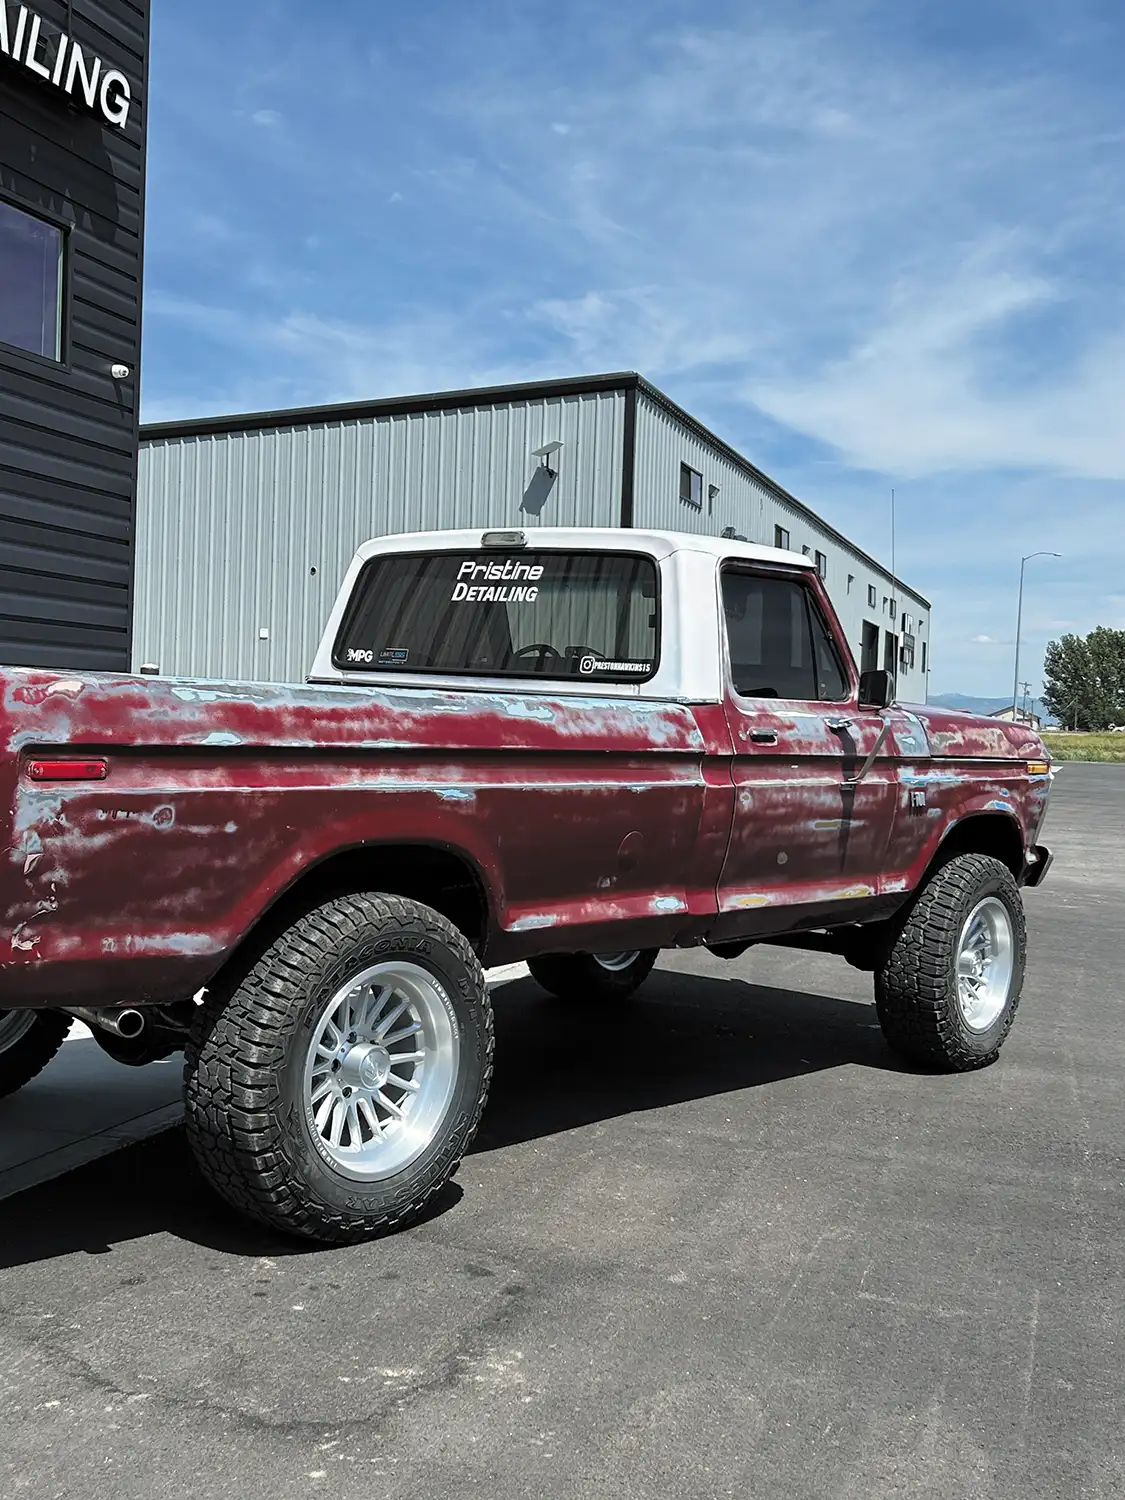
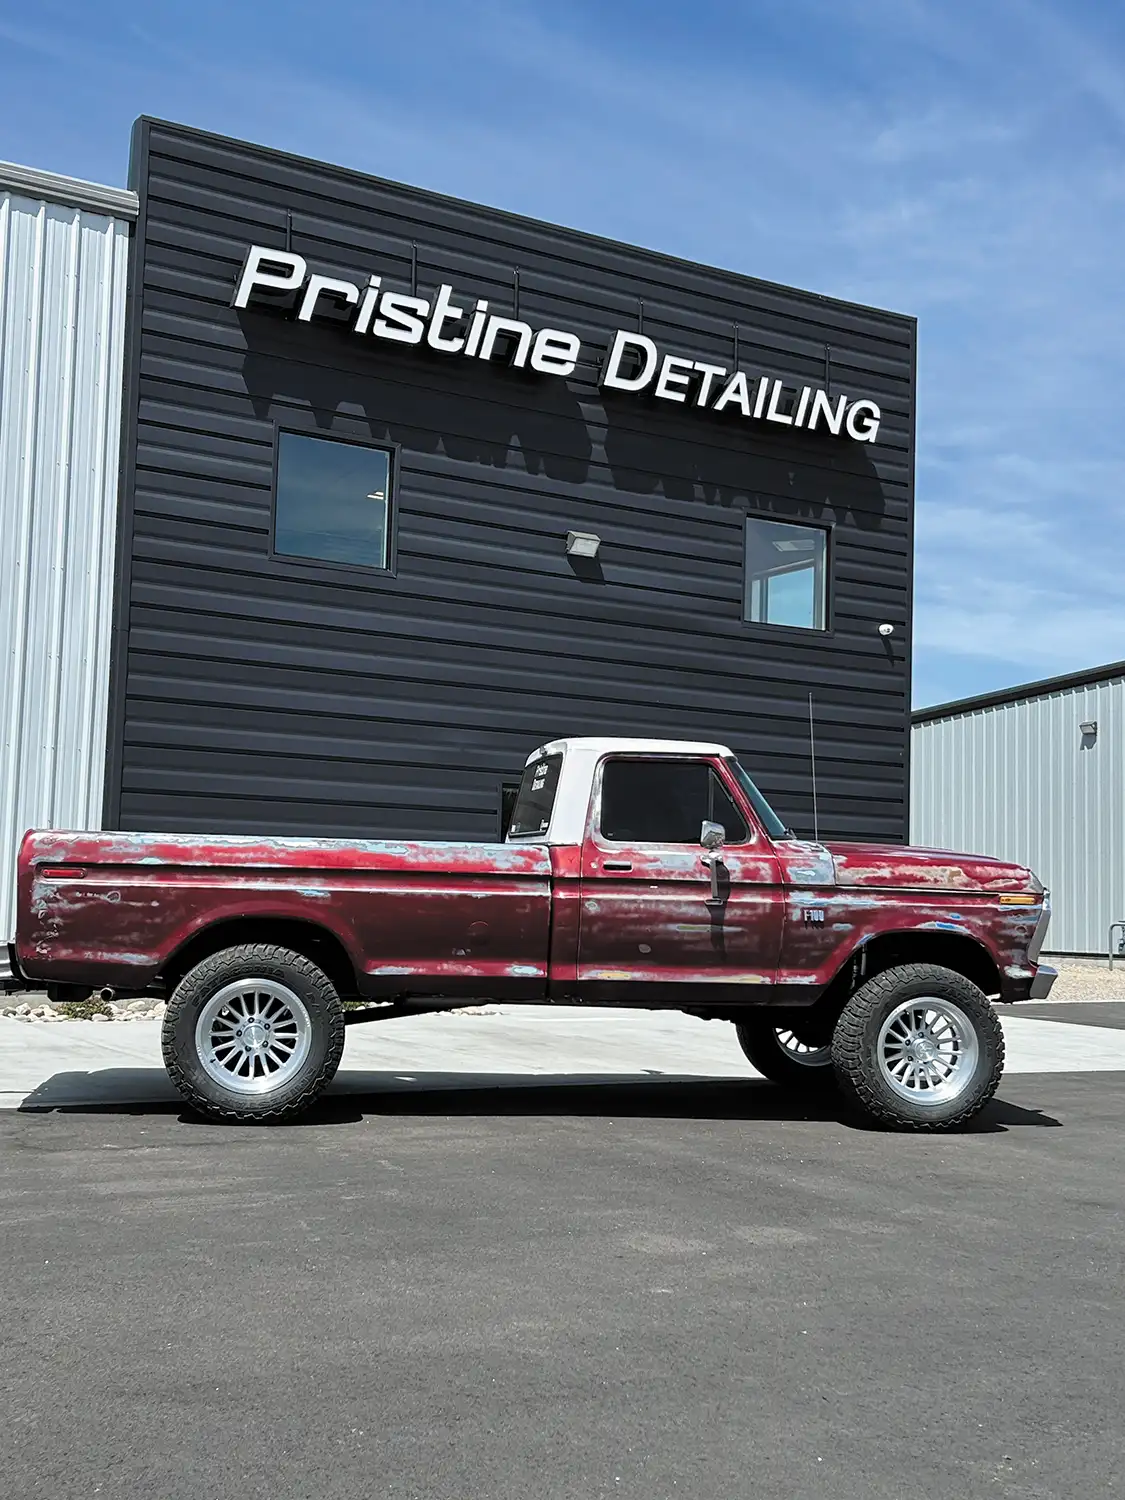
There’s something special about a classic Ford sitting tall and proud. If you’ve got a 1974 F-100 4×4, you already know the charm—squarebody lines, old-school strength, and real truck DNA. But let’s be honest: from the factory, these trucks didn’t exactly sit high and mighty. That’s where a quality lift like the Skyjacker 4-inch kit comes in. Whether you’re building a weekend cruiser, a mild trail rig, or just want your truck to stand out with bigger tires and a tougher stance, a 4-inch lift strikes the perfect balance between form and function.
Installing a lift on an old truck like this isn’t just a bolt-on and done deal. You’re dealing with 50-year-old hardware, seized bolts, worn bushings, and decades of grime—but that’s part of the fun. With the right prep, patience, and a few smart tips, you can absolutely do this at home or in a small shop. Whether you’ve got a full lift or just jack stands, this story walks you through every step with real-world advice—not just the polished manufacturer instructions.

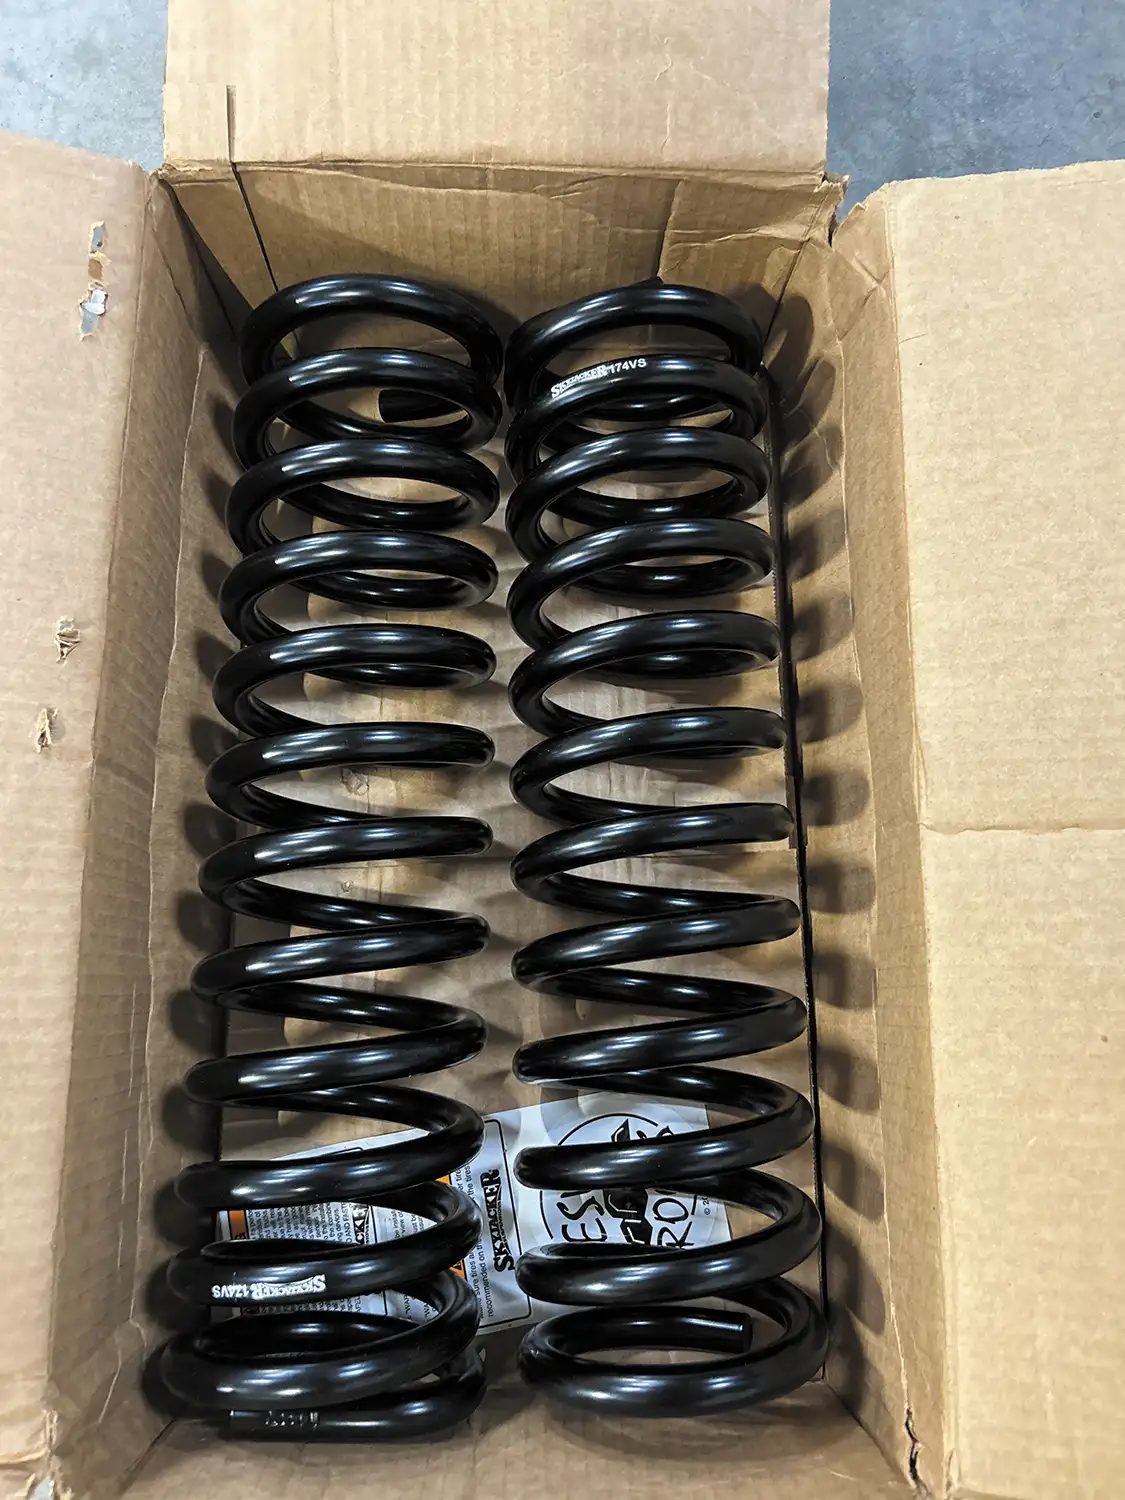
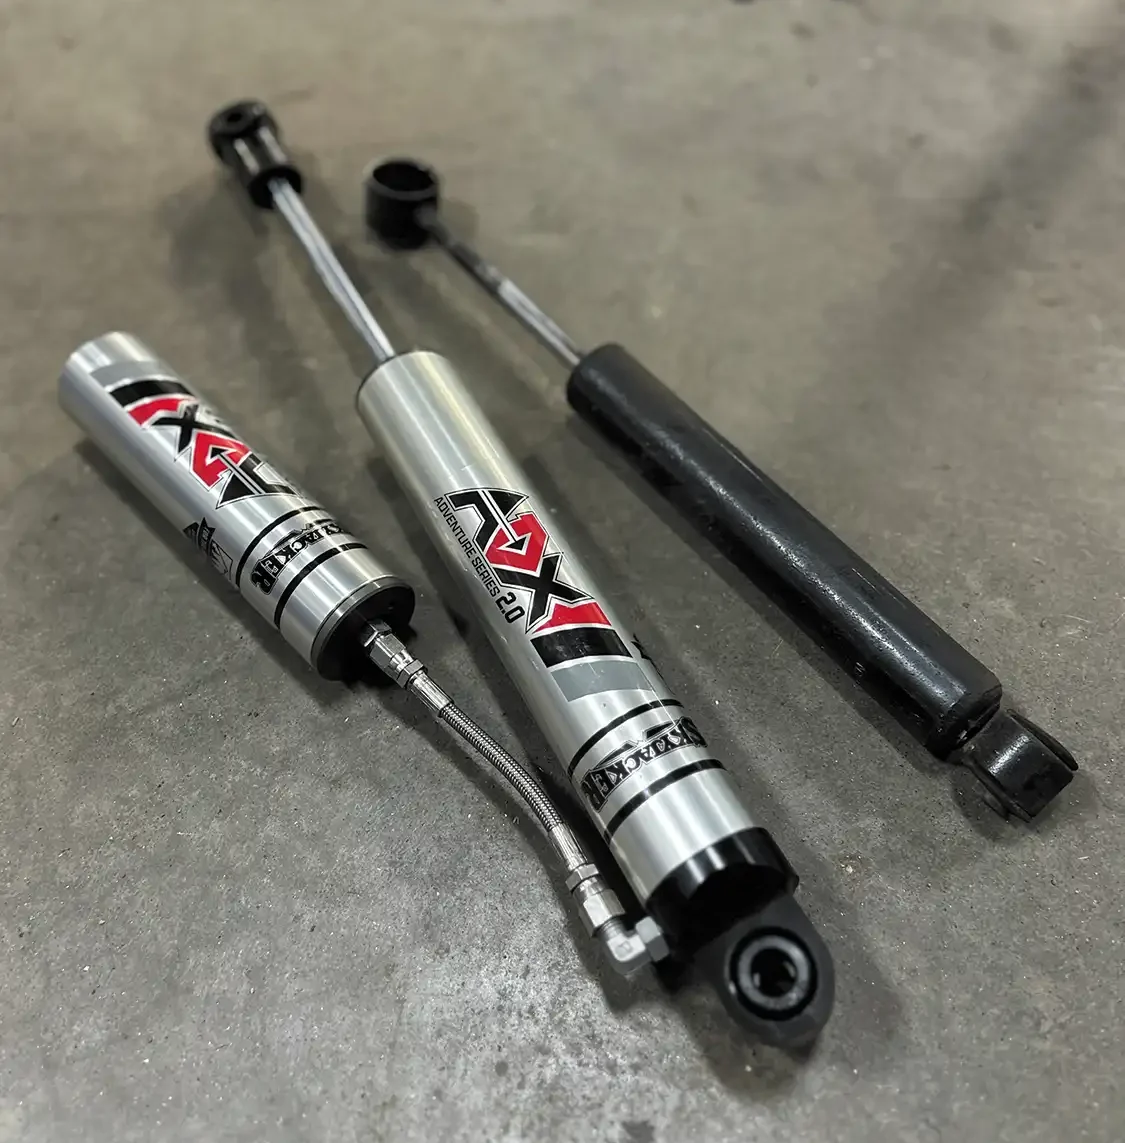
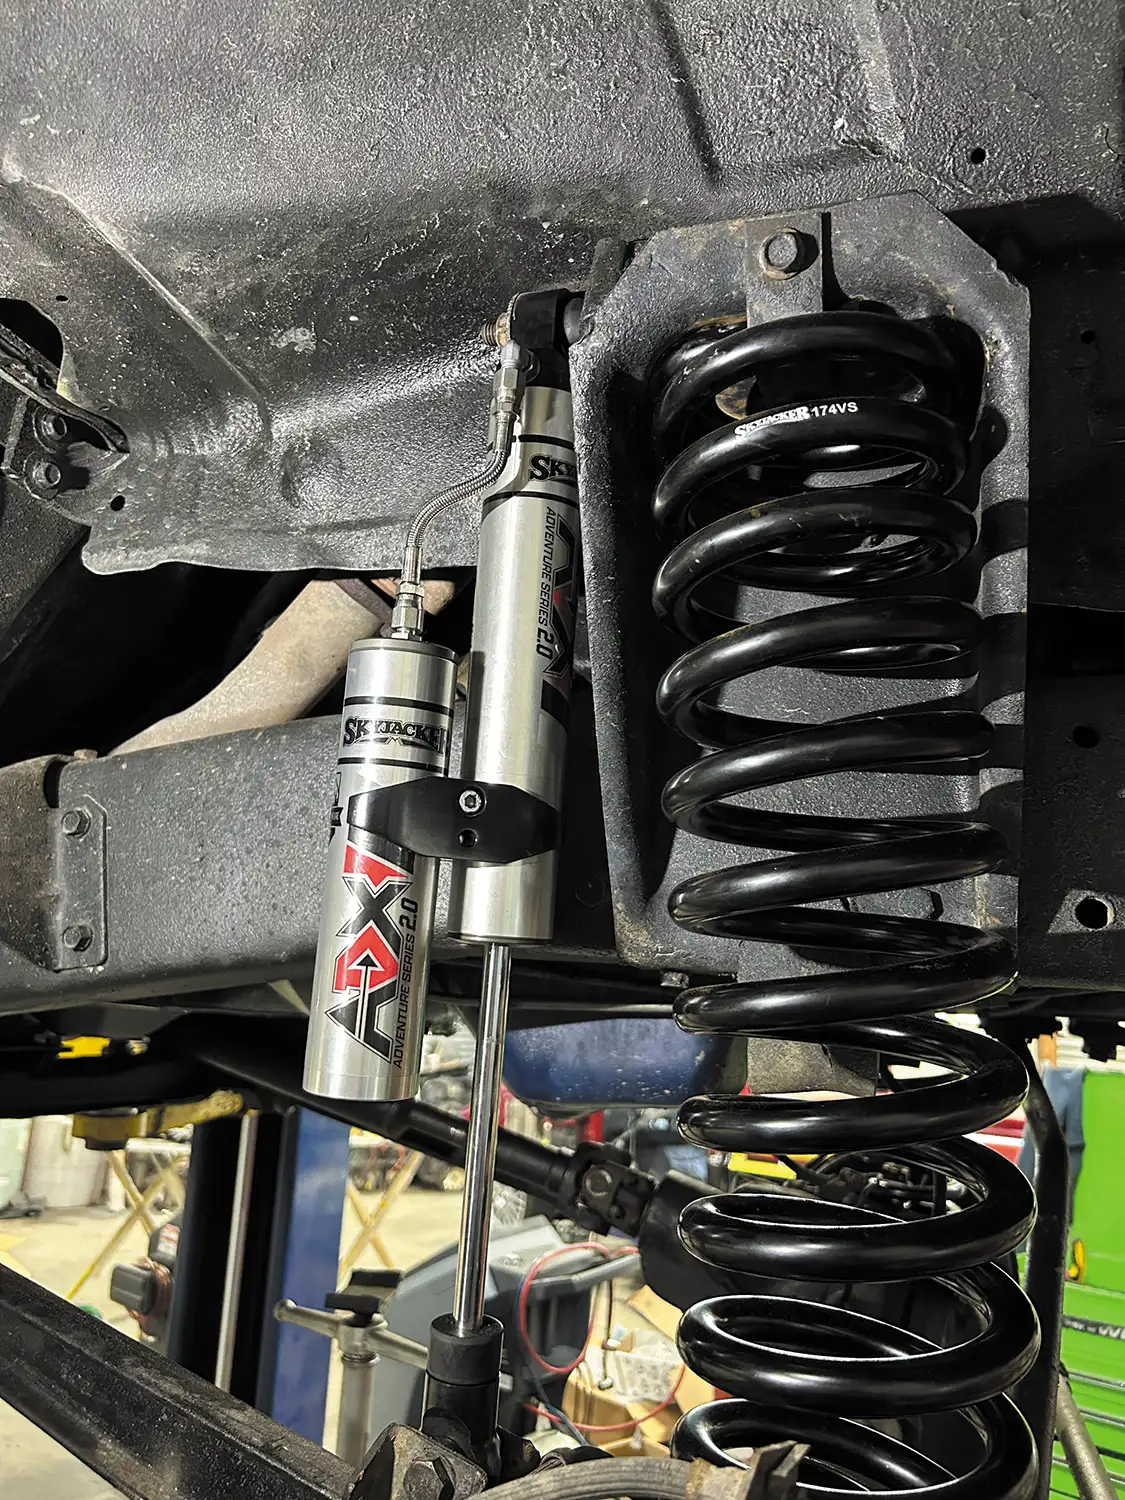
The Skyjacker kit keeps things simple but effective with new front coil springs, rear add-a-leafs, extended shocks, and drop brackets to keep the suspension geometry in check. You won’t need to cut or weld anything major, but you will need to get your hands dirty. Expect a solid day’s work (maybe a weekend if it’s your first time), but once you’re done, you’ll have a truck that looks better, drives higher, and clears those 33s or 35s you’ve been eyeing.
Unbox and inventory everything.
Open the kit, lay out every part, and check it off the instruction sheet.
Tip: Take a pic of the layout for reference later. Skyjacker’s hardware can look similar—group by front vs. rear.
Spray all bolts the night before.Soak every suspension bolt—radius arms, U-bolts, shock mounts, etc.—with penetrating oil.
Tip: PB Blaster or Kroil works great. Do it again the morning of install if they’re really crusty.
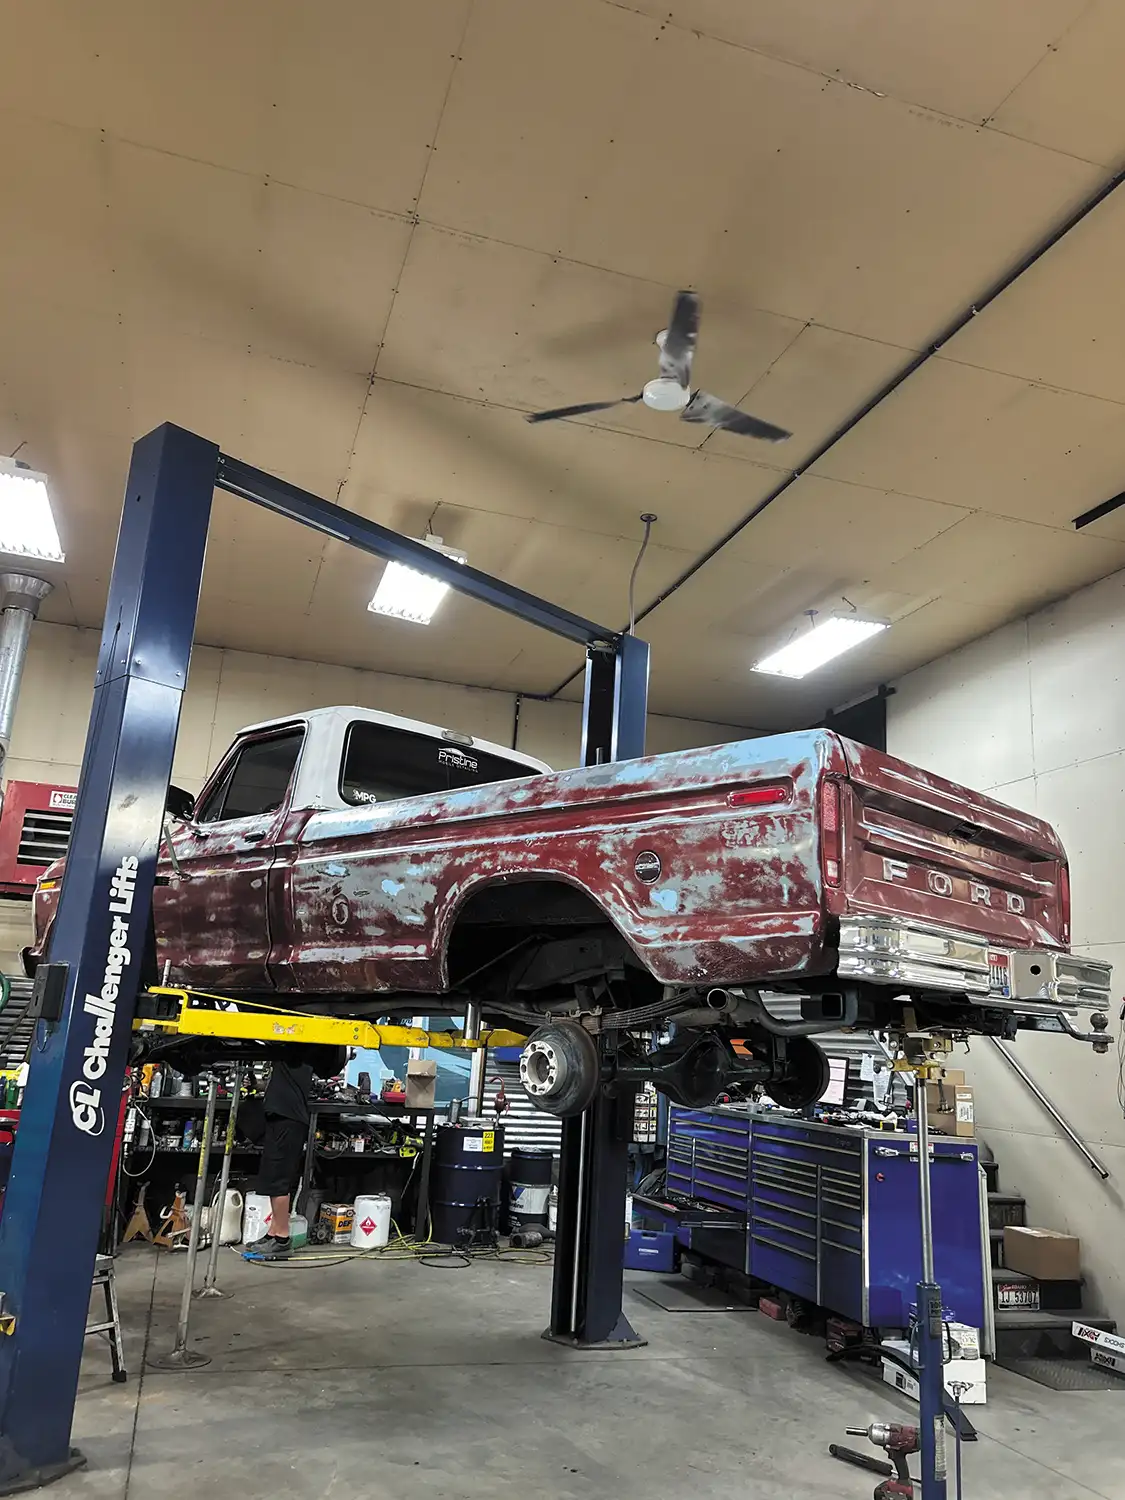
Get the truck in the air—level and safe.
Use a hoist if you have it. Otherwise, jack up one end at a time and place jack stands under the frame so the axles can droop.
Tip: Use wood blocks or old tires under the frame as backup safety.
Remove the wheels.
Crack the lugs loose on the ground, then remove the wheels once it’s up.
Tip: Keep lugs and washers together in labeled bags.
Pull the front shocks.
Unbolt them and toss them—they won’t work with the lift.
Tip: Hit the lower bolts with an impact from behind and a pry bar if they’re stubborn.
Disconnect the sway bar (if equipped).Some trucks had them; some didn’t. Remove the links or brackets.
Tip: If reusing it, take a picture of the orientation—it’s easy to forget which side faces up.
Unclip brake line brackets.
Unbolt the brackets where soft lines meet the frame.
Tip: Hang them with wire to avoid stretching. Consider steel braided line upgrades if yours are crusty.
Loosen radius arm frame nuts.
Loosen (don’t remove) the nuts where the arms meet the frame. This gives the axle freedom to move.
Tip: Use a cheater pipe or heat if they won’t budge.
Support and lower the axle.
Place a floor jack under the front axle and lower it just enough to remove spring tension.
Tip: Don’t let brake lines pull tight. Watch them as you lower.
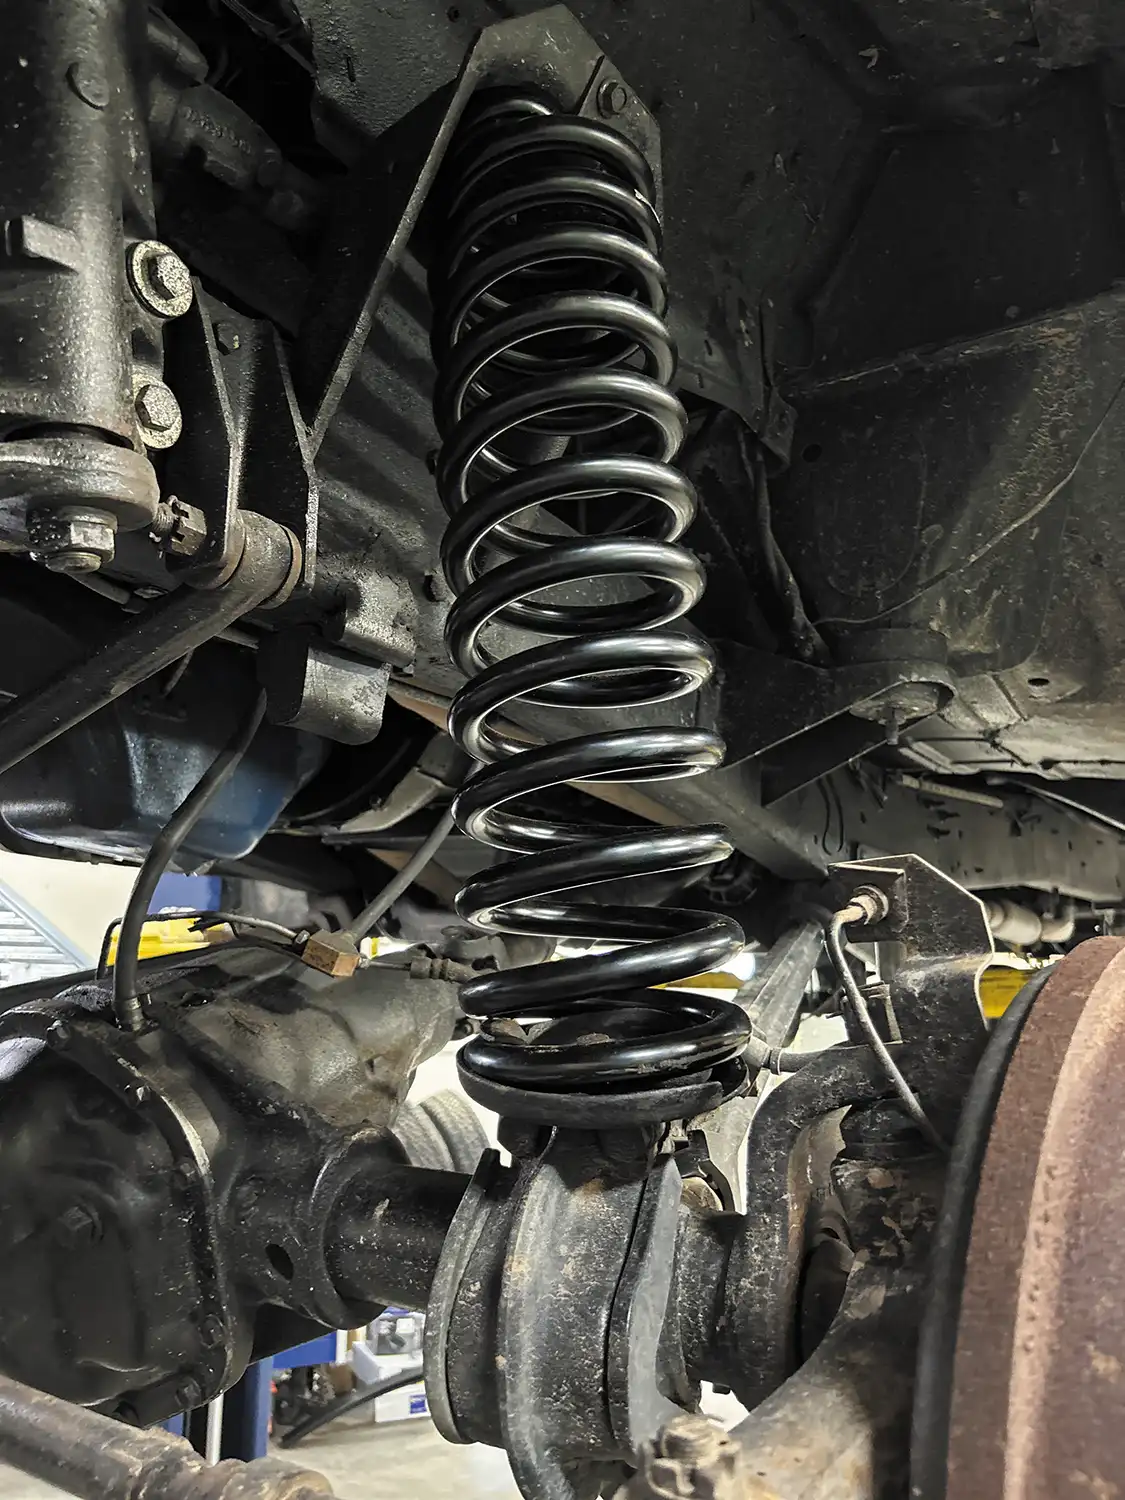
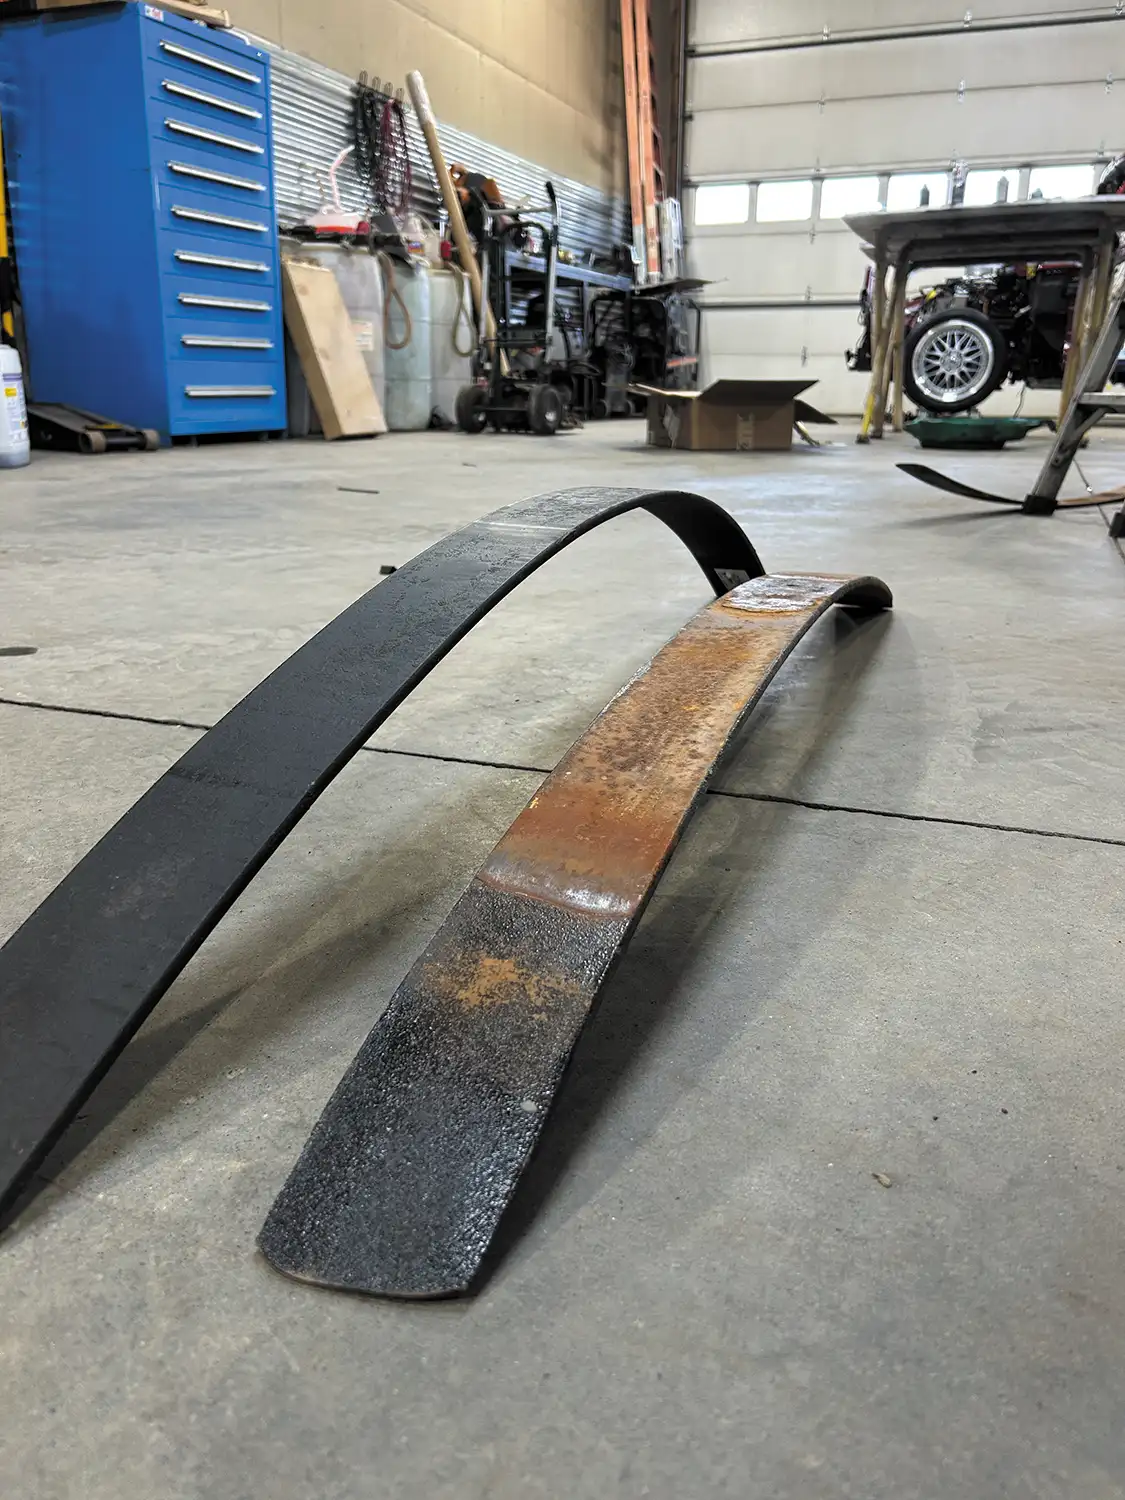
Remove coil springs.
Wiggle the old coils out. Use a pry bar if needed or compress them slightly.
Tip: Keep an eye out for rubber isolators—if they’re shot, replace them or use coil spacers as a cushion.
Clean and prep spring buckets.
Wire brush the upper buckets and inspect for rust or cracks.
Tip: A coat of paint or undercoating here is smart. Clean metal helps seating.
Install new coil springs.
Seat the new coils properly—clock the pigtails to factory notches.
Tip: Use zip ties to temporarily hold them centered until the axle is raised.
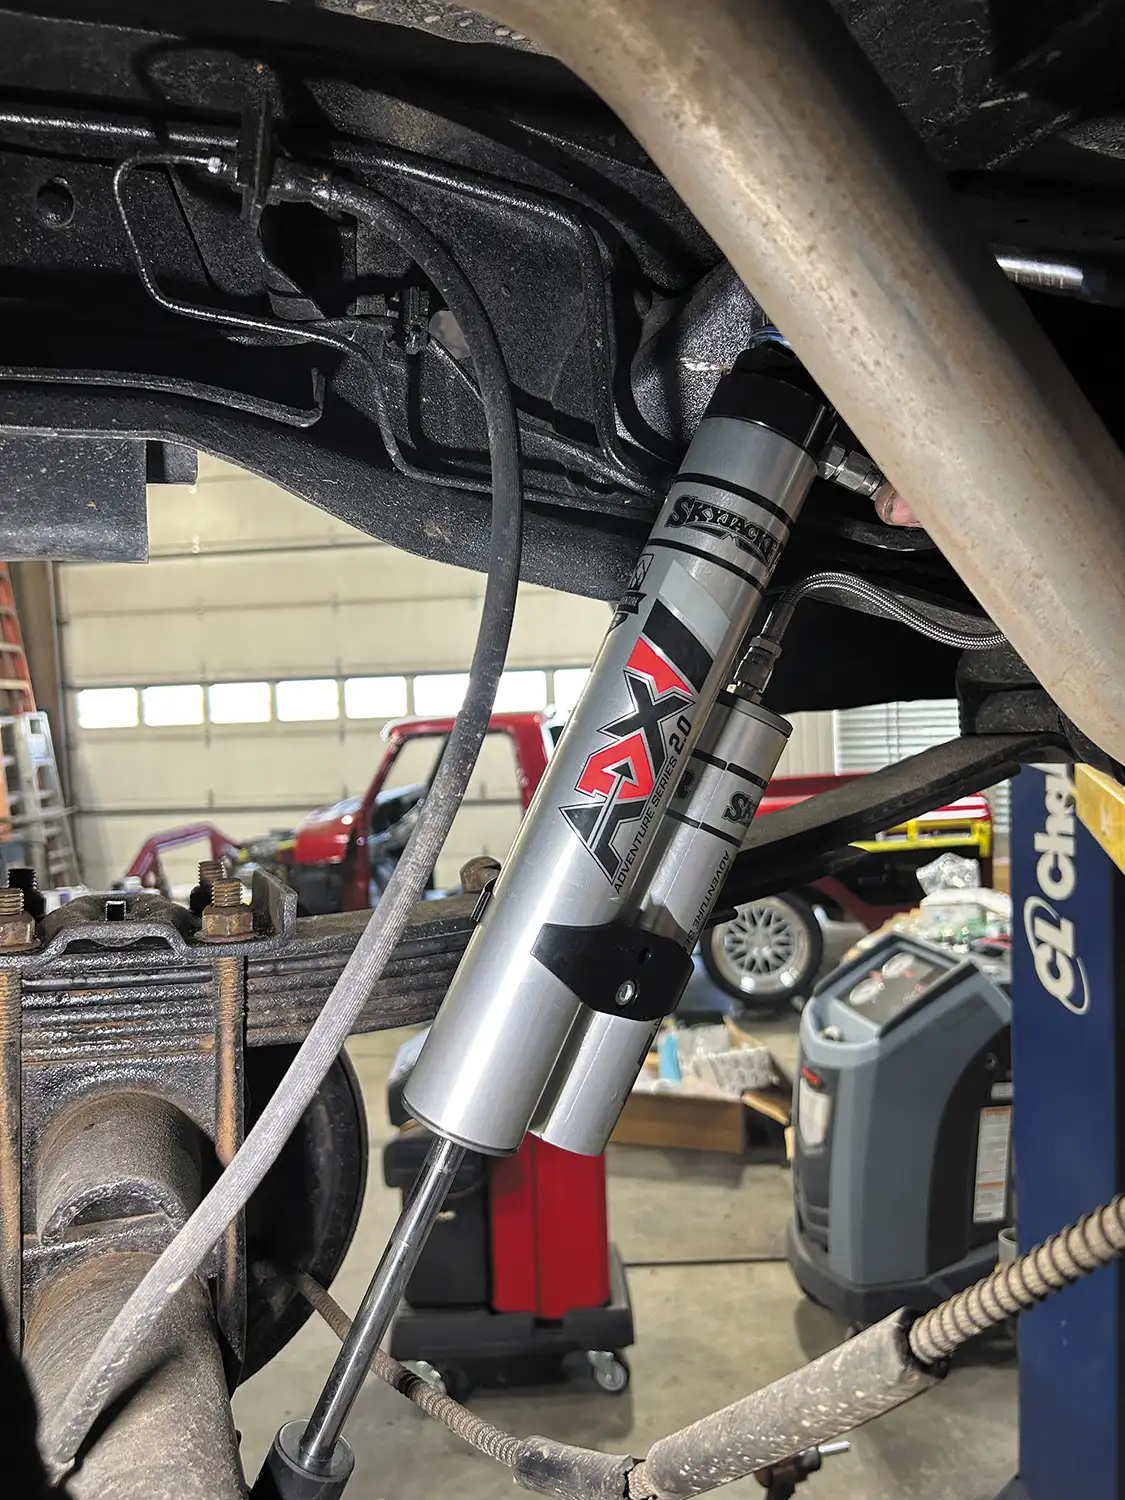
Raise the axle and install the front shocks.
Lift the axle slowly to compress the coils. Then install the new Skyjacker shocks.
Tip: Don’t torque the bushings until the truck is sitting on the ground to avoid twisting rubber.
Install radius arm and track bar drops.
If your kit includes drop brackets, bolt them up now.
Tip: Use thread locker and torque to spec. You might need to notch the frame slightly for a clean fit.
Move to the rear—lift and support.
Jack up the rear and place jack stands under the frame so the axle can drop.
Tip: Watch driveshaft slack as the axle drops—don’t let it pull out of the slip yoke.
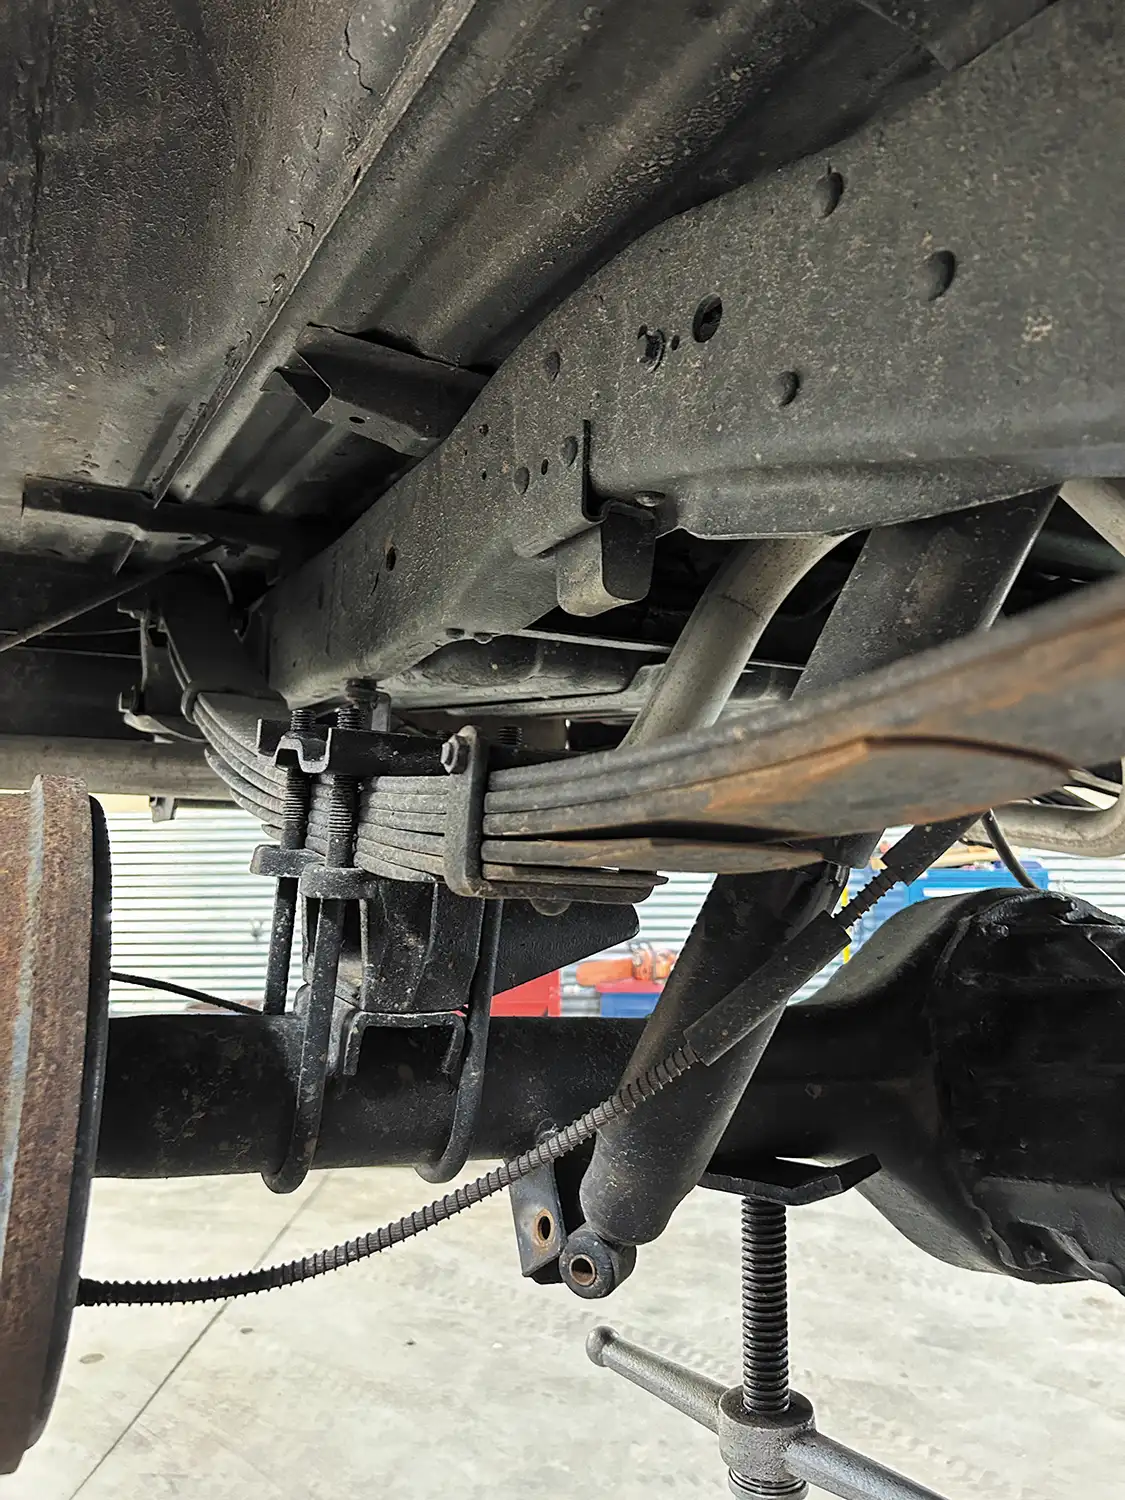
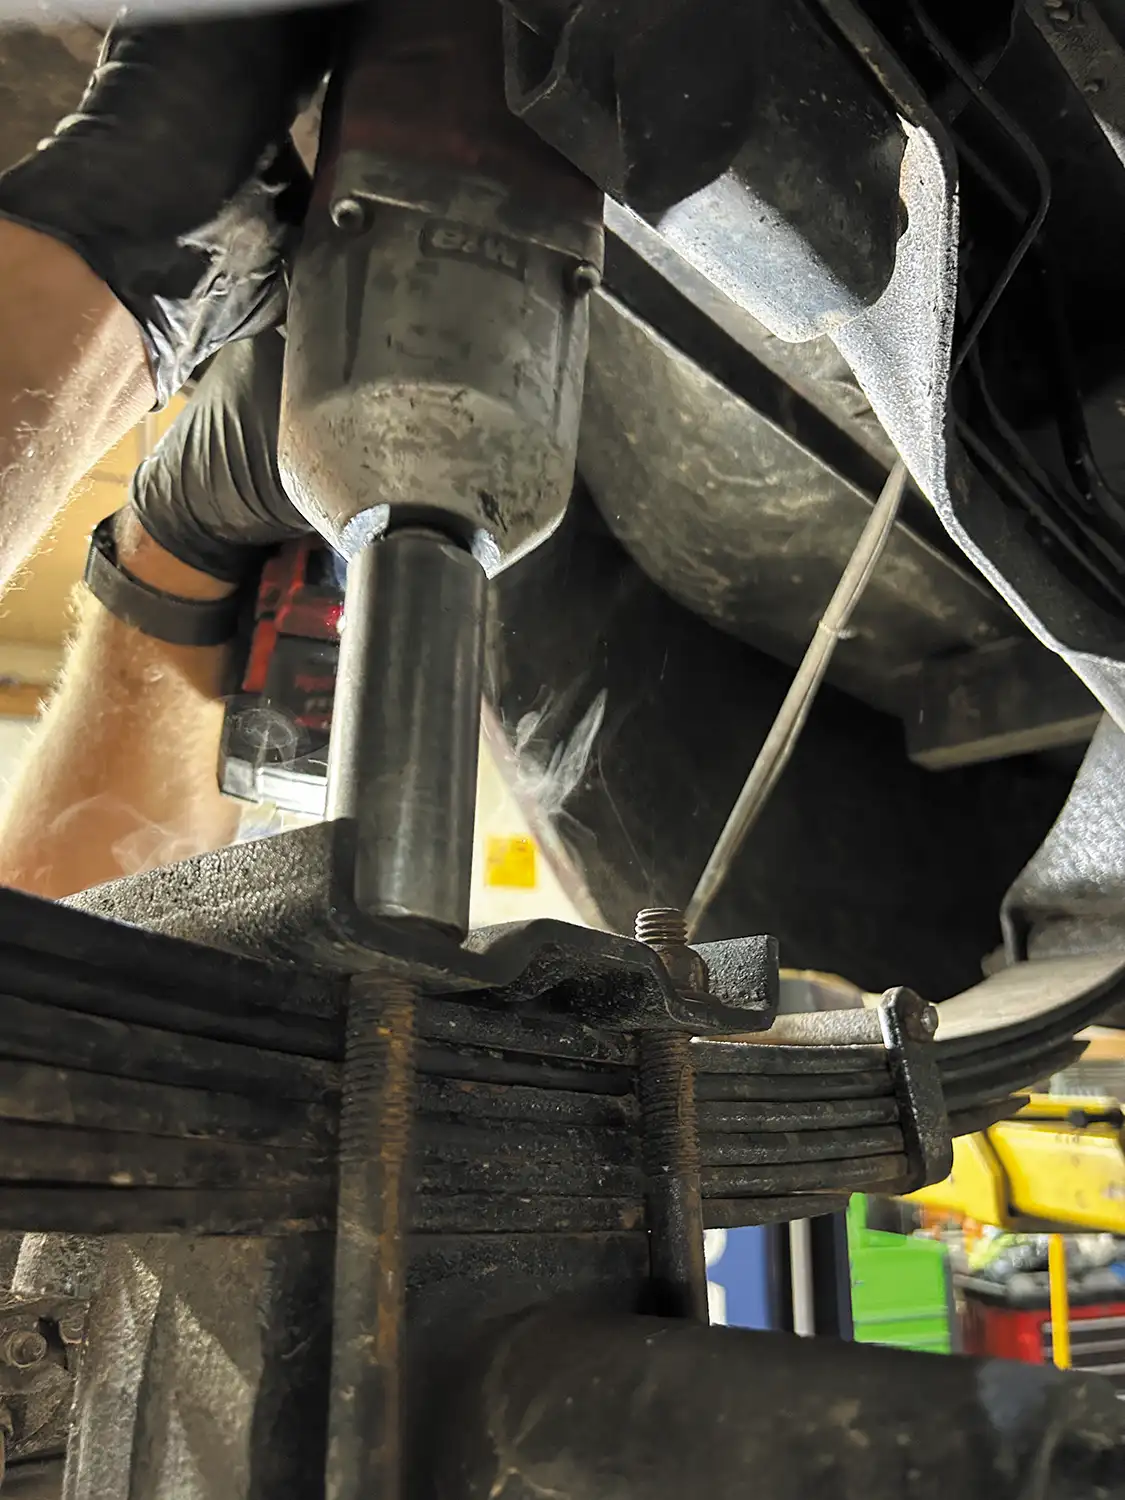
Remove rear shocks and U-bolts.
Shocks come off first, then U-bolts. Use an impact if possible.
Tip: If U-bolts are rusted solid, cut them with a saw or angle grinder—don’t fight them for hours.
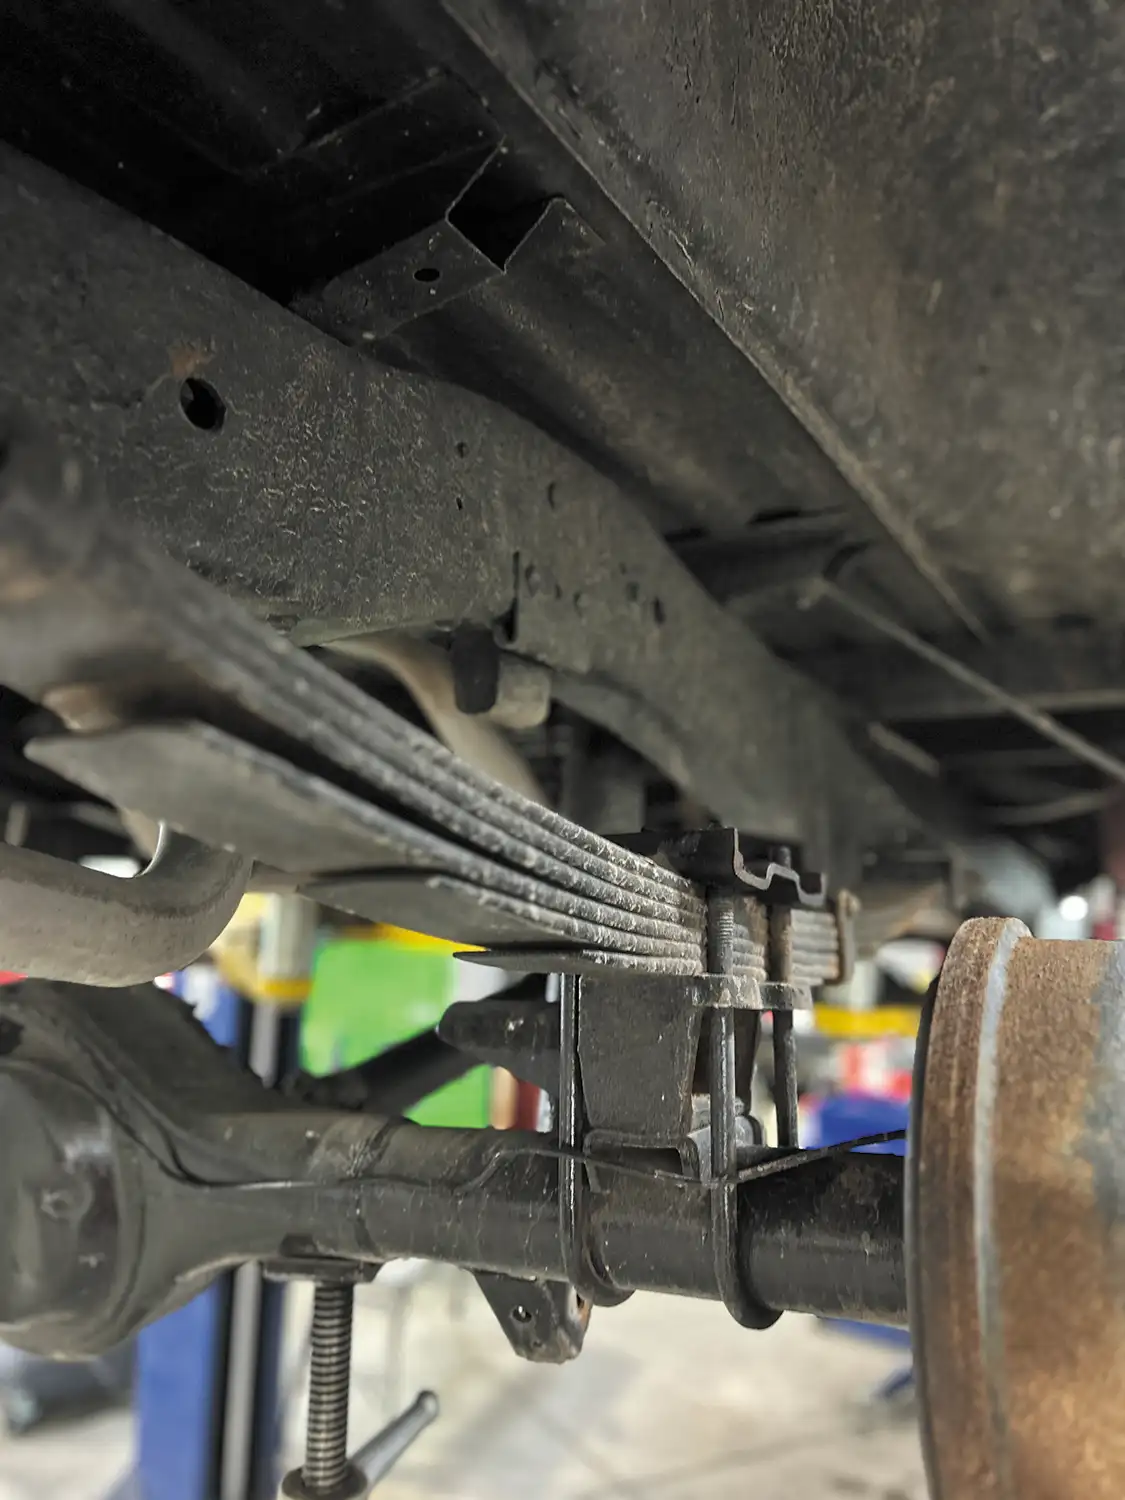
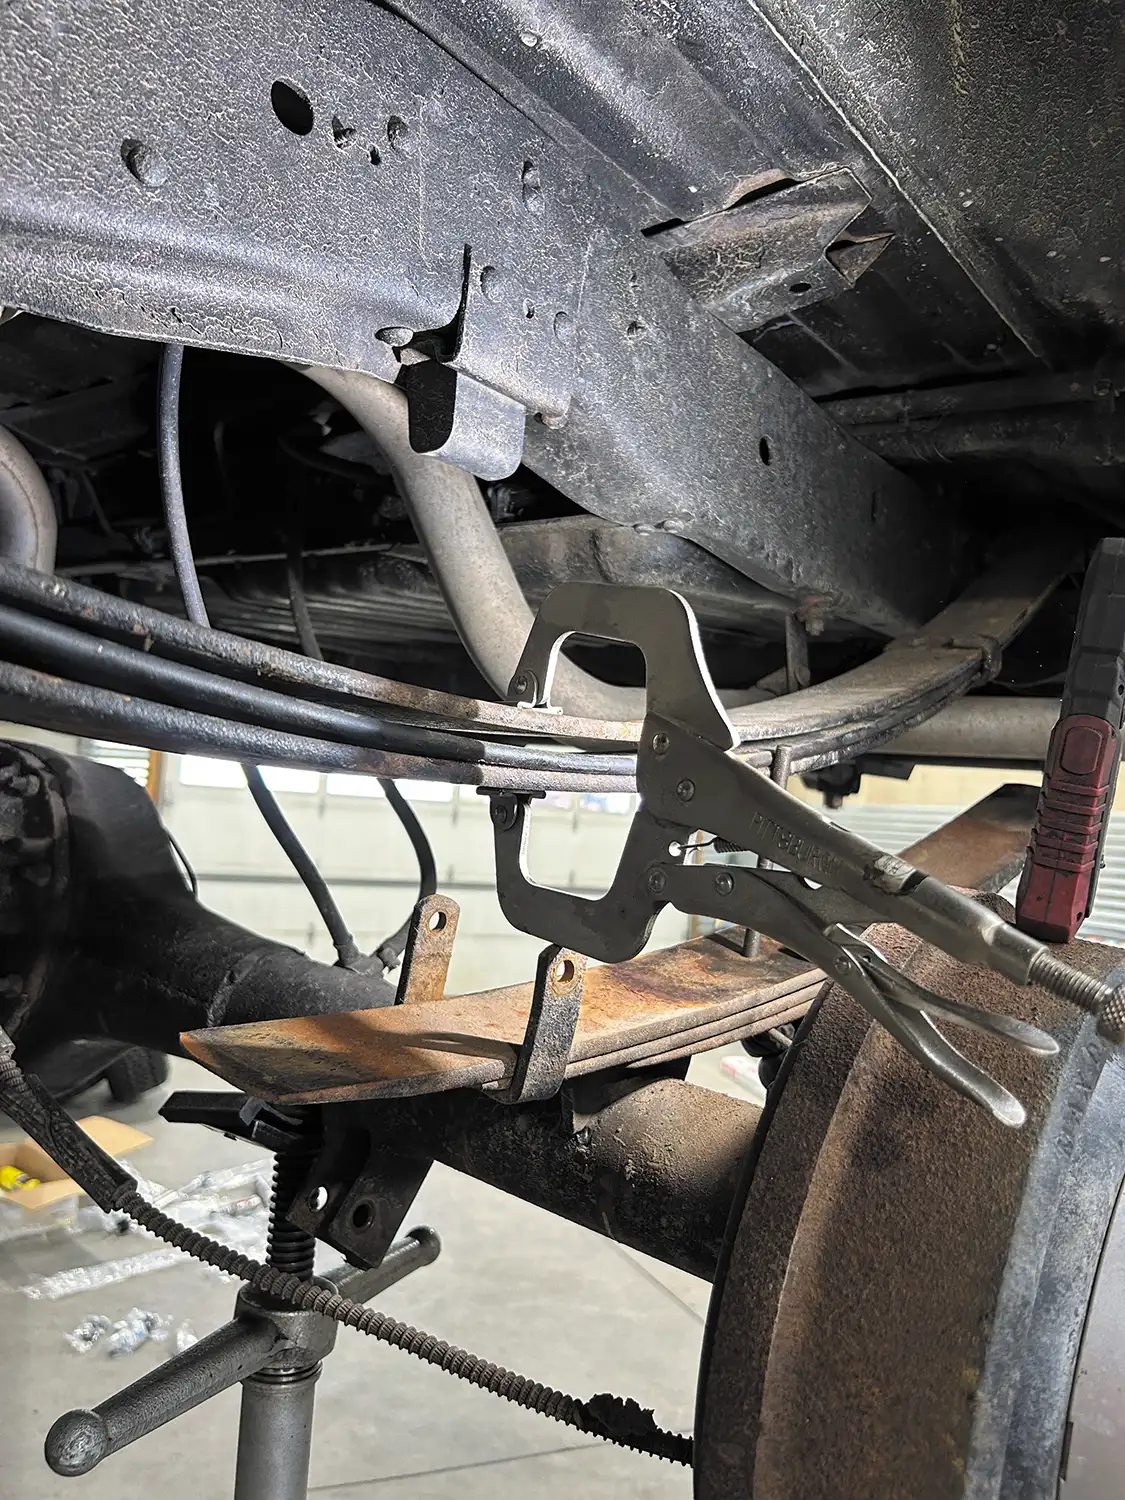
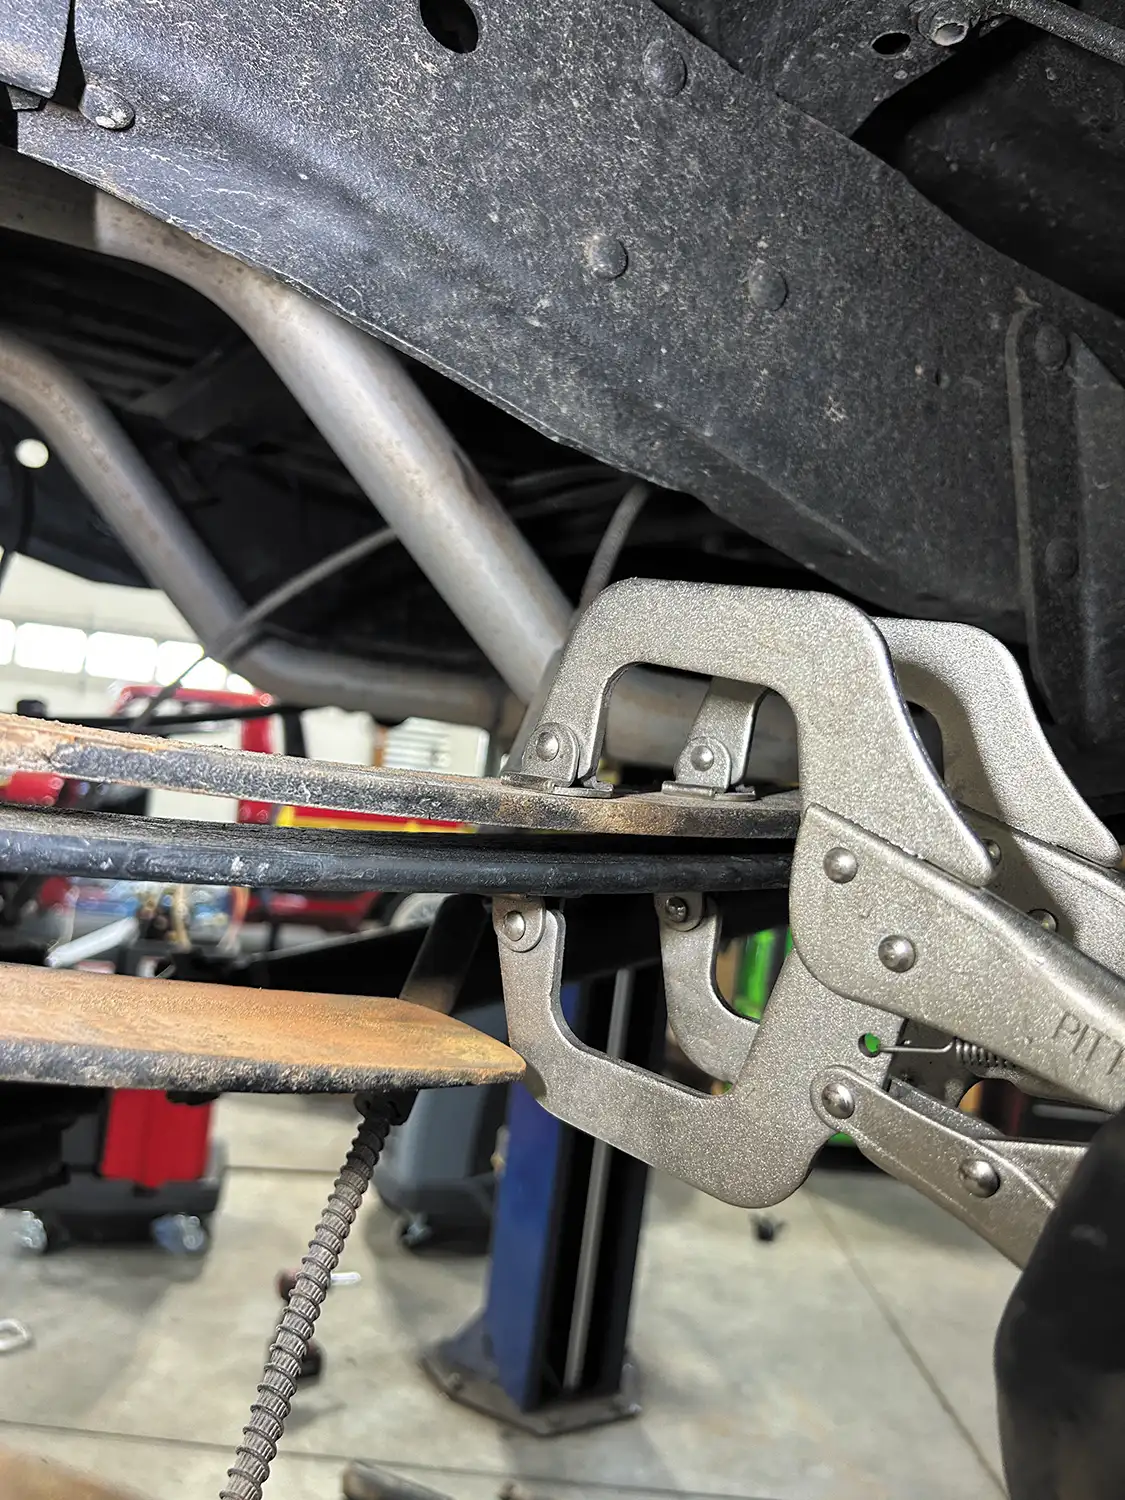
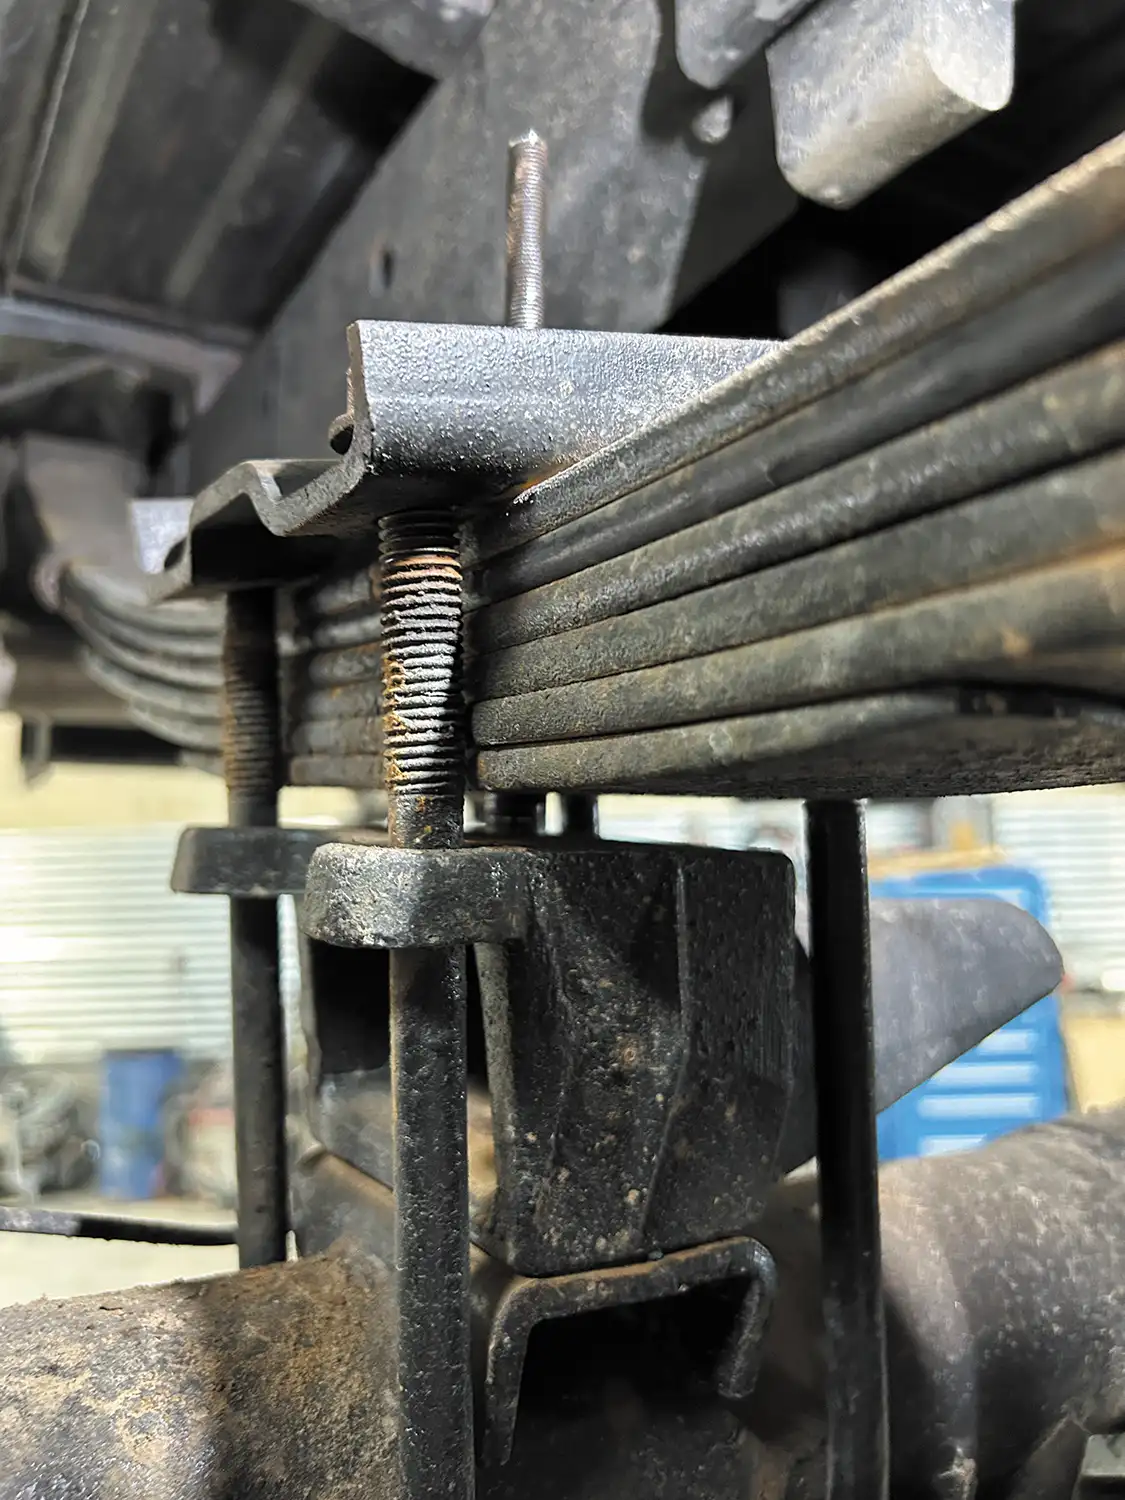
Clamp and disassemble leaf pack.
Use two C-clamps to sandwich the pack, then remove the center pin.
Tip: Position clamps close to the center bolt so the pack stays aligned.
Insert an add-a-leaf and reassemble.
Slide in the new leaf (usually second or third down), reinstall the center pin, and tighten.
Tip: Tap the pack with a hammer as you tighten to keep everything flat and straight.
Reposition axle, install U-bolts and shocks.
Set the axle back down on the leaf pin, install new U-bolts in an X-pattern, and add new shocks.
Tip: Use anti-seize on U-bolt threads and retorque after 50–100 miles.
Final torque, drop to ground, and drive
Reinstall wheels, drop the truck, and torque everything: radius arms, U-bolts, shocks, and lugs
Tip: Go for a short test drive, then recheck every fastener. Don’t skip the alignment—it’s critical.
This wheel and tire setup features 20×10 Lucid Forged brushed Outcast wheels and 35/12.5×20 Milestar Patagonia A/T Pro tires.
Bonus Tips


Department
We Love Truck Toons from Trosley! We publish one in the back of each and every issue of Street Trucks magazine. Here are our top… Continue reading
Chris Hamilton . December 12, 2022

Department
A Tribute Truck with Meaning When it comes to creating a full-out show truck, people have so many reasons why they choose what they build… Continue reading
Brandon Burrell . November 22, 2023
C10 Builders Guide
ePlus Air Management AccuAir Suspension, maker of next generation air suspension control products, has launched the ePlus air management system app. The new app allows… Continue reading
Chris Hamilton . May 25, 2021
Features
Inside Cut Weld Drive’s Custom Chassis Legacy Beau isn’t new to the world of fabrication. His background is forged from long hours in the shop,… Continue reading
MJ Phillips . August 13, 2025
Features
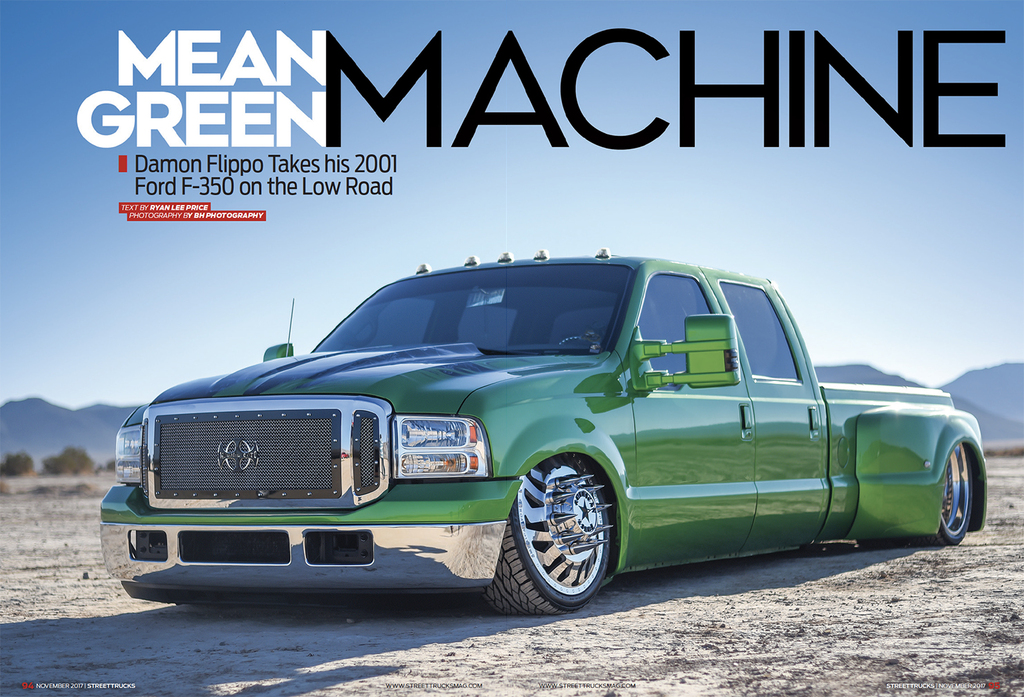
At 45 years old, Damon Flippo is no stranger to the world of custom trucks. According to Damon he’s been involved with mini-trucks since the… Continue reading
Chris Hamilton . May 31, 2022
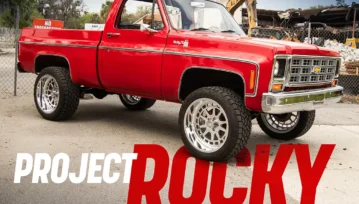
c10
The Ultimate “Work Truck” After two years of dedication, long nights, and plenty of wrench time, Project Rocky, our 1979 Chevy C10, was finally completed… Continue reading
Chris Hamilton . July 01, 2025


Share Link