 Chris Hamilton
.
January 10, 2020
.
F100 Builders
.
Chris Hamilton
.
January 10, 2020
.
F100 Builders
.
As of 2025, the Coyote/6R80 combo remains one of the most cost-effective and performance-packed swaps for classic Fords. With newer support kits and better salvage availability, enthusiasts are finding it easier than ever to modernize their builds.
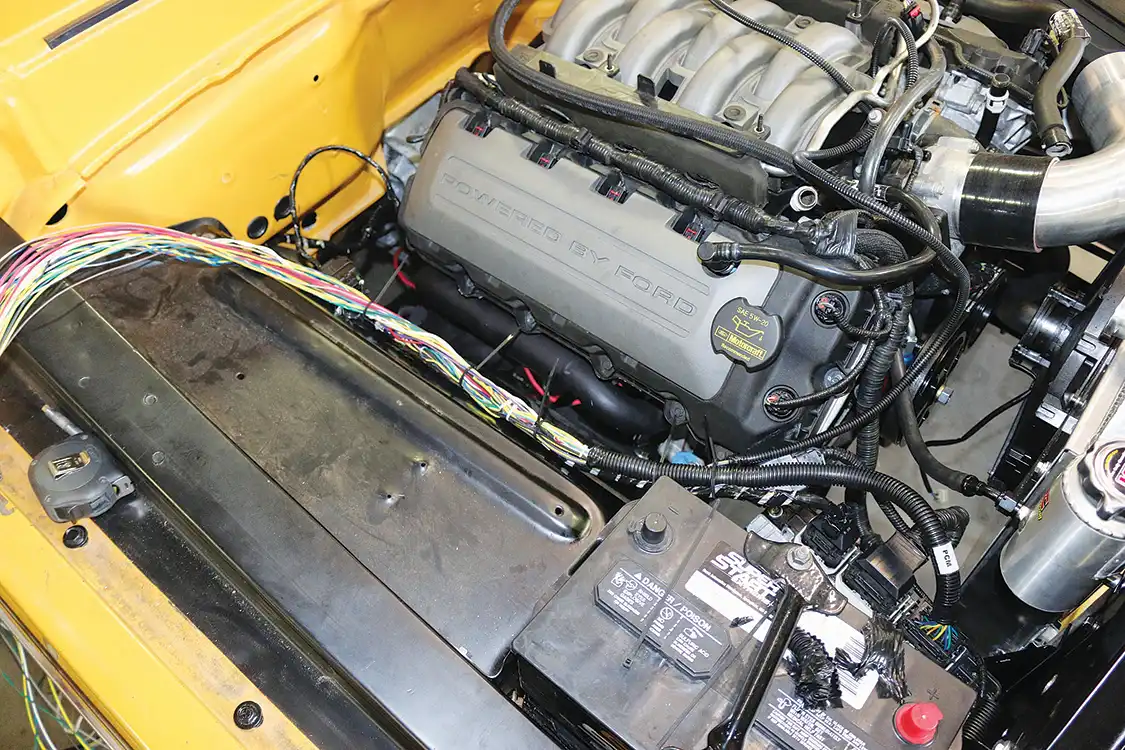
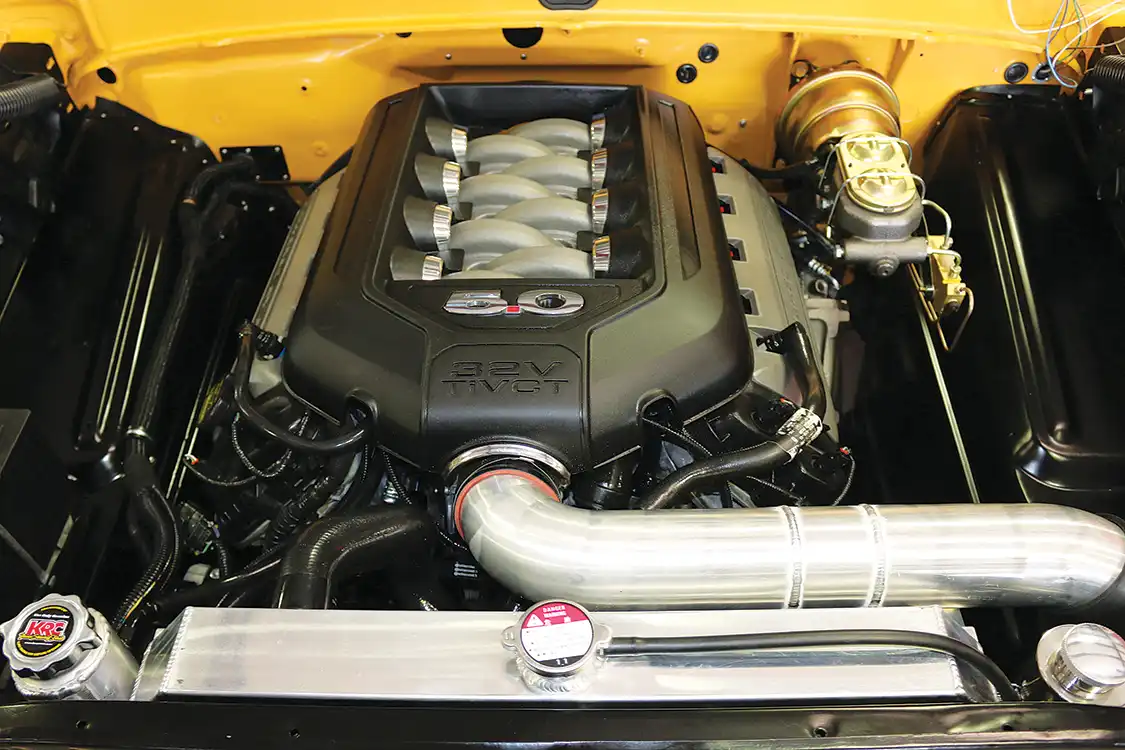
Every brand has fans, and all of them have a motor enthusiasts want to stuff under the hood. For Dodge guys it’s a Hemi, and for Chevy guys, it’s usually an LS. But when it comes to Fords, it’s all about the Coyote. There are lots of reasons why.

It’s a 5.0L engine that Ford has been building in one form or another since 1968, which gives it history. It offers rock-solid performance and reliability, and there are tons of options for improvements should you want to go even faster.
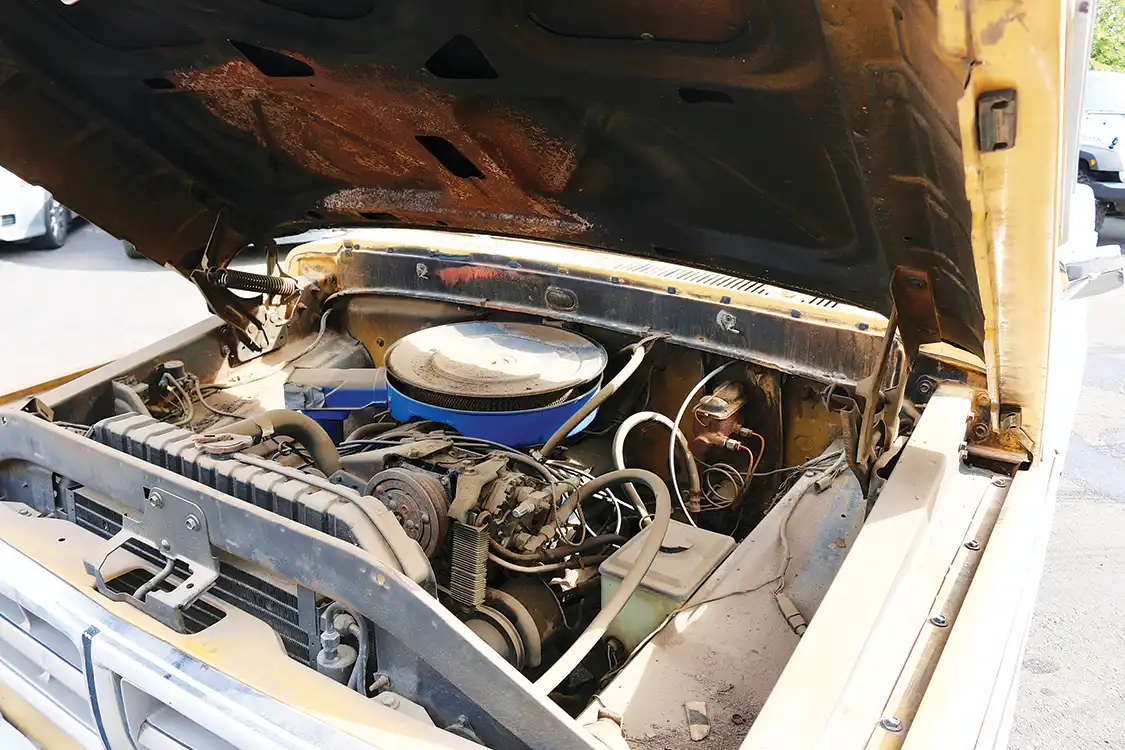
Basically, it’s a great power plant for the money, which is why many F100 owners decide on one to get their trucks down the road. The problem is that it seems like it’s difficult to install. There’s the wiring and computer to worry about; plus, can you even keep the front suspension stock? So many questions.
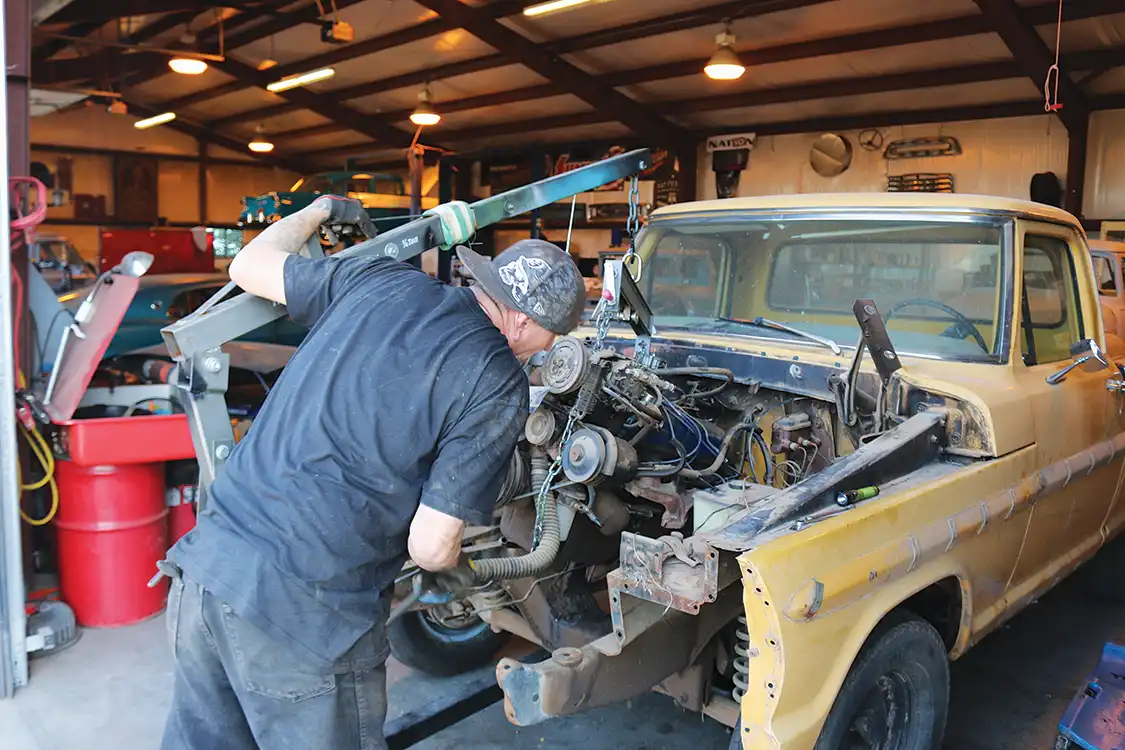
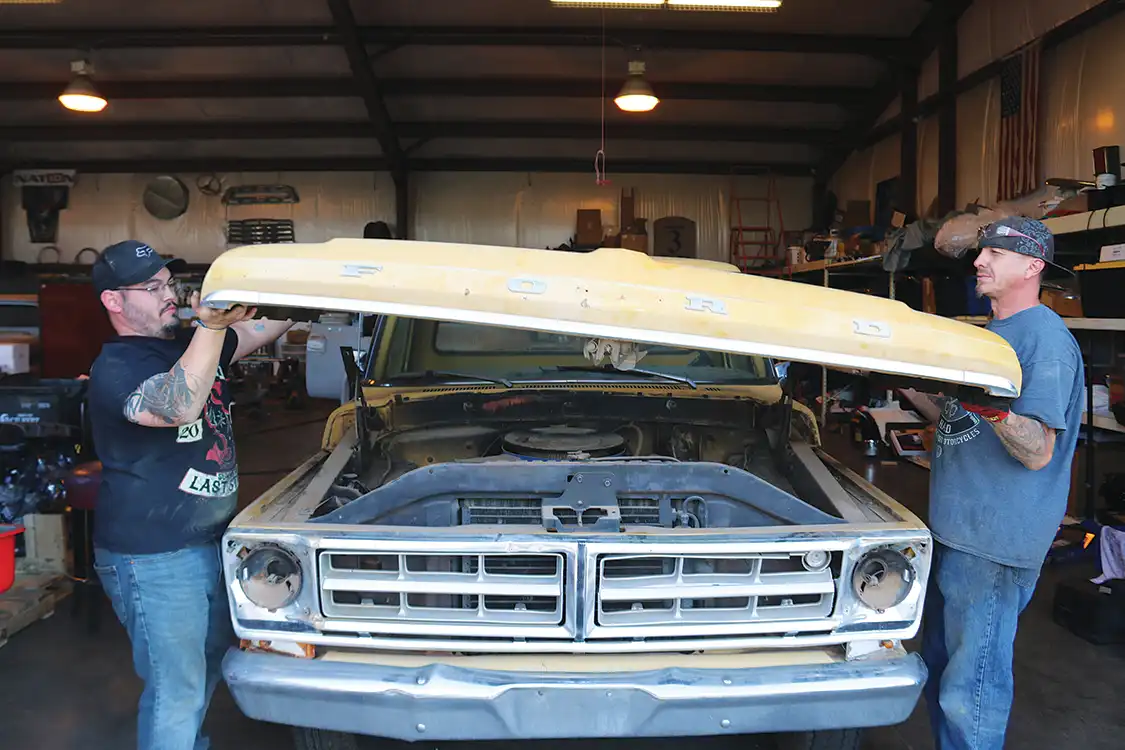
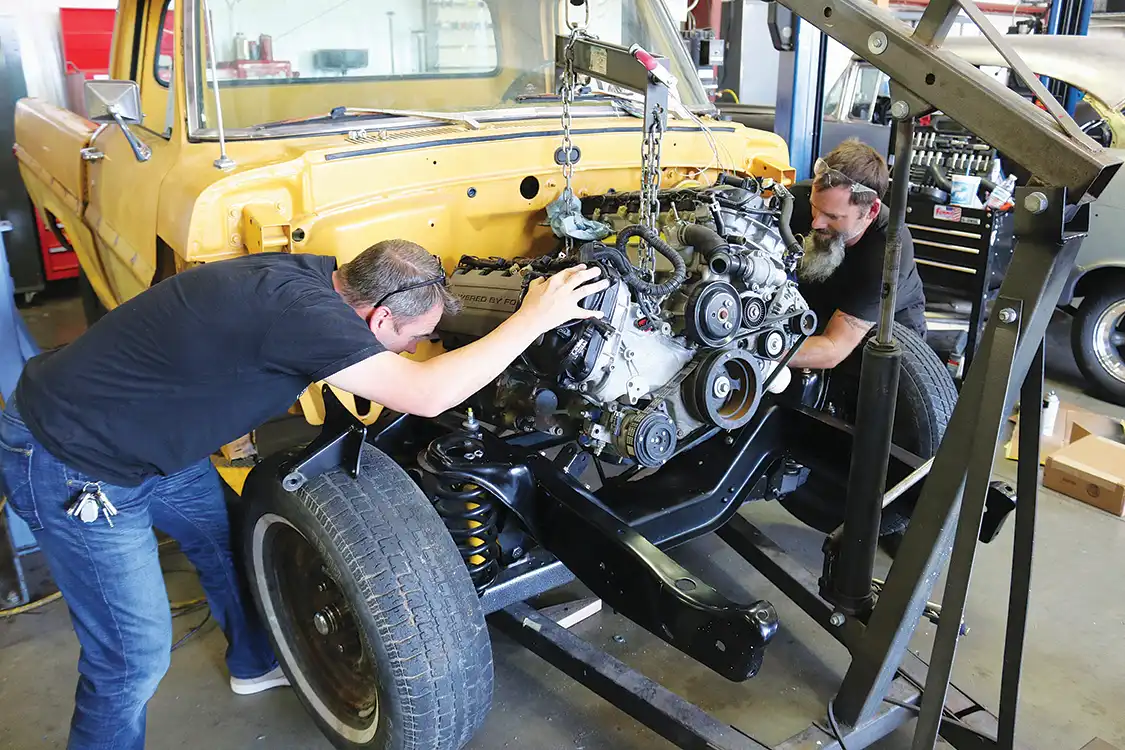
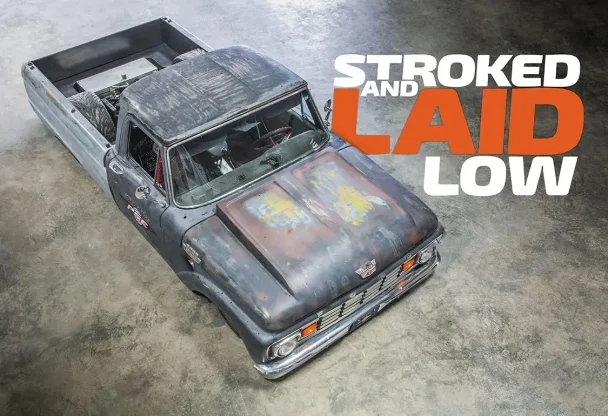
Jason Noel and the team at Fat Fender Garage not only know the Coyote well, but they have a ton of F-100 knowledge. They know these trucks inside and out, which is why they bought a ’71 F100 with the intention of swap a Coyote into it.
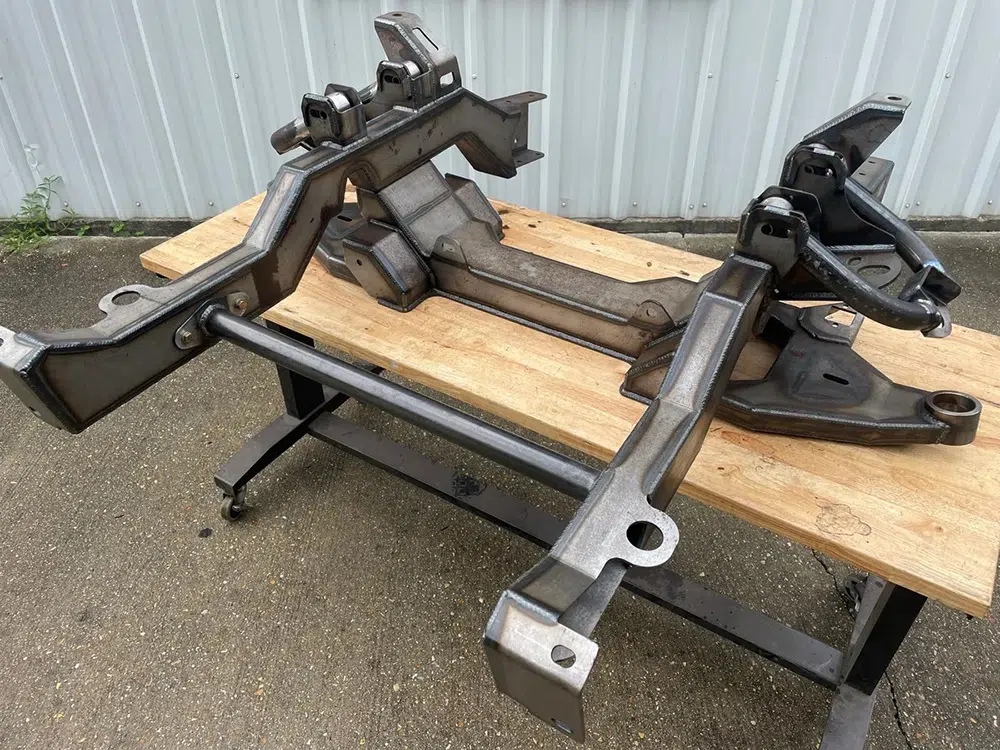
The goal here was a little different from the norm, though. They wanted to keep the stock power steering box and front suspension, and make it as affordable an option as possible so that everyone can do it.
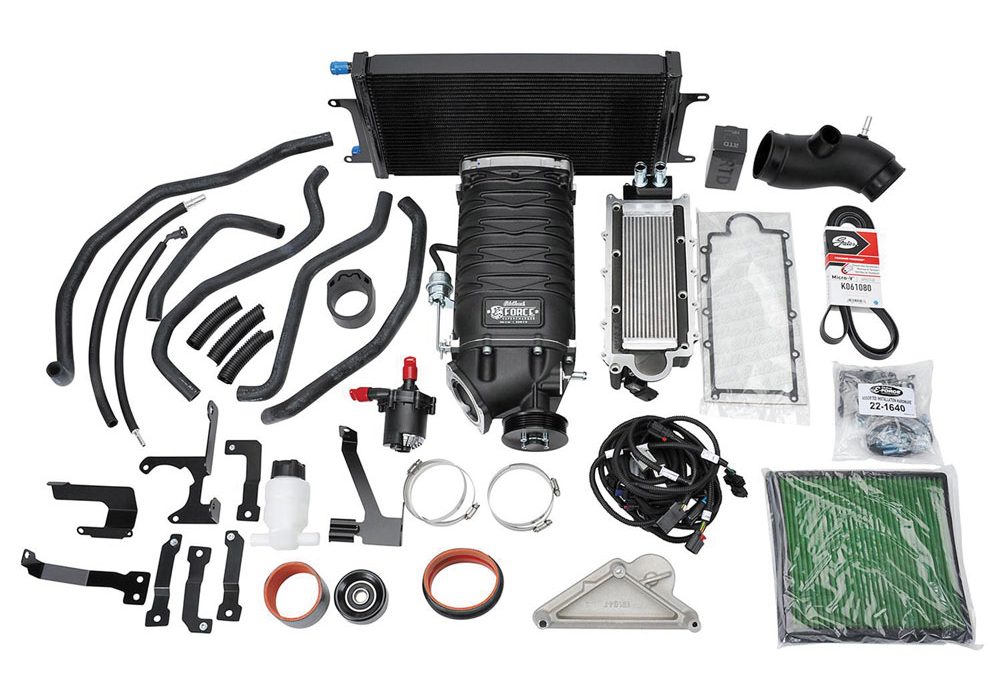
To make this setup happen for yourself, you can buy a Coyote with a 6R80 package directly from Ford, but it comes with a very steep price tag. On top of that, you’ll have to pay extra for essential components like a driveshaft, headers and accessory drive system. All of these parts can dramatically raise the cost of an already pricey package.
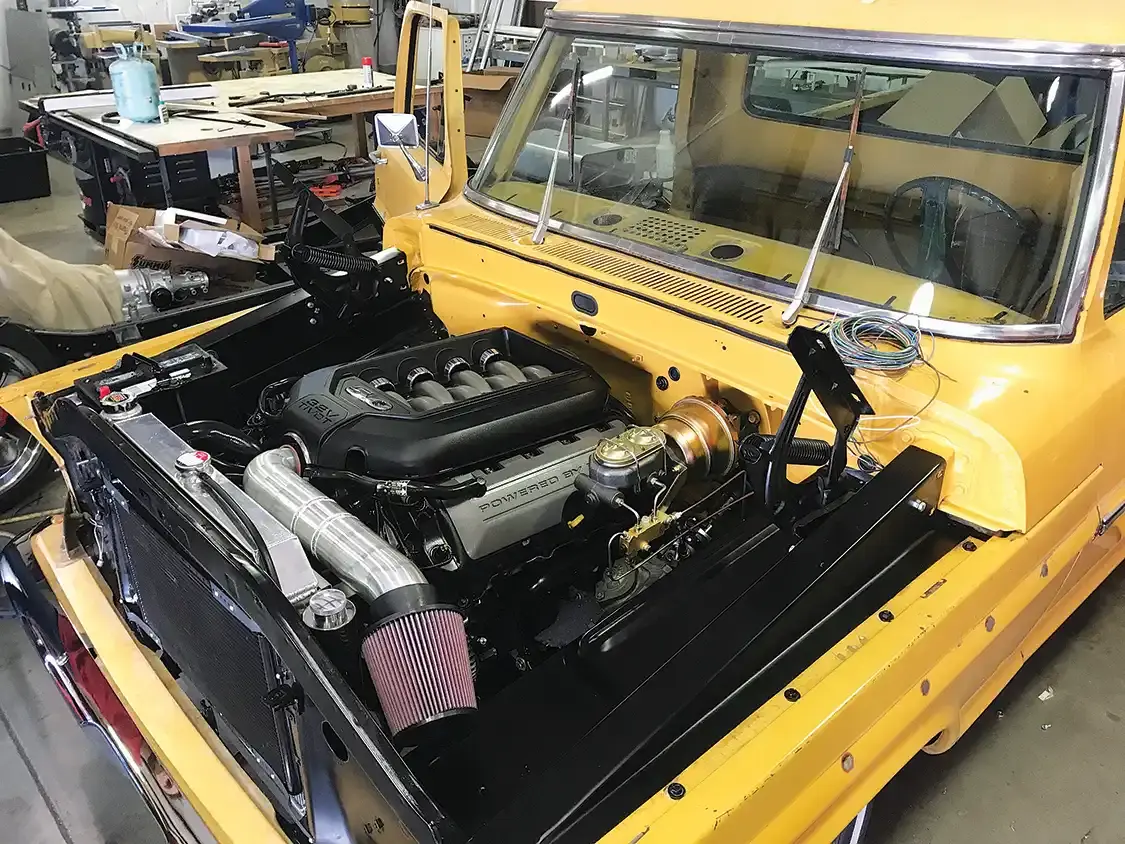
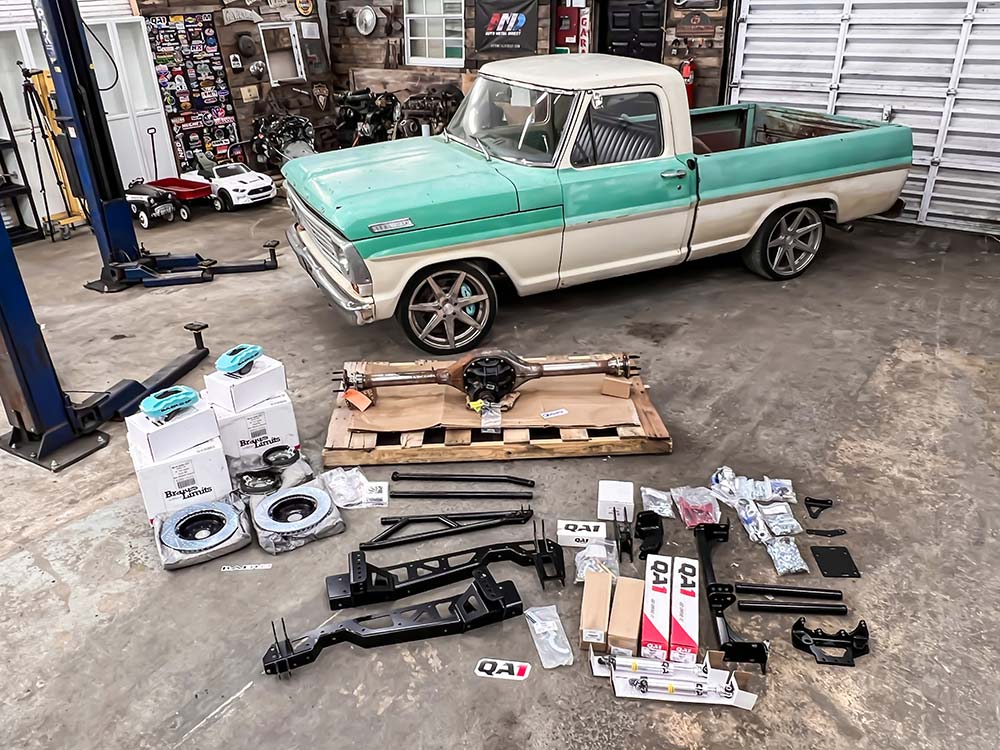
In this story, Fat Fender Garage shows how to do the swap on a more modest budget. Keeping the price tag down, you can acquire a low-mileage Coyote/6R80 driveline combo from a 2011-present Mustang GT.
Though you can pull one from an F-150, the Mustang GT version has more power and the stock headers will fit the frame rails of an F-100. We’ve seen these packages sold in local salvage yards for around $6,500-8,500, which is more affordable than buying new.
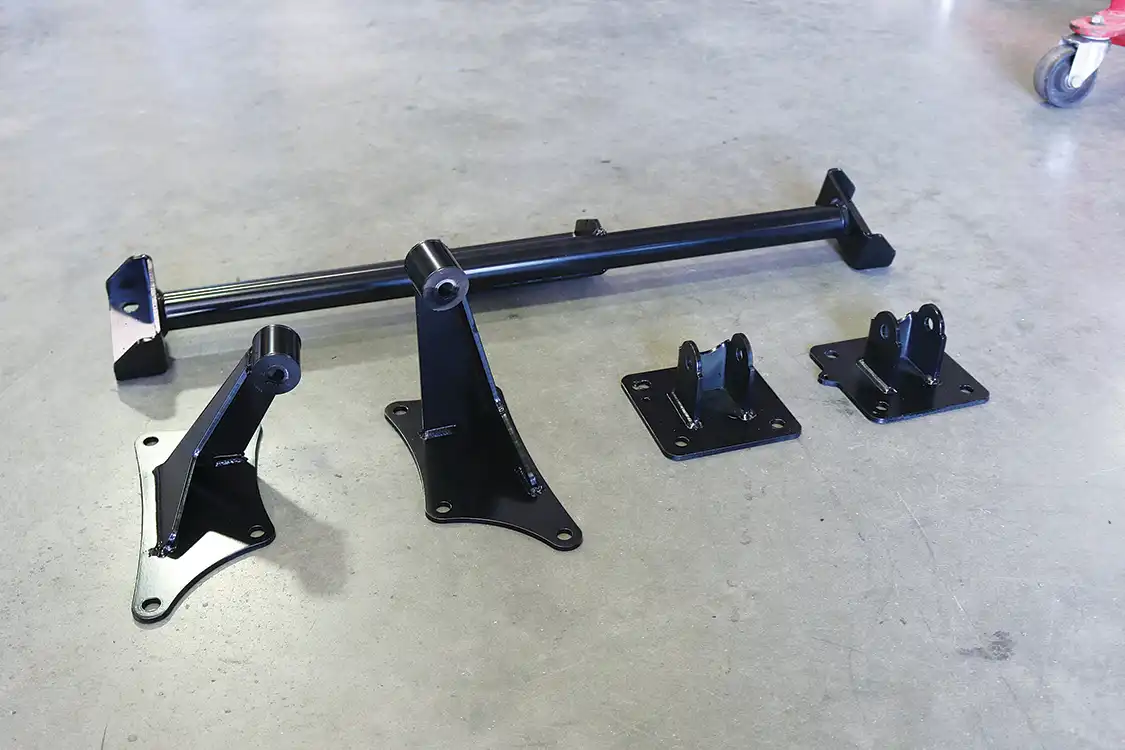
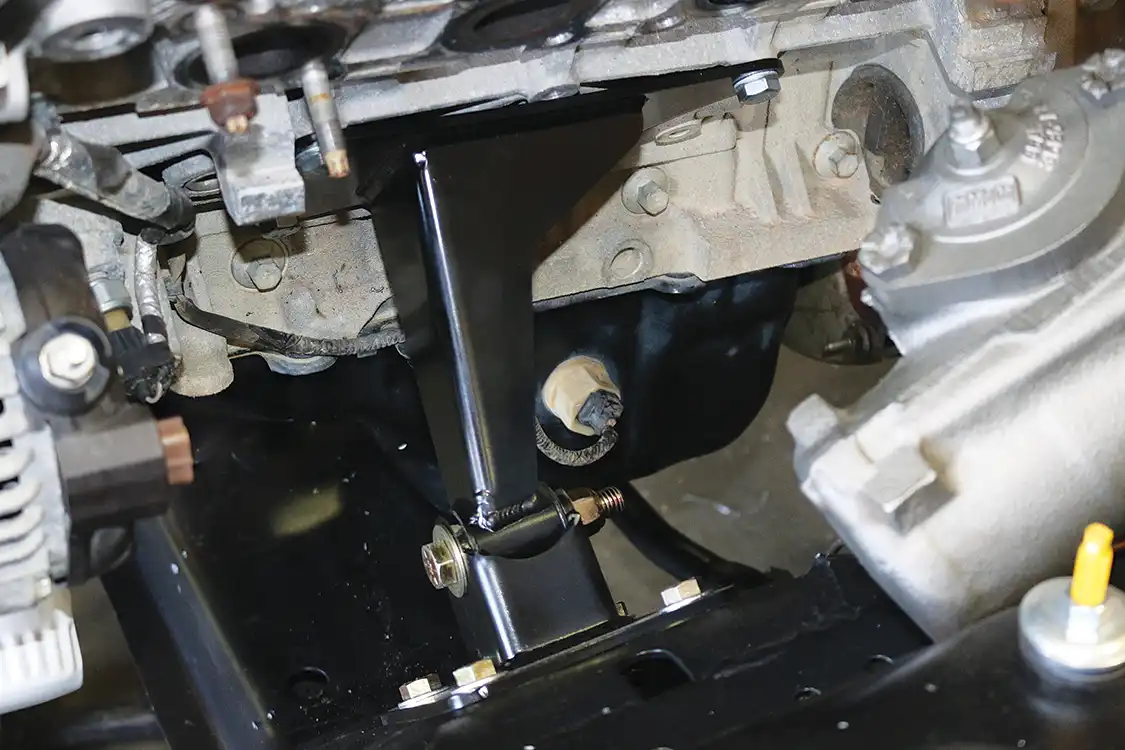
To that end, Fat Fender Garage developed a series of mounts that allows customers to drop a Coyote into their very own trucks worry-free. Not only does it locate the engine in the correct place, it does the same for the transmission, making the installation go a lot smoother.
If you want info on the other parts and pieces they used to get it moving, they can help you out there, too. Give them a call, because they’re the experts, after all.
But before you do, take a peek at this swap of a Coyote engine in their ’71 F100. It’s a beast.
Read More: ’55 Ford F-100 – Killer Coyote
Source:
Fat Fender Garage
1385 N. Recker Rd.
Gilbert, AZ 85234
480-621-6072
Fatfendergarage.com
Instagram.com/fatfendergarage/
Facebook.com/fatfendergarageaz/

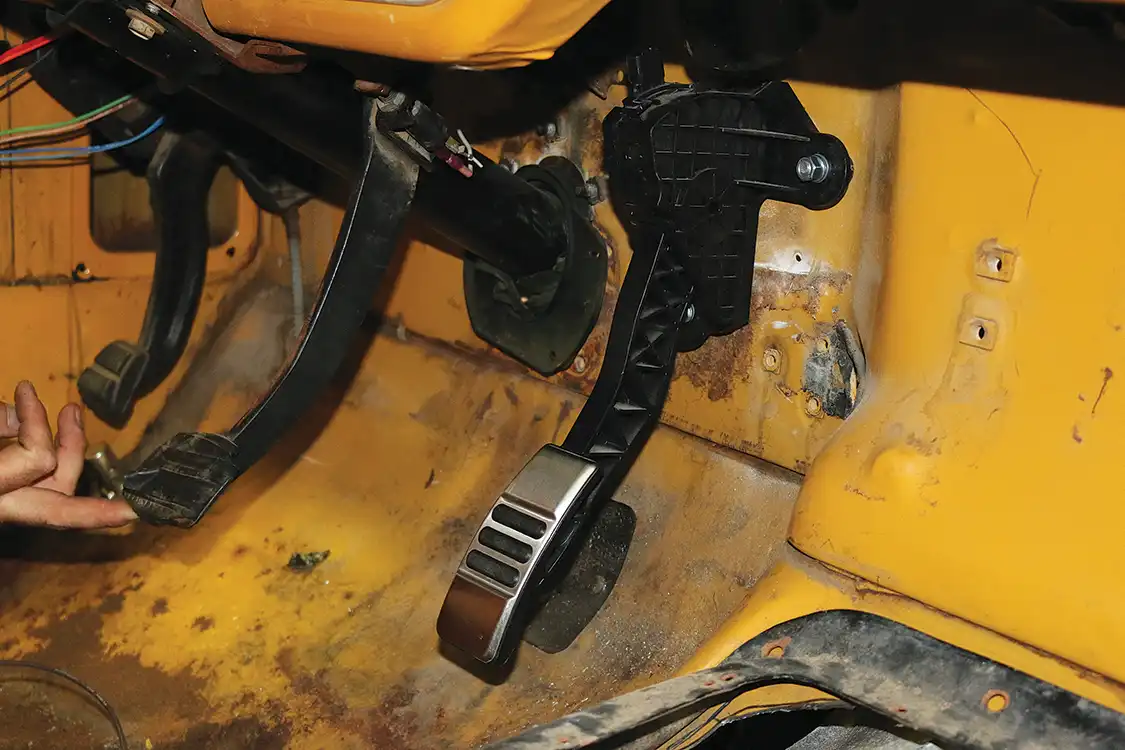
🗣 We just used a floor shifter. Not enough room for the linkage on the column – that Coyote motor takes up a LOT of room. — Reddit user from r/F100
Read More: Fat Fender Garage’s Classy ’71 F-100 Build
Read More: Restoring the Legend: A 1971 F-100 Brought Back to Life
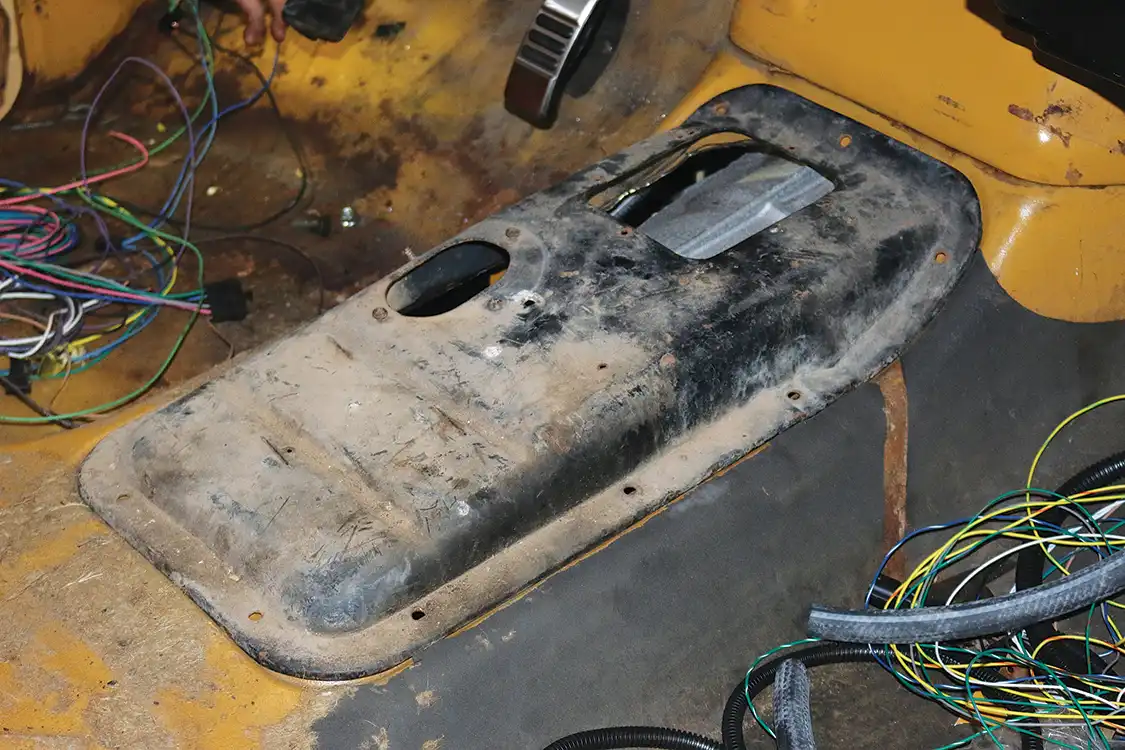
Ensuring Proper Lubrication and Oil Flow in a F100 coyote engine swap
When performing a F100 coyote engine swap, ensuring proper lubrication and consistent oil flow is crucial to prevent engine damage. Here are a few steps you can take to achieve this:
Install a Remote Oil Filter
One effective method to maintain optimal oil circulation is to install a remote oil filter. A remote-oil-filter adapter allows you to relocate the filter away from the engine, providing easier access and potentially freeing up space for other components.
Use Universal Remote-Filter Kits
For many vehicles, universal remote-filter kits are readily available at most automotive speed shops. These kits come with all the necessary fittings and hoses to reroute the oil flow efficiently.
Opt for Right-Angle Adapters
If you are working on a specific engine type, such as a small-block Mopar, a right-angle adapter might be necessary. This adapter helps you navigate around obstructions like headers, ensuring that the oil filter remains easily accessible and that oil flow is not compromised.
Tips for Installation
Final Checks
After installation, double-check all connections and run the engine to ensure there are no leaks. Regularly monitor oil pressure and oil levels to promptly address any issues that may arise.
By following these guidelines, you can effectively manage your oil system during a F100 coyote engine swap, ensuring your engine runs smoothly and efficiently.
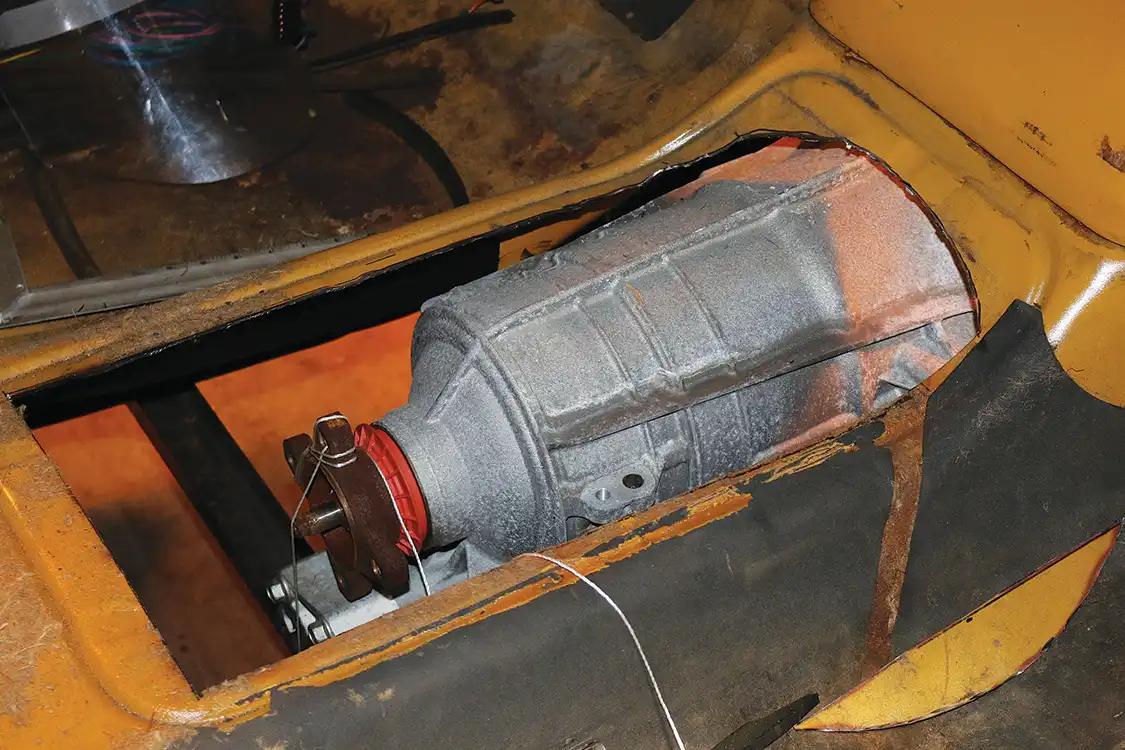
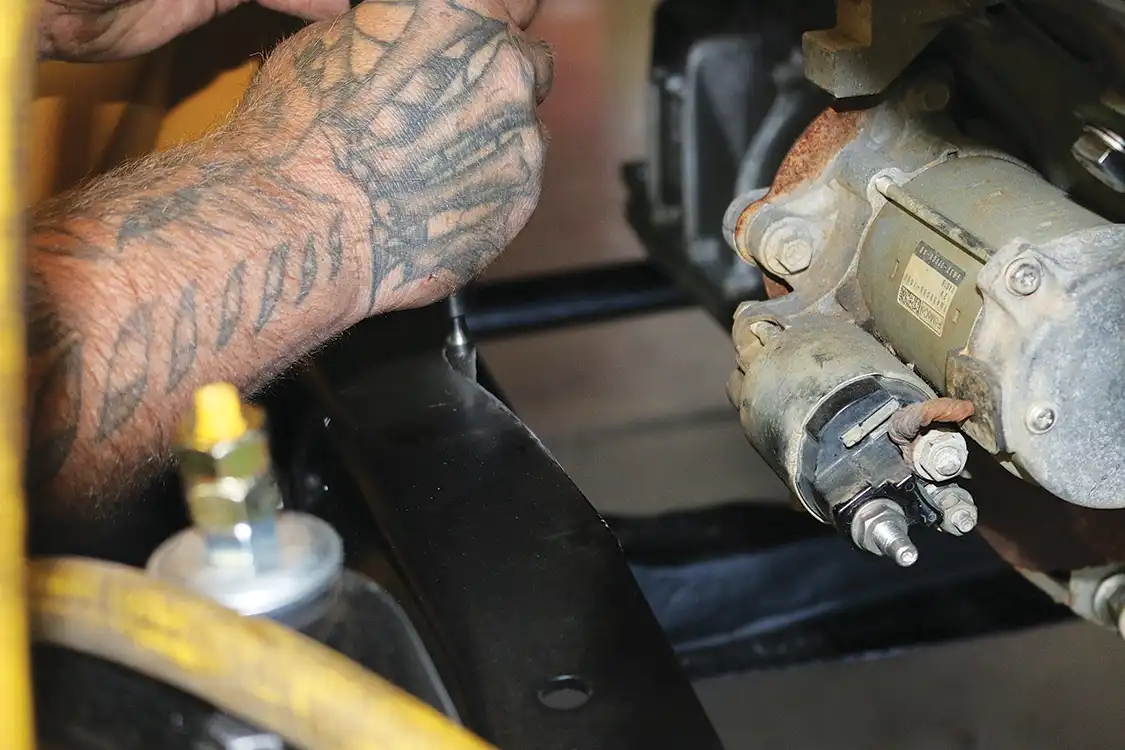
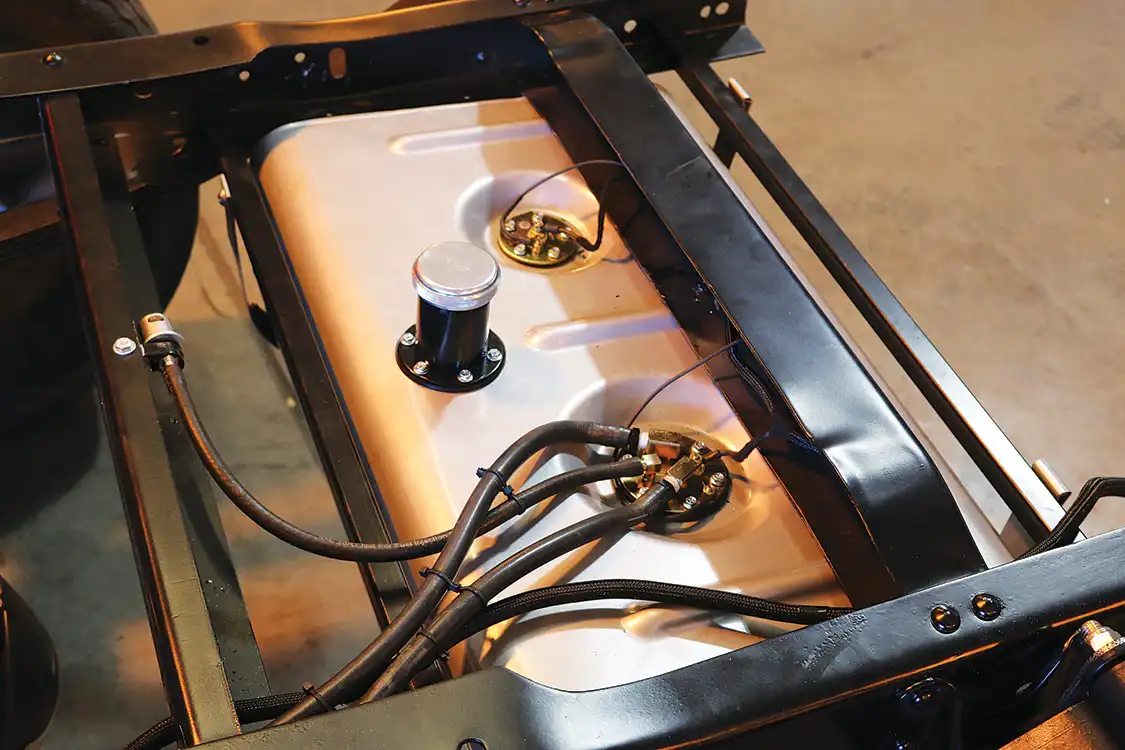
When you perform a F100 coyote engine swap, you will likely need to modify your driveshaft to match the new setup. Typically, this requires altering the length of the driveshaft to accommodate the different dimensions of the new transmission.
Here’s a step-by-step guide to modifying a driveshaft for a F100 coyote engine swap:
Tips for Successful Modification
By following these steps, you can modify a driveshaft effectively for your coyote engine swap, ensuring your vehicle runs optimally with its new setup.
Read More: New Parts and Accessories for Classic Ford Truck and SUV Restorations
Transmission Adapters for Various Engine Swaps
When it comes to engine swaps, having the right transmission adapter can simplify the process significantly. Here are some options for adapters that can help you pair nearly any automatic transmission with a variety of engines.
Types of Adapters Available
Using these adapters can make your engine swap project smoother and more efficient, providing the flexibility to mix and match engines and transmissions to achieve the desired performance and fit for your vehicle.
Whether you’re modernizing a classic car or building a custom hot rod, these adapters offer reliable solutions to bridge the gap between different engine and transmission types.
Types of Transmission Dipsticks for F100 Coyote Engine Swaps
When you’re tackling a F100 coyote engine swap, choosing the right transmission dipstick is crucial. Here are the main types available, each designed to address specific needs:
Benefits of Flexible Dipsticks
Key Considerations
Popular Third-Party Brands
Choosing the right type of transmission dipstick can make all the difference in the success of your F100 coyote engine swap. Consider your specific needs, the space constraints of your setup, and the quality of materials to find the best fit.
Read More: 1958 Ford F100 Restomod with Gen 3 Coyote and 8.8 Explorer Rear
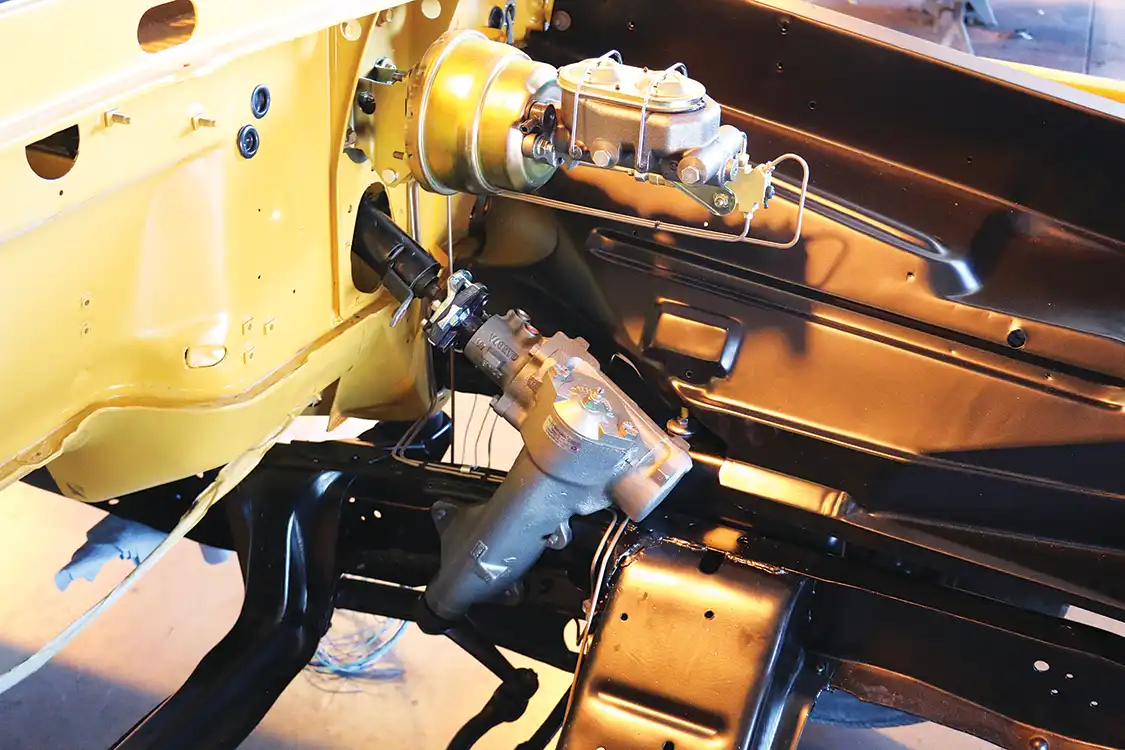
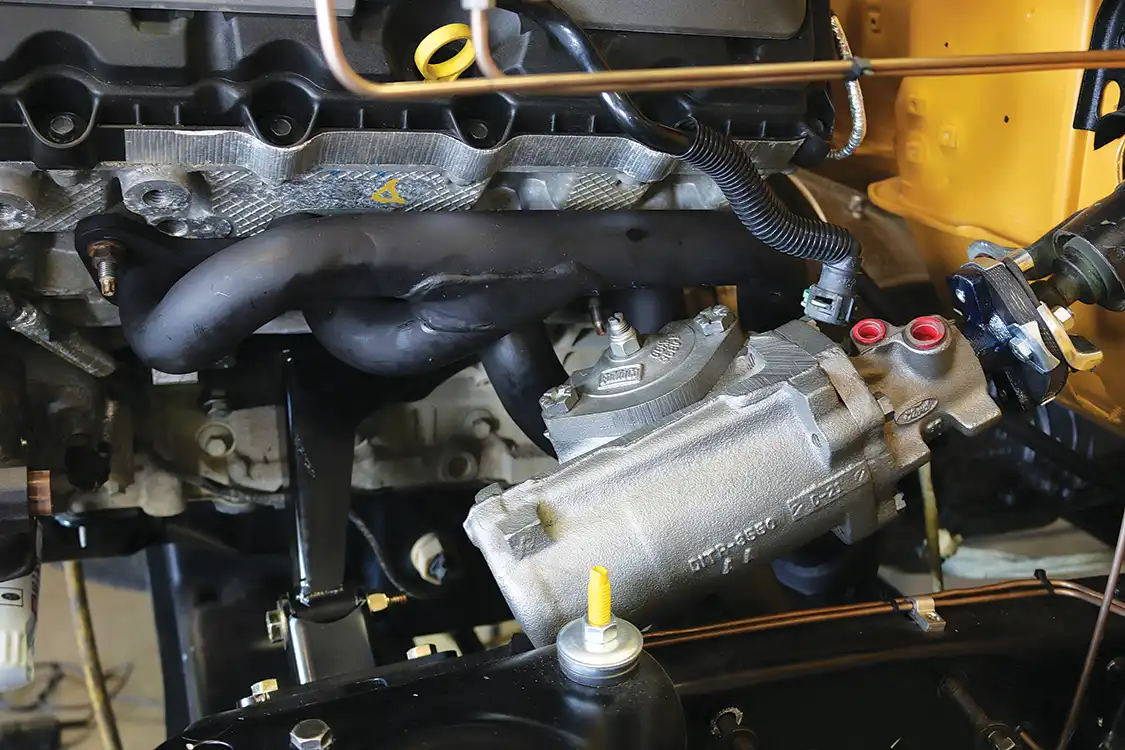
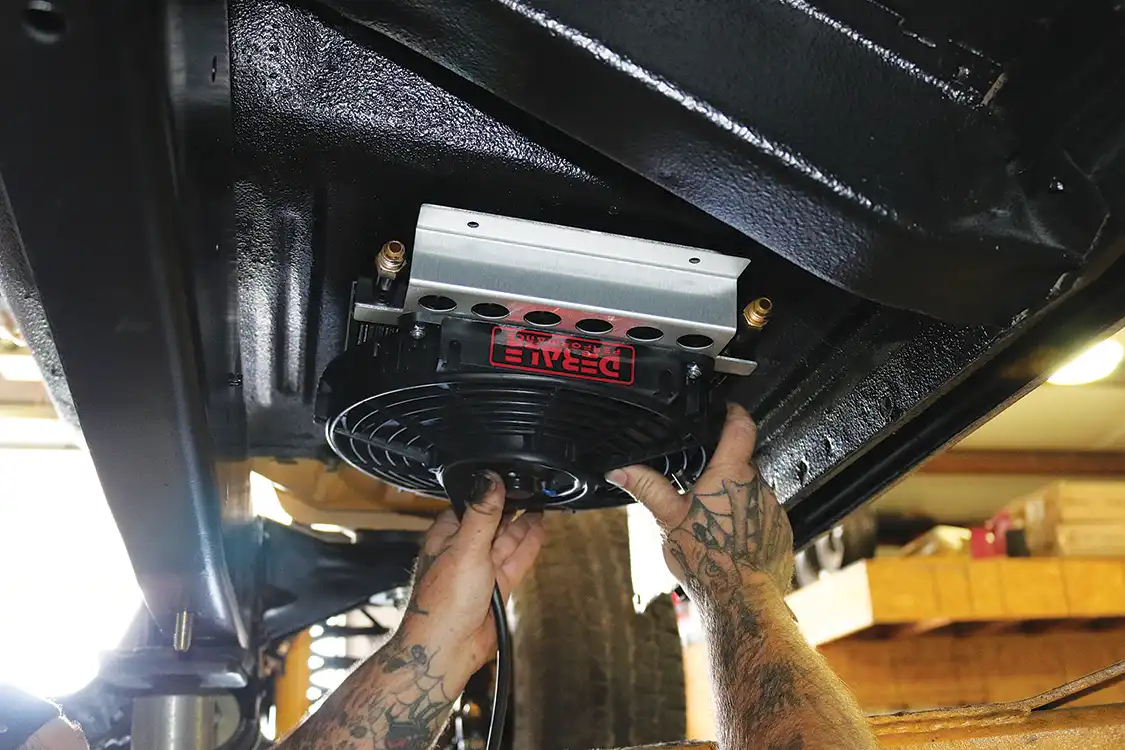
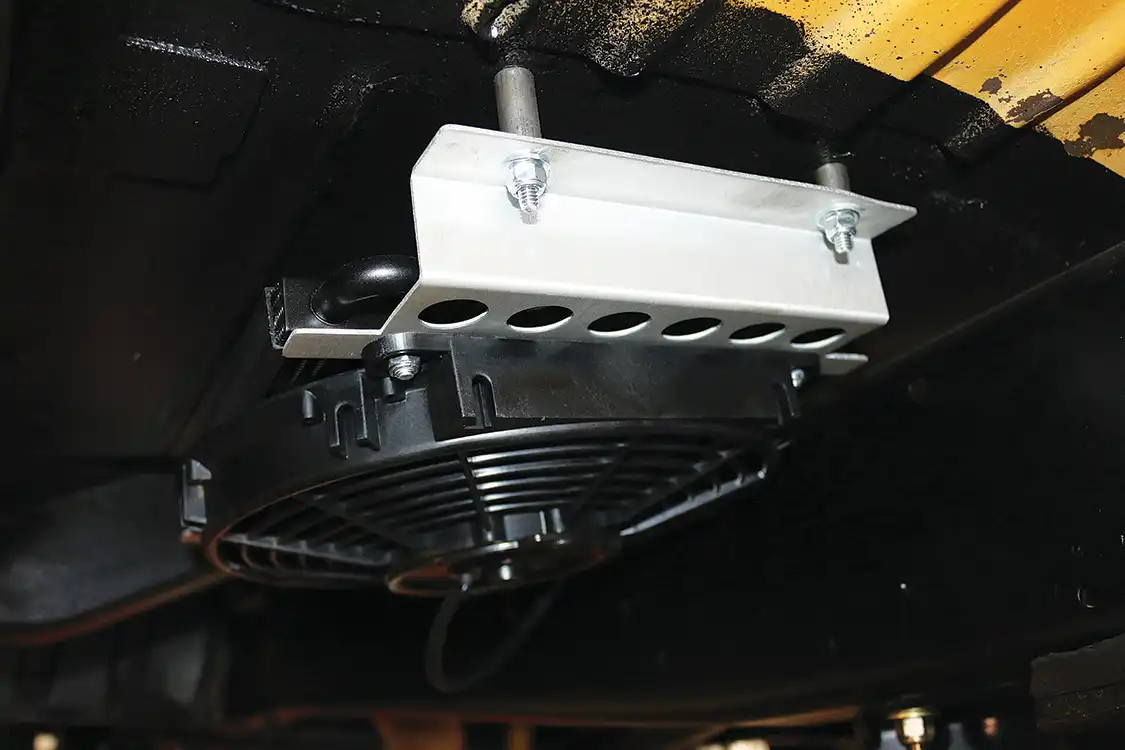
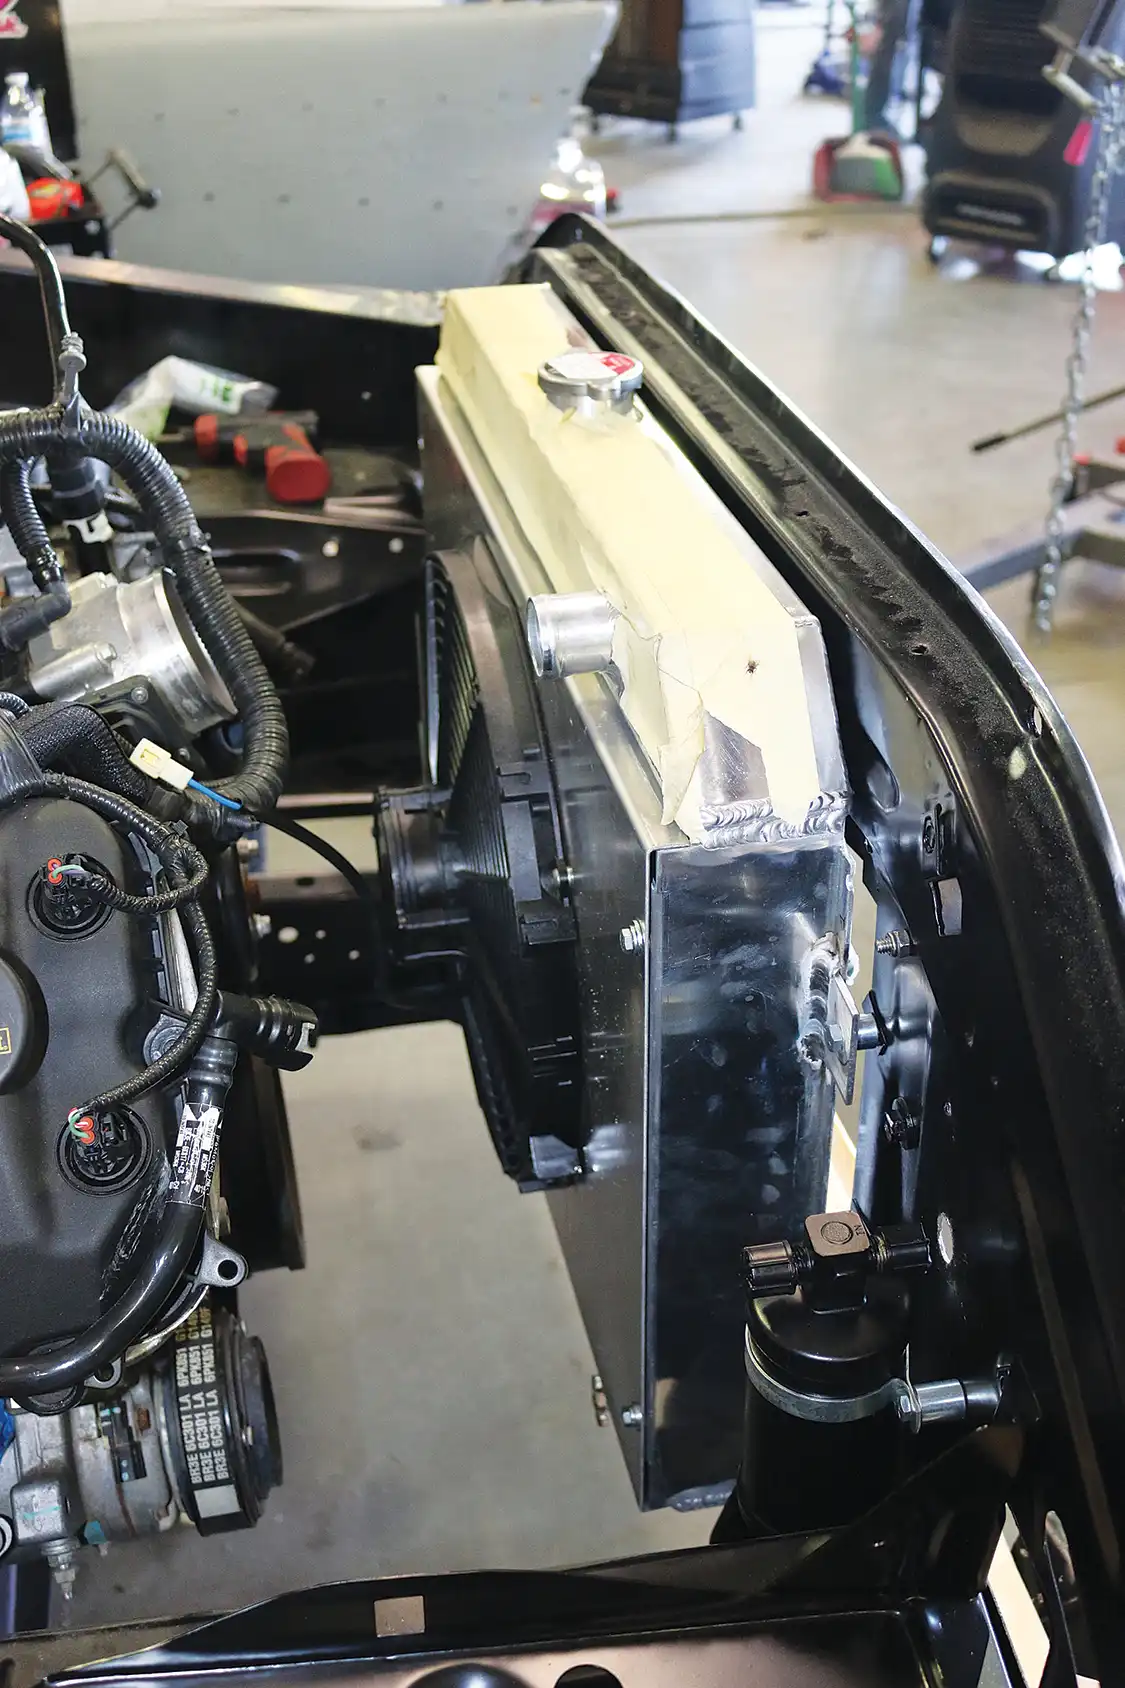
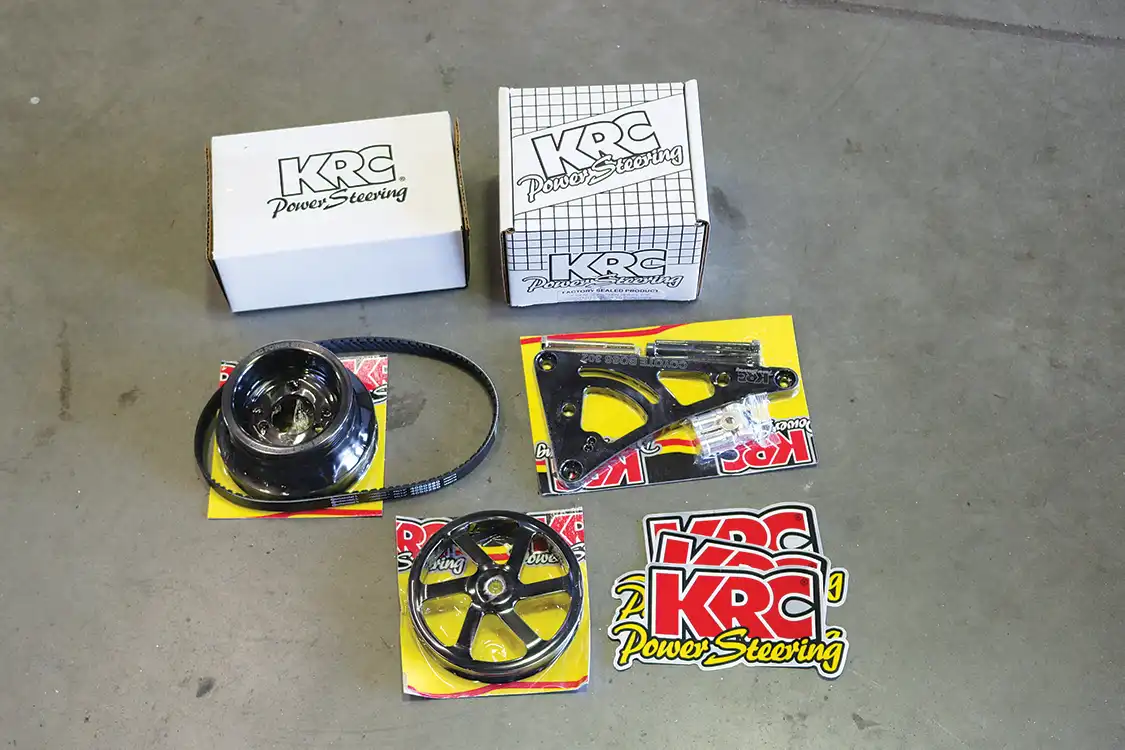
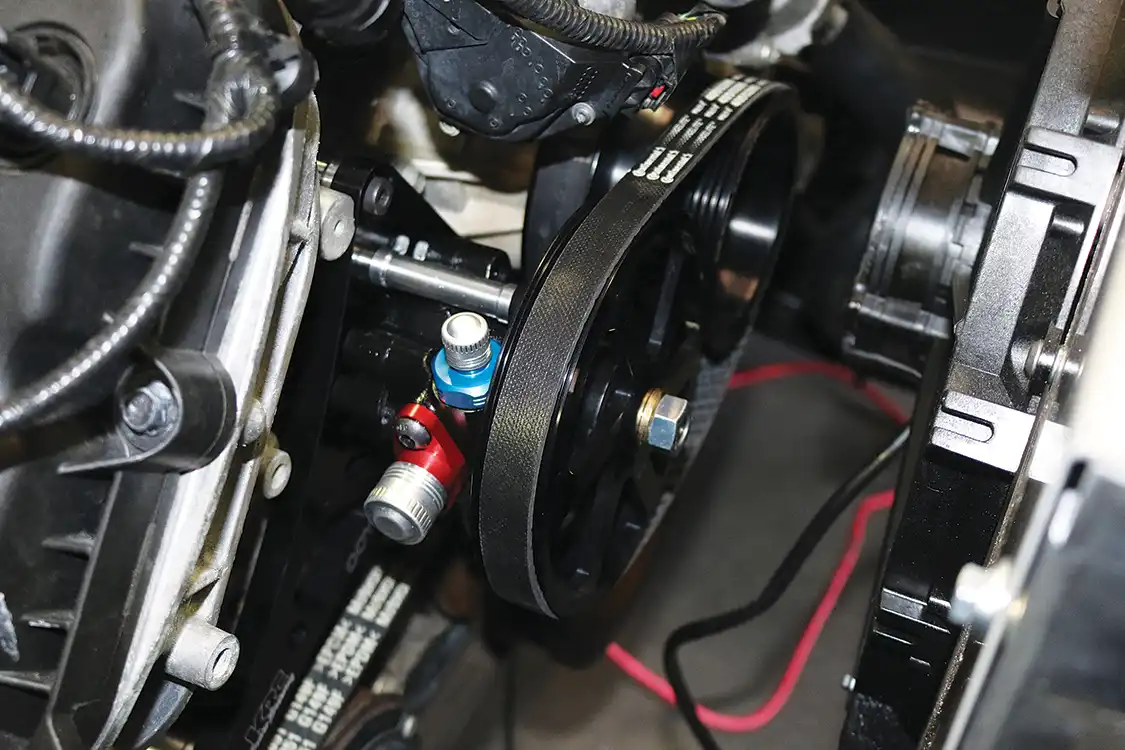
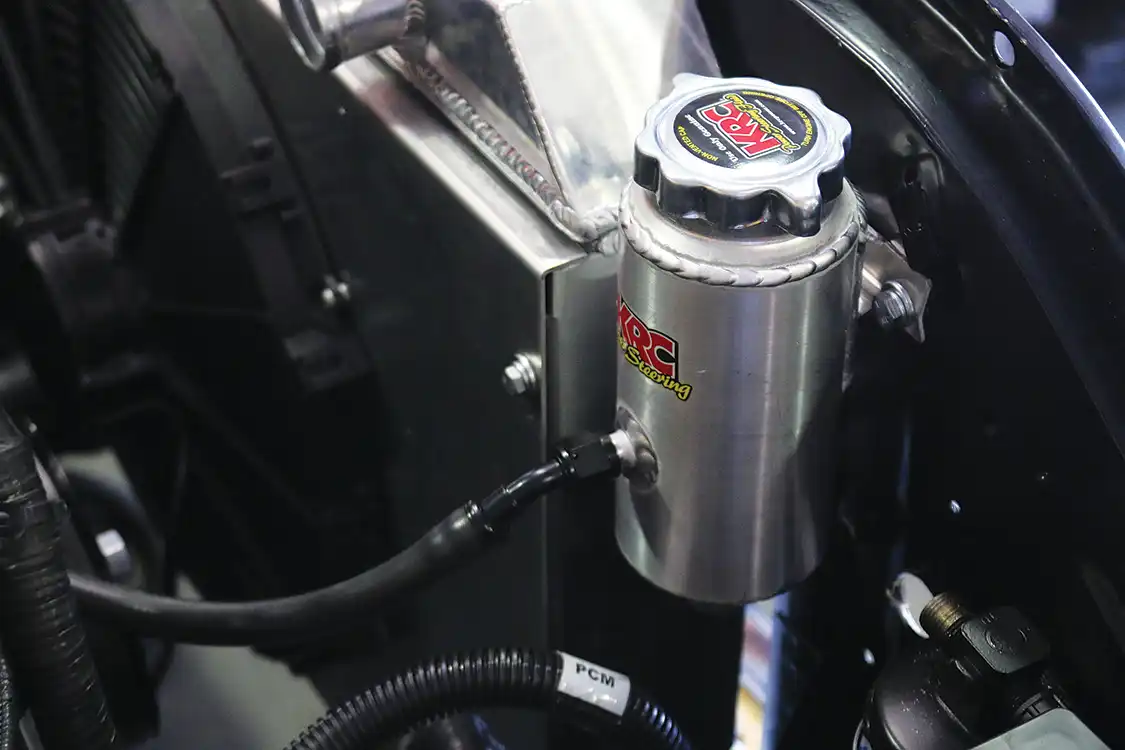
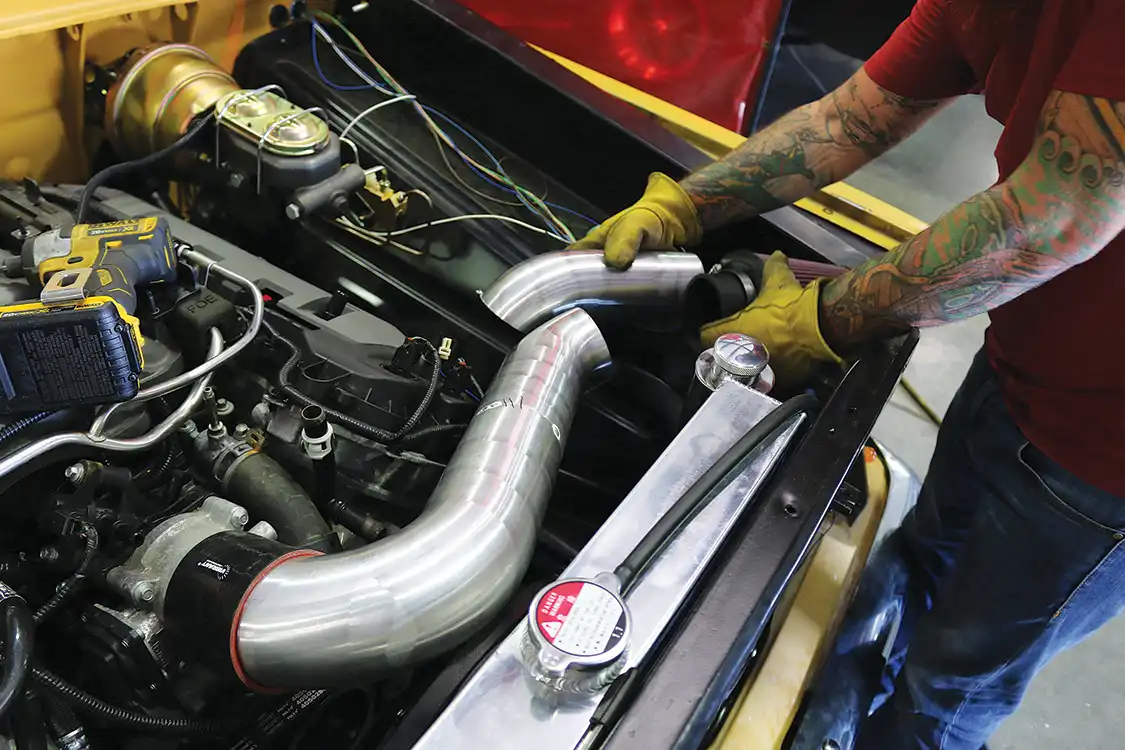
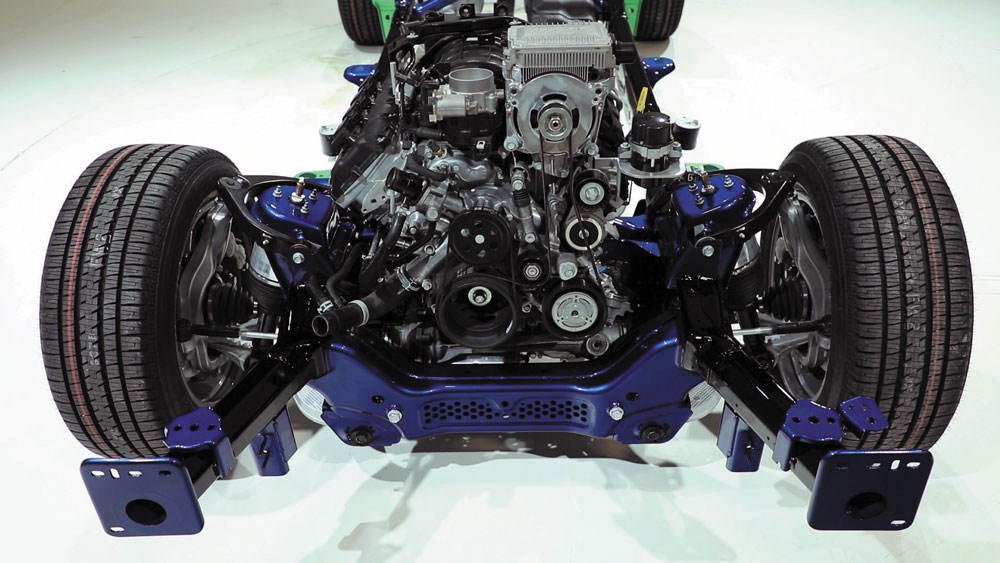
The driver’s side Mustang GT header will clear the factory power steering box, and a small heatshield slips between the two for protection. A Ford Mustang has electric power steering.
It takes a kit, like this one from KRC, to convert it to work for the F-100. Installed, the KRC kit looks clean and simple. The KRC kit includes a remote reservoir that was mounted to the radiator.
When dealing with power steering during an engine swap involving different makes, compatibility between the steering gearbox and the power-steering pump is crucial. It’s often less complicated if you don’t have to fabricate brackets to mount the pump that originally came with the car.
Fortunately, there are solutions available. For instance, pumps from Ford, GM, or Chrysler can usually be recalibrated to work with a mismatched box. Additionally, fittings are available so you can create custom hoses to connect the pump to the box seamlessly.
This comprehensive approach ensures that your power steering system is both functional and reliable, regardless of the makes involved in your engine swap.

F100 Builders
Metal is Thicker than Blood Although this issue is paying homage to all you home builders out there, this man, Dorian Reyna, owns a killer… Continue reading
Mike Alexander . April 14, 2020

F100 Builders
A Hand-Me-Down Transformation of a 1955 Ford F100 That Gets Down 1955 Ford F100 trucks that are handed down through one’s family are an extra… Continue reading
Mike Self . August 06, 2024

Department
A Dentside F-100 Built to Stand out From the Crowd LIKE MOST OTHER PEOPLE IN THE TRUCK SCENE, JASON JONES HAD DREAMS OF BUILDING SOMETHING… Continue reading
STREET TRUCKS STAFF . August 11, 2020
COOL GEAR
The Latest Gear for your Ford Truck Direct-Fit All-Electric Cluster for ’73-’79 Ford Trucks This 1973-’79 Ford truck direct-fit package from Classic Instruments is an… Continue reading
SOLOMON LUNGER . March 01, 2023

F100 Builders
This F-100 Always Strikes First Cody Roussel saw a hole in the game, a hole that a slammed fourth-generation F-100 could fill nicely. It’s easy… Continue reading
MICHAEL J. PHILLIPS . May 19, 2022
Department
Keeping the Rhythm Going on Our ’67 F-100 In the last issue of FBG, we did some Crown Vic front upgrades to our 1967 F-100,… Continue reading
SOLOMON LUNGER . March 15, 2023


Share Link