GOING THE EXTRA MILE AND SAVING GAS WHILE WE GET THERE
THE RECENT RUN of lifted-style tech articles in the last few issues of StreetTrucks magazine is no accident. We’ve seen the popularity of tech articles about daily drivers skyrocket when published alongside pages of full-blown custom fabrication tips and tricks. StreetTrucks readers seem to like a little bit of everything, which lends itself well to special edition books like C-10 Builder’s Guide and F-100 Builder’s Guide. Be sure to check out one of those if you’re a hardcore fan of either truck model. You’d be surprised to see how much content we can print and how much knowledge you can gain, but first, let’s get back to the project at hand.
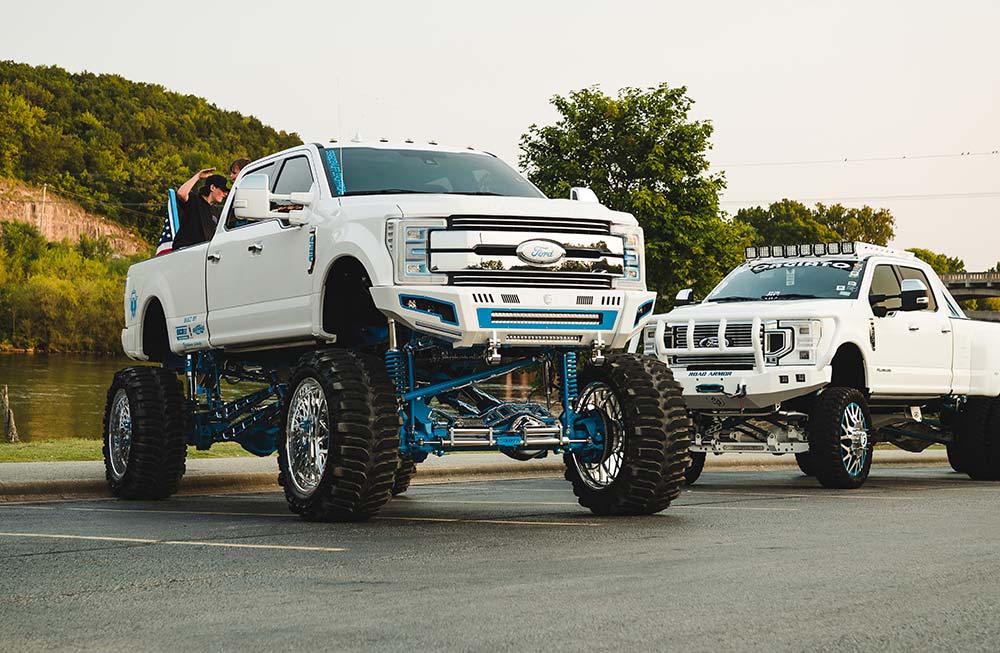
The lifted truck industry has a tendency to focus on bolt-on brackets and upgraded coil springs, since those are usually on full display and powder-coated in wild colors. What doesn’t get brought up enough are the additional steps that any truck owner should take after installing a lift kit of significant size. The factory drivetrain of most modern trucks is designed specifically for the original overall wheel-and-tire size; so, bigger wheels and heavier tires will obviously change the gearing, which in turn will change the speedometer, shift points and the gas mileage. Unfortunately, the fix for these issues requires parts, labor and absolutely zero visual impact. We understand how tough it can be to spend a chunk of cash on parts that will never be seen when you could easily buy some striking visual appeal for the same dollar amount. That said, if you want your lifted truck to last as long as intended, and you also want to spend your paychecks on something other than gas and transmissions, this article is written specifically for you.
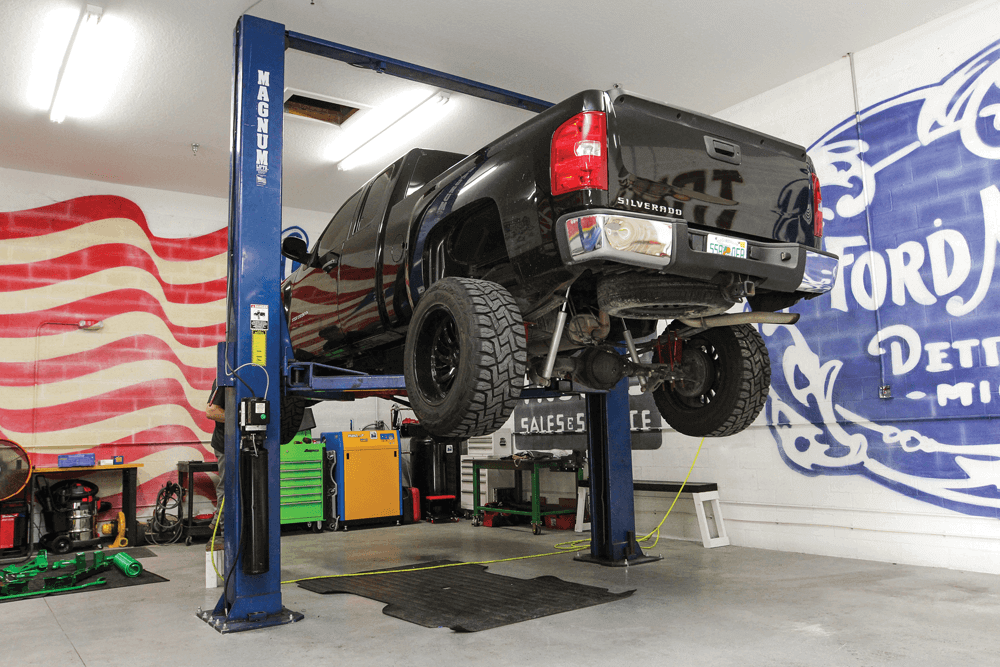
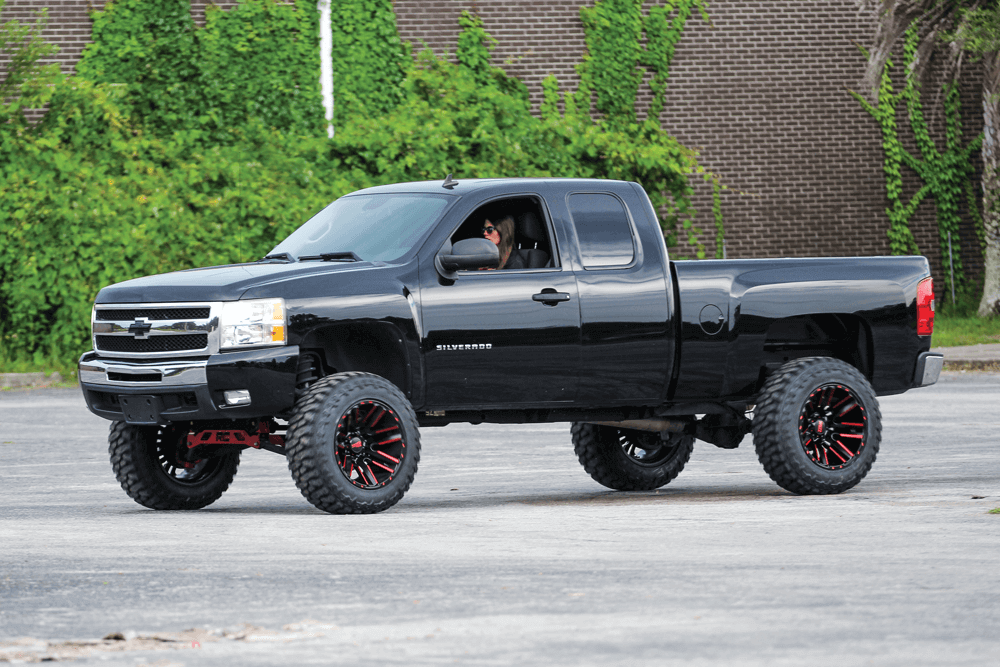
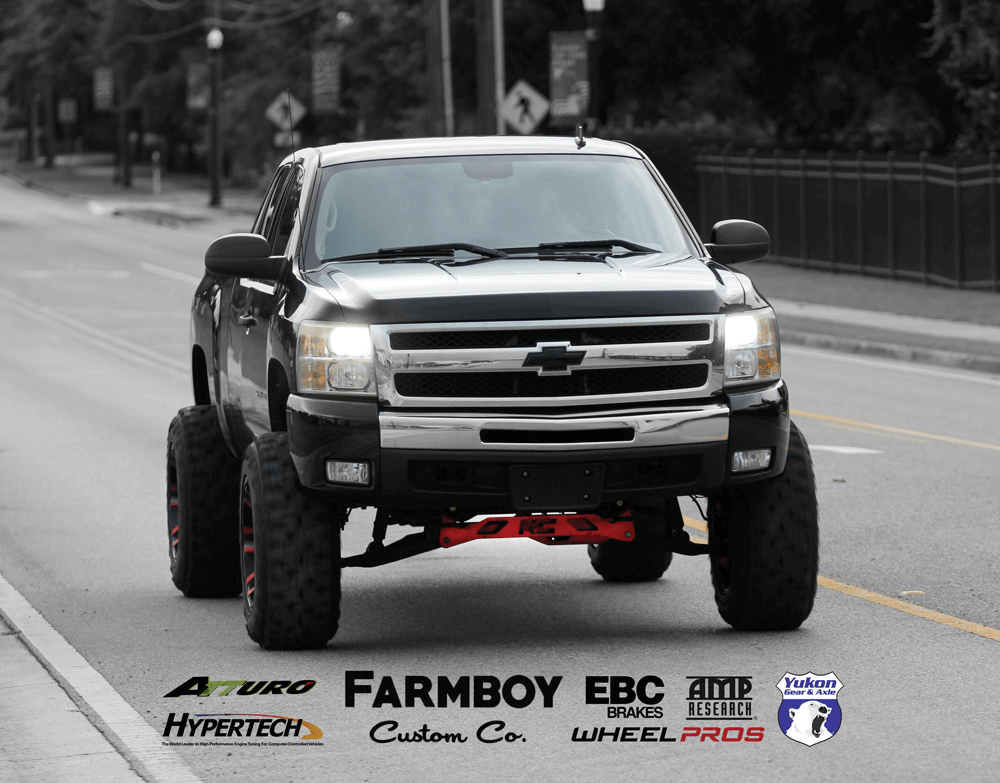
This was the case for Nicole and the ’11 Chevy Silverado mall crawler she recently had lifted. A struggling transmission and an untold number of fill-ups were enough to make anyone throw up their hands in disgust, so she called the crew at Farmboy Customs in Royal Palm Beach, Florida, for some technical advice. Luckily for her these guys are pros, and they’ve done this type of job a hundred times. Without any further hesitation, she ordered a set of 4.56 gears from Yukon Gear and Axle along with the master installation kit and a posi-trac rearend for a little extra traction.
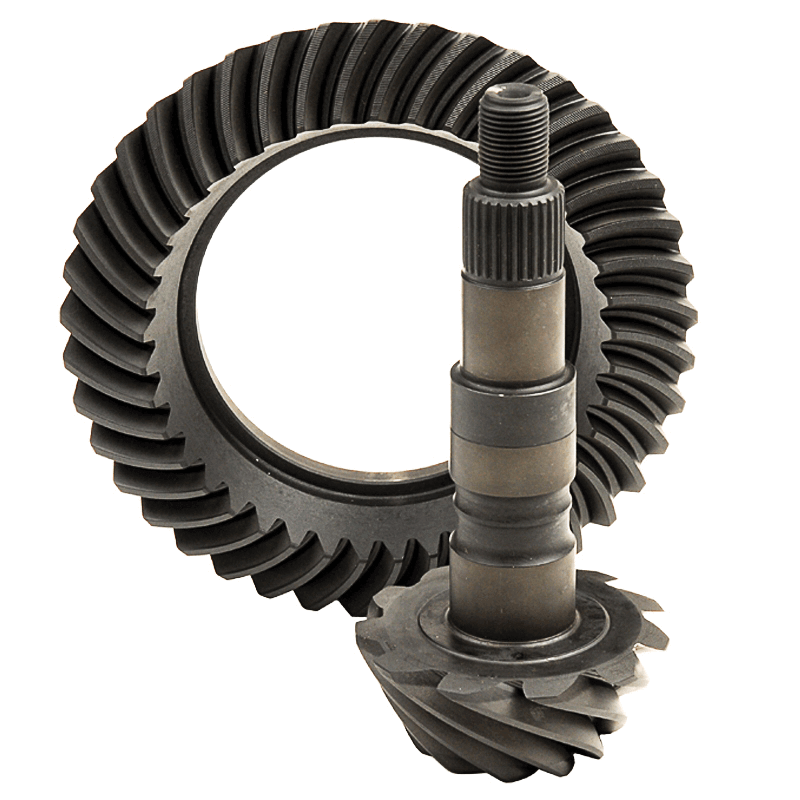
Gears, brakes and a tune are the standard upgrades any truck shop would recommend after installing a significant lift kit. For this setup, Yukon Gear and Axle recommended new ringand- pinion gears with a 4:56 gear ratio and the master installation kit. The kit comes complete with the axle bearing and seal kits, pinion bearing and shim kits and everything else needed for a complete installation, aside from new gear oil, of course.
While the truck was on the lift and maintenance was on his mind, Mark Wetherington, lead tech at Farmboy Custom, floated the idea of upgrading the brakes to accommodate the increased rotational mass. After scanning a few product options and price quotes, Nicole chose EBC rotors and pads, as well as a Hypertech MaxEnergy 2.0 power programmer to reprogram the factory computer. To complete the post-lift maintenance package, a new set of tires from Atturo were slapped onto the Moto Metal wheels, and she was out the door for a test drive. Now the truck uses its power more efficiently and isn’t as thirsty for fuel.
EBC rotors and Orange Stuff brake pads will increase stopping power, and a new computer tune will correct the speedometer along with a few other ECM adjustments like transmission shift points.
Check out the steps involved in this single-day parts swap, and decide for yourself whether the price of the parts is easier to swallow than the price at the pump.
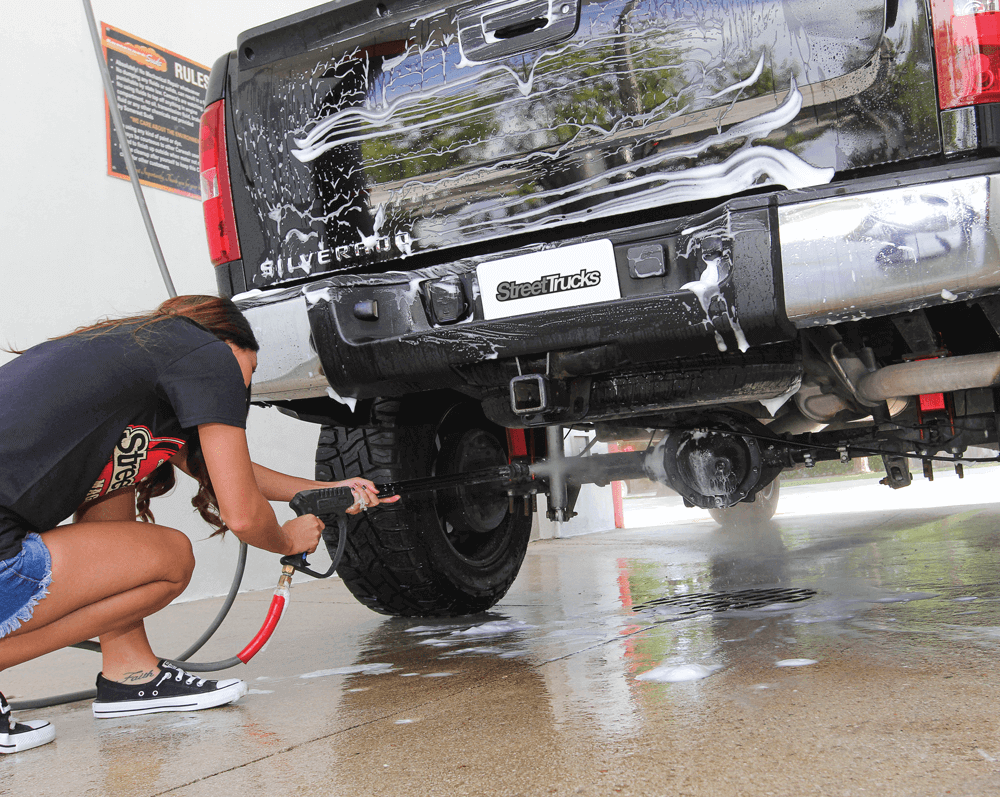
Before you drop your truck off at a shop for undercarriage mechanical work, do your mechanic a favor and give it a good pressure clean at the local car wash. He will appreciate it, we promise.
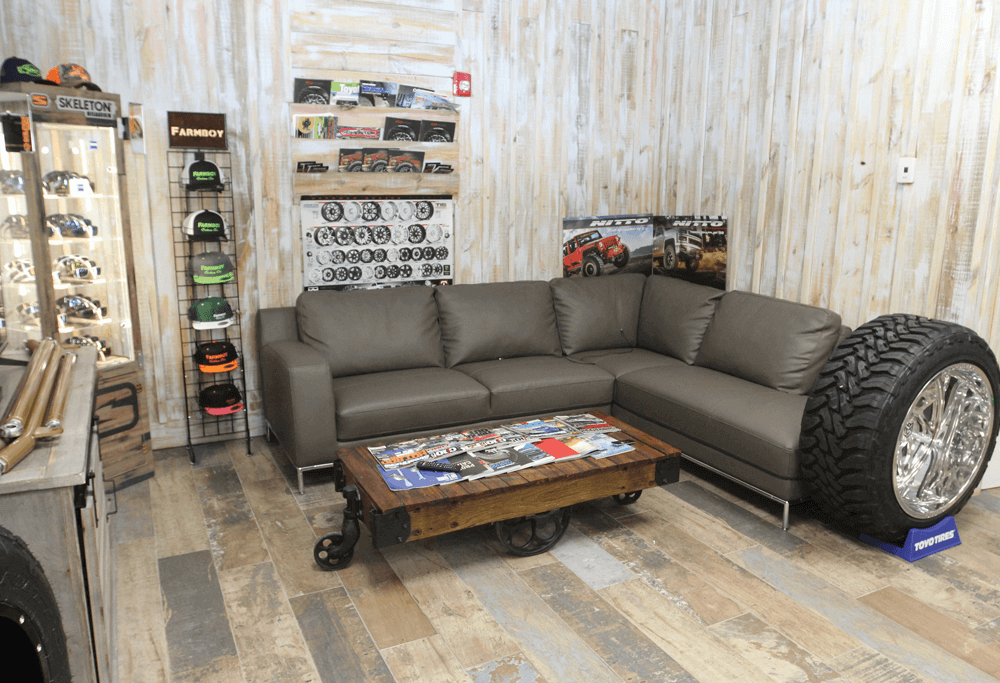
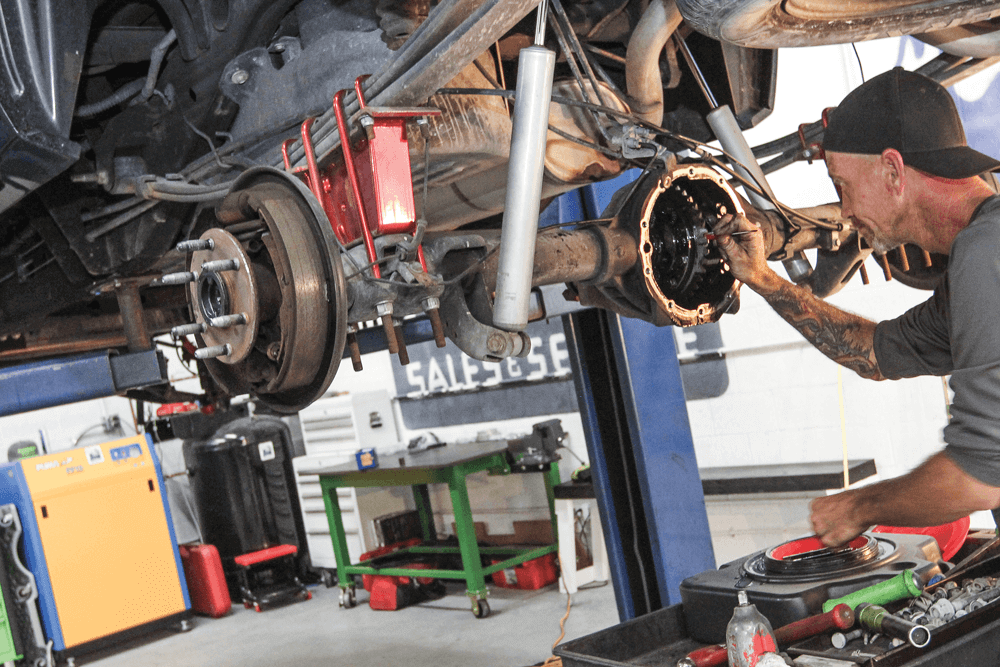
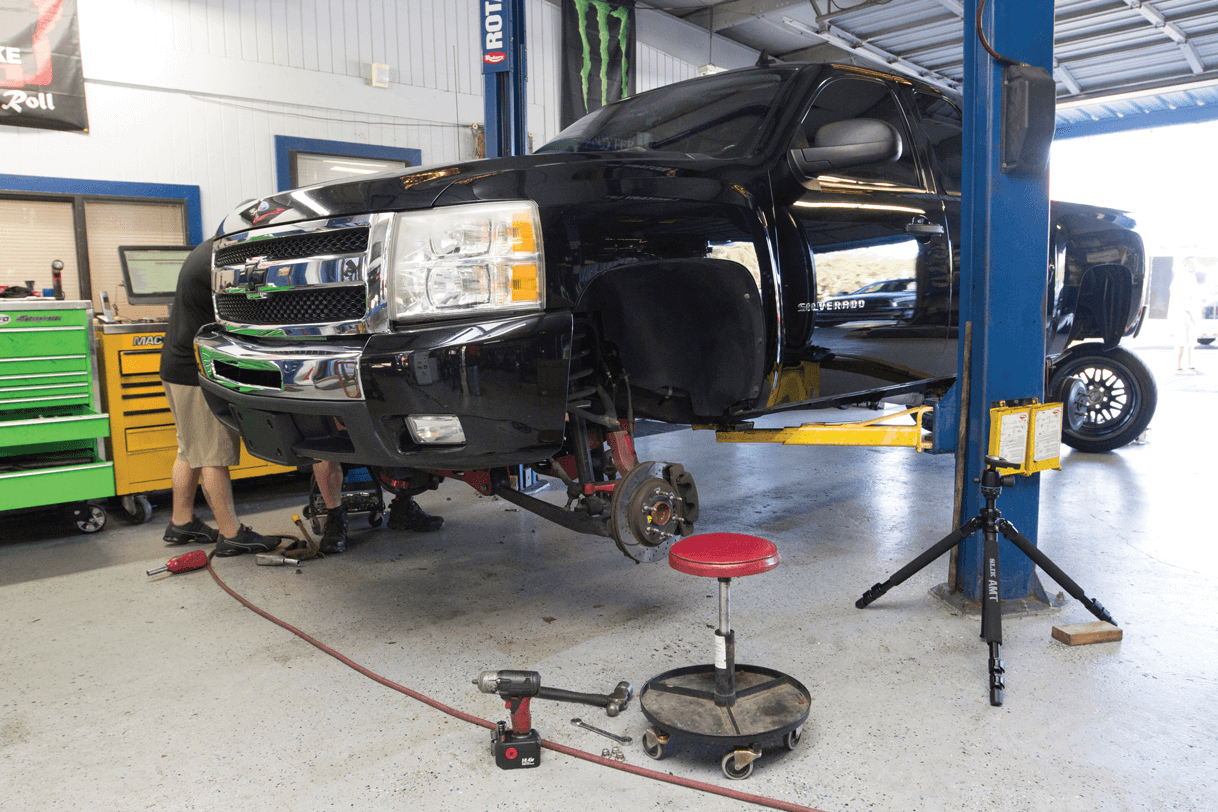
Farmboy Customs out of Royal Palm Beach, Florida, has a staff of master mechanics that handle all facets of truck customization, from lifted to lowered, resto to modified. The crew’s attention to detail is second to none, and the extremely impressive front office could double as a high-end boutique with a few quick product swaps.First things first, put the truck on the lift and search endlessly for the wheel key. Good thing Lead Tech Mark has a tool for any situation and pretty much any lug nut lock key ever made.
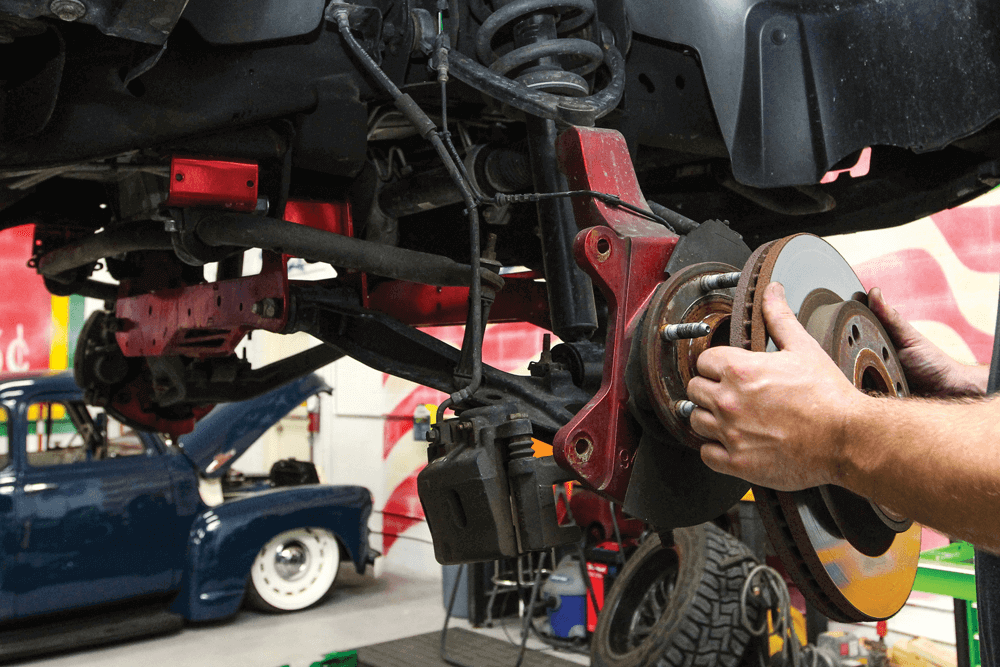
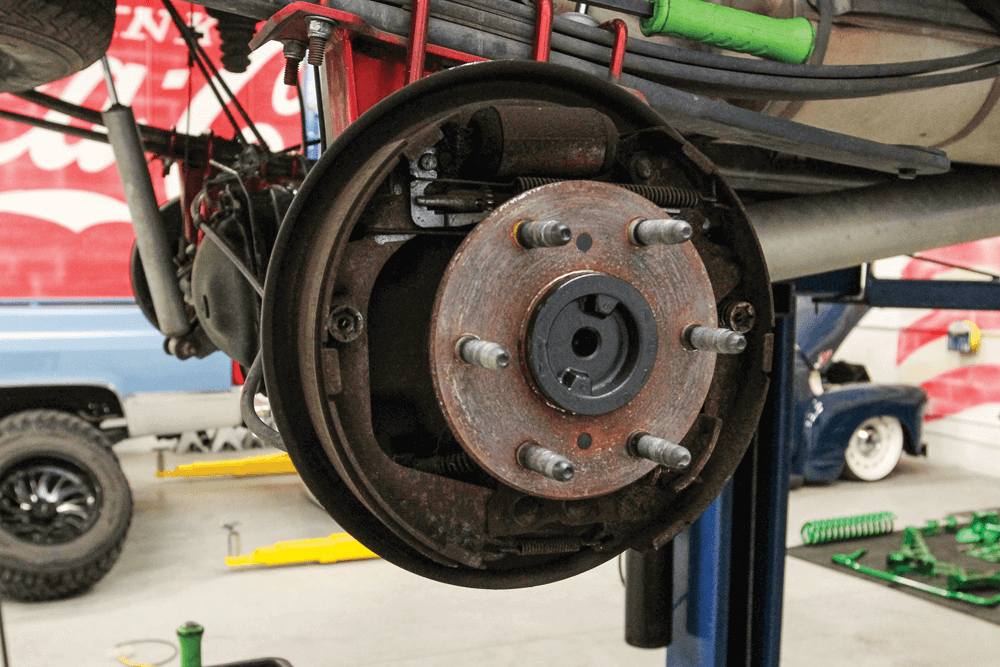
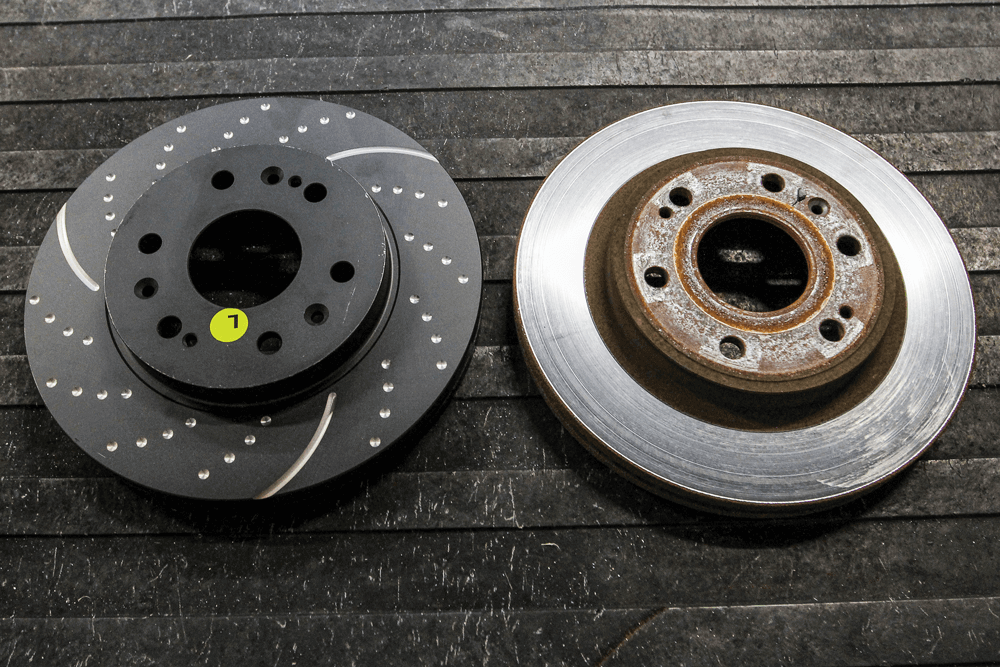
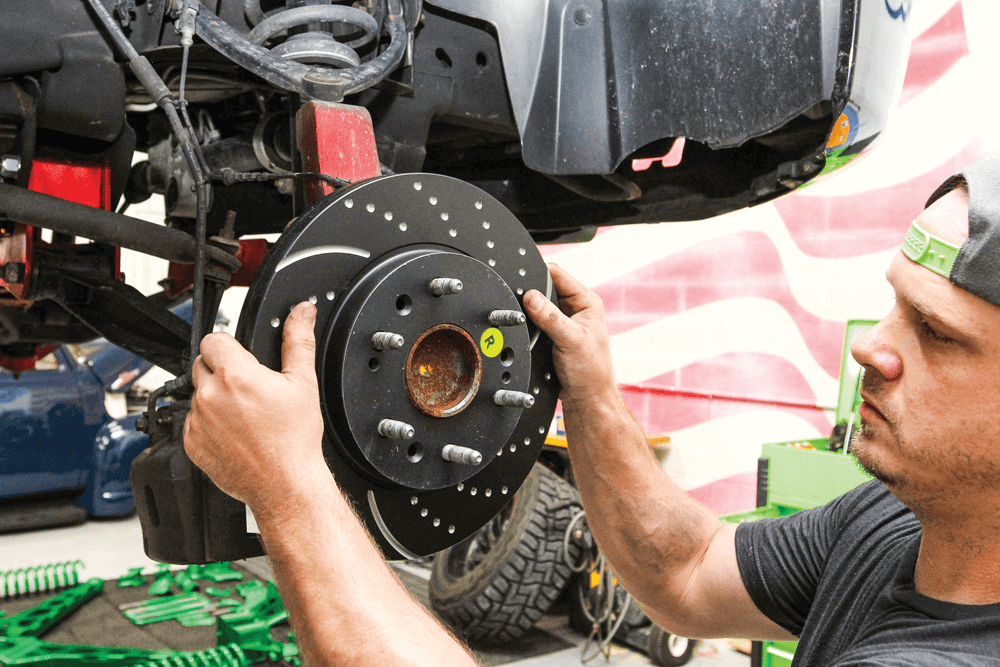
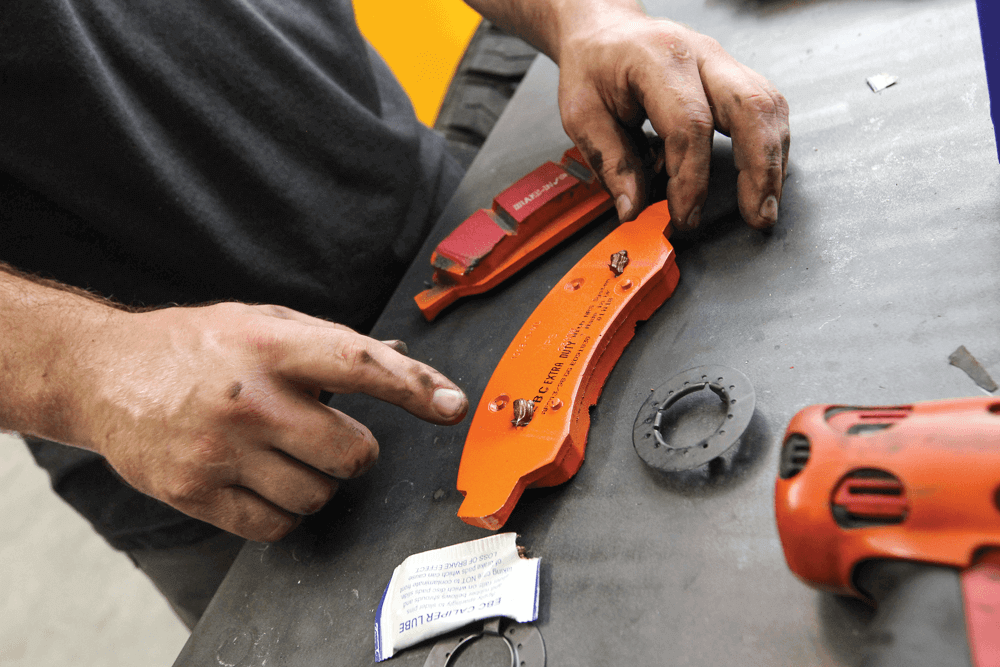
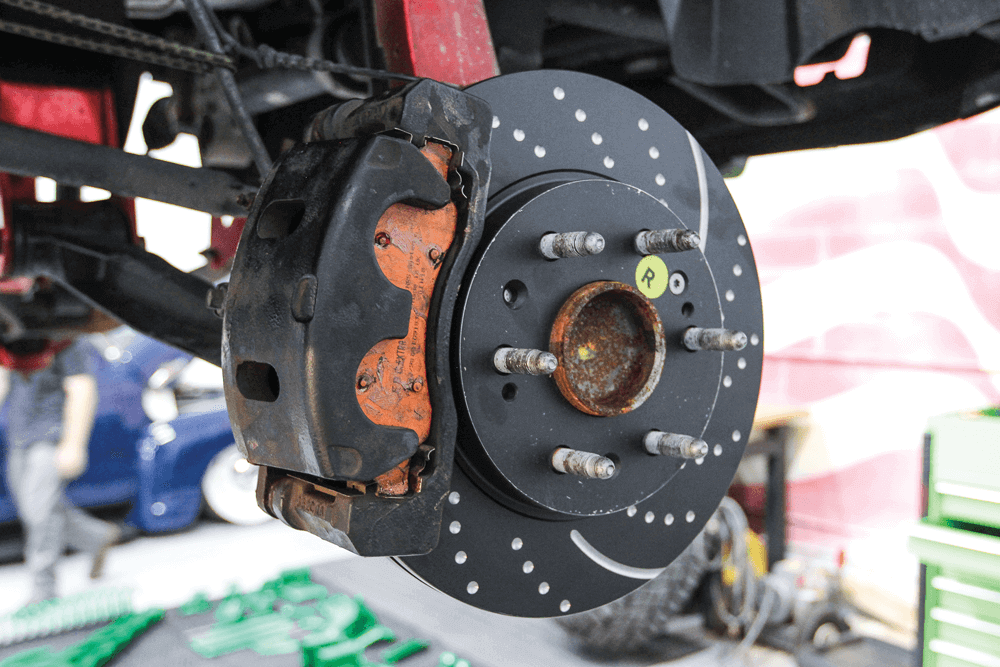
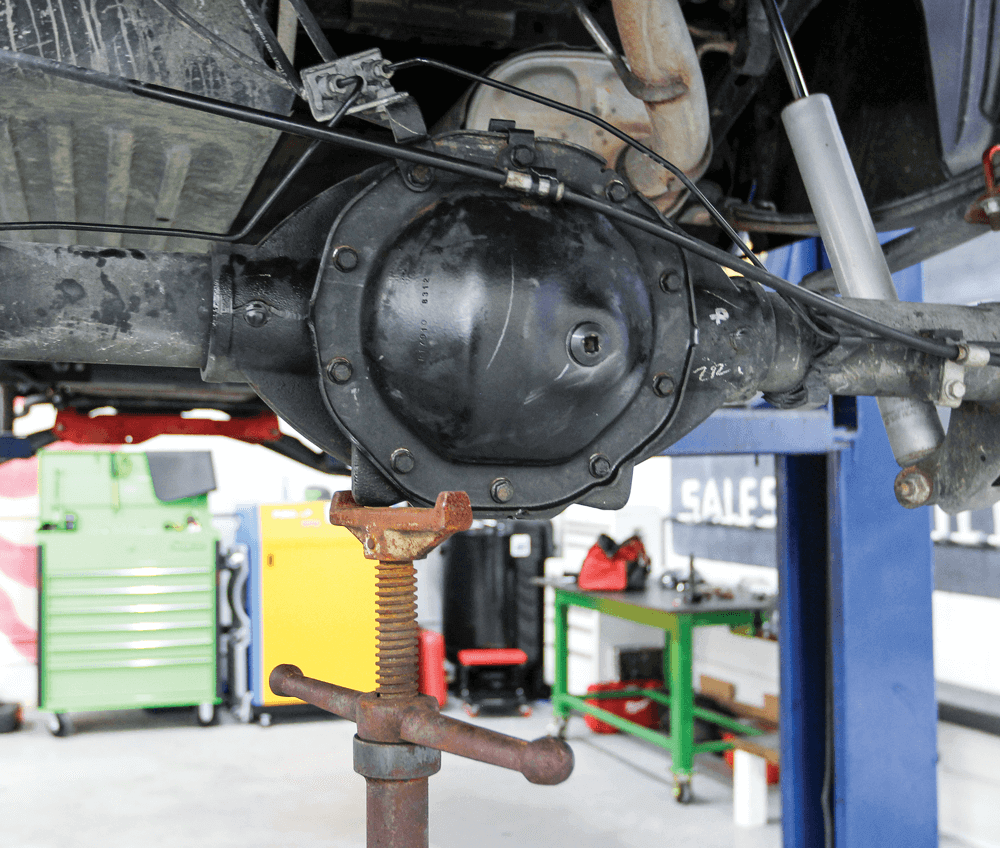
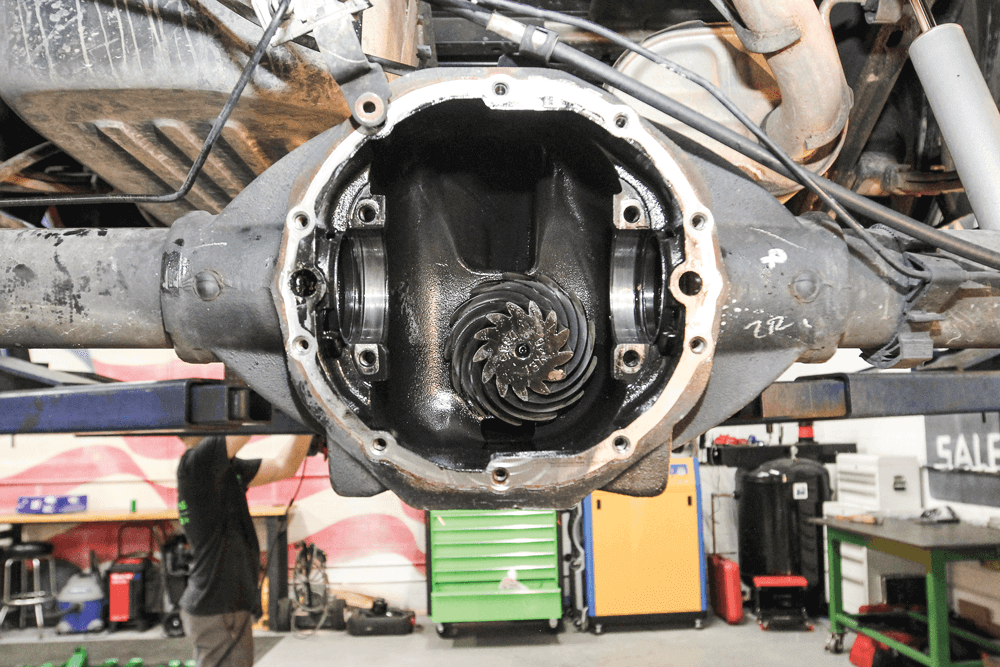
Since we’re replacing the front brakes and the rear gears, both rotors and drums can come off at the same time. No brake line extensions are being used, so the calipers can simply hang to the side using a small bungee.The new EBC GD7372 3GD series dimpled and slotted sport rotor features wide aperture slots that draw cool air into the braking contact area and reduce temperatures, preventing brake fade. Dimple drilling avoids stress cracks, and the new gold anodized EBC finish provides great looks and prevents corrosion. Better stopping power, longer life and zero noise, that’s why EBC Orange Stuff extra-duty light truck and SUV brake pads have taken the industry by storm. They offer five times the bond strength of conventional pads; while the fade-free material performs in both frigid winters and in temperatures exceeding 1,400°F, which is well above the maximum experienced in heavy braking, towing or downhill descents. High-volume V-grooves in the pads help remove debris and better cool hot center areas. The new carbon granule-based extra-duty material is rotor-friendly, throws off minimal dust and is noiseless.Mark slides the new rotors on and secures them with a few retaining screws before moving on to the new EBC brake pads.EBC caliper lube is supplied with the kit, and a little goes a long way, but don’t be afraid to give it a good coat.The completed brake upgrade looks great, took a very short amount of time to install and dramatically increases stopping power.Moving on to the rear axle gear swap, removing the differential cover is step one, but make sure you have a drain pan handy.With the truck in neutral, the factory differential and gears are spun manually with the driveshaft to get that last little bit of fluid out.
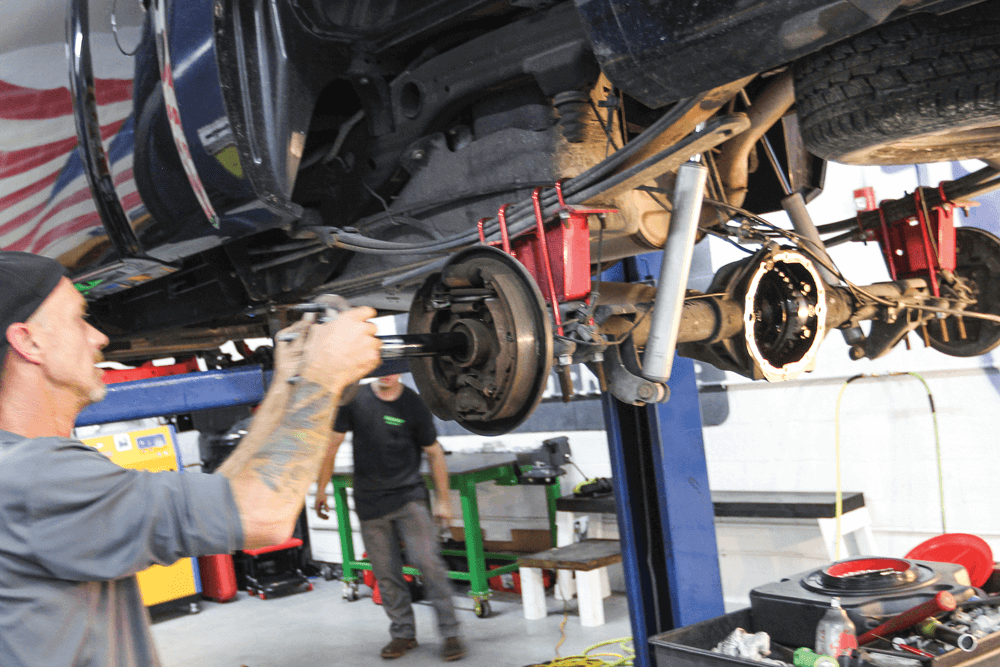
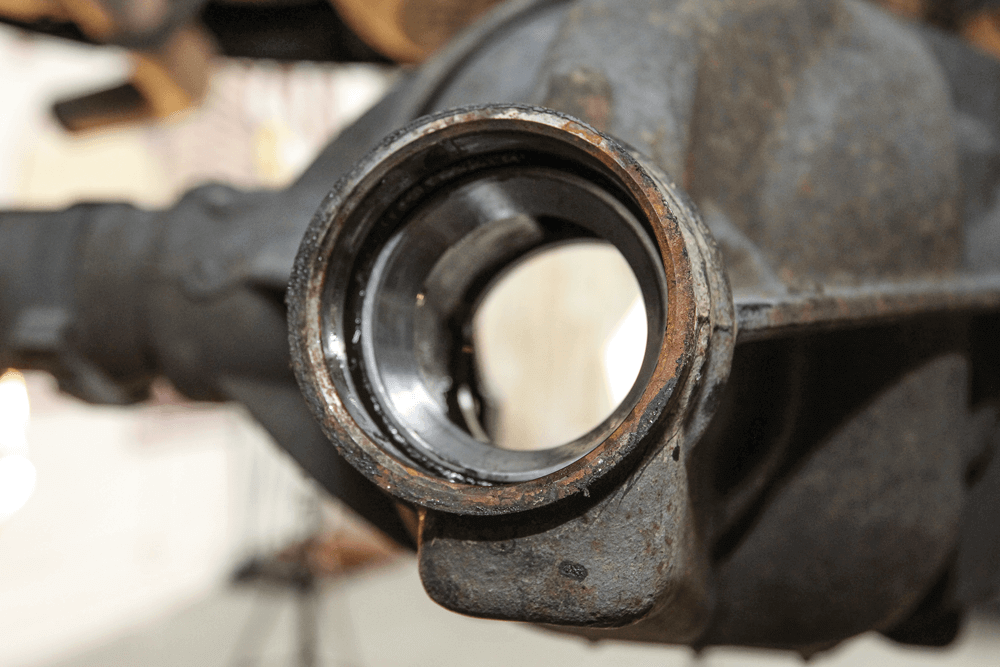
Once the two factory C-clips holding the axle shafts have been removed with a magnetic tool, both axles slide out nice and smoothly.
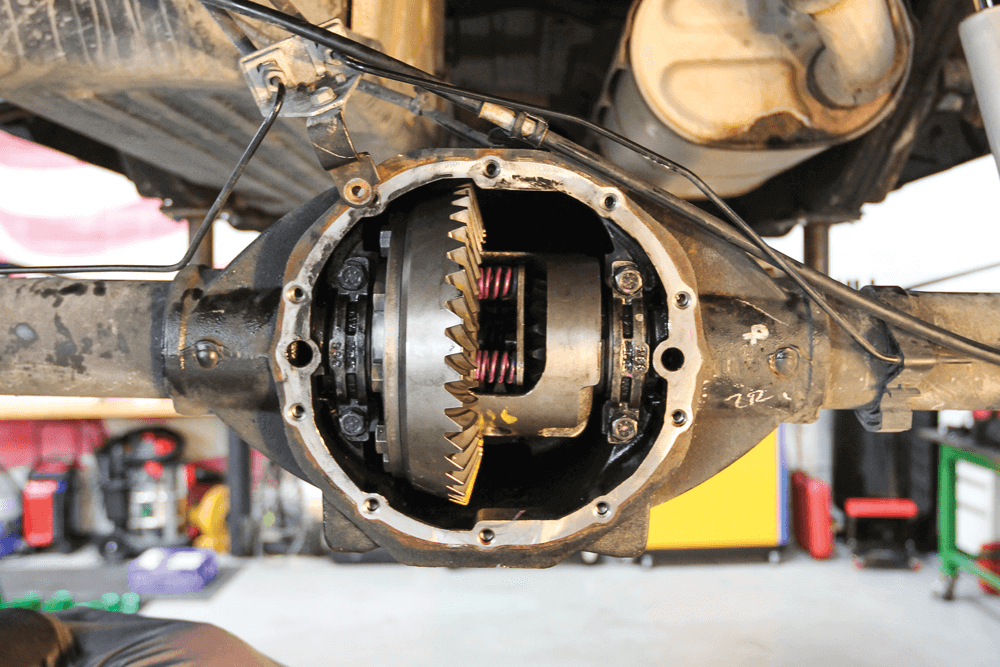
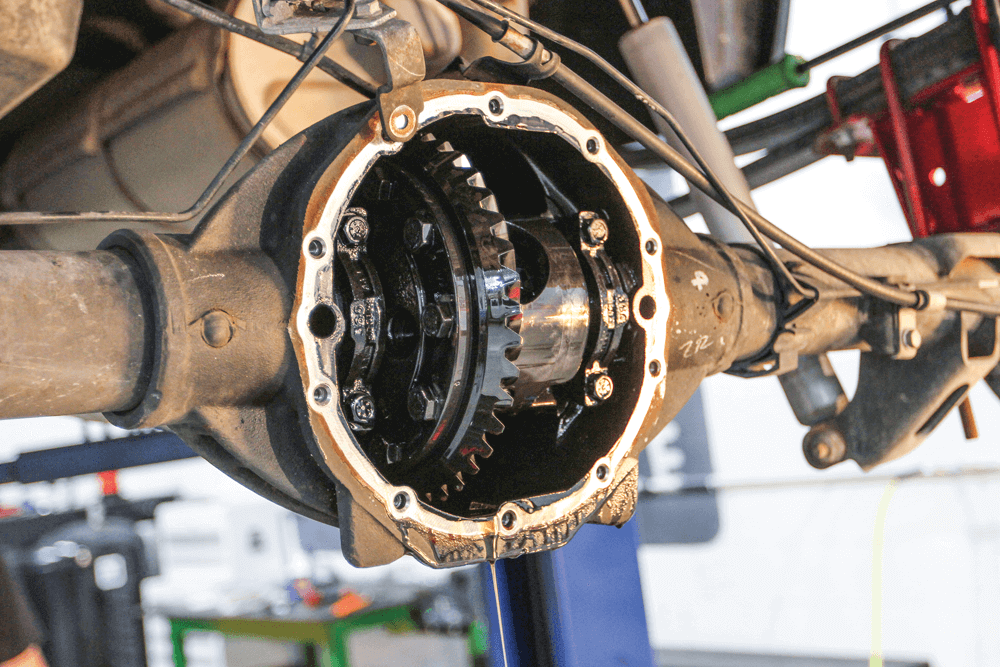
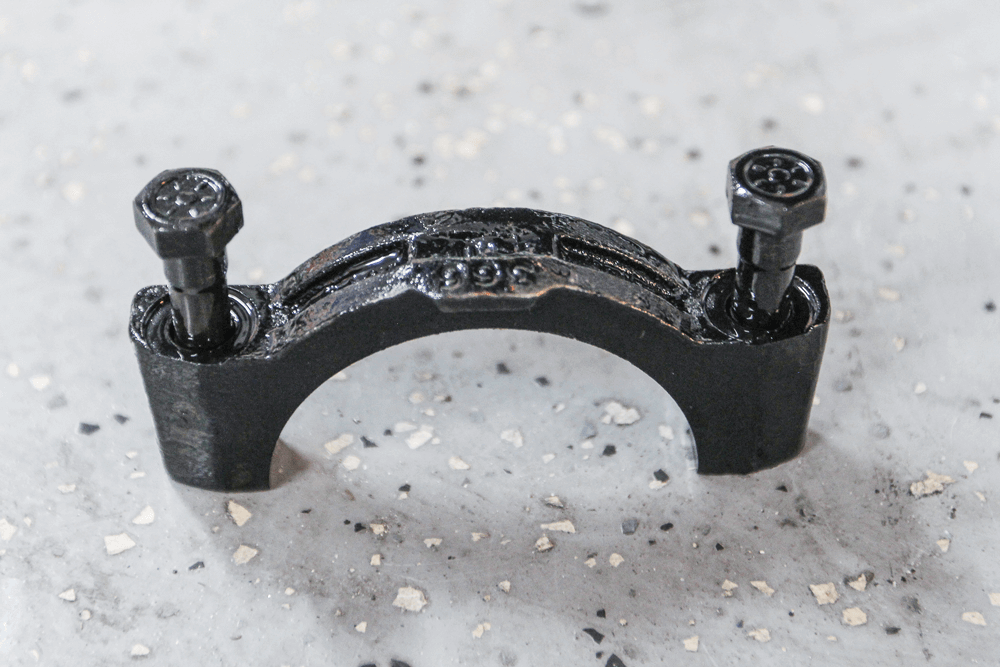
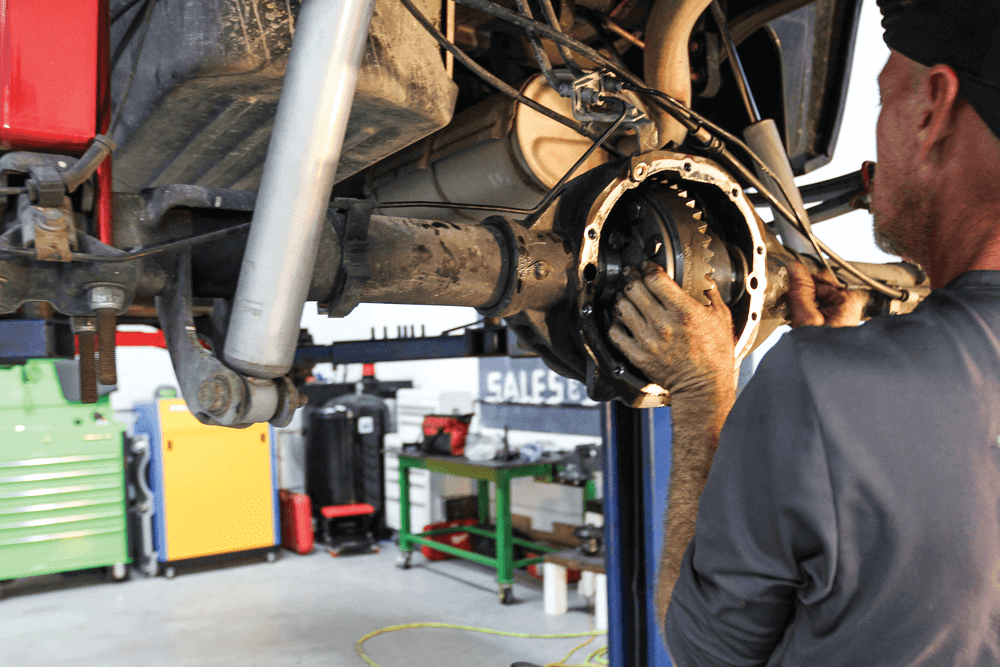
Next, the differential bearing caps are removed, followed by the differential itself.
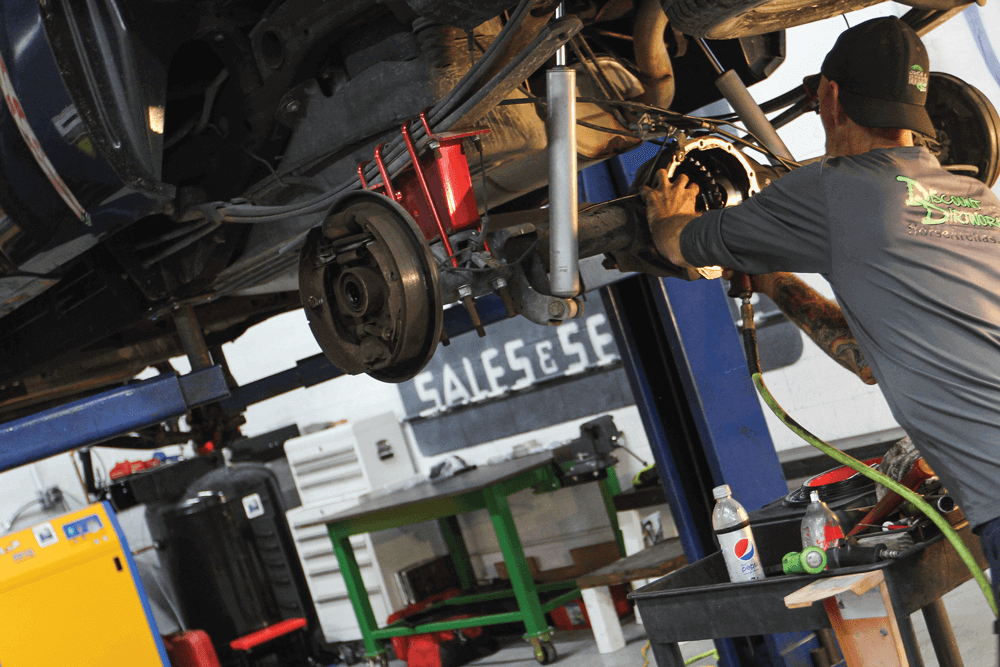
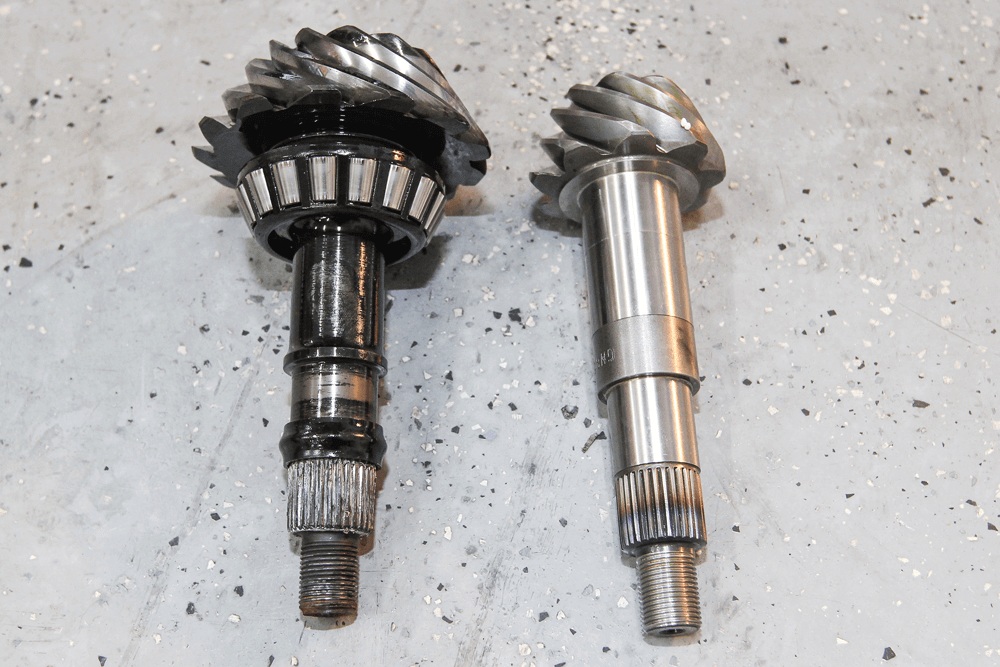
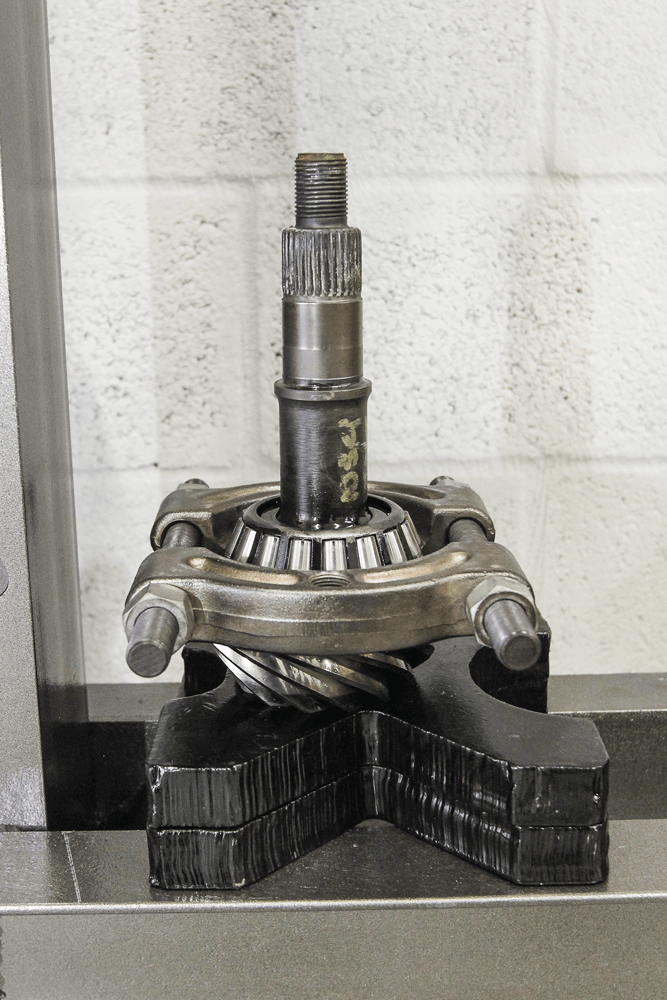
After a few coats of brake cleaner are sprayed on to get at the remaining gear oil, and the driveshaft is disconnected, the pinion is airhammered out from the back side. If you plan to reuse this gear, be extra careful not to damage it during removal. Yukon Gear and Axle recommends a 4:56 gear ratio for this truck, and its customer service staff is ready and waiting to tell you which gear ratio is best for your build.This side-by-side shot of a factory Chevy 3.08 and brand-new Yukon Gear and Axle 4:56 really drives the point home.
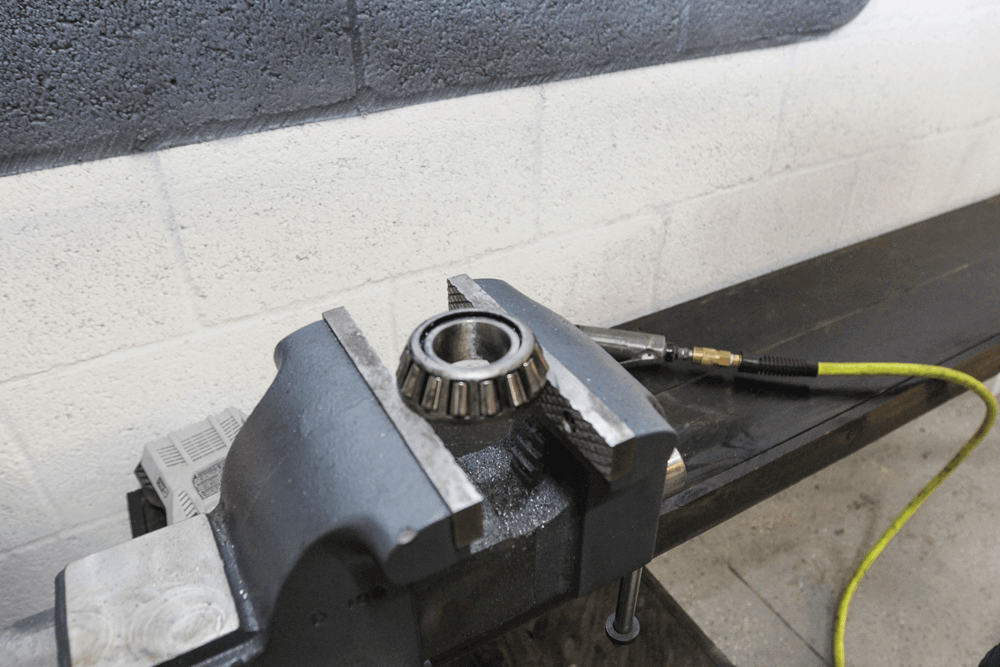
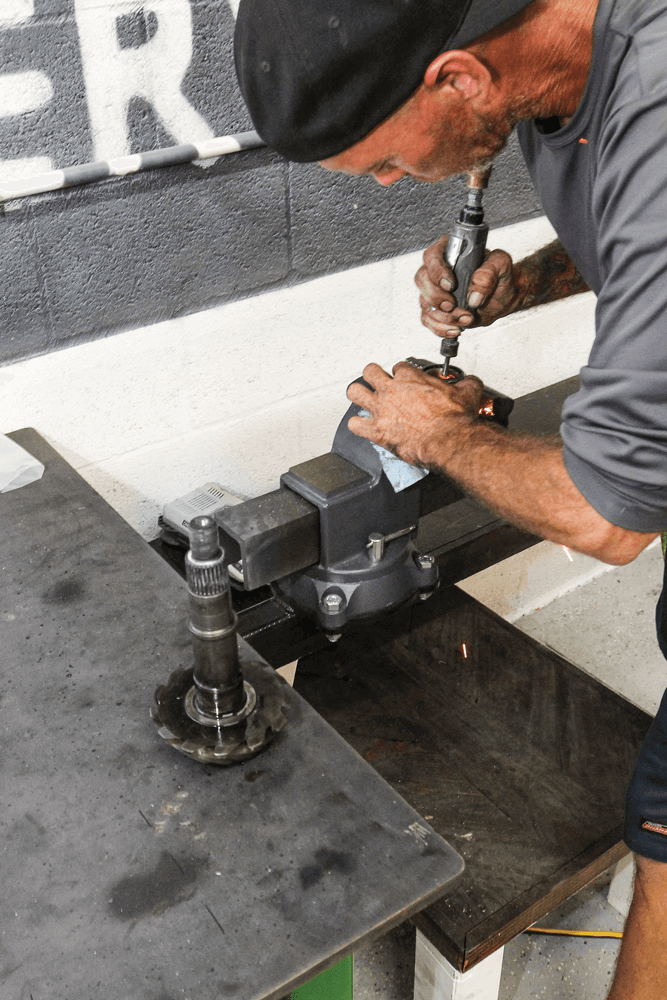
Once the axle is clear, a new bearing race is installed front and back.A well-known trick of the trade is to carefully remove the old pinion bearing, grind the inside of the bearing to open it up a little, and then use it to properly set the depth.
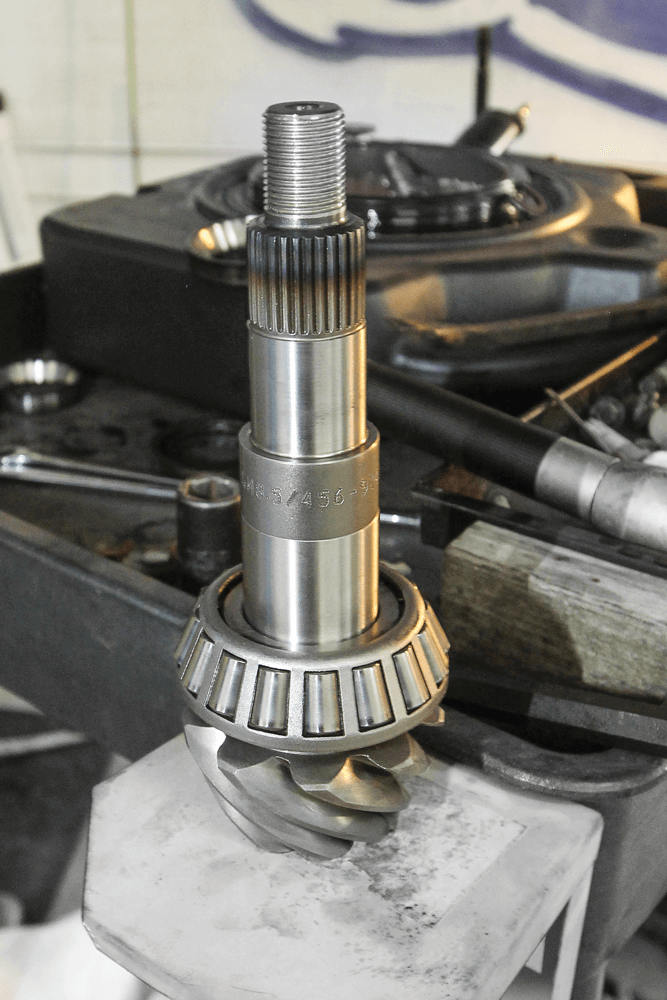
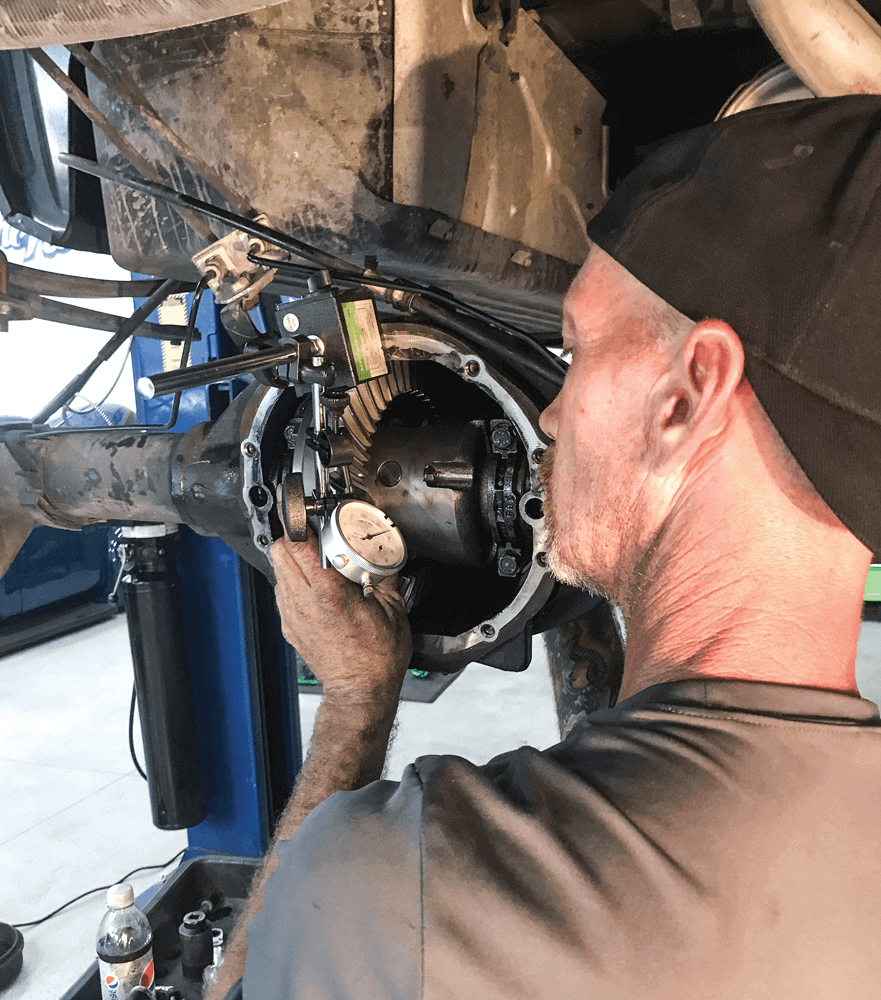
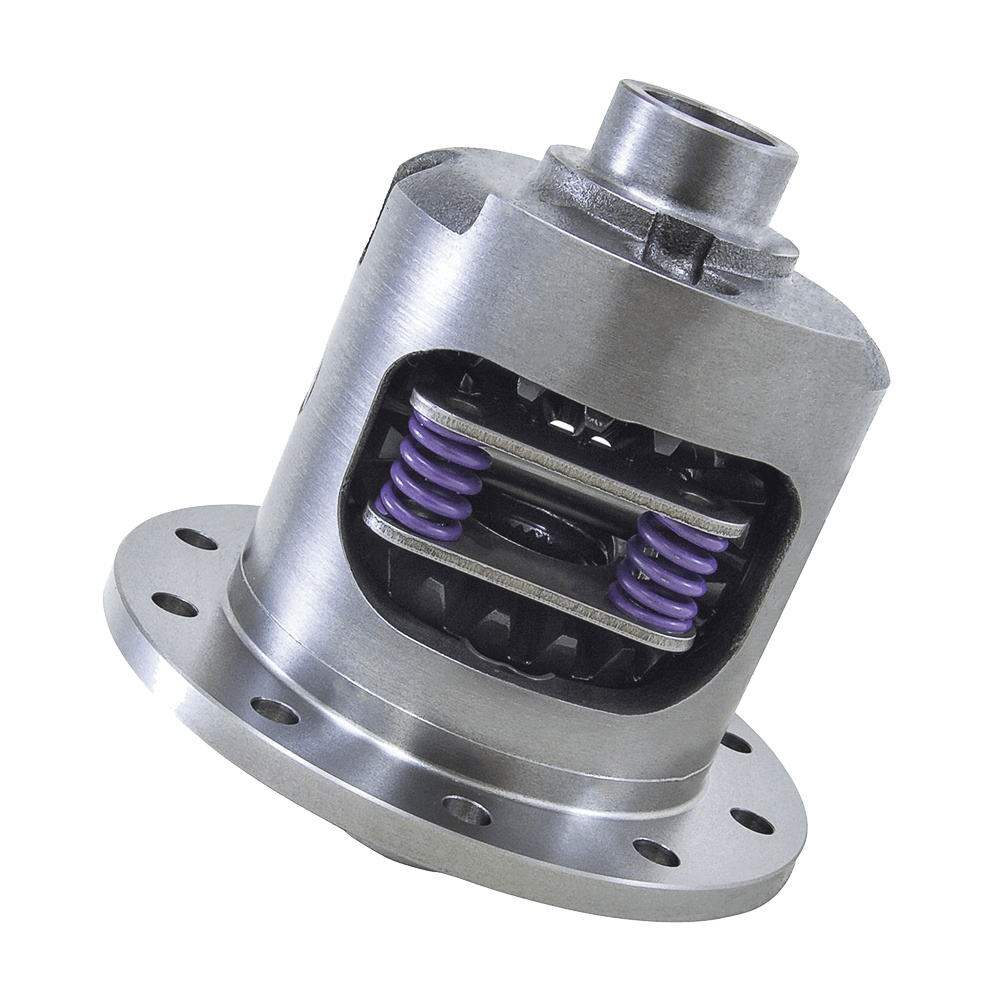
19 LEFT. With the new pinion bearing in place, Yukon’s Dura Grip posi-differential is installed, and the gears are aligned. We recommend doing lots of research before taking on this step yourself. Yukon has some great online videos that can help with the learning process.
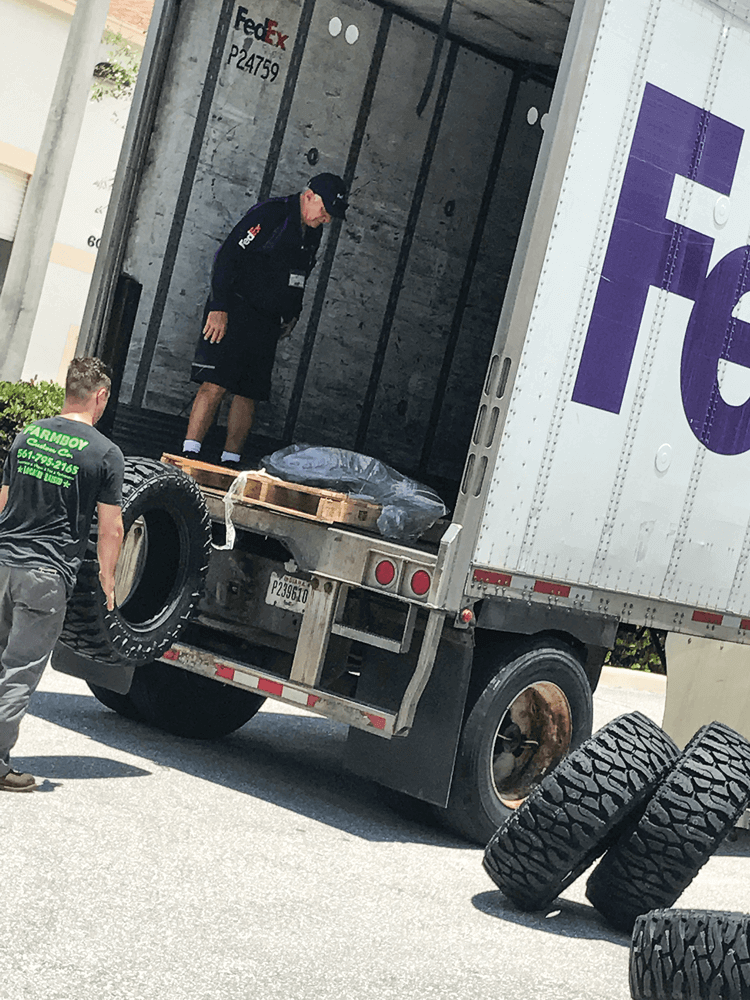
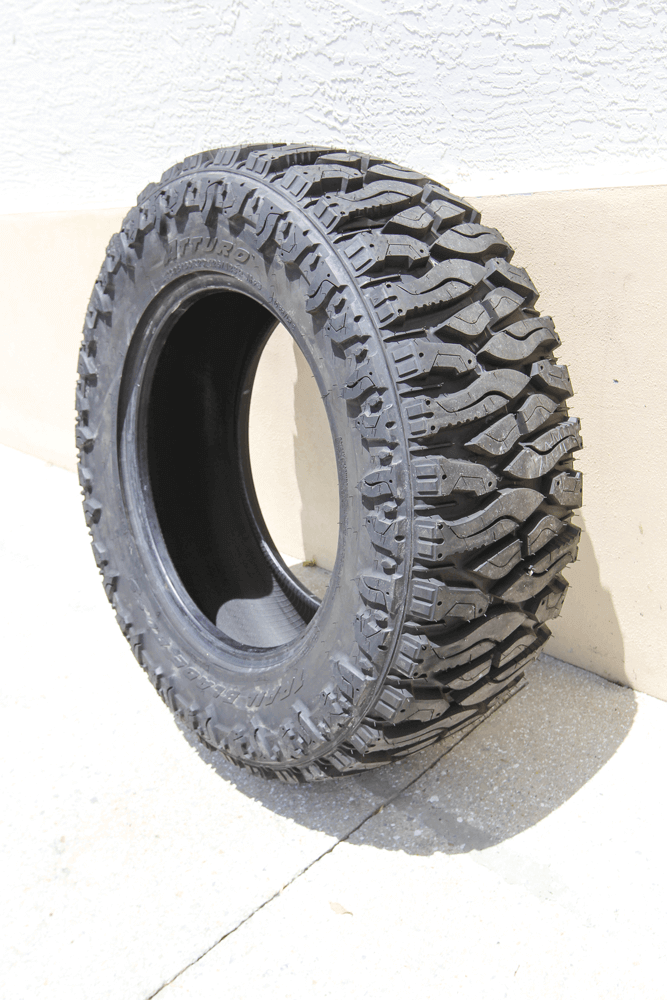
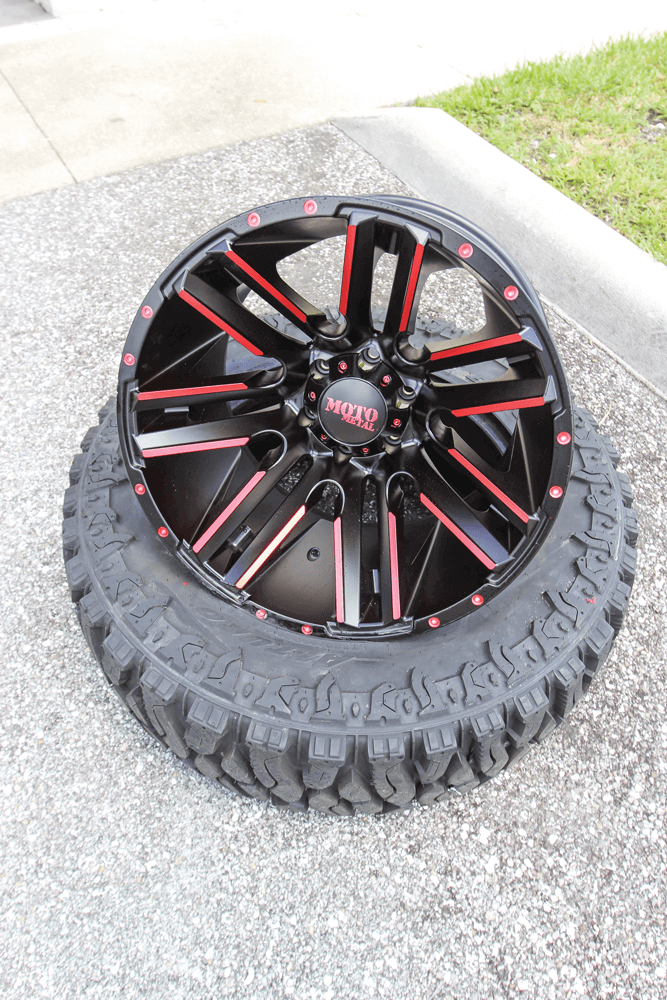
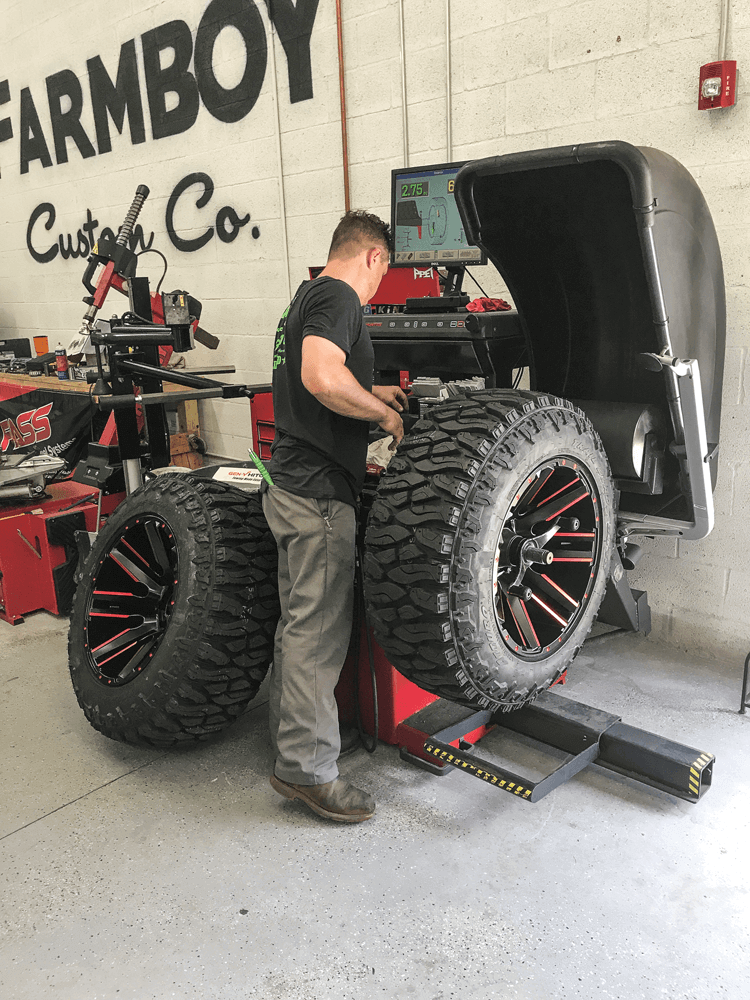
Now that the new diff is in place and the gears aligned correctly, new gear oil is added, and the driveshaft is bolted back in place. The Yukon Dura Grip provides aggressive yet smooth traction to give you the confidence and performance you need. The new diff features a four-spring clutchstyle posi-traction and internal gears that are manufactured using forged 4320 steel and cut to provide stronger teeth. This piece is fully rebuildable and completely assembled in the USA.Just as the last few bolts were being reinstalled on Nicole’s truck, the new LT325/60R20 (35x12x50) Atturo Trail Blade Boss tires arrived. They look just as aggressive in person as they do online.The tread of this new design is inspired by the Quartermaster QSA-1 BOSS HOG knife, a blade made for hardcore use. Alternating shoulder blocks follow the outline of the knife handle tread. The tread’s high void ratio provides superior grip across varied terrain. Smaller center tread blocks are linked for stability from the high abrasion abuse of rocks. Beneath the tread lies a three-ply sidewall for load capacity and protection.Moto Metal MO978 Razor 20x12s with red accents match the red suspension perfectly.After a quick mount and balance, Mark is ready to bolt up the new wheel-and-tire combo. You can see how they look when they’re spinning as they’re balanced; the red accent on these Moto Metal MO979 Razor wheels looks really cool.
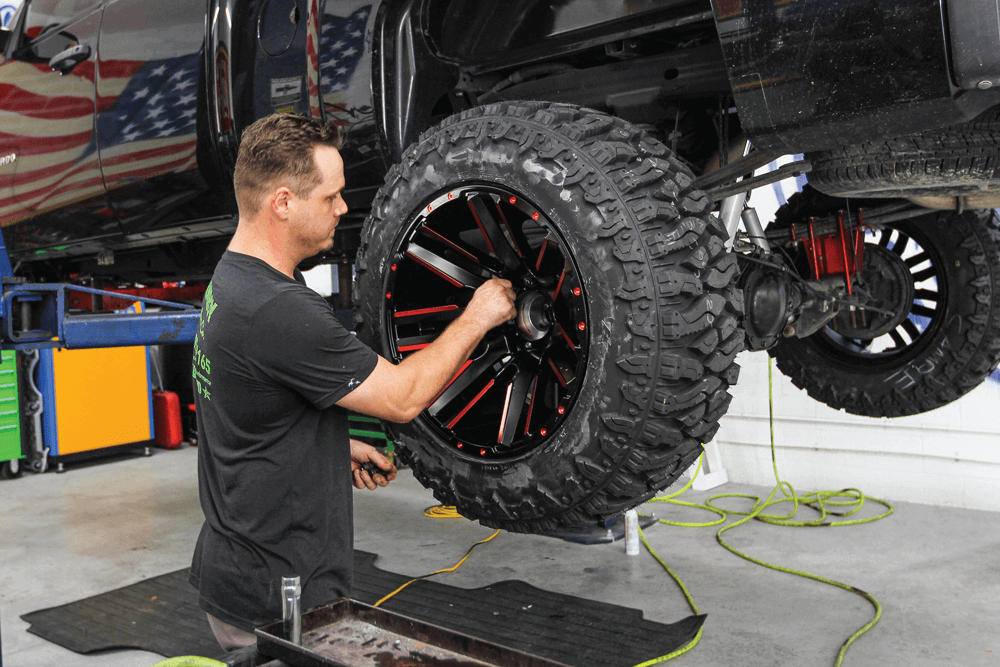
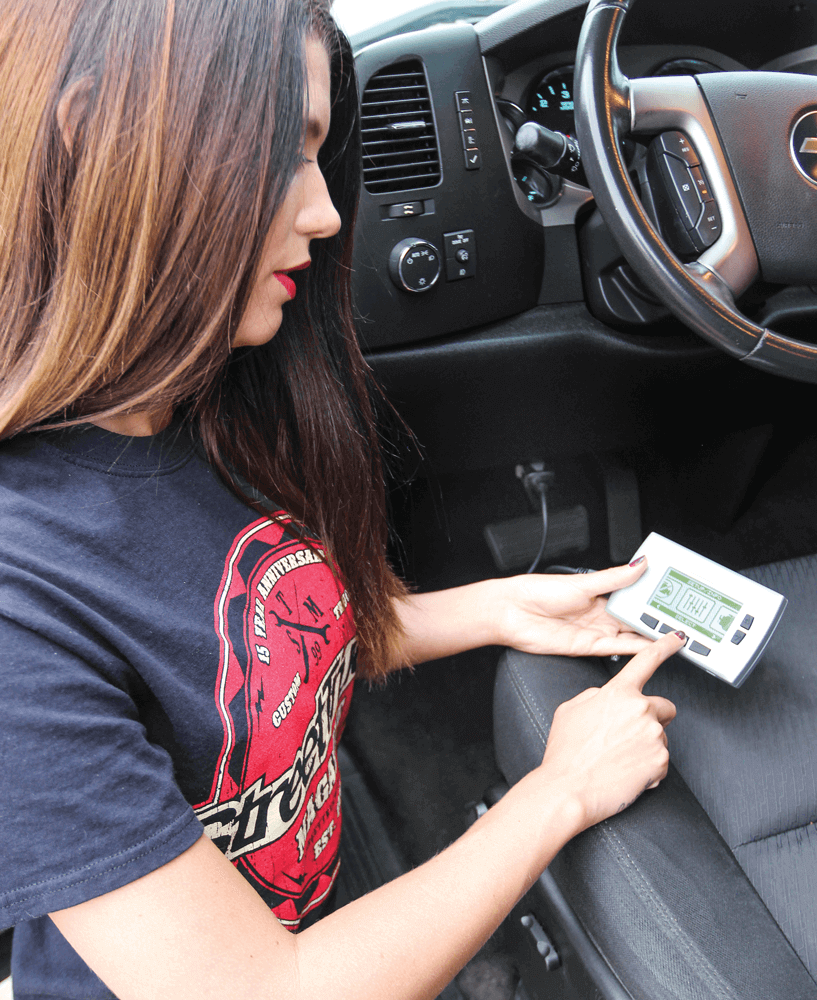
The wheel locks go back on, and the lift arms start heading south. There’s time for a quick tune and then a final road test.The beauty of the Hypertech MaxEnergy 2.0 power programmer is how easy it is to use. We wanted to prove it, so we asked Nicole to tune it herself. She plugged it into the OBD2 port, selected tire size, along with other preferences, and it was a done deal. Pretty impressive!Tire testing and mpg results are coming up in the next issue, but for now, check out the finished product. It looks as good as it runs, and now it will last as long as it should.
Chris Hamilton is an automotive journalist, editor, and lifelong truck enthusiast with extensive experience covering custom truck builds, fabrication, performance upgrades, aftermarket products, and a ...
We use cookies to enhance your browsing experience, serve personalized ads or content, and analyze our traffic. By clicking "Accept All", you consent to our use of cookies. Visit our Cookie Policy for more info.

 The lifted truck industry has a tendency to focus on bolt-on brackets and upgraded coil springs, since those are usually on full display and powder-coated in wild colors. What doesn’t get brought up enough are the additional steps that any truck owner should take after installing a lift kit of significant size. The factory drivetrain of most modern trucks is designed specifically for the original overall wheel-and-tire size; so, bigger wheels and heavier tires will obviously change the gearing, which in turn will change the speedometer, shift points and the gas mileage. Unfortunately, the fix for these issues requires parts, labor and absolutely zero visual impact. We understand how tough it can be to spend a chunk of cash on parts that will never be seen when you could easily buy some striking visual appeal for the same dollar amount. That said, if you want your lifted truck to last as long as intended, and you also want to spend your paychecks on something other than gas and transmissions, this article is written specifically for you.


Share Link