 JEFF LILLY RESTORATIONS
.
November 02, 2018
.
How to
.
JEFF LILLY RESTORATIONS
.
November 02, 2018
.
How to
.
MOST CLASSIC TRUCKS have been used and abused. Our precious pickups lived rough lives earning their keep, and after decades of hard work, they’ve earned the right to be treated like family members. Once they’ve contributed 50 to 80 years of reliable service, classic trucks usually need a little love, and getting them back in shape means dealing with a load of dented metal.
Don’t despair; we have the answer for what ails your truck. Gather a few hand tools and follow our tips and you, too, can achieve excellent results to get your hardest working family member in better-than-new shape. Although we used a ’54 Ford as our example, thick metal is thick metal and these techniques will work on your truck whether it’s a Chevy, Dodge, Studebaker, International, etc. Classic truck bodies were built tough, so get ready for another century’s worth of use from your pickup.

• Jeff Lilly Restorations
11125 f.m. 1560
Helotes, TX 78023
210.695.5151
Jefflilly.com
What are the advantages of using magnets over traditional dent removal rods?
Precision and Control: Neodymium magnets combined with steel balls offer a precise and controlled way to fix dents. Unlike traditional rods that can accidentally push too far, this method ensures controlled movement. The ball, guided by the magnet, rolls to exactly where it’s needed, smoothing out the dent without risking overcorrection.
Reduced Risk of Damage: With traditional rods, there’s always a possibility of creating an unwanted bump or “outie” by pushing too hard. The magnetic method avoids this issue since the ball stops exactly at the surface level, dragged along by the magnet’s pull. This minimizes secondary damage often seen with manual rods.
Ease of Use: The magnetic system simplifies the process, making it accessible even if you don’t have professional repair skills. Simply place the ball on the inside of the dent and use the magnet externally. The magnetic attraction naturally draws the ball outward, effectively removing the dent.
Non-intrusive: There’s no need to apply excessive force with tools or risk compromising the structural integrity of the material. This method is gentle on the surface and respects the original form, offering a seamless finish.
This technique represents a shift towards more intuitive and less invasive dent repair options, ideal for those seeking a balance of efficiency and safety without needing advanced technical skills.
How do neodymium magnets and steel balls work for dent removal?
If you’re a parent of a high-school saxophonist with a penchant for vintage instruments, you might find yourself juggling repair duties to keep your costs in check. Though dents don’t impact the sound of the saxophone, they can be unsightly. Luckily, there’s an innovative method to tackle these blemishes—using neodymium magnets and steel balls.
Neodymium magnets paired with steel balls provide an effective way to remove dents, acting almost like magic in the right circumstances:
The magnet’s powerful pull draws the steel ball up against the dent, rolling it back to shape precisely. This method offers a clear advantage over traditional rods since the ball cannot push beyond the magnet’s force, avoiding the risk of creating a bulge.
While effective, this technique comes with potential hazards:
By following these guidelines, you can maintain the aesthetics of your saxophone without breaking the bank.
Can this magnet and steel ball technique be used on cars?
The magnet and steel ball technique is an innovative approach often used for small-scale repairs, notably in machinery with accessible inner surfaces. However, when it comes to car dent repairs, this technique may not be effective.
Although it’s an intriguing concept, the magnet and steel ball technique is not recommended for car dent repairs. For best results, consider traditional methods or consult a professional auto body technician.
What materials are suitable for dent removal using magnets and steel balls?
When it comes to dent removal with magnets and steel balls, the choice of materials is crucial. Magnets tend to adhere to ferromagnetic materials, which can hinder the process of moving them freely over the surface to allow the steel ball to work effectively. Therefore, non-magnetic metals are ideal.
By using these materials, the magnets can move freely, helping the steel balls to eliminate dents efficiently.
What safety precautions should be taken when using strong magnets for dent removal?
When handling powerful magnets for dent removal, it’s crucial to prioritize safety. Here’s a guide to ensure you use these magnets safely and effectively:
By following these precautions, you can safely use strong magnets in your dent removal projects while minimizing the risk of injury or damage.
What are some techniques for removing dents from musical instruments?
Removing dents from musical instruments can seem daunting, but with the right approach, it’s surprisingly manageable. Whether you’re a parent of a budding musician or a DIY enthusiast, a few techniques can help restore the pristine look of instruments without causing further damage.
This innovative method is excellent for non-ferrous instruments like those made of copper, brass, and aluminum. Here’s how it works:
Caution: These magnets are extremely strong and can be dangerous if not handled properly. Ensure you follow safety guidelines while using them.
Ideal for ferrous materials and varying types of instruments:
Sometimes, the best option is to consult a professional:
Each technique has its unique advantages and limitations, but with careful consideration and execution, you can successfully tackle those pesky dents and keep your instrument looking and sounding its best.
How can magnets affect electronic equipment?
Magnets, particularly powerful ones, can significantly disrupt electronic devices. This is primarily due to their strong magnetic fields, which can interfere with the delicate components inside these devices.
By understanding how magnets interact with electronics, we can take steps to protect sensitive devices from their potentially disruptive influence.
How can I fix dents in metal?
Trade Secrets – How to Re-shape Dented Metal
MOST CLASSIC TRUCKS have been used and abused. Our precious pickups lived rough lives earning their keep, and after decades of hard work, they’ve earned the right to be treated like family members. Once they’ve contributed 50 to 80 years of reliable service, classic trucks usually need a little love, and getting them back in shape means dealing with a load of dented metal.
Don’t despair; we have the answer for what ails your truck. Gather a few hand tools and follow our tips and you, too, can achieve excellent results to get your hardest working family member in better-than-new shape. Although we used a ’54 Ford as our example, thick metal is thick metal and these techniques will work on your truck whether it’s a Chevy, Dodge, Studebaker, International, etc. Classic truck bodies were built tough, so get ready for another century’s worth of use from your pickup.
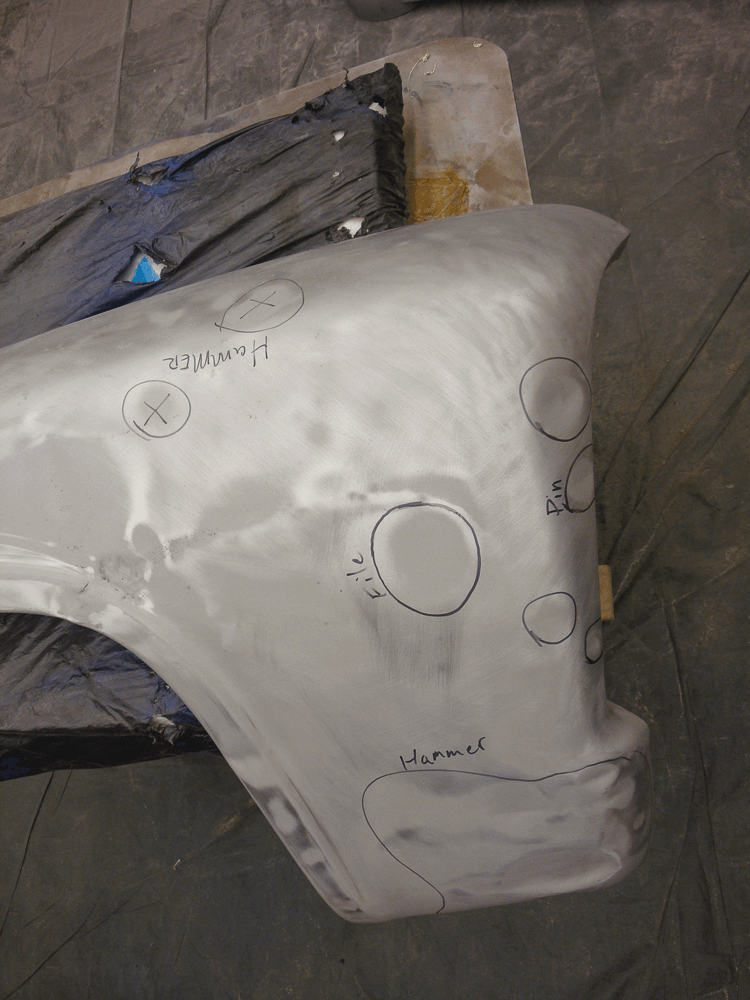
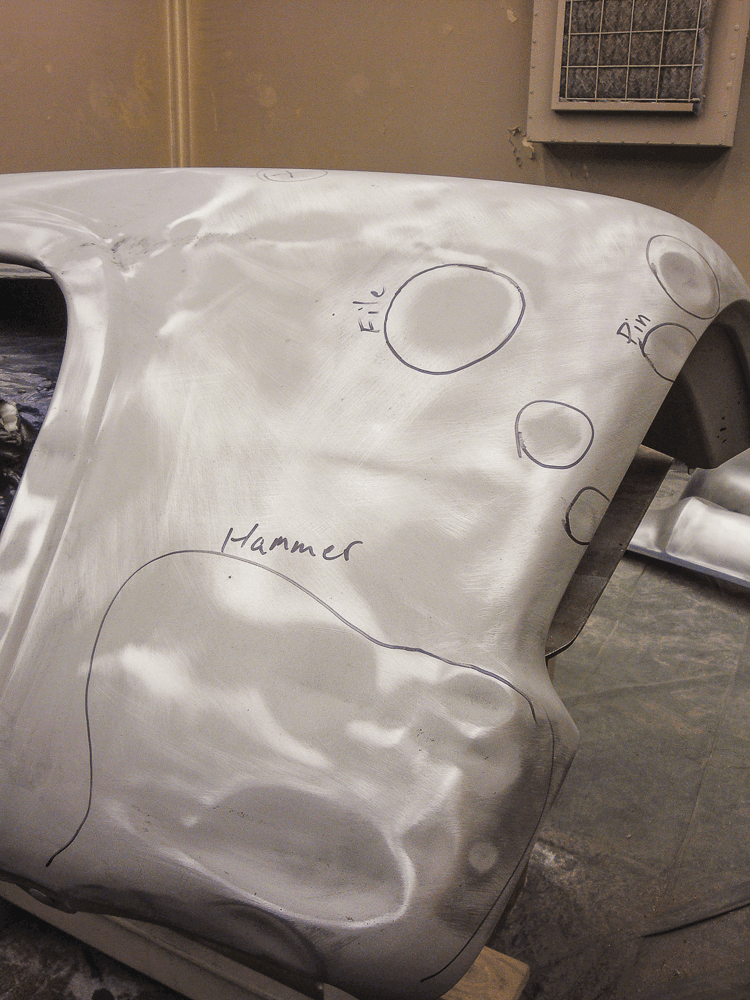
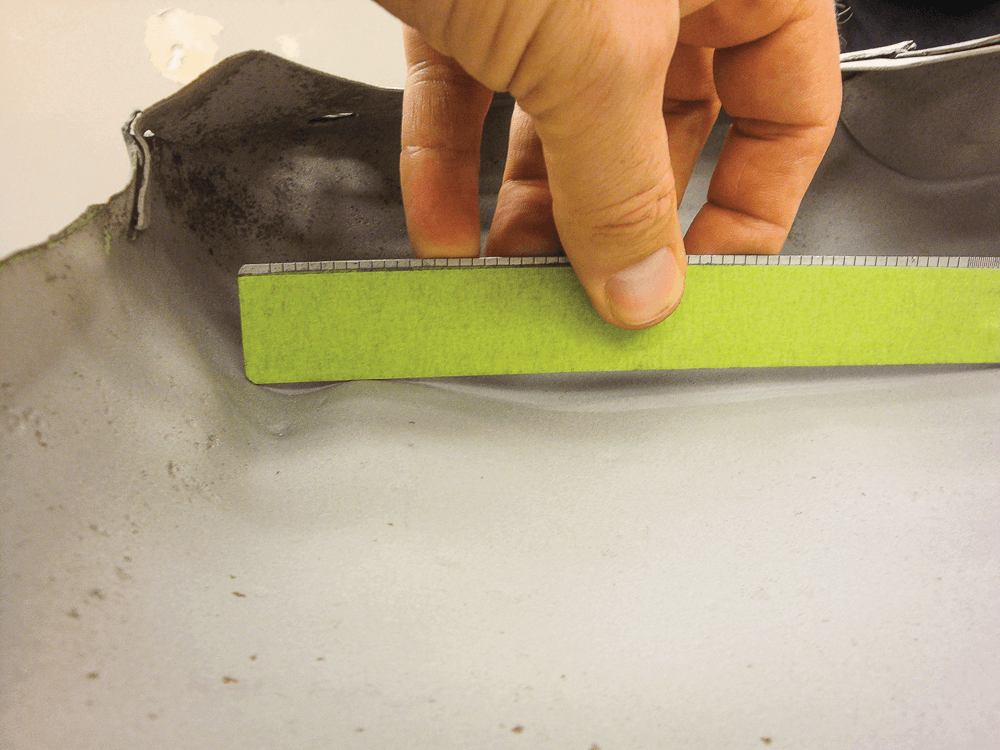
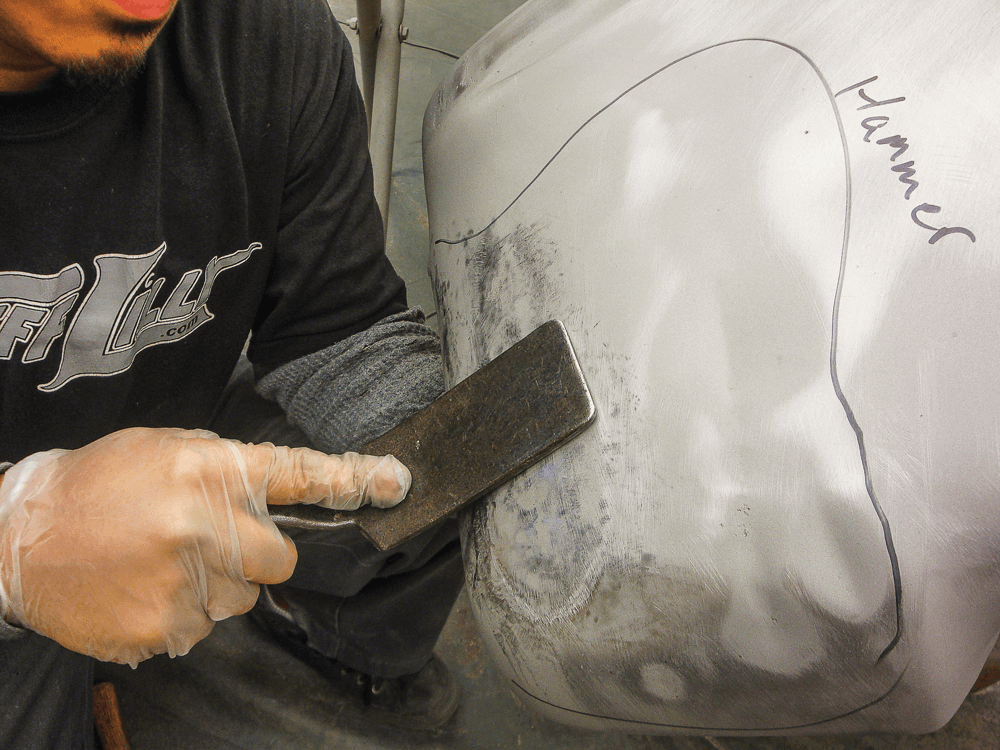
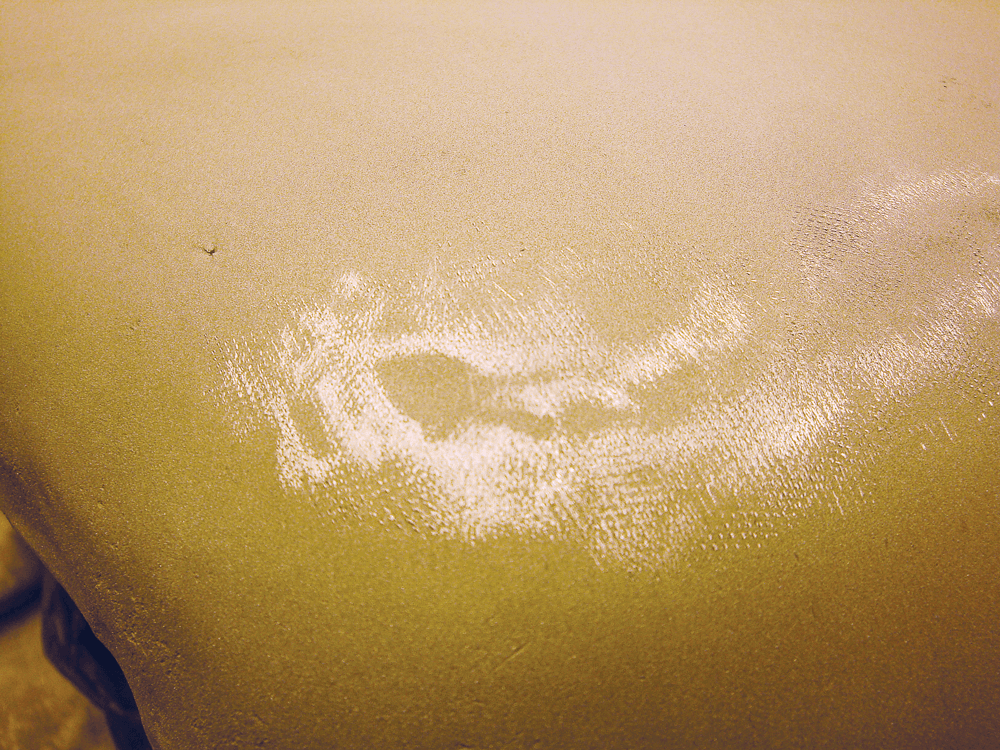
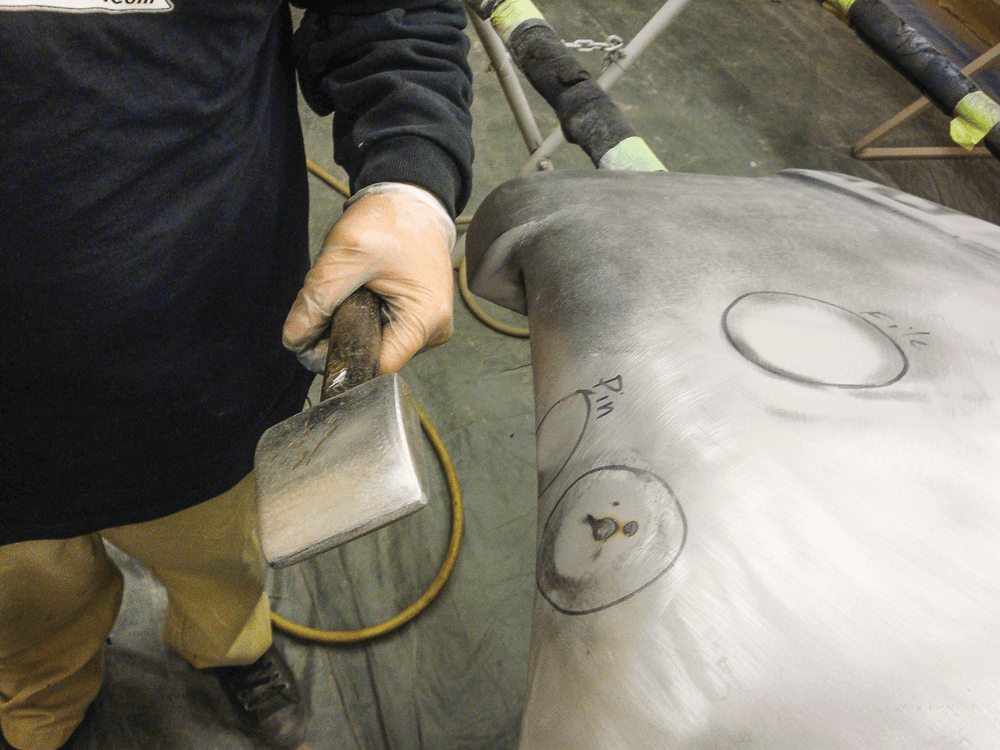
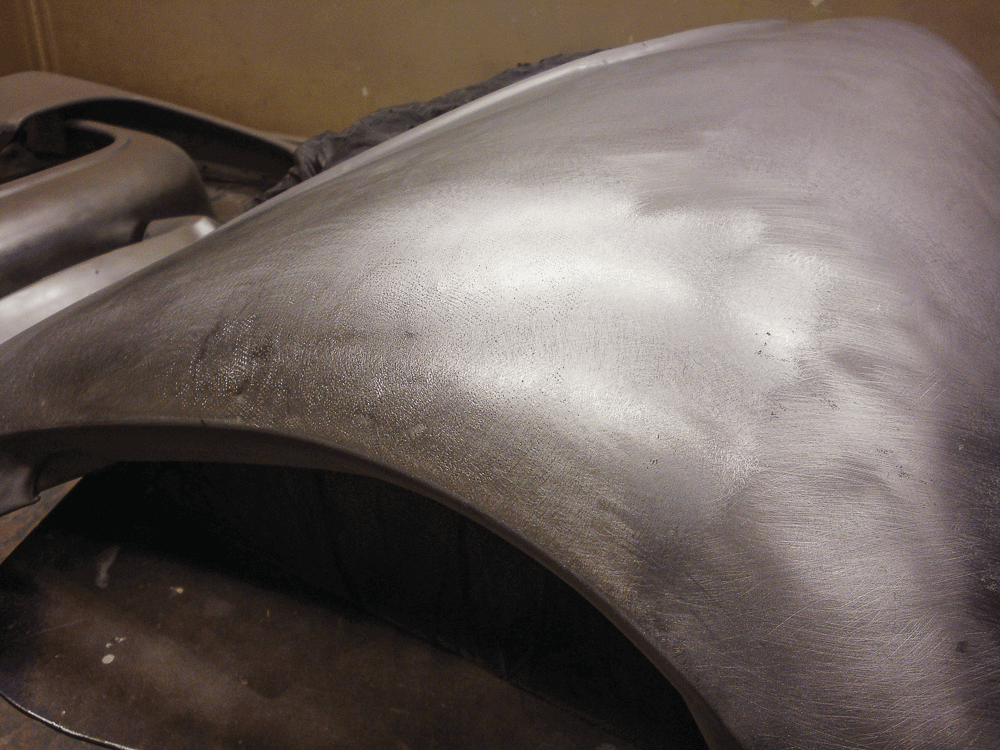
A familiar foe is the front fender of a 1954 Ford F-100. The mega dents make it a perfect example to demonstrate our favorite techniques. The average person might think this fender is too rough to use, but we know how difficult it is to get good sheet metal, and since it’s mostly rust-free and our metal meister can easily repair dents, the decision to fix rather than scrap is clear. We marked the fender for hammer and slap-file work and pindent removal.
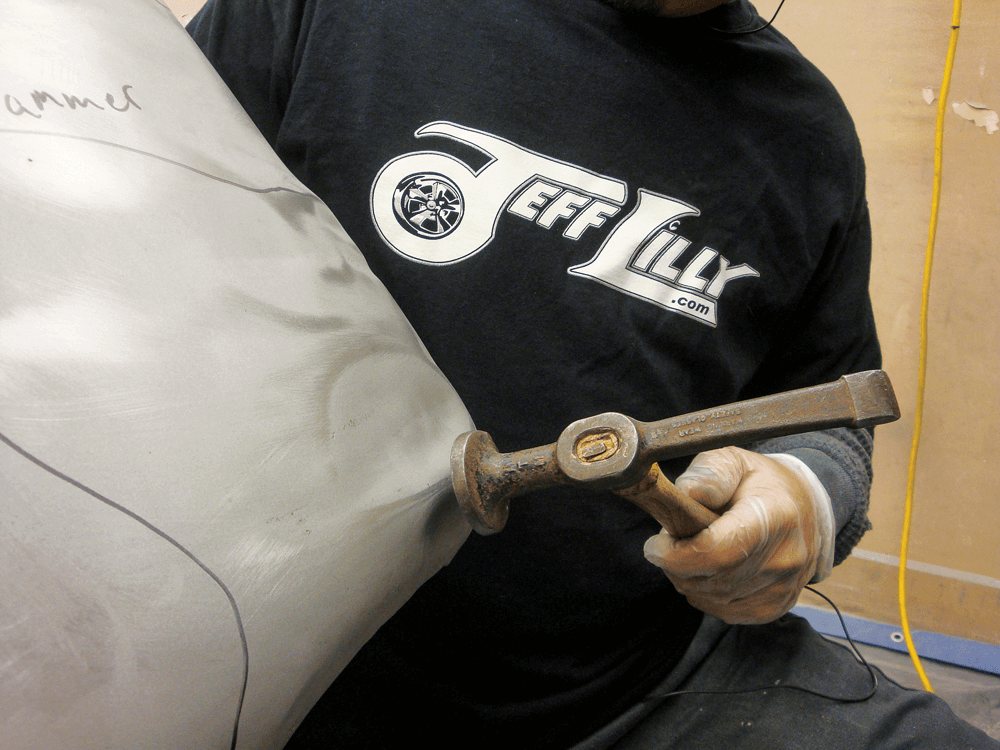
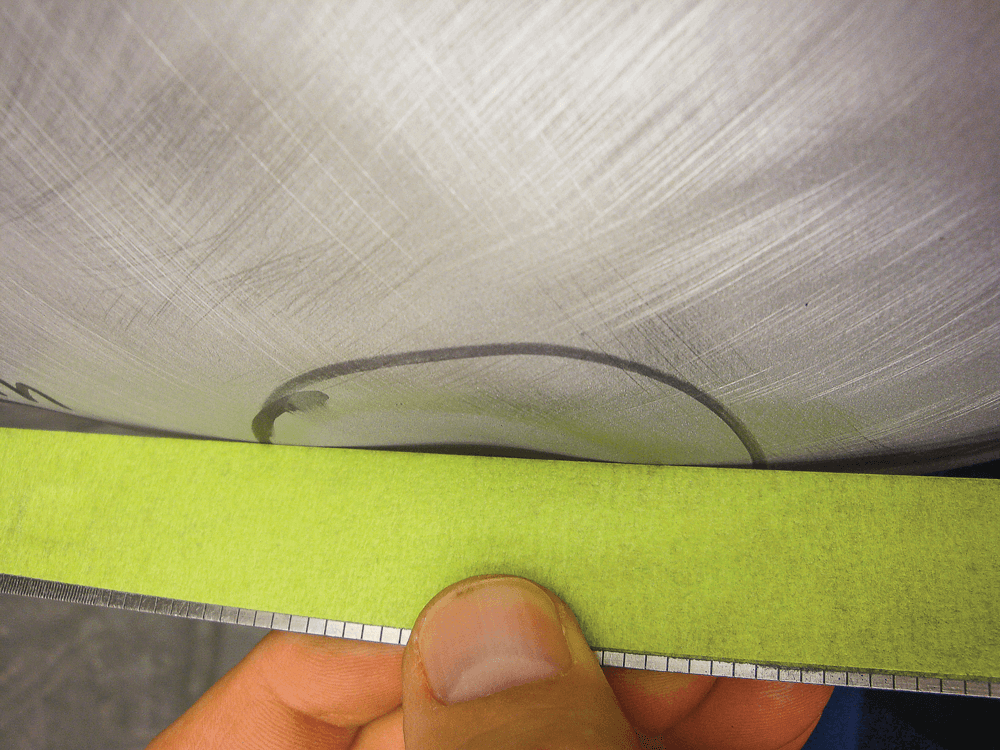
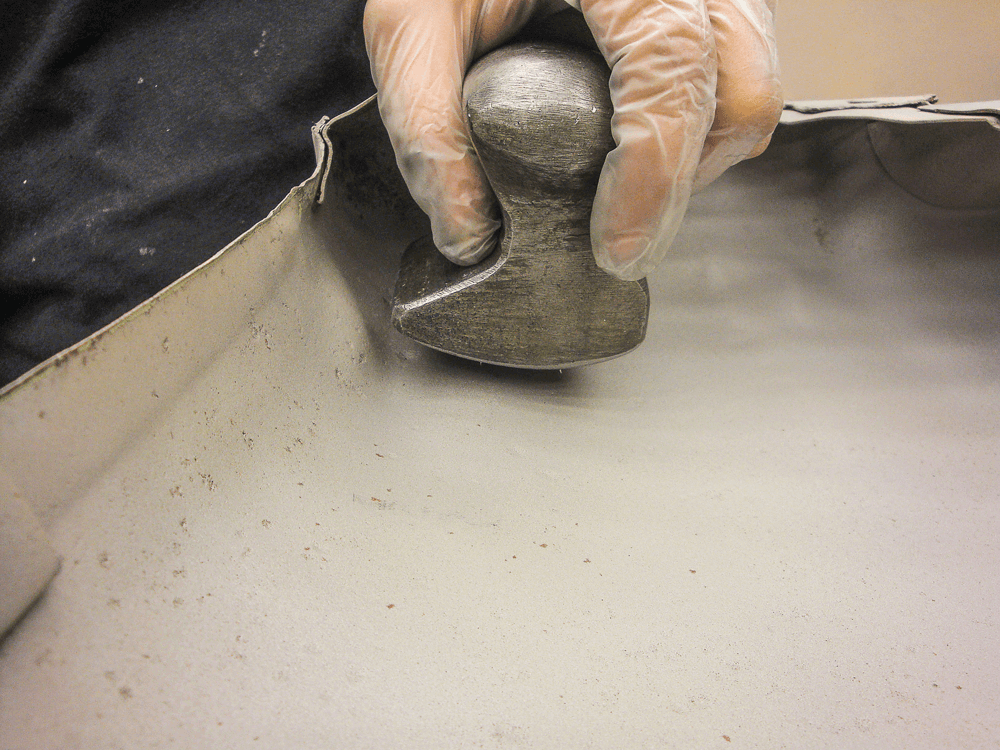
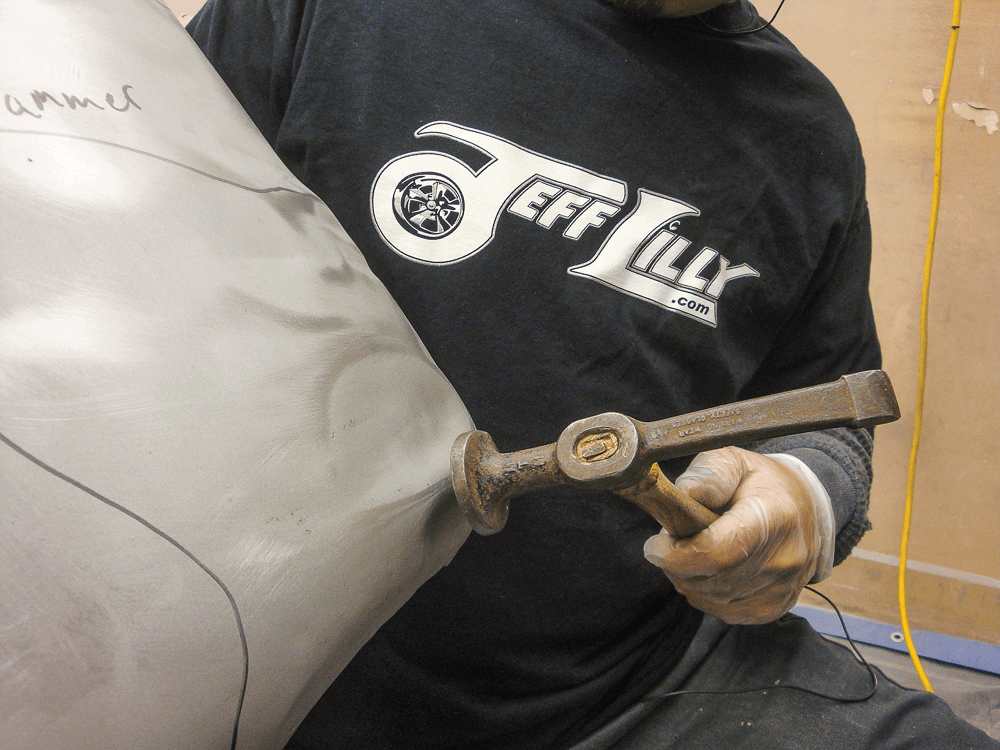
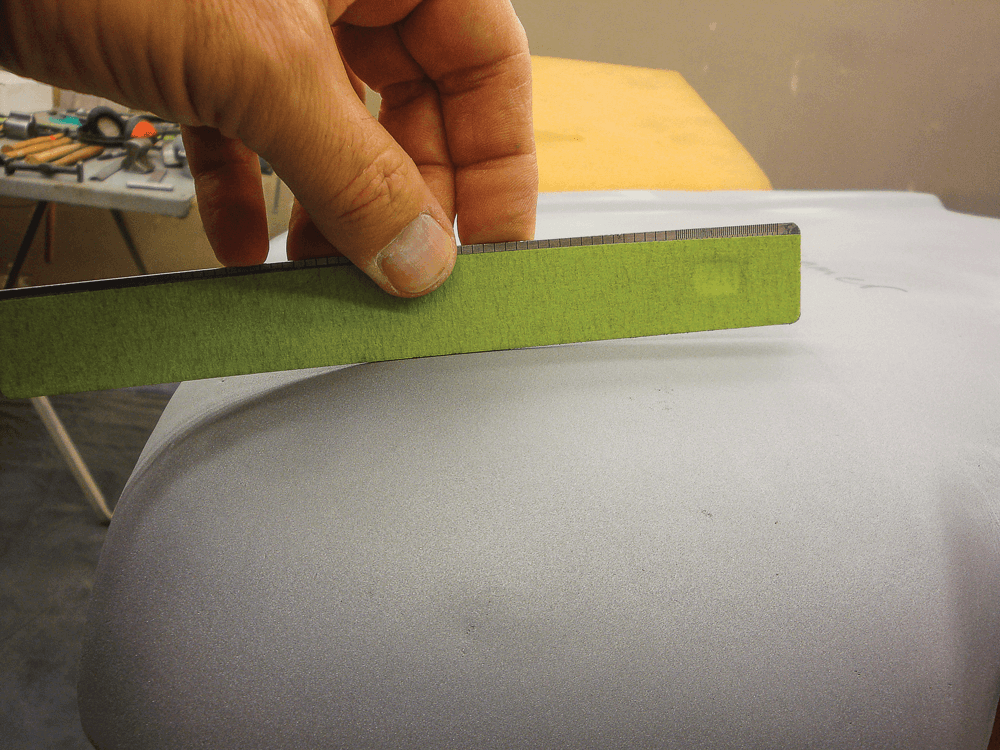
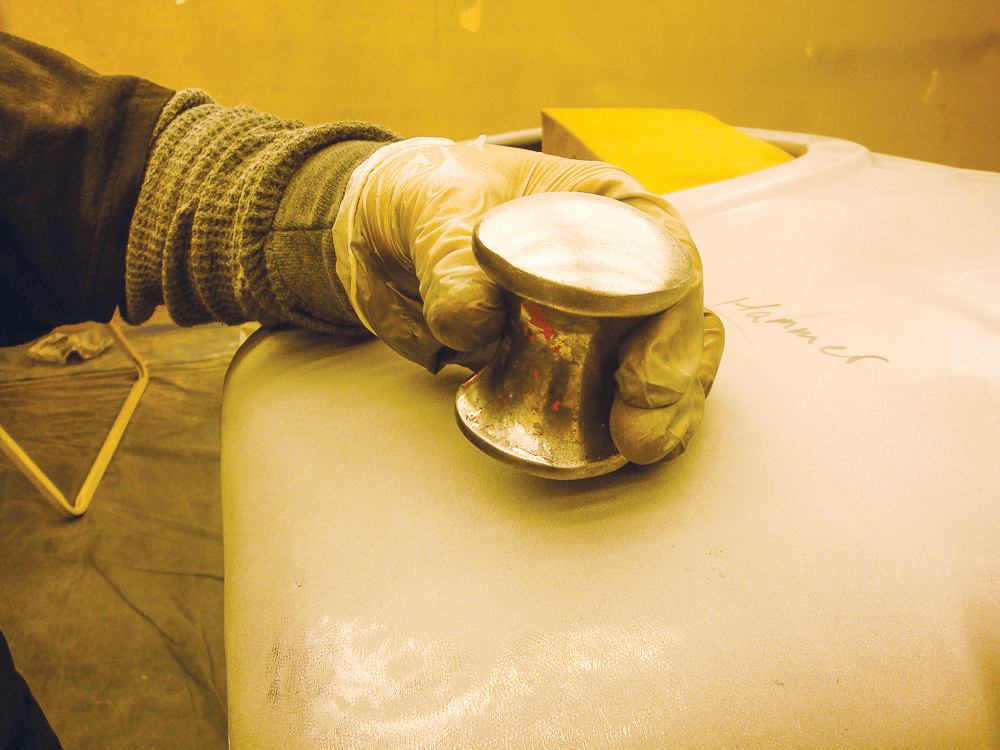
Using a straightedge, we determined the depth of each dent in order to choose the correct dolly and hammer to use. Hammer weight and how much metal needs to be moved, along with gauge thickness, are important considerations. This one is shallow so a lighter hammer and/or less strike force should be used. We started at the back of the fender using a high crown dolly and medium weight hammer. We flipped the fender upside down to show the exact location. We placed the high crown dolly directly on the highest point to demonstrate, and then we flipped the fender back over to perform the techniques. Holding the dolly as previously instructed, we tapped with medium pressure, making sure to contact squarely with each blow. We did this in a circle all around the perimeter on the outer edge of the dent. We held the dolly in the center of the backside and the metal started to release and return to its original shape.
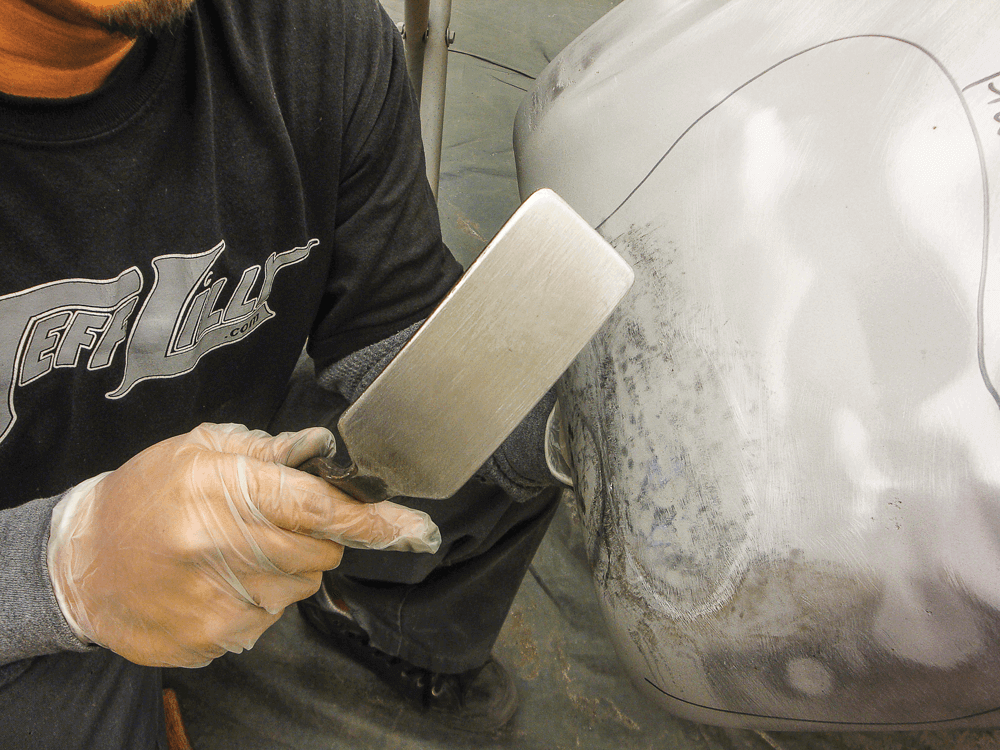
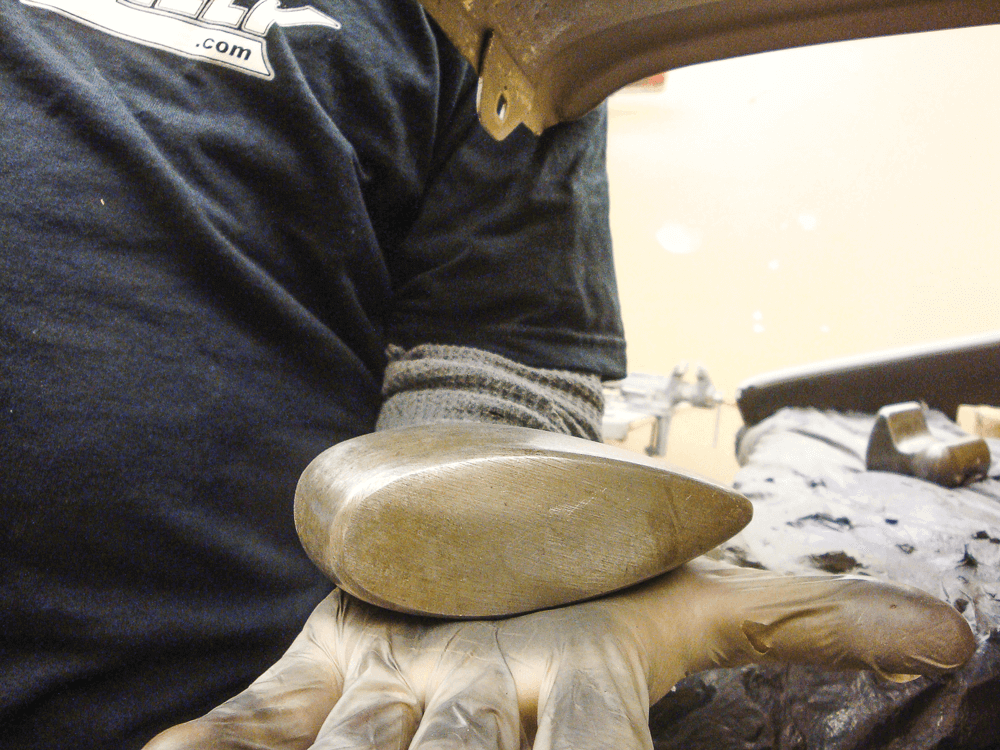
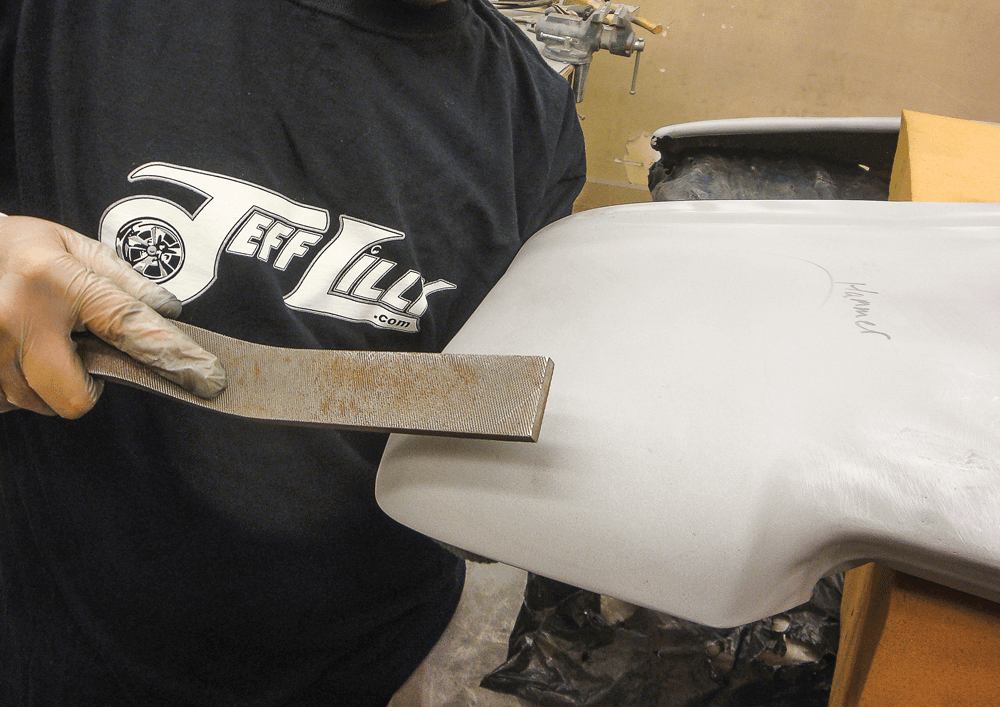
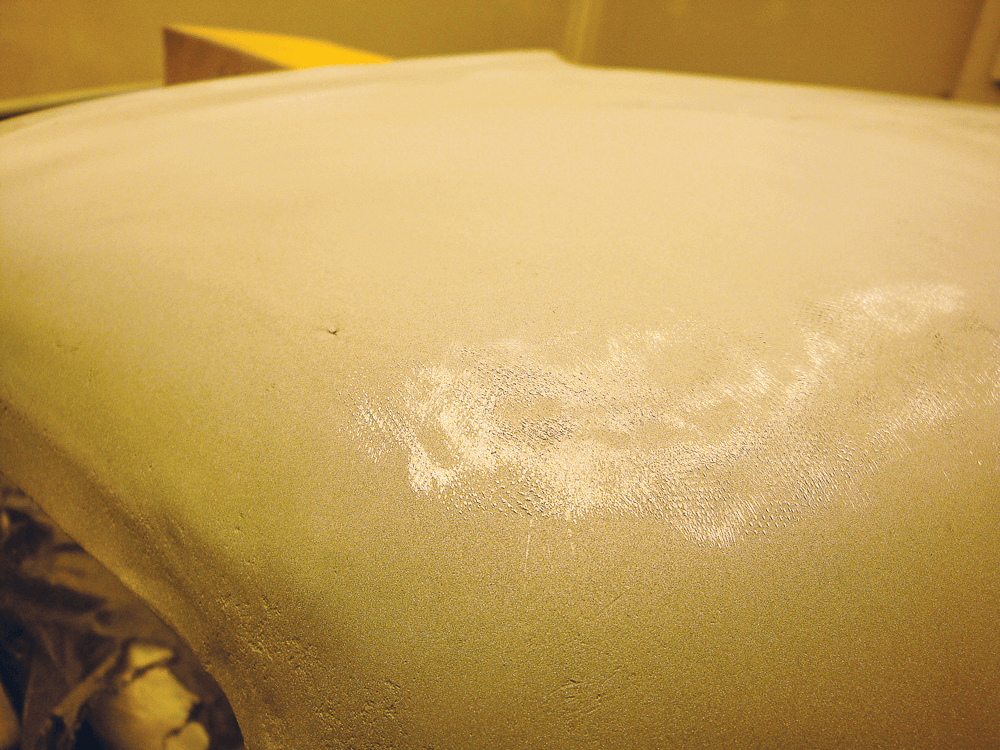
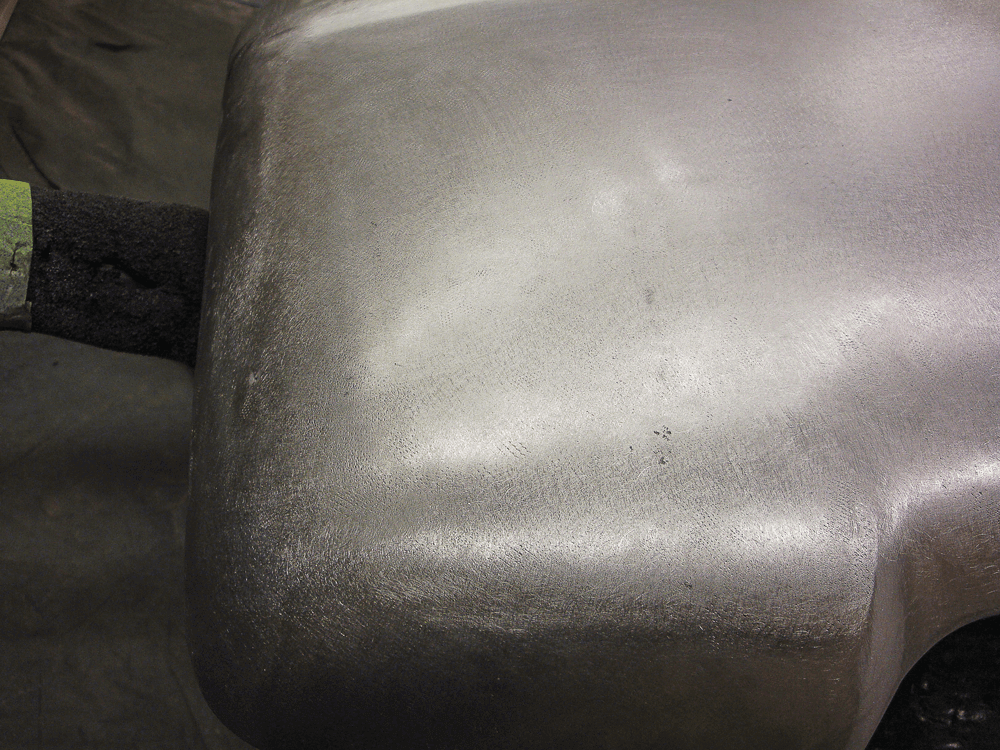
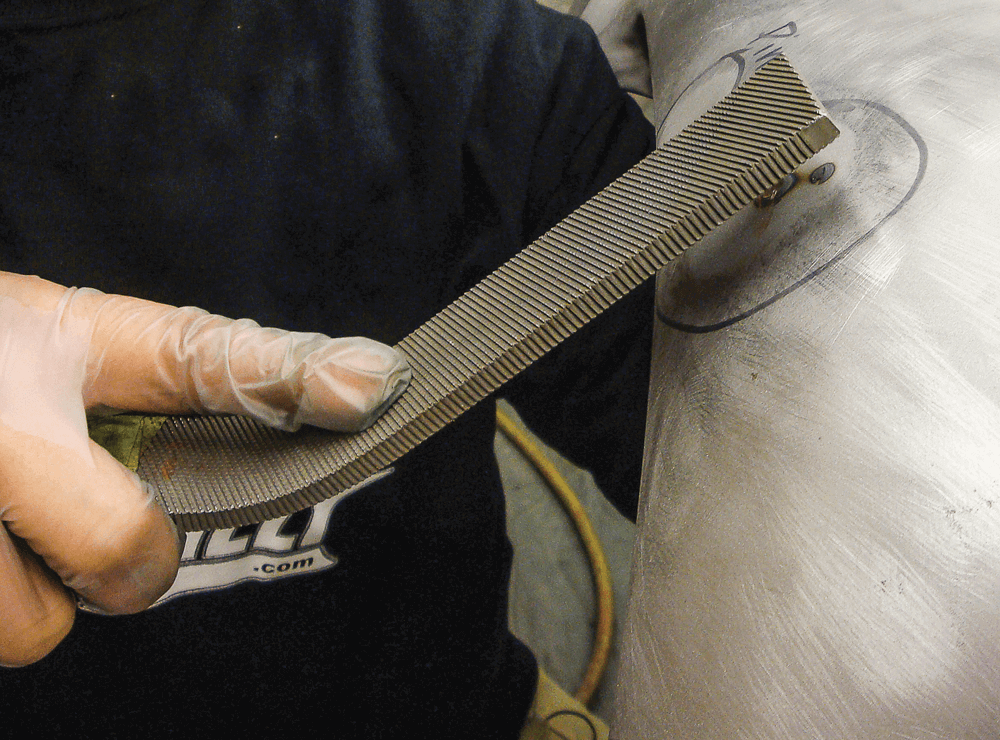
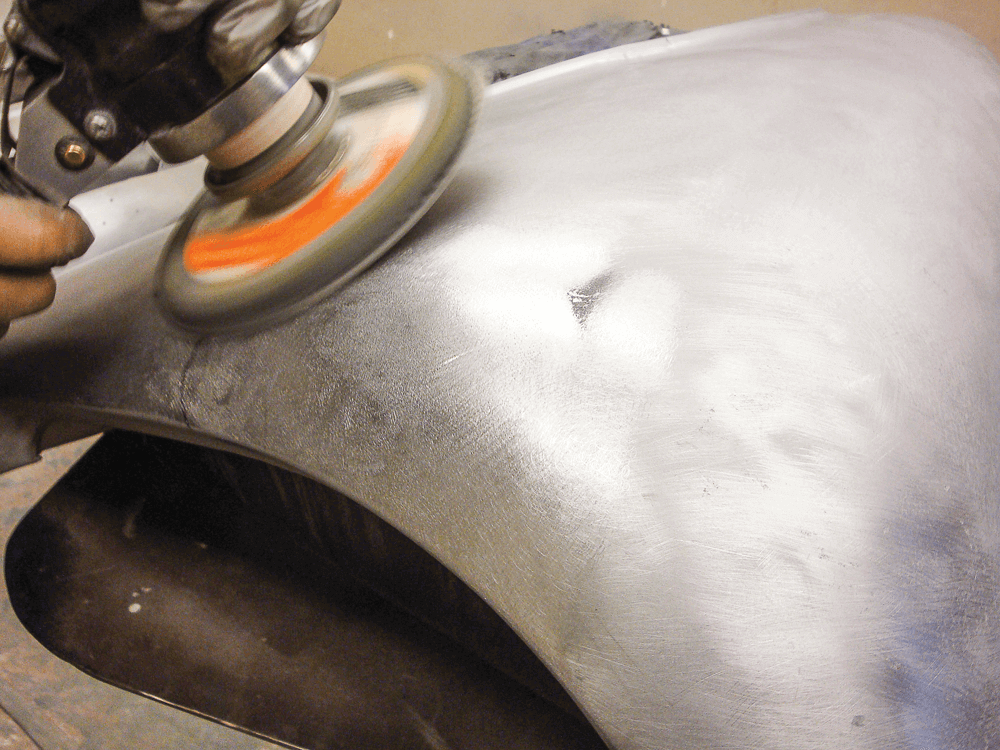
Once the dent was roughed out, we repeated the process using a slapping spoon. This tool allows more surface contact than a hammer with less strike force, so it’s great for finishing smaller imperfections. We continued working from the outer perimeter in a circle towards the center using the spoon slapper. Once all of the dents were worked out, we blasted the surface then block sanded it with 80 grit to remove any remaining spots. We checked for the right contour and were pleased with the results. Using an oval dolly we worked out the little details. The slapping file pulls the dent out by allowing the metal to release into the file teeth as it strikes the surface. “Reverse shrinking” is what the old-timers call it. This is a slow but sure method that you can master with a little practice. A close-up shows the serrated teeth were making contact on the high/level spots, indicating that the low, untouched areas needed further attention. The key is to hold the dolly in the low, untouched section as you tap it with the file and the action will pull out the dent. This spot is smaller, so we used a round dome dolly, which is excellent for placement in tight areas and for working out small imperfections. We’re almost finished. DA sanding and a final check are the last steps. The fender is primer-ready with no filler needed.
Another innovative approach for those stubborn dents, especially in non-ferrous materials, involves using neodymium magnets and steel balls. This technique is like magic when applied correctly. Place the steel ball inside the dented area and the magnet on the outside. The powerful magnetic pull allows the ball to roll out the dent without the risk of creating an “outie,” as the ball stops at the magnet.
Caution: These magnets are incredibly strong and can be dangerous. Store them safely, possibly in a corner where a metal joining plate is present, to prevent unexpected collisions. Always cover the magnet’s surface with felt or a Teflon sheet to avoid scratching the metal.
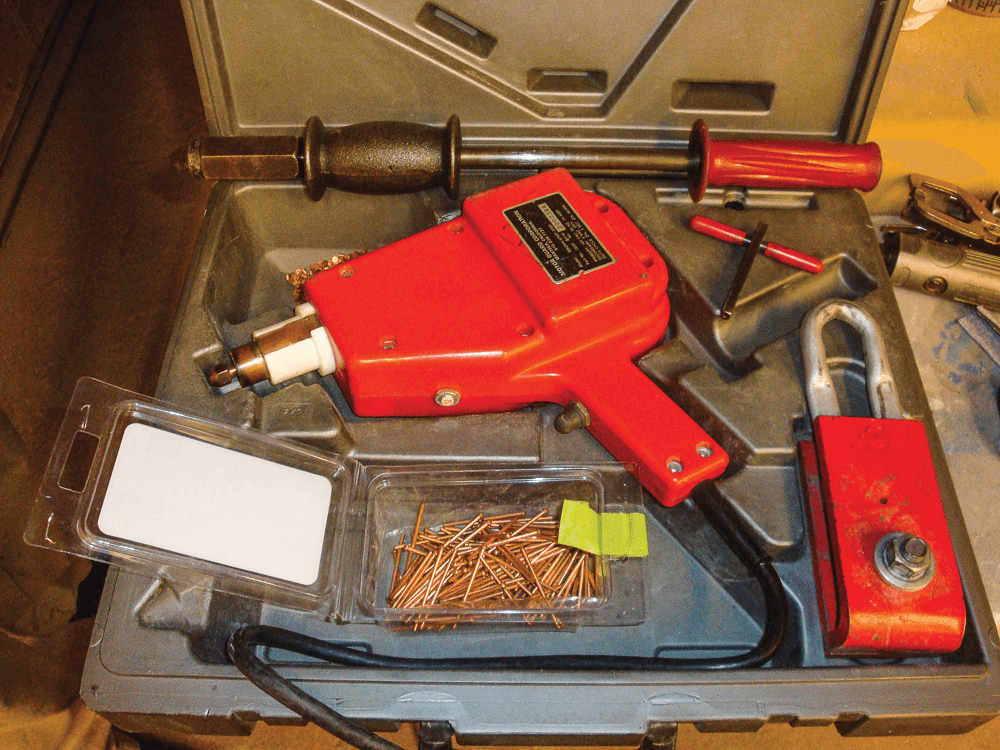
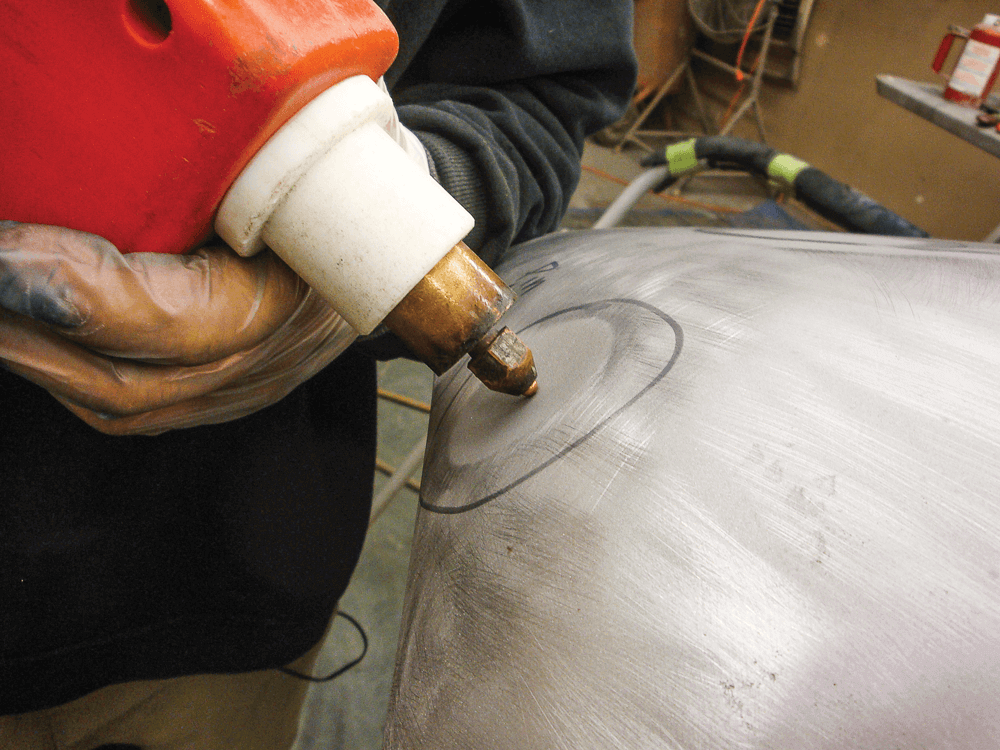
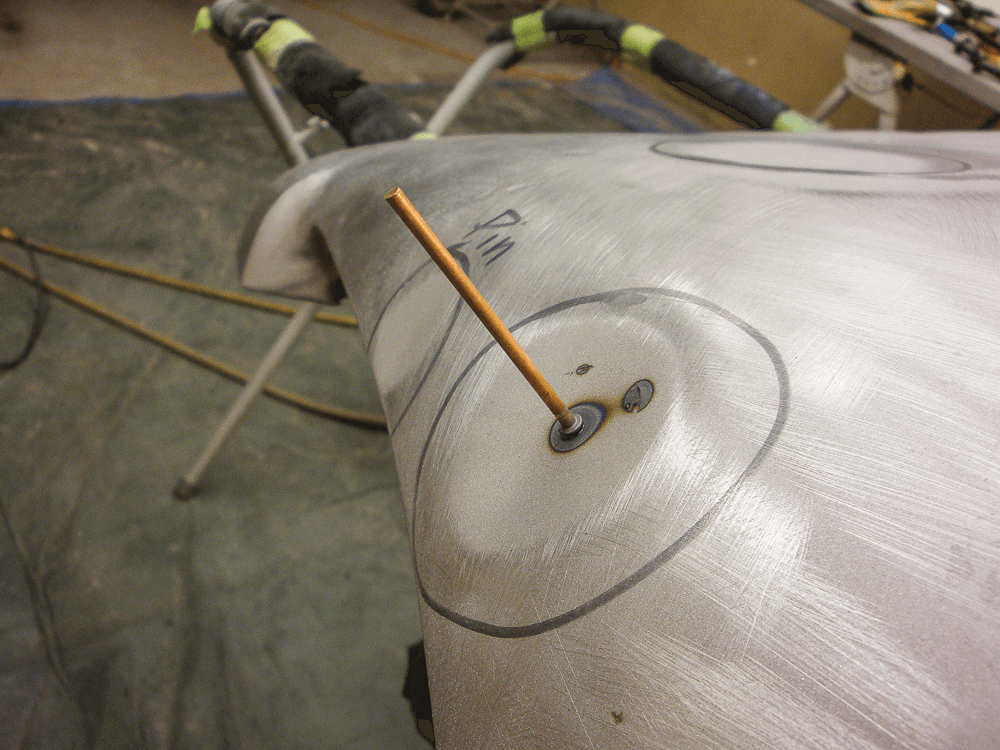
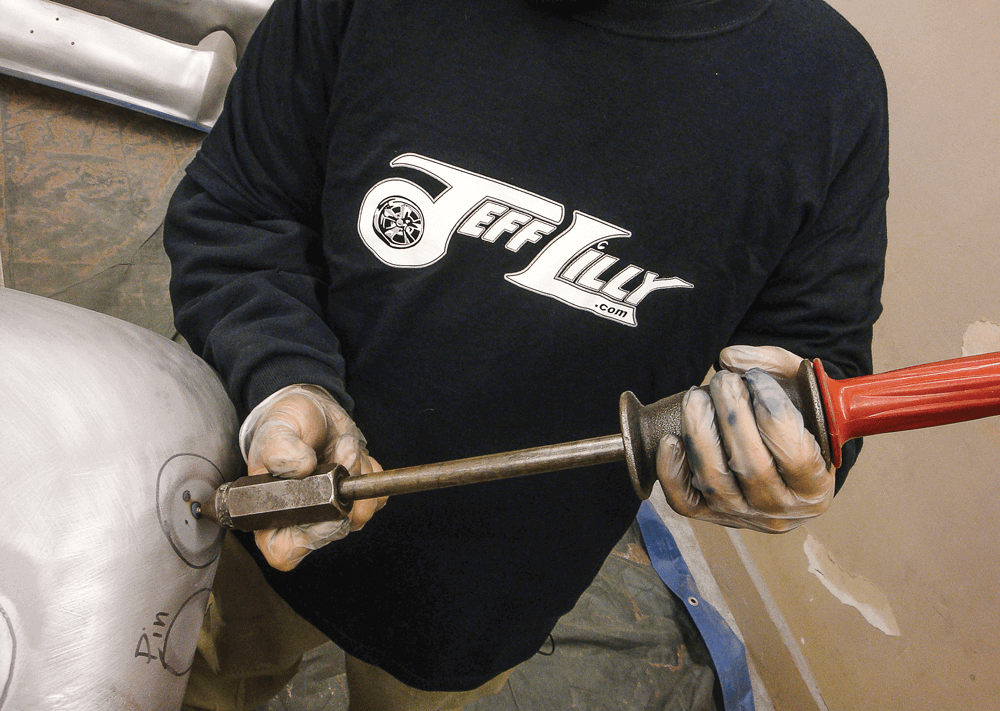
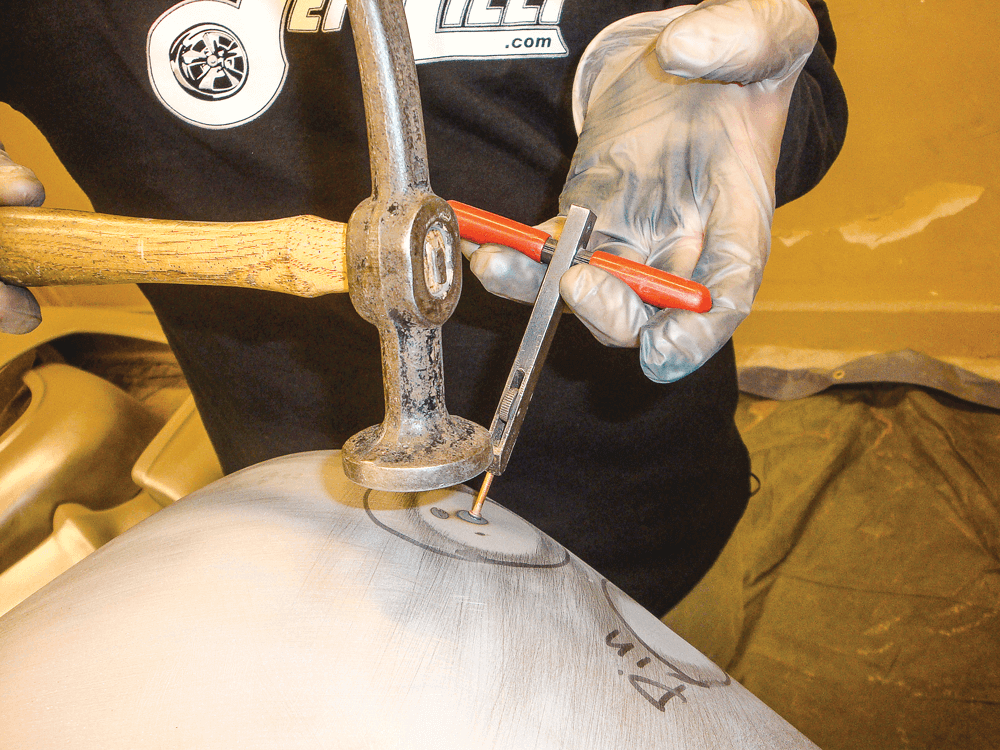
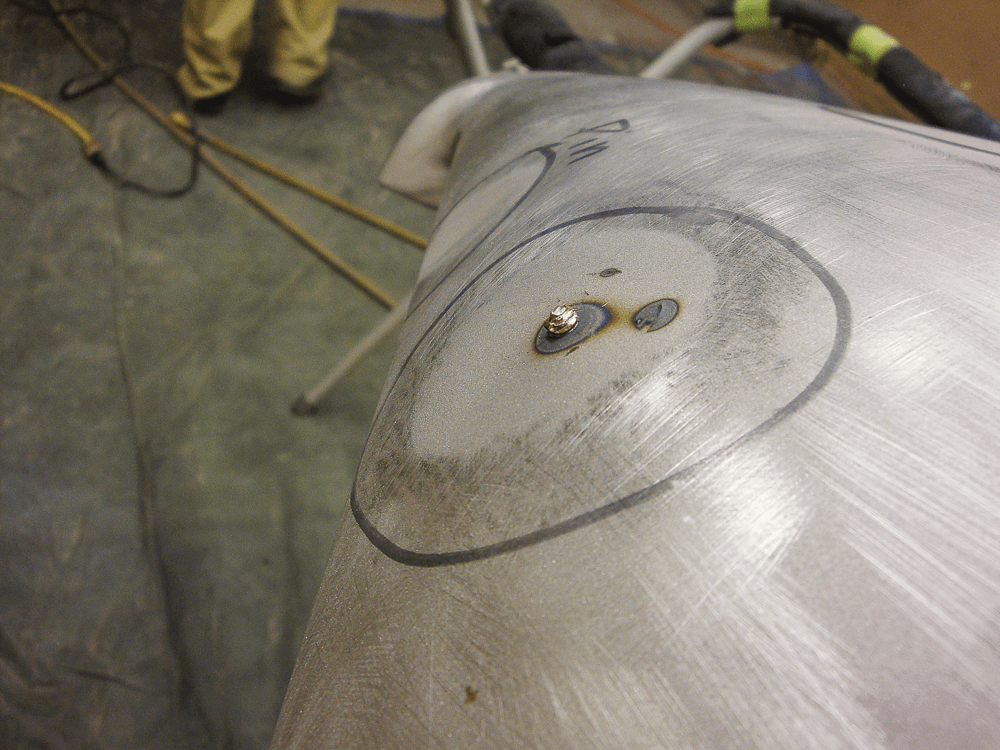
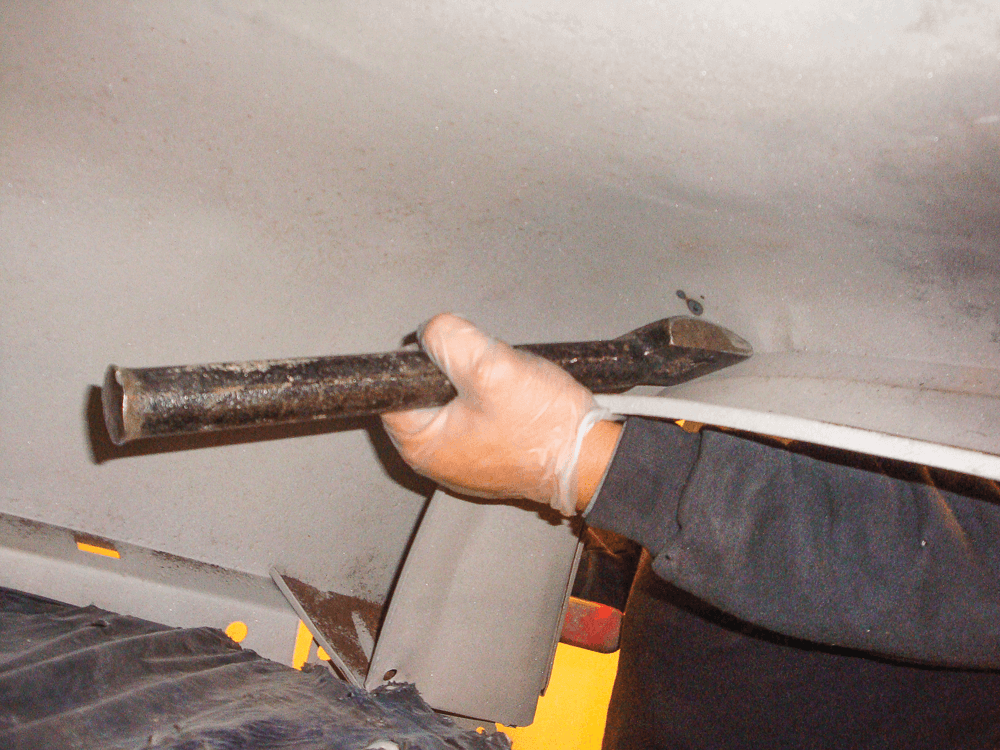
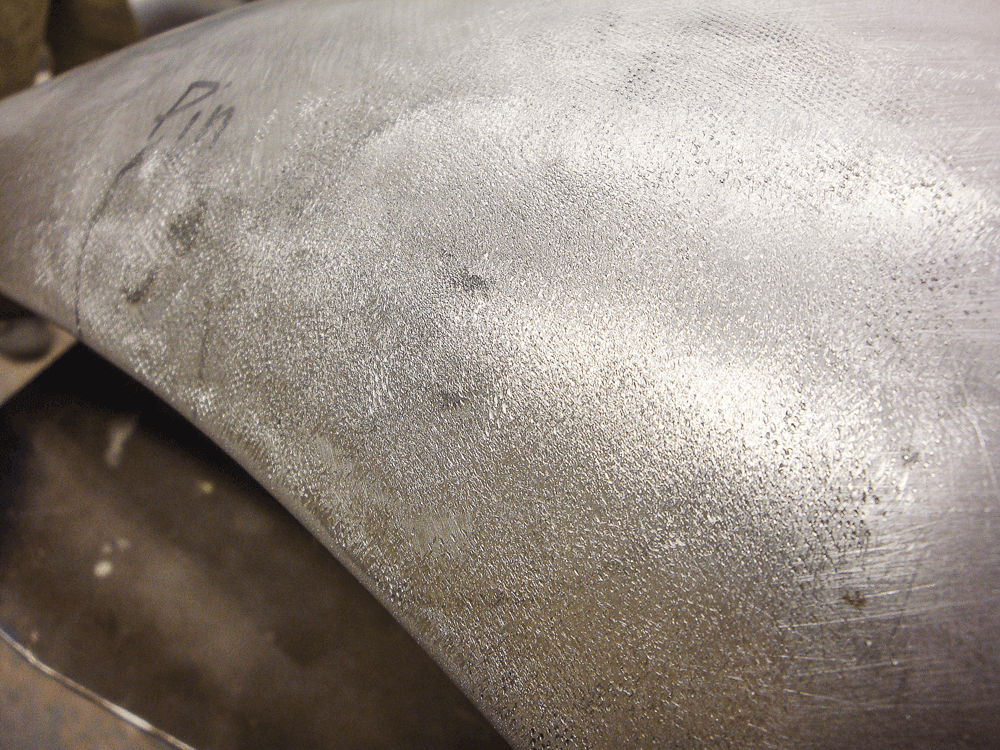
Another dent removal technique deploys a stud welder, which is useful when you don’t have access to the back of the metal. We found the center and welded on a stud to begin the process. The fender was ready for a pull. The baby slide hammer made short work of the job. Using the hand tool, we tapped around the perimeter while pulling 5 pounds of pressure and the dent began to work out. Once the dent was removed as much as possible, we simply cut off the pin and ground it flush. We also used a long-handled dolly for hard-to-reach areas. We placed the long-handled dolly in position and began to tap out the dent. We used the slap file to raise the surface. The fender was looking good after it had been thoroughly touched by the serrated file teeth. Finally, we sanded it smooth and made a final check. We’re ready to rock! With time and patience, you can get great results by banging out dents.
By combining traditional techniques with innovative methods, you can restore your classic truck to its former glory. Whether you’re using time-tested hammer and dolly work or experimenting with magnetic magic, the key is patience and precision.
How can you prevent additional damage during the process?
To avoid scratching the surface of the metal, it’s recommended to cover the magnet with a protective layer, such as felt or a Teflon sheet.
What materials are suitable for this method?
This technique is likely only effective on non-ferrous materials, as ferrous metals can interfere with the magnetic process.
What are the safety concerns and precautions associated with this method?
The strong magnets can be dangerous, capable of causing injuries like finger fractures or skin pinches if handled carelessly. It’s important to store them safely, away from easy access, to avoid accidental collisions.
What are the advantages of using this method over traditional methods?
One major advantage is that there is no risk of creating outward dents, or “outies,” because the ball is confined by the magnet’s position, ensuring it doesn’t push the metal too far.
How does this method work?
The technique requires placing a steel ball inside the dent and a neodymium magnet on the outside. The magnetic attraction is so powerful that it pulls the ball across the interior surface, effectively smoothing out the dent.
What is a unique method for removing dents in non-ferrous metals?
A unique method involves using neodymium magnets paired with steel balls to roll out dents. This approach leverages the strong magnetic pull to reshape the metal without traditional tools.


We use cookies to enhance your browsing experience, serve personalized ads or content, and analyze our traffic. By clicking "Accept All", you consent to our use of cookies. Visit our Cookie Policy for more info.


Share Link