 Chris Hamilton
.
July 24, 2019
.
HEADLINE
Chris Hamilton
.
July 24, 2019
.
HEADLINE
SEEING THE SUSPENSION AND ENGINEERING UNDER YOUR BED FLOOR IS SUPER COOL AT TRUCK SHOWS AND CRUISE-INS, BUT DRIVING A FLOORLESS BED IN THE RAIN JUST MAKES A MESS, AND OUTSIDERS JUST THINK ITS INCOMPLETE WHEN THEY LOOK AT IT. Back in the day, it was tough to build a custom bed floor for your classic or modern truck. Finding the right hardware and prepping the wood made for a project most guys didn’t want to take on. Well those days are gone, and thanks to Jeff Major and his fine crew of woodwork warriors at Bed Wood and Parts, LLC, you can now order a kit with everything you could possibly need.
The company offers a significant number of beautiful domestic and exotic species, with each having its own distinct appearance, grain pattern and character. This will allow you to enhance both the appearance and attitude of the final build, and to further personalize your truck.
“From our inception, the mission of Bed Wood and Parts, LLC, was (and remains) to offer you, our customer, the highest quality service and products, at a competitive price, which bring your dreams and aspirations to reality,” Jeff says.
Our buddy Sean ordered a set for his truck, and we decided it would be fun to follow the install. We admit this looked like a lengthy project, but with the proper planning and engineering, anything can go smoothly. Let’s follow the process from production to perfection.
Bed Wood and Parts, LLC
www.bedwoodandparts.com
877-206-9663

What are the considerations for using stainless steel screws in decking a wooden flatbed?
When decking a wooden flatbed, choosing the right hardware is crucial for durability and appearance. Stainless steel (SS) screws are a popular choice, yet they come with specific considerations.
One of the main advantages of stainless steel screws is their exceptional resistance to rust and corrosion. They maintain their appearance and structural integrity despite exposure to harsh weather conditions. However, this material is not as strong as some alternatives, making it slightly more prone to breaking under pressure.
Due to the relative brittleness of SS screws, it’s essential to pre-drill holes before driving them into the wood. Pre-drilling helps prevent the heads of the screws from snapping off, which could compromise the stability and aesthetics of the decking.
Stainless steel screws are often chosen for their sleek and polished look. They blend seamlessly with most wood finishes, adding a touch of elegance while providing practical benefits.
By weighing these factors, you can make an informed decision about using stainless steel screws for your wooden flatbed decking project.
How should cross beams be measured and cut for proper alignment on a truck frame?
To ensure your cross beams fit seamlessly on a truck frame, follow this step-by-step process:
By following these steps, you’ll achieve a precise fit for cross beams on your truck frame, ensuring both security and alignment.
What are the plans for constructing a bulkhead for a wooden truck bed?
To construct a secure and functional bulkhead for a wooden truck bed, you begin with 2×2 angle iron. This material is crucial as it provides the necessary strength and support. Here’s a step-by-step outline of the plan:
By following these steps, you ensure that the bulkhead is not only robust but also tailored to the specific needs of your wooden truck bed, offering both functionality and safety.
What type of bolts are suggested for securing cross beams to a truck frame?
When considering bolts for securing cross beams to a truck frame, it’s advisable to opt for 1/2-inch stainless steel (SS) bolts. Begin by drilling a pilot hole, followed by a counter bore, and then create the final 1/2-inch diameter hole to accommodate the bolt. While stainless steel isn’t as strong as grade 8 bolts, it offers the advantage of resistance to rust. Pair these bolts with nylock nuts, which can securely hold the assembly without requiring excessive torque. This combination ensures durability and reliability in various conditions.
What materials are recommended for constructing cross beams for a wooden truck bed?
When building cross beams for a wooden truck bed, choosing the right materials is essential for durability and strength. Here are some top recommendations:
By selecting durable materials and considering supplementary support, you can construct reliable cross beams for your wooden truck bed that will last for years.
What are the challenges and solutions for ensuring clearance for tires with a wooden flatbed?
Building a wooden flatbed for a vehicle can present unique challenges, particularly when it comes to ensuring adequate clearance for tires. Let’s delve into the common issues and explore solutions that can effectively address them.
Utilizing these strategies, you can effectively tackle the challenges of building a wooden flatbed that accommodates tire clearance while ensuring the structure remains practical and aesthetically pleasing.
How can a goose neck hitch be re-installed on a newly constructed wooden truck bed?
Step 1: Prepare the Frame
Begin by ensuring the frame of your new wooden truck bed is completely prepared and painted. This will help prevent any future corrosion and provide a solid foundation for subsequent steps.
Step 2: Plan for Openings
Before installing the gooseneck hitch, plan for the necessary openings. You need to leave an appropriate gap in the wooden bed for the hitch ball and the safety chain attachments. Careful planning at this stage will facilitate smoother installation.
Step 3: Install the Cross Beams
Mount all the cross beams securely onto the truck bed frame. This provides a strong structure and support. During this process, make sure the beams are not obstructing the areas reserved for the hitch and chains.
Step 4: Re-install the Gooseneck Hitch
Reattach the gooseneck hitch to its original position. Start by lining up the hitch ball with the prepared opening. This step requires precision to ensure the hitch is attached securely and properly aligned.
Step 5: Reinforce the Cross Beams
Once the hitch is in place, inspect the nearest cross beams to determine if reinforcement is necessary. If needed, take an offcut from the beam you trimmed earlier and attach it using lag bolts for extra stability. This will enhance the structural integrity and ensure the hitch remains firmly in place.
After installation, perform a thorough inspection to ensure everything is secure. Check the tightness of all bolts and verify the stability of the hitch. This ensures safety and reliability when towing.
By carefully following these steps, you can successfully re-install a gooseneck hitch onto a newly constructed wooden truck bed, providing lasting performance and durability.
What are the options for wiring new tail lights on a truck with a wooden flatbed?
When upgrading or replacing tail lights on a truck with a wooden flatbed, you have various options to consider. Let’s delve into the practical steps you can take to ensure a successful installation.
For enhanced visibility, particularly if the reverse lights aren’t bright enough, consider attaching extra reverse lights below the bumper. This offers an opportunity to increase illumination and safety without altering your existing setup.
While this setup should work effectively for basic needs, you might find the lighting isn’t as bright as you’d prefer, particularly in reverse mode. In such cases, extra auxiliary lights can be beneficial. Ensure each wire connection is secure and insulated, and if you’re unsure, consulting a wiring diagram can be incredibly useful. This will help you achieve an optimal blend of functionality and aesthetics on your truck’s wooden flatbed.
What are potential issues with using circular trailer lights for a truck flatbed?
Installing circular trailer lights on a truck flatbed might seem like a straightforward upgrade, but there are a few challenges and potential pitfalls to consider:
One primary concern is the brightness level of these lights. Users have reported that these lights may not provide the level of illumination desired, particularly for reverse lights. This can impact visibility and safety during nighttime or low-light conditions.
Another significant issue lies in the wiring setup. Circular trailer lights often require specific wiring adjustments to function correctly with a truck’s existing light system:
While the process isn’t exceedingly difficult, it does require some technical skill and confidence with automotive electrical systems. Anyone attempting this needs to be comfortable with handling wiring and interpreting wiring diagrams.
Lastly, ensuring you have a proper wiring diagram is crucial. Yet, the lack of readily available diagrams or detailed installation guides can make the process a bit daunting for novices.
Overall, while upgrading to circular trailer lights offers potential aesthetic benefits, these issues highlight why planning and understanding the requirements is essential before getting started.
How can a 2-to-3 wire converter be used for taillight wiring?
If you’re looking to enhance your vehicle’s taillight system, using a 2-to-3 wire converter can simplify the process, especially when integrating modern light fittings. Here’s how you can effectively set it up:
For a typical setup involving brake, turn, running, and reverse lights, a 2-to-3 wire converter is crucial. This device helps translate the combined signals for clear functionality between diverse light types.
By following these steps, you’ll achieve a seamless integration of a 2-to-3 wire configuration in your vehicle’s taillight system. This method makes it easier to adapt to new lighting needs while maintaining clear, functional signal displays.
What are the considerations for cleaning and painting a rusted truck frame?
Restoring a rusted truck frame requires careful attention to detail, particularly when dealing with the elements and materials. Here are some key considerations:
By keeping these considerations in mind, those tackling a rusted truck frame can achieve better results while safeguarding the longevity and integrity of their vehicle.
What are the steps involved in removing a rusted truck bed?
Removing a rusted truck bed can be a daunting task, but with some patience and the right tools, you can get the job done. Here’s a streamlined guide to help you through the process:
By following these steps, you’ll be able to tackle the removal of a rusted truck bed efficiently. Remember to prioritize safety throughout the process, especially when handling heavy components.
How can a tractor be used in the process of removing a truck bed?
Removing a truck bed might seem like a daunting task, but a tractor can simplify the process significantly. Here’s how you can effectively use a tractor to lift and remove a truck bed:
By following these steps, a tractor can be a valuable tool in removing a truck bed, turning a potentially strenuous task into a more manageable one.
What tools are recommended for cutting bolts when removing a truck bed?
When removing a truck bed, having the right tools to effectively cut bolts can save you time and effort. Here’s a list of recommended tools and tips to get the job done efficiently:
By equipping yourself with these tools and following these tips, cutting bolts during the removal of a truck bed will become a smoother and more manageable task.
What are the common issues with truck beds in older Ford trucks?
If you own an older model truck, you’re likely aware of some common challenges that come with maintaining the truck bed. One prevalent issue is rust, which often starts as small spots but can quickly spread, leading to serious deterioration.
Aside from rust, there are several other issues that might affect truck beds in older vehicles:
Maintaining an older truck bed requires regular inspection and timely interventions to address these potential issues. Applying protective coatings, ensuring proper drainage, and replacing damaged parts can help extend the life of your truck bed.
What is the plan for building a wooden flatbed for a truck?
YES, YOU CAN DO IT YOURSELF!
SEEING THE SUSPENSION AND ENGINEERING UNDER YOUR BED FLOOR IS SUPER COOL AT TRUCK SHOWS AND CRUISE-INS, BUT DRIVING A FLOORLESS BED IN THE RAIN JUST MAKES A MESS, AND OUTSIDERS JUST THINK ITS INCOMPLETE WHEN THEY LOOK AT IT. Back in the day, it was tough to build a custom bed floor for your classic or modern truck. Finding the right hardware and prepping the wood made for a project most guys didn’t want to take on. Well, those days are gone, and thanks to Jeff Major and his fine crew of woodwork warriors at Bed Wood and Parts, LLC, you can now order a kit with everything you could possibly need.
The company offers a significant number of beautiful domestic and exotic species, with each having its own distinct appearance, grain pattern, and character. This will allow you to enhance both the appearance and attitude of the final build, and to further personalize your truck.
Before diving into the installation, it’s essential to have a clear plan for your wooden flatbed. Consider starting with a simple strategy: mount beams perpendicular to the bed frame and run 5/4 x 6″ x 8′ pressure-treated boards to create the deck. This foundational step sets the stage for a successful build.
However, keep in mind several unknowns you may encounter, such as:
Our buddy Sean ordered a set for his truck, and we decided it would be fun to follow the install. We admit this looked like a lengthy project, but with the proper planning and engineering, anything can go smoothly. Let’s follow the process from production to perfection.
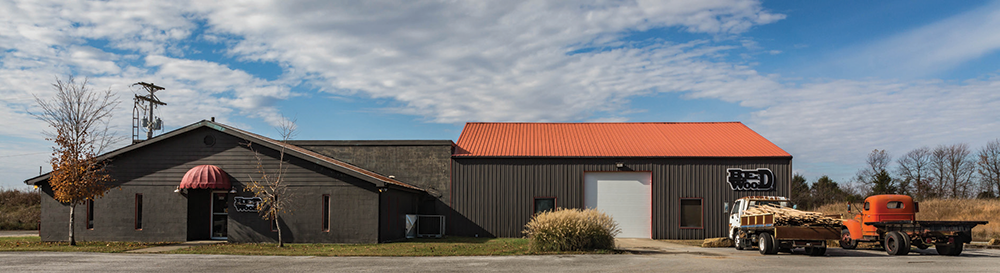
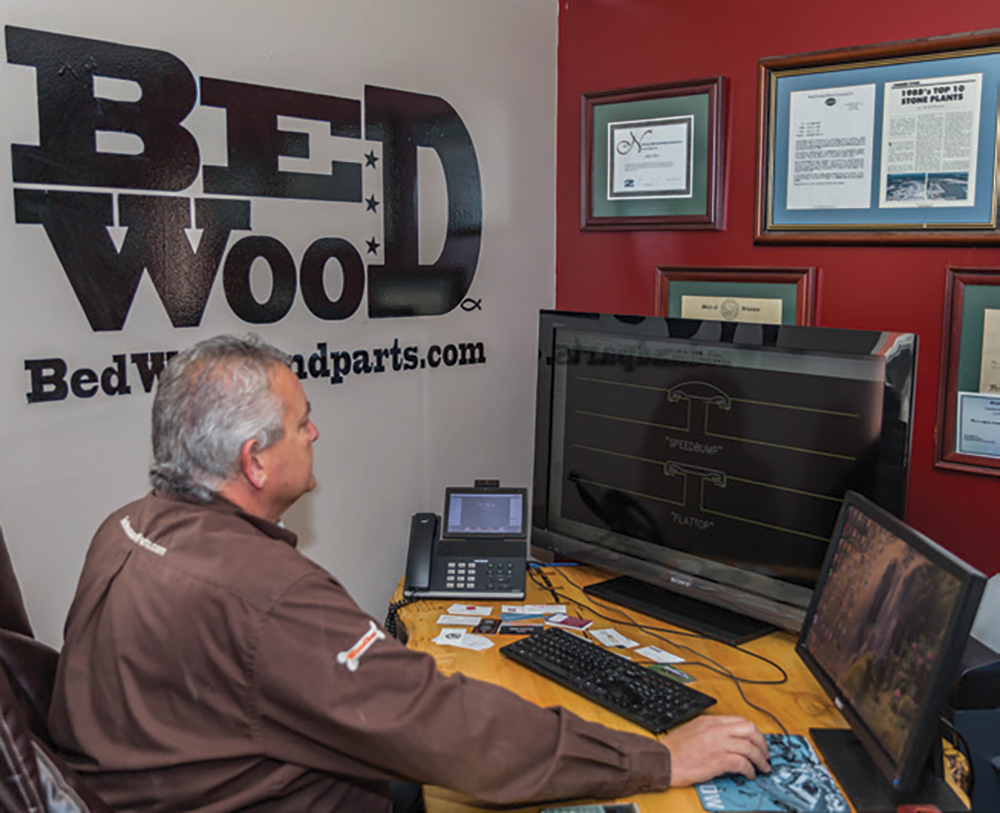
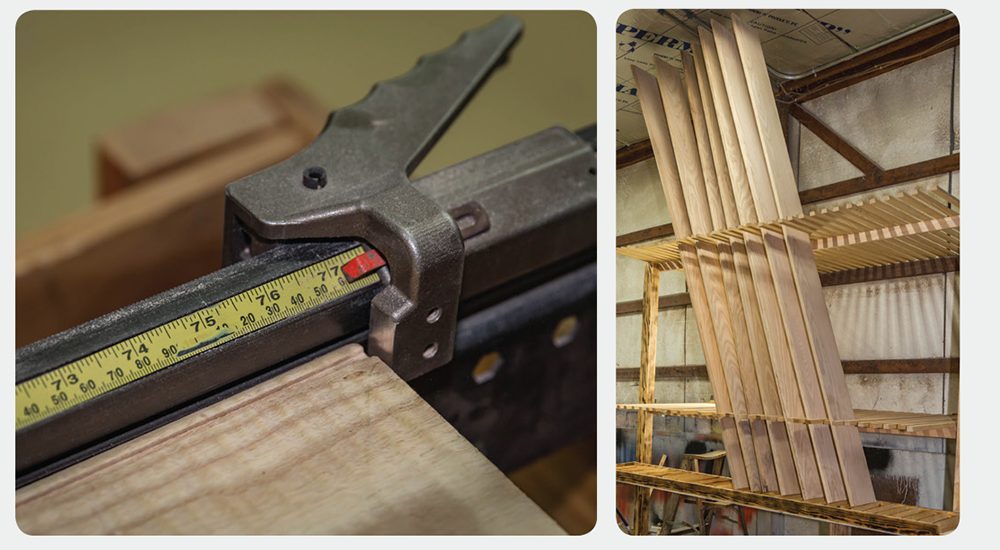
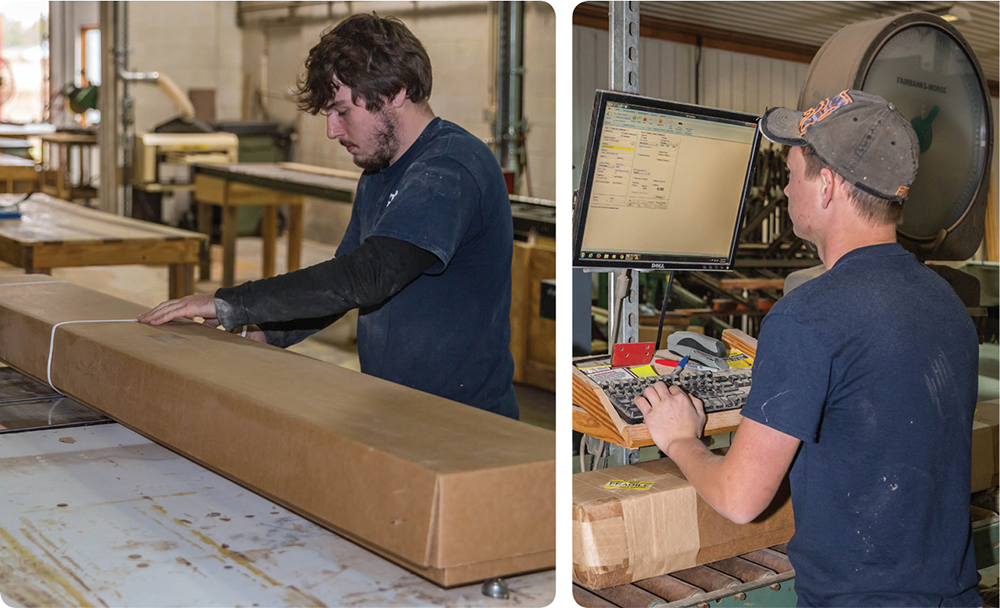
Based in Hopkinsville, Kentucky, Bed Wood and Parts’ manufacturing facility handles all the prep work for your new bed-floor in-house. The first step in the process is to produce the perfect wood panels. Jeff Major preps the job digitally before anything is cut, ensuring cost-effectiveness and efficiency.
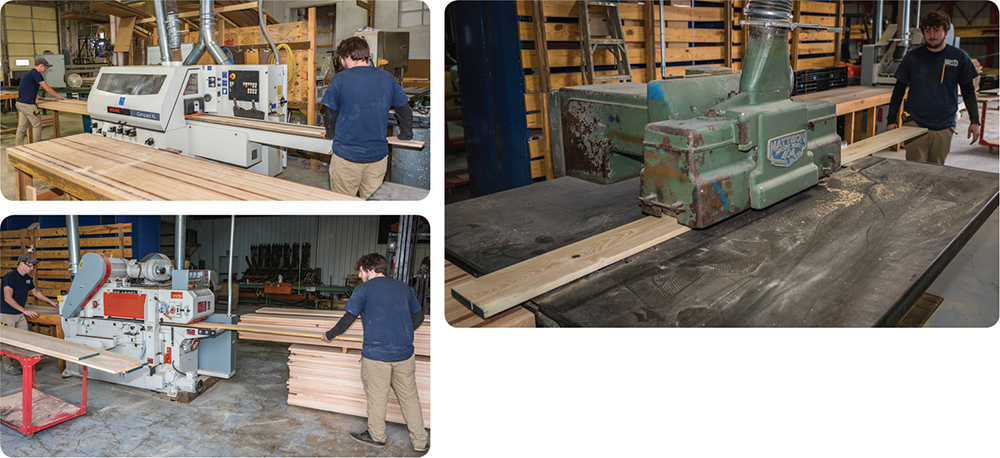
Once the complete package is preplanned, the crew starts the production of the wood panels. Cutting, measuring, and planning are all part of the perfect process. With everything cut and double-checked, the wood can be stacked and prepped for coating and drilling.
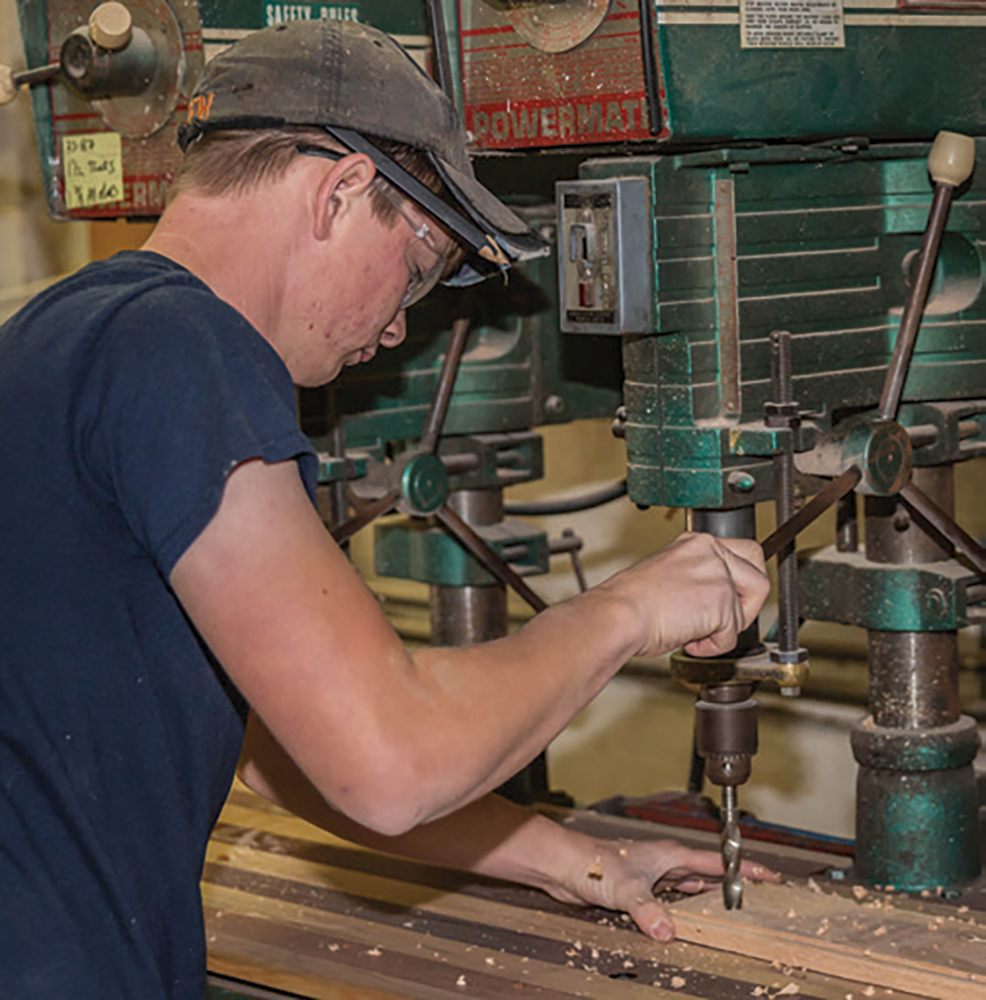
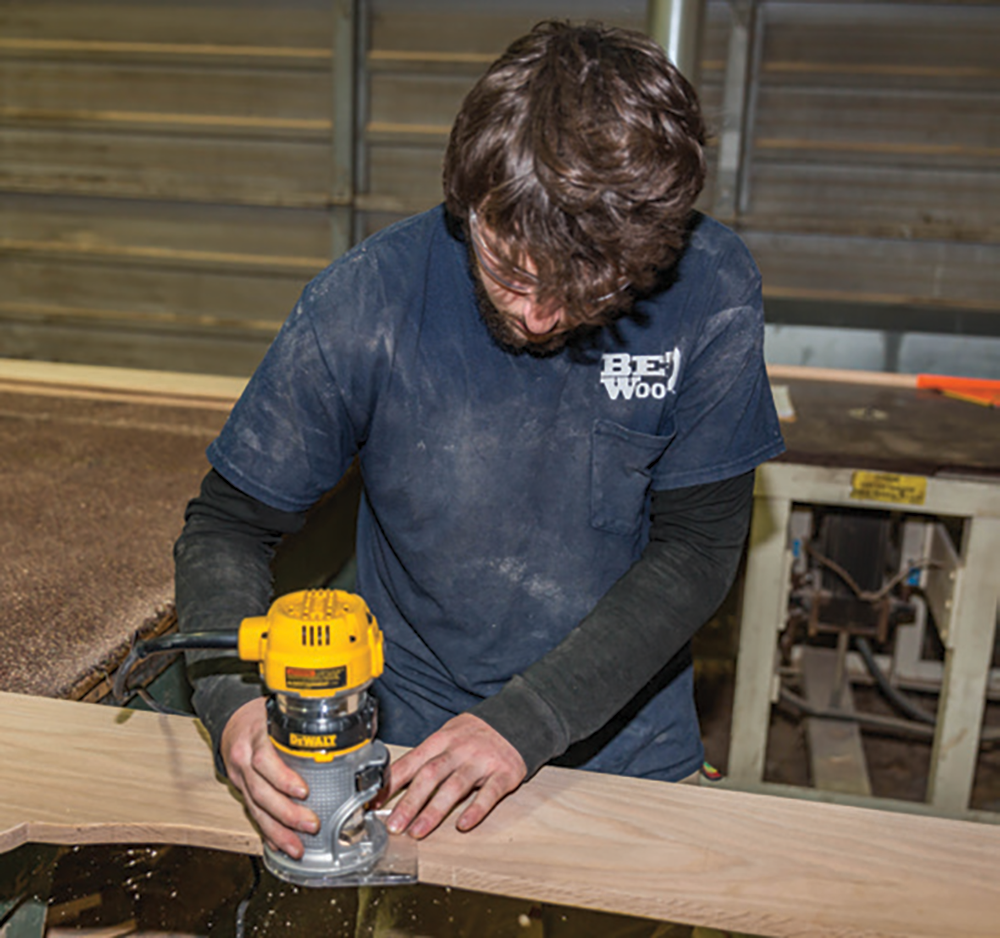
Since Jeff plotted the parts ahead of time, drilling the correct holes in the correct spots comes easy for the crew. Routing the edges improves and provides for superior fit and finish. Once the complete package is coated and ready to ship, a hardware kit is packaged and double-checked for accuracy.
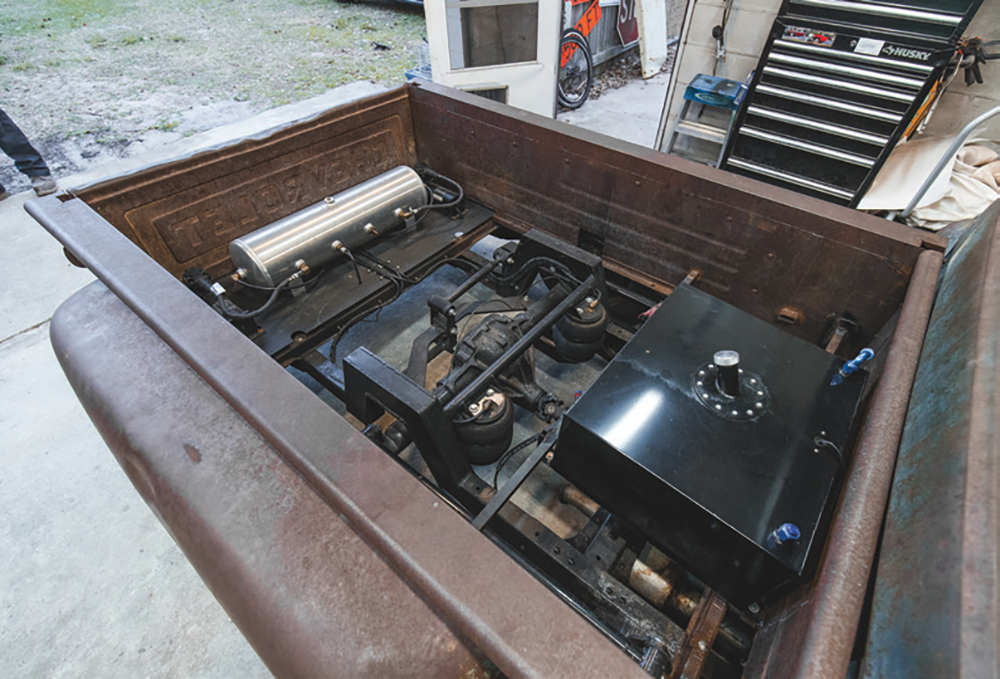
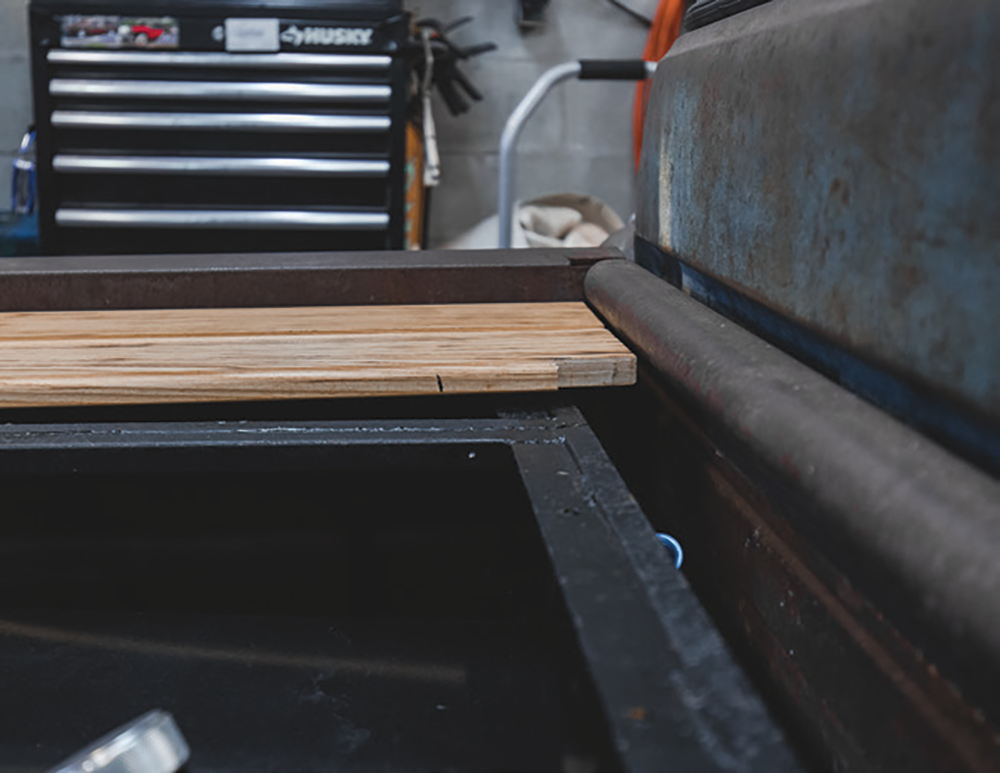
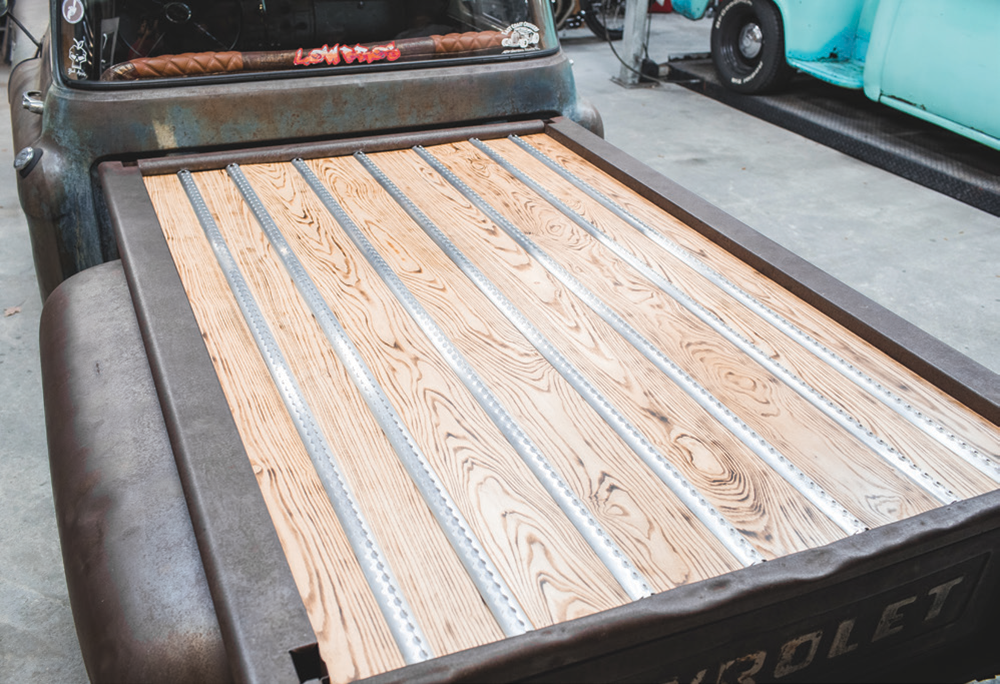
The final step in the process is prepping the panels for shipping. With hundreds of bed wood panels shipped, this crew knows how to pack it perfectly for the trip across the country. This is the bed floor we are working on this month. Currently, this bagged classic Chevy has nothing in the bed but axles, tanks, and suspension.
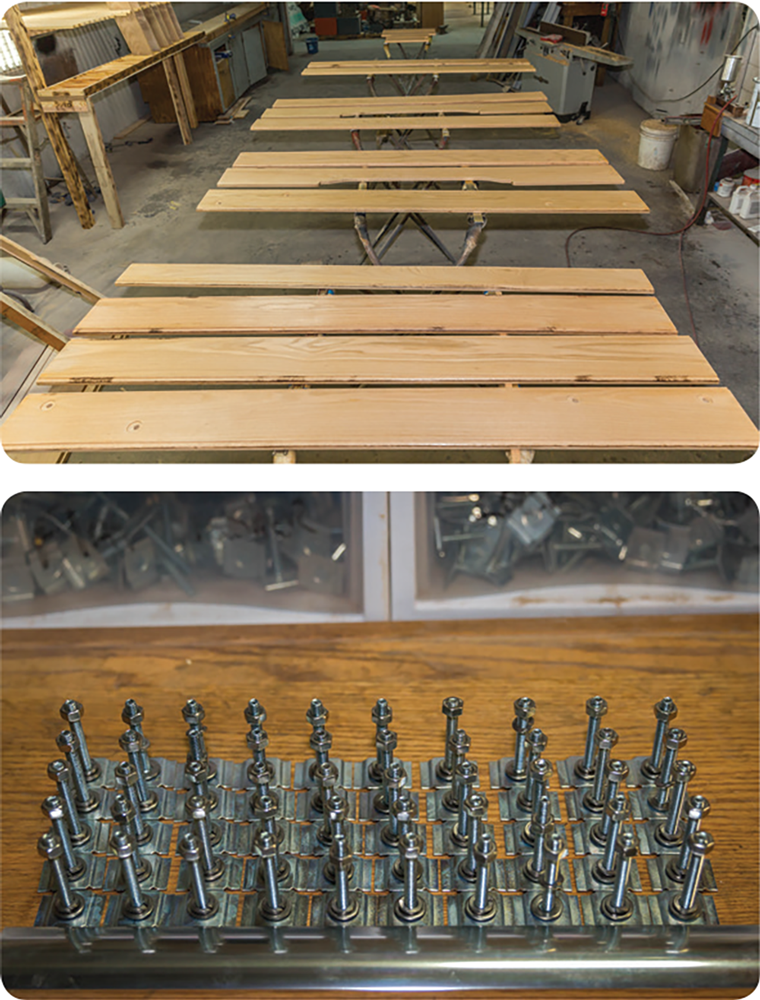
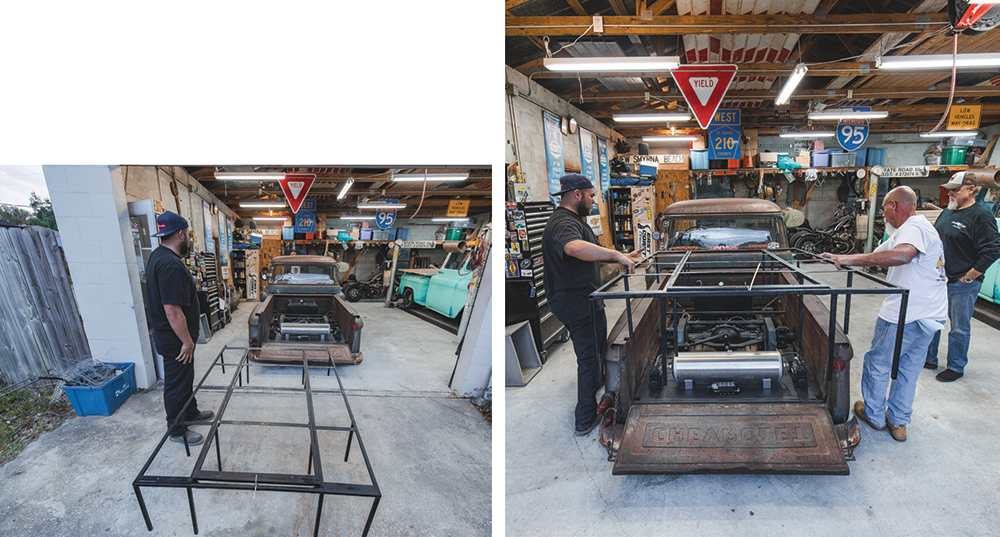
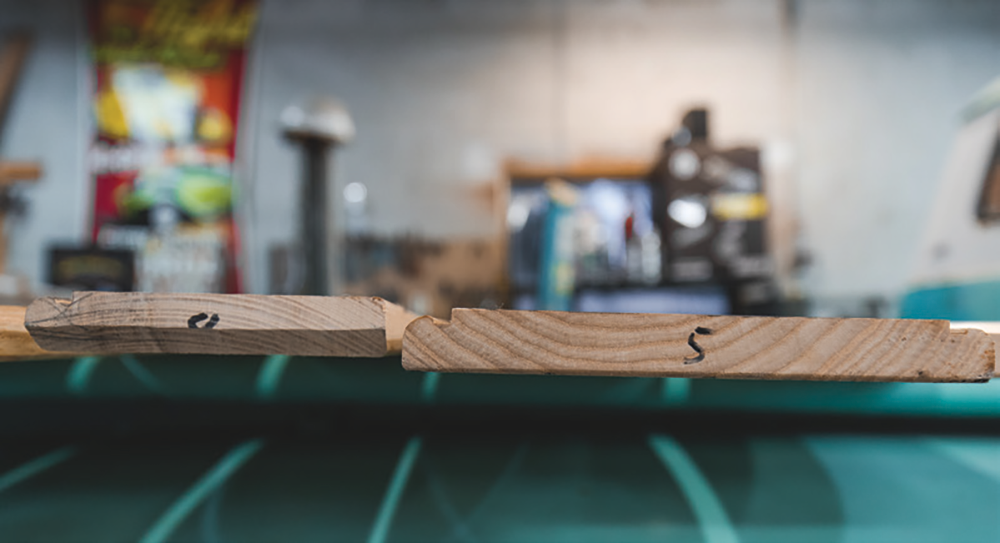
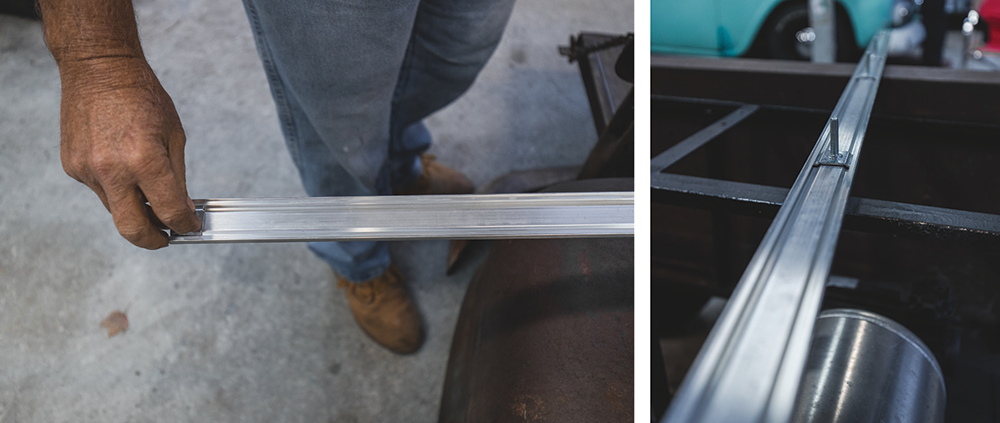
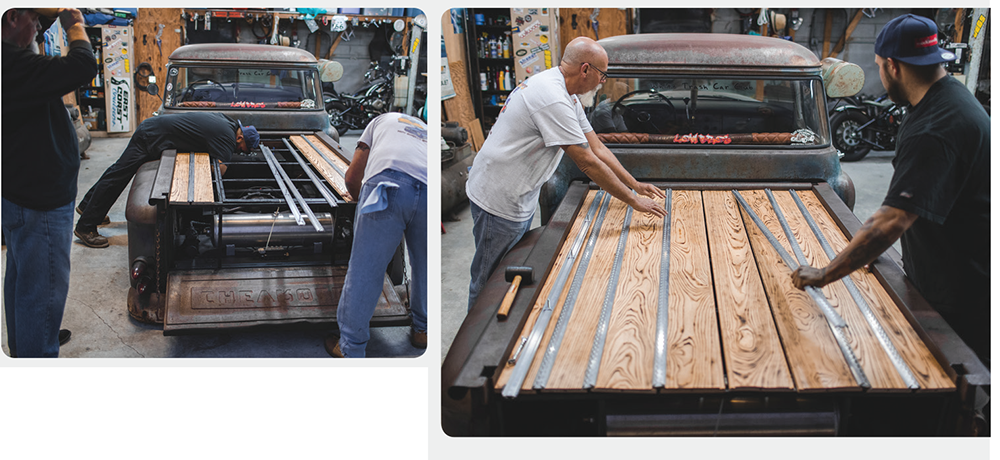
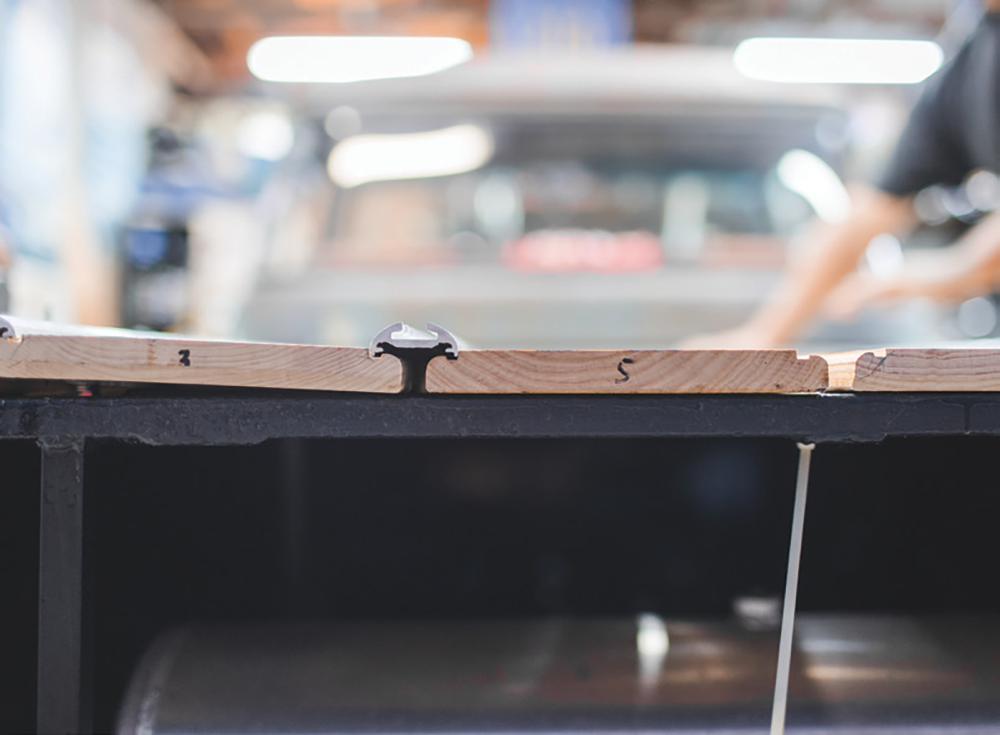
Sean and his dad built a frame for the bed floor that will sit above the items in the rear of the truck. This frame will bolt to the truck rails for a removable, serviceable setup. With the panels unpacked, we can see how smooth and clean they come shipped. The metal strips have multiple different styles, and we love this “Classic Track” design.
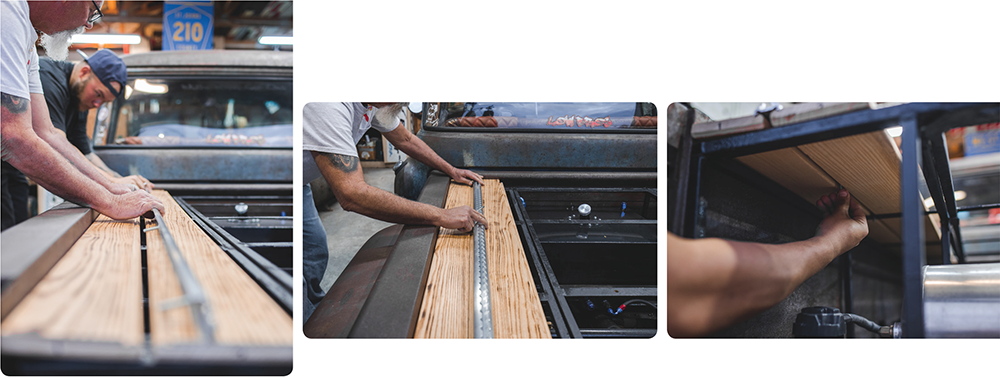
Jeff’s engineering also pre-planned for the installation by numbering the panels so you put them in order. They also have an app that helps with the squaring process. Starting with the first panel, Sean put the wood in place on the driver’s side and moved toward the center.
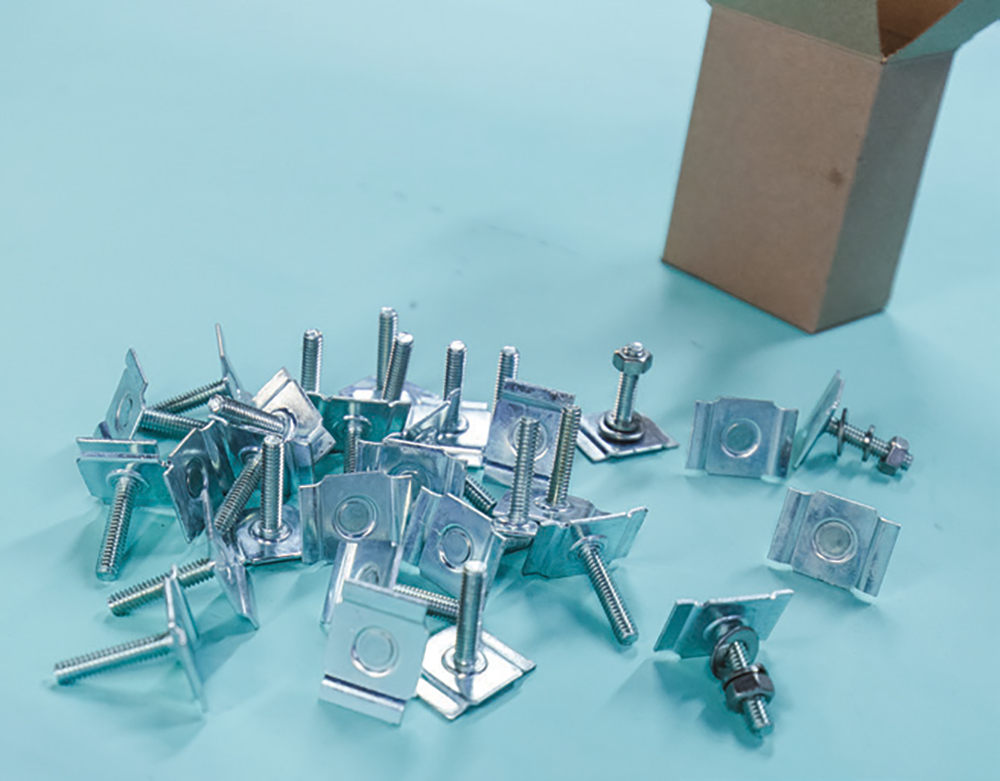
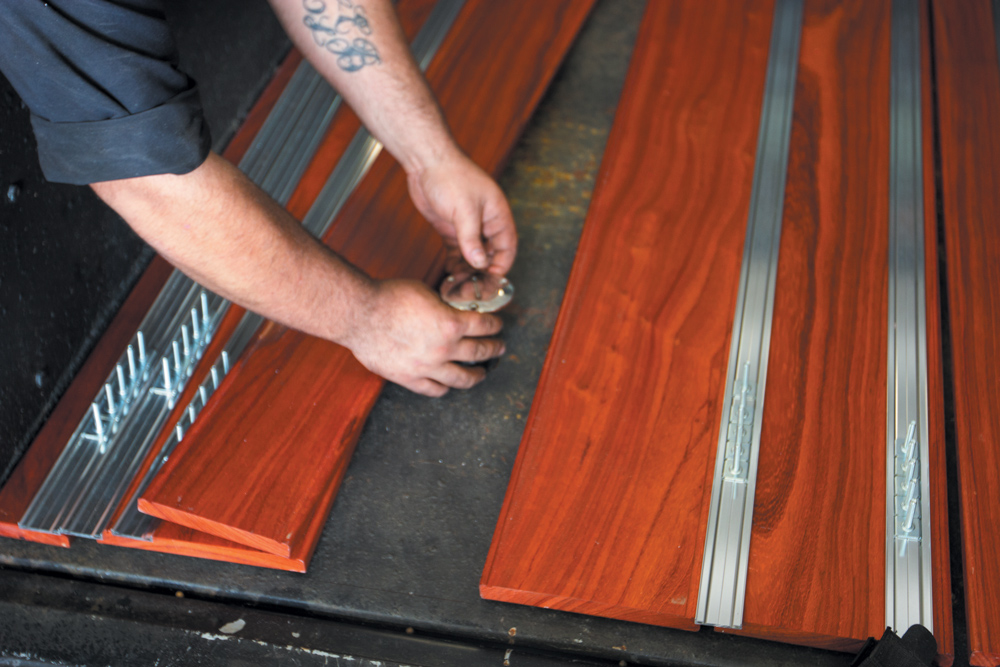
All the hardware is supplied in the kit, which takes the guesswork out of the install. The studs are slid into the metal strips before placing them between the wood panels. Such a clean, smart design. The studs are placed into the holes of the frame. The nuts were also installed but not tightened so the wood panels can be aligned.
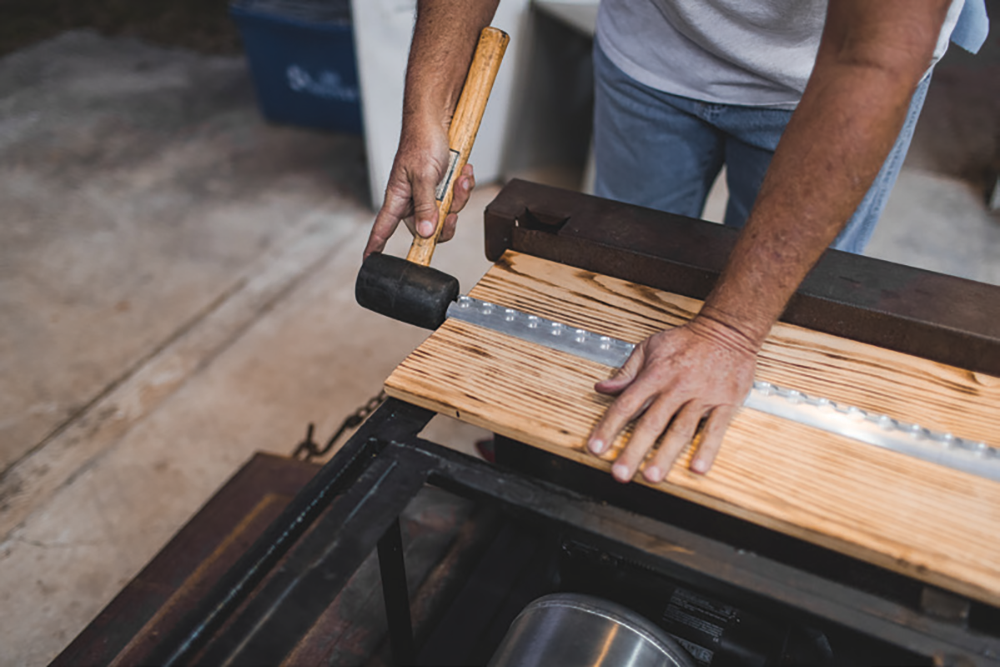
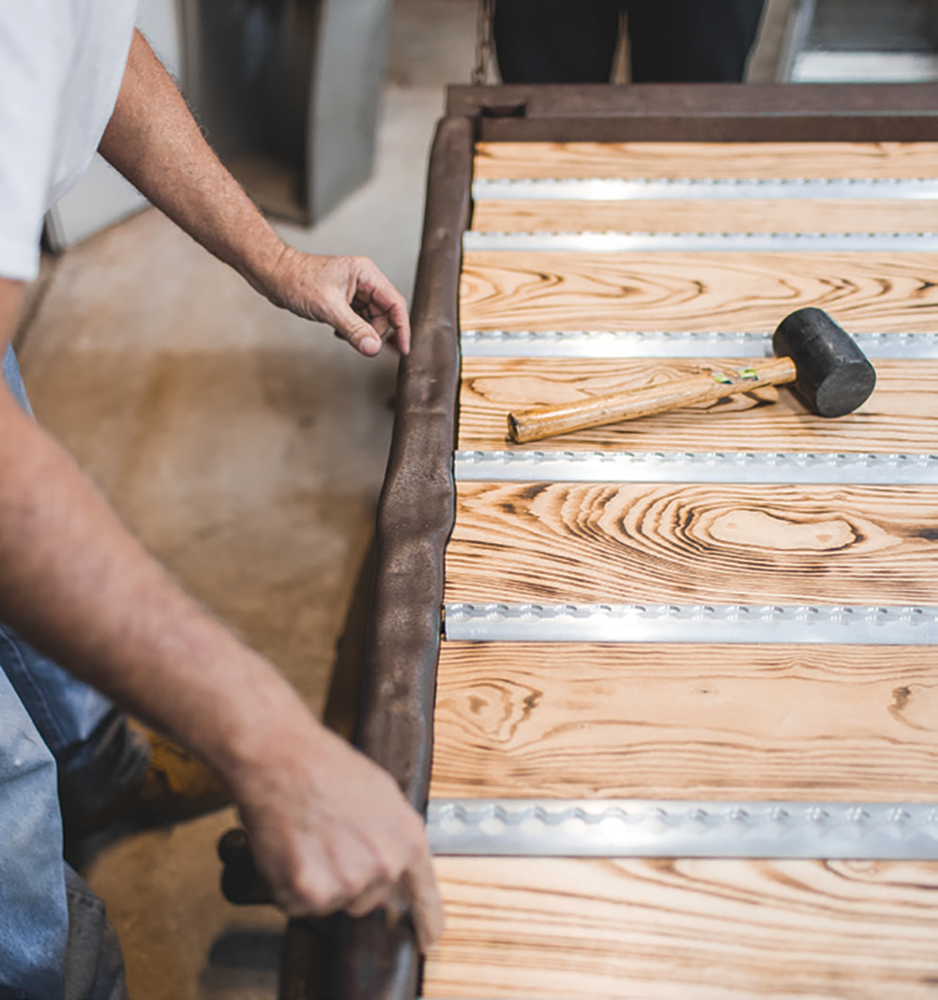
Once the panels are loosely installed, Sean’s dad used a rubber hammer to tap the wood slats into place. With the outer panels installed, the crew can start moving toward the center, making sure everything is level and straight. Here you can see how the panels are routed for the metal strips, creating a clamping system.
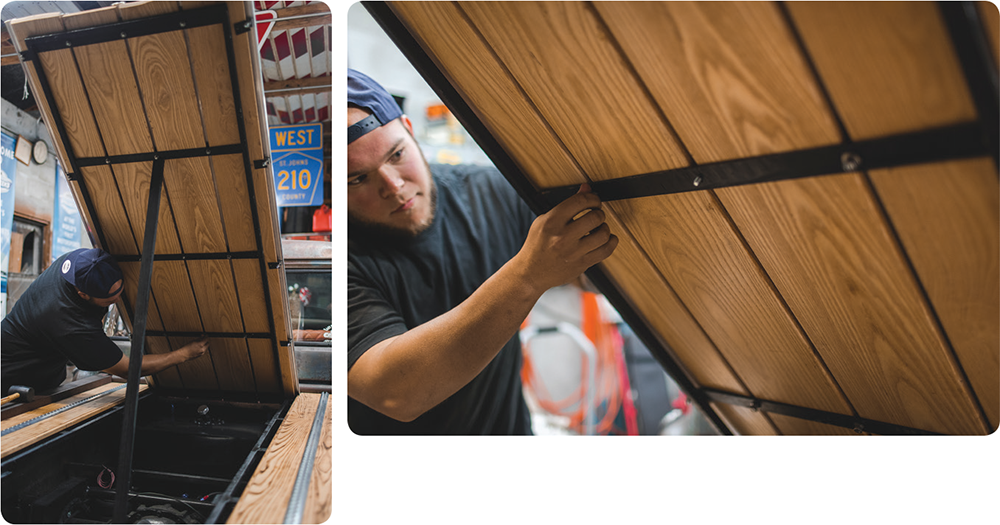
The guys designed the frame to raise in the center for service. This also makes it quite easy to tighten the wood floor panels. One of the last things to check before cranking down all the nuts is if the tailgate closes correctly and without resistance. A few extra taps may be needed to align everything.
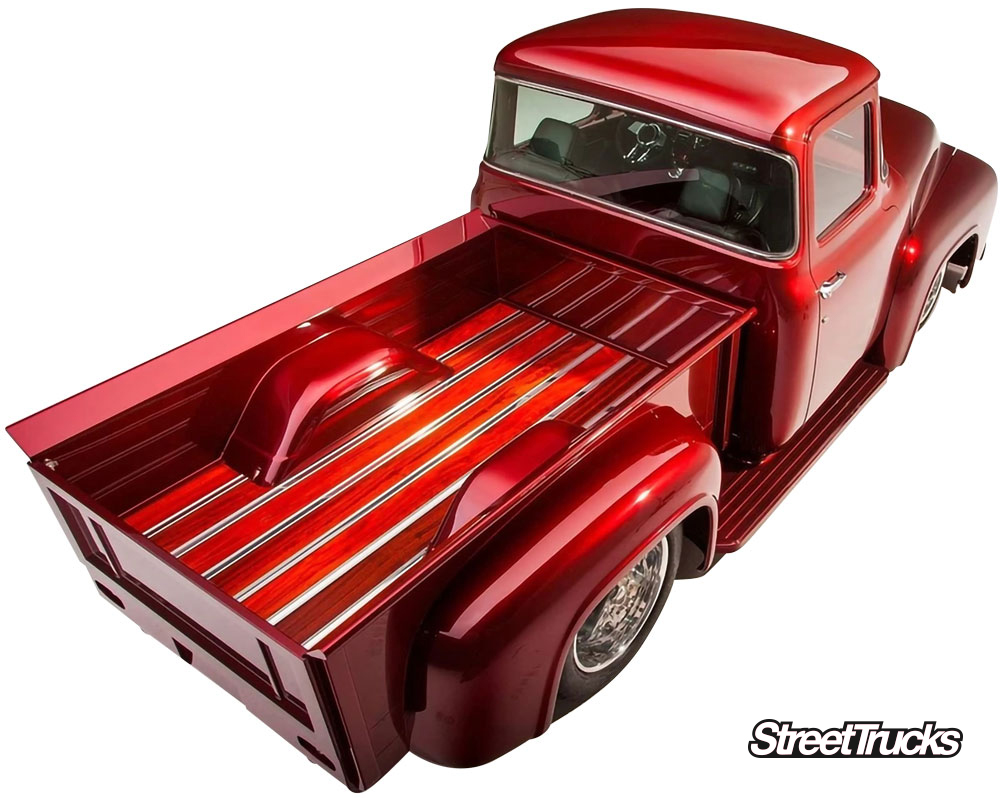
The final product. We can’t say enough about this unbelievably clean design. The install was smooth, and the engineering of this kit is on point. Ten out of 10 recommended.

Features
No Explanation Needed When You Do It Yourself Being the boss has its perks. You get to sit back and watch the workers do the… Continue reading
Chris Hamilton . June 17, 2022

Department
In the first-ever OBS Builders Guide, we put our direct focus on swapping the factory engine for a Blueprint Engines 383c.i. stroker motor, an American… Continue reading
Chris Hamilton . December 10, 2020
America
If you own a truck then you will want to check out our latest parts counter, with newest custom truck parts! Wanting to stay up… Continue reading
Chris Hamilton . February 09, 2021

Events
SEMA 2019 was epic! Trucks filled every corner of the Las Vegas Convention Center and our man Solomon Lunger captured each and every one of… Continue reading
Chris Hamilton . November 15, 2019
HEADLINE
THE RAVEN” FROM Edgar Allan Poe was his most popular literary creation, although it did not bring him much financial success. Over the years, this… Continue reading
Chris Hamilton . April 06, 2020
C10 Builders Guide
Cruising Through 41 Years in a Big-Block Powered, Long-Bed Bow Tie BeautySubscribe to our weekly newsletter Nostalgia. When you have owned a truck for… Continue reading
Travis Noack . March 25, 2024


Share Link