 streettrucks
.
February 22, 2018
.
Tech
.
streettrucks
.
February 22, 2018
.
Tech
.
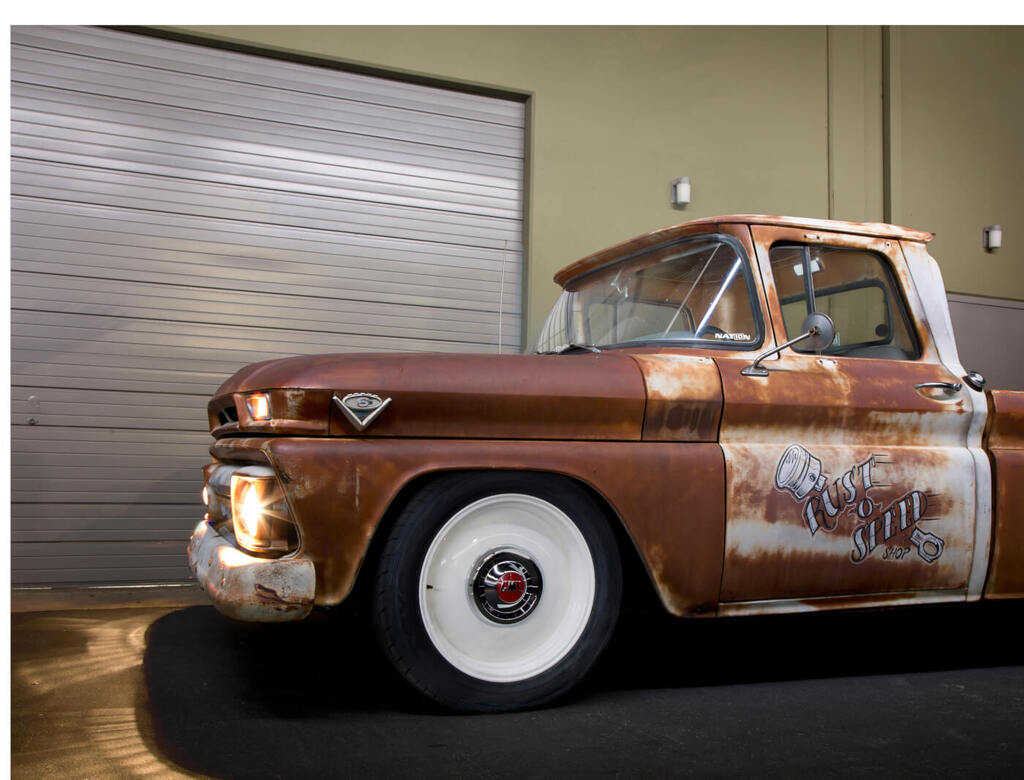
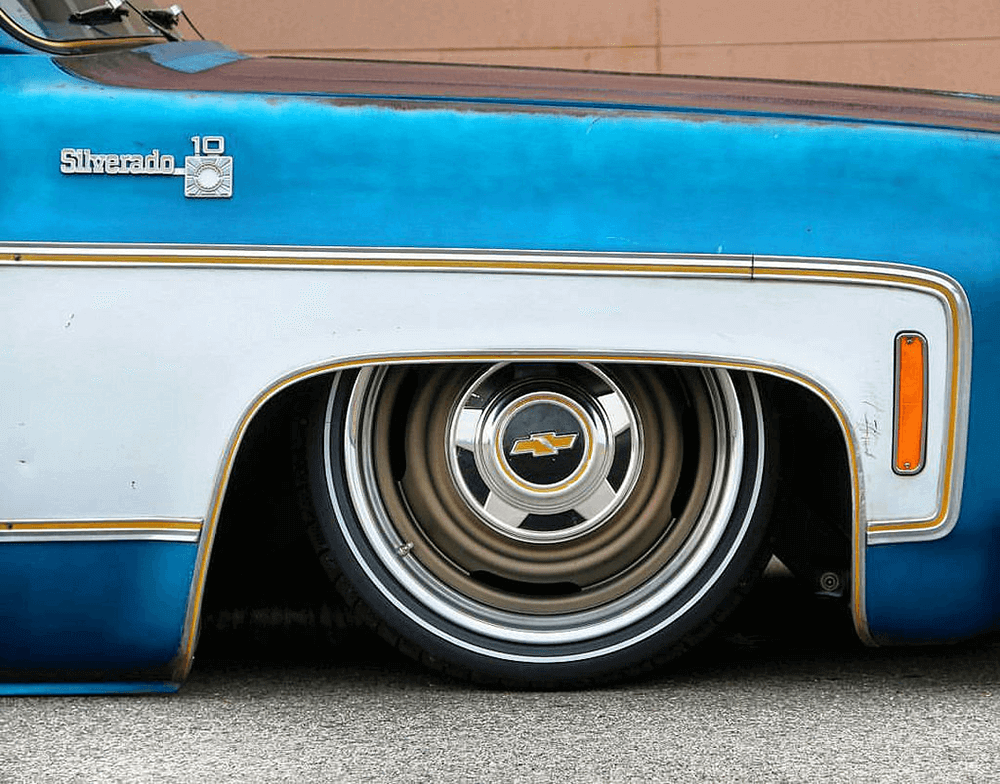
Fitting oversized steelie-type wheels with hubcaps has been a hot trend for quite a few years. This wheel style looks great on classic trucks because they look like the original wheels but in modern and larger sizes. You get the best of both worlds with big wheels that maintain the factory look of your classic truck. These wheels aren’t limited to old trucks either. We’ve seen them on newer trucks with great results.
The question is how do you get this look? There are several approaches and the biggest question you have to ask yourself is what cap style you want to run. There are many different options and once you’ve picked a particular hubcap, you can move on from there. Some want to run generic moon caps, while others prefer later dog-dish-style caps. The options are limitless.

Once you’ve selected a cap, decide which wheel you want. One of the most popular is a basic billet smoothie. There are many companies providing different wheels with a variety of contours. Another option is running GM transit wheels. Customarily, they’re only used when transporting modern trucks to dealerships, and then they’re returned or destroyed once the truck is fit with custom wheels. These work if you can find them, but you’ll be limited to 22 inches and they’re made for six-lug applications only.
One of the simplest options is from Coy’s wheels. It’s new C-33 wheel has a smooth look reminiscent of classic wheels in 18-22-inch sizes. Their best feature is their aluminum construction. They’re also an on-the-shelf item that can be purchased easily. If you go this route, you can search swapmeets for caps or turn to companies like Classic Industries for reproductions. Coy’s can mount them for you, or you can use a kit like the one available from Chad Terhar.
You can also finish off your wheels any way you want, including paint or powder-coating. This can be a little more difficult with patina-style vehicles because you’ll have to eyeball a color to match. For this story, we turned to New Year Metal Finishing. The staff specializes in custom wheel-and-tire combos. These guys are refinishing pros, and they were the perfect choice to powder-coat a set of C-33 wheels.
Speaking of wheel-and-tire combos, Toyo just released the third version of its performance truck tire. The Proxes ST III has a wider tread comprised of a silica-based compound that contributes to shorter stopping distances in wet conditions. Not only are they an all-season tire, they also come with a 40,000-mile warranty for extra peace of mind. With everything in hand, it was go time. Continue reading to see how the process went down.
Source:
Clipcaps by Chris Tahar
Instagram @Struggle_55
Quickier2@gmail.com
Coy’s
801.392.2639
Classic Industries
800.854.1280
New Year Metal Finishes
714.371.0703
Toyo Tires
800.442.8696
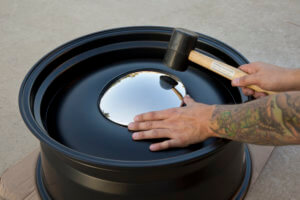
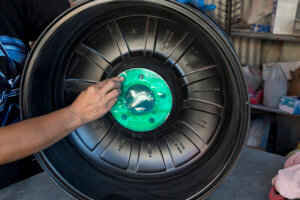
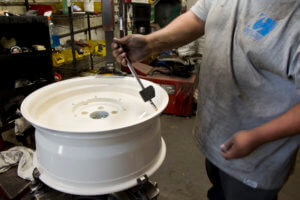
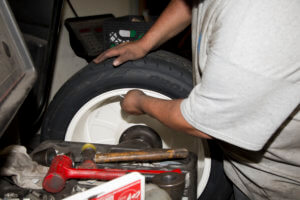
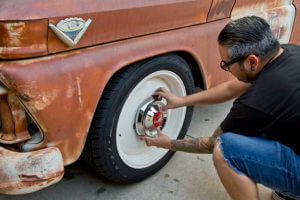
We started the process with a set of Coy’s 20×8.5 C-33 wheels with 4.75-inch backspacing with the standard black powder-coat. They were packaged with smooth 7.5-inch caps for a clean look. Installing these takes a few gentle taps using a rubber mallet.
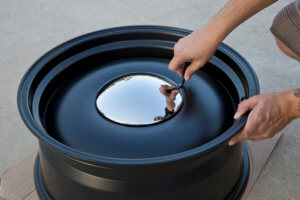
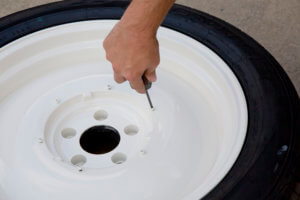
Pry the caps off using the provided plastic tool.
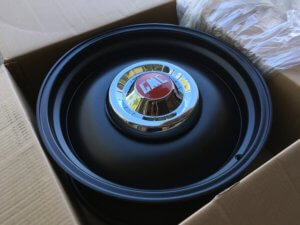
We wanted a more classic look and decided to fit a set of 1955-59 GMC caps (P/N CT26710) from Classic Industries. As you can see, they don’t attach easily to these wheels.

We used a set of custom clips to mount these caps. Many people make them and we found some from #Clipcaps by Chris Tahar. Though these were made to fit caps to transit wheels, they were a good base for our project.
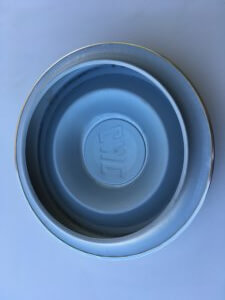
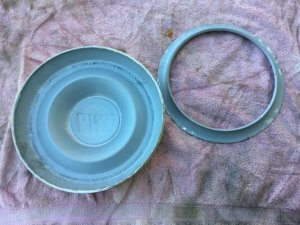
The back of these caps have an inner ring that prevents them from fitting wheels other than the originals.
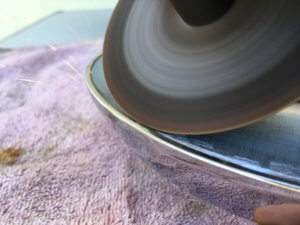
We started by cutting off the inner ring using a die grinder with a cutoff wheel. We cut up to the lip of the chrome outer, which leaves enough material for mounting.
We started by cutting off the inner ring using a die grinder with a cutoff wheel. We cut up to the lip of the chrome outer, which leaves enough material for mounting.
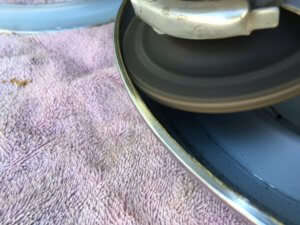
We used an angle grinder to smooth the jagged edges left behind from the cuts.
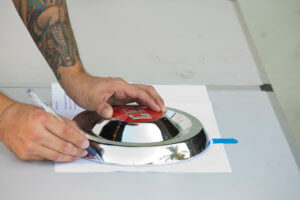
The clip kit comes with a template to mount 10.5-inch caps on transit wheels, but it can be used to mount caps to other wheels as well. First, we traced the caps and discovered they were 9.5 inches in diameter.

The clips were laid over the template to determine their spacing and new mounting points.

The holes for the clips need to be ¼-inch from the inner lip of the wheels, so we marked one spot as a base for the template.

Then, we poked some holes and used a felt pen to mark the clip location.

With the wheels marked for the mounting points, we used a punch as a guide to make the holes.
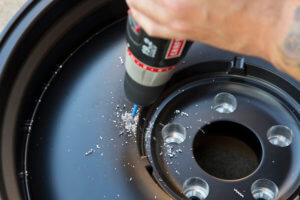
The provided bit was secured to our drill and we marked off an inch with tape as a stopping point. That should be plenty to fit the hardware for the clips.
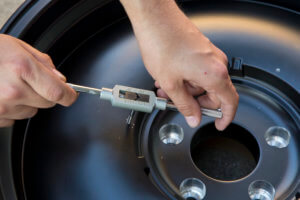
With the holes drilled out, they were threaded with the included pipe tap. A good tip is to turn the tap back out one-quarter turn for every half turn forward. Also, don’t go too far or you might break off the bit.
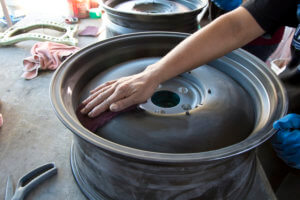
Since we wanted to match the color of the wheels to the truck, we turned to New Year Metal Finishing for powder-coating. The wheels were scuffed with scouring pads and an orbital sander using 320-grit sandpaper.
The mounting surface was covered in tape to keep it bare and help mate the wheels with the truck.
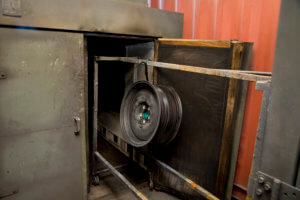
The wheels were wiped down and thrown in the oven for a few minutes to soften up the existing coating for better adhesion.
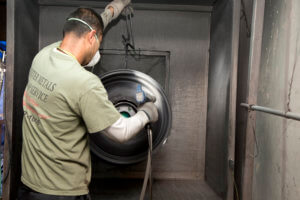
The wheels were hung and negatively charged before positively charged powder was sprayed on. The bolts for the clips were left on to prevent powder-coat from clogging up the holes.
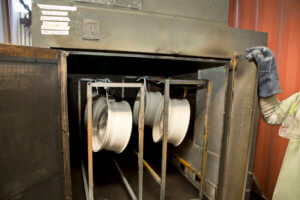
Once the wheels were coated in fresh powder, they were loaded in the oven for the material to harden.
Once the coating had baked for an hour, the wheels were unloaded and allowed to cool for 30 minutes. Then the valve stems were added.
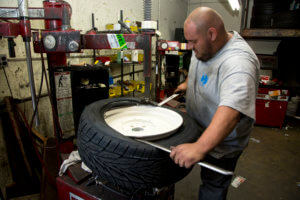
The Toyo ST III tires (255/50R20 front and 265/50R20 rear) were mounted and the tape on the backside was removed.
The tires were filled with air and the units were balanced with proper weight.
Once the wheels returned from New Year Metal Finishing, the bolts were removed. This was a bit tricky because the heads had been coated, which made it difficult for us to fit our tool.
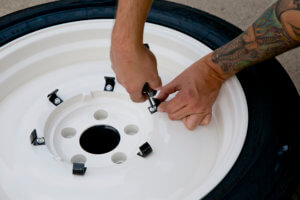
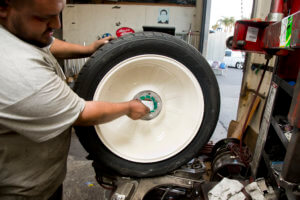
The clips were installed for the final fitment with the bolts and washers from the kit.
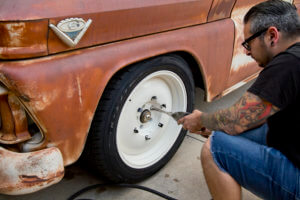
The wheels were bolted to the truck using the provided lug nuts.
Finally, the caps were simply pressed on to the wheels and the clips keep them in place.
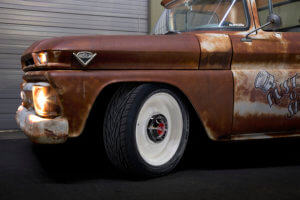
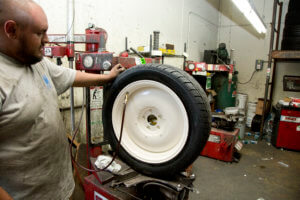
The process might have taken some time to configure, but as you can see, the results were well worth it. The Coy’s wheels had the look we were after, and the wheels are the perfect size with our 5×5-lug pattern, too. After some work to fit the caps from Classic Industries, they really topped it off well.
The Toyo Proxes STIII tires with modern engineering to handle the updated performance of this truck make it possible to use these wheels. The arrowhead tapers help maintain straight-line stability, while the directional shoulder blocks assist with braking and maintain a quiet ride. The multi-wave sipes combat irregular wear for longer life and a smooth ride. We actually had a set of bigger STII tires on the truck before and these new STIIIs provide better handling and a smoother ride. We were impressed with the new tires. Combined with the look of the wheels, this combo really did the trick for this truck.
What are the differences between 22×8 and 22×9 transport wheels?
When selecting transport wheels, it’s essential to understand the differences between the 22×8 and 22×9 sizes. Here’s a breakdown to help:
In summary, the choice between 22×8 and 22×9 wheels boils down to your specific needs:
By understanding these key differences, you can select the right wheels for your transport needs.
Are 22” transport wheels too big for a truck with a 5/7 drop?
When deciding whether 22” transport wheels will look too large on a truck with a 5/7 drop, there are several factors to consider.
Pros and Cons of 22” Wheels on a 5/7 Drop:
If 22” wheels seem too imposing for a 5/7 drop, you might consider switching to 20” wheels. They often strike a balance between aesthetics and functionality, offering a robust look without overwhelming the truck’s profile.
Ultimately, whether 22” transport wheels are too big for a truck with a 5/7 drop largely depends on personal taste and how the truck will be used. Reviewing images of similar setups and seeking community advice can help in making a more informed decision. If unsure, starting with 20” wheels might provide a more universally appealing and practical solution.
Does anyone have pictures of 22” transport wheels on trucks with a 5/7 drop?
Hey everyone,
I’ve recently acquired a set of 22″ transport wheels and I’m curious to see how they look on trucks with a 5/7 drop. Specifically, I’m interested in how these wheels look on trucks that aren’t bagged, as the few images I’ve come across online mostly feature bagged setups.
If you have any photos of your trucks with this setup, please share! I want to make sure the wheels won’t appear too large for my truck. If they do, I might consider trading them for a set of 20″ wheels or even selling them.
Thanks in advance for your help!
Any insights or images would be greatly appreciated!
What are the implications of using transport wheels that are not DOT approved?
When it comes to vehicle modifications and maintenance, using components that do not meet Department of Transportation (DOT) standards can lead to a range of serious issues. Below, we explore the key implications of using transport wheels that lack DOT approval.
Using transport wheels that are not DOT approved can lead to legal and financial burdens, safety risks, and reliability issues. It’s crucial to always opt for DOT-approved components to ensure compliance, safety, and peace of mind while driving.
What are the regulations and requirements for wheels to be road legal according to DOT standards?
To ensure wheels meet the Department of Transportation (DOT) standards for road legality, there are several key requirements they must fulfill. These standards exist to maintain safety and consistency across all vehicles used on public roads.
By including these elements, wheels ensure they are not only compliant with legal standards but also safe for vehicle operators on the road. These markings must be easily visible and legible to maintain effectiveness and reliability.
Why might wheels come with stickers indicating they are not for road use despite having DOT markings?
When you purchase wheels that come with stickers stating “not for road use” despite having DOT (Department of Transportation) markings, it can create confusion. Here’s a breakdown of why this happens:
Many manufacturers affix these stickers to limit their liability. Even if the wheels meet DOT standards, the manufacturer may still advise against road use to mitigate any legal repercussions should an issue arise when the wheels are installed.
Some wheels are specifically designed for off-road or competition use. Although they bear the DOT mark indicating they meet certain safety criteria, their optimal performance or durability might only be guaranteed in non-road settings.
Wheels marked with such stickers might have specifications that, while technically compliant, aren’t ideal for regular street driving. For example, they might not handle the stress of potholes or rough pavements as well as wheels designed explicitly for urban use.
DOT markings indicate that a wheel has passed certain safety tests. However, real-world conditions can vary greatly. The “not for road use” sticker might be an extra precaution due to variations in factors like load ratings or braking performance under different conditions.
When choosing wheels, always consider your specific use case and consult with a professional to ensure you’re making the safest choice.
Are transport wheels DOT approved for road use?
Transport wheels are commonly used for moving vehicles during shipping or within repair facilities. However, there’s often confusion about whether these wheels meet Department of Transportation (DOT) requirements for road use.
Transport wheels are not DOT approved for road use. They lack the necessary part number identification, are meant to be returned as cores, and are explicitly marked to indicate they should not be used on public roads. Always ensure your wheels meet DOT standards to avoid legal issues and potential safety risks.
What specific information should be marked on a rim according to DOT regulation 571.120?
The Department of Transportation (DOT) mandates specific markings on each tire’s rim or wheel disc for identification and compliance purposes. Here are the key details that should be marked on the rim:
These markings help verify the rim’s compliance with safety standards and regulatory requirements.
What DOT markings should be present on wheels to indicate approval?
To ensure compliance with the Department of Transportation (DOT) standards, wheels must feature specific markings. These markings provide crucial information for identification and safety purposes. According to DOT regulation 571.120, here are the details that must be present:
These markings not only confirm the wheel’s compliance with safety standards but also provide essential information for maintenance and replacement. Make sure to check for these markings when selecting or inspecting wheels to ensure they meet DOT approval.
What should one consider when deciding between 20 inch and 22 inch wheels for a truck?
These work if you can find them, but you’ll be limited to 22 inches and they’re made for six-lug applications only. When deciding between 20 inch and 22 inch wheels for your truck, it’s essential to consider how they’ll look and perform. I picked up a set of 22” transport wheels and was curious about how they’d fit on my truck with a 5/7 drop.
After some research, I found a few pictures online. However, many of them were on bagged trucks, which can affect the overall appearance. If you’re worried about the wheels looking too big, you might want to compare them visually first.
Here are some considerations:
So, while 22 inch wheels are a viable option, make sure they align with your visual and performance expectations.


We use cookies to enhance your browsing experience, serve personalized ads or content, and analyze our traffic. By clicking "Accept All", you consent to our use of cookies. Visit our Cookie Policy for more info.


Share Link