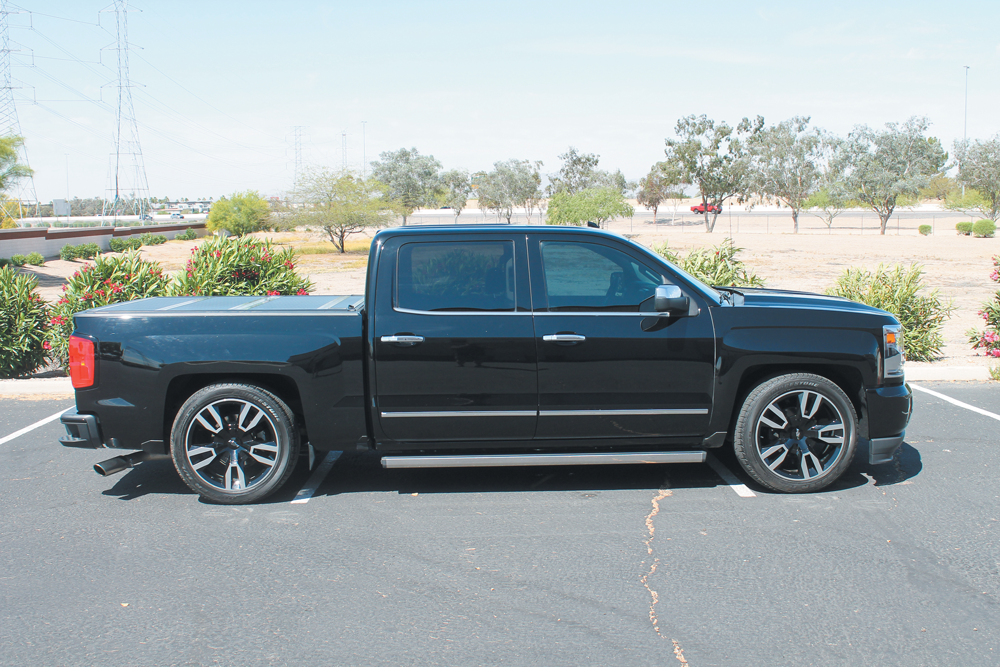
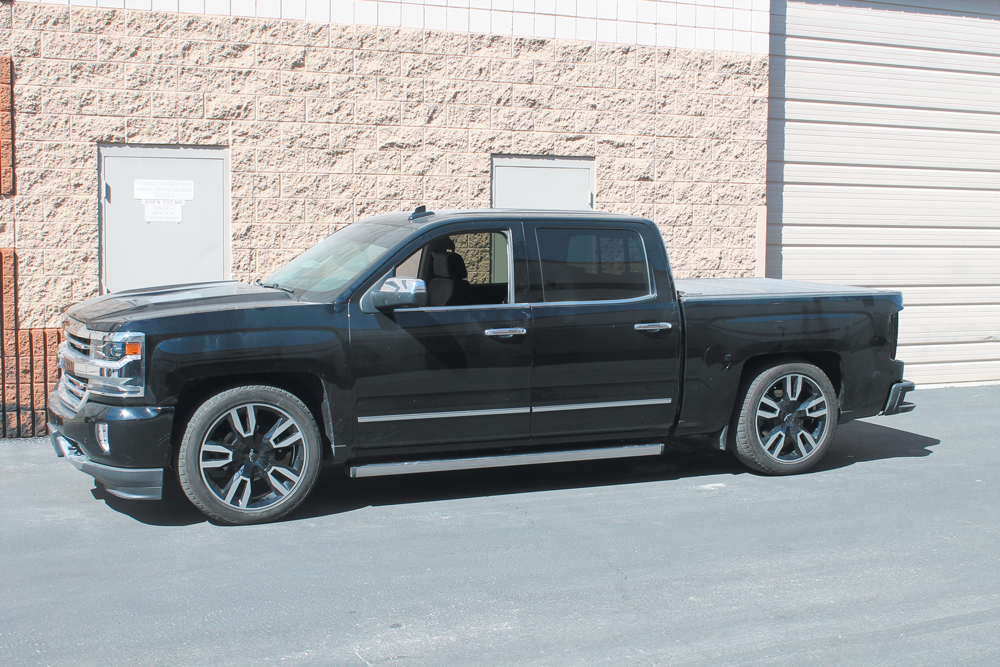
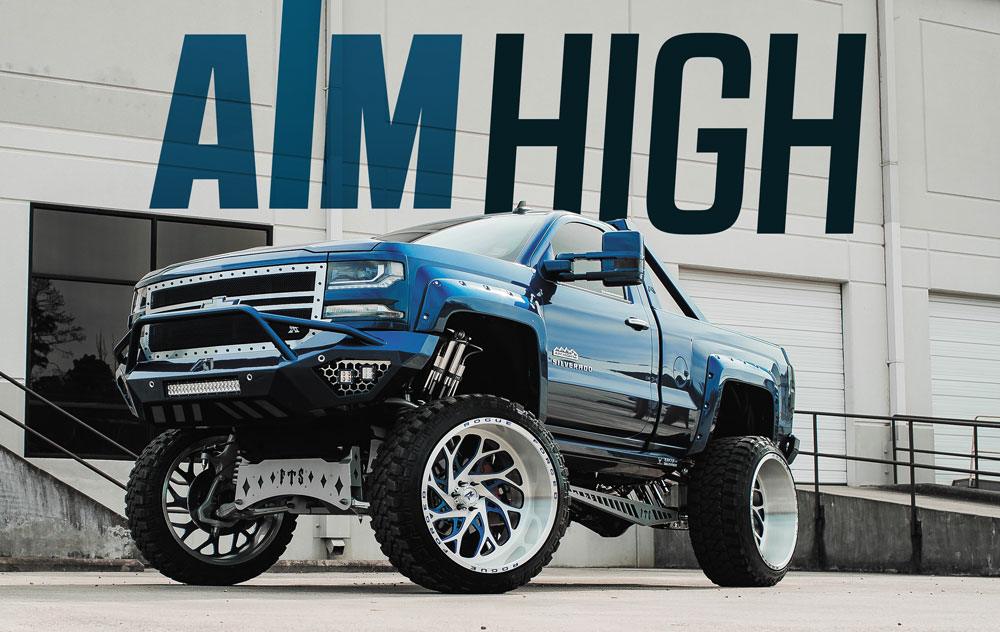
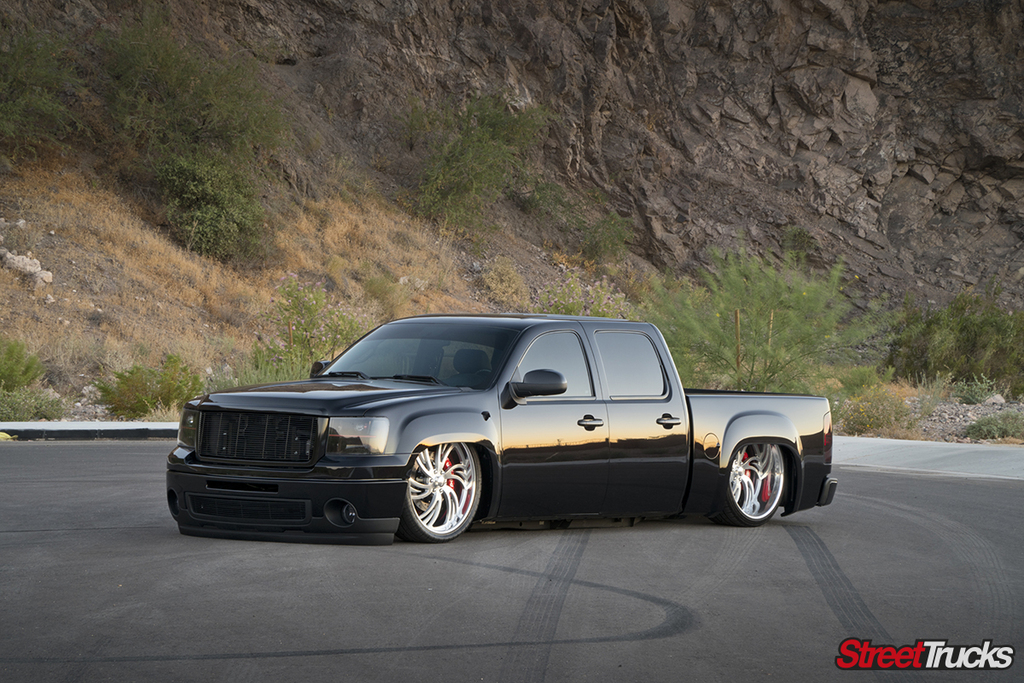
When considering a lowering kit for your newer Chevy Silverado, you’ll find a handful of options out there. There are different companies, different lowering heights, adjustable kits and even different parts depending on which trim level your truck is. Most companies also offer the parts individually, so you can customize your lowering job and get creative with parts combinations to get your desired results. In our case, we had a four-wheel-drive ’17 Silverado and wanted it to achieve a typical 4/6 drop.
As stated, there are several ways to get these trucks lowered. We wanted to try and get this job done with ultimate ride quality in mind. To do this, we had to get creative with the parts we would use. After making a phone call to Rob over at Suspension Superstore, we were confident we’d be able to accomplish the 4/6 drop while maintaining all the stock springs to keep the truck riding as close to factory as possible.
Rob recommended the use of MaxTrac Suspension products and set us up with everything we’d need. We decided to utilize adjustable struts that can be set anywhere from a 0-inch drop to a 3-inch drop. We paired those with a 2-inch drop spindle up front. To achieve our desired drop out back we went with a flip kit. The flip kit is also adjustable drop because it comes with new rear shackle mounts that will yield either a 5- or 6-inch drop. Instead of grabbing a set of lowered height shocks, we picked up a set of shock extenders so we can utilize the factory shocks. We also decided to add an airbag assist kit to the rear since this truck will occasionally haul around a trailer.
Since this truck is a 4WD version, we had to do a couple extra steps up front when installing the lowering kit. We will explain these steps during the installation. Follow along with the captions on the photos, and let’s get started!
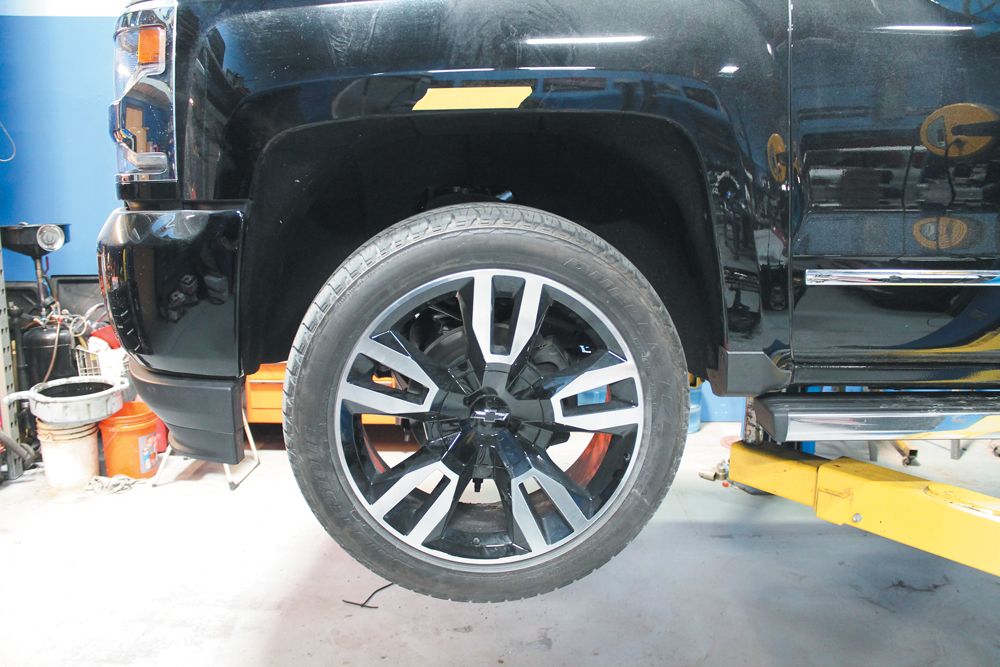
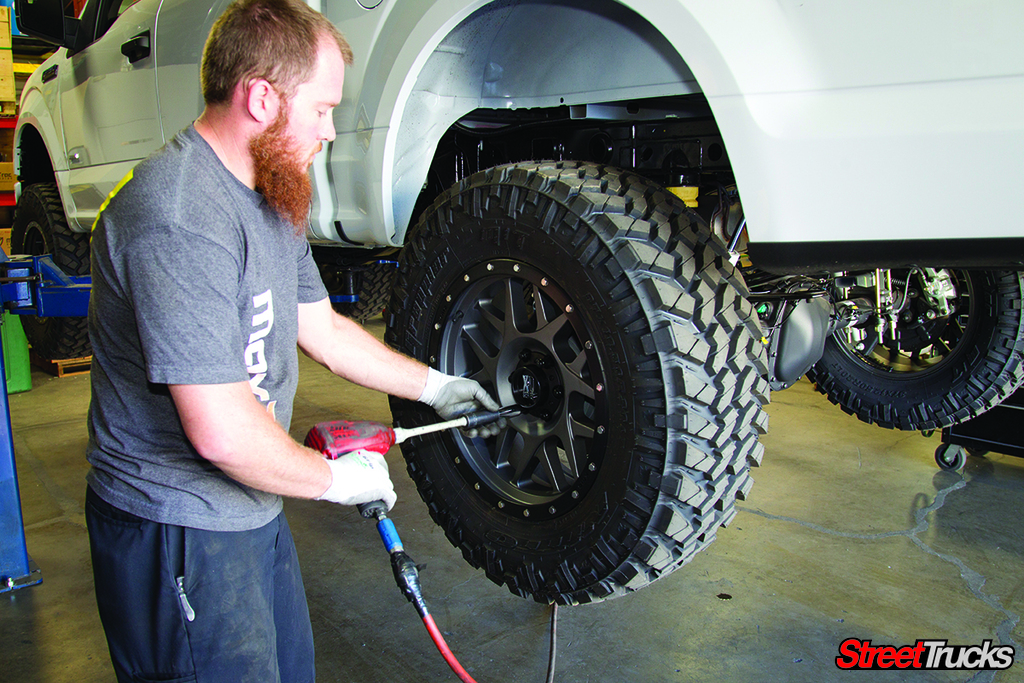
We started on this ’17 Chevy Silverado 1500 Crew Cab by getting it on the lift and removing the upgraded 22-inch factory wheels. You’ll notice the yellow piece of tape above the fender opening. We like to measure each corner of the vehicle to see where we actually end up after the lowering kit is installed. We stick the tape to the fender and record the “before” measurements for reference.
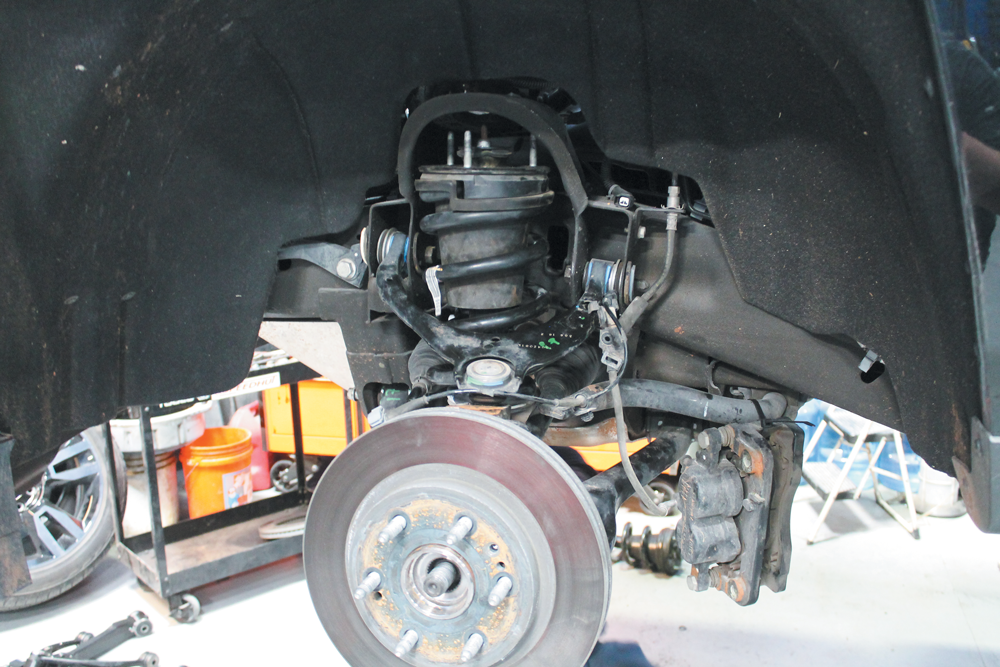
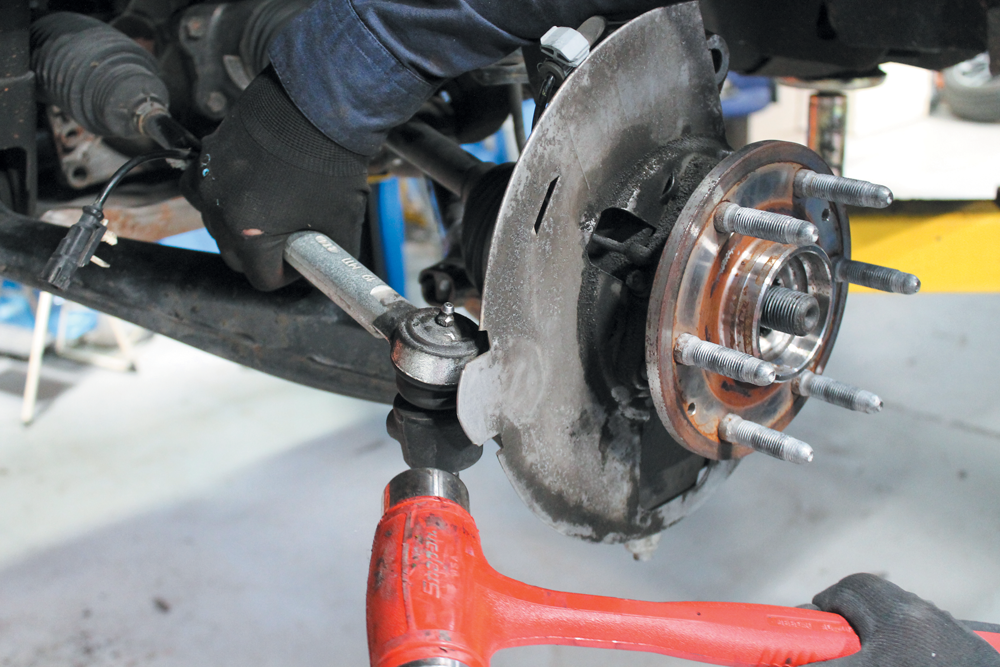
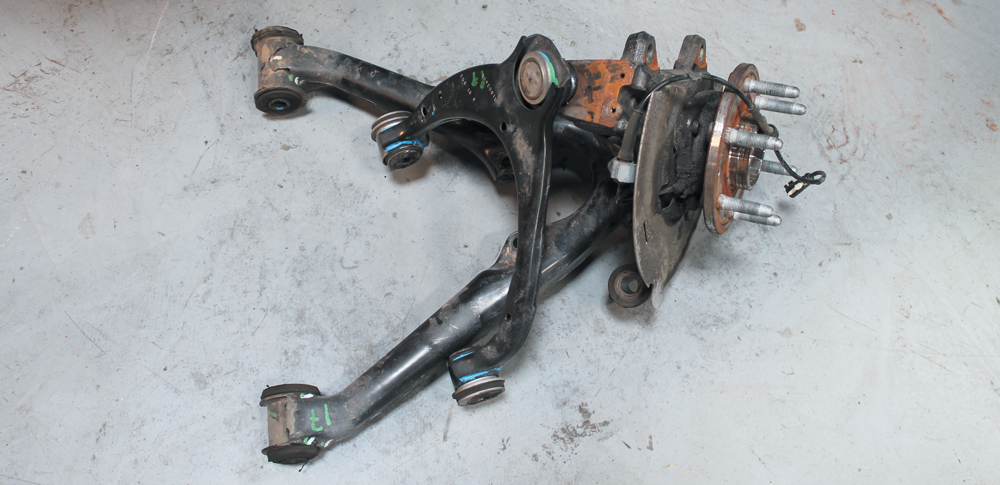
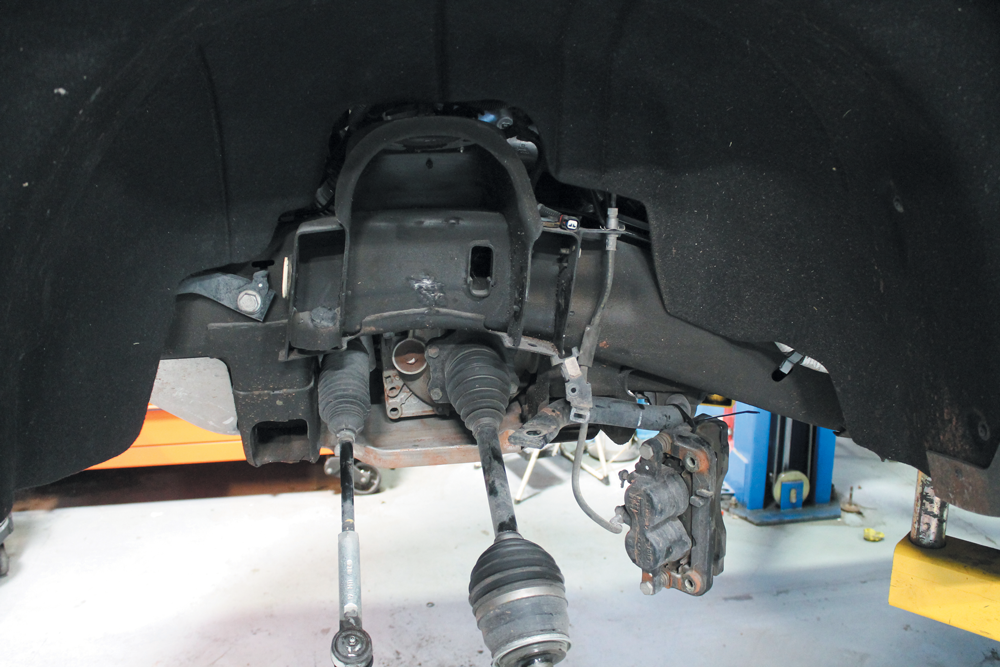
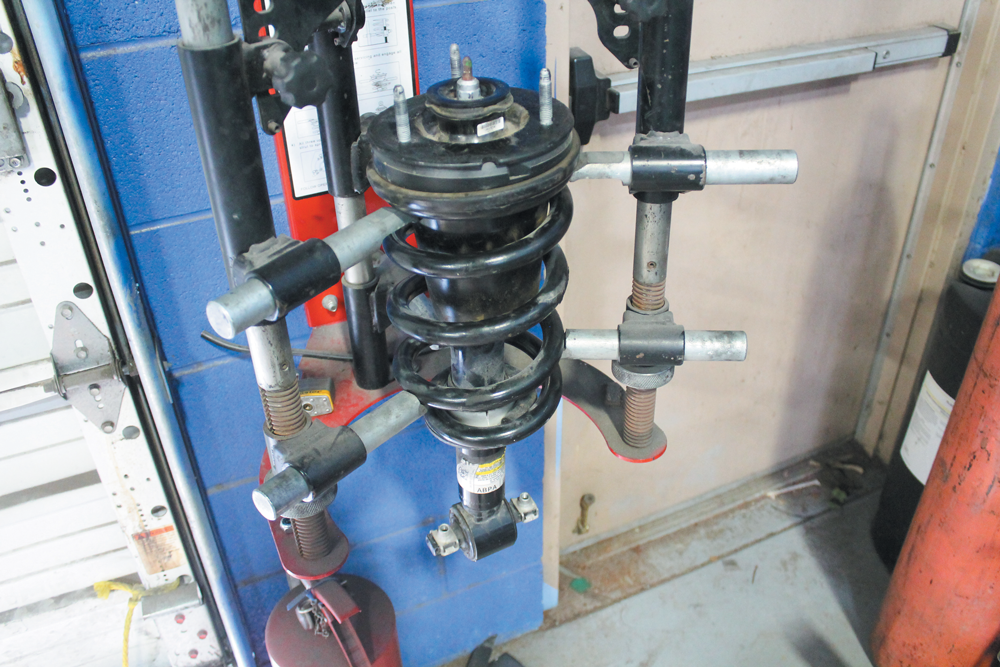
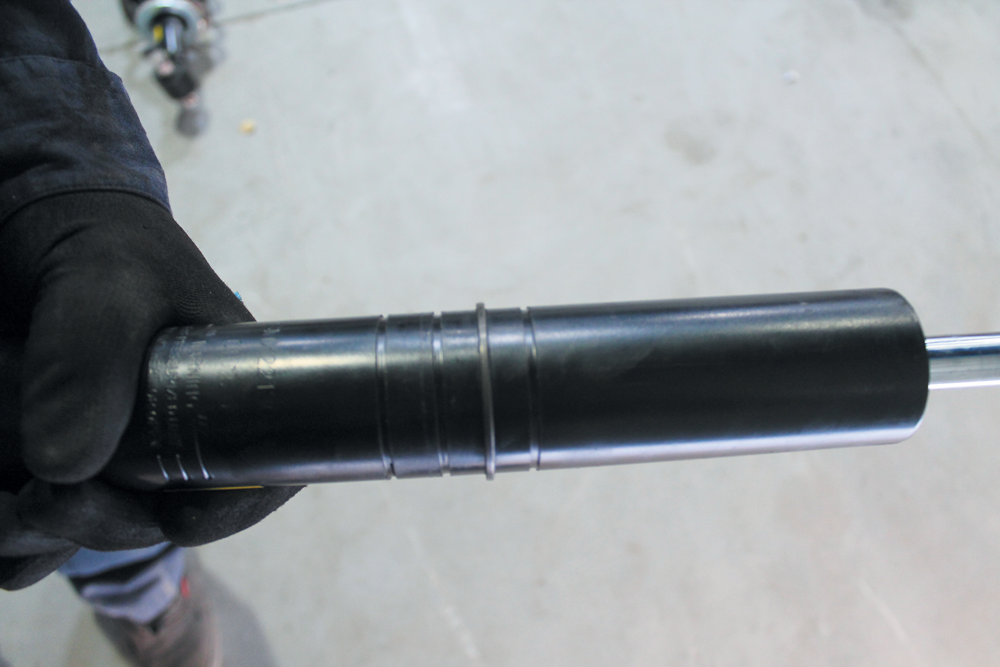
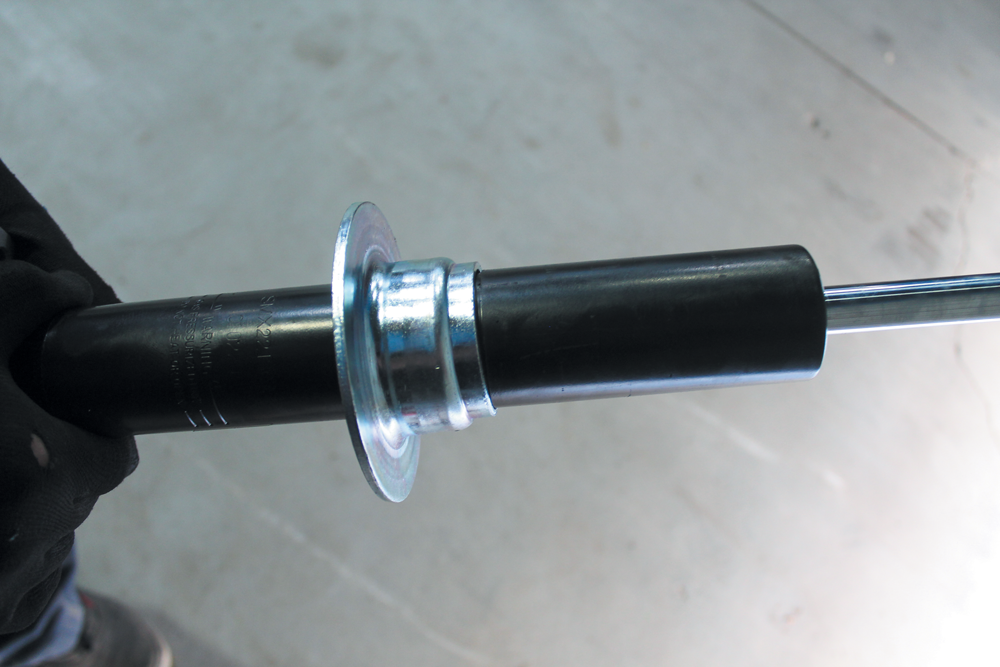
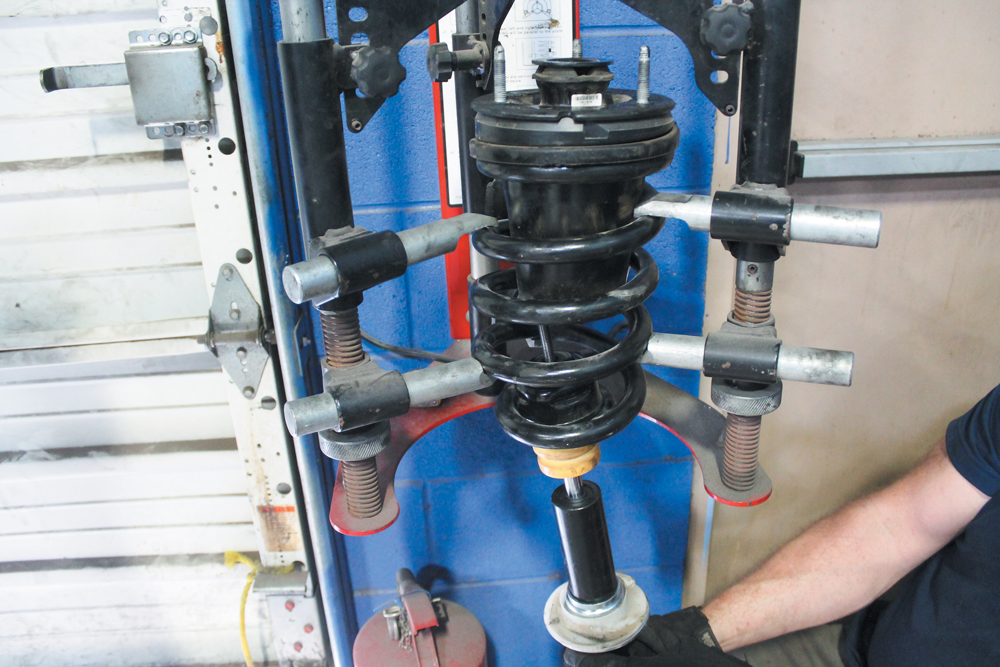
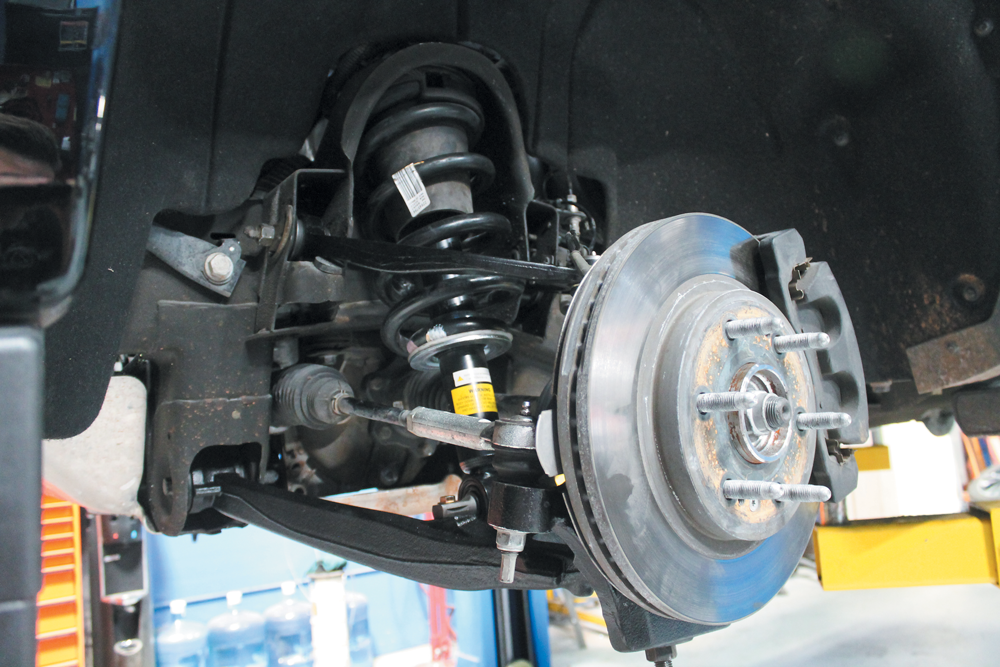
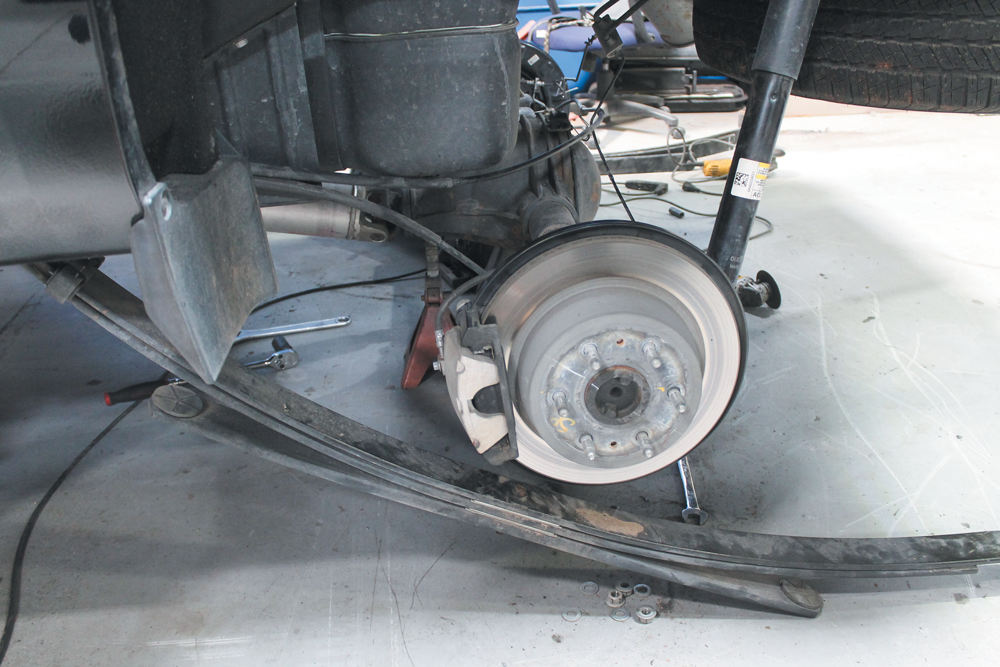
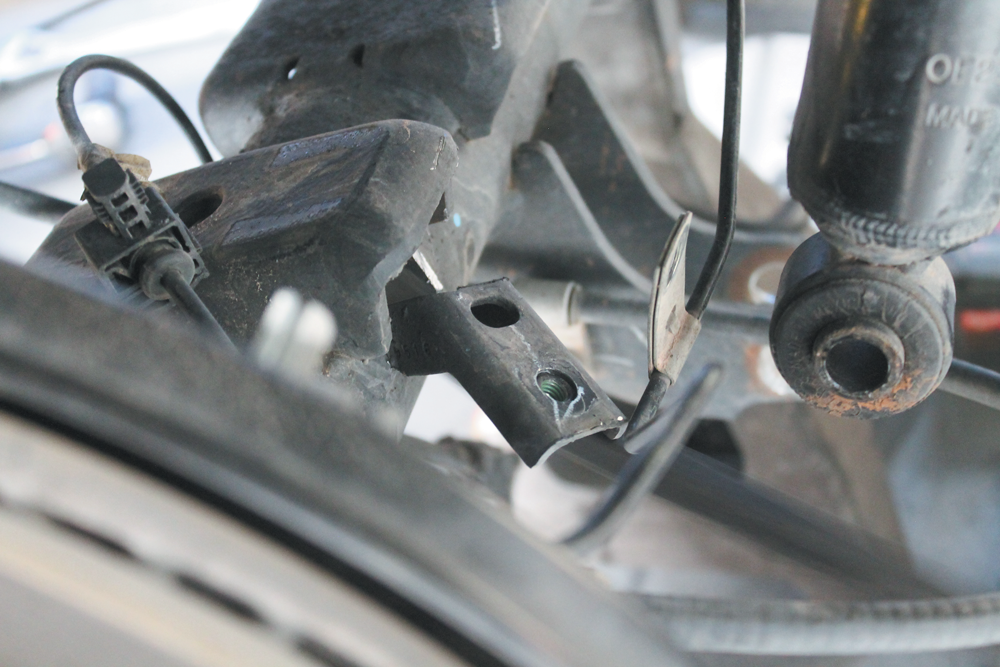
After removing the wheel, we started disassembling the factory front suspension. The factory strut was first to be removed from the truck. There are three bolts that hold the top of the strut and two bolts securing it to the lower control arm.The brake caliper was then removed and held to the truck with a thick zip tie. When doing this you really don’t want the heavy brake caliper to hang by the hose, so finding a temporary home for it during the install is good practice.Removing the brake rotor required backing out a single Torx head bolt. Then the caliper can be set aside; this will be going back on the truck during reassembly.A step that is unique to this job because it is a 4WD truck is the removal of the axle nut.With the tie rod nut removed, we used a hammer to free the tie rod from the spindle. A common mistake that people make when doing a job like this at home is hitting the tie rod. A couple good whacks with a heavy hammer on the spindle itself will free the tie rod. Never hit the tie rod itself. It will damage the tie rod and it won’t help free it anyway.Another unique step to the particular job is the removal of the stock control arms. Because this truck is a 4WD, the spindles are slightly different and the factory 2017 control arms will not fit the drop spindles.Rather than freeing the stock spindles from the control arms first, we just removed the entire suspension at once.We will be reusing the factory 4WD hub unit, so the three bolts holding it to the factory spindle were removed and we set the hub aside for later. The control arms and spindles headed to the scrap pile.Here’s a look at what is left of the front suspension on the truck: just the front axle and the tie rod. Now we can start swapping to the new parts.Luckily for us, we have a nice wall mounted coil spring compressor to use. If you don’t have one, most parts stores will rent you a version of a spring compressor that you could use to get the job done. However, these wall mounted ones make the job pretty simple.As we stated in the intro paragraphs, we are using an adjustable front strut to help us get the front of the truck lowered. These MaxTrac struts (Part #221303) can be adjusted from 0 to 3 inches of drop. Each grove in the shock accounts for a 1-inch increment. The C-clip is on the 1-inch drop in this photo, but we ended up moving it to the 2-inch drop grove.
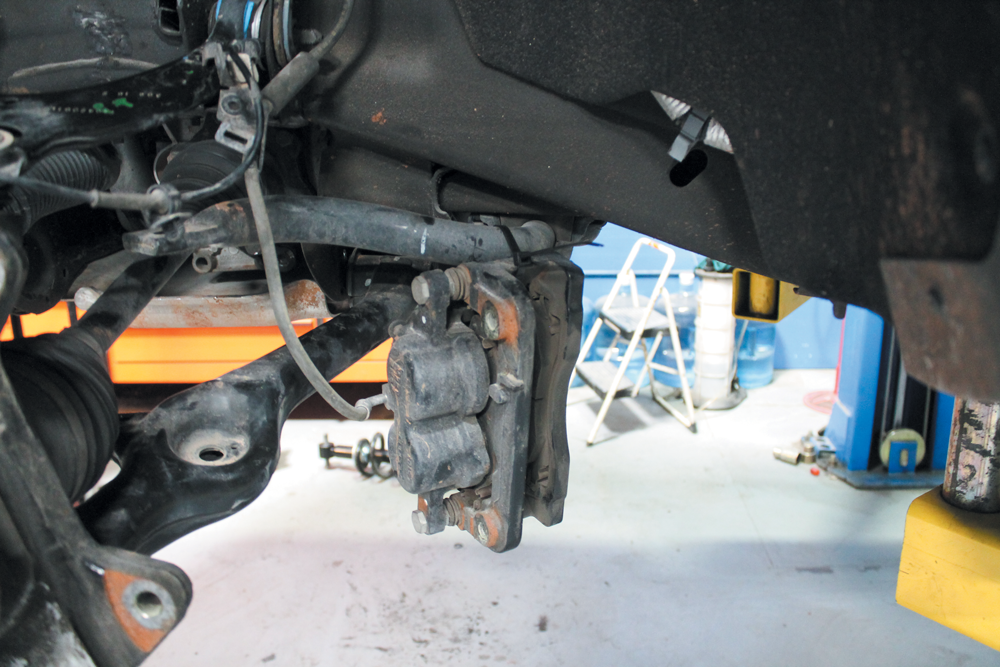
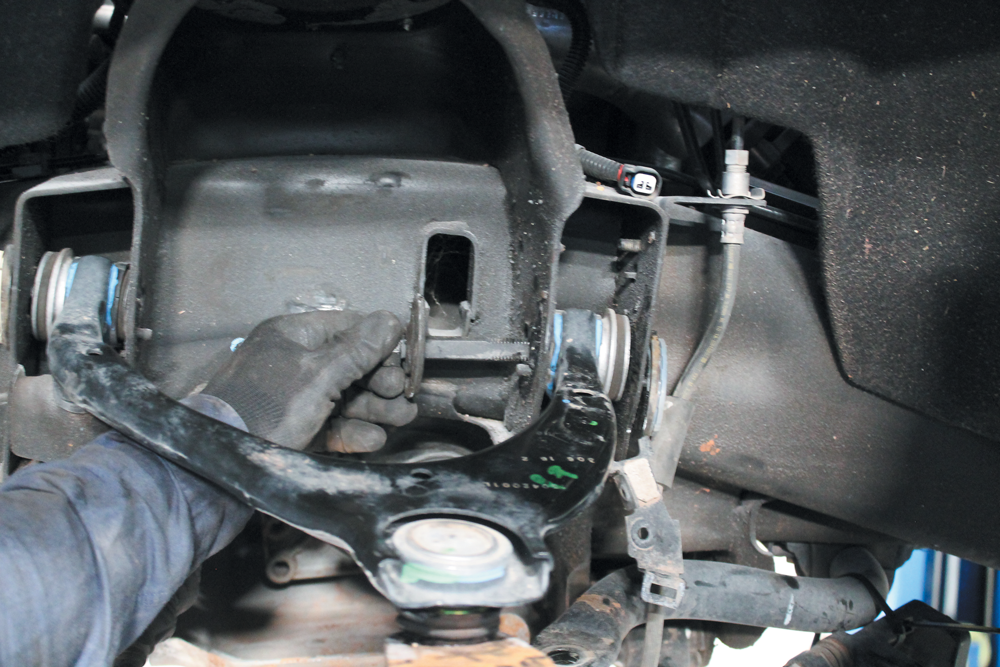
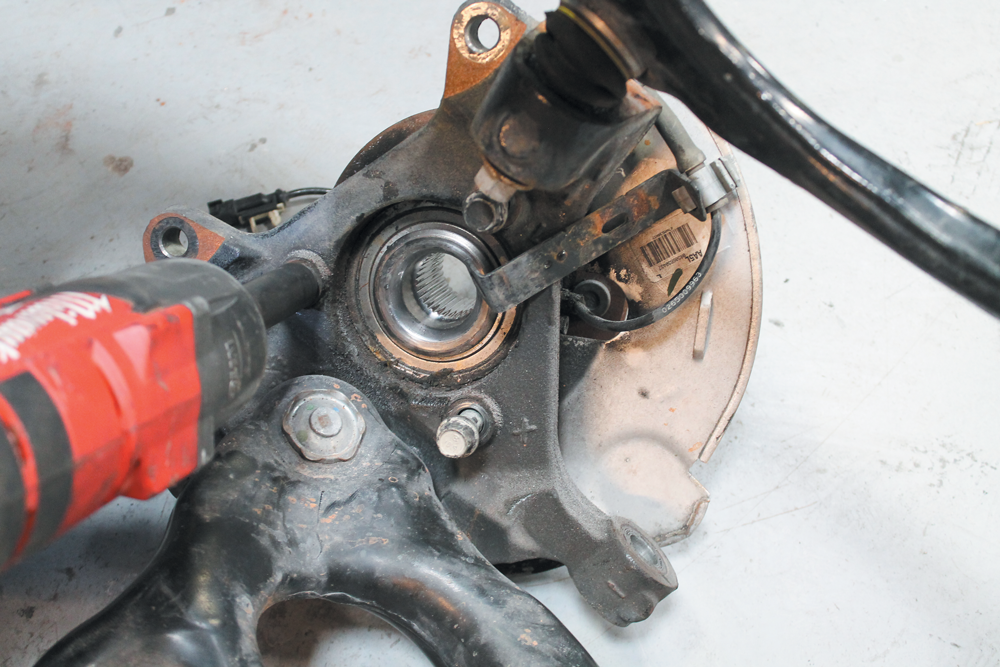
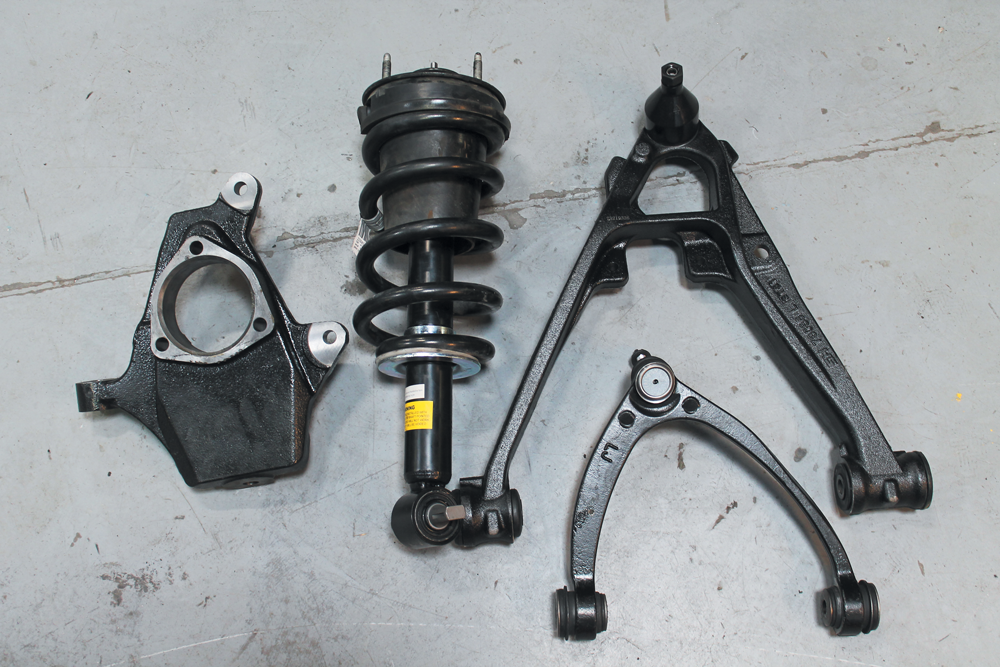
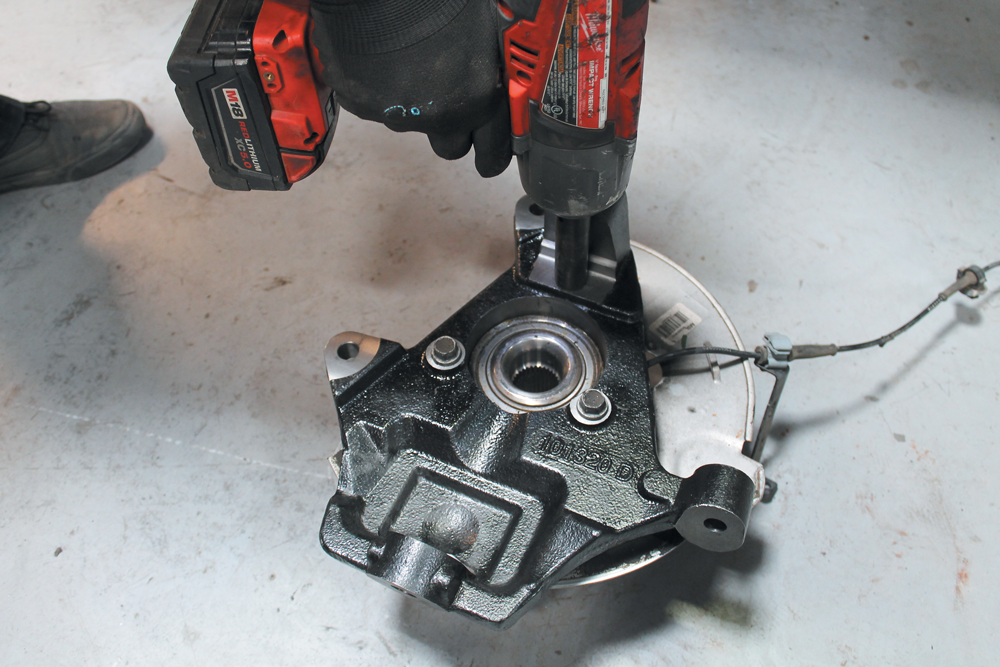
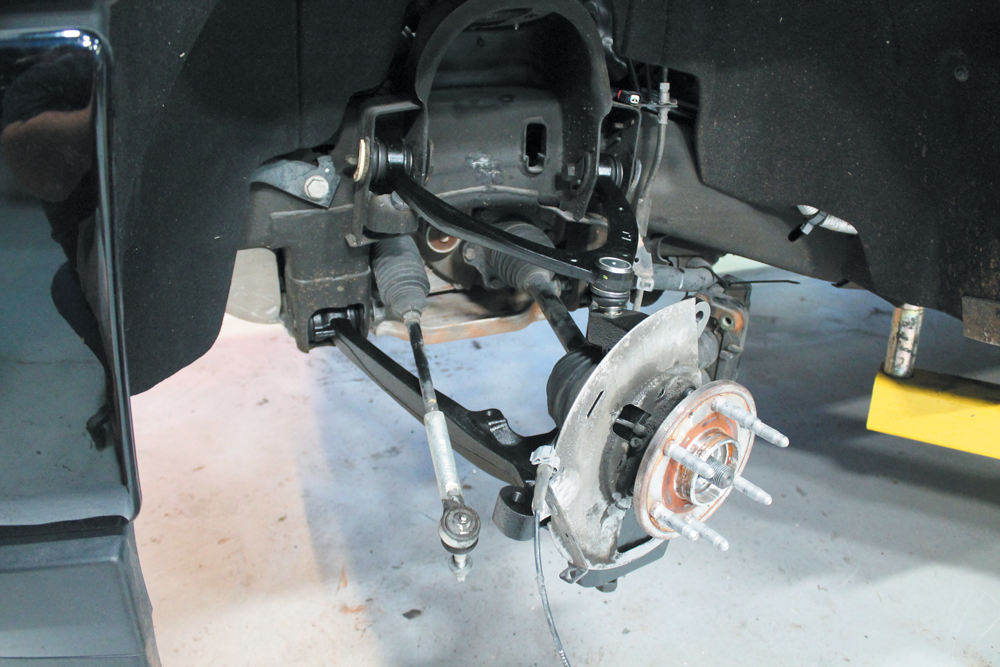
Once we had the C-clip where we wanted it, we reassembled the strut assembly. First, we slid the lower coil spring mount over the strut, which rests on the C-clip. Then we trimmed the factory bump stop to allow for a bit more travel. Finally, the new strut was slid back into the factory spring and attached to the factory upper spring mount with the new hardware provided with the strut.In this photo we have the new MaxTrac 2-inch drop spindle (Part # 101320), the newly assembled coil spring/strut combo, and the new Moog control arms we picked up from our local parts store. To make all this work, we swapped the upper and lower control arms from the 2017 versions to the 2010 versions. So, if you were to order these from the parts store, you’d want to order them for a 2010. This way we can utilize the drop spindle needed for the lowering job. There is another way to do this without buying new control arms. You could also do a drop coil spring on the drop strut and keep the stock control arms. Doing it this way you will max out the alignment adjusters and possibly not be able to get the alignment within spec. That is one reason we choose to do the job the way we are.Moving on, let’s start putting the front suspension back in the truck. This process is pretty quick, since it is just the reverse of what we just removed. We began by reinstalling the factory 4WD hub onto the new drop spindle.Next, the new upper and lower control arms were installed into the factory locations with the factory hardware. Following that we installed the new spindle assembly onto the control arms.The factory brake rotor and caliper then went onto the new spindle. The factory outer tie rod fits perfectly into the new spindle, but it will need to be adjusted once we get both sides done and the truck back on the ground.Reinstalling the wheel is the last step of the front suspension. Along with the wheel, we made sure all the hardware on the suspension is torqued properly before it was finalized.Since we are using the lift in the shop, the rearend was already off the ground so we began by removing the rear wheels.
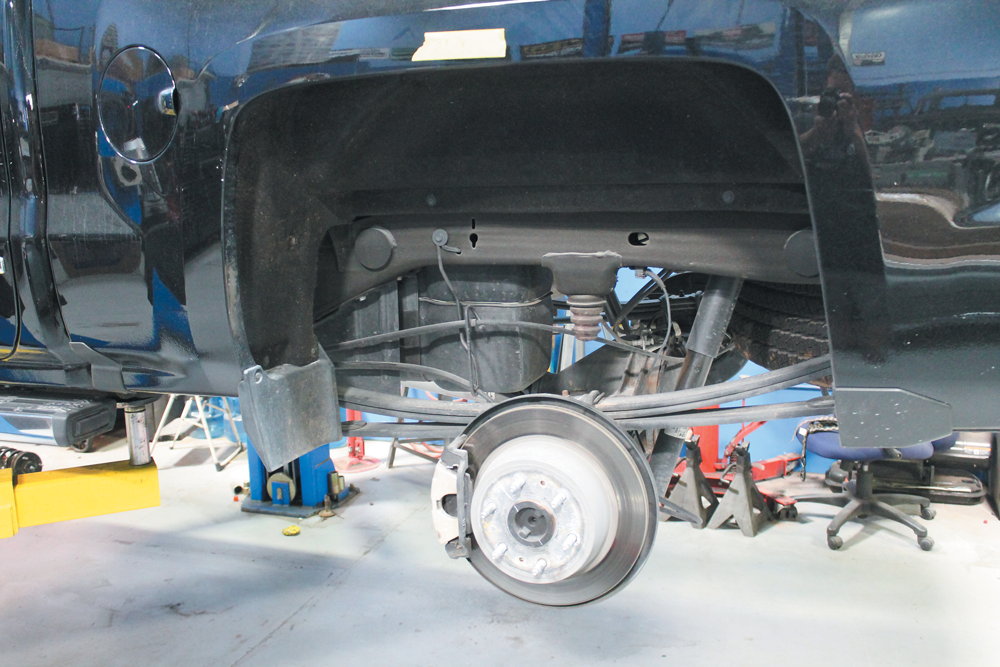
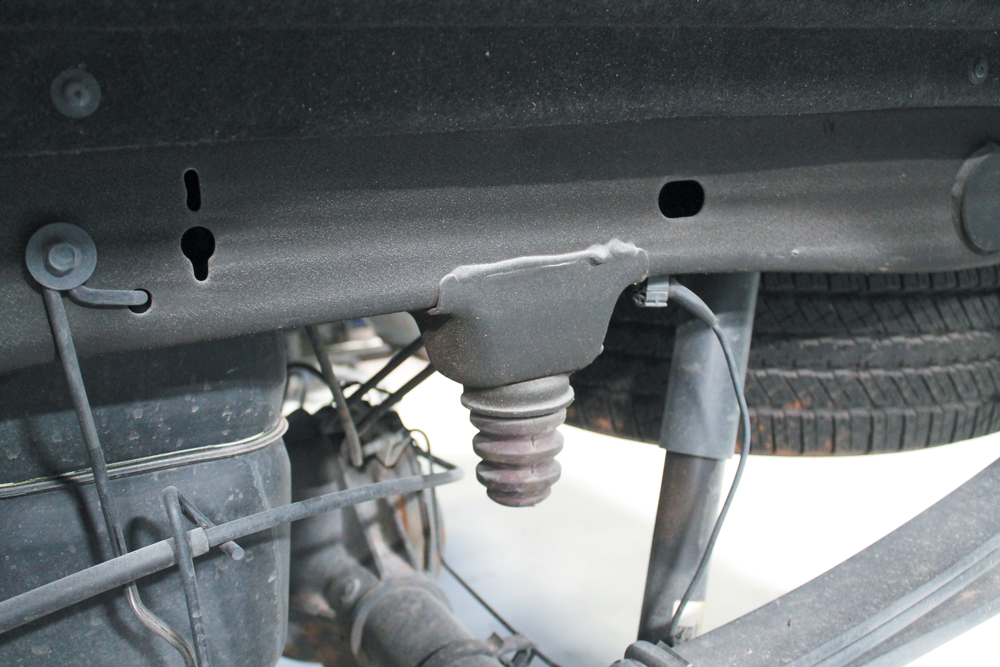
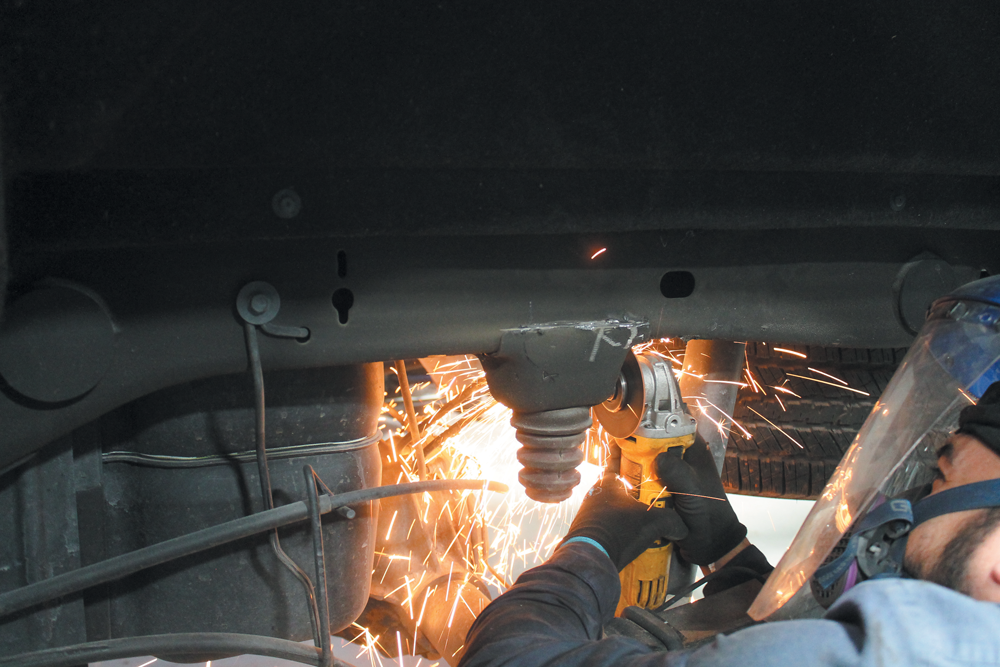
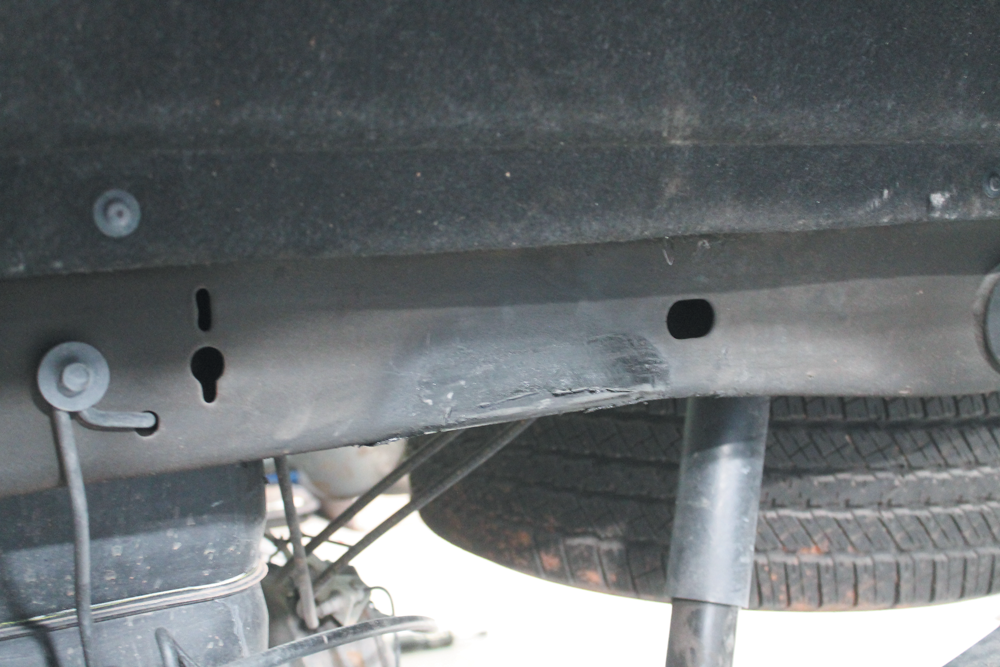
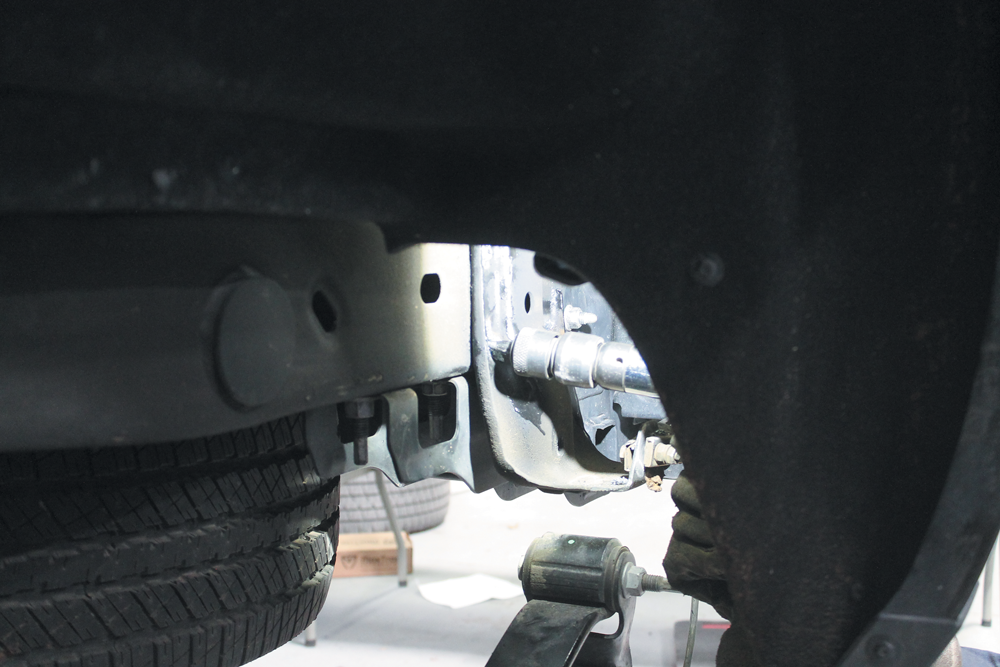
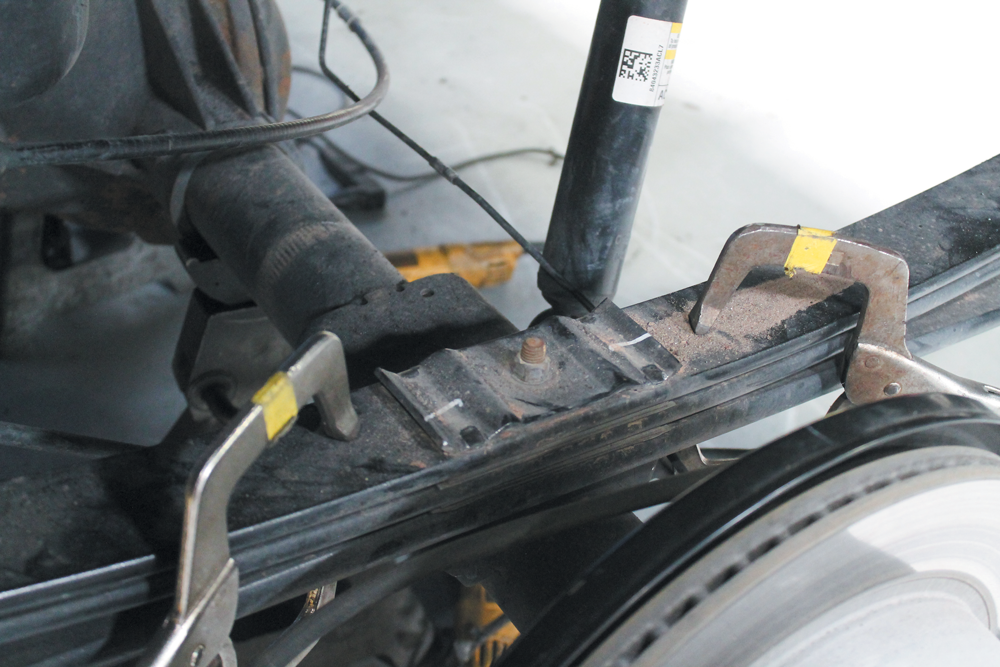
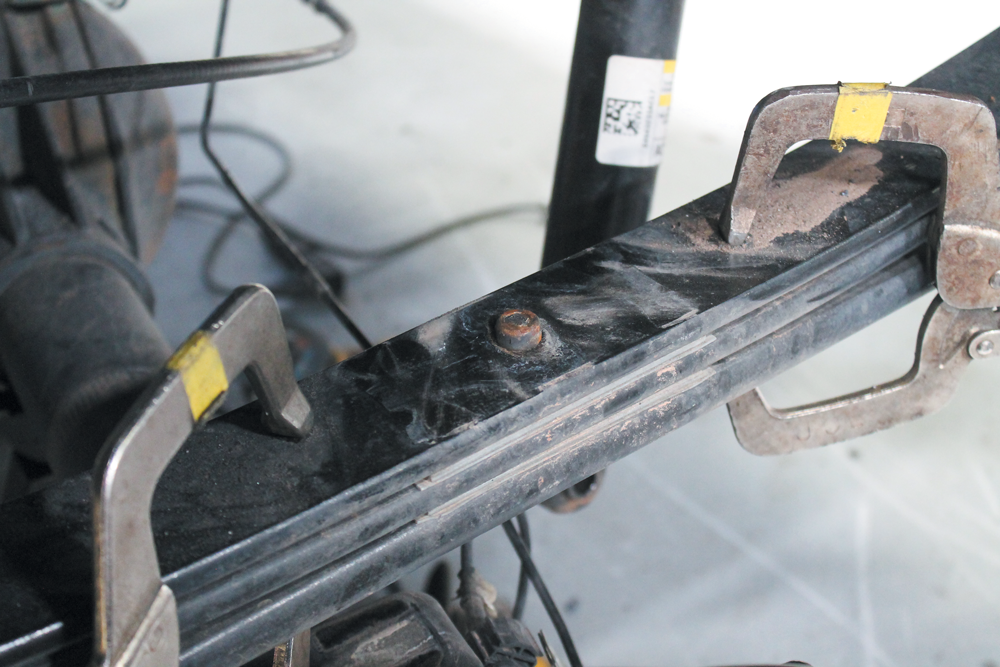
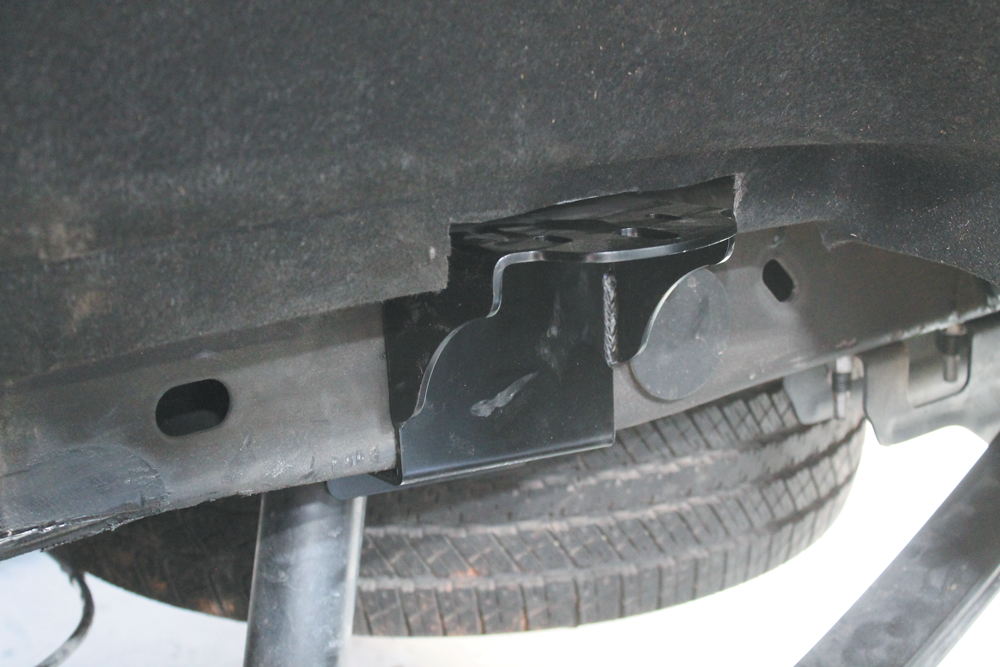
Our first task on the rear suspension was to remove the factory bump stop mounts. On these trucks there is a rather large mount that is welded to the frame rail. To remove it we broke out the 4.5-inch grinder with a cut off wheel attached to it. We scored the factory welds with the cut off wheel, making sure not to cut into the actual frame rails. We then used a chisel attachment on an air hammer to separate the bracket from the frame rail. Finally, we hit it with the sander and applied a quick shot of paint to keep the area from rusting.We could then turn our attention to the axle and getting it ready to be flipped. We started by disconnecting the bottom of the factory shock from the axle.
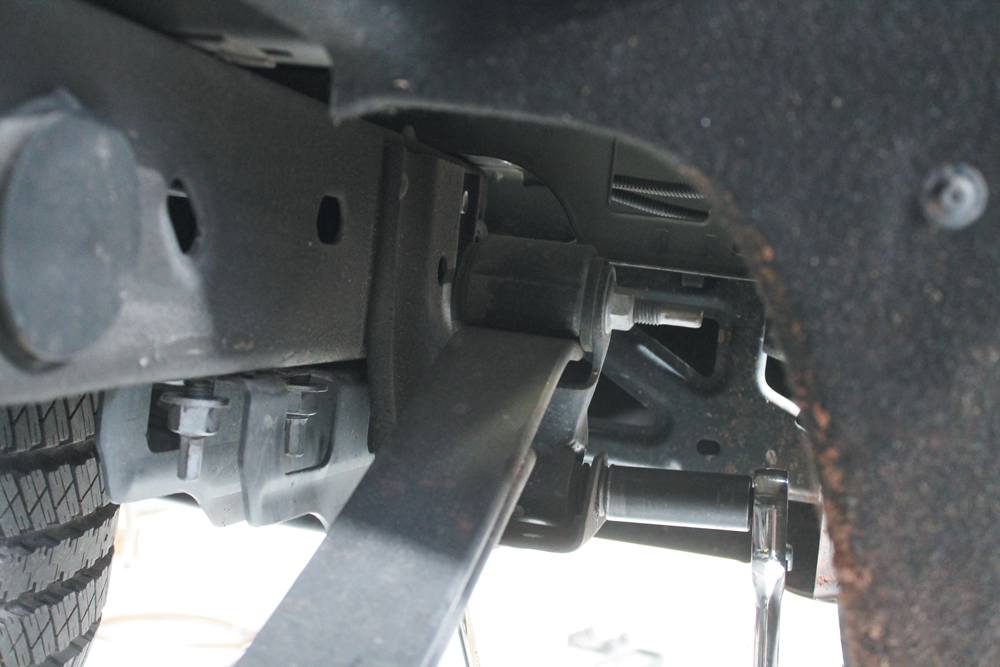
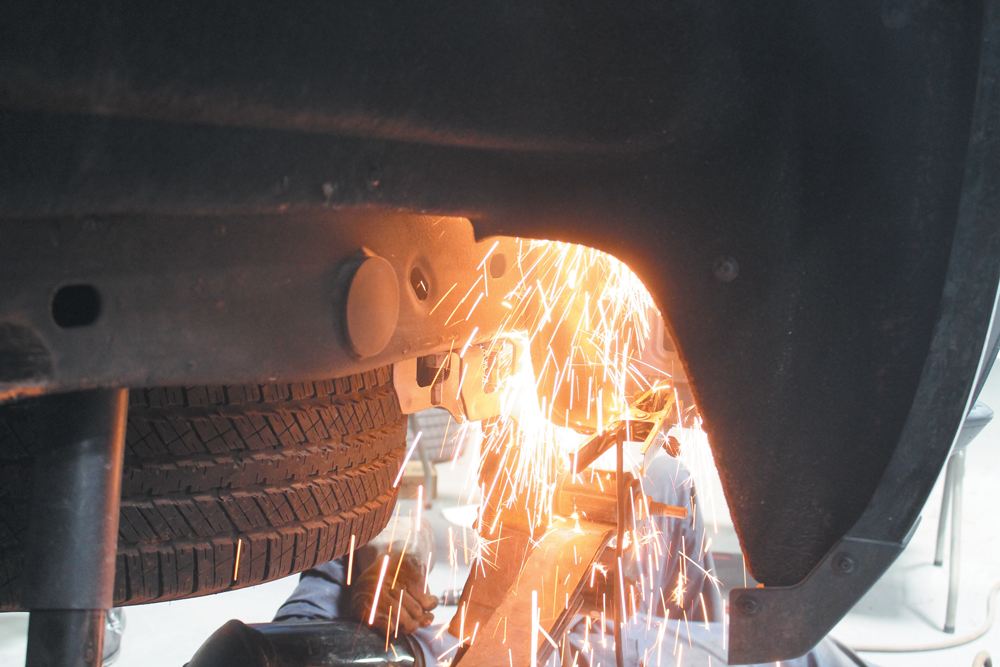
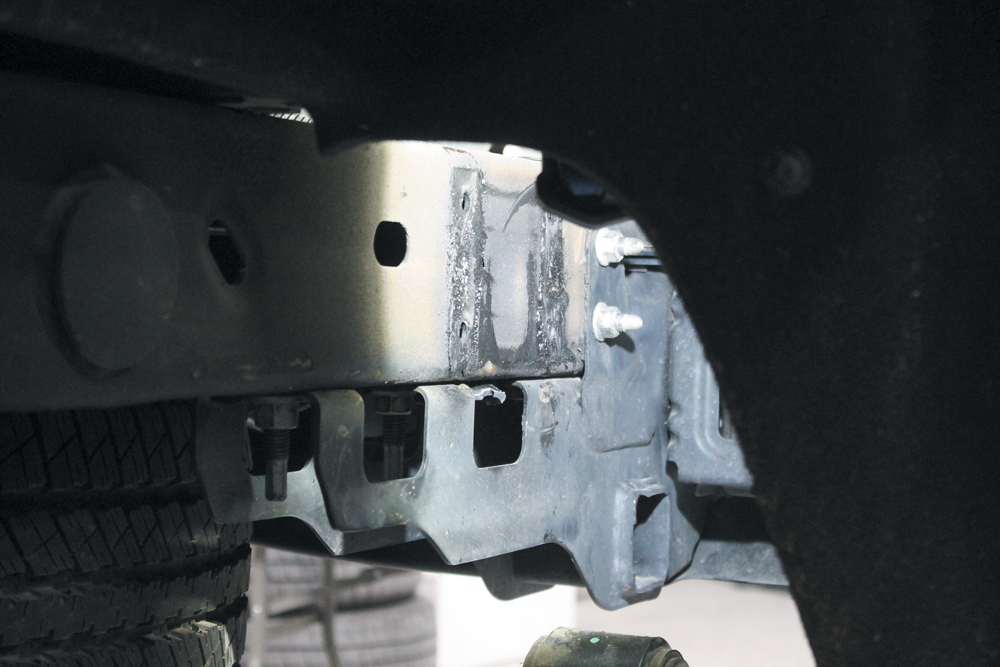
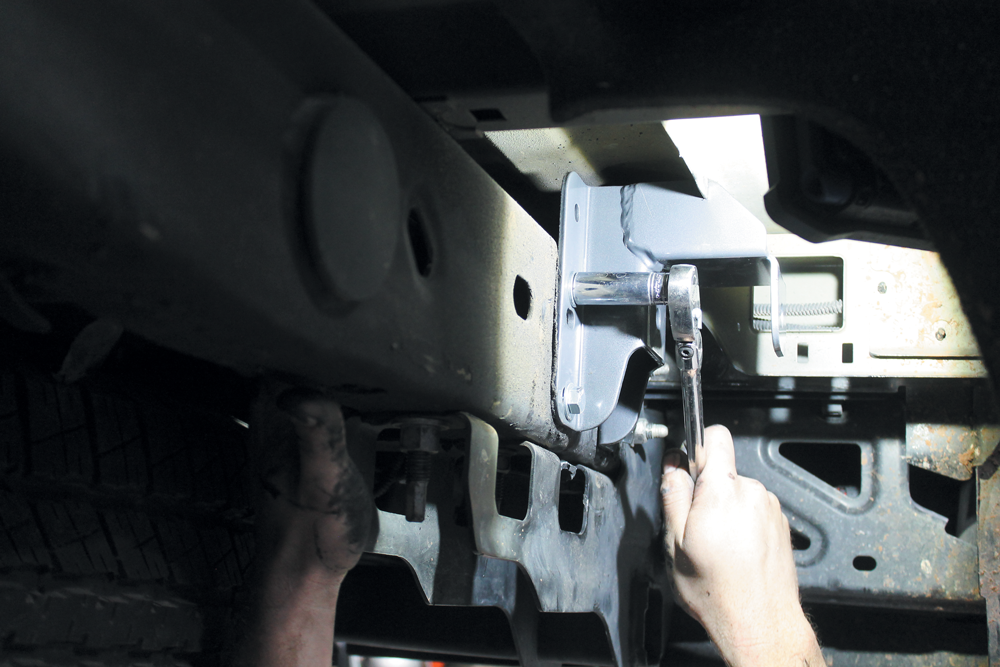
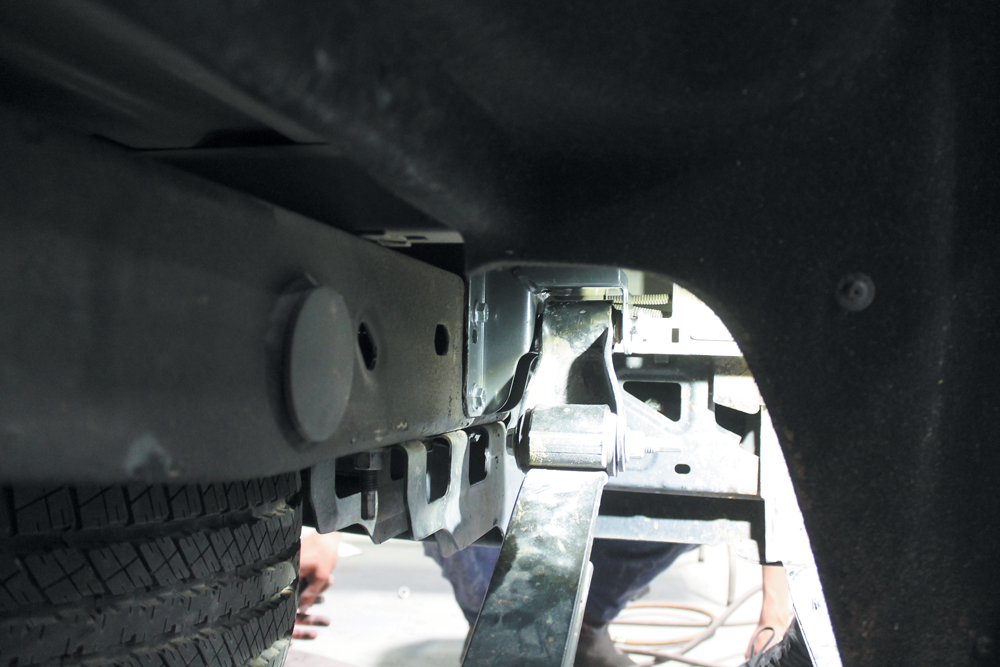
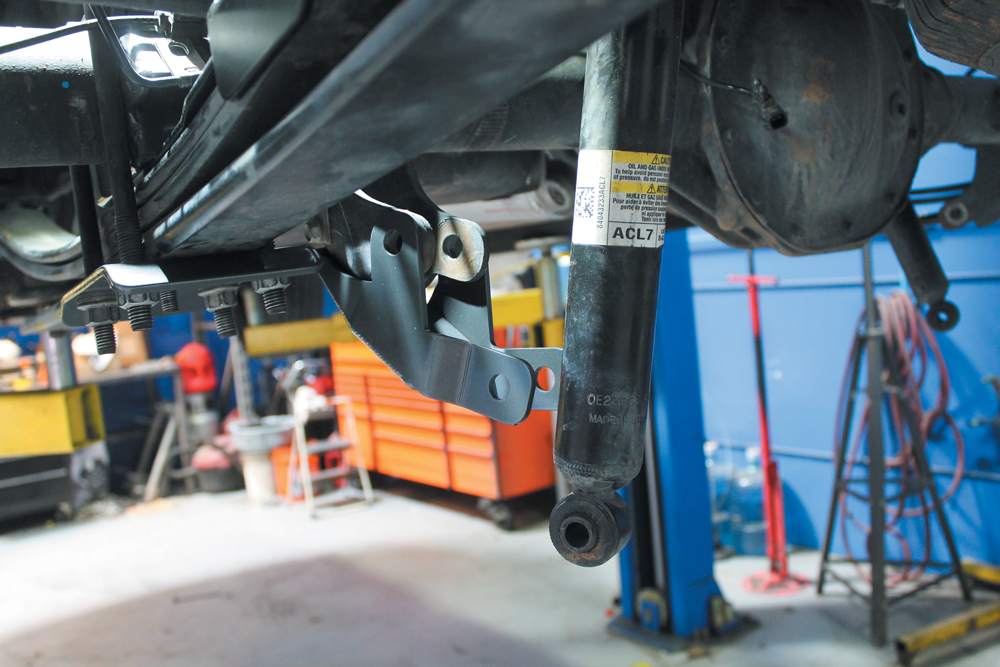
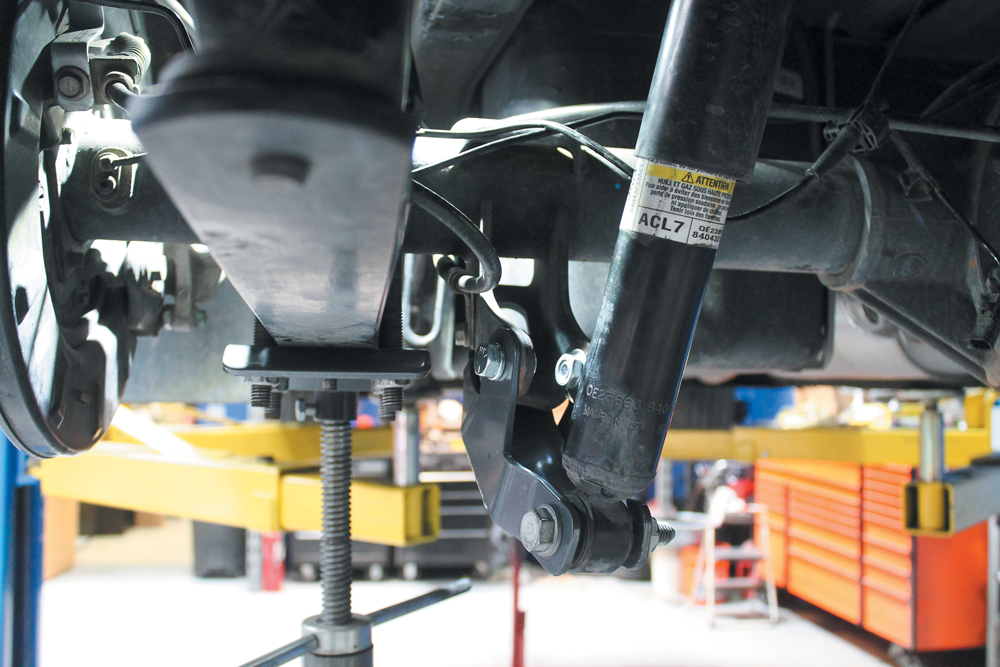
The leaf springs need to be detached from the frame at the rear mount on both sides of the truck for two reasons. The first reason is that the rear shackle mounts are going to be replaced with new adjustable ones. Also, we are going to be flipping the axle to the top side of the leaf spring, so the leaf needs to be dropped out enough to reposition the axle.Removal of the rear shackle mounts is a bit difficult. There is a gusset on the inside portion that needs to be cut away. The easiest way for us to handle this was with our plasma cutter; however, you can accomplish it at home with a cut off wheel if you don’t own a plasma.After removing the factory rivets that secure the shackle mount to the frame, we were able to remove the mount and toss it in the scrap pile.The new mount was then installed with new hardware provided with the kit. The entire flip kit (Part # 301360) comes with this mount and the necessary parts to relocate the axle on the top of the leaf springs. This mount is also adjustable for a 5- or 6-inch drop; we set it up for the 6-inch drop.
The new mount was then installed with new hardware provided with the kit. The entire flip kit (Part # 301360) comes with this mount and the necessary parts to relocate the axle on the top of the leaf springs. This mount is also adjustable for a 5- or 6-inch drop; we set it up for the 6-inch drop.The center pin needs to be flipped around so that it keys back in properly with the flipped axle. The plate on the top of the leaf spring was also removed during this step.
Now it was finally time to relocate the axle to the top side of the leaf springs. We removed several bolts and nuts that attached the brake lines to the frame and the axle, along with the E-brake lines and breather tube. We were able to swing the axle far enough to the passenger side without removing the driver side leaf spring from the front mount to get it on top of the driver-side leaf. We did it this way to avoid having to drop the gas tank to access the front driver-side leaf spring bolt.
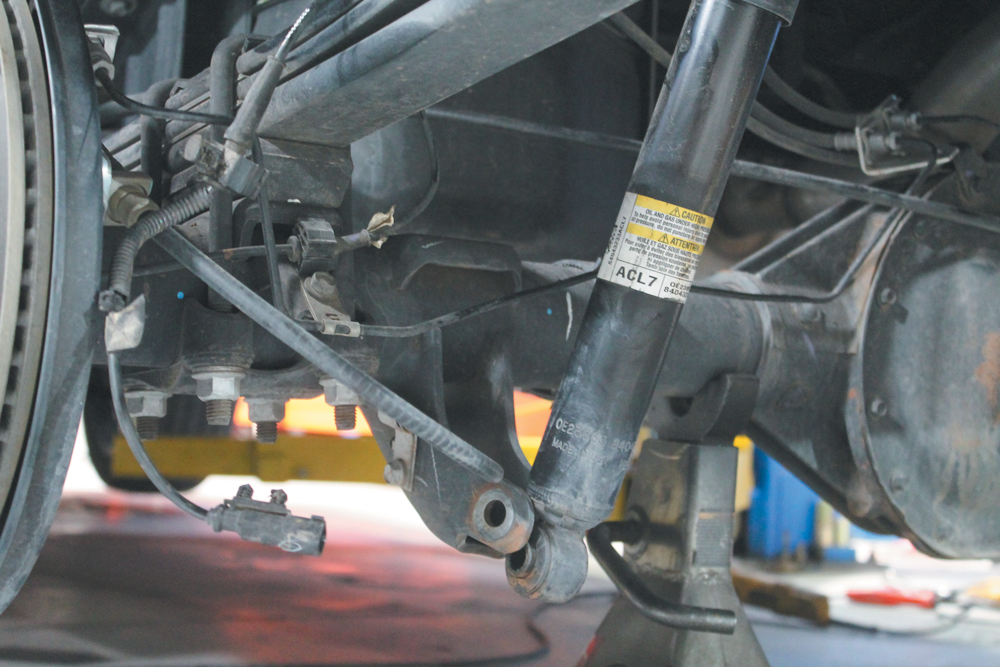
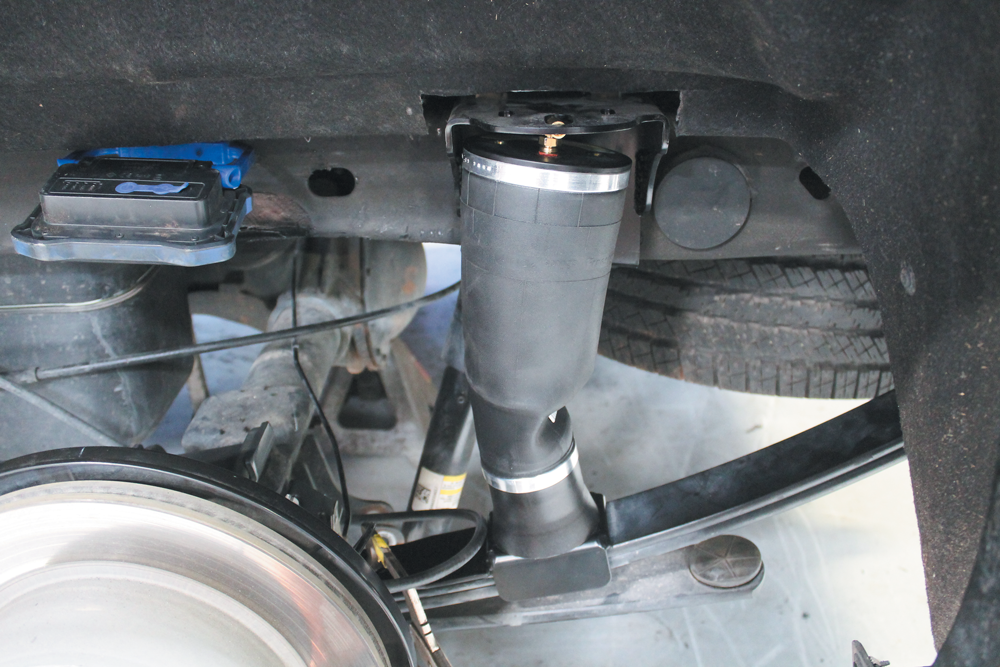
With the axle relocate to the top side of the leaf springs we could start putting the rear suspension back together. The shackle on the back of the leaf spring needed to be loosened and positioned upside down to be reinstalled into the new shackle mount.Before the new axle saddles could be installed, the factory brake line attachment points needed to be cut off. The new saddles come with provisions to reattach the lines.Now the new saddles, and the lower mounts for the air bag, could be installed under the axle. There are alignment holes in both pieces to position them perfectly on the leaf spring.The final pieces to the flip kit are the new upper and lower mounting plates. This bent upper plate its attached with the factory U-bolts, which go through the lower plate, and sandwich everything around the axle tube.Installing the upper airbag plate is pretty straightforward. Since the frame is tapered on these trucks, there isn’t a chance of installing it incorrectly. The taper on the new mounts matches up to the taper on the frame and they almost install themselves. A plate on the inside of the frame and the provided hardware are used to secure the upper bag mount in place.With the bag attached to the lower mount and the air fitting installed in the bag, we could now bolt the bag to the upper mount and route the provided airline to the rear bumper area of the truck. The kit comes with the necessary airline, a tee fitting and a filler fitting that we mounted at the rear bumper.
The final step before putting the wheels back on is to install the new shock relocation mounts (Part # 401500). Using the provided hardware, we installed the new shock mounts to the axle. After that was done, we reinstalled the factory shocks.Once we made sure everything was torqued down and we reattached all the brake lines, we set the truck down off of the lift and rolled it outside to have a look. We added about 10 psi to the rear air bags to get it to a nice and level height. One thing that we want to make sure to point out with a project like this is that it definitely needs to go straight to the alignment shop. We were able to get the front toe close enough to make the short drive to our local alignment shop, but to keep up the life of your tires and the driving characteristics of the truck, alignment by a professional alignment shop is a must!
We use cookies to enhance your browsing experience, serve personalized ads or content, and analyze our traffic. By clicking "Accept All", you consent to our use of cookies. Visit our Cookie Policy for more info.
 STREET TRUCKS STAFF
.
August 03, 2020
.
Department
.
STREET TRUCKS STAFF
.
August 03, 2020
.
Department
.


Share Link