 ST-STAFF
.
March 10, 2020
.
Blood Sweat and Gears
ST-STAFF
.
March 10, 2020
.
Blood Sweat and Gears
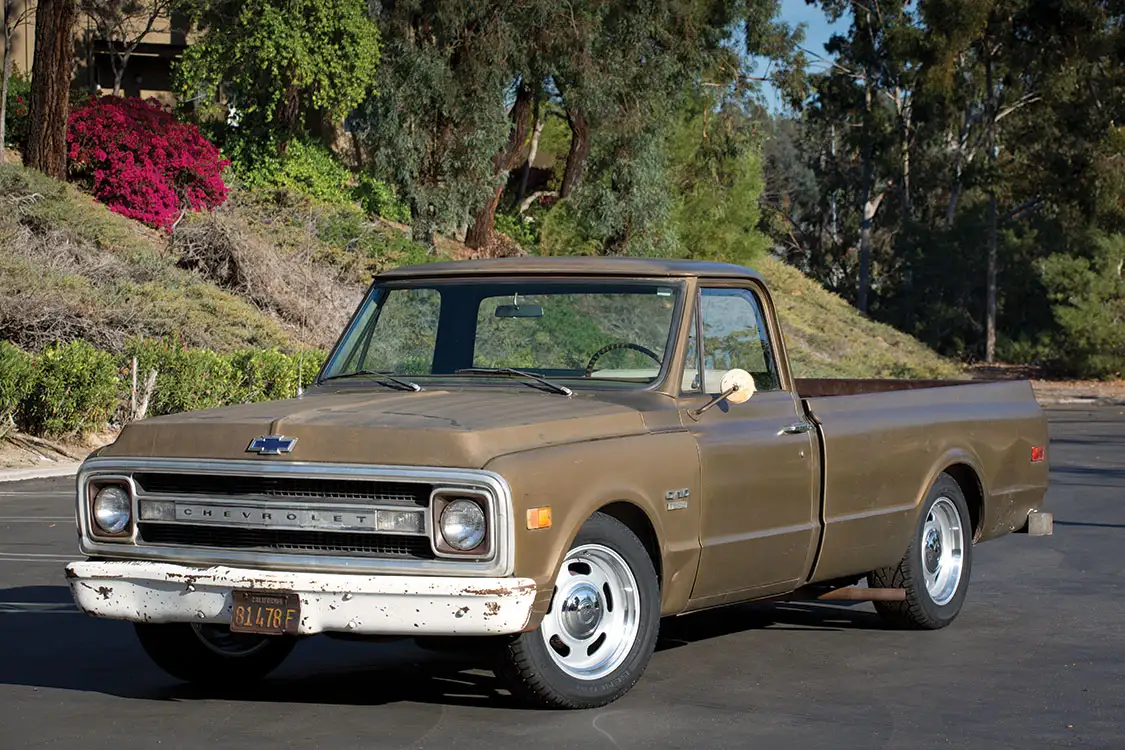
We realize that not everyone has a mattress full of Franklins to spend on creating a show-stopping classic pickup. However, there are ways of getting yourself behind the wheel of a cool truck without draining your bank account. Long-bed C-10s can still be found for reasonable prices; this running ’70, for instance, was scooped up for a measly $2,300, proving that there are still deals to be had. The only thing going against it were problems related to age.
The 1967-72 C-10s are one of the best platforms to wrench on or modify mainly due to their simplicity. The folks at GM in the ’60s really did their homework when creating these trucks. The front and rear suspensions are fairly easy to work on, and corrosion issues will most likely be their only real problem. If there is some rust on the underside, we suggest getting out a spray can of penetrating lubricant and soaking all of the hardware.
These trucks are very popular with customizers, and numerous companies have caught on and started developing products to serve them. We are very lucky these days because the market is flooded with parts to give these trucks a mild drop or even slam them to the pavement. The only question is how far you want to go and how big your budget is.
If you pick up one of these trucks, you’ll to want to get it down a few inches because they are sky high in stock form. Again, there is no need to break the bank in order to add style. All you need to purchase is a simple spring drop kit, and you can actually lower your C-10 for a reasonable price. To get this ’70 down, we placed an order with Western Chassis for a 3/4 drop kit, spring kit, shocks, shock relocator kit and deluxe pan hard bar and topped it off with sway bars for better handling ($889.49 total).
Since the build tally was low, there was still more in the budget for other goodies. To complement the truck and its new stature, we purchased a set of 18×8-inch Rev Classic Wheels 107s with police hubcaps for $747.60. These things are slick; they resemble classic rally wheels but larger (up to 20 inches).
Since the rolling attire was upsized, new rubber was required. General Tire offered a great option. The company’s Grabber UHP design comes in many sizes that correlate with larger-than-stock wheels. Grabber UHPs not only look great, they were also designed to offer excellent traction in dry and wet road conditions with even wear. We spent another $536.80 for the tires.
The whole drop and wheel/tire swap was completely handled in a driveway, which saved us even more cash. All of the parts were relatively easy to install once the stubborn, rusty bolts were dealt with. If you have some spare change and wrenching capabilities, you, too, can accomplish a simple transformation like this.


Events
Camp-N-Drag is an annual truck show based in Waveland, IN. This fun event was founded in 2008 with their most recent event being the weekend… Continue reading
Chris Hamilton . July 22, 2019

Industry News
2022 GMC Sierra 1500 Denali gets Super Cruise and an upgraded interior GMC teases a totally redesigned dashboard with a digital instrument cluster The 2022 GMC… Continue reading
Logan Wade . December 10, 2020

C10 Builders Guide
Who doesn’t love cool trendy shirts? We decided to take a minute to and compile a group of some awesome shirts designs available on Amazon.… Continue reading
Chris Hamilton . August 30, 2019
C10 Builders Guide
There are lowering components on the market with very different agendas. For C10 owners looking to simply lower the ride height of their truck, the… Continue reading
Chris Hamilton . January 30, 2020
c10
Dreams are fleeting, most are usually forgotten by the time we wake up and rub our eyes, but there are some that stay with us… Continue reading
Chris Hamilton . January 13, 2021
c10
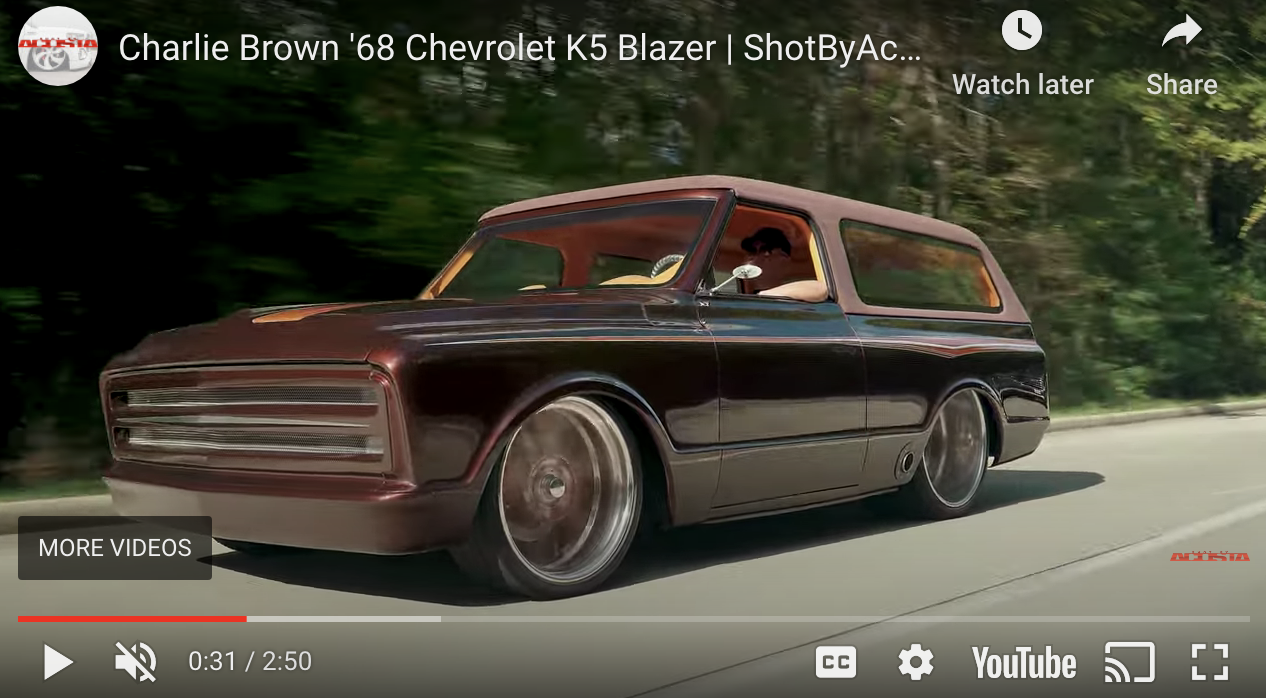
Check out this killer video put together by ShotByAcosta on our current cover truck Charlie Brown! Full Story and pics can be seen at this… Continue reading
Chris Hamilton . December 04, 2020

Share Link