As of 2026, the Coyote/6R80 combo remains one of the most cost-effective and performance-packed swaps for classic Fords. With newer support kits and better salvage availability, enthusiasts are finding it easier than ever to modernize their builds.
Every brand has fans, and all of them have a motor enthusiasts want to stuff under the hood. For Dodge guys it’s a Hemi, and for Chevy guys, it’s usually an LS. But when it comes to Fords, it’s all about the Coyote. There are lots of reasons why.
It’s a 5.0L engine that Ford has been building in one form or another since 1968, which gives it history. It offers rock-solid performance and reliability, and there are tons of options for improvements should you want to go even faster.
Basically, it’s a great power plant for the money, which is why many F100 owners decide on one to get their trucks down the road. The problem is that it seems like it’s difficult to install. There’s the wiring and computer to worry about; plus, can you even keep the front suspension stock? So many questions.
Jason Noel and the team at Fat Fender Garage not only know the Coyote well, but they have a ton of F-100 knowledge. They know these trucks inside and out, which is why they bought a ’71 F100 with the intention of swap a Coyote into it.
The goal here was a little different from the norm, though. They wanted to keep the stock power steering box and front suspension, and make it as affordable an option as possible so that everyone can do it.
To make this setup happen for yourself, you can buy a Coyote with a 6R80 package directly from Ford, but it comes with a very steep price tag. On top of that, you’ll have to pay extra for essential components like a driveshaft, headers and accessory drive system. All of these parts can dramatically raise the cost of an already pricey package.
In this story, Fat Fender Garage shows how to do the swap on a more modest budget. Keeping the price tag down, you can acquire a low-mileage Coyote/6R80 driveline combo from a 2011-present Mustang GT.
Though you can pull one from an F-150, the Mustang GT version has more power and the stock headers will fit the frame rails of an F-100. We’ve seen these packages sold in local salvage yards for around $6,500-8,500, which is more affordable than buying new.
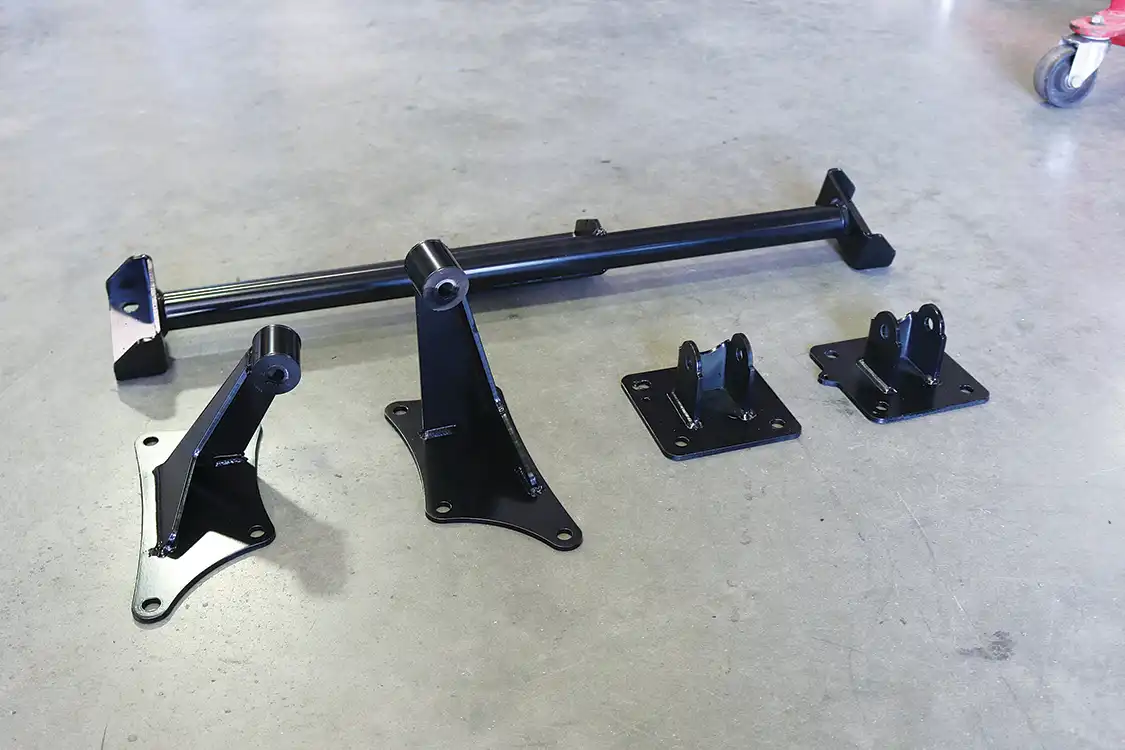
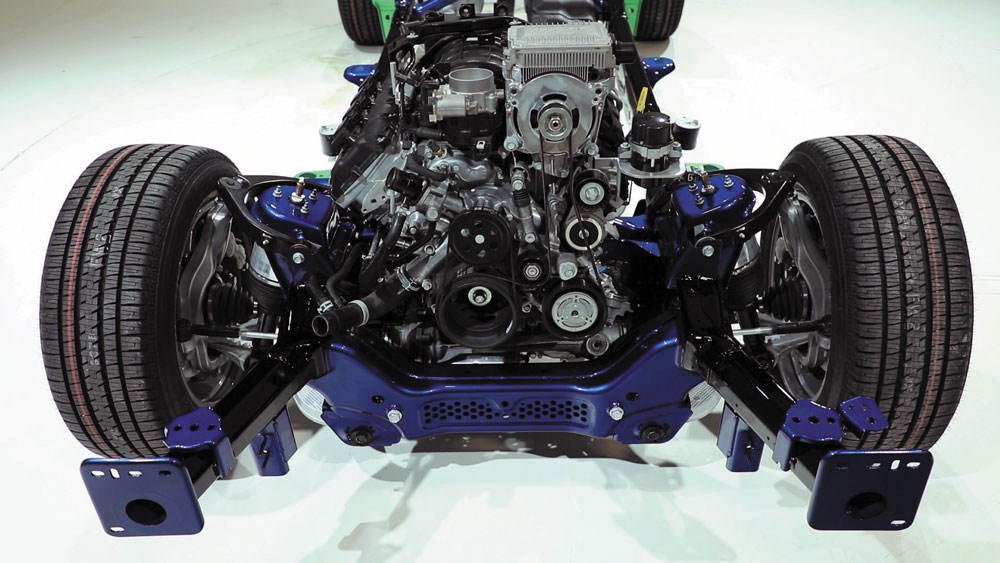
To that end, Fat Fender Garage developed a series of mounts that allows customers to drop a Coyote into their very own trucks worry-free. Not only does it locate the engine in the correct place, it does the same for the transmission, making the installation go a lot smoother.
If you want info on the other parts and pieces they used to get it moving, they can help you out there, too. Give them a call, because they’re the experts, after all.
But before you do, take a peek at this swap of a Coyote engine in their ’71 F100. It’s a beast.
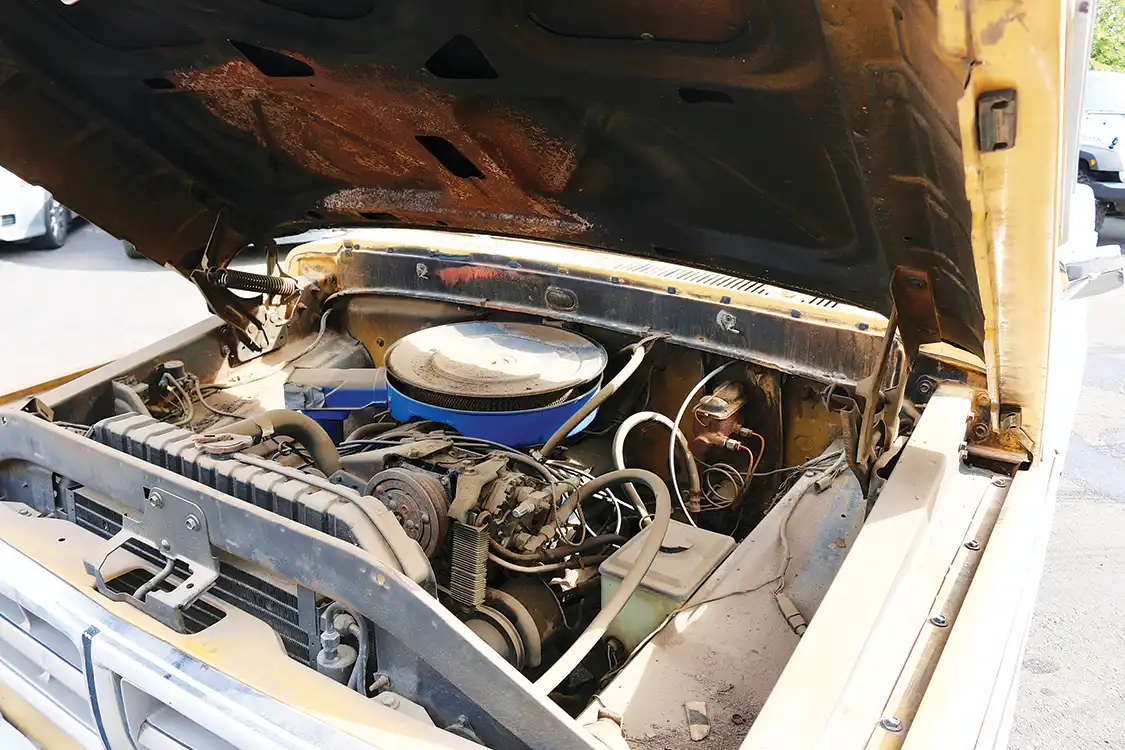
Here’s the truck in its more-or-less original form, complete with a worn-out V-8. The Fat Fender team is going to fix that problem.
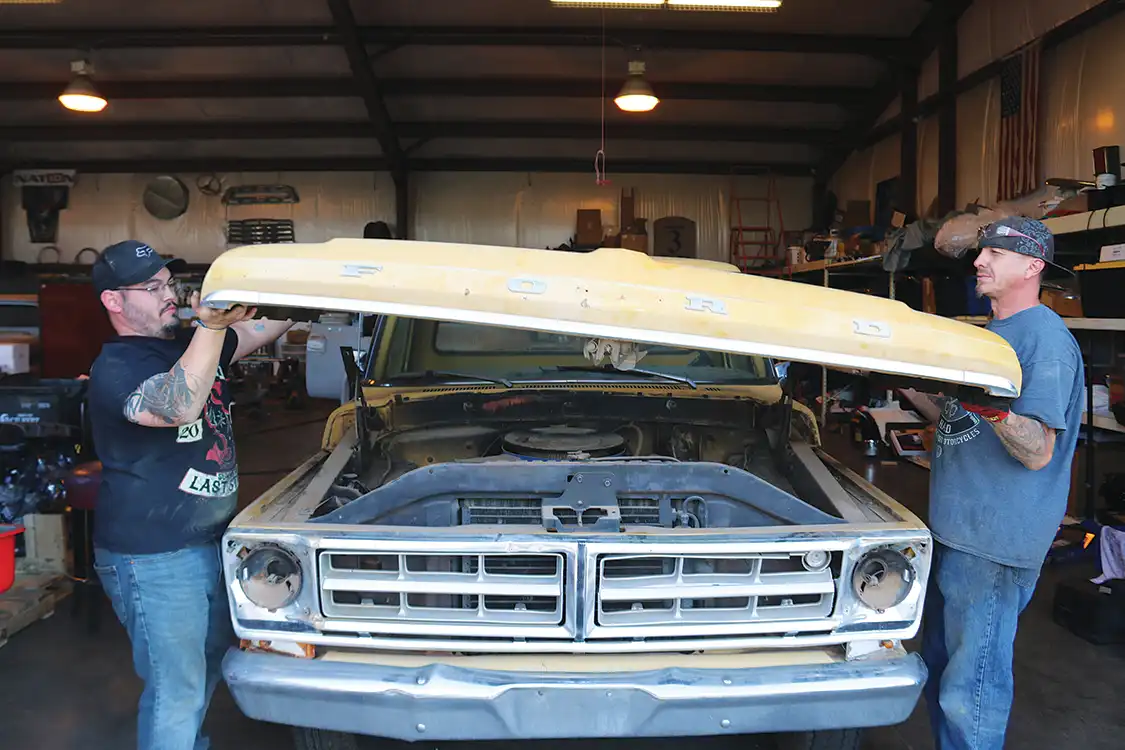
2 – Strip the front end for access
To free up some room, the hood came off first and was placed in a safe area.
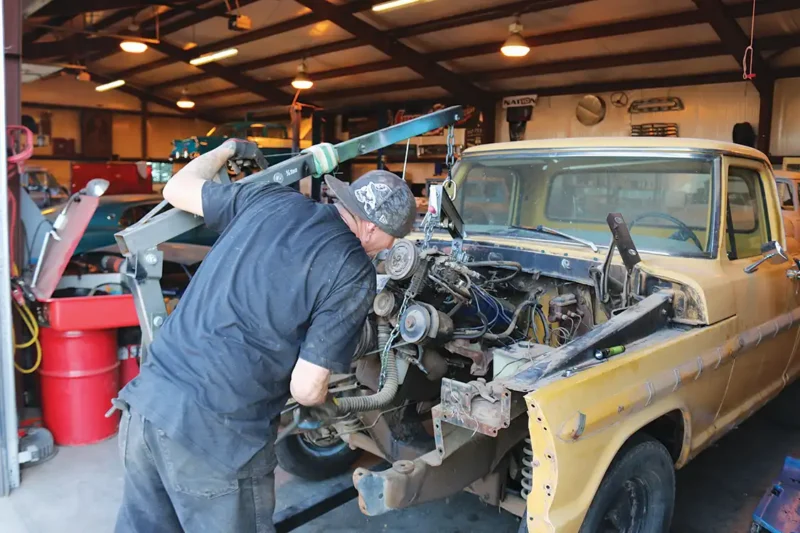
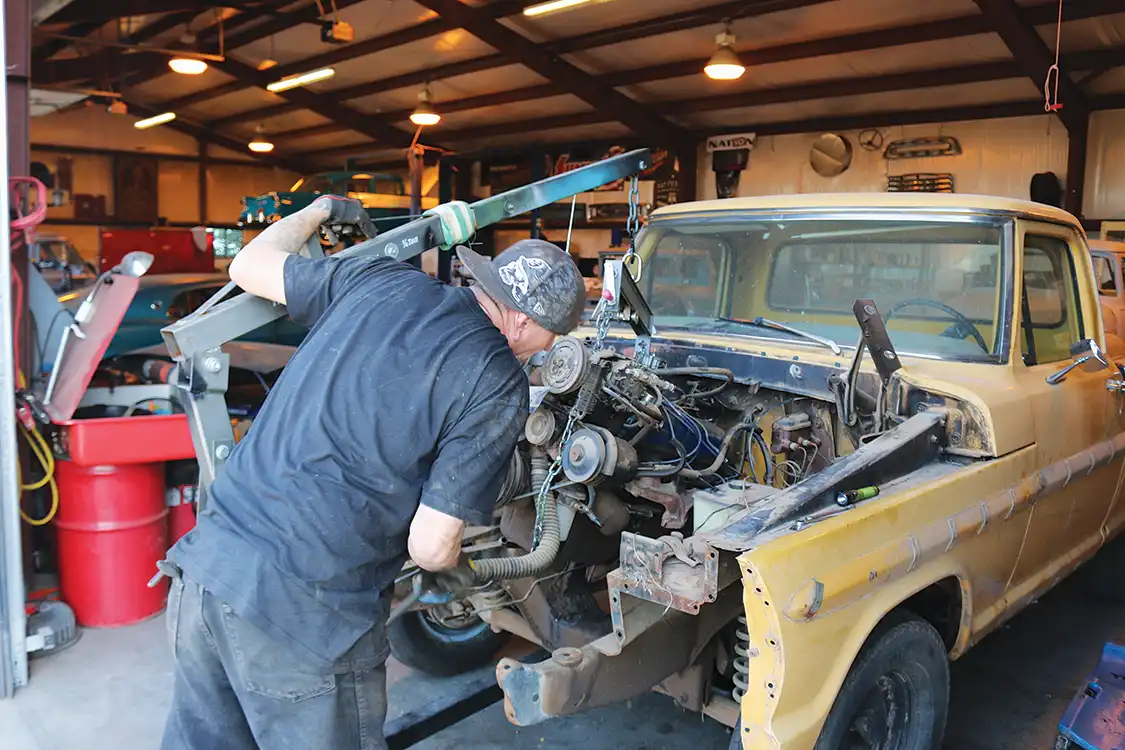
3 – Remove the original V-8
With the grille and core support removed, there was plenty of room to remove the engine.
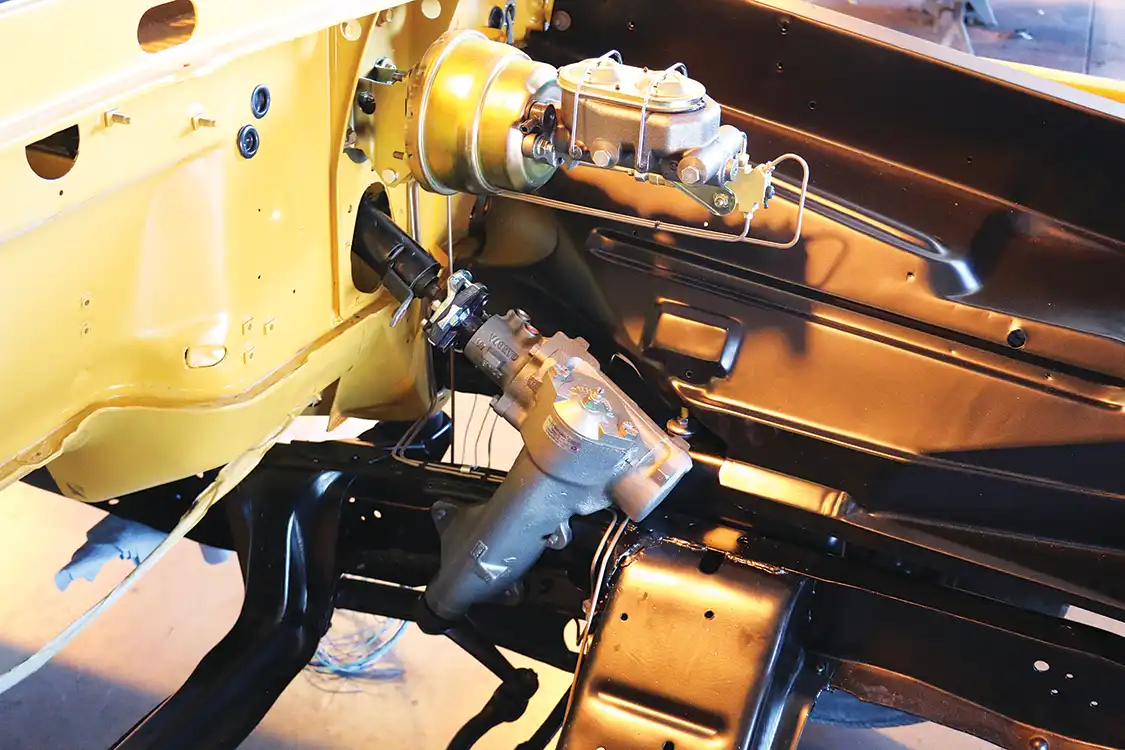
4 – Rebuild the power steering box and convert the brakes
To ensure that the truck would function well, the team added power brakes to the system, plus they rebuilt the power steering box.
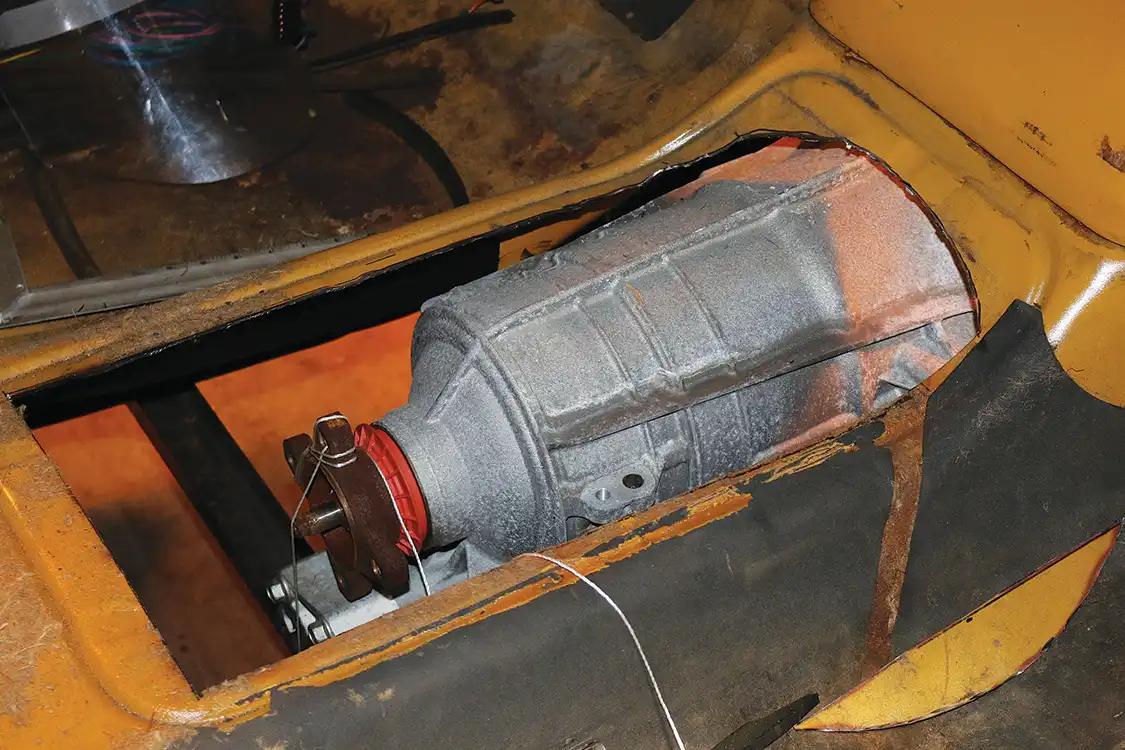
5 – Trim the transmission tunnel
The stock transmission tunnel isn’t big enough to handle the 6R80. To make it work, the team did a bit of trimming.
🗣 We just used a floor shifter. Not enough room for the linkage on the column – that Coyote motor takes up a LOT of room. — Reddit user from r/F100
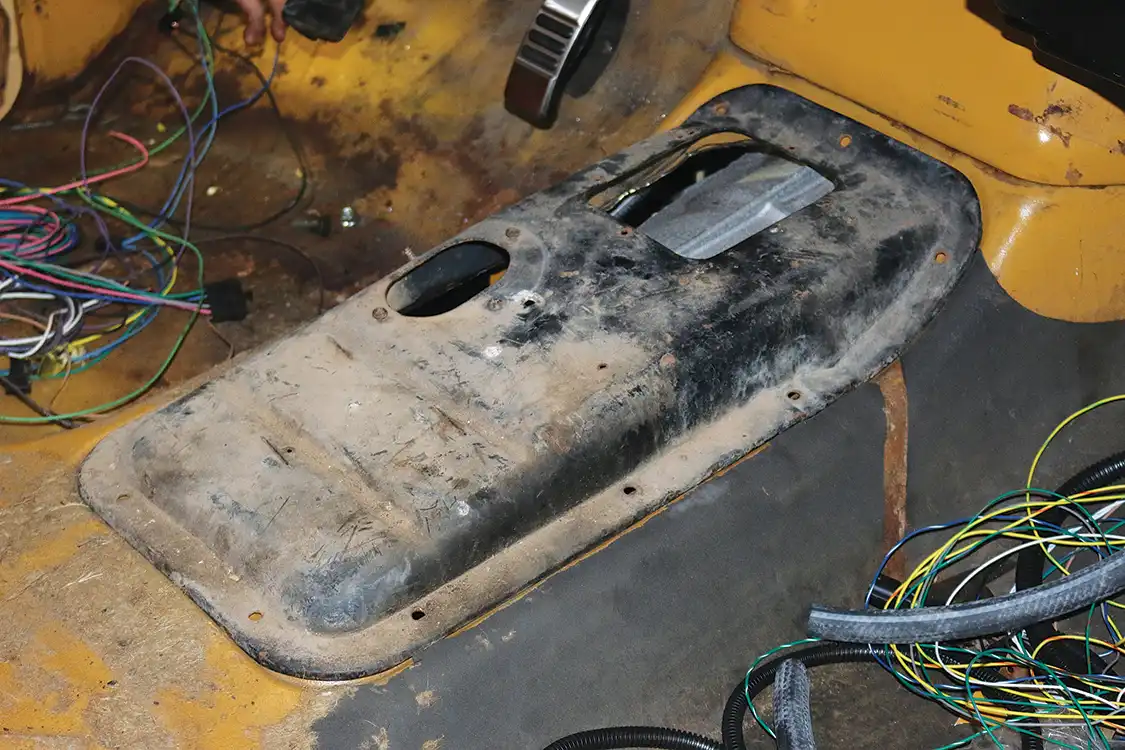
6 – Fit a manual or 4×4 transmission hump
Fortunately, the high transmission hump from a manual or 4×4 transmission does provide enough clearance, so installing one will give you a factory appearance.
7 – Install the engine and transmission mount kit
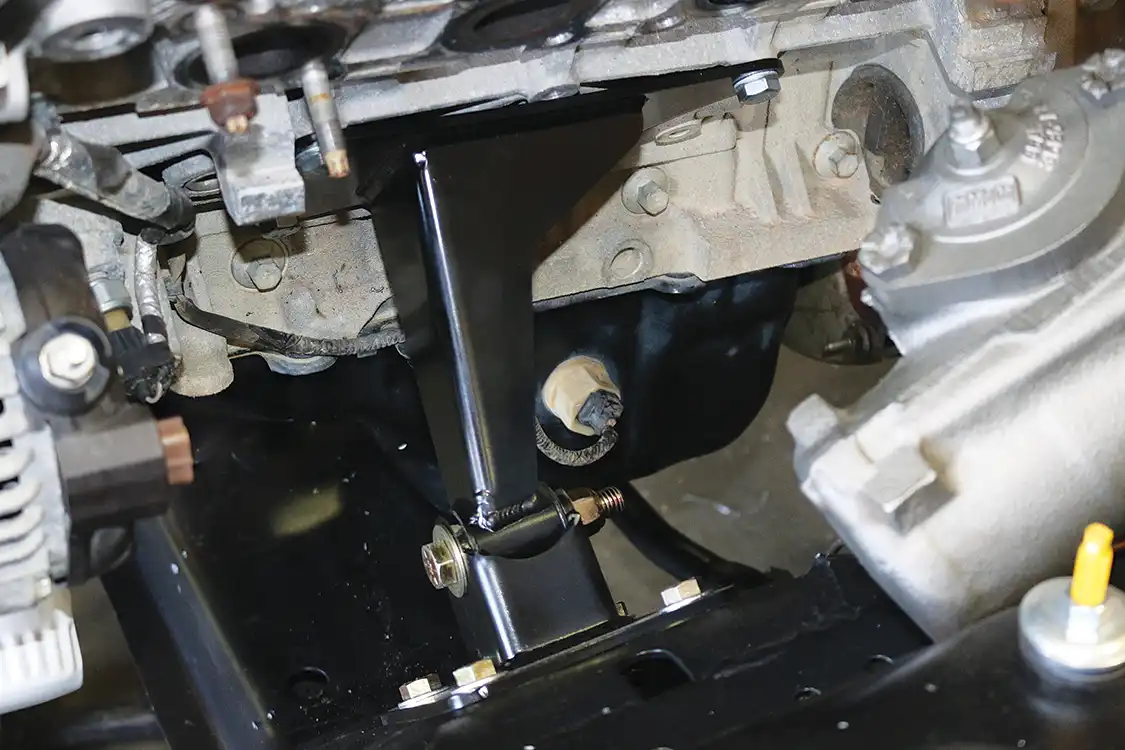
Fat Fender Garage sells a complete adapter kit for these trucks, too. It includes engine and transmission mounts for a perfect fit. This saves a bunch of time on an installation like this one.Here are the Fat Fender Garage engine mount adapters up close and personal. They make the process much easier.
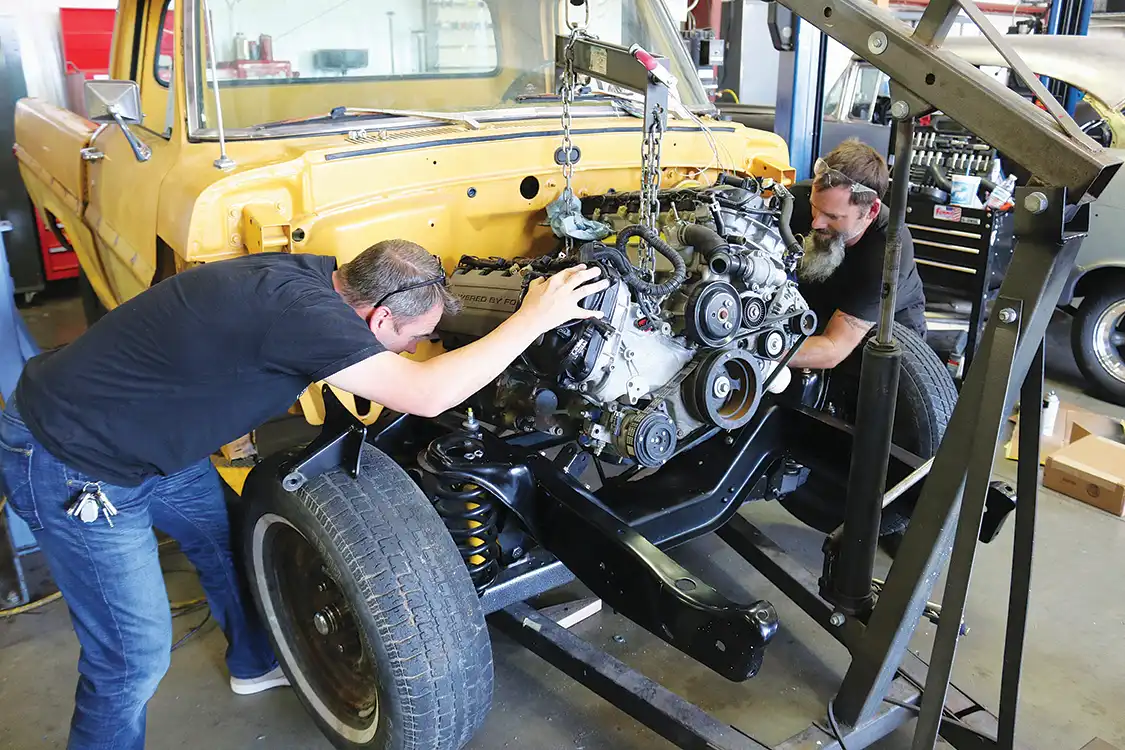
With the fenders removed for a little bit of extra breathing room, the team set the motor into the frame for the first time. This Coyote/6R80 combo came from a 2013 Mustang GT that had only 59,000 miles on it.
9 – Fit the exhaust headers
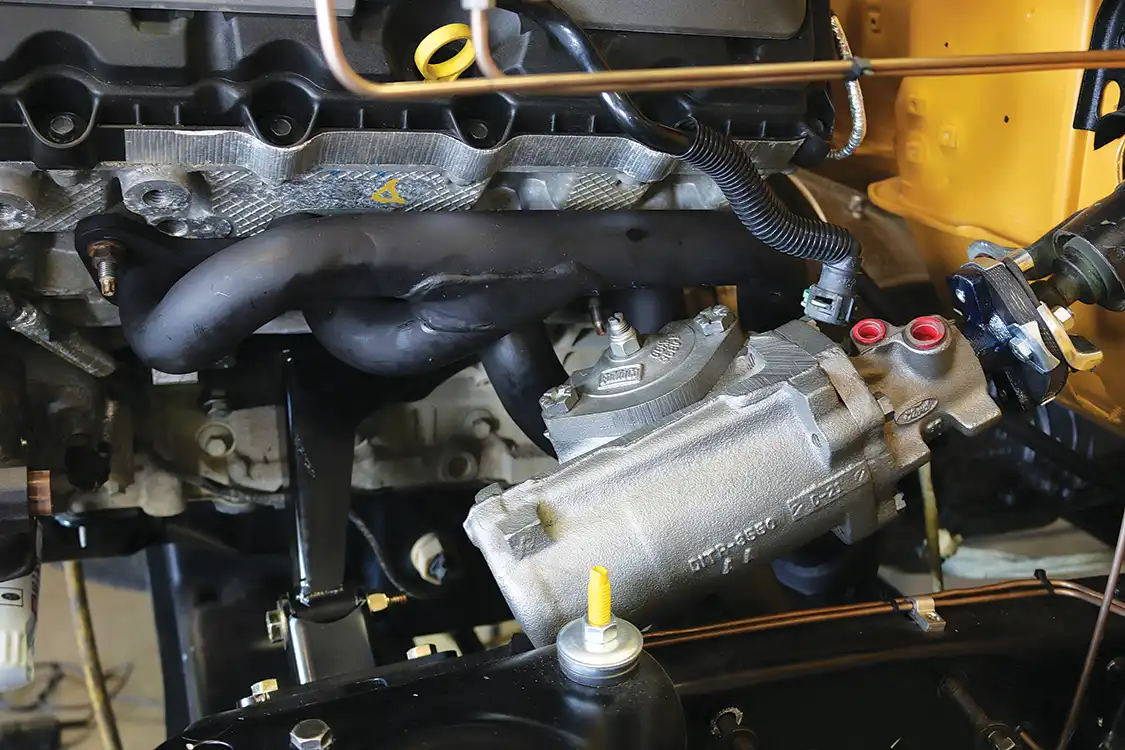
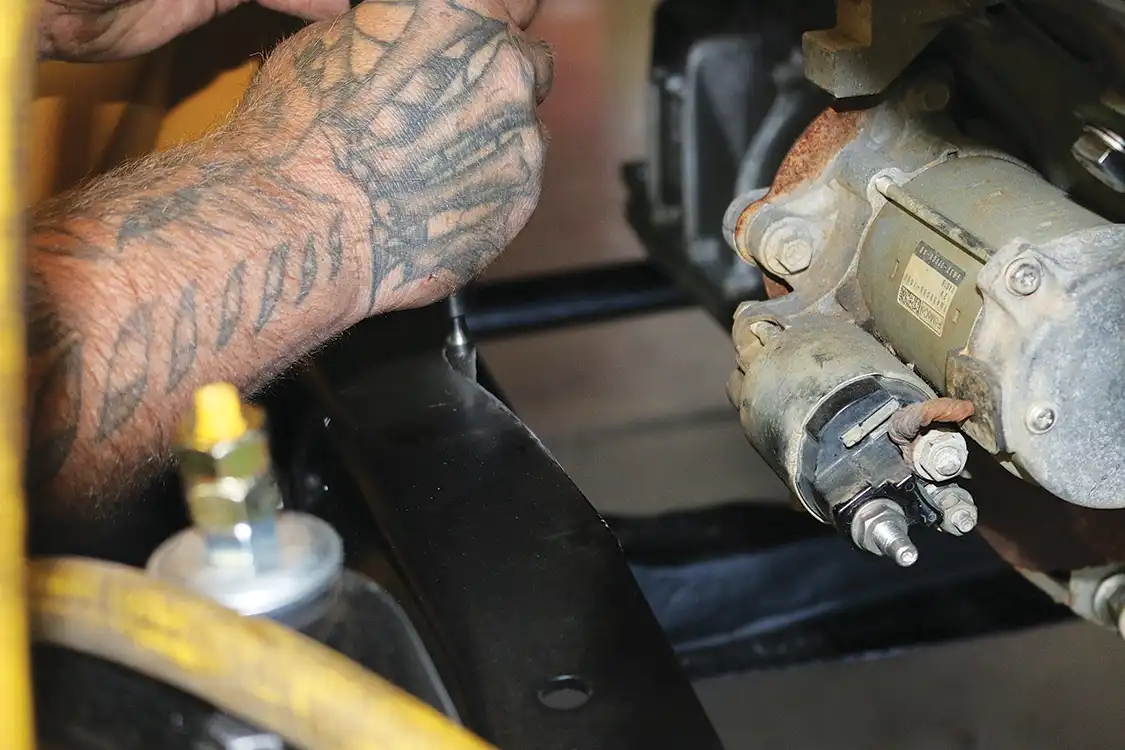
The driver’s side Mustang GT header will clear the factory power steering box, and a small heatshield slips between the two for protection.The passenger-side header needed a bit of work to fit. Fortunately, it’s not a lot, just a bit of grinding on the top of the frame.
10 – Mount the transmission cooler
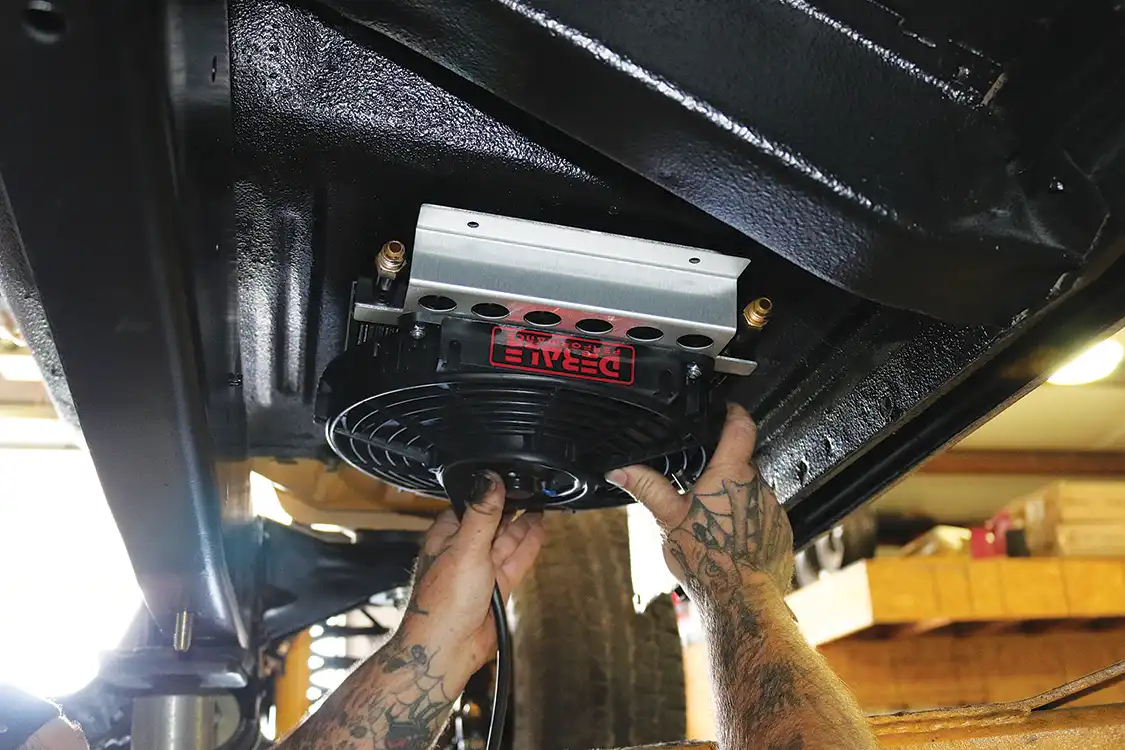
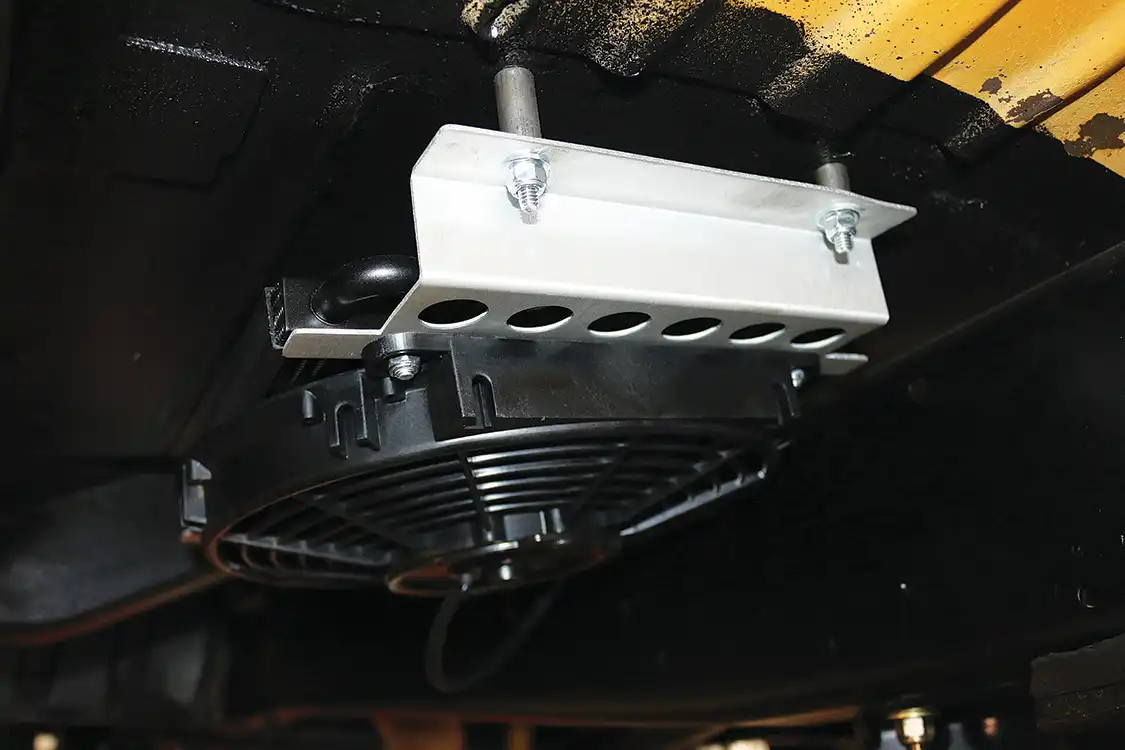
The transmission cooler was positioned under the passenger side floorboard for a stealthy look that’s functional.The transmission cooler uses a few spacers to provide the best airflow possible.
11 – Install the radiator and electric fan
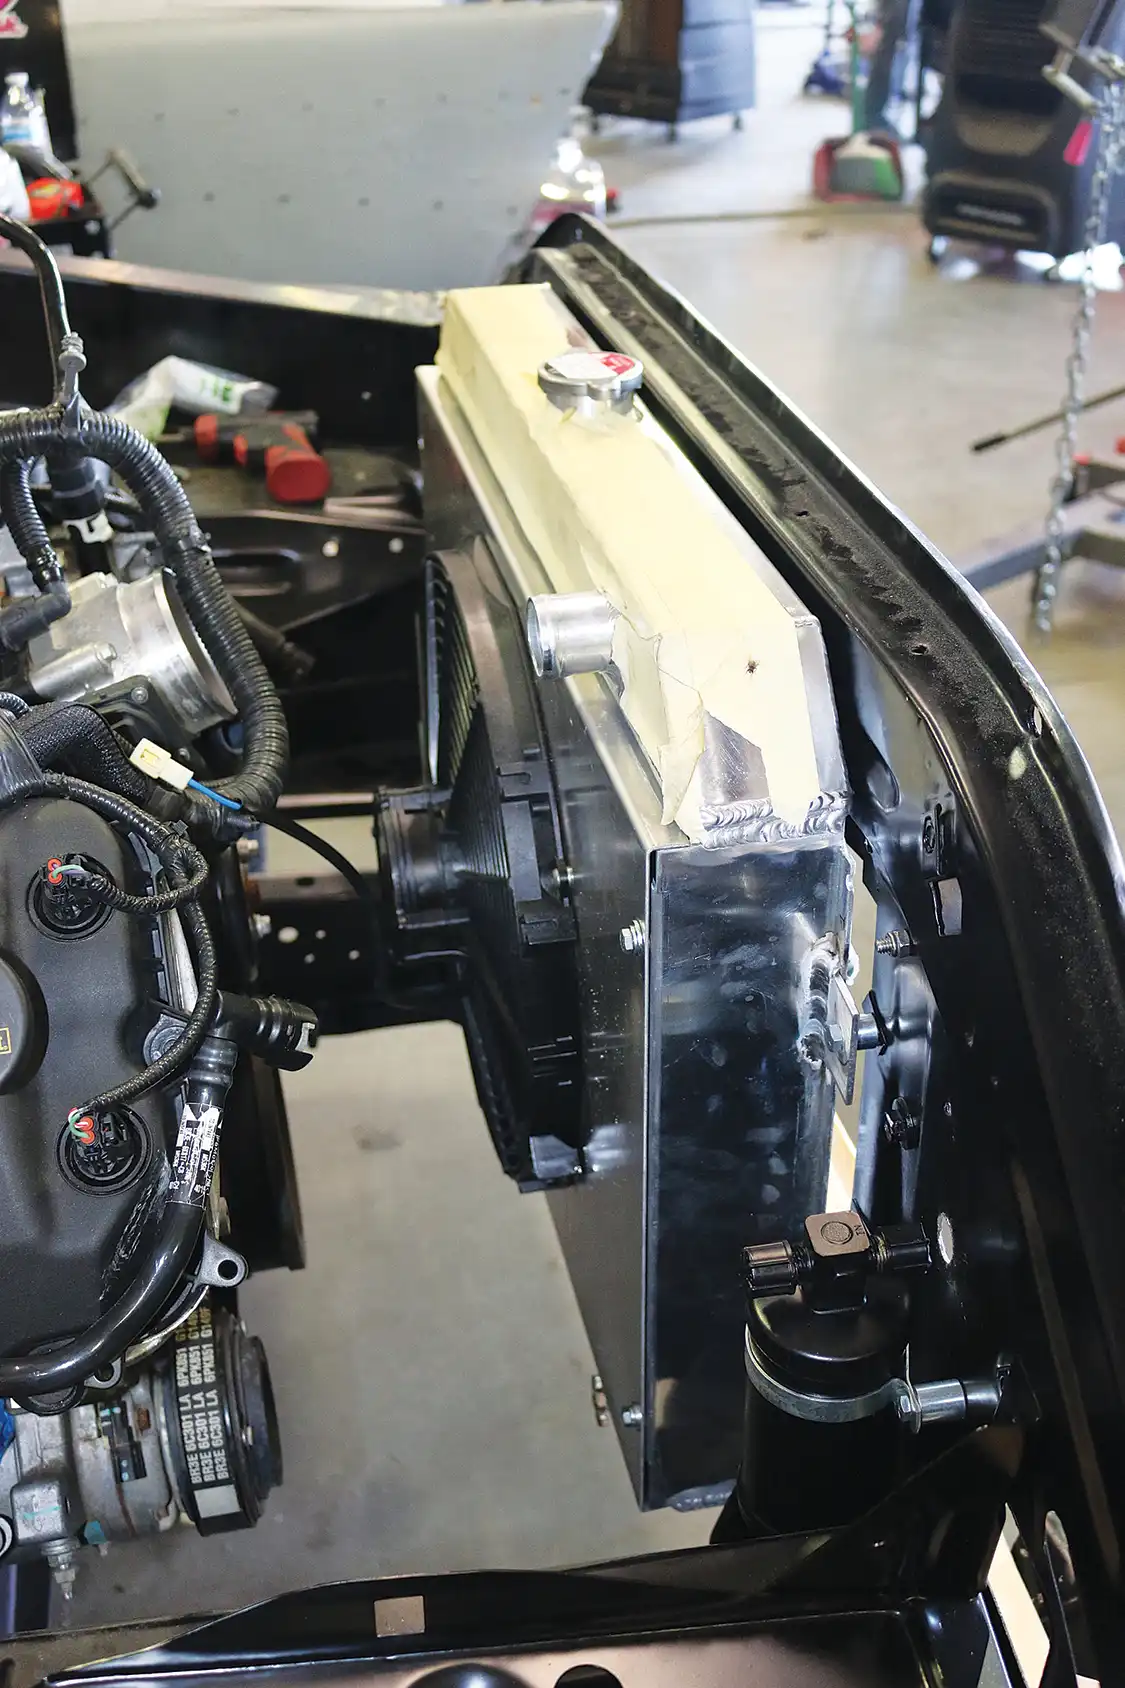
SoCal Speedshop in Phoenix provided the high-output electric fan, and it fit perfectly with the radiator in the core support.
For another example of a modern engine conversion, check out this F-100 Coyote swap.
12 – Install the power steering conversion
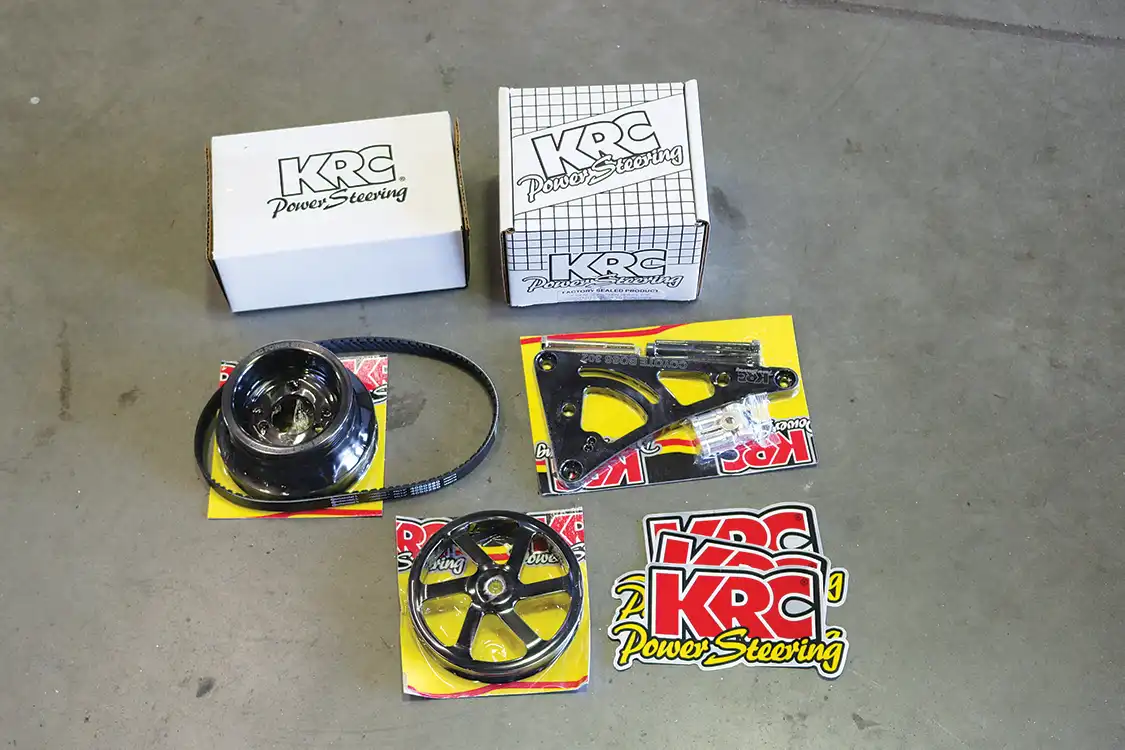
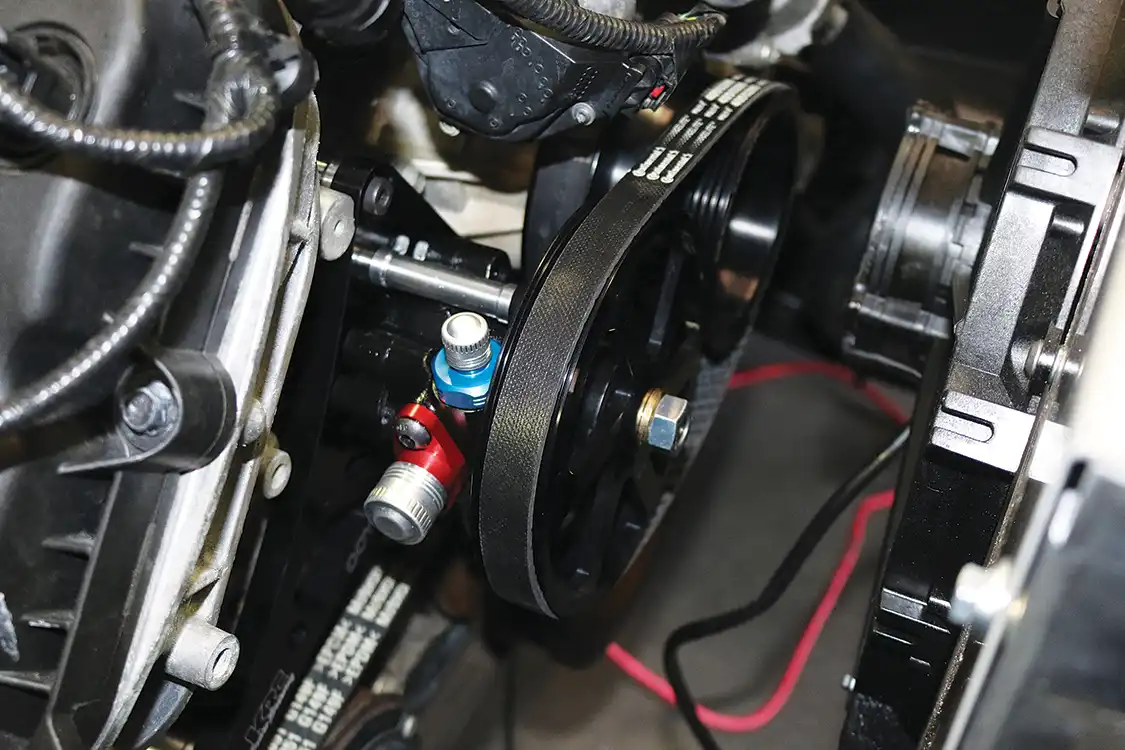
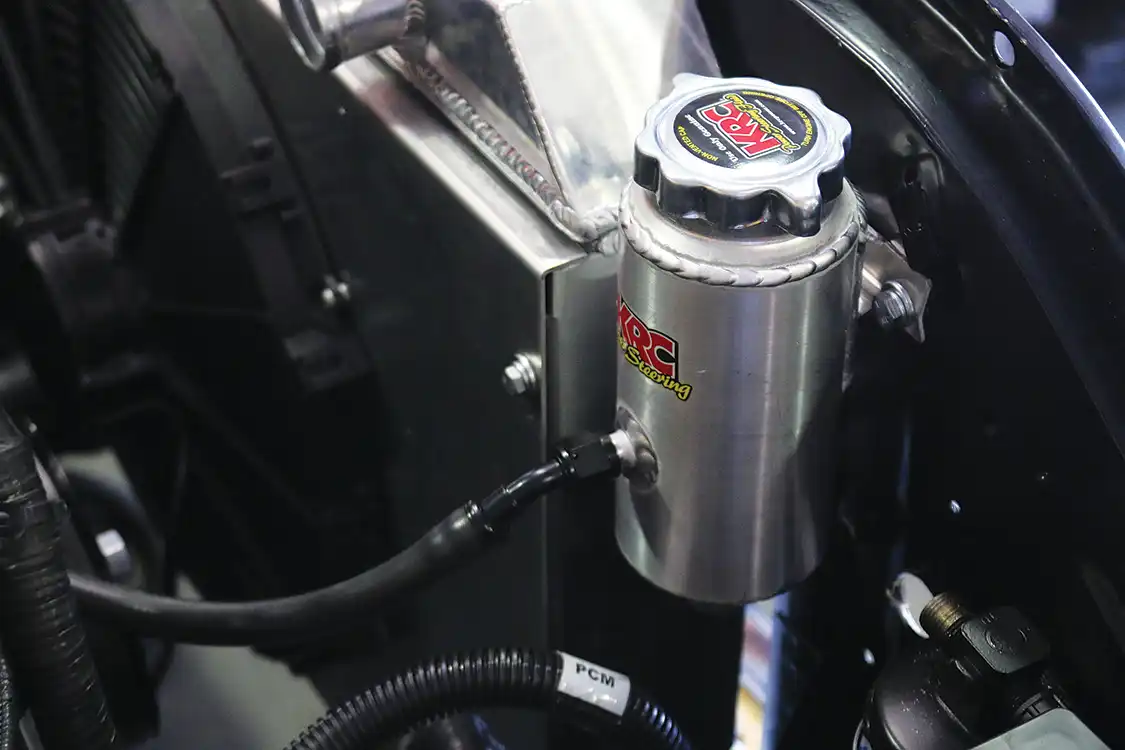
A Ford Mustang has electric power steering. It takes a kit, like this one from KRC, to convert it to work for the F-100.Installed, the KRC kit looks clean and simple.The KRC kit includes a remote reservoir that was mounted to the radiator.
13 – Install the control pack and wiring
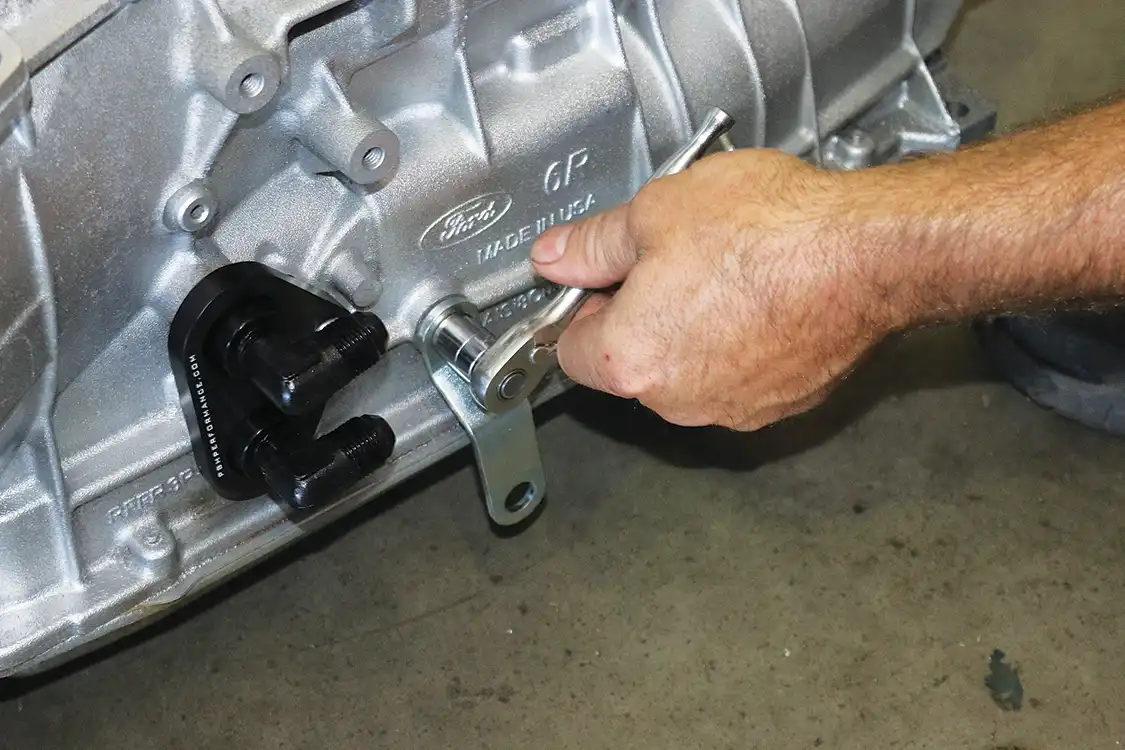
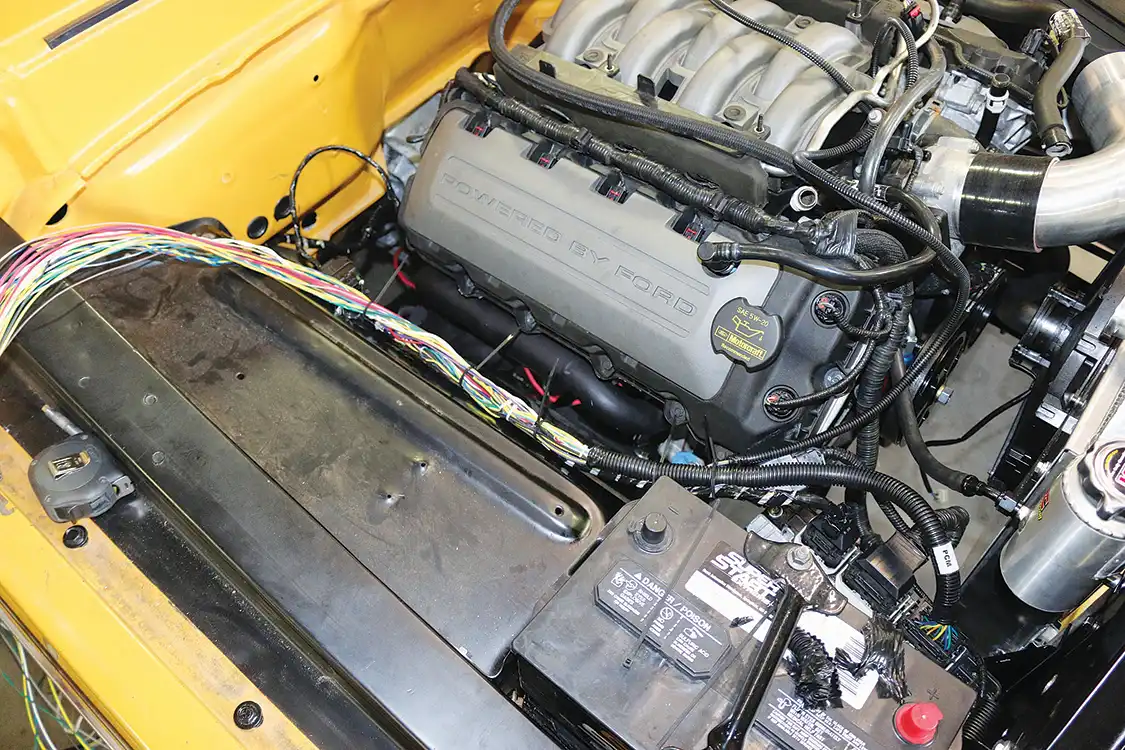
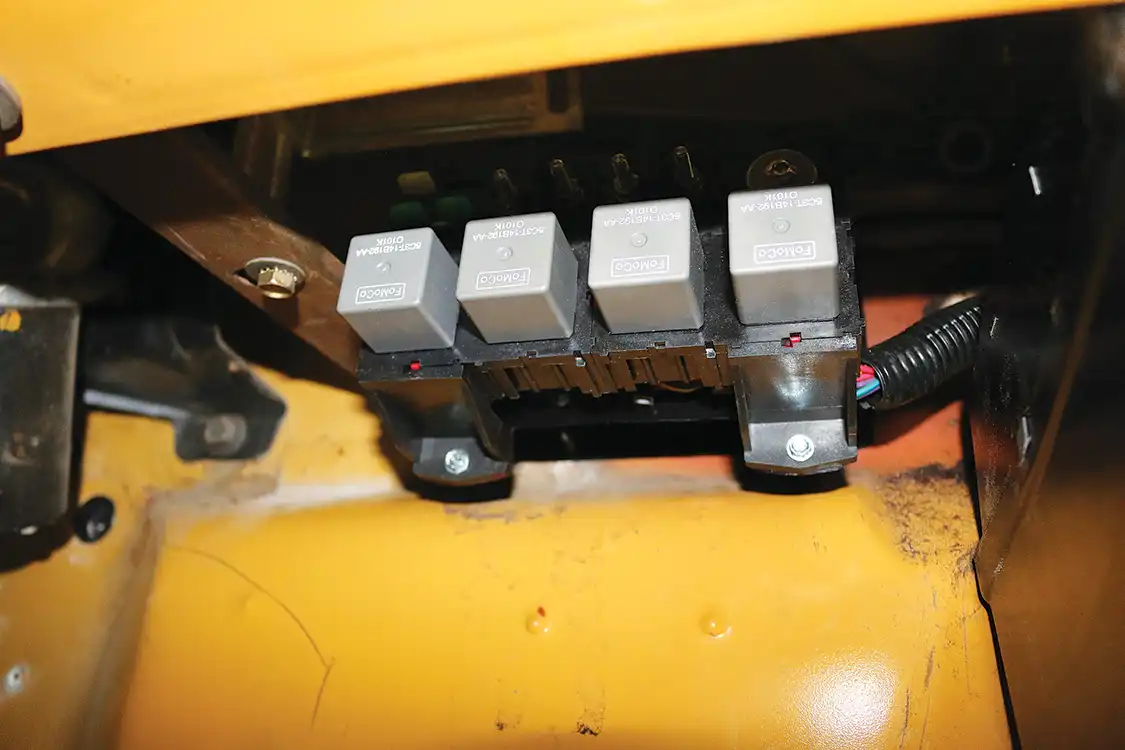
Fat Fender uses a Power by the Hour Performance kit that allows you to mount a transmission cooler and shift linkage to the automatic transmission to ease the installation process.To keep things simple, they used the stock engine and transmission harness and a standalone power harness from Power by the Hour. This also meant that the computer needed to be located low and up front.The Power by the Hour harness includes the power block and relays for the fan, which they mounted under the dash.
14 – Fabricate the intake tube
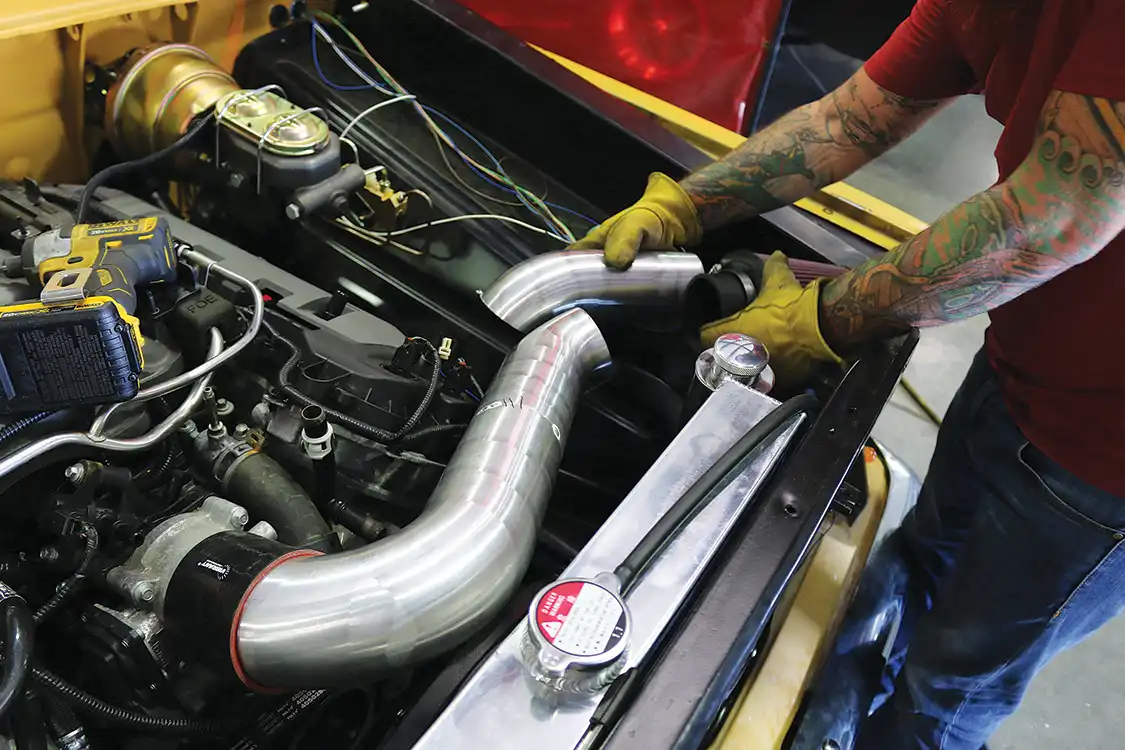
Fabricating the custom intake tube took a little planning and forethought. A breather port was welded in place, as well as an MAF bung on the underside.
15 – Install the drive-by-wire accelerator pedal
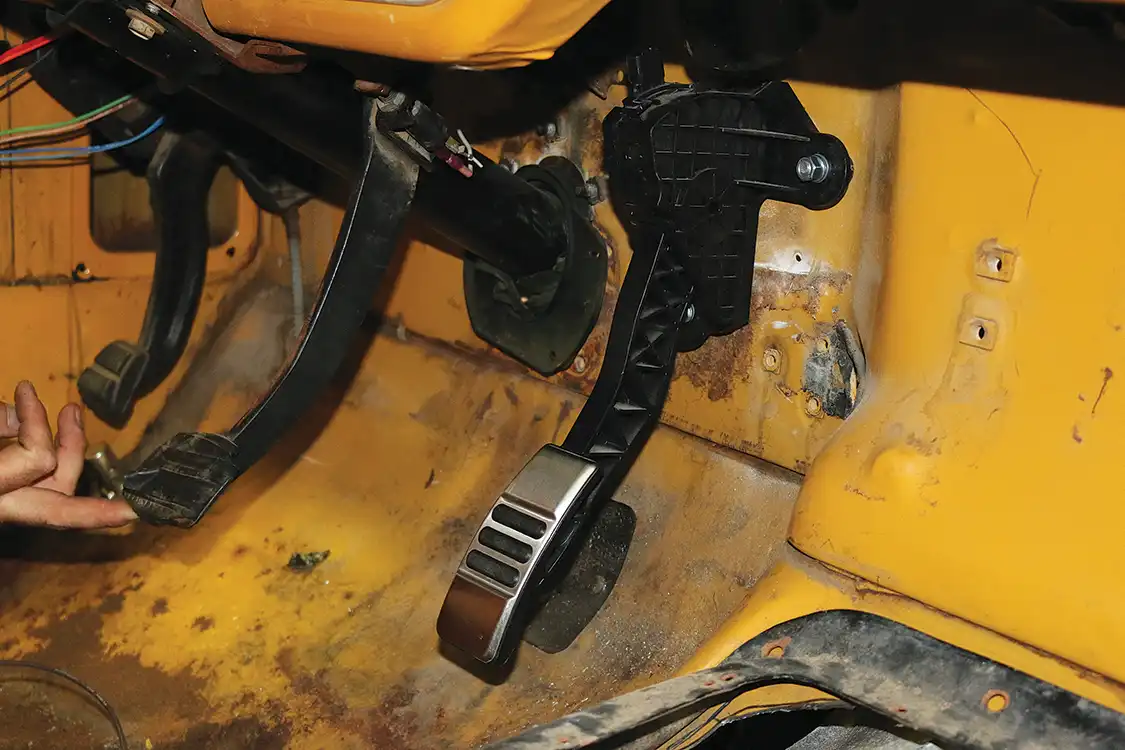
The easiest part of the entire process was installing the accelerator pedal. One of the bolts even lined up with a hole in the firewall.
16 – Install the fuel system
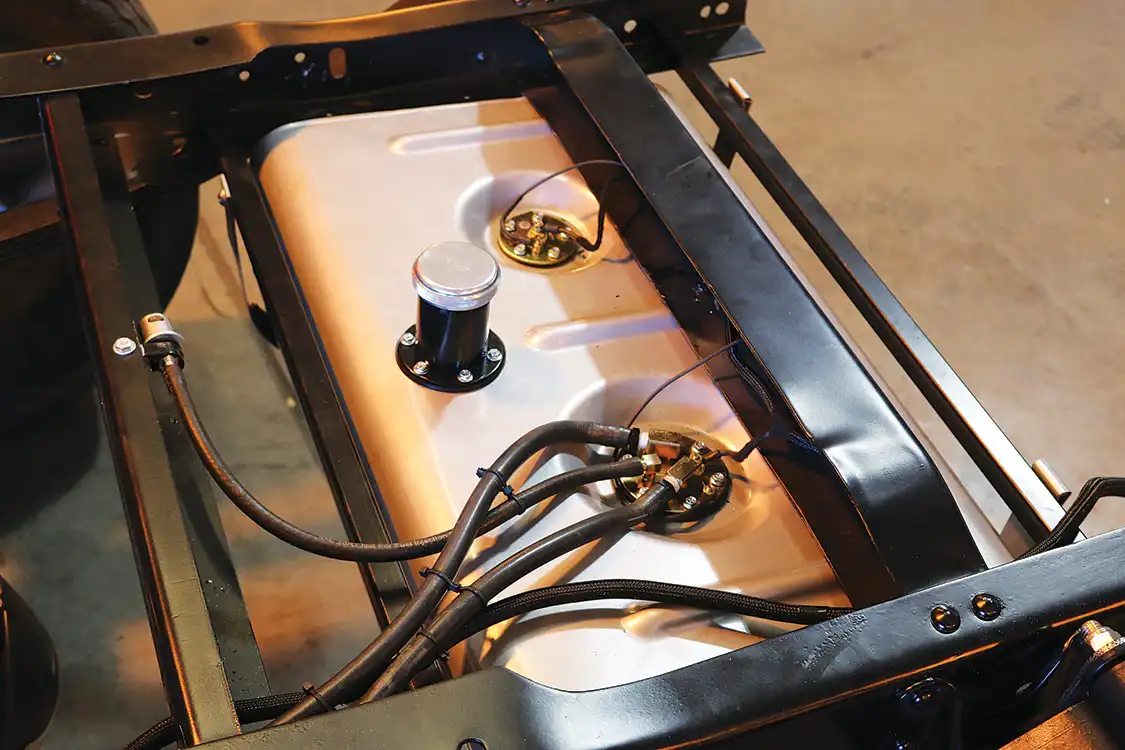
The fuel for the system is stored in a new Tanks Inc. fuel tank. It includes baffles and an intake fuel pump that works with the Coyote.
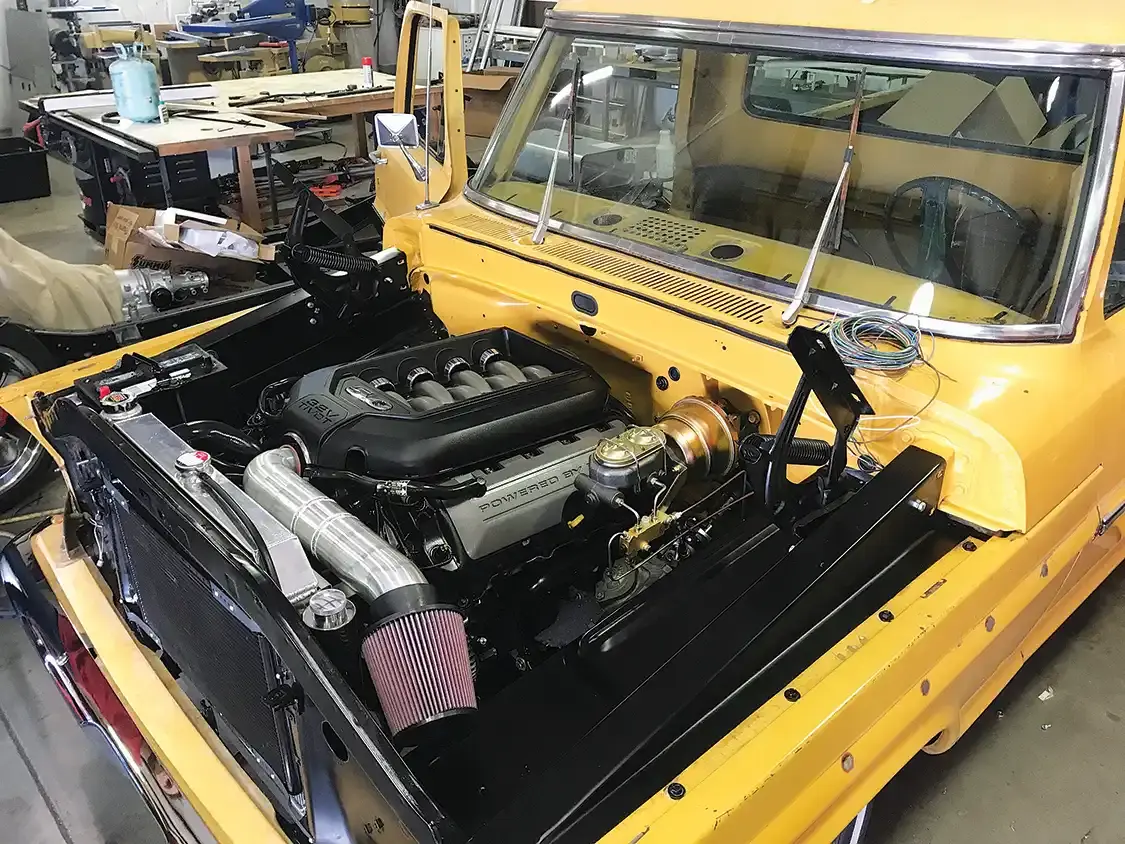
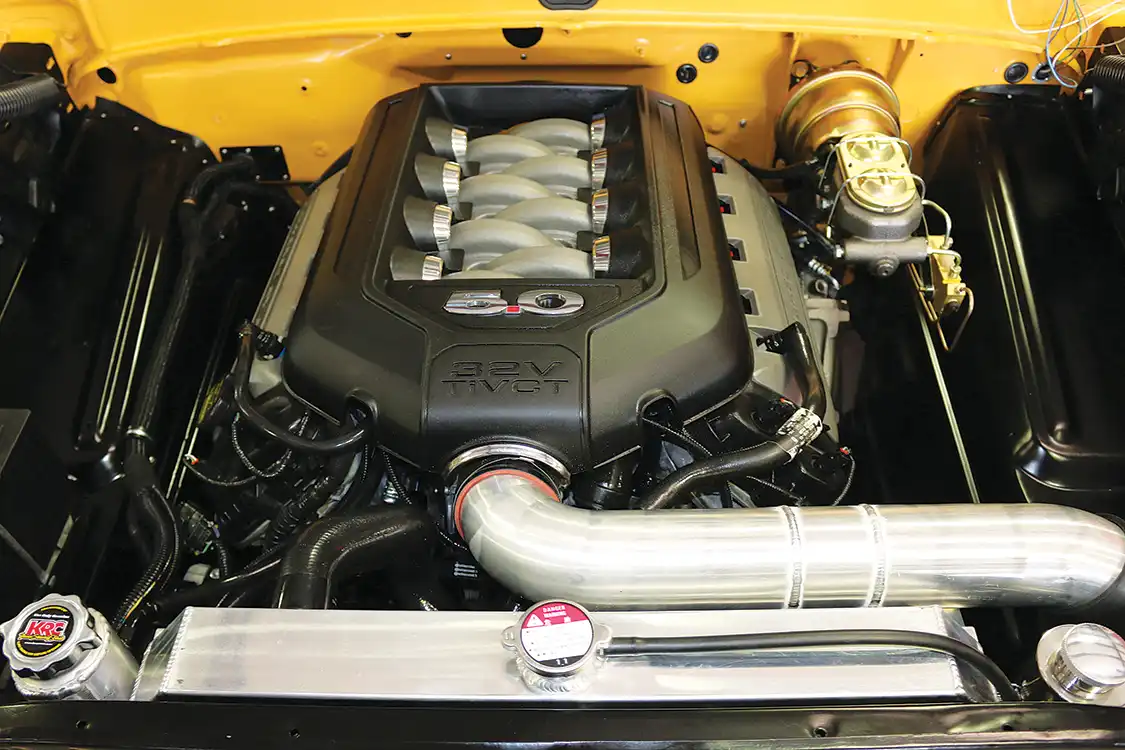
Here’s the finished product. The cold-air intake needs to be powder-coated and a few other details worked out, but it runs and is good to go.
Frequently Asked Questions
How can I ensure proper lubrication and oil flow in a F100 coyote engine swap?
Ensuring Proper Lubrication and Oil Flow in a F100 coyote engine swap
When performing a F100 coyote engine swap, ensuring proper lubrication and consistent oil flow is crucial to prevent engine damage. Here are a few steps you can take to achieve this:
Install a Remote Oil Filter
One effective method to maintain optimal oil circulation is to install a remote oil filter. A remote-oil-filter adapter allows you to relocate the filter away from the engine, providing easier access and potentially freeing up space for other components.
Use Universal Remote-Filter Kits
For many vehicles, universal remote-filter kits are readily available at most automotive speed shops. These kits come with all the necessary fittings and hoses to reroute the oil flow efficiently.
Opt for Right-Angle Adapters
If you are working on a specific engine type, such as a small-block Mopar, a right-angle adapter might be necessary. This adapter helps you navigate around obstructions like headers, ensuring that the oil filter remains easily accessible and that oil flow is not compromised.
Tips for Installation
Check Compatibility: Always make sure that the remote filter kit or adapter is compatible with your engine model.
Secure Fittings: Ensure all fittings are tightly secured to avoid leaks.
Use High-Quality Hoses: Opt for hoses that can withstand high temperatures and pressures to prevent deterioration.
Final Checks
After installation, double-check all connections and run the engine to ensure there are no leaks. Regularly monitor oil pressure and oil levels to promptly address any issues that may arise.
By following these guidelines, you can effectively manage your oil system during a F100 coyote engine swap, ensuring your engine runs smoothly and efficiently.
How can I modify a driveshaft for a F100 coyote engine swap?
When you perform a F100 coyote engine swap, you will likely need to modify your driveshaft to match the new setup. Typically, this requires altering the length of the driveshaft to accommodate the different dimensions of the new transmission.
Here’s a step-by-step guide to modifying a driveshaft for a F100 coyote engine swap:
Measure the Driveshaft:
Determine the correct length needed by measuring the distance from the end of the new transmission to the rear differential. Precise measurements are crucial for proper alignment and performance.
Remove the Driveshaft:
Detach the existing driveshaft from the vehicle. Be careful to mark the orientation before removal to ensure it is reinstalled correctly.
Determine the Modification Type:
Decide whether the driveshaft needs to be lengthened or shortened. This decision will be based on your initial measurements.
Choose a Modification Method:
If you don’t have access to a local shop, you can send the driveshaft to an industrial service provider that specializes in modifications. There are several companies that offer mail-in services for driveshaft modifications, ensuring accurate and reliable adjustments.
Reinstall the Driveshaft:
Once the driveshaft has been modified to the correct length, reinstall it in the vehicle. Ensure all connections are secure and properly aligned to avoid vibrations and wear.
Tips for Successful Modification
Double-Check Measurements: Incorrect measurements can lead to significant issues, including drivetrain misalignment and vibrations.
Consult a Professional: If you are unsure of the process, seeking help from a professional can save time and prevent potential damage.
Test Thoroughly: After reinstalling the driveshaft, take the vehicle for a test drive to ensure everything is functioning smoothly.
By following these steps, you can modify a driveshaft effectively for your coyote engine swap, ensuring your vehicle runs optimally with its new setup.
What types of transmission dipsticks are available for F100 coyote engine swaps?
Types of Transmission Dipsticks for F100 Coyote Engine Swaps
When you’re tackling a F100 coyote engine swap, choosing the right transmission dipstick is crucial. Here are the main types available, each designed to address specific needs:
Flexible Braided Line Dipsticks
These dipsticks are highly adaptable, featuring a flexible, braided line that can twist and turn to fit tight spaces. Ideal for custom setups where space is at a premium and conventional dipsticks just won’t fit.
Billet Handle Dipsticks
Featuring sturdy, billet handles, these dipsticks offer durability and ease of use. They can be mounted in various locations, providing versatility and convenience.
Extension Tube Dipsticks
For those needing a longer reach, extension tube dipsticks provide added length. They are perfect for configurations where the transmission is positioned further from the access point.
Benefits of Flexible Dipsticks
Adaptability: Can be maneuvered around engine components.
Ease of Installation: Suitable for complex engine/transmission combinations.
Durability: Often made from high-strength materials that resist wear and tear.
Key Considerations
Compatibility: Ensure the dipstick matches your transmission type.
Material: Look for materials that will withstand high temperatures and harsh conditions.
Mounting Options: Choose a dipstick that offers flexible mounting solutions for your specific setup.
Popular Third-Party Brands
Lokar: Known for high-quality, flexible dipsticks with billet handles.
Moroso: Offers a range of durable, reliable dipsticks for various applications.
Spectre: Known for affordable yet effective transmission dipstick solutions.
Choosing the right type of transmission dipstick can make all the difference in the success of your F100 coyote engine swap. Consider your specific needs, the space constraints of your setup, and the quality of materials to find the best fit.
How much does it cost to swap a Coyote into a Ford F-100?
A budget build using a salvage donor typically lands between $17,500 and $28,500 all-in, including parts and labor. Using a new Ford Performance crate engine instead pushes the total to roughly $22,000–$34,000. The single biggest line item is always the engine itself, followed by the control pack and the steering conversion. See the full cost breakdown table above.
How long does a Coyote swap take, and can I do it myself?
Plan on 40 to 60 shop hours for a complete install: engine and transmission removal, tunnel and frame modification, mount installation, harness and control pack integration, cooling, fuel, brakes and steering. If you have sheet-metal skills and a welder, a confident DIYer can cut the labour bill substantially. If you are hiring it out, get the shop to quote the tunnel and frame work separately — that is where surprises live.
Chris Hamilton is an automotive journalist, editor, and lifelong truck enthusiast with extensive experience covering custom truck builds, fabrication, performance upgrades, aftermarket products, and a ...
We use cookies to enhance your browsing experience, serve personalized ads or content, and analyze our traffic. By clicking "Accept All", you consent to our use of cookies. Visit our Cookie Policy for more info.



















Share Link