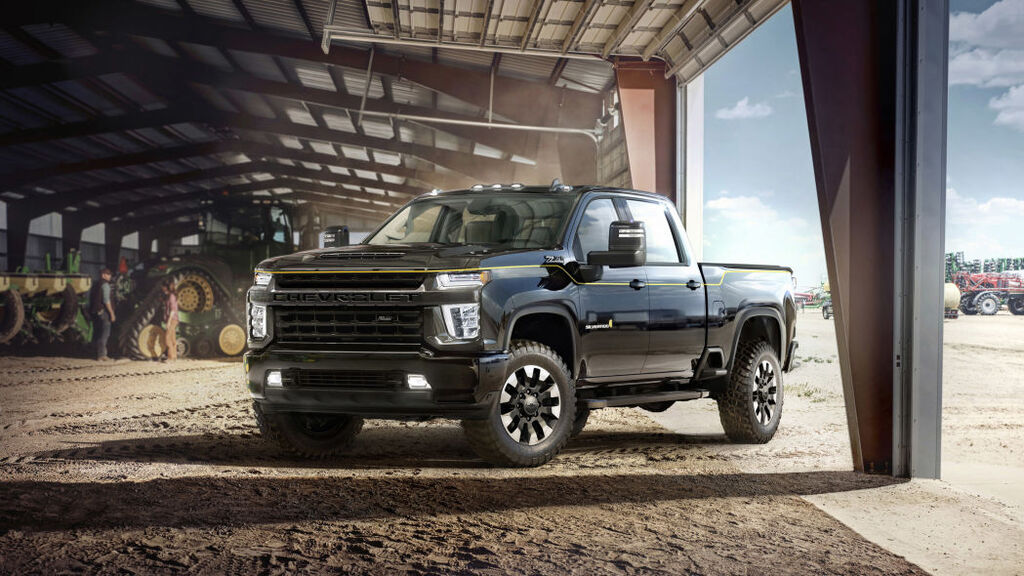
AS THE PRICE OF TRUCKS CONTINUES TO INCREASE, FEWER PEOPLE ARE HEADING TO THE DEALERSHIP TO BUY BRAND NEW VEHICLES. Sure, a 2019 Chevy Silverado LTZ with full leather and all the new gadgets would be nice, but for the cost of something like that, you could almost buy a house! On the other end of the spectrum are the classic trucks. The C10s are more popular than ever, but if you need the room of a crew cab, they don’t really fit the bill either.
So, what do you do to have a nice, reliable truck to drive every day, plus be able to transport the family or pick up supplies from the local home improvement store? Well, one option that won’t break the bank is to find a used truck and do some light restoration—and, of course, some upgrades.
A while ago, we picked up a 2005 Chevy Silverado 2500HD 4×4 with a crew cab and short bed. This truck checked all the boxes for us. It was cheap enough that we didn’t have to take out a huge loan to buy it. Being a crew cab, it has plenty of interior room and comfort inside, and the 6-foot bed length provides ample cargo room as well. The truck does have more than 100,000 miles on the it, so some wear items will definitely need to be addressed. However, this is Street Trucks magazine, and we aren’t going to just replace worn parts with stock replacements. We have to go bigger than that.
Our first order of business was to adjust the worn-out suspension. Because the truck is four-wheel drive, we decided to give it an updated appearance by installing a new lift kit. As I’m sure you already know, this required removing of a lot of the front suspension, which gave us the opportunity to replace those worn out stock parts with brand new parts as well as upgrade the look of the truck. We know from past projects that Summit Racing has just about everything we could ever need, so we reached out to them for some help on our new project, and they had us covered. We placed our order, and a few days later we had all the parts to improve the truck.
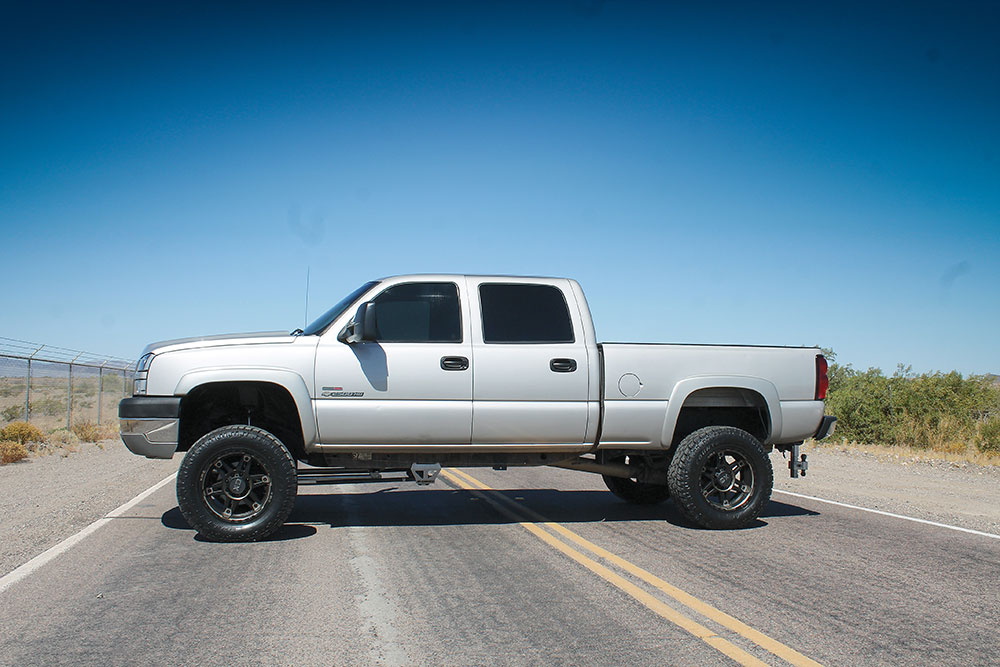
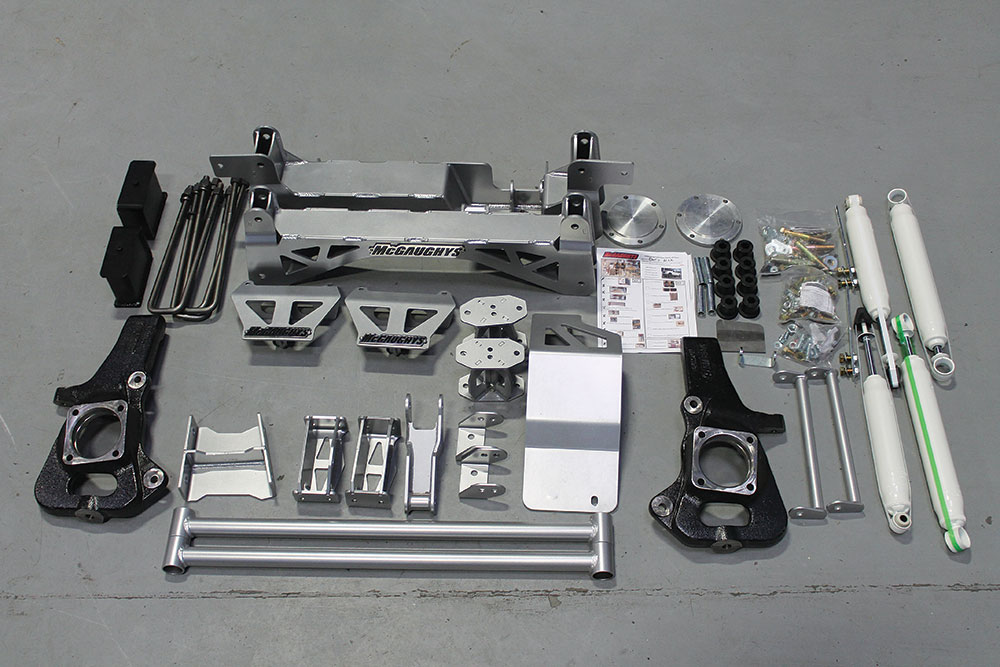
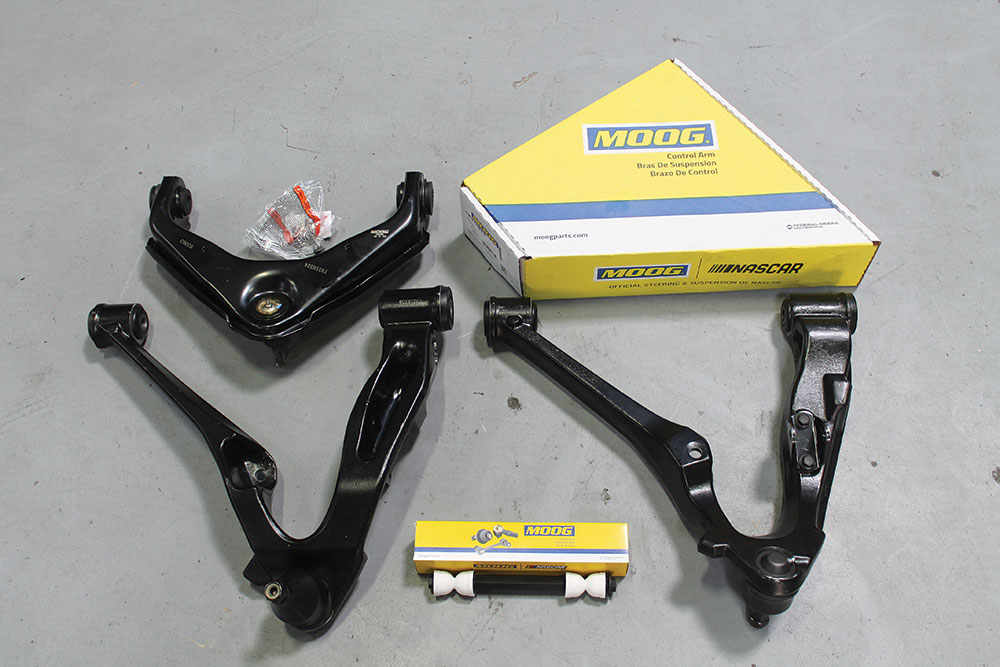
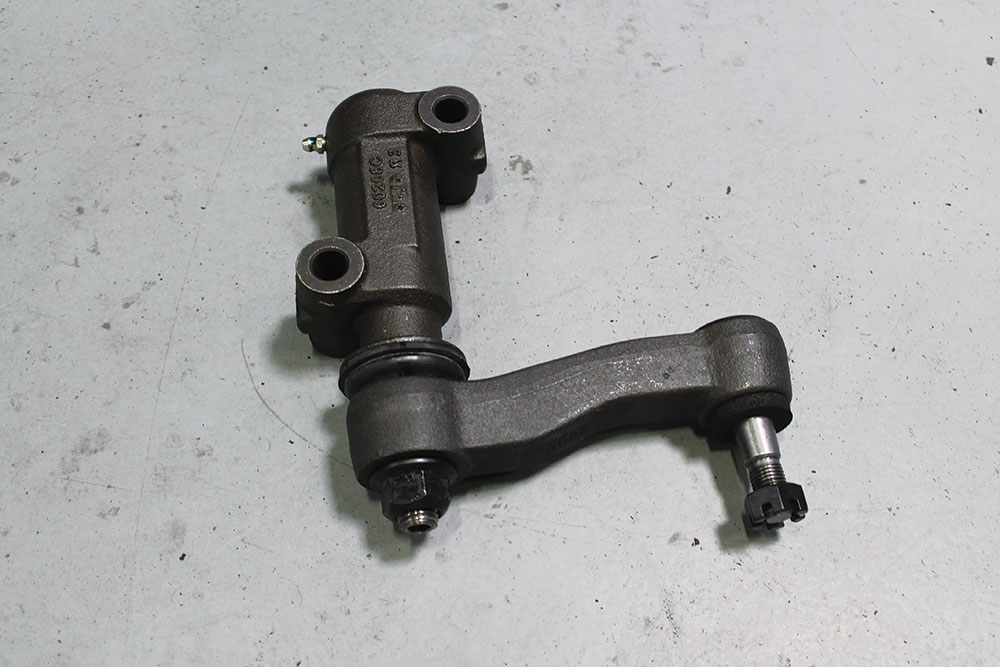
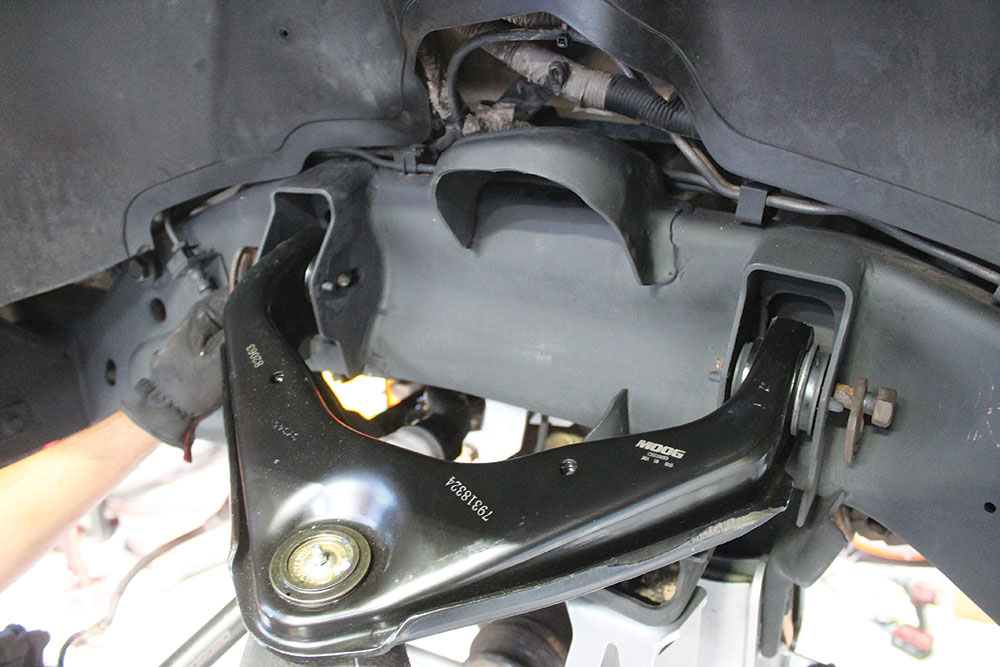
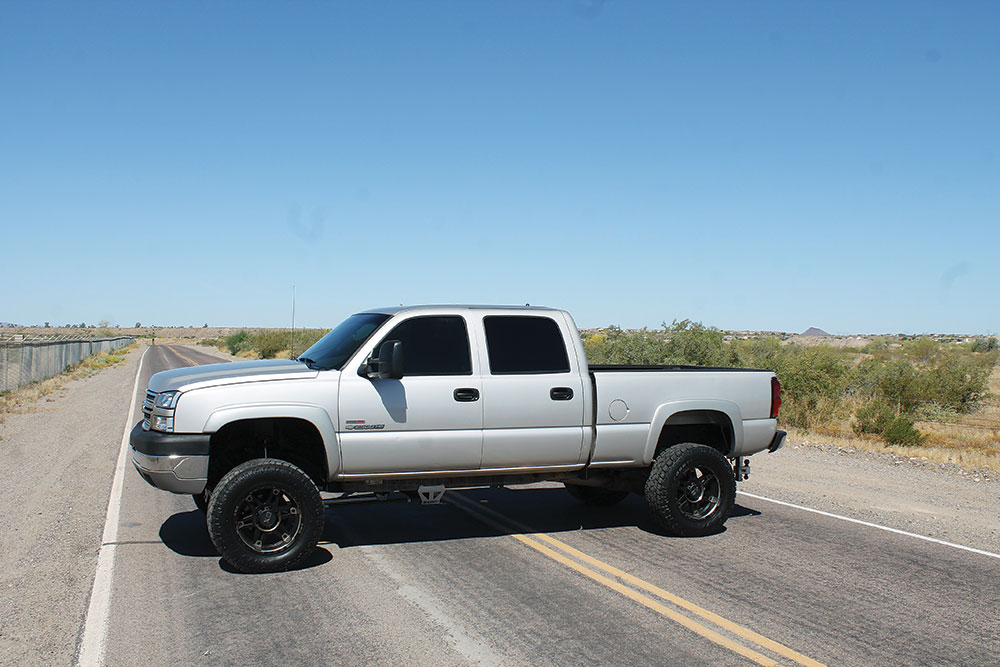
Here’s the truck before we began. Sure, it looks fine for the average Joe out on the road, but we wanted something that stands out in the parking lot … in a good way.The biggest part we ordered from Summit Racing was this 7-inch McGaughy’s lift kit (part #MMC-52050). It includes everything we need to lift the truck high enough to clear the new rolling attire we ordered. The kit also includes four new shocks, so we’ve already started on replacing the worn parts on the truck just with the lift kit.Because Summit carries hundreds of thousands of parts, we knew they’d have the other worn items we wanted to replace at the same time we installed the lift kit. We searched their online catalog and found these new Moog upper and lower control arms. The upper control arms are identical on either side, so we ordered two of them (part #MOG-CK620053). The lowers are different from side to side, so we ordered up one driver (part #MOG-RK621356) and one passenger (part #MOG-RK621355). We also picked up a new set of sway bar end links (part #MOG-K700539).The last piece of the puzzle we planned to tackle was the steering. On these HD trucks, the steering is known to be a weak point and our truck was no exception—it had a ton of slop. We ordered up these new Proforged heavy duty tie rods (part #POF-104- 10966), a new idler arm (part #POF-102-10032) and a pitman arm (part #POF-103-10014).
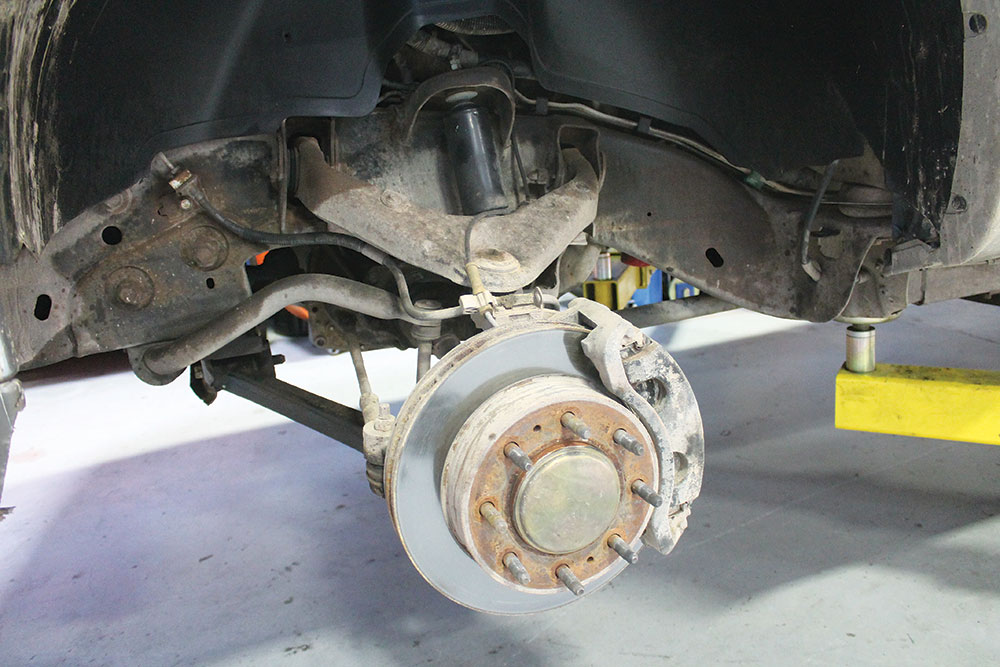
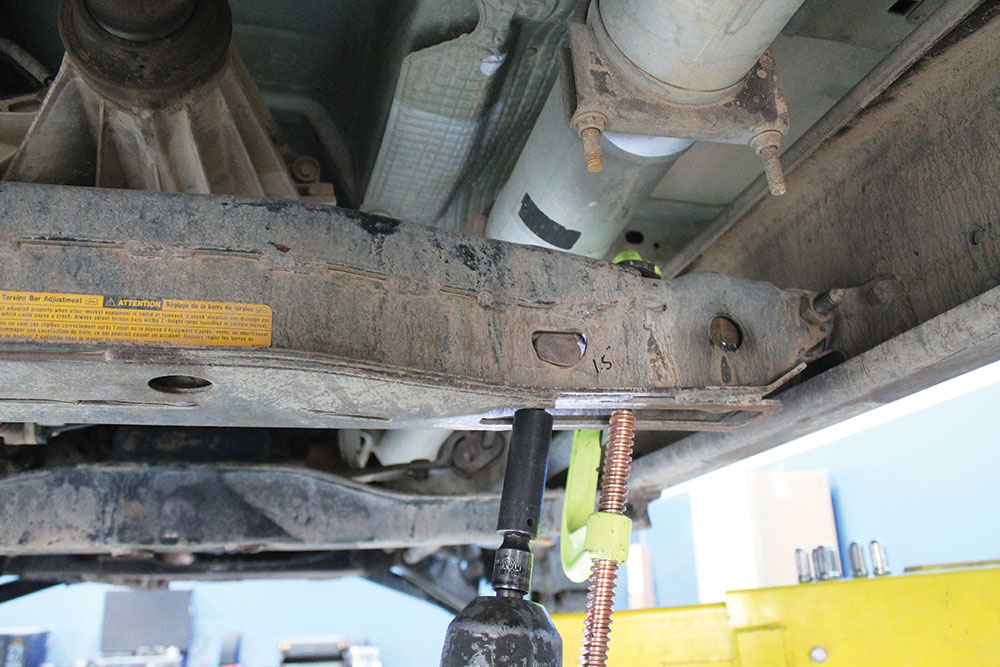
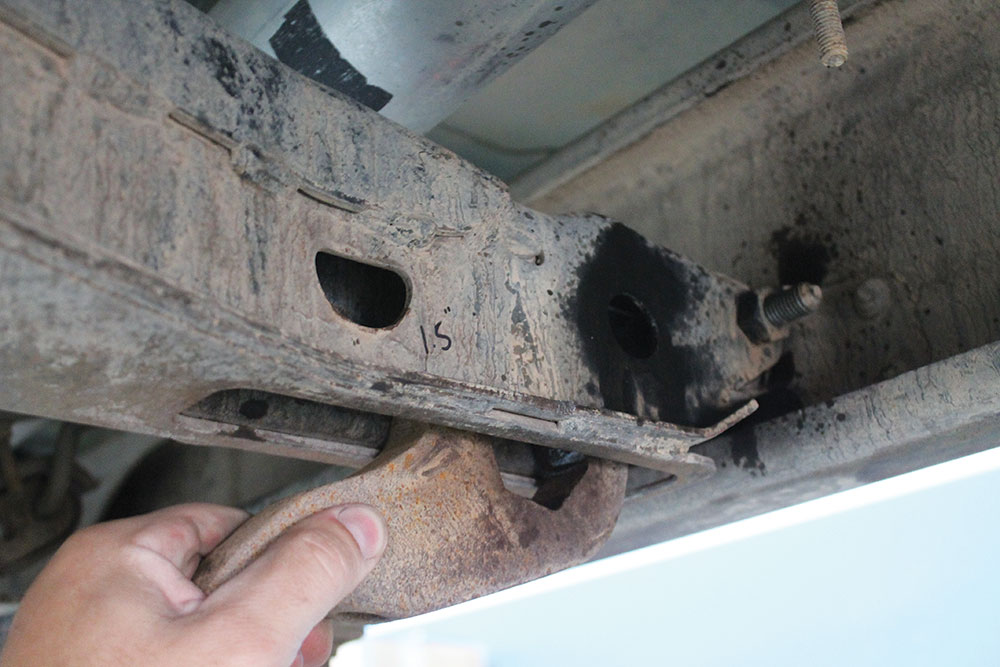
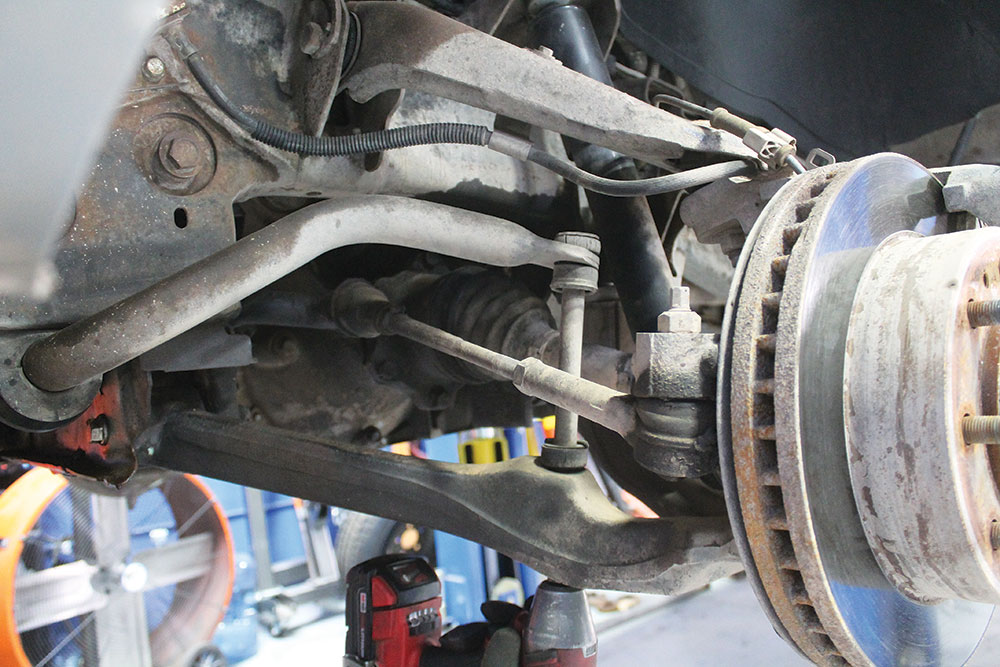
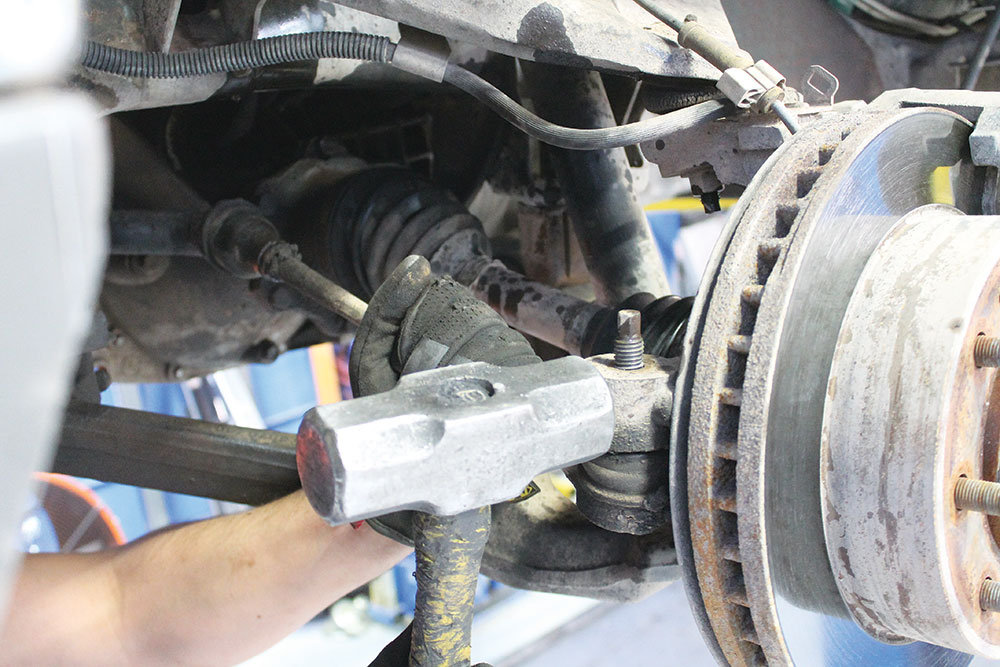
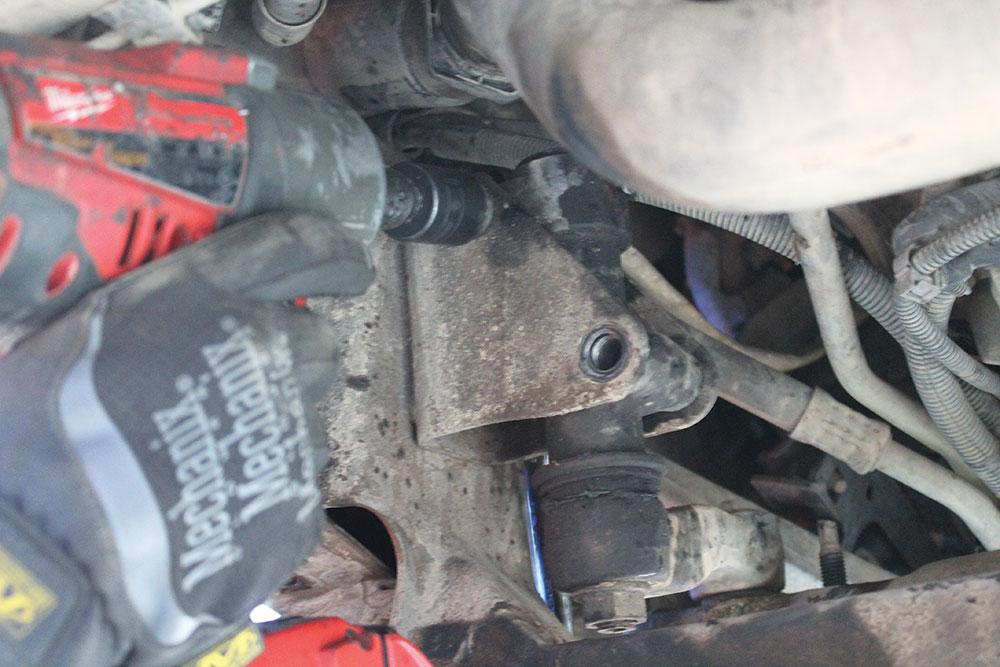
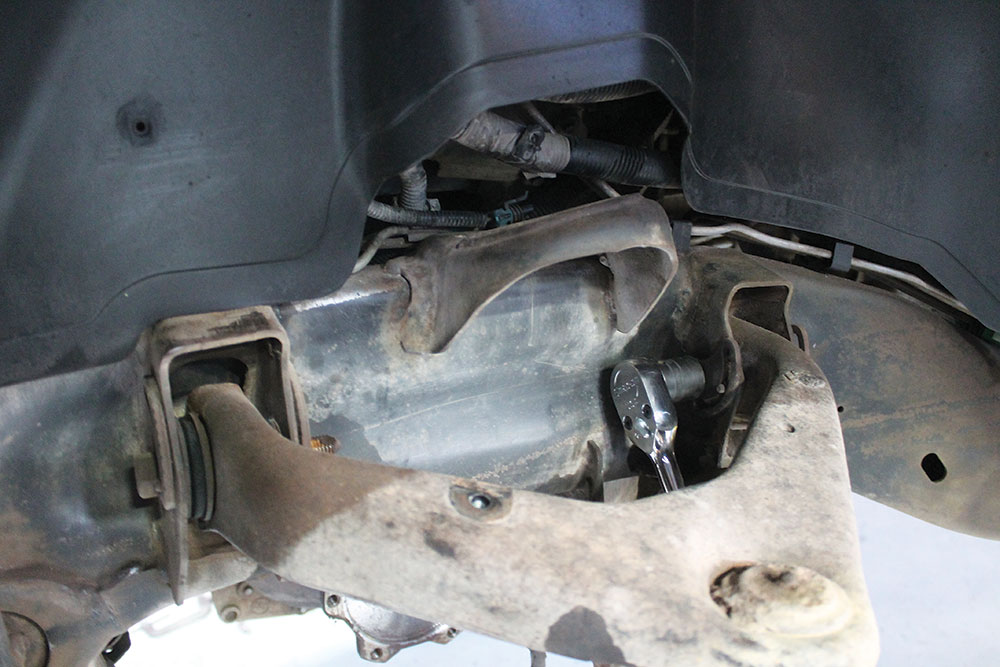
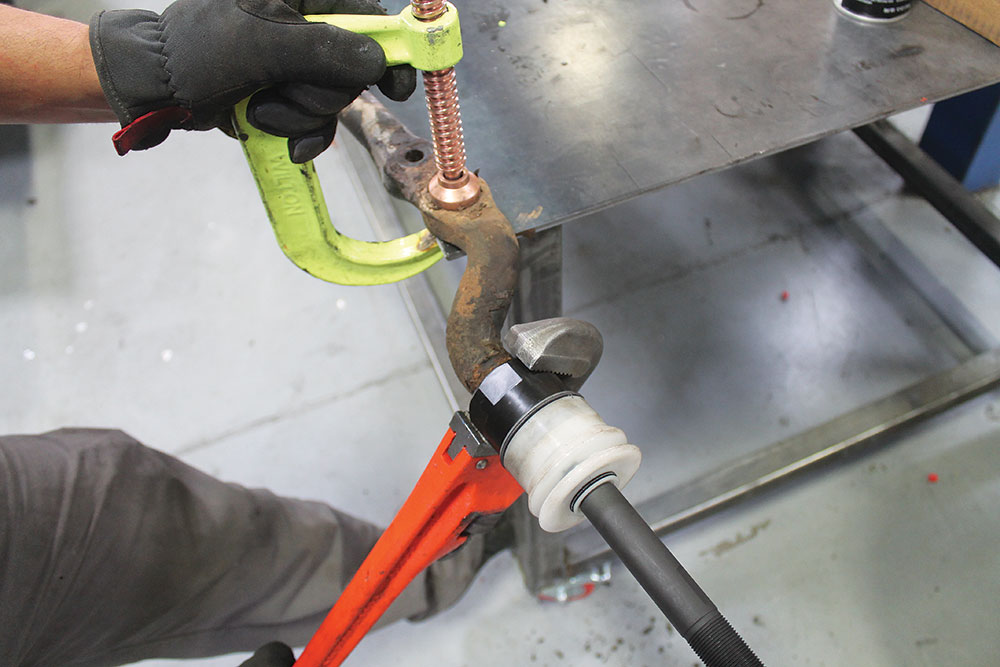
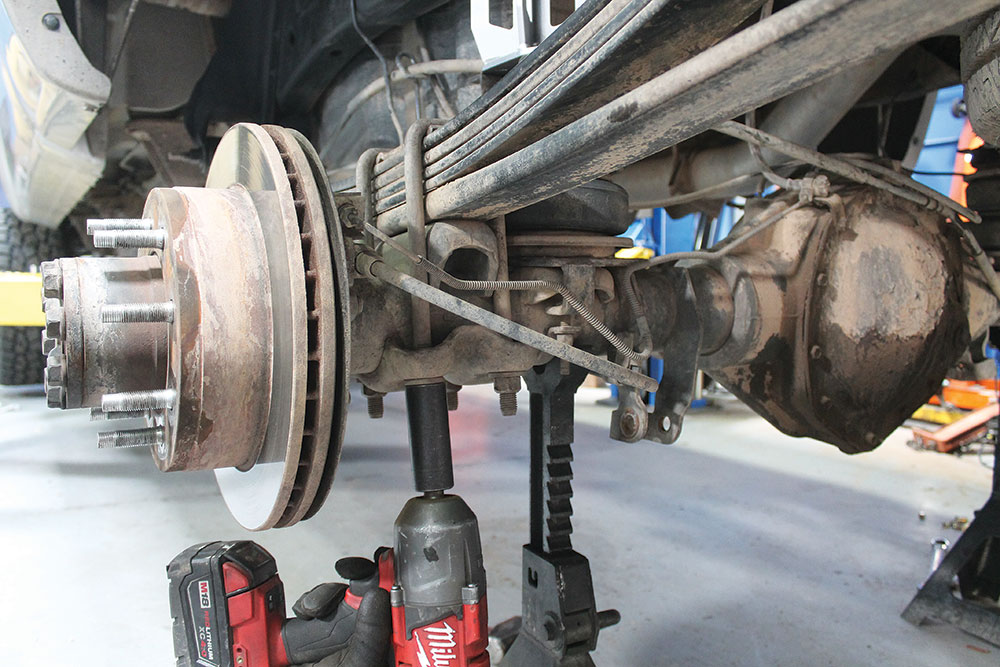
With all of our parts on deck, we got started on the project. The first step was to get the truck up on a lift and remove the old wheels and tires. This revealed the stock suspension, which was pretty badly worn out and in dire need of replacement.Using a big C clamp, we relieved the pressure on the torsion bar keys and backed out the torsion key adjusting bolt.After the bolt was out, all the pressure was off the torsion bar setup. The bar itself was pushed toward the front of the truck and the key could be removed.The torsion bar cross member also needed to be removed because it will be lowered down when the truck is lifted. Two bolts were removed, one from each side of the frame, and the cross member was lowered out of the way for now.The stock sway bar worked with the new lift kit, but it will actually go in upside down when we are all said and done. Because of this, we removed the entire assembly at this stage.We like to disconnect the steering before removing the brakes and other parts attached to the spindle. Without the steering attached, we can easily spin the assembly around to get better access to the hardware.A fairly large hammer was used to free the tie rod from the spindle. They’ve been together for quite some time, so it took a bit of persuasion, but they did separate after a few hits.
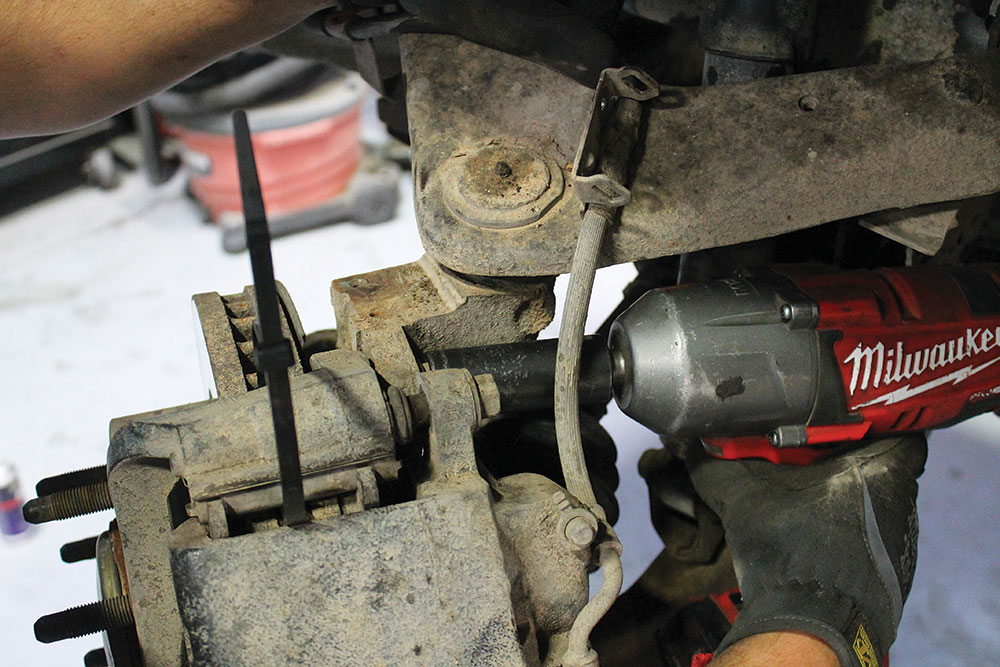
Because we are going to replace just about every part of the steering, we went ahead and removed the idler arm and pitman arm at this time, too. We just pulled the entire assembly, from tie rod to tie rod, out of the truck at once.With the steering out of the way, we were able to turn the spindle and access the caliper bolts. We also snuck a zip tie in the caliper, which used to tie up the calipers during this process. It’s never a good idea to let the calipers hang from the brake lines.
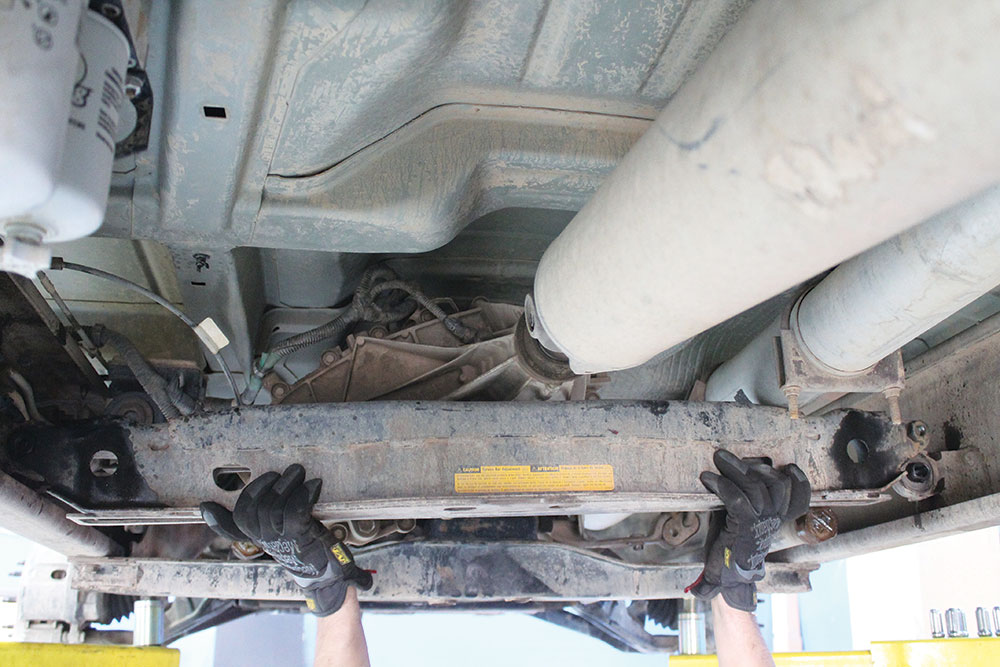
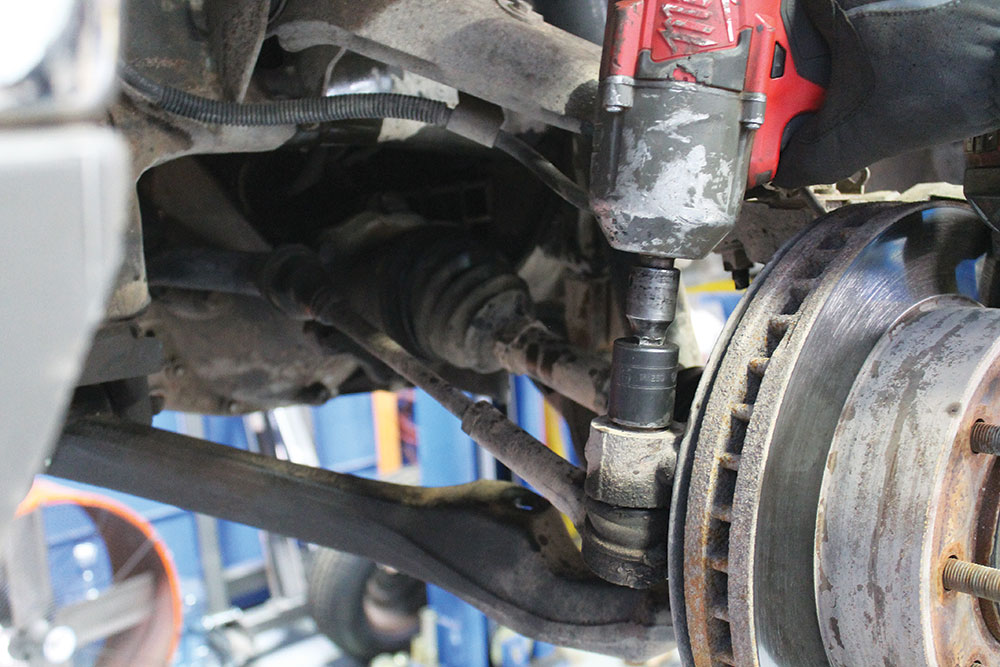
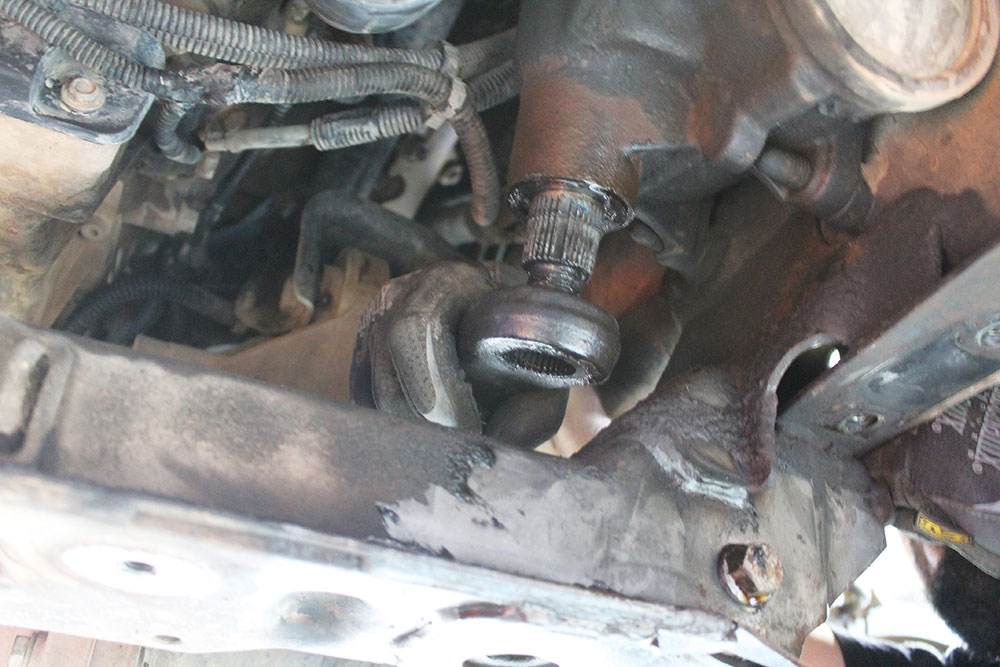
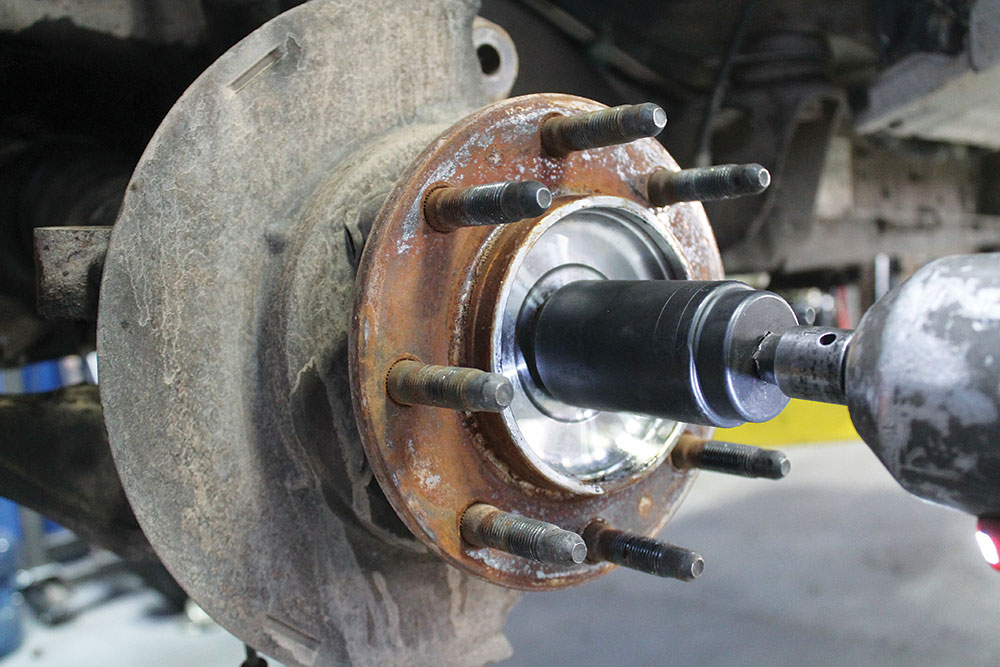
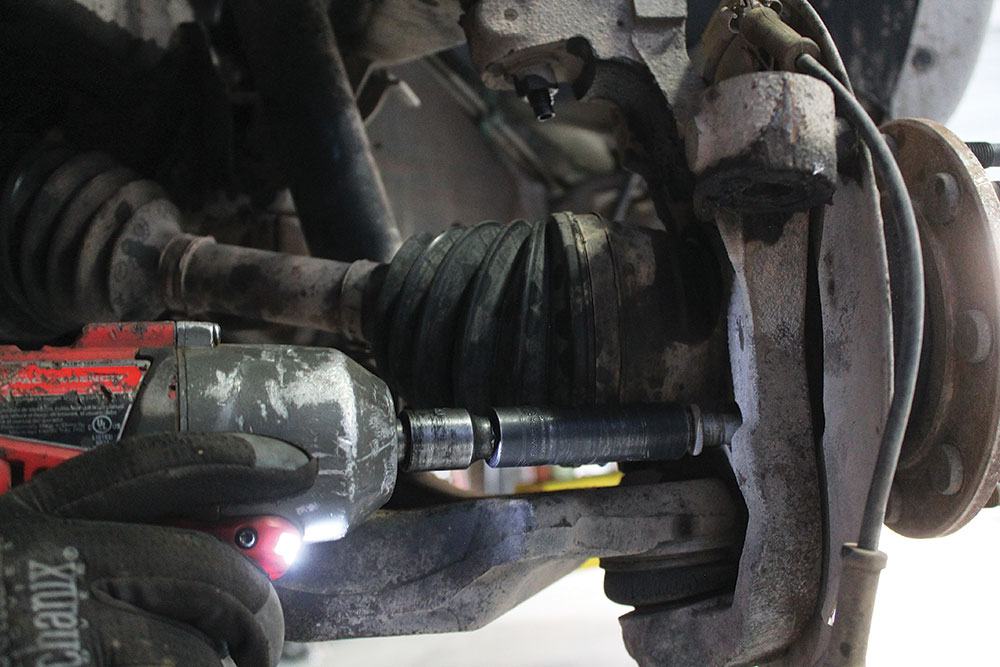
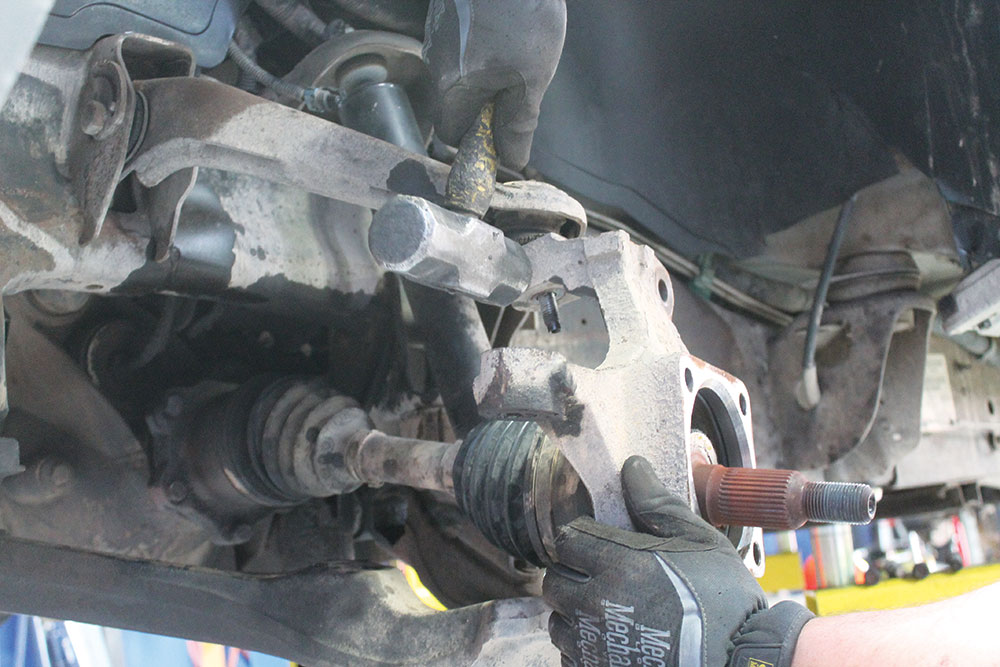
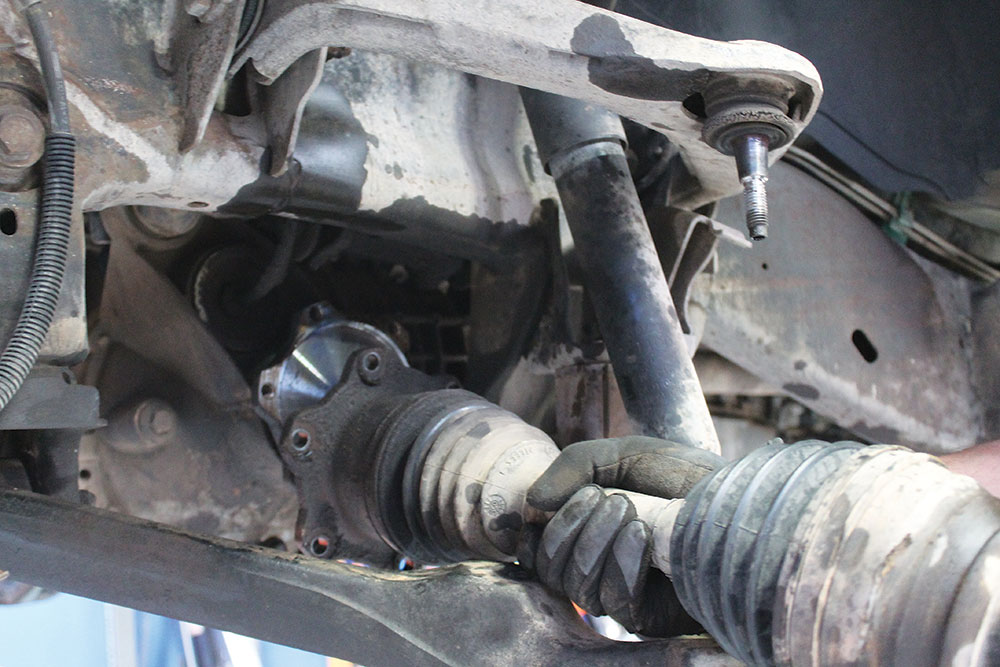
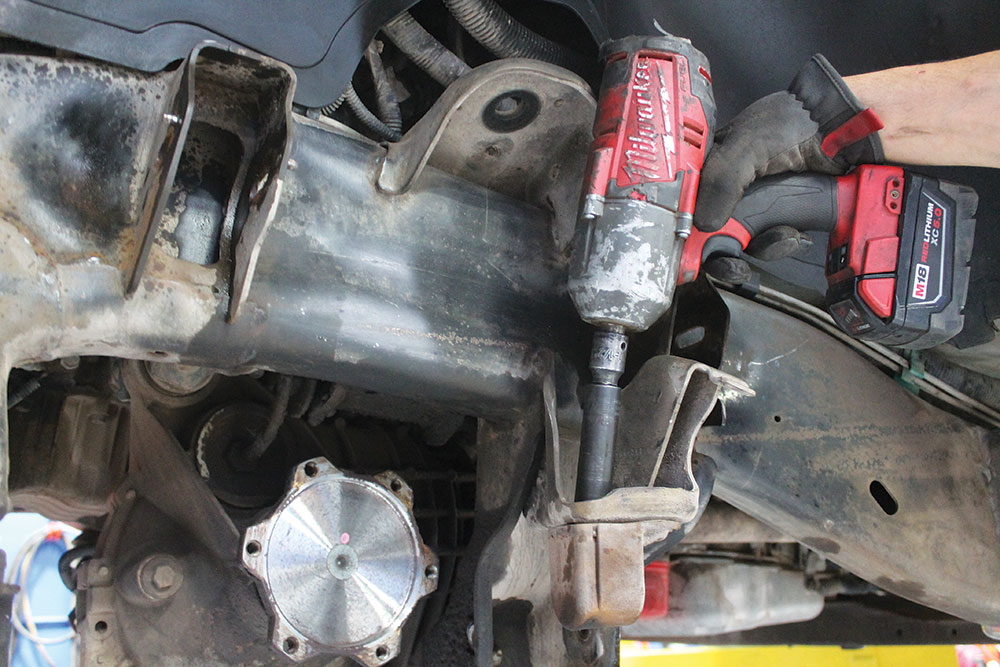
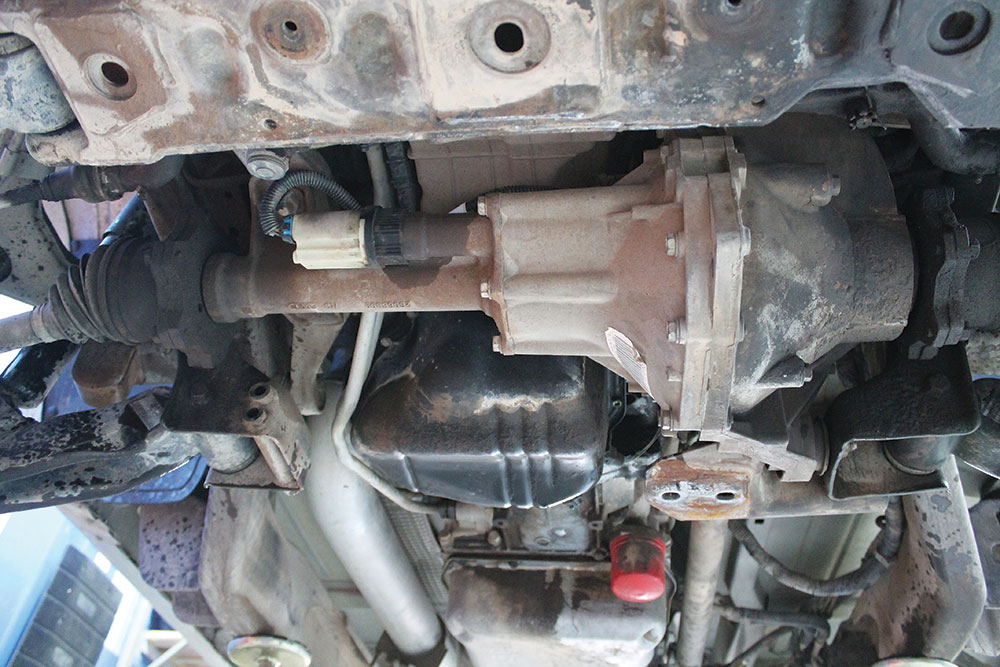
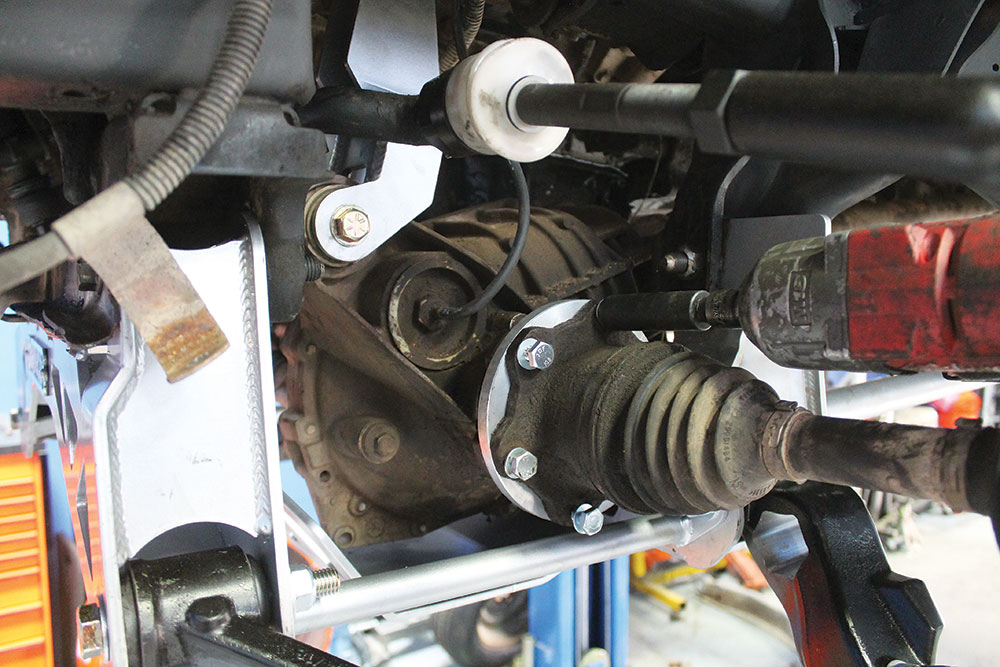
The axle was held to the hub with one large nut that required a strong impact to remove. Once that nut was off, the four bolts that secure the hub to the spindle could be removed as well.Removing the spindle required the upper and lower ball joints to be separated from the spindle. After loosening the nuts from the ball joints, the same hammer method is used to break the ball joints free from the spindle.Once the spindle was out, the bolts securing the axle were removed from the front differential and the axles were set aside for the time being.An obvious worn item on the front end was the shock. The new lift kit came with longer shocks, so the stock ones were removed and tossed in the trash.The lower control arm was next to be removed, and it was a pretty simple process. There were two bolts, one through each pivot, and then the arm could be removed.Removing the upper control arm wasn’t necessary for this lift kit installation, but because there’s only two bolts securing it to the frame of the truck, it would have been a shame not to replace it at this stage.The last piece of the stock suspension to be removed was the small bump stop. We will be reusing this, so it was set aside.We took the time at this stage to clean up the front frame rails some. We spent a few minutes with a wire wheel, some Scotch Brite pads and some lacquer thinner to clean up the frame rail. Then we hit it with the good ol’ rattle can.While that paint dried, we started removing the differential. A stock cross member was removed, but not reused.
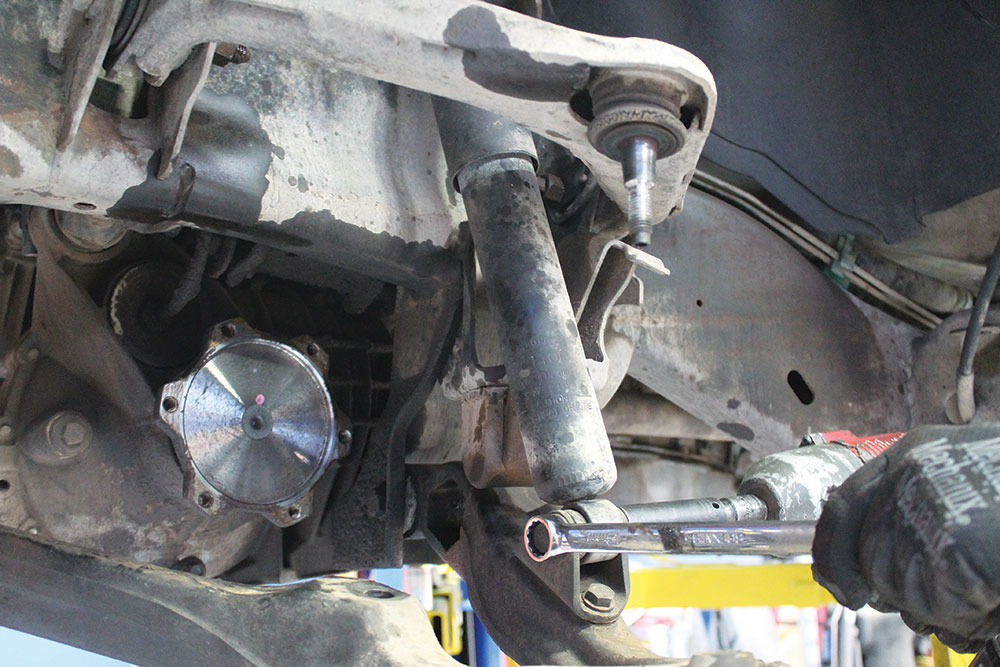
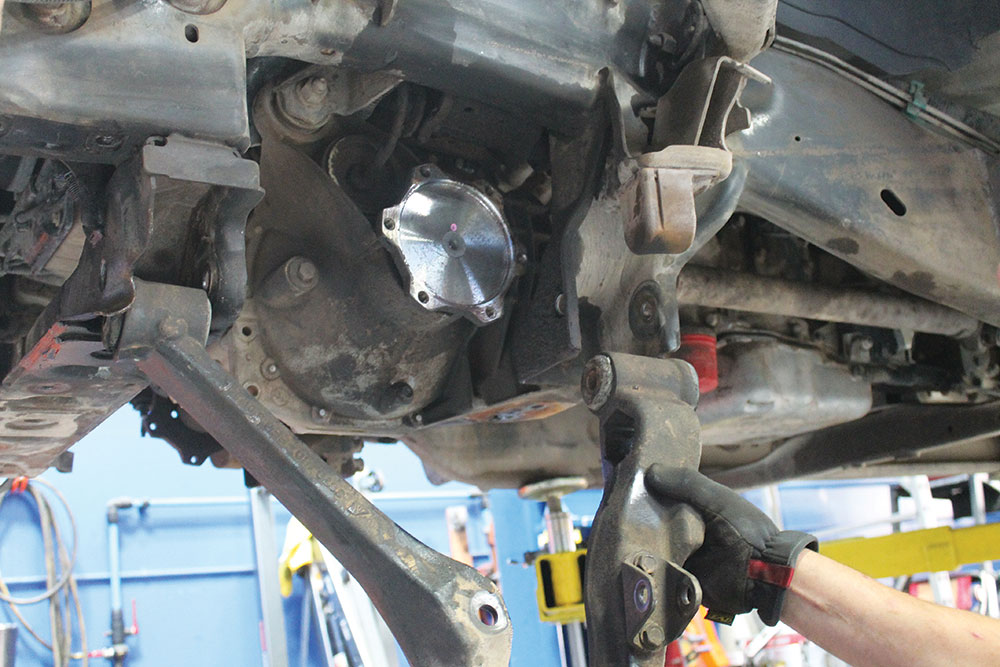
After the cross member was tossed in the trash can, we could access all the hardware attaching the differential to the chassis. One wiring plug and one vent line also needed to be removed before dropping the diff down.Luckily for us, we had the truck on a lift and a transmission jack, which made removal of the diff a breeze. However, you could still do all this with the truck on a good set of jack stands.
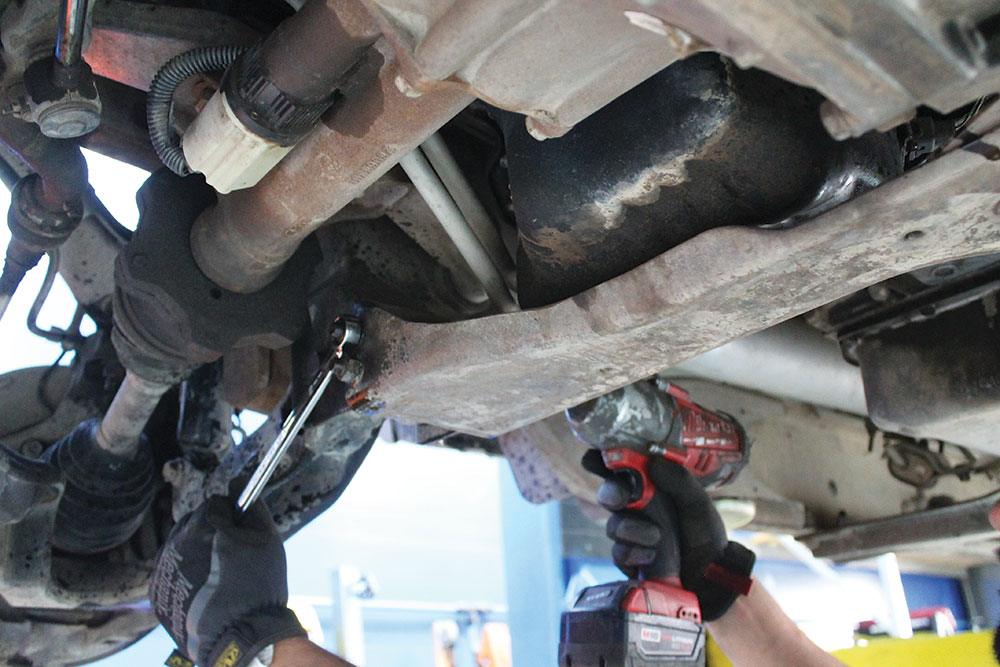
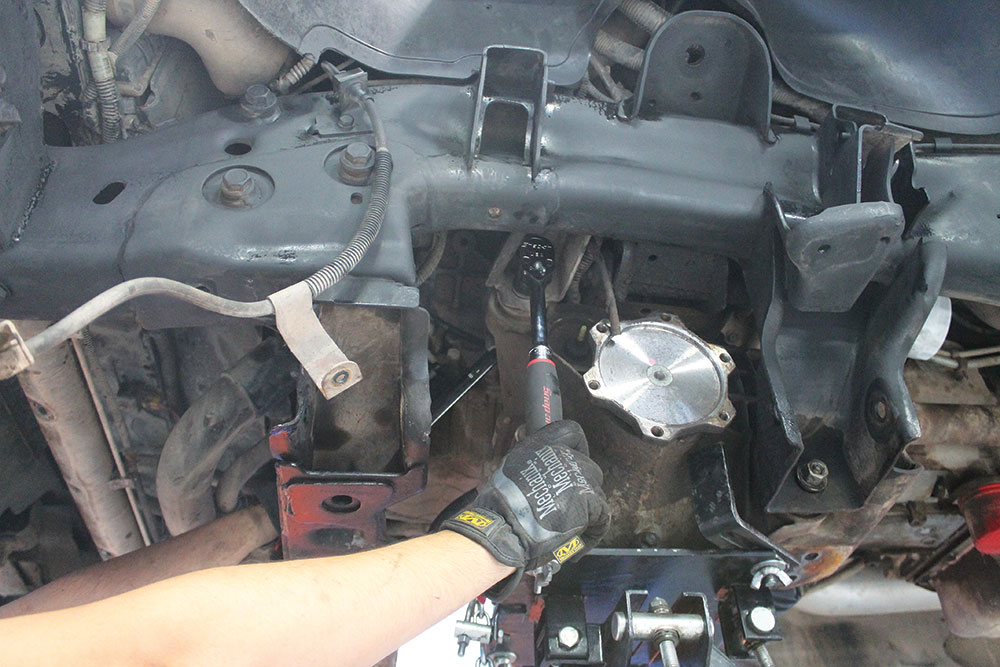
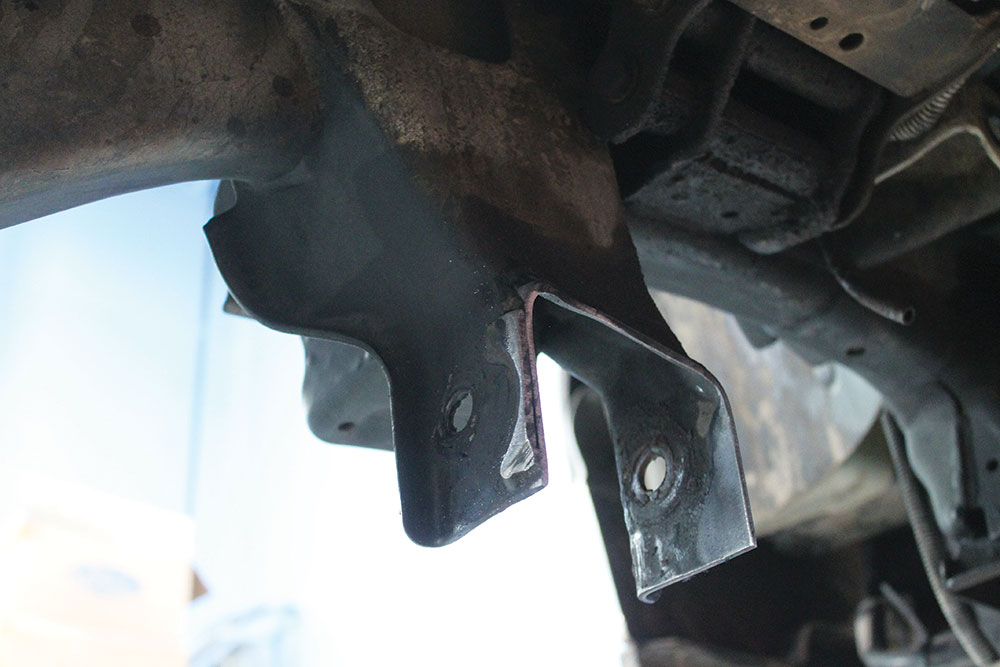
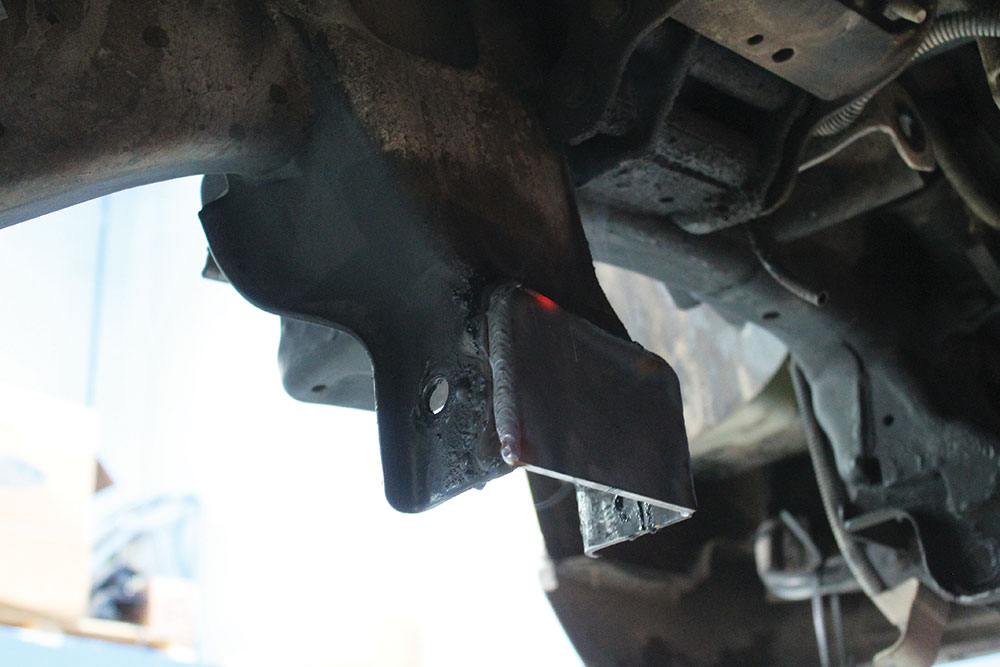
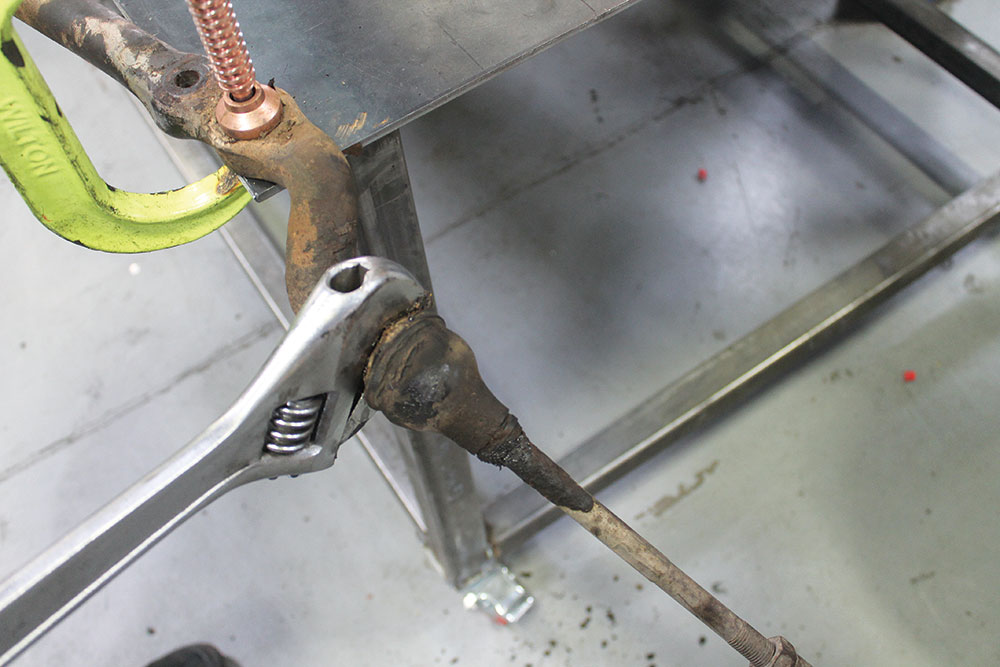
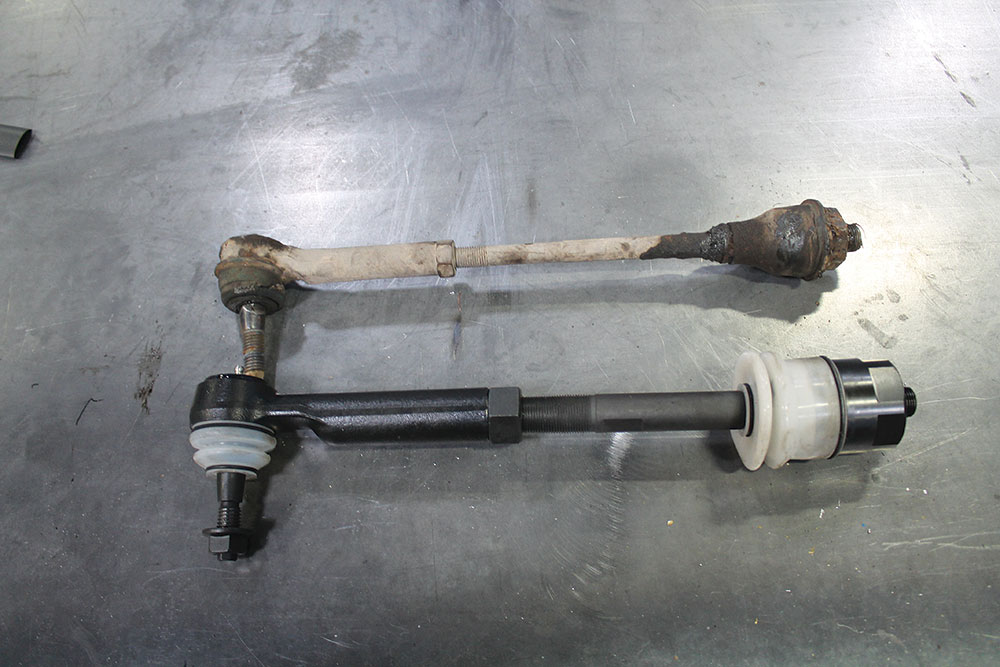
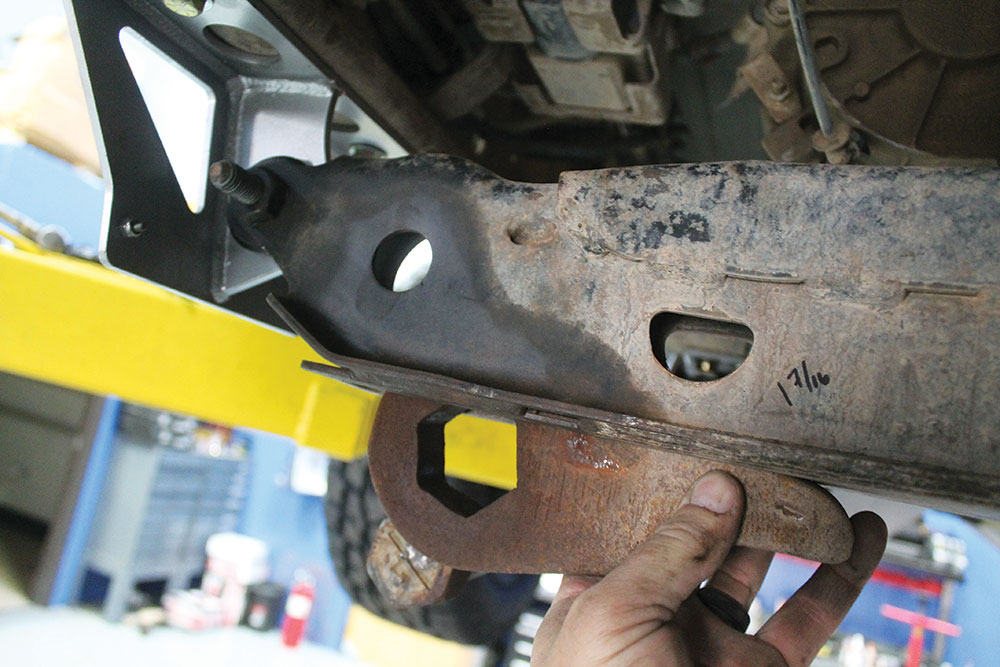
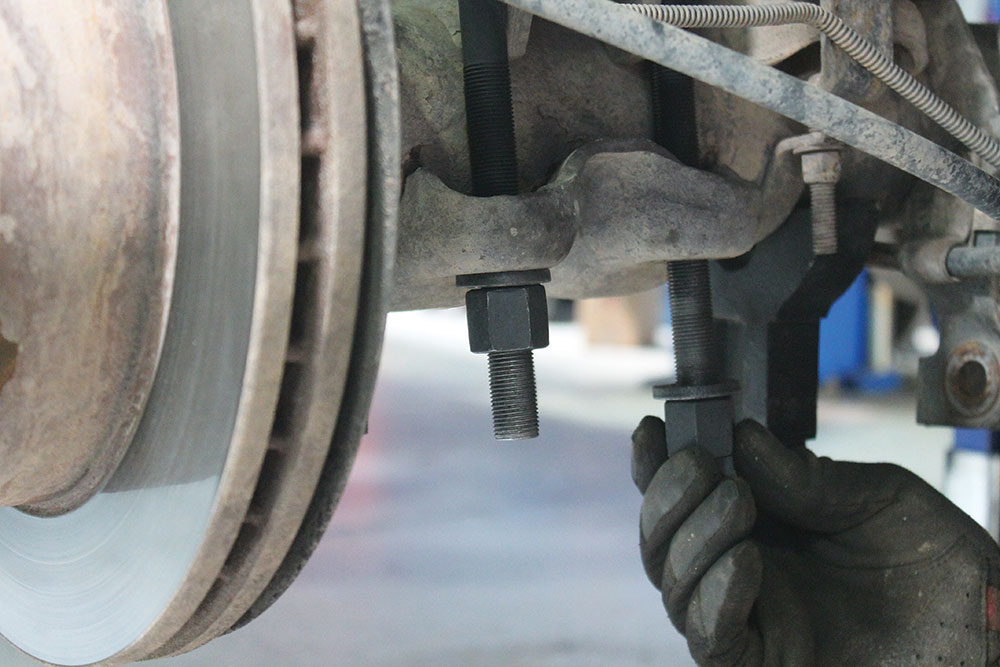
This lift kit from Summit Racing was 95% bolt on, but one section of the stock frame needed to be trimmed off. We used a Sawsall and made quick work of cutting it off the frame. We then welded the supplied plate onto the tabs that were left. Some of that black rattle can was used to keep the bare metal from rusting.When we removed the steering linkages, we noticed it would be easier to get it reinstalled on the truck with the diff out of the way. So, at this stage, we quickly turned our attention to the new steering components. We needed to remove all of the parts from the drag link, starting with the stock tie rods.Here’s a side by side comparison of the stock tie rod and the new Proforged heavy duty tie rod. There was quite a big difference in size, which means there will be a ton of extra strength.The new tie rod was so large that we didn’t have a wrench big enough to tighten it onto the drag link, so we had to break out the pipe wrench.
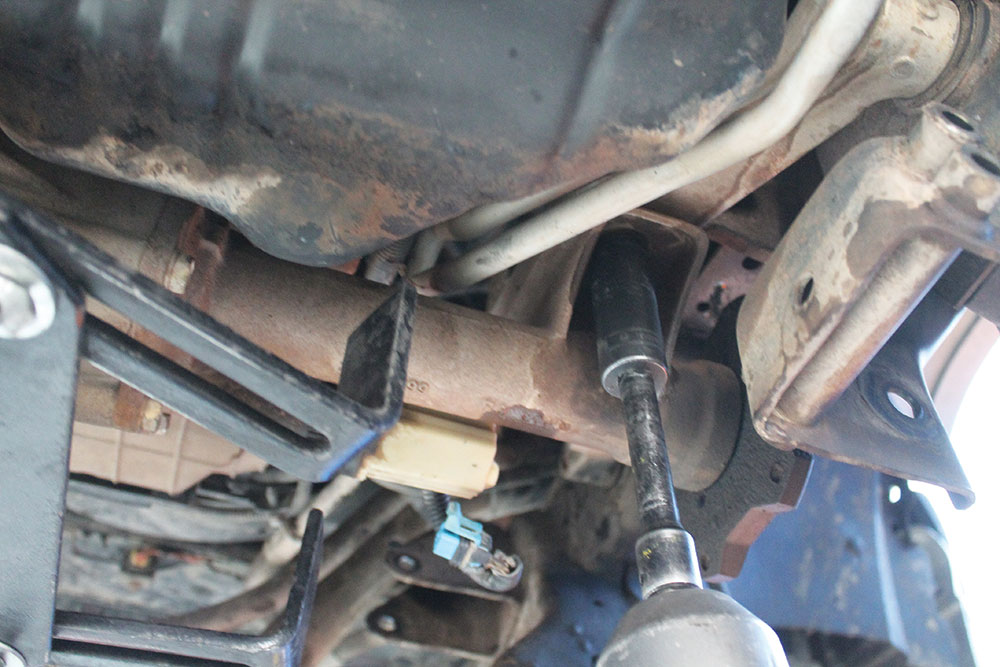
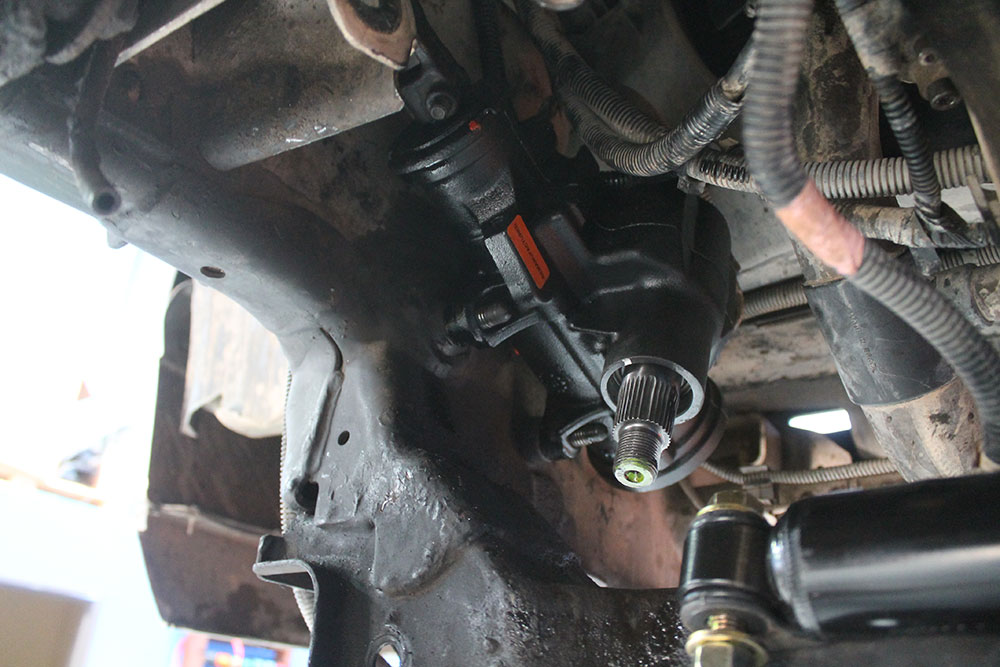
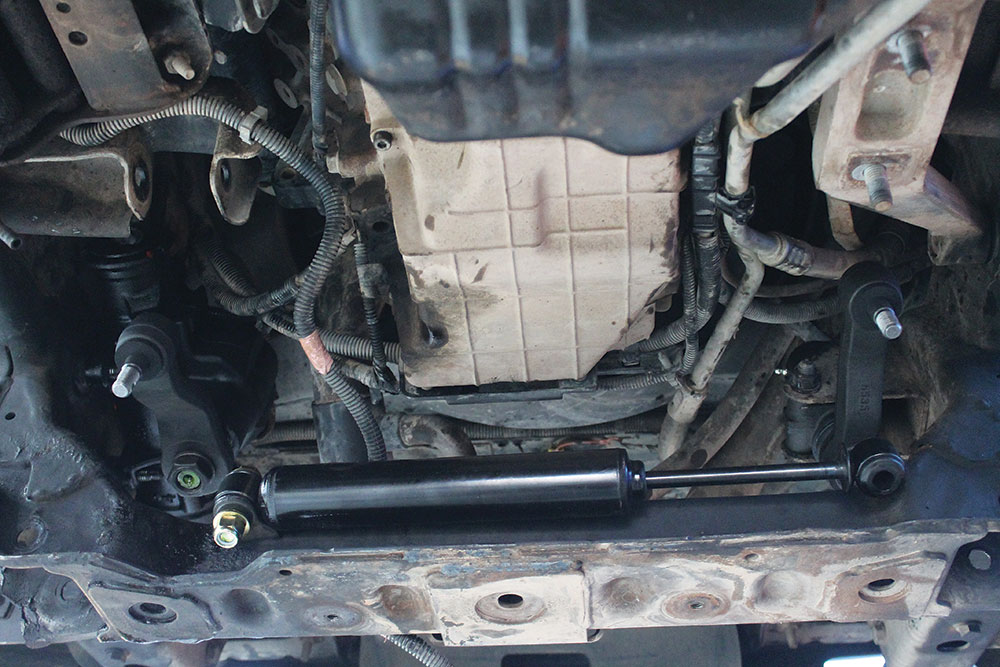
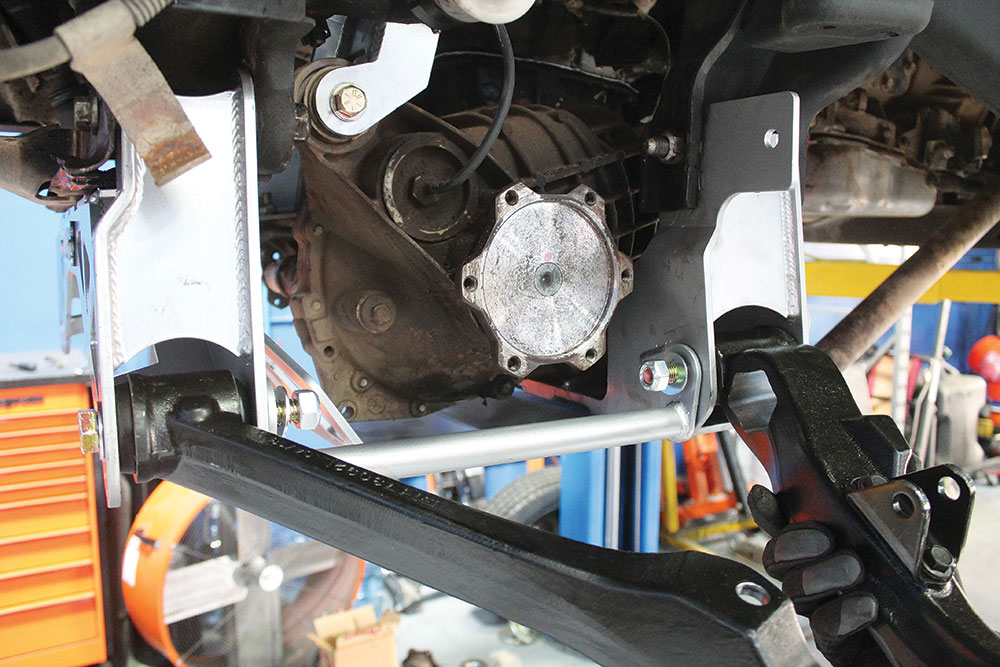
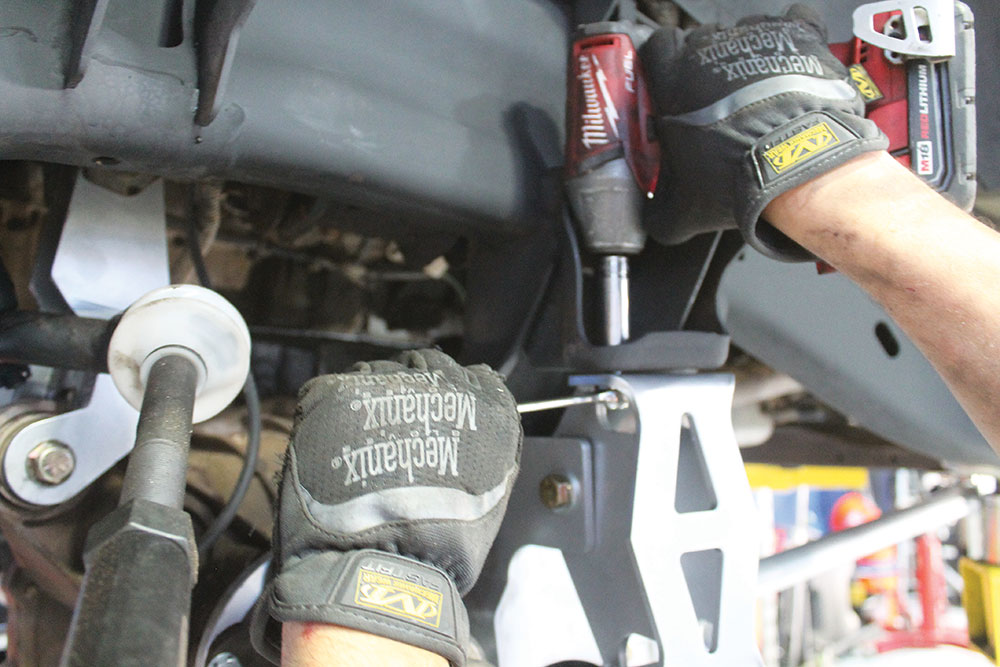
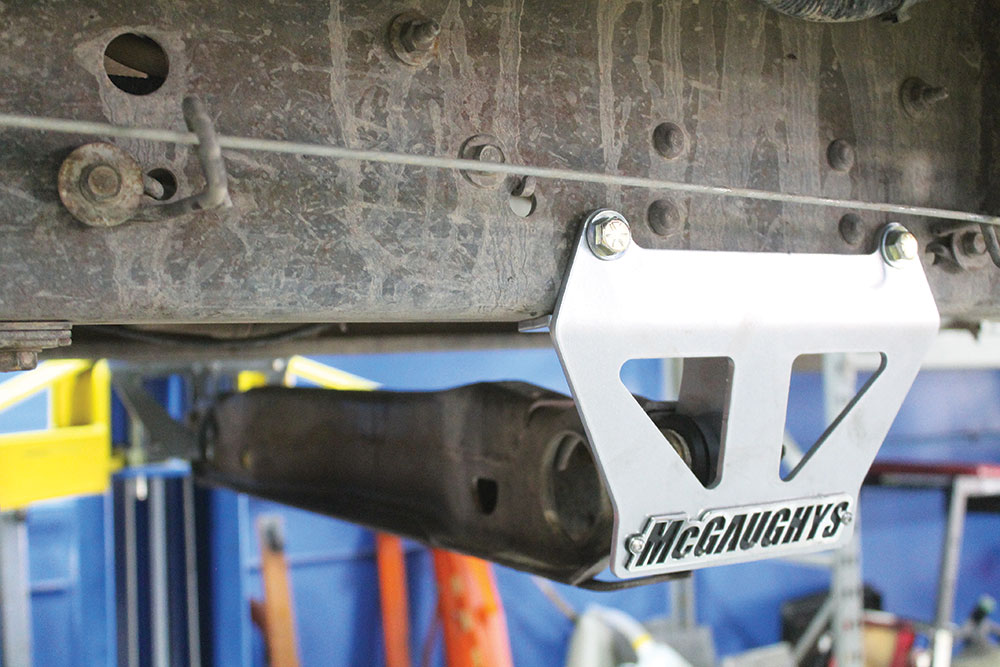
The new idler arm was assembled outside of the truck, and then it was installed into the factory location, along with a new steering box and steering stabilizer. The tie rod and drag link assembly was then installed back into the truck and hooked up at the idler arm, pitman arm and steering stabilizer.With the steering handled, it was time for us to start installing parts from the actual lift kit. The first piece of the kit to be installed was the rear control arm cross member. This cross member bolted into the factory rear control arm pockets on each side of the frame.
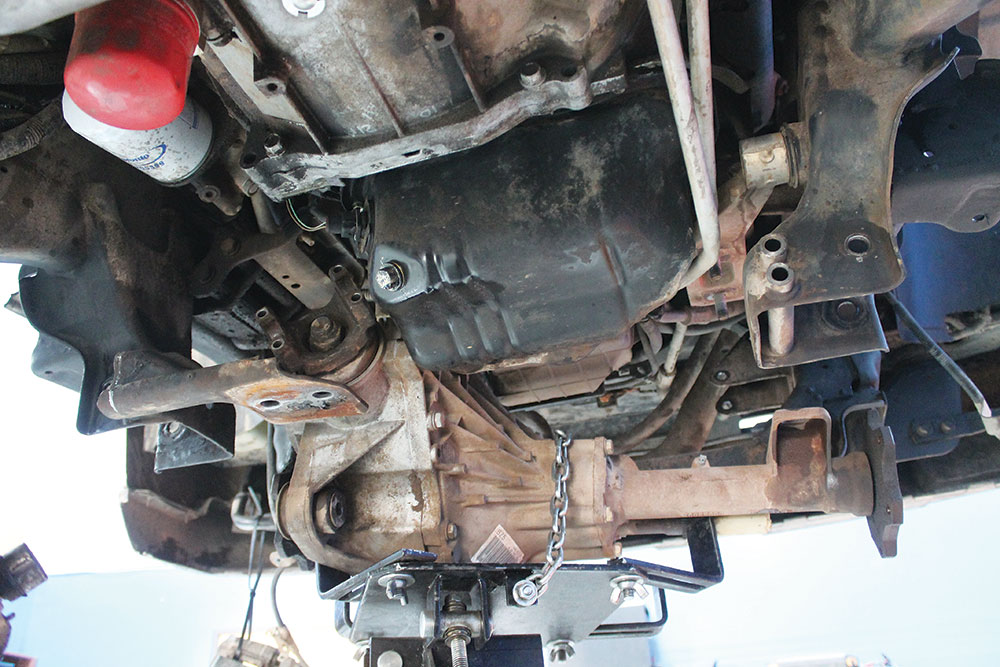
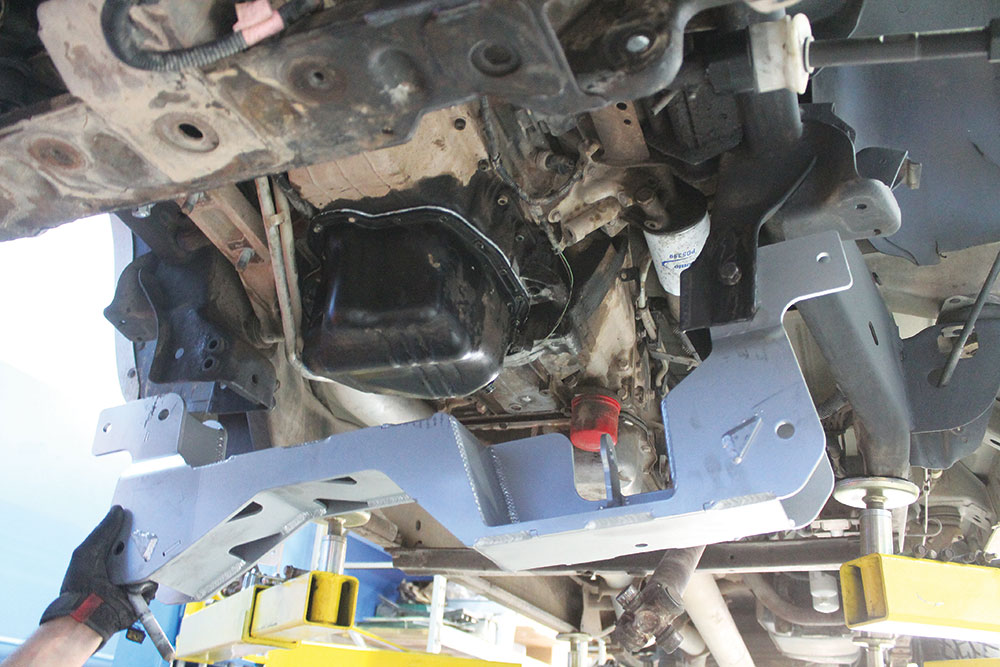
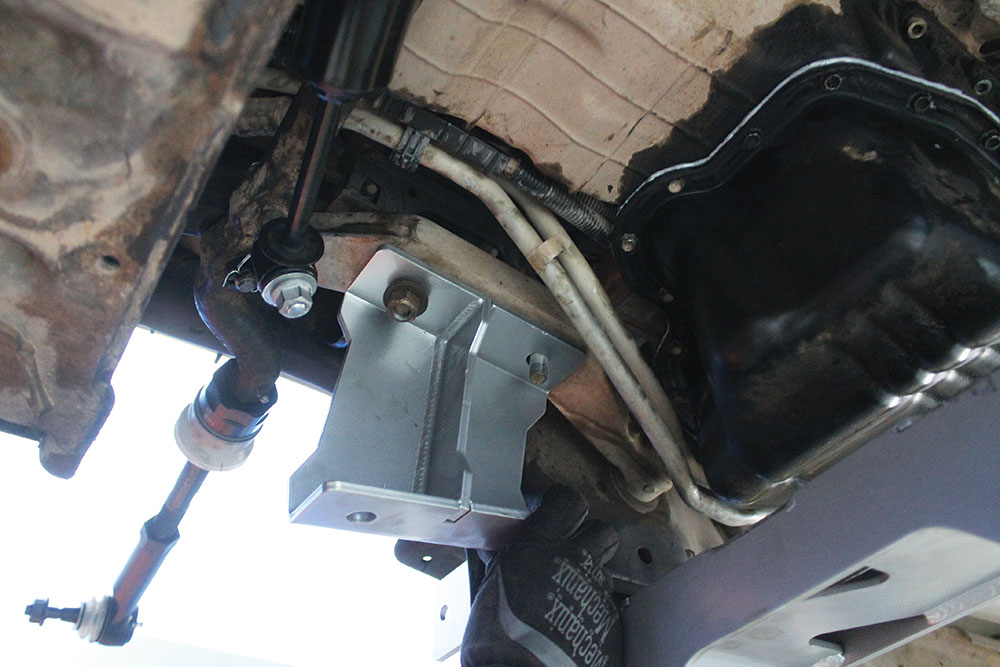
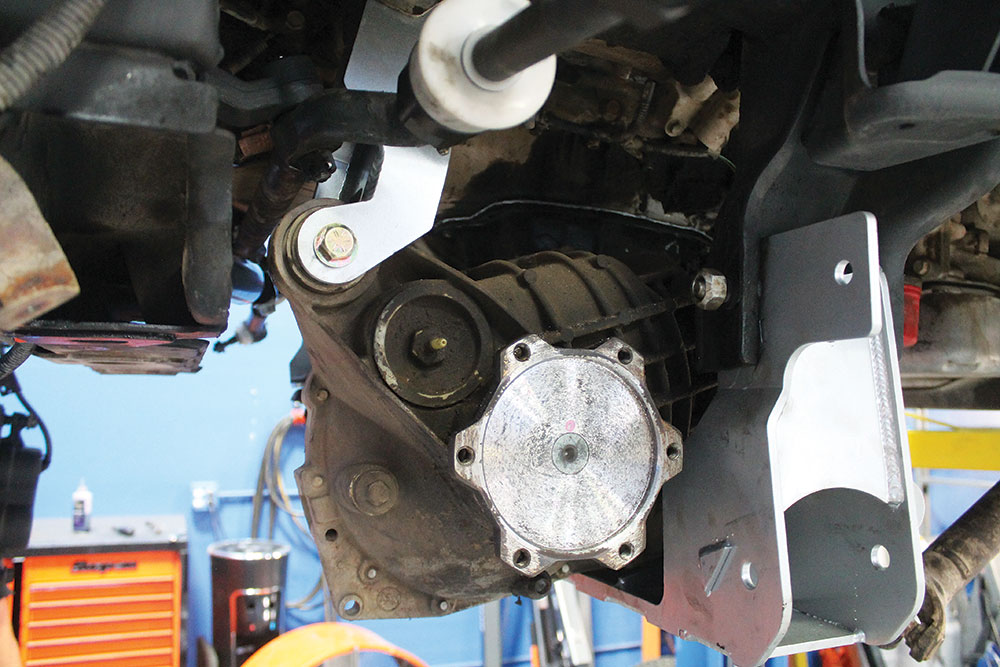
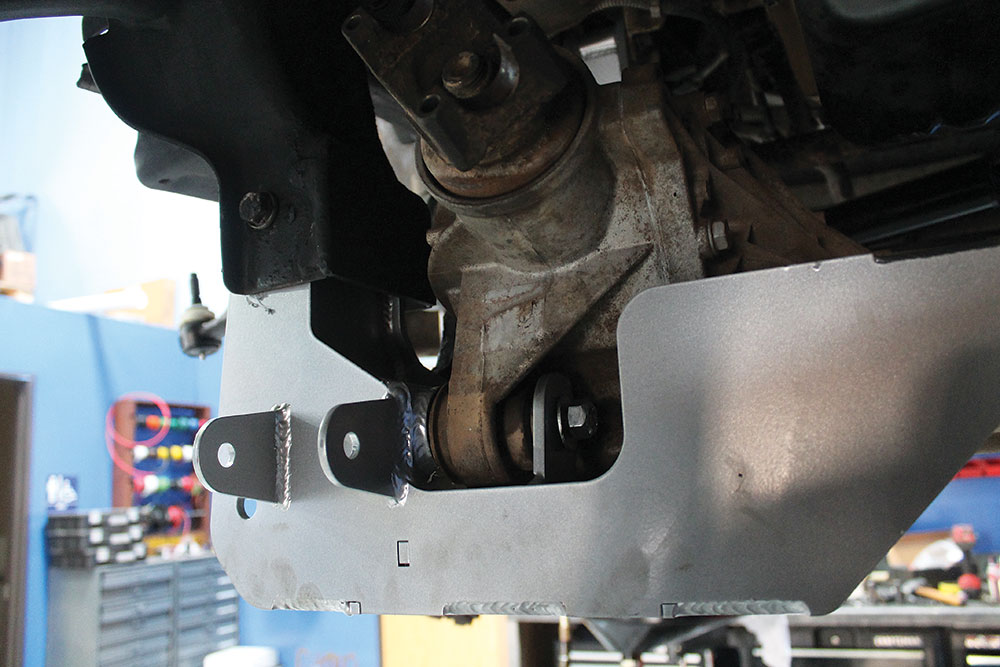
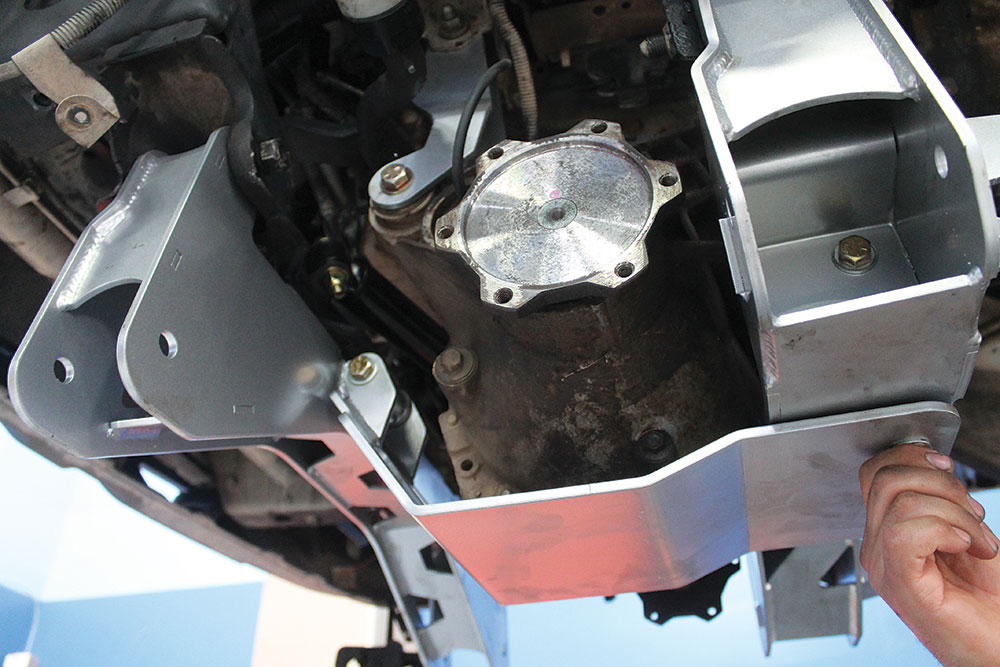
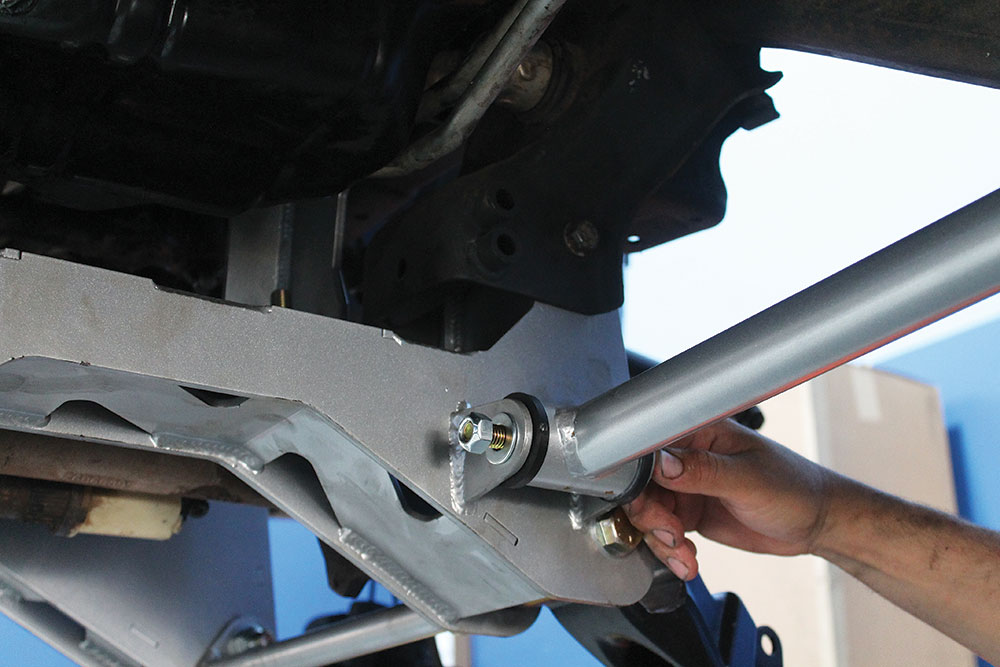
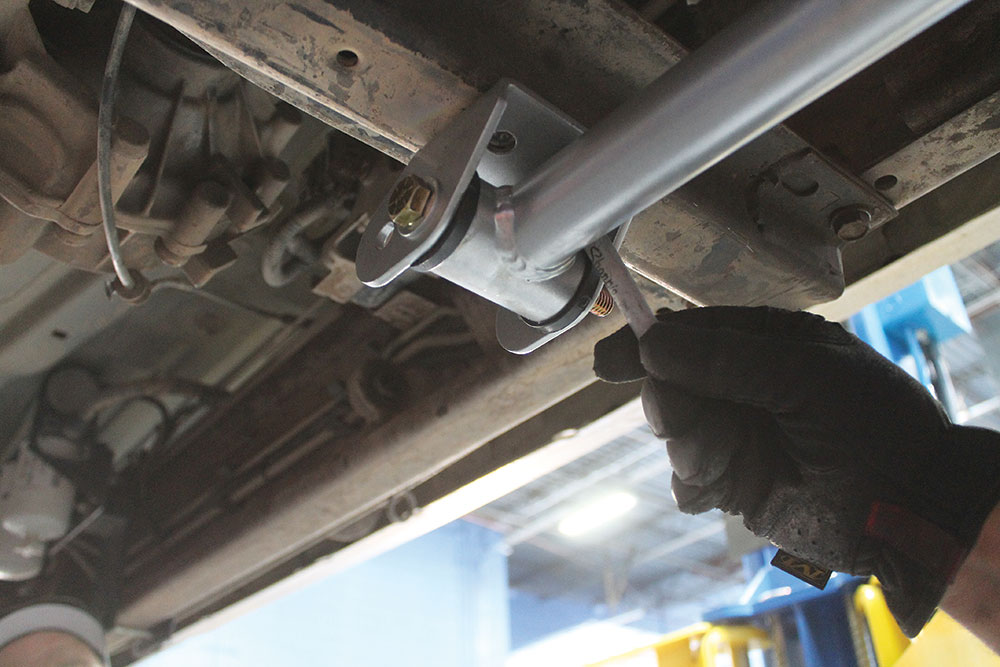
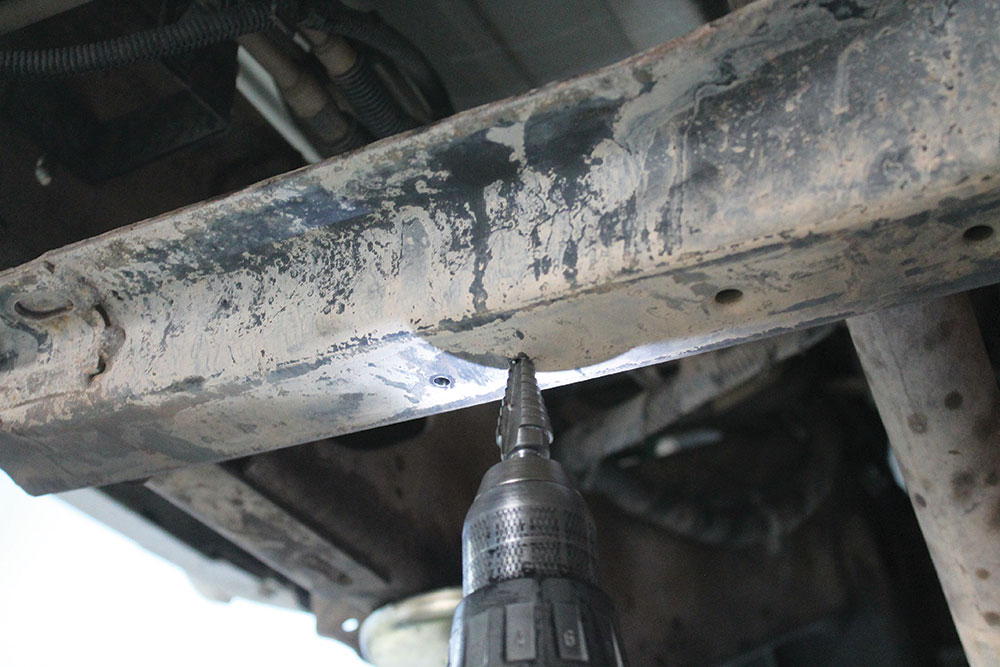
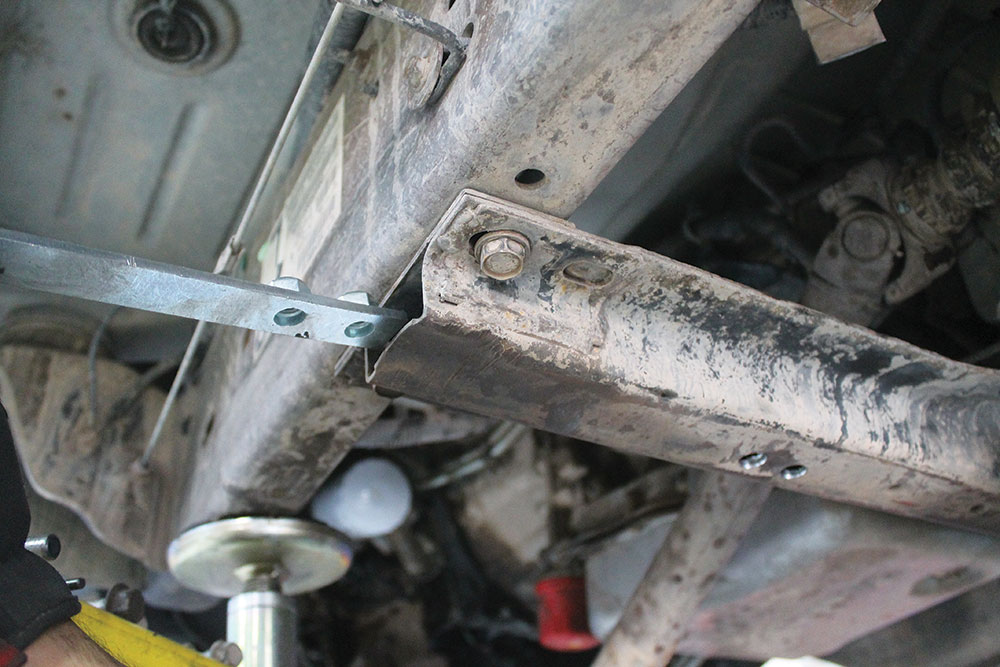
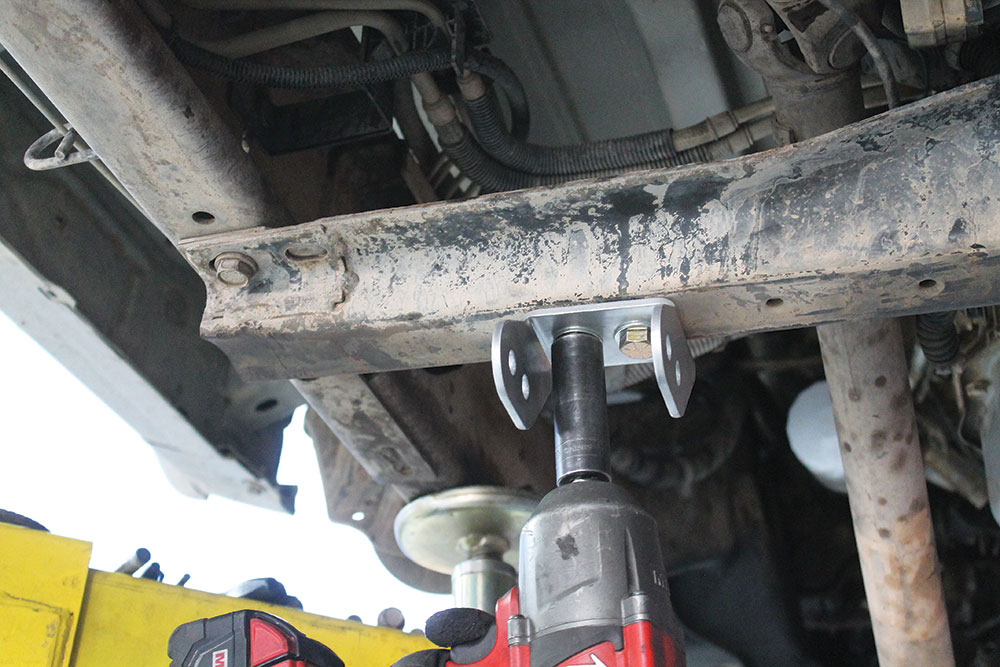
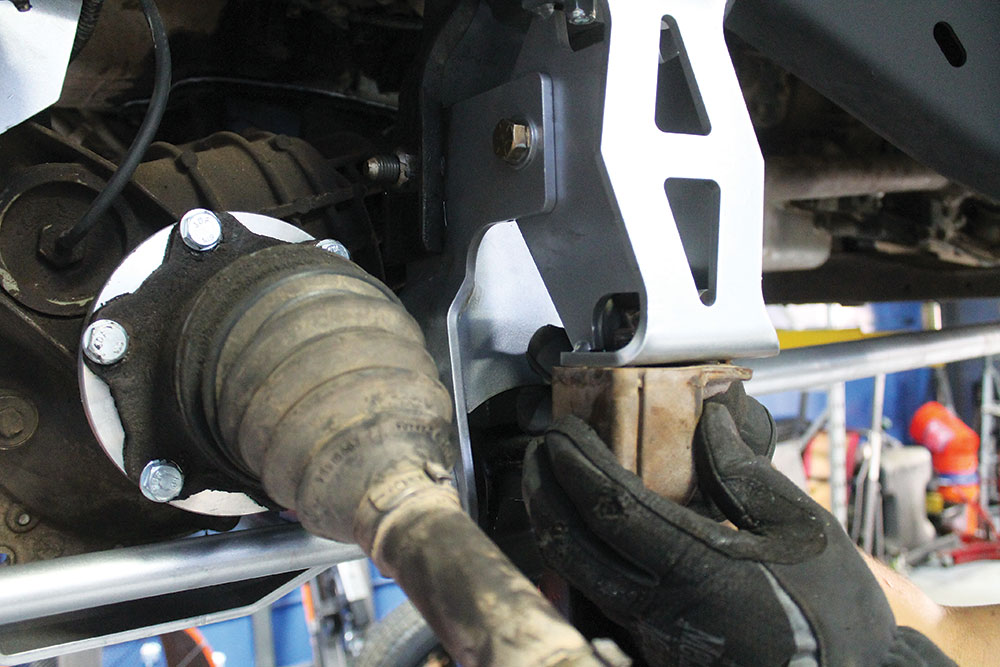
Reinstalling the differential was next on the list. Two separate brackets, along with the cross member we just installed, held the diff in its new location. We left all these brackets and bolts loose to make lining up the rest of the parts easier.Next up was the other cross member, which installed in the forward lower control arm pockets. This cross member, as well as the first one we installed, used the stock hardware to attach the new parts to the frame.In the lift kit was a skid plate that protected the diff in its new location. This is a good example of why we hadn’t tightened any of the hardware yet. This skid plate attached to the front cross member and then swung back and bolted up to the rear cross member. Having the parts loose made aligning the holes pretty easy.Another occurrence of this was when we installed our new Moog control arms. A tube support went in between the front and rear drop cross member. We made sure not to forget this when installing the new hardware on the lower control arms. Once we reached this stage of the installation, we went back over all the nuts and bolts and tightened every single one of them for good.Even though everything on the front suspension was tight, we weren’t finished with the front install quite yet. The kit included some more tubular support bars to strengthen the front drop cross members. Installation of these involved assembling the bushings into the tubes, installing one side of the tubes onto the back side of the rearmost cross member, and then installing the supply mounts onto the other side of the tubes.The tubes and mounts were then swung up until they made contact with the stock transmission cross member. The new hole locations for the support tube mounts were then marked on the cross member.
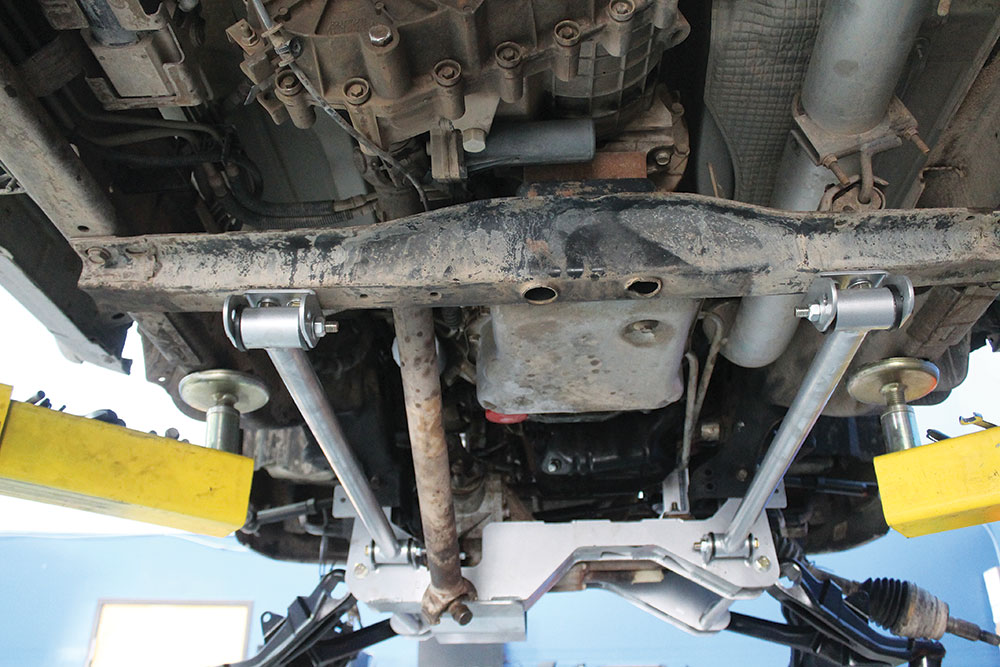
With the hole locations marked, we used a step bit to drill out the cross member. We then used the provided brackets, with nuts welded to them, to attach the tube mounts to the trans cross member. This attachment design allowed the bracket to slide in from the side of the cross member, making installation of the bolts easier than fighting with loose hardware and getting a wrench into a difficult area.Here’s a look at the completed supports. You can see how this kit was designed to maintain a lot of strength. The drop cross members are braced between the front and rear, and then the rear was braced all the way back to the transmission cross member.Moving back into the wheel well, we had a few more parts that still needed to be installed. We started with the axles. We installed the provided axle spacers between the diff and the axles and attached them with the new longer hardware.
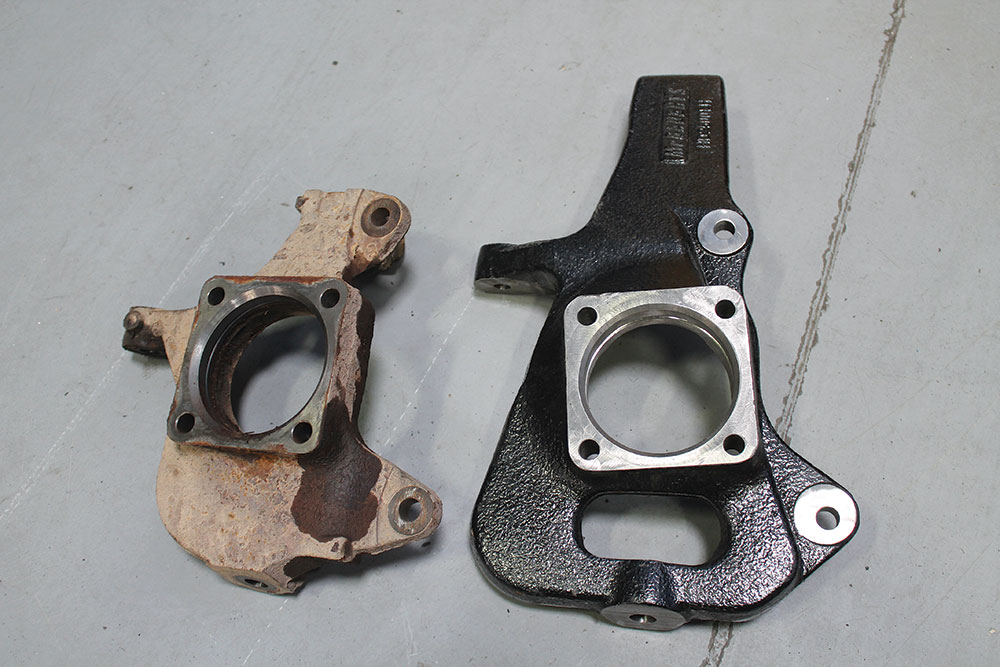
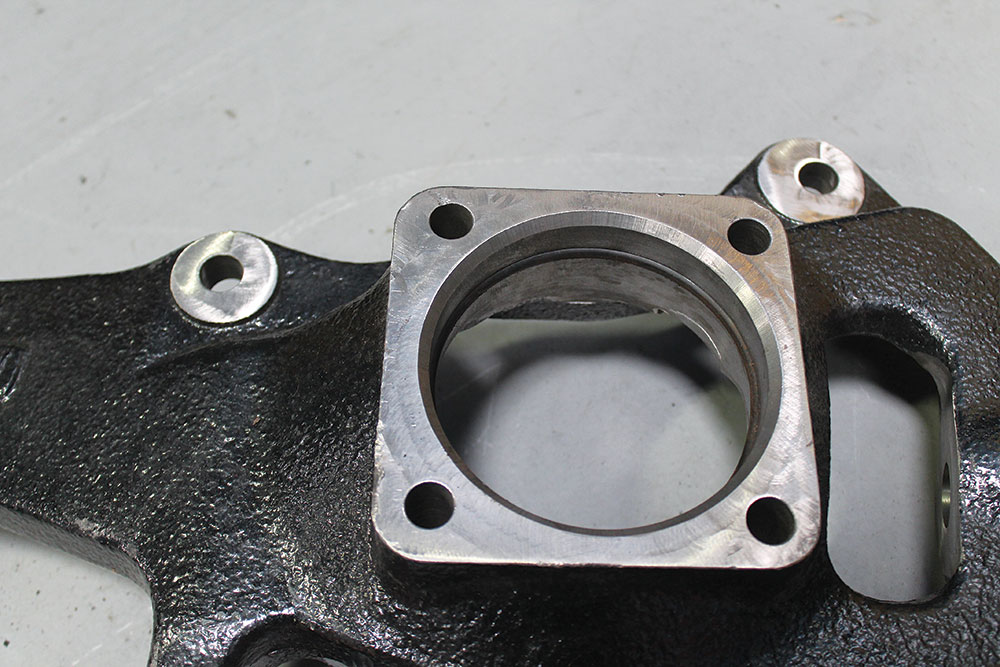
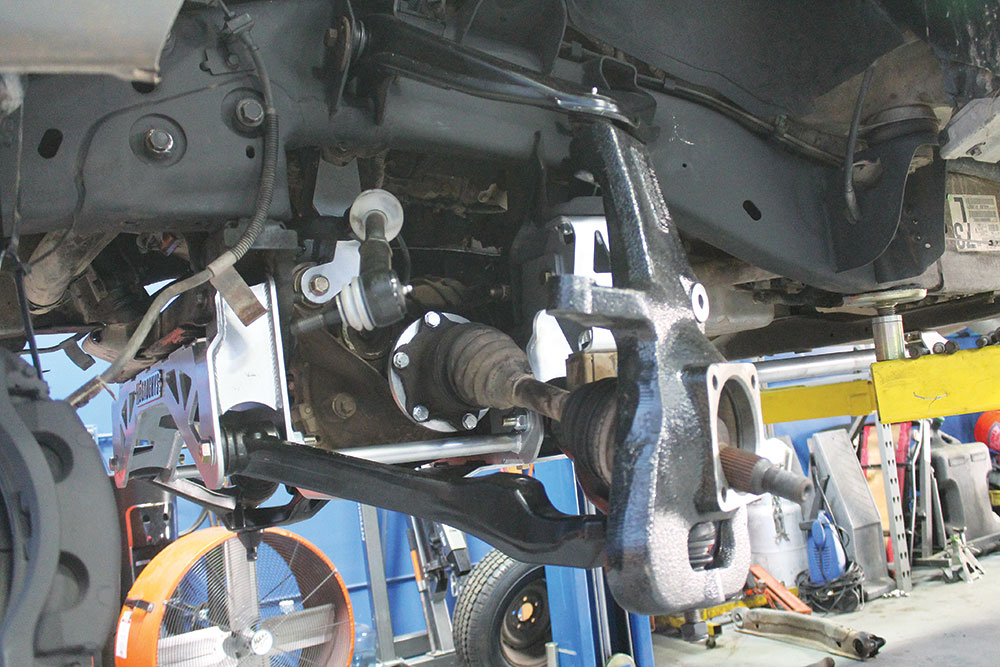
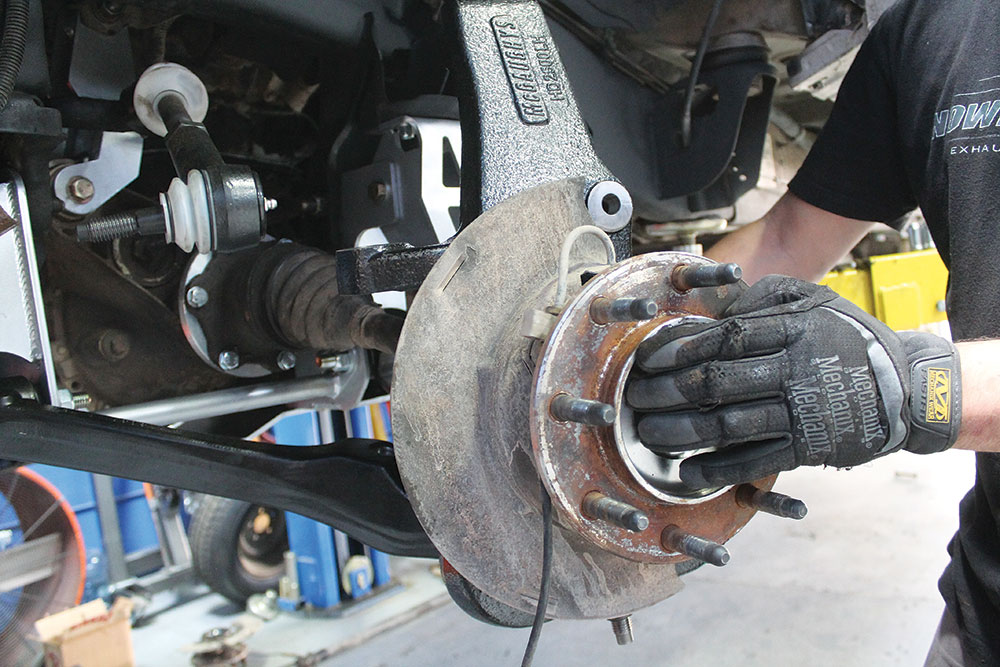
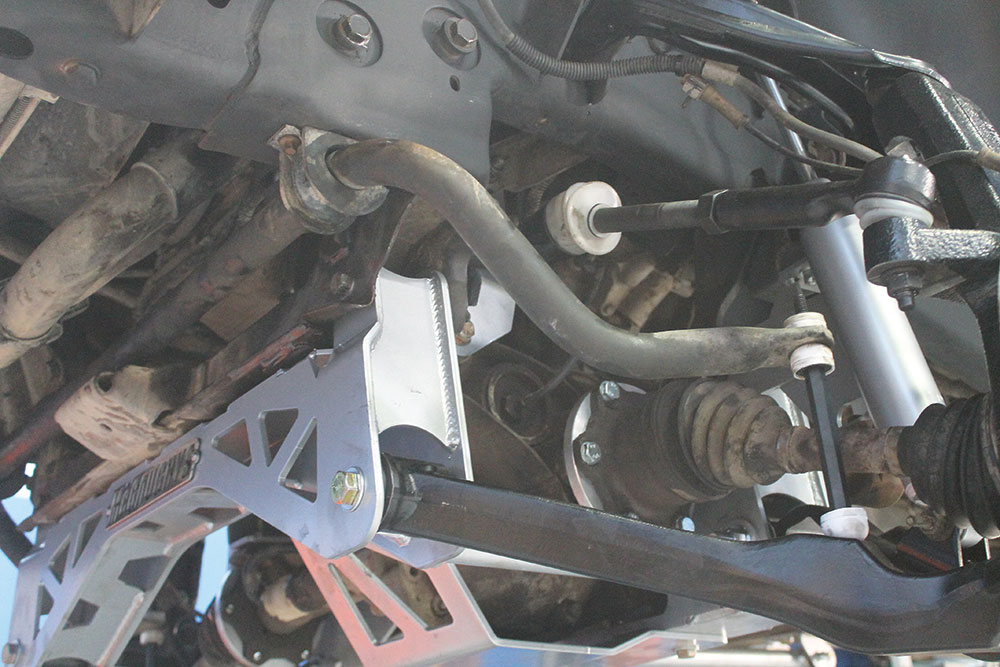
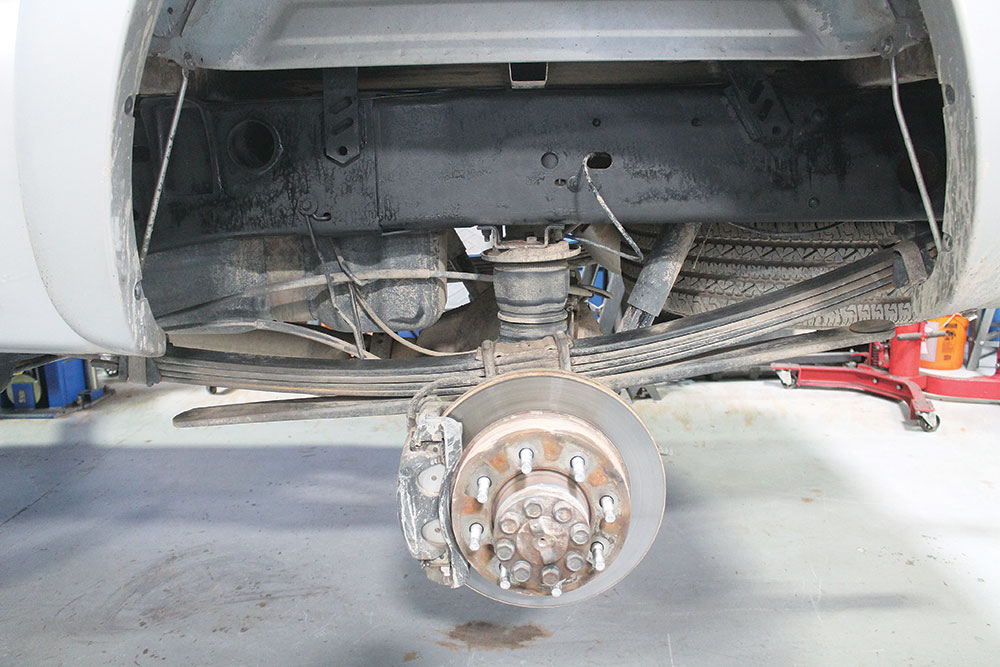
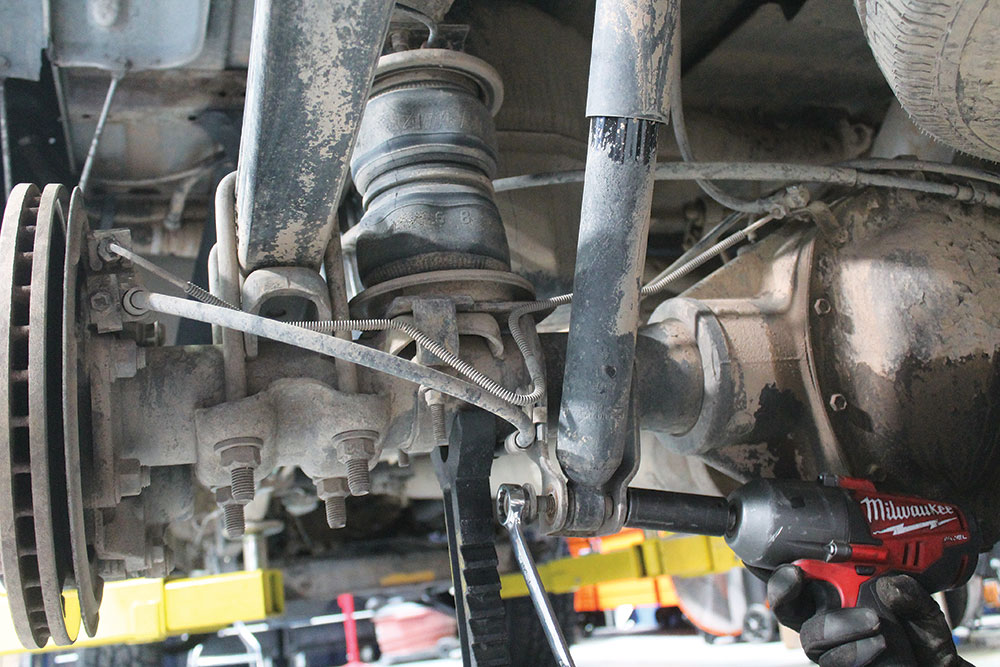
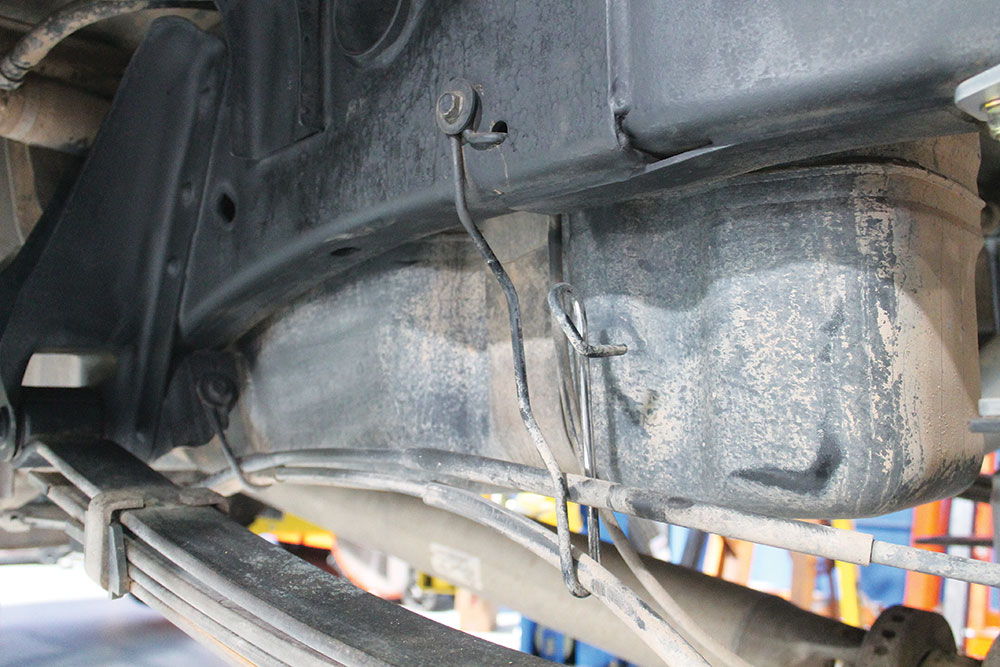
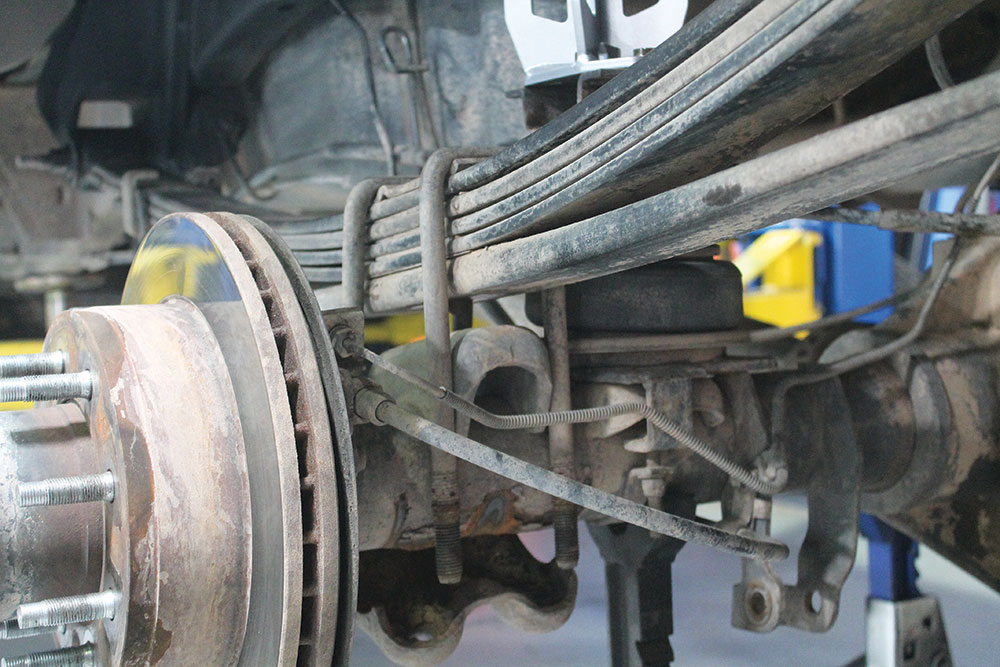
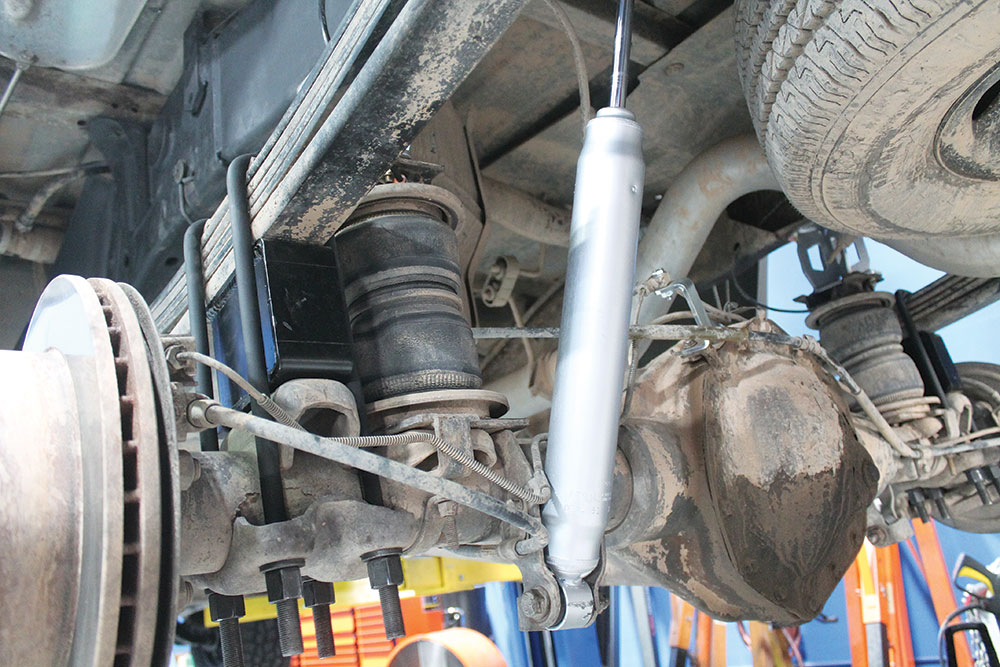
The bump stop extension brackets were up next. These bolted up to the stock location and also had a bolt location into the new cross member. Once the mount was in place, the factory bump stop was reinstalled in the new location.We didn’t mention it when we installed the new lower control arm, but when installing a whole new Moog control arm, you get new pivot bushings and new ball joints. The new upper and lower control arms from Summit Racing came as complete units and simply bolt right up. They are already treated to prevent rust and have all new bushings and ball joint installed.Because the location of the upper control arm doesn’t change, the spindle needed to be much taller than stock. In this photo you can see just how much taller the McGaughy’s spindle is over the stock spindle.A small O-ring inside the spindle needed to be transferred over from the stock spindle to the new lift spindle. We used a small pick tool to remove it, and then simply pressed it in the new spindle by hand.After we installed the O-ring, the new spindle was installed onto the new control arms and attached with the new hardware that came with the control arms.The stock hub was then slid over the axle shaft and the hub was secured to the new spindle with the stock hardware. The axle was also secured to the hub with the stock nut.Moving on to the torsion bar cross member. Remember we said that the cross member would be dropped down to line up with the new front suspension? Well, here are the new mounts that relocate the cross member. The bushings on the new mounts were vertically lined up with the factory mounts and the hole locations were marked and then drilled for the new hardware. The stock cross member was then loosely bolted to the new mounts, while the mount hardware was left loose as well. After everything was lined up, all the bolts were snugged up for the final time.The stock torsion keys, adjuster bolts and torsion bars were then reinstalled like factory.We are just about wrapped up on the front end. Notice we had the new McGaughy’s shocks reinstalled, and we could now work on the last stock part that needed to go back on the truck.Reinstalling the sway bar upside down was genius if you ask us. All we had to do was flip it around so the bend faced downward, and the factory replacement sway bar end links from Moog lined right up. That finished up the front lift kit install. This part of the installation was definitely the most time consuming. It took us about five hours to do, but if you don’t have a lift and some other specialty tools, plan on a full day of work.Turning our attention to the rear of the truck, we pulled the wheel off and assessed the one thing we weren’t sure would work. This truck had an air bag helper setup, and we weren’t sure how that would play with the lift kit since it was actually mounted to the axle, which needed to drop away from the frame to achieve the lift we were looking to do.To allow the axle to drop out a bit further, the first part of the rear suspension we removed was the stock shock.
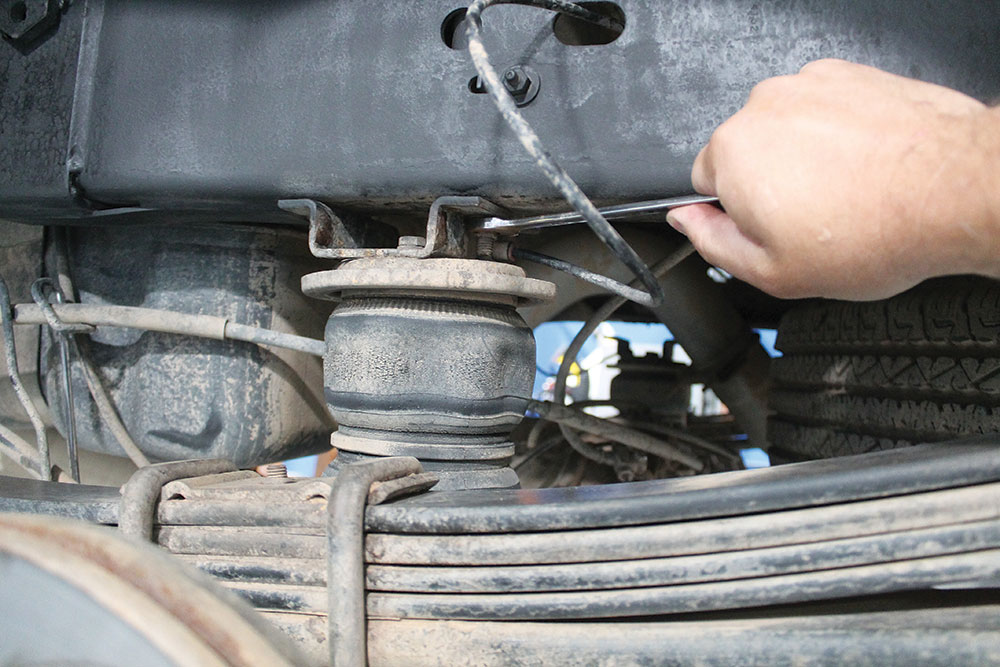
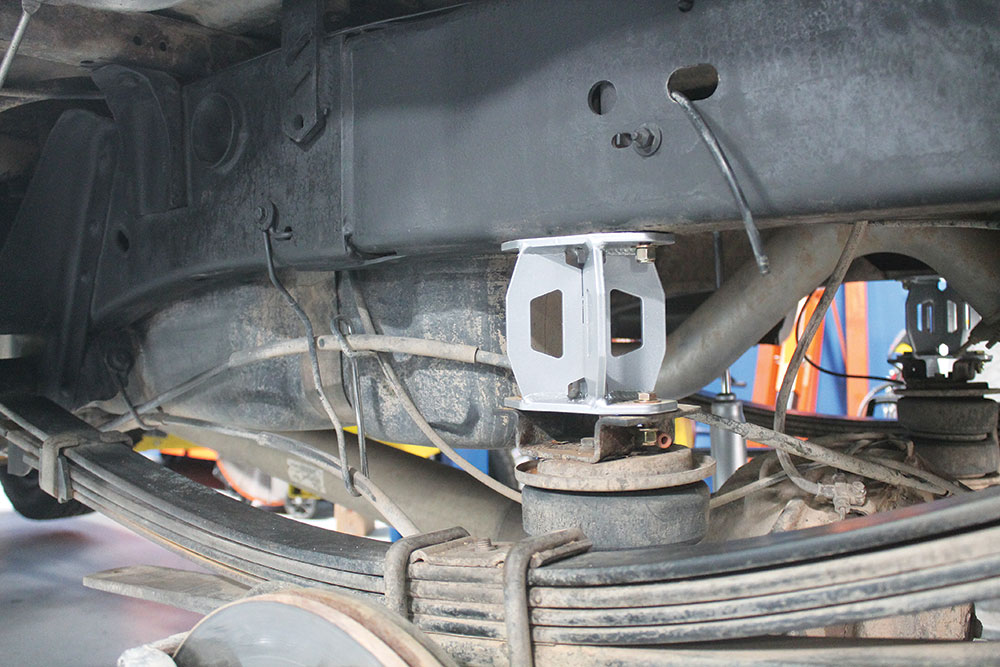
Luckily, when the helper bag was installed, the brackets were bolted to the factory bump stop location. We simply removed the upper mount, and then slid the new bump stock extension between the air bag bracket and the frame rail. This ended up working out perfectly and we were able to retain the helper ‘bag setup.
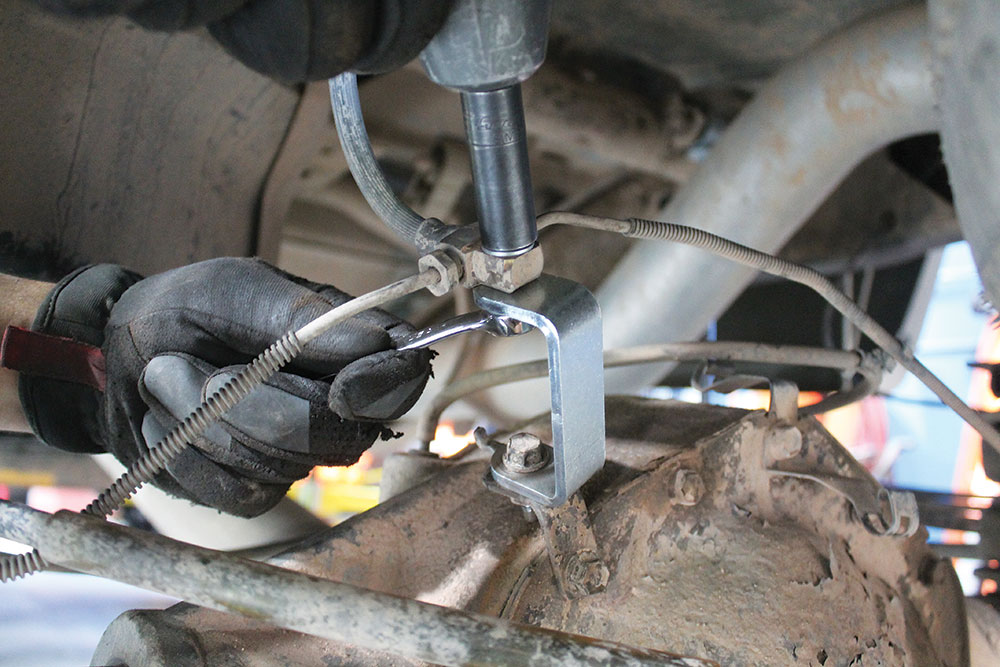
Before we dropped the axle lower, we addressed a couple items that needed to be modified so they don’t get damaged. The first item was factory brake line. Supplied in the kit was this bracket that raised the location of the brake line tee on the axle. Raising the tee kept the factory brake line from stretching. The second item was the e-brake cables, which we just snaked out of the upper loop and let the cable rest in the bottom loop.
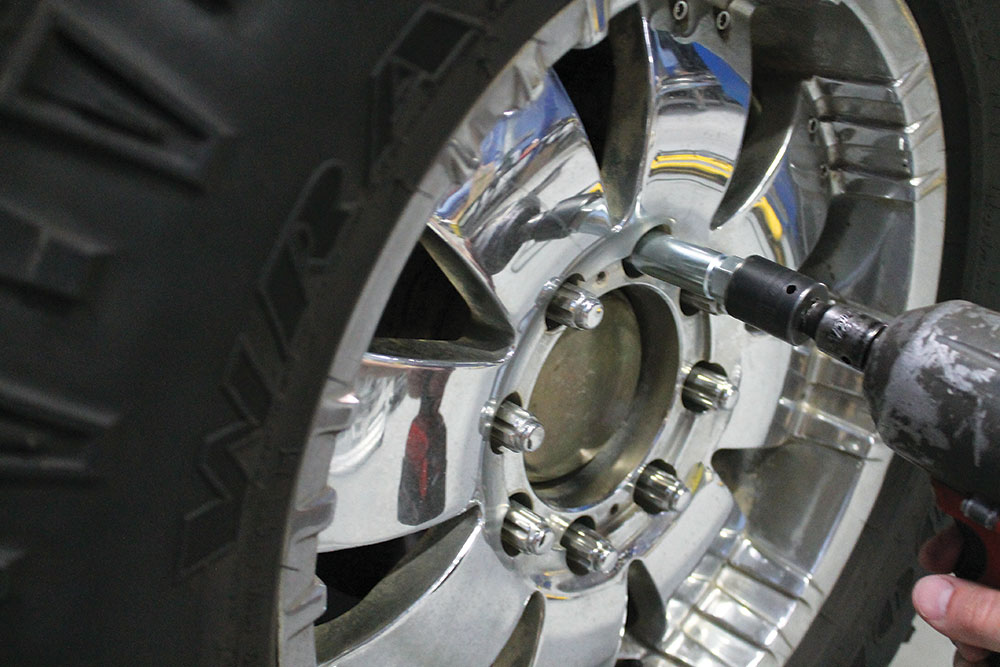
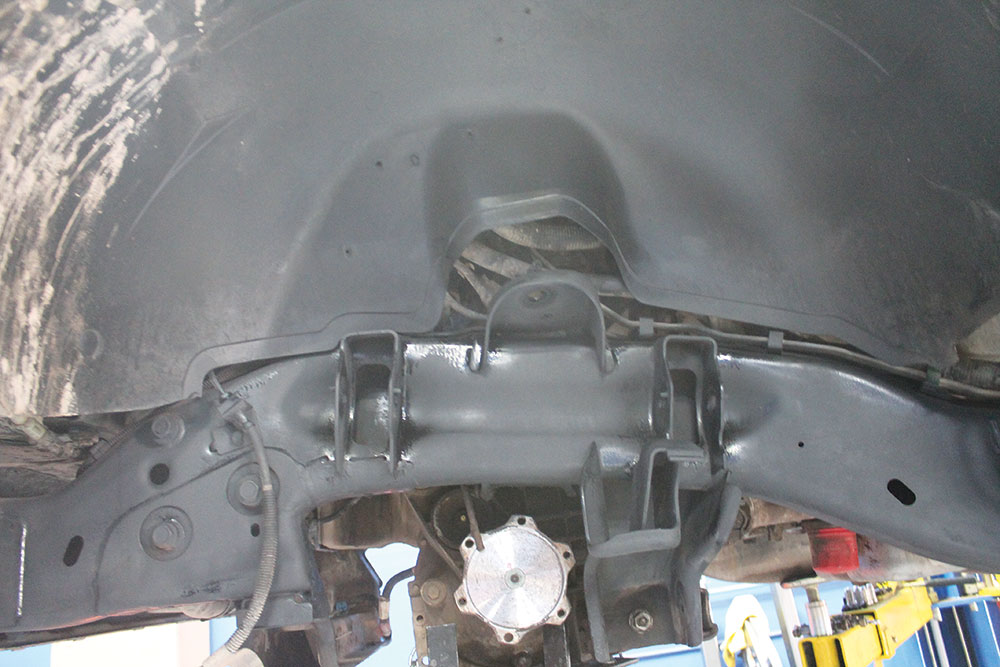
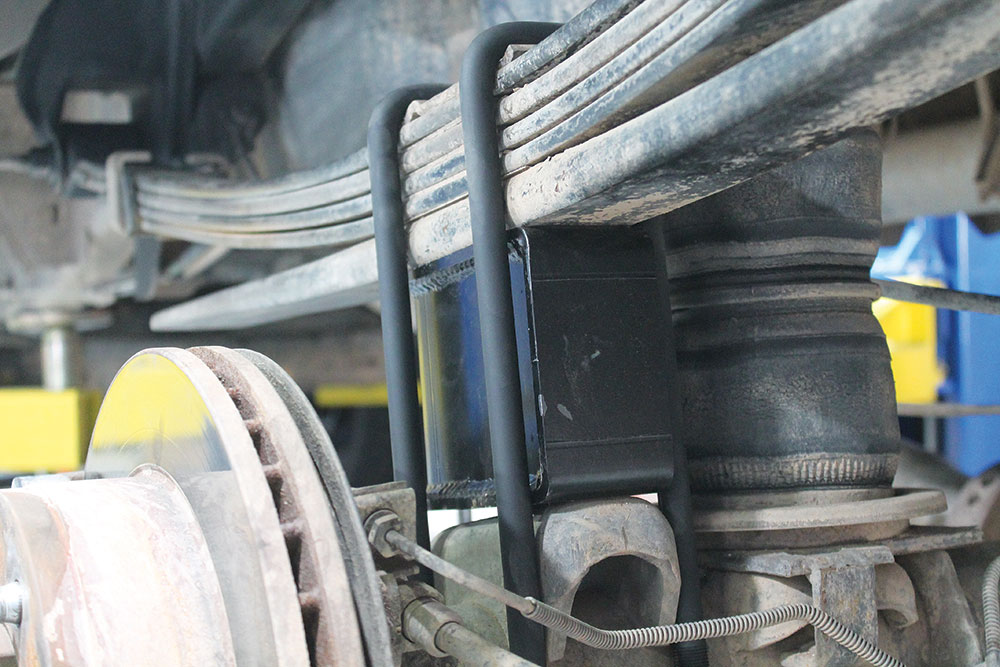
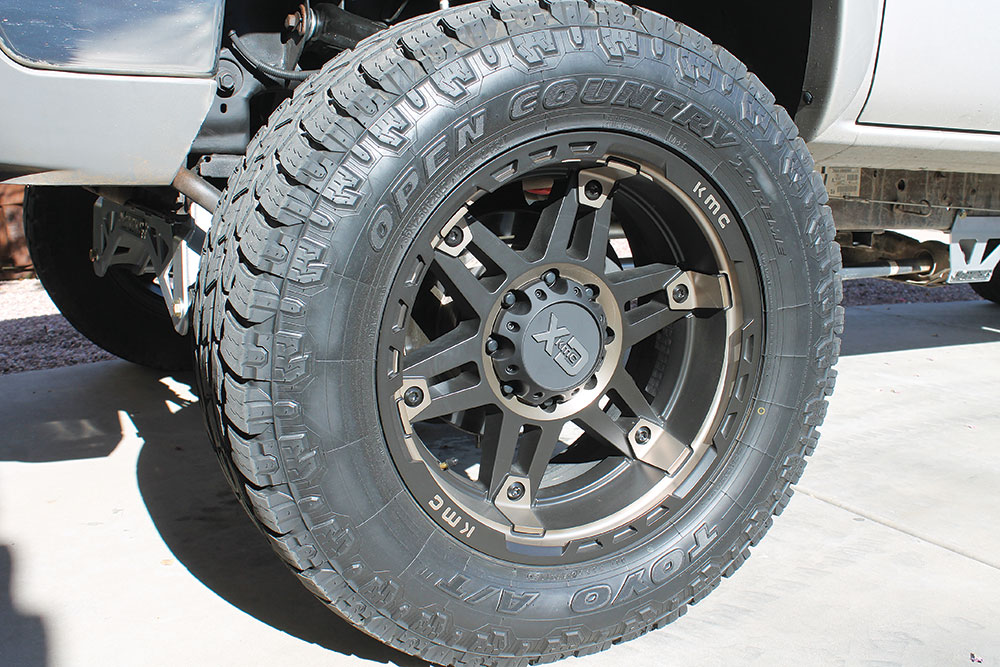
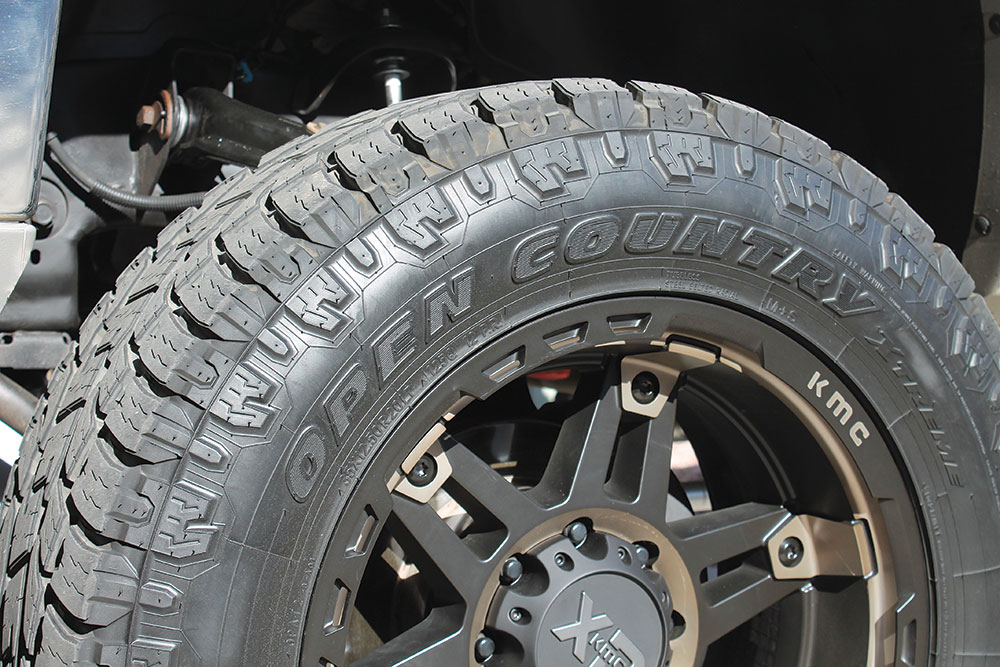
Now for the part that actually lifted the rear of the truck. This kit came with fabricated lift blocks. To install them, the factory U-bolts were removed. With the axle free from the leaf spring, the truck was lifted up to create enough separation between the two and the new lift blocks were installed.New U-bolts and hardware were supplied with the complete kit. They were slid over the leaf springs and reattached with the new nuts and washers. The nuts were tightened up with an impact and should be checked after a couple hundred miles of driving.Rounding out the new rear suspension lift kit was the new McGaughy’s shocks. These installed just like factory, in the factory locations and with the factory hardware. With that, our lift kit was complete!I’m sure you knew we weren’t going to throw those ugly old chrome wheels back on the truck after all these new parts. It just wouldn’t be right. So, to address that issue, we turned to KMC Wheels and Toyo Tires and picked up a new set of wheels and tires. For wheels, we picked up KMC’s new XD840 “Spy” in a 20 inch by 10 inch with a -18mm offset. The wheels are their satin black dark tint, which played well with the color of the truck.For tires, we ordered a set of 35X12.5R20 Toyo Open Country AT II tires. This was the perfect tire for a daily-driven vehicle that sees a lot of on road driving; however, the aggressive tread pattern is still great in off road conditions. It was also the perfect size tire for this amount of lift. Our truck had a bit of an oversized tire on it when we got it, so the front bumper valance had already been trimmed to clear the tire. Some trimming would have been required if this wasn’t already taken care of by the previous owner.As soon as we completed the full install of our new lift kit, all new front end components, and our new wheels and tires, we took the truck straight to the alignment shop to dial in the front end alignment. With that done we took it for a quick drive to snap a photo of the truck. What a difference all the new front end makes in drivability. The lift kit and new wheel and tire combo refreshed the looks of the truck, too. We have a couple more plans for the truck, so stay tuned!
We use cookies to enhance your browsing experience, serve personalized ads or content, and analyze our traffic. By clicking "Accept All", you consent to our use of cookies. Visit our Cookie Policy for more info.
 JEREMY RICE
.
September 16, 2019
.
How to
.
JEREMY RICE
.
September 16, 2019
.
How to
.


Share Link