 Kevin Whipps
.
April 02, 2019
.
C10 Builders Guide
.
Kevin Whipps
.
April 02, 2019
.
C10 Builders Guide
.
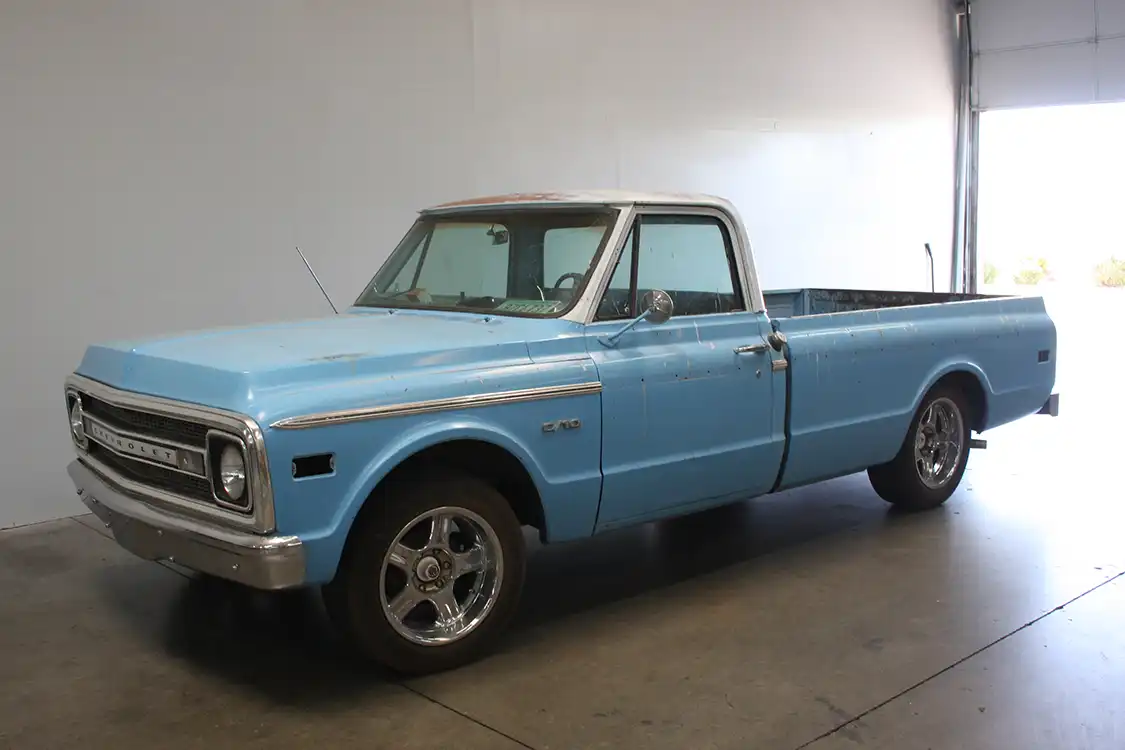
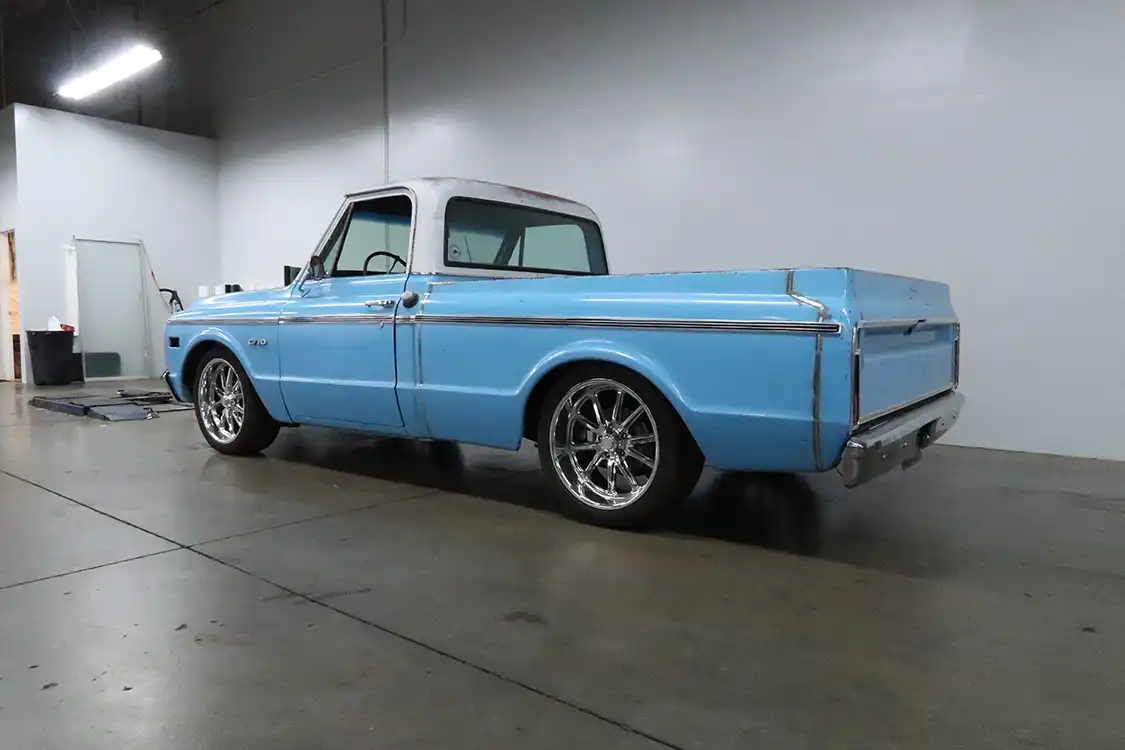
If you’re in the market for a new C-10, you’re going to hit a harsh reality: Short beds ain’t cheap. If you find one that is, it might have a shotgun hole through the headliner, or maybe it’s missing the bed entirely. Either way, if you’re looking for a good deal, you might want to consider a long bed. After all, you can convert C10 into short bed.
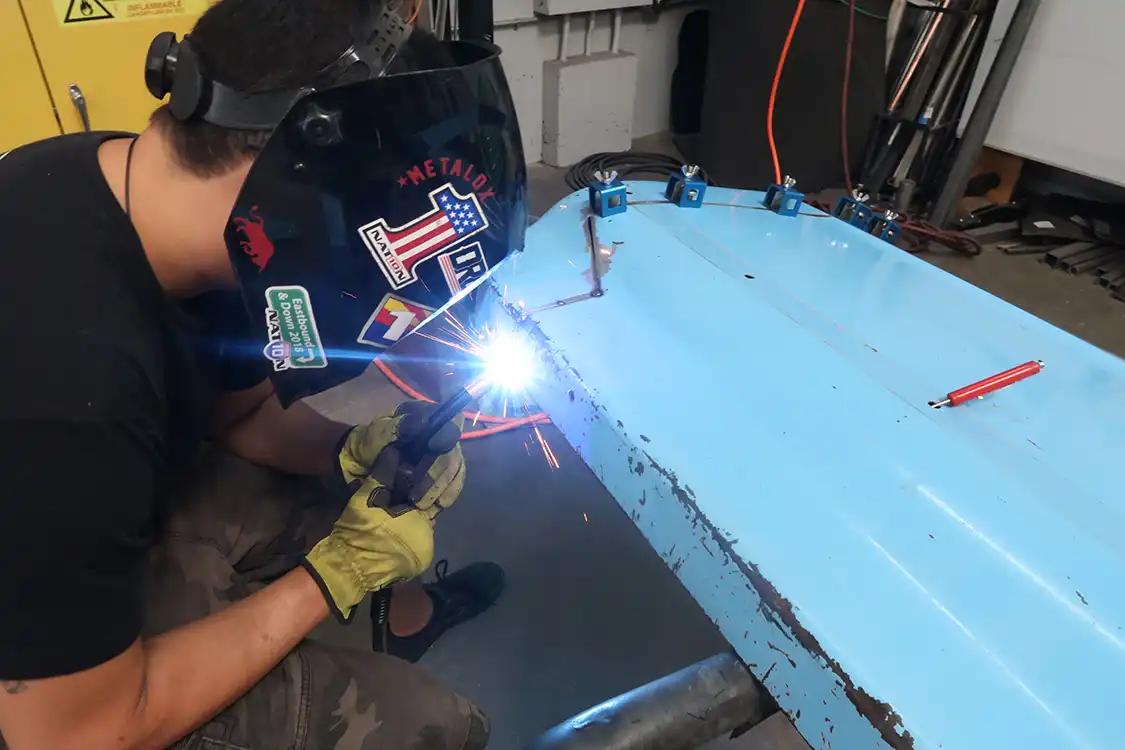
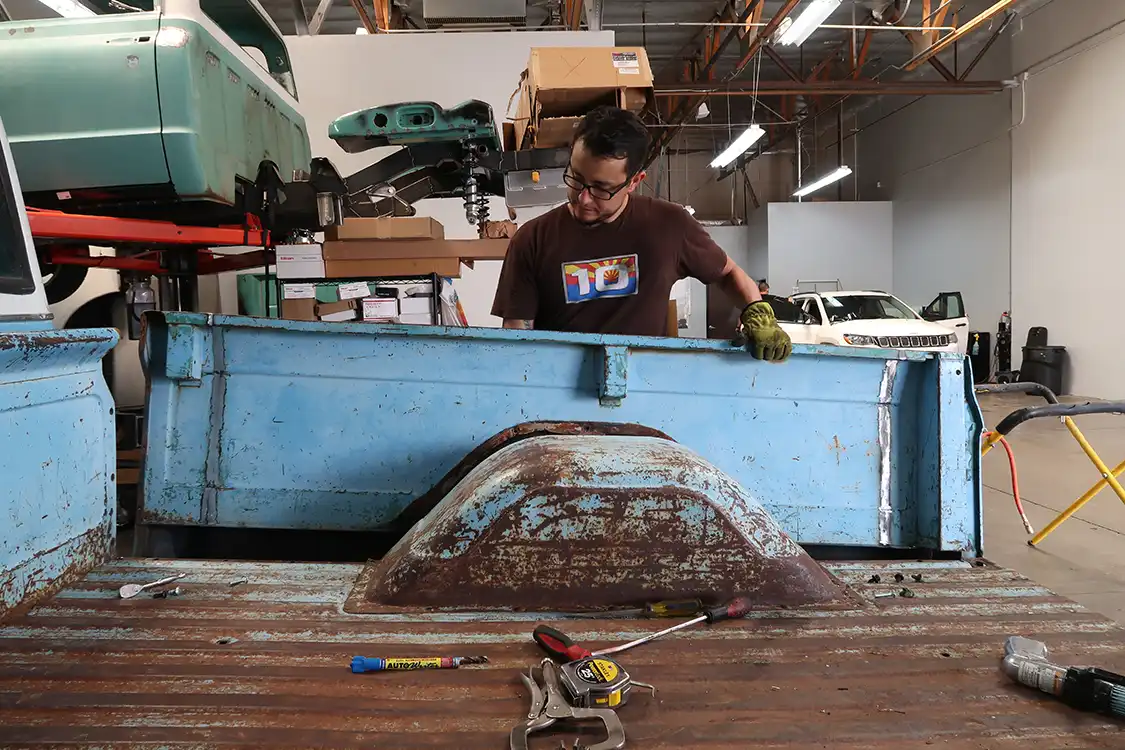
Kyle at Metalox Fab has made his living doing just that for loyal customers from all across North America for the past few years. The resulting beds have a tiny scar down the front and back, and sometimes not even that. He knows these trucks so well that the job is done like a surgeon—clean and perfect.

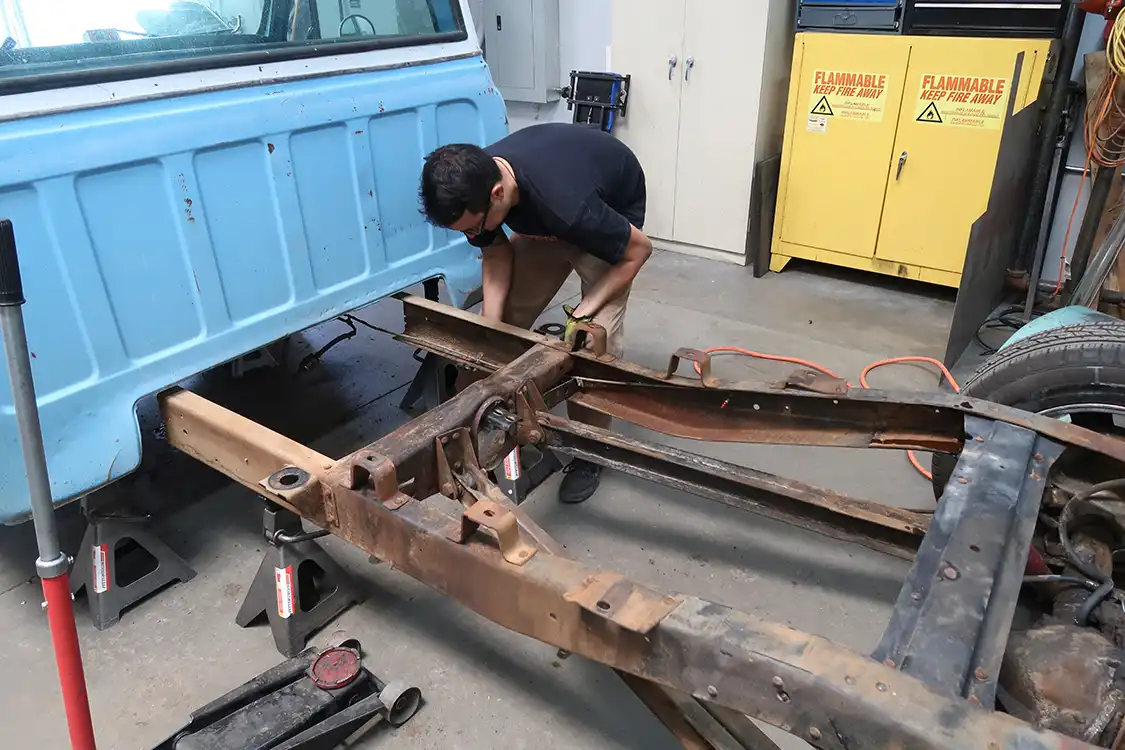
We were fortunate enough to spend some time with him while he cut down a 1969 Chevrolet C-10 long bed into short bed. By the time he was done a few days later, the truck was not only 20 inches shorter, but it looked a ton better, too.

SOURCES
Metalox Fabrication
8615 W. Kelton Lane,
Suite 305
Peoria AZ 85382
@metaloxfab
623-308-1170
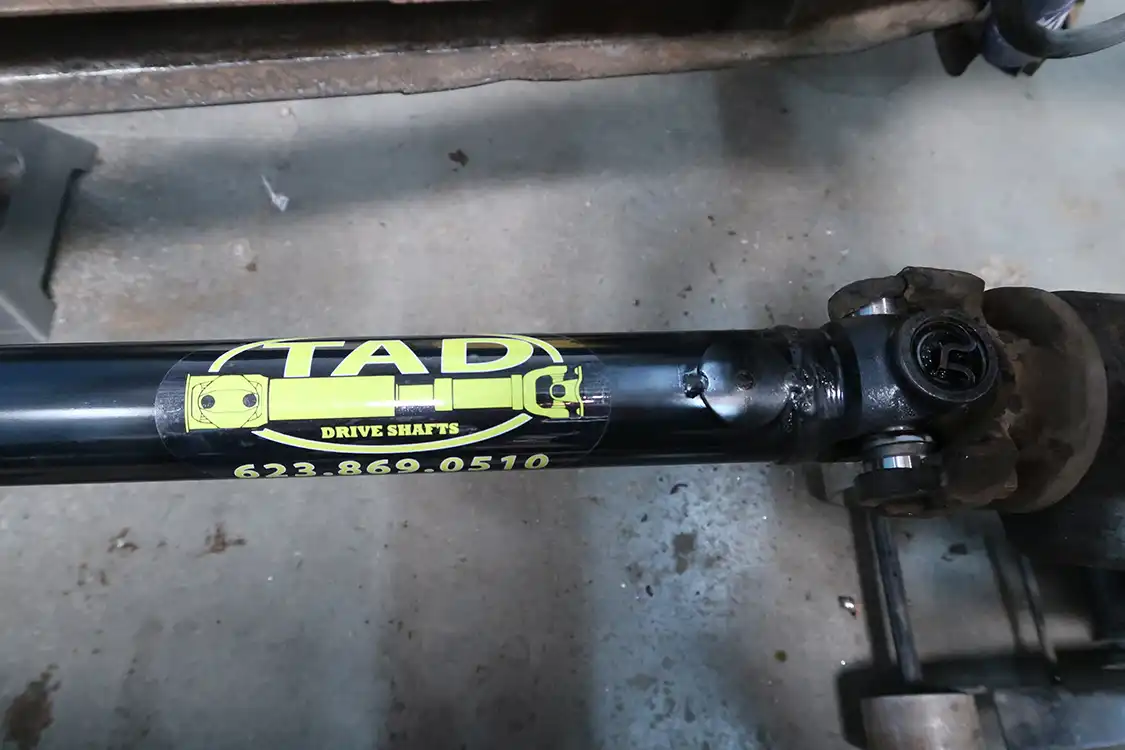
TAD Drive Shafts
22010 N. 24th Ave
Phoenix, AZ 85027
623-869-0510
Tadshafts.com
If you’re in the market for replacement bedsides, you might be wondering where fellow enthusiasts source their parts. Here are some recommended alternatives based on user experiences.
Many users suggest checking with local auto parts suppliers and dealers. These sources often carry a range of replacement panels and can provide the convenience of immediate pickup, saving you shipping costs and time.
Specialized auto body parts stores are a frequently mentioned alternative. These retailers typically offer a robust selection of high-quality parts designed for specific vehicle makes and models.
Several users recommend exploring online retailers. These websites usually feature a wider selection and competitive pricing. Look for retailers with positive reviews and detailed product descriptions to ensure compatibility and quality.
Experienced users often find great deals at automotive swap meets. These events provide an opportunity to inspect parts firsthand and sometimes negotiate prices directly with sellers.
Another popular suggestion is salvage yards. They can be a goldmine for finding original parts that fit perfectly. Although it might require a bit more effort to find what you need, the authenticity of original parts can be worth it.
Some recommend buying directly from manufacturers. While potentially more expensive, it ensures that you’re getting parts made to the original specifications. This can be crucial for maintaining the integrity and value of your vehicle.
By considering these sources, you can find the right replacement bedsides that fit your needs and budget. Happy repairing!
When evaluating part prices from various suppliers, it’s crucial to adopt a comprehensive approach. Here’s a structured guide to help you make informed decisions:
Start by visiting the websites of multiple suppliers to note the listed prices for the same part. Ensure you’re comparing identical specifications to get an accurate comparison.
Investigate if different suppliers are offering parts from the same manufacturer. Sometimes, a price discrepancy arises because one supplier has branded parts while another offers generic ones.
Suppliers often list attractive prices that don’t include additional costs. Be thorough in checking for:
For large or bulky items, freight shipping is usually mandatory. This can be a substantial part of your total cost. Compare the freight charges:
Some suppliers may have hidden charges such as handling fees. Always read the fine print or contact customer service for clarification.
Combine the part price with shipping, taxes, and any additional fees to figure out the total cost:
Evaluate if the price includes value-added services like extended warranties, customer service quality, or return policies. Sometimes paying slightly more can save money in the long run due to better service or easier returns.
By systematically breaking down all associated costs and comparing them, you can ensure you get the best deal when purchasing parts from different suppliers.
Users have shared a mixed bag of experiences when it comes to using LMC replacement bedsides for shortbed conversions. Here are the key points:
While some users report satisfactory experiences with LMC replacement bedsides, highlighting solid metal quality and free shipping incentives, a significant number of users face fitment issues and inconsistent quality. The industry-wide challenge of reverse-engineered parts affects not only LMC but other vendors as well. For those seeking guaranteed fitment and reliability, sourcing OEM parts remains a recommended approach.
By aggregating these insights, it’s clear that potential buyers should weigh the cost benefits against the possible need for adjustments and replacements when choosing LMC replacement bedsides for shortbed conversions.
When considering replacement parts for your vehicle, particularly from third-party suppliers, several potential issues with fit can arise. Here’s a closer look:
One of the most common problems reported with replacement parts is misalignment. For instance, parts like fender wells may not line up correctly with the existing structure of your vehicle. This can result in gaps, uneven surfaces, and a non-seamless appearance.
Many replacement parts are reverse-engineered, meaning they’re recreated based on existing parts rather than original manufacturer specifications. This process can introduce minor discrepancies in measurements and design, leading to parts that don’t fit as snugly as they should.
The quality of replacement parts can be hit or miss. Some manufacturers may produce parts that fit perfectly, while others may not. It’s essential to research and compare different manufacturers, as one brand’s panels might align much better than another’s.
Given that there are only a handful of manufacturers producing these parts, the issue often lies not with the seller but with the parts themselves. These compatibility issues can stem from the materials used, the precision of the engineering, or even the batch production quality.
By being aware of these potential issues and taking proactive steps, you can mitigate the risks and ensure a smoother experience with your replacement parts.
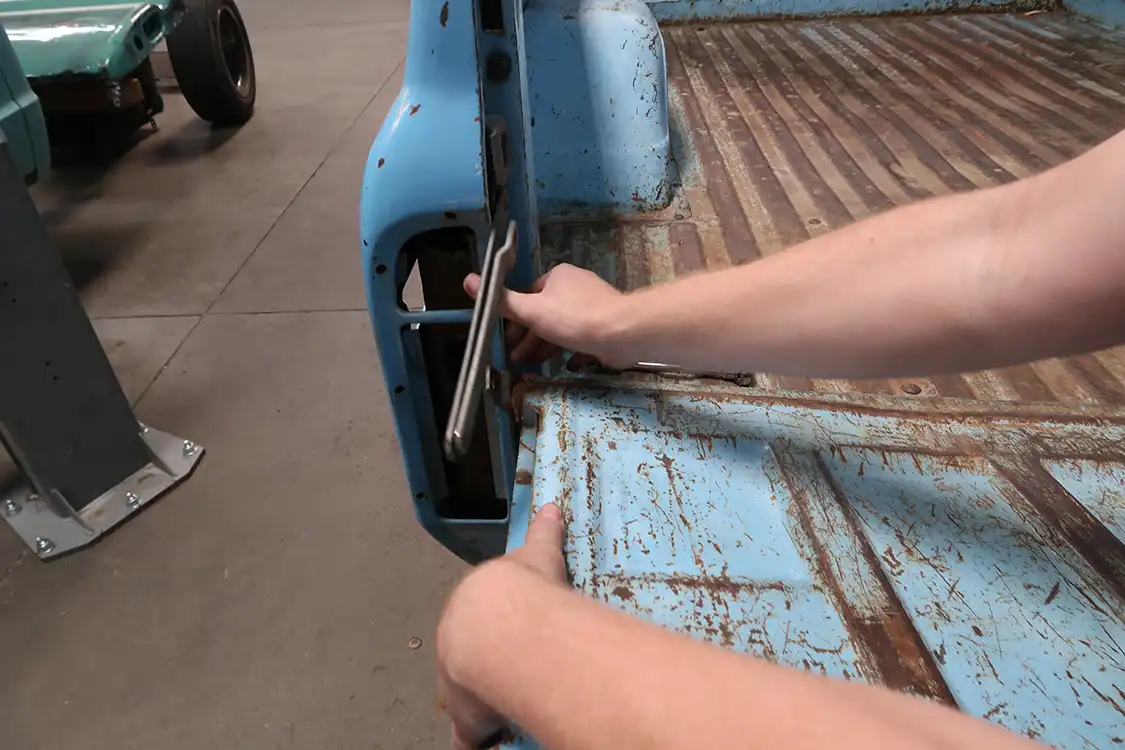
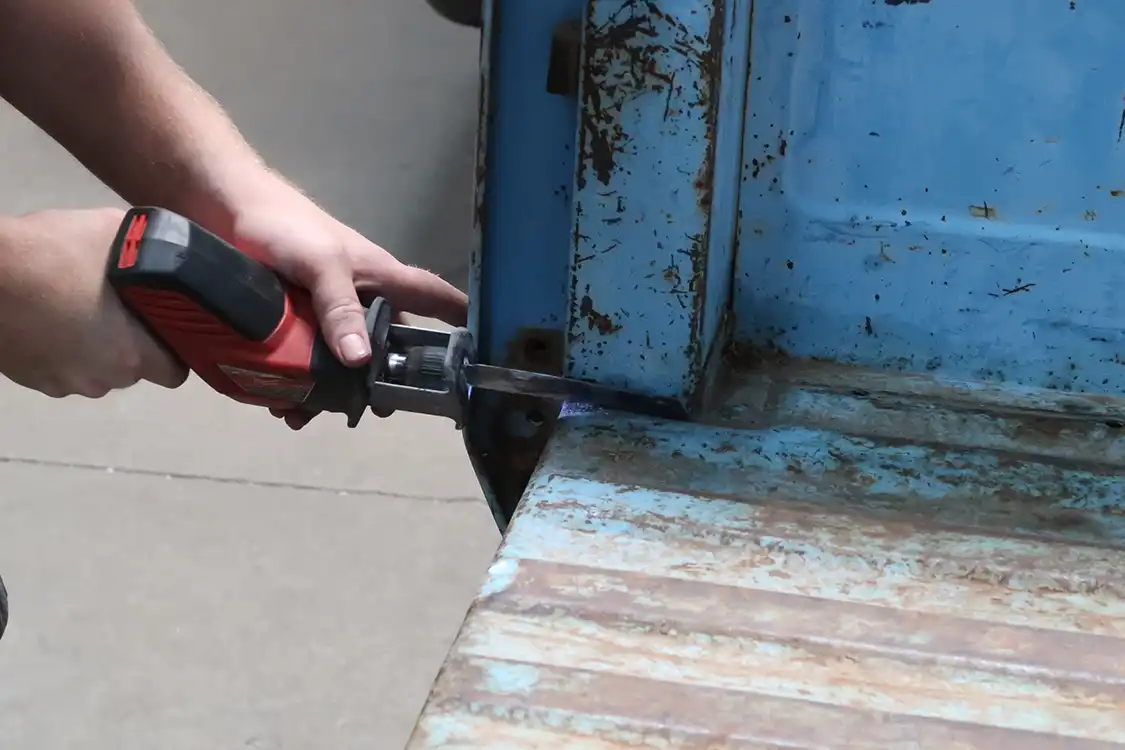
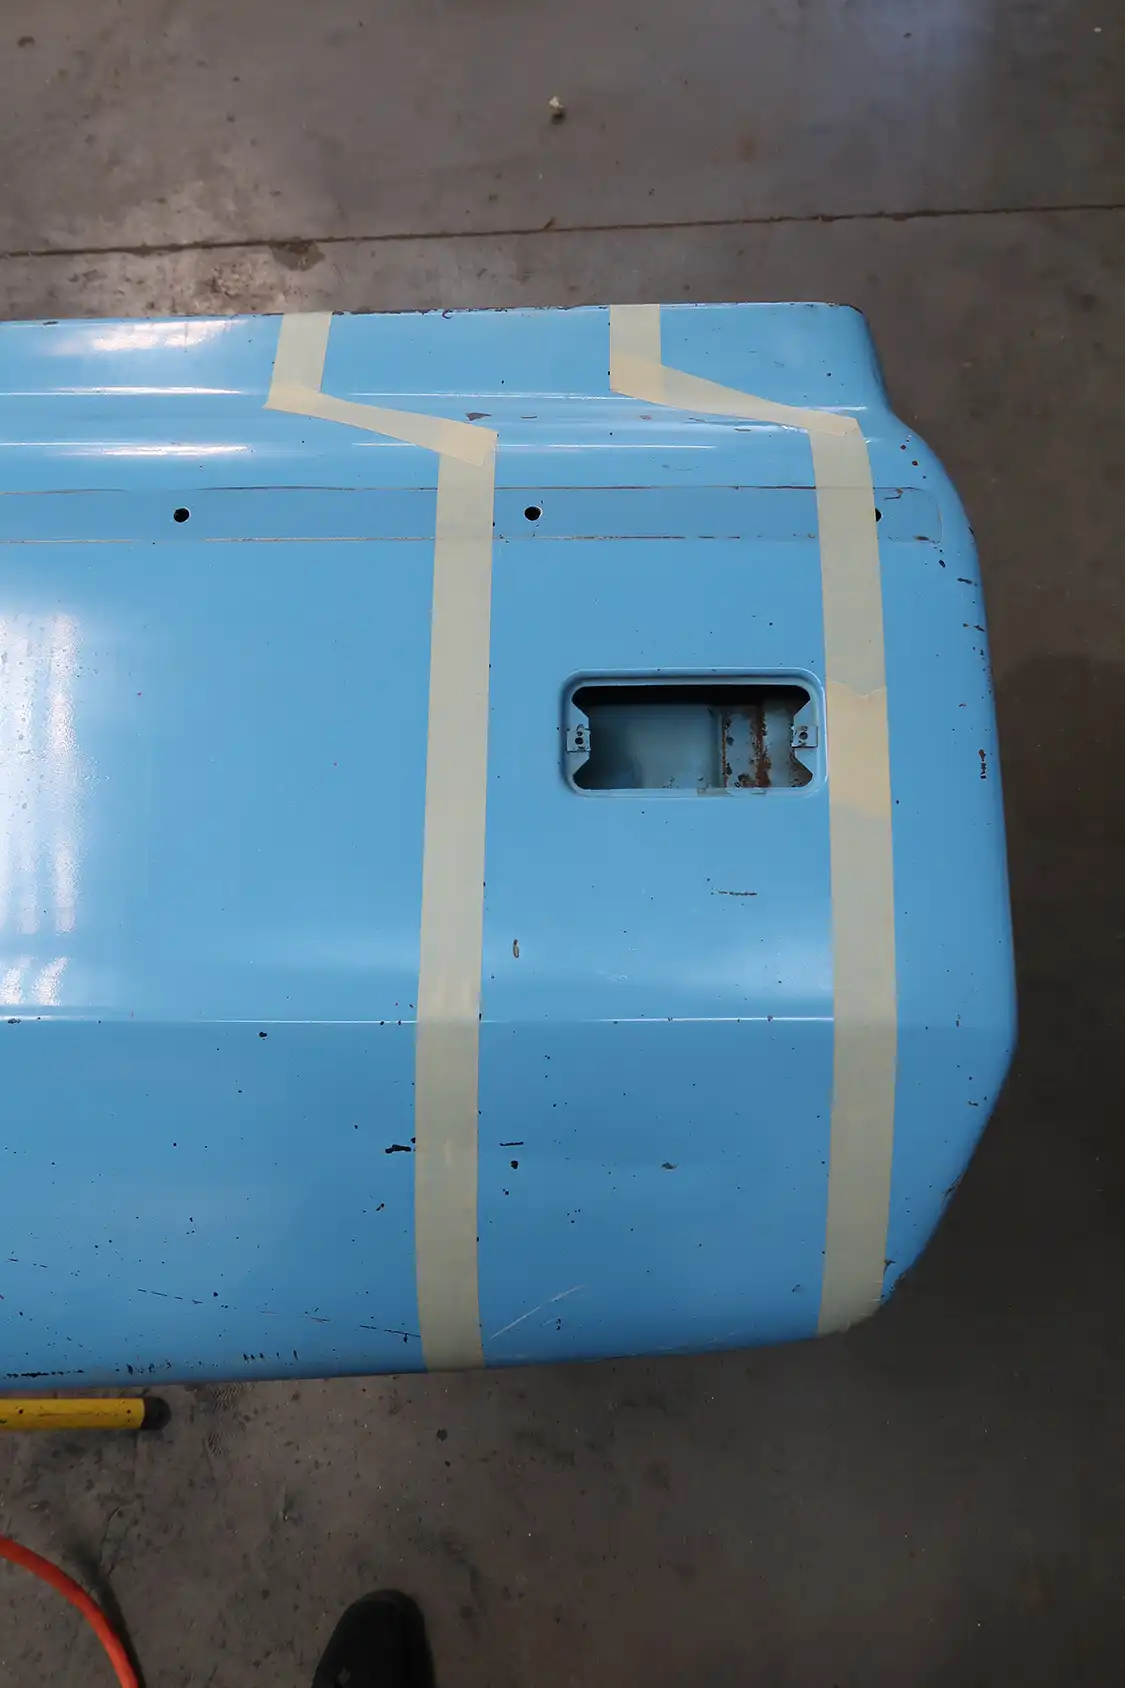
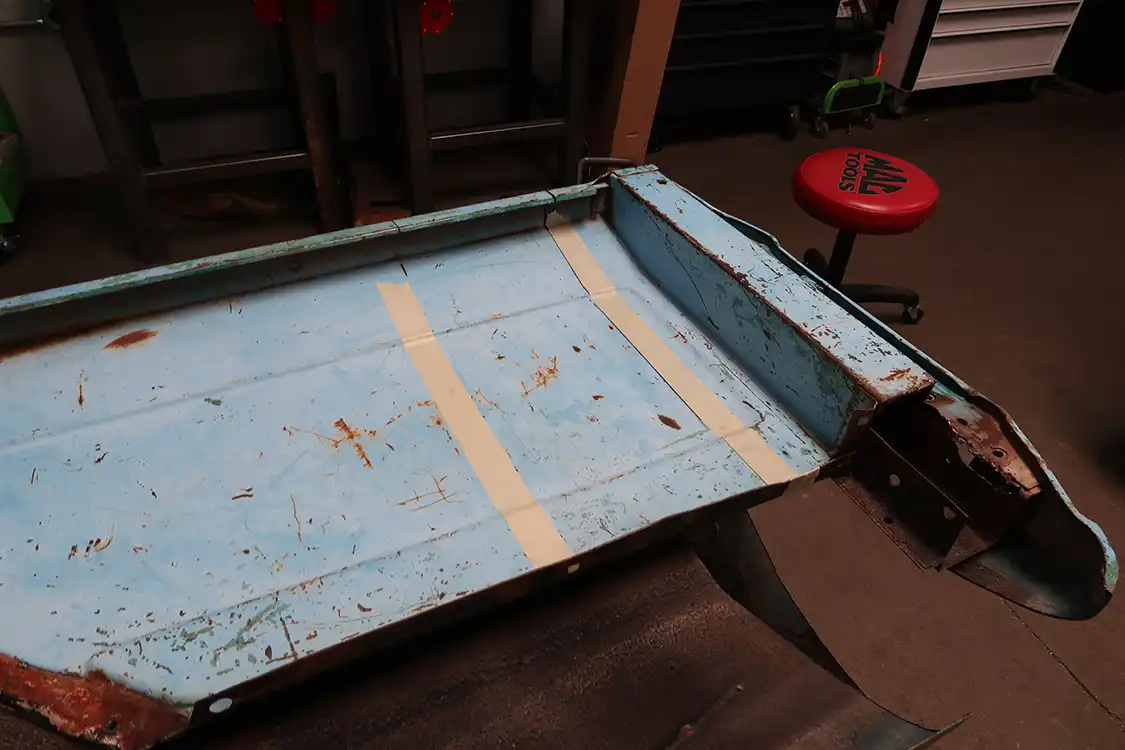
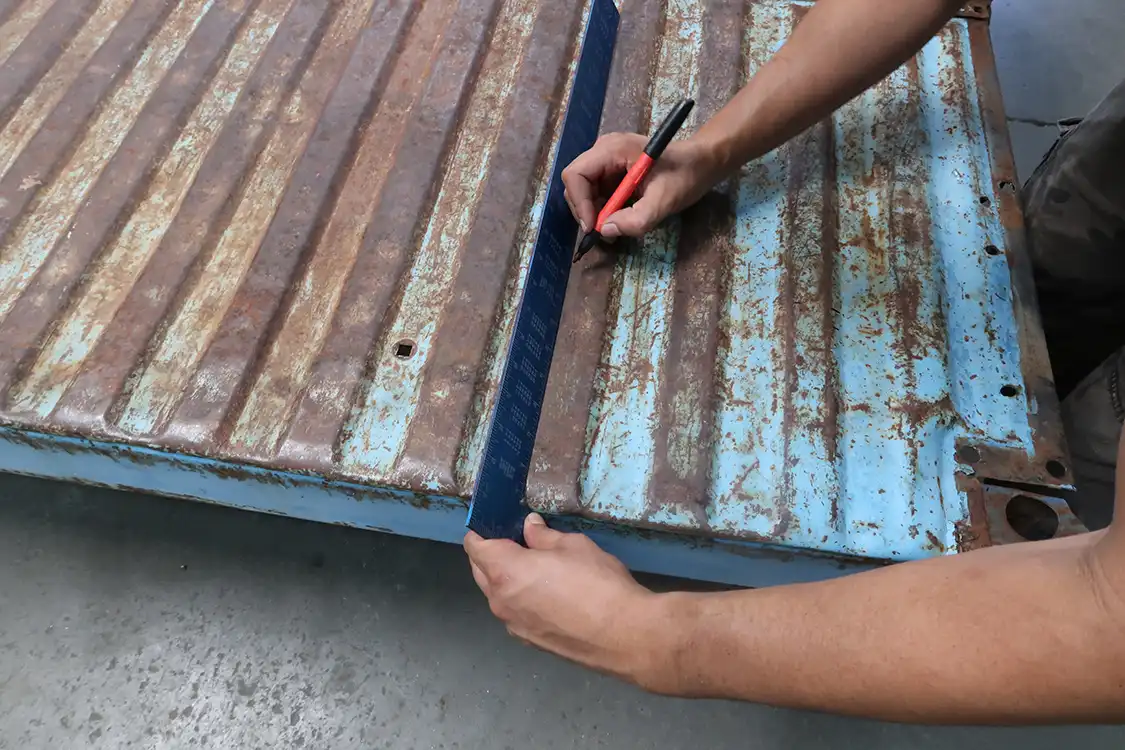
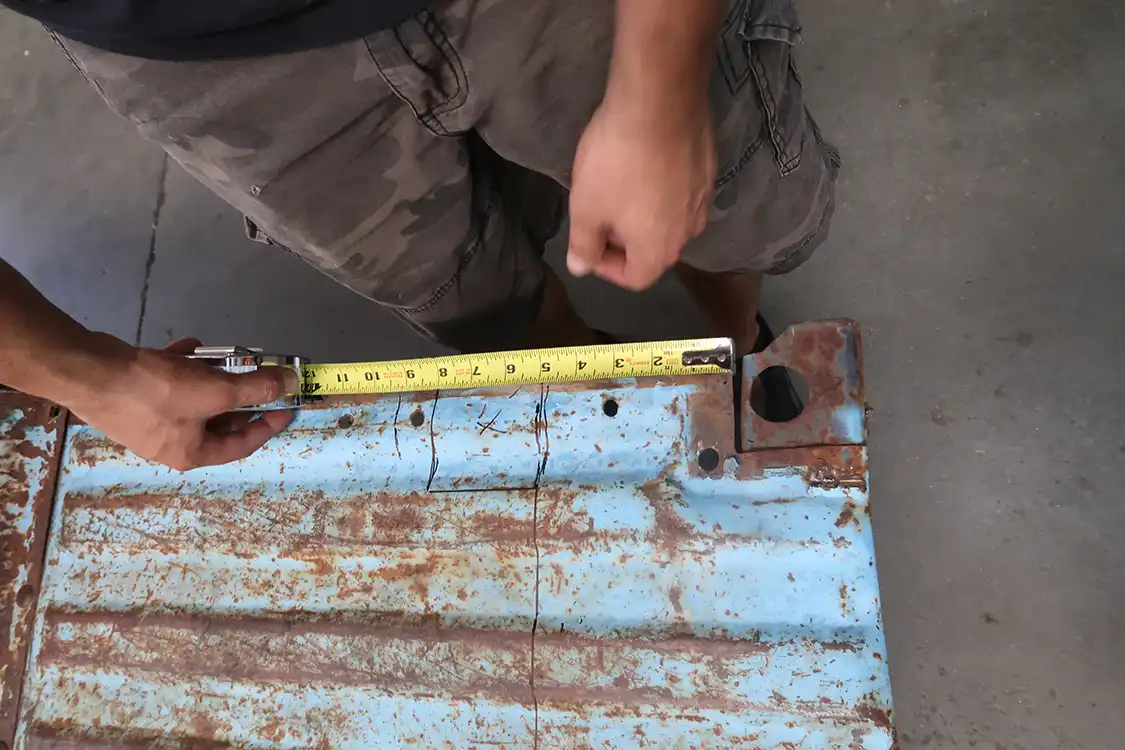
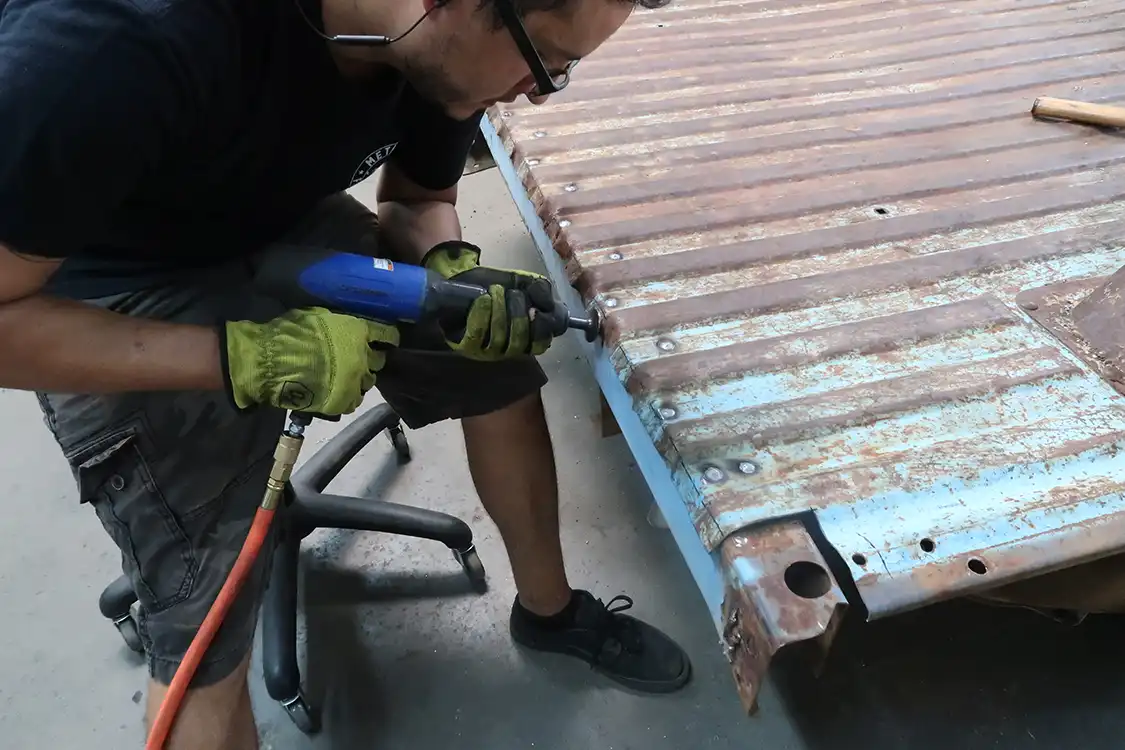
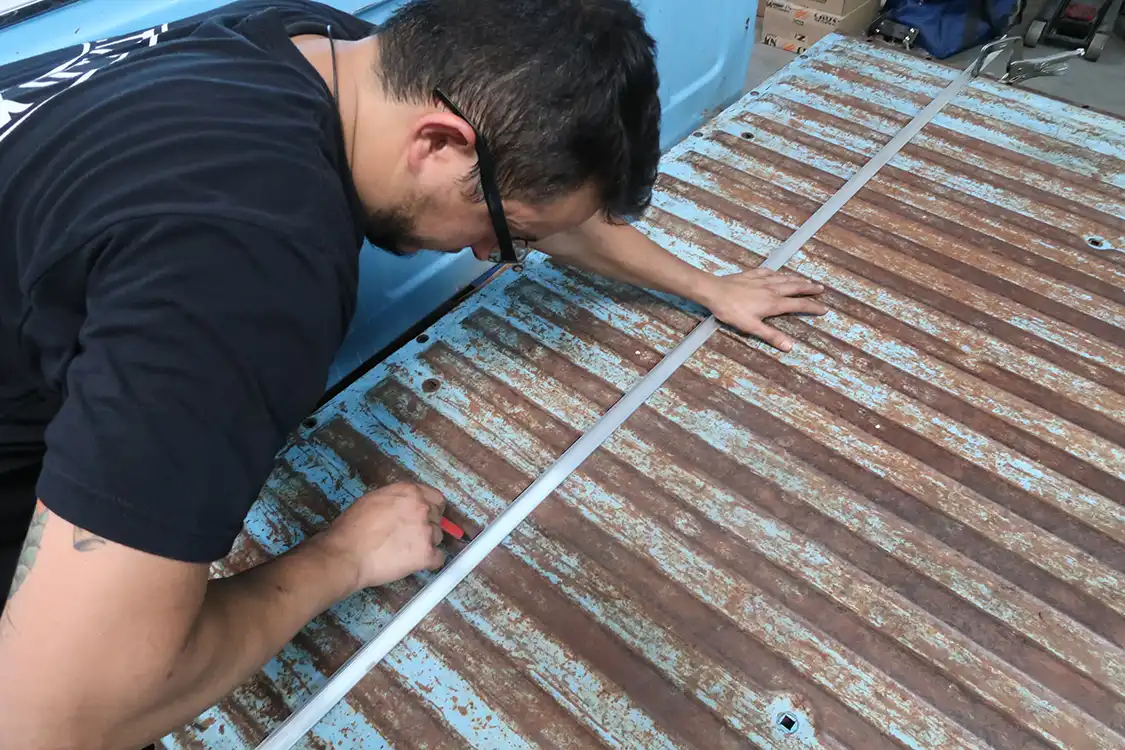
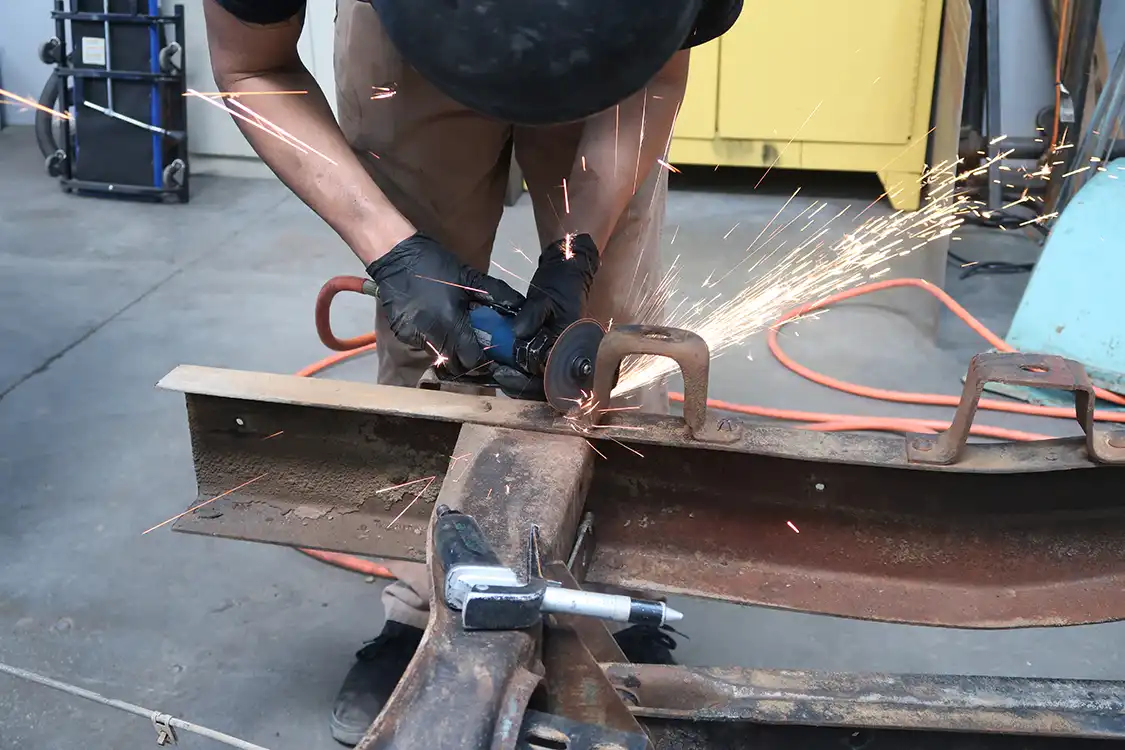
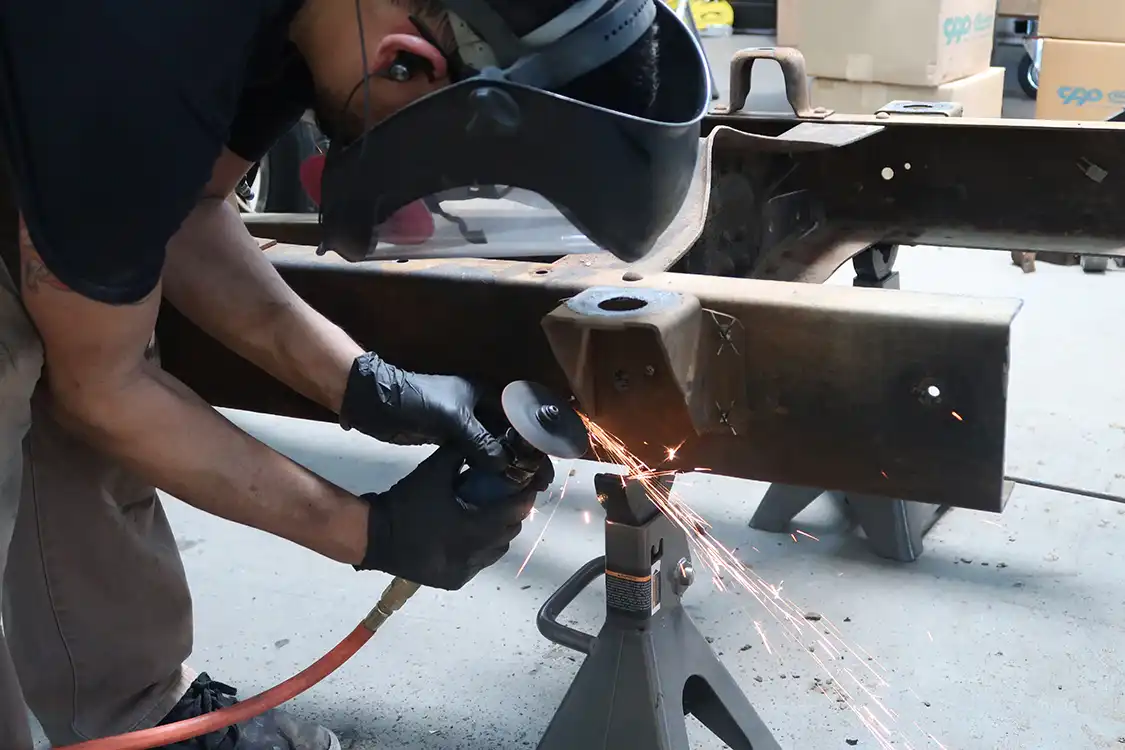
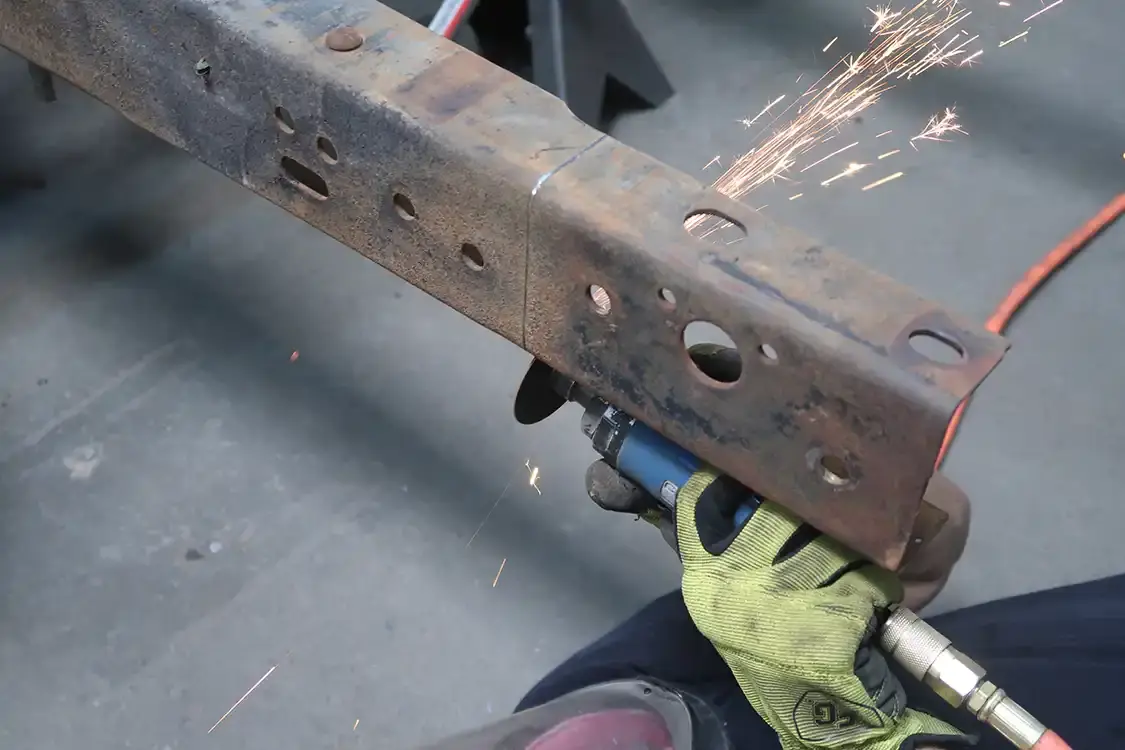
07 Kyle marked out the bedsides for the cuts. You need to take 8 inches out of the rear of the bedside and 12 inches out of the front. And that jog in the tape? That’s to compensate for the bodyline that slopes down by the tailgate.
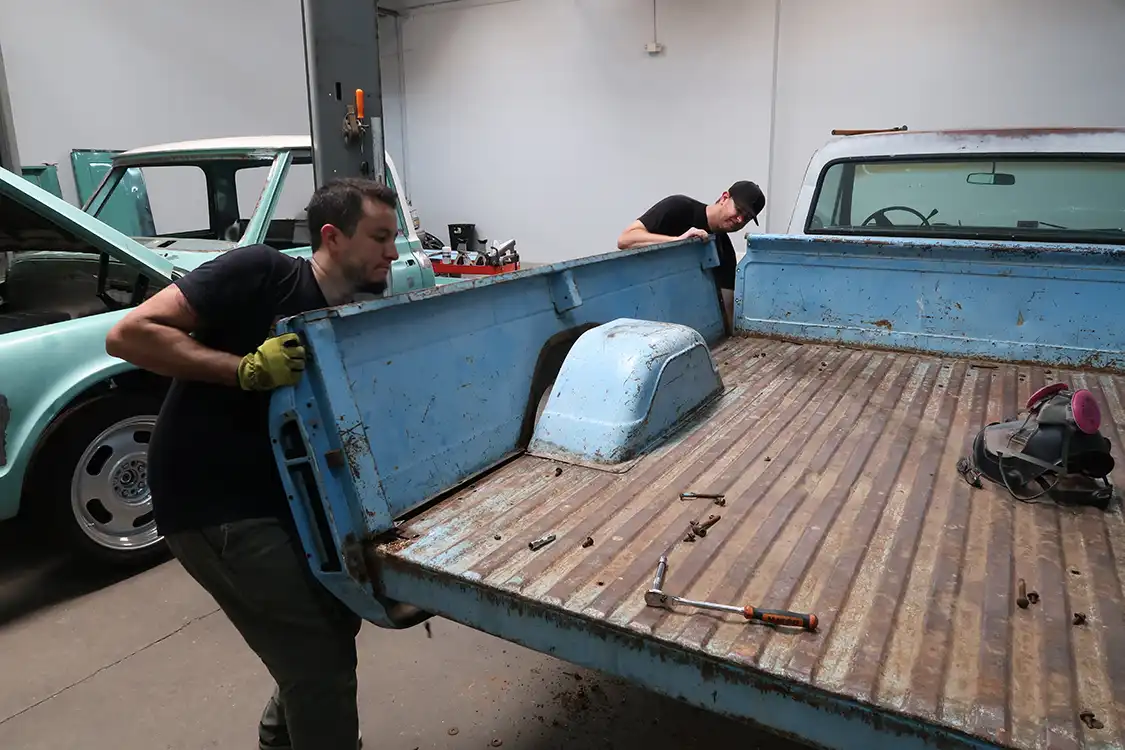
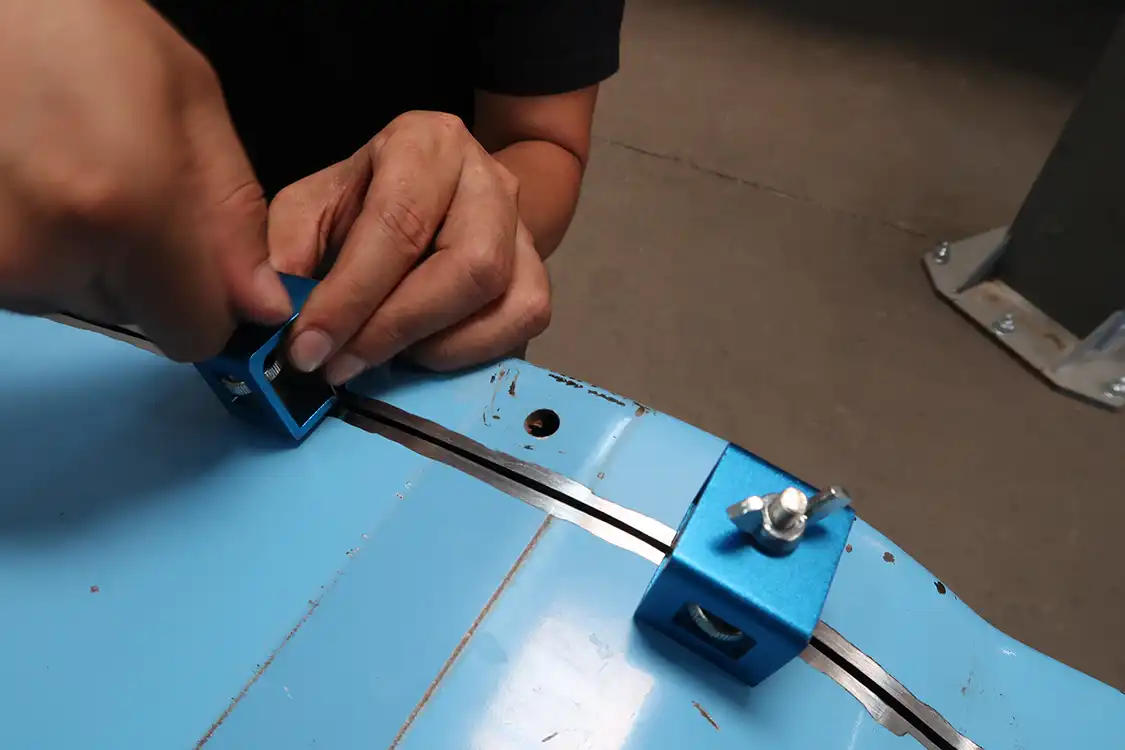
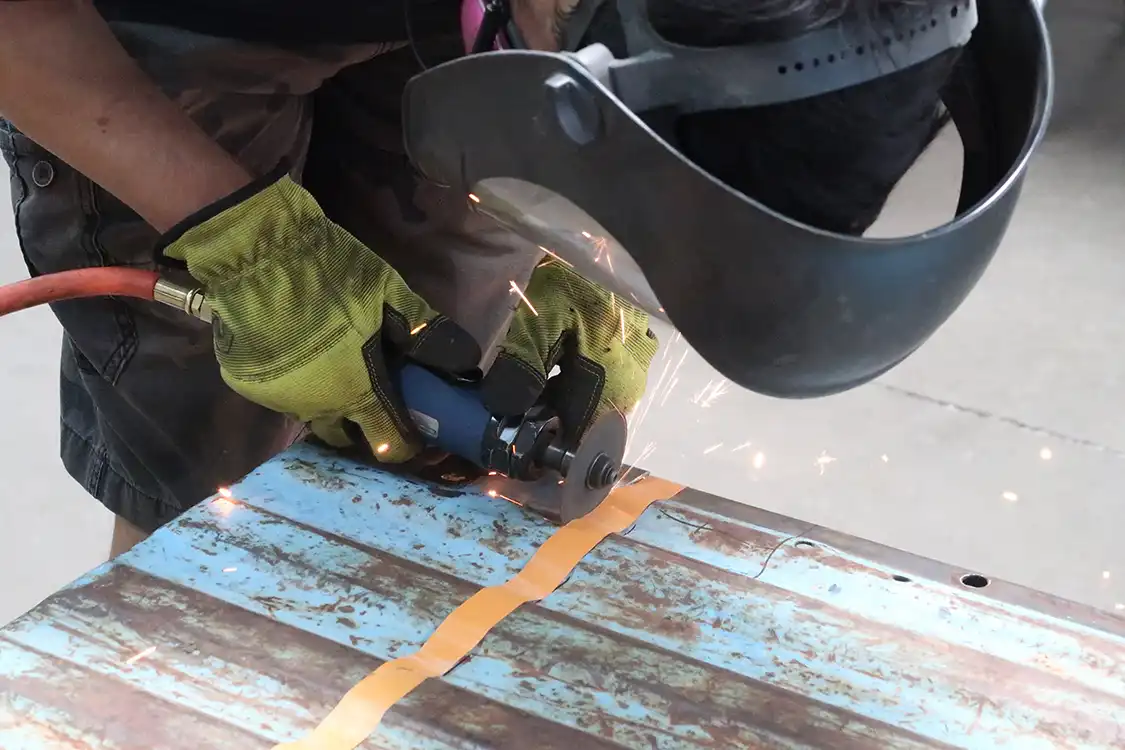
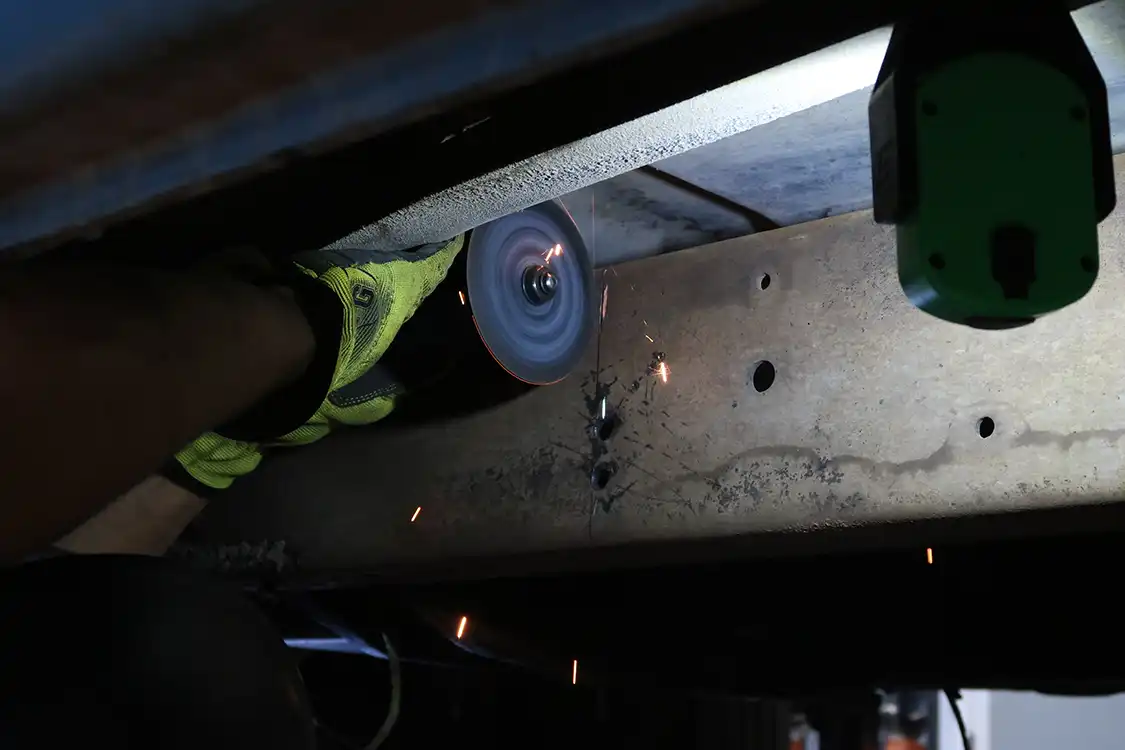
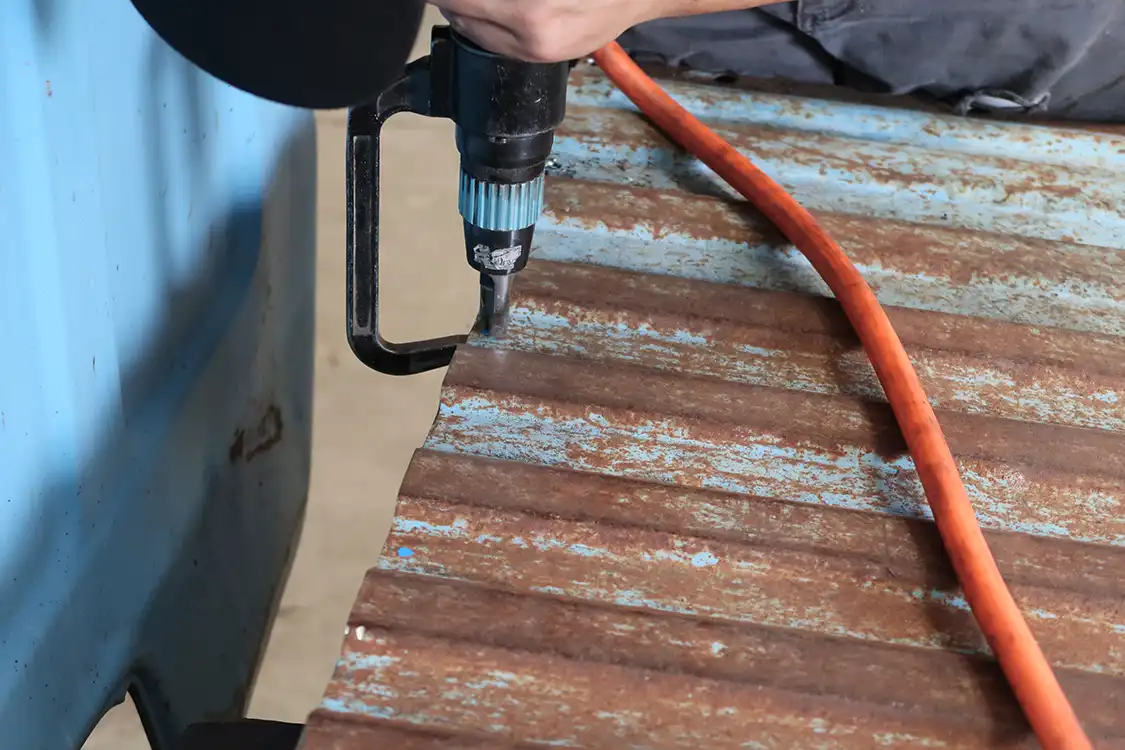
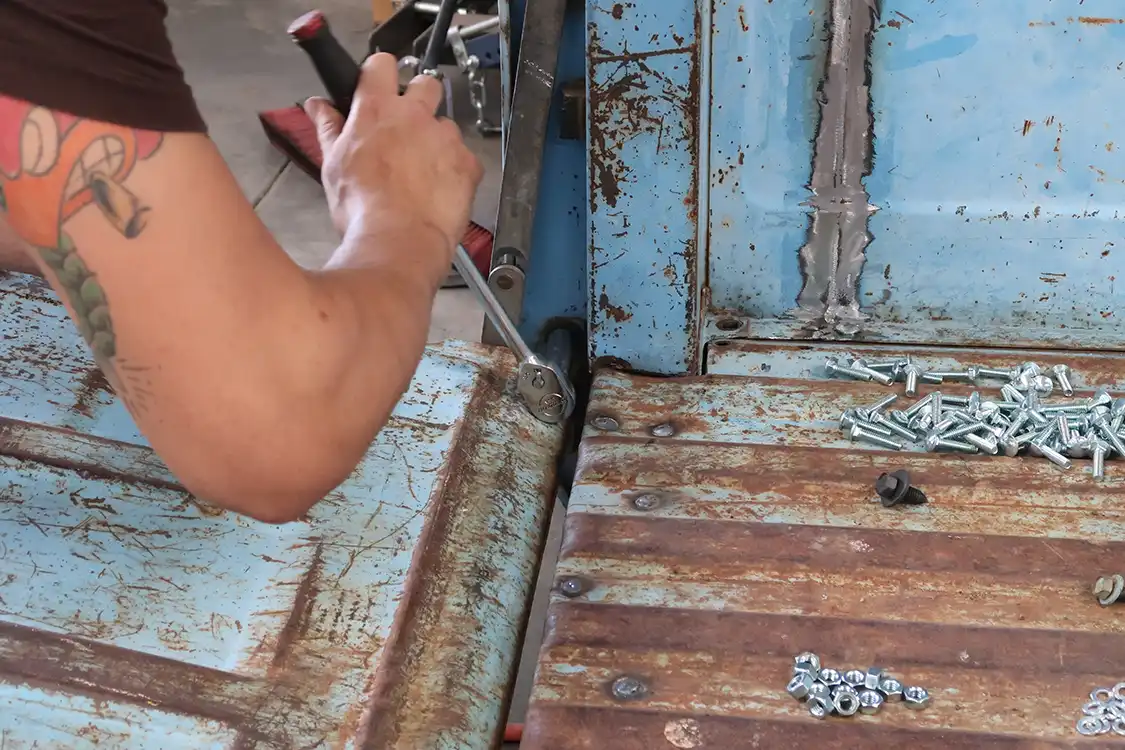
Using a die grinder, Kyle cuts the outer skin on the bedsides. Once the outside is cut, he tapes and cuts the inside of the bed. The bed now needs to be welded back together, so Kyle places everything using these sheetmetal clamps that provide just the right amount of gap.
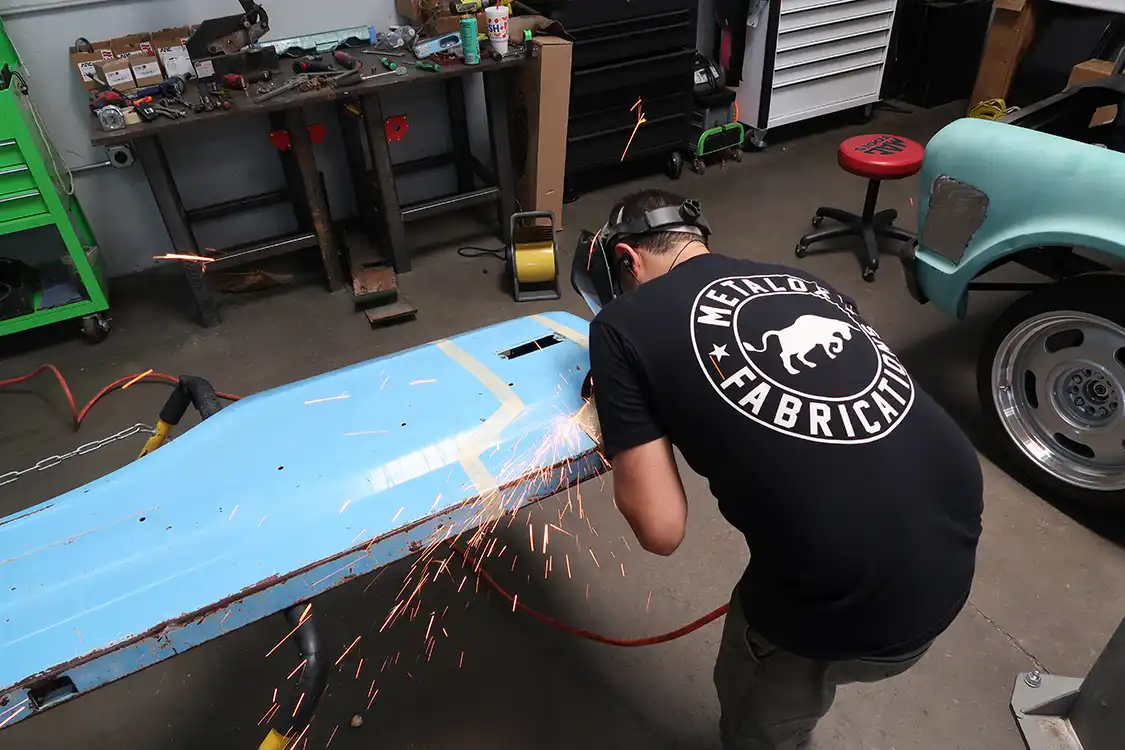
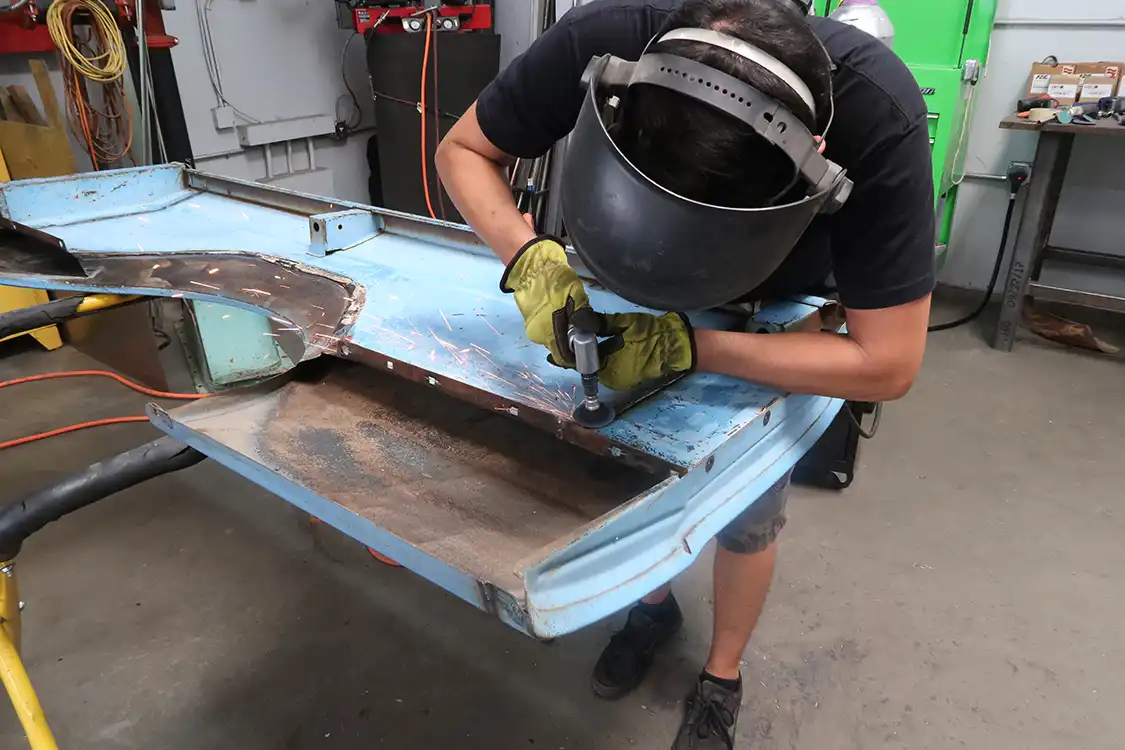
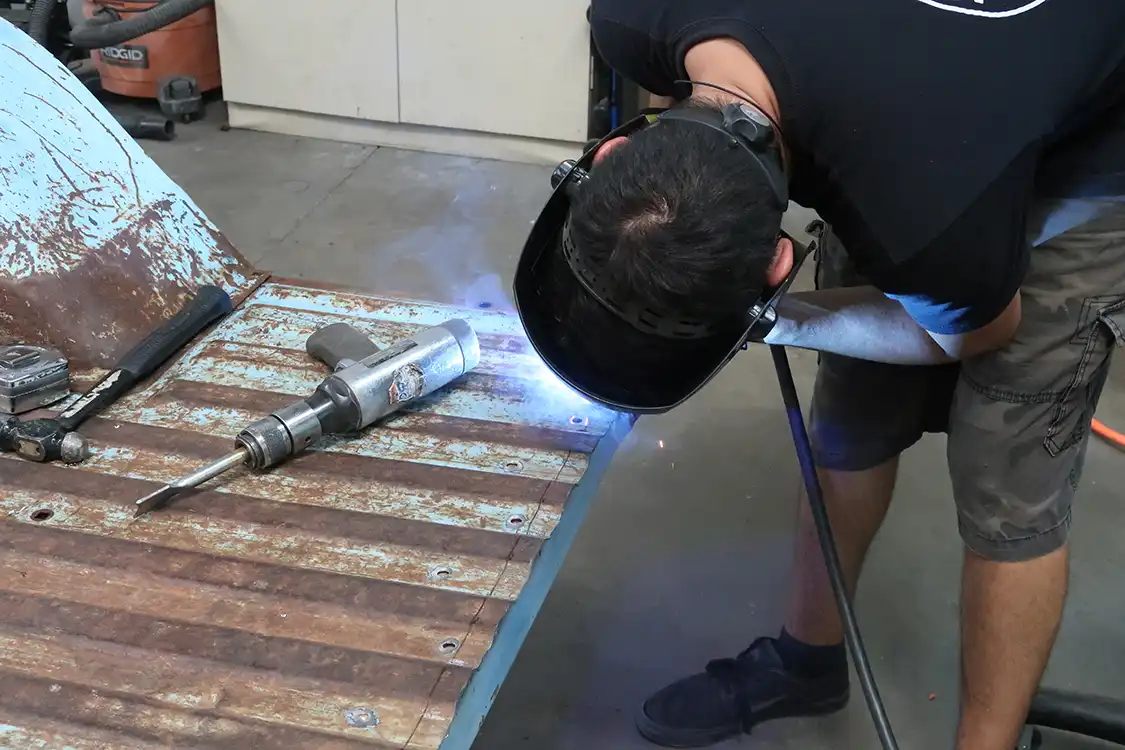
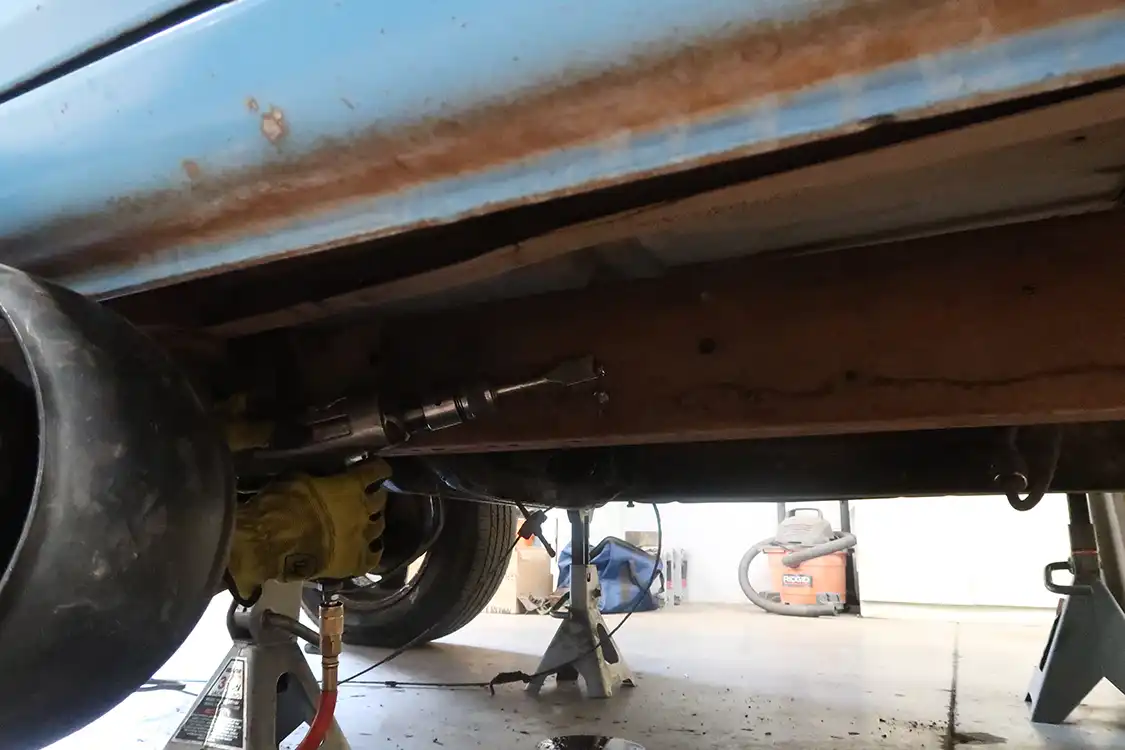
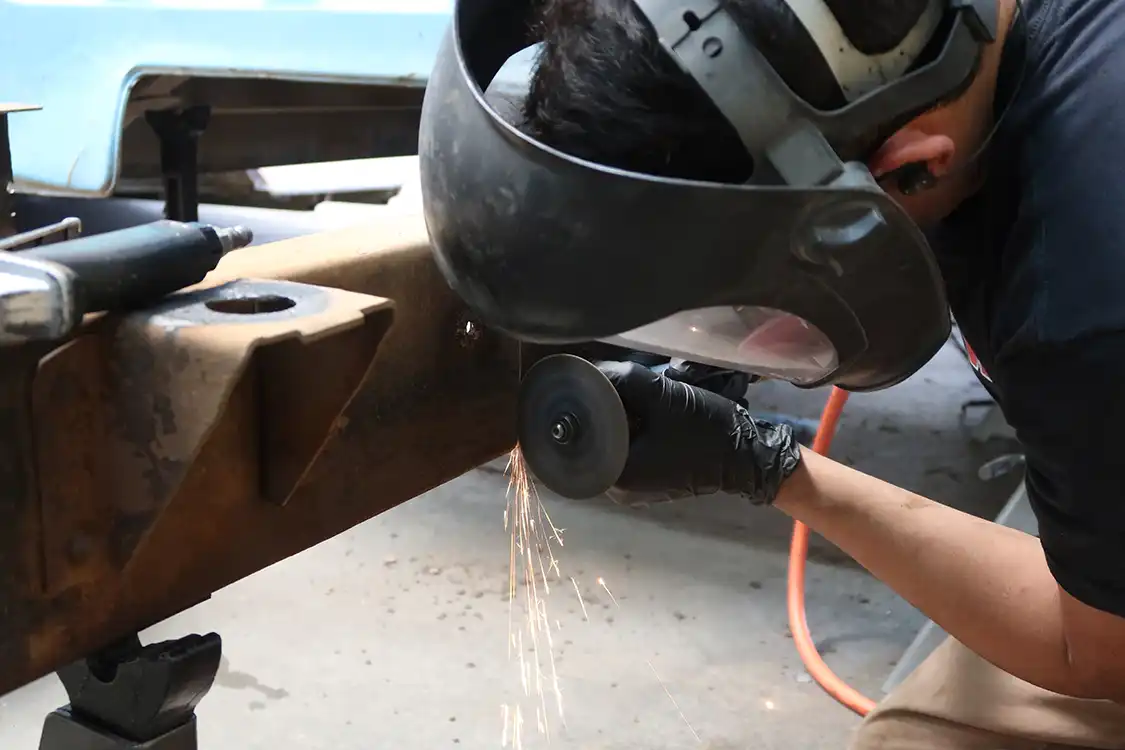
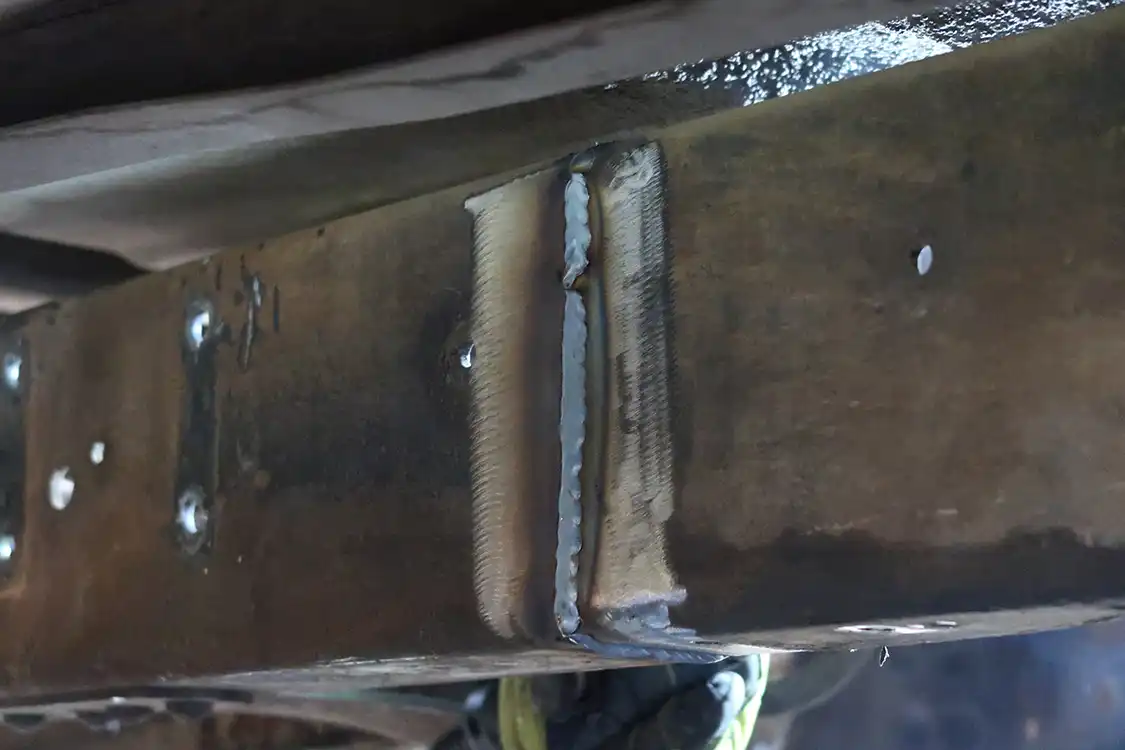
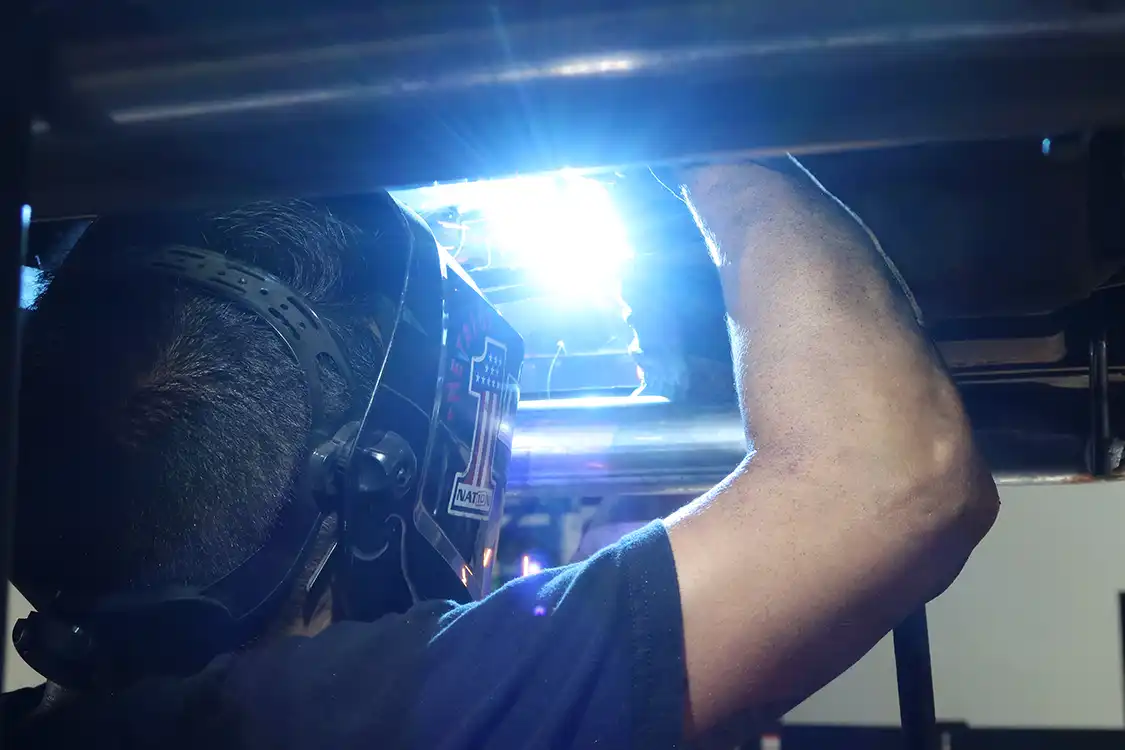
Now it’s time to weld everything back together. It’s a tedious process, but it needs to be done right; otherwise, the metal will need a ton of bodywork. The way Kyle does it, everything turns out perfect. Using a series of sanding discs, Kyle grinds down the welds so they’re flush with the surrounding metal.
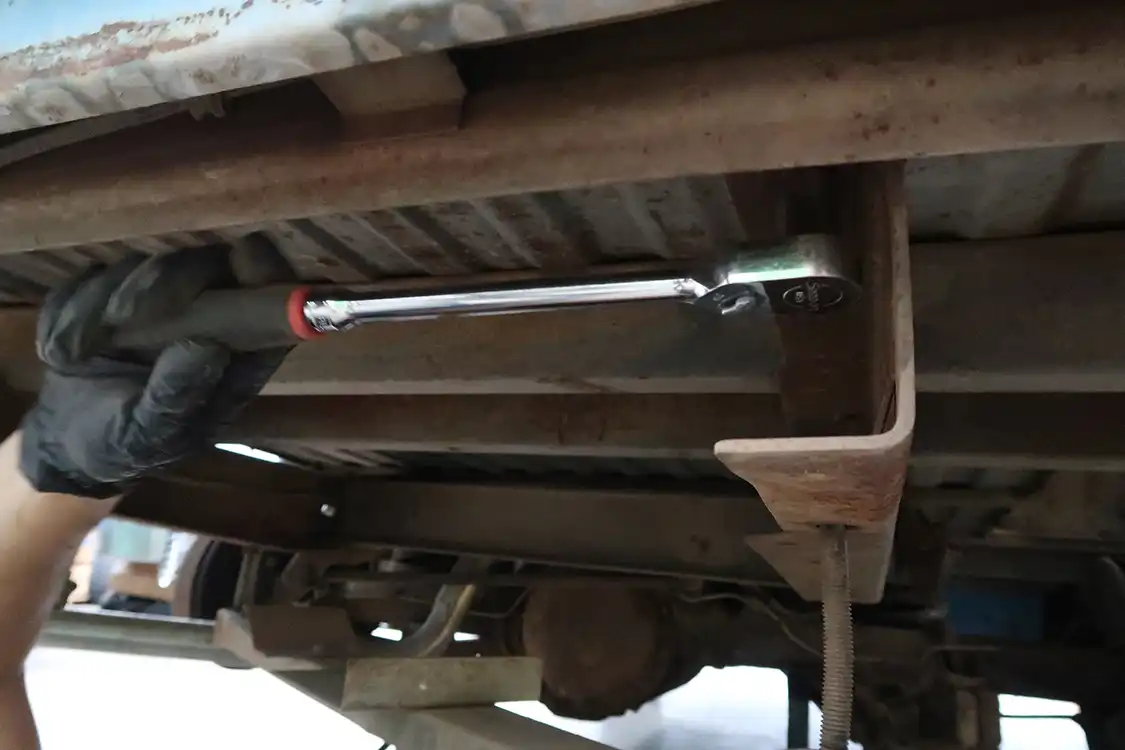
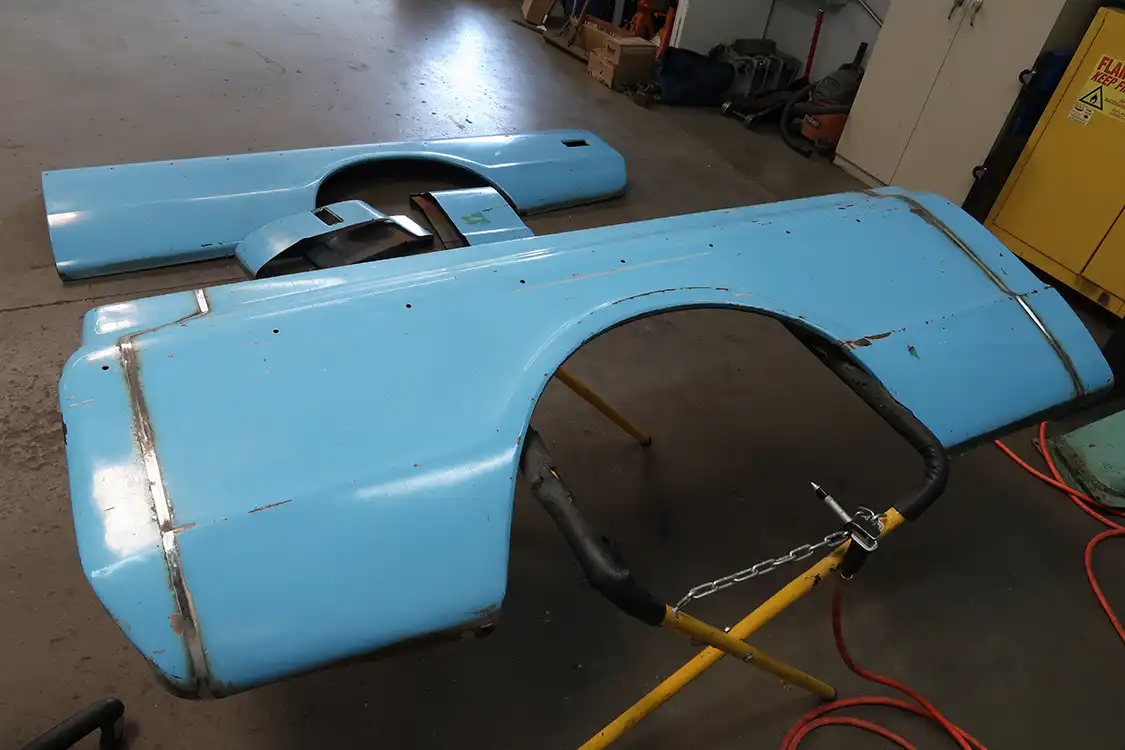
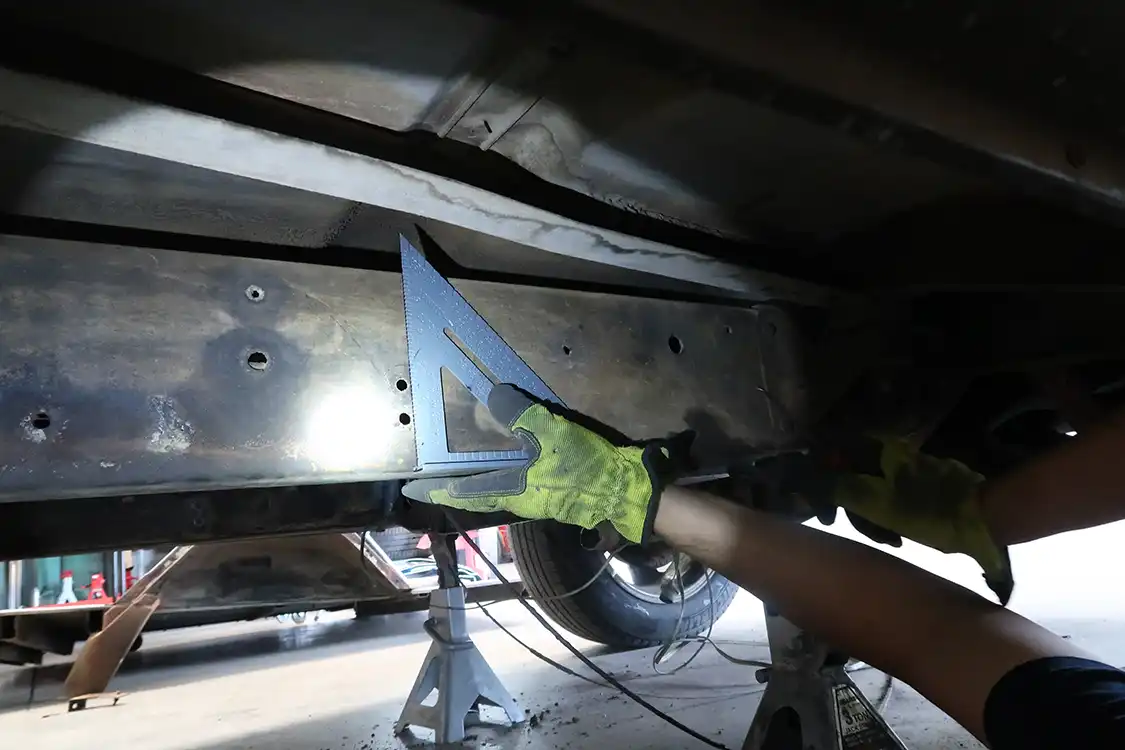
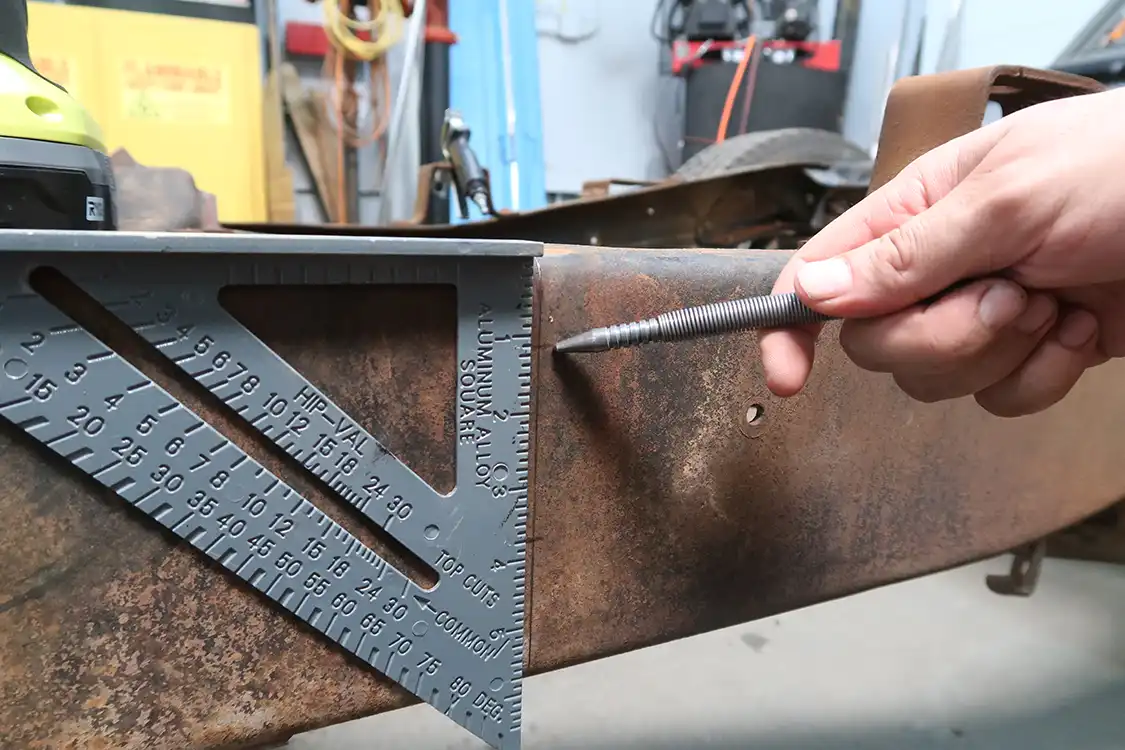
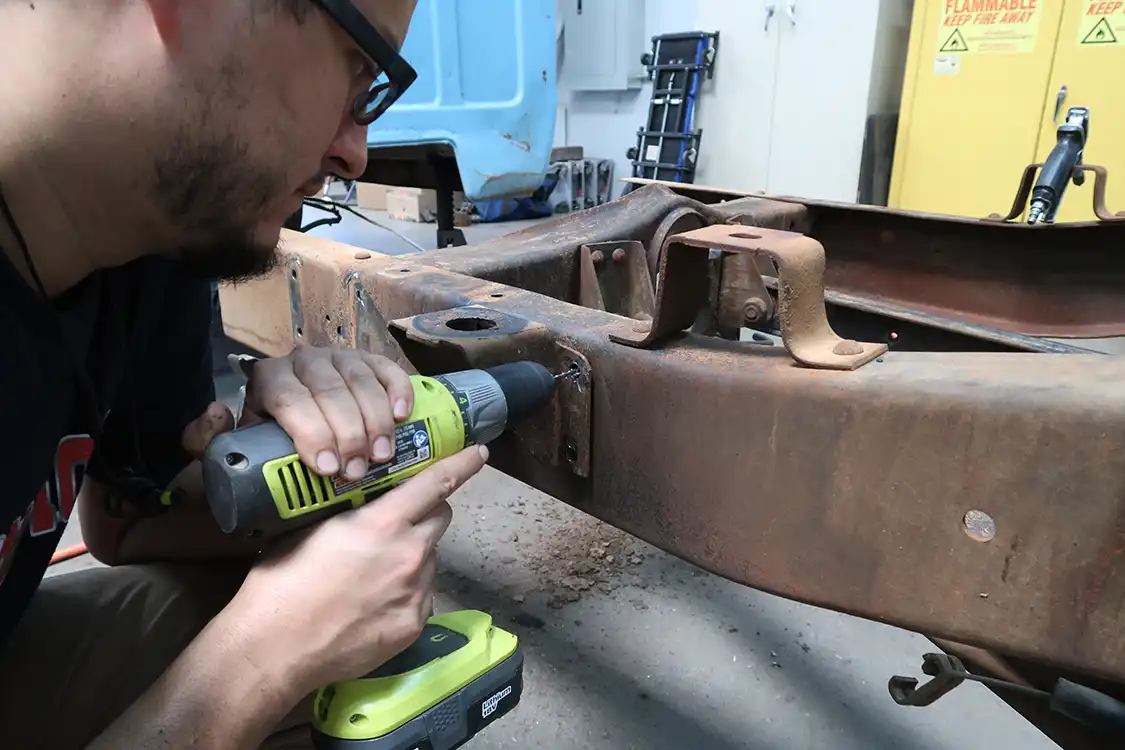
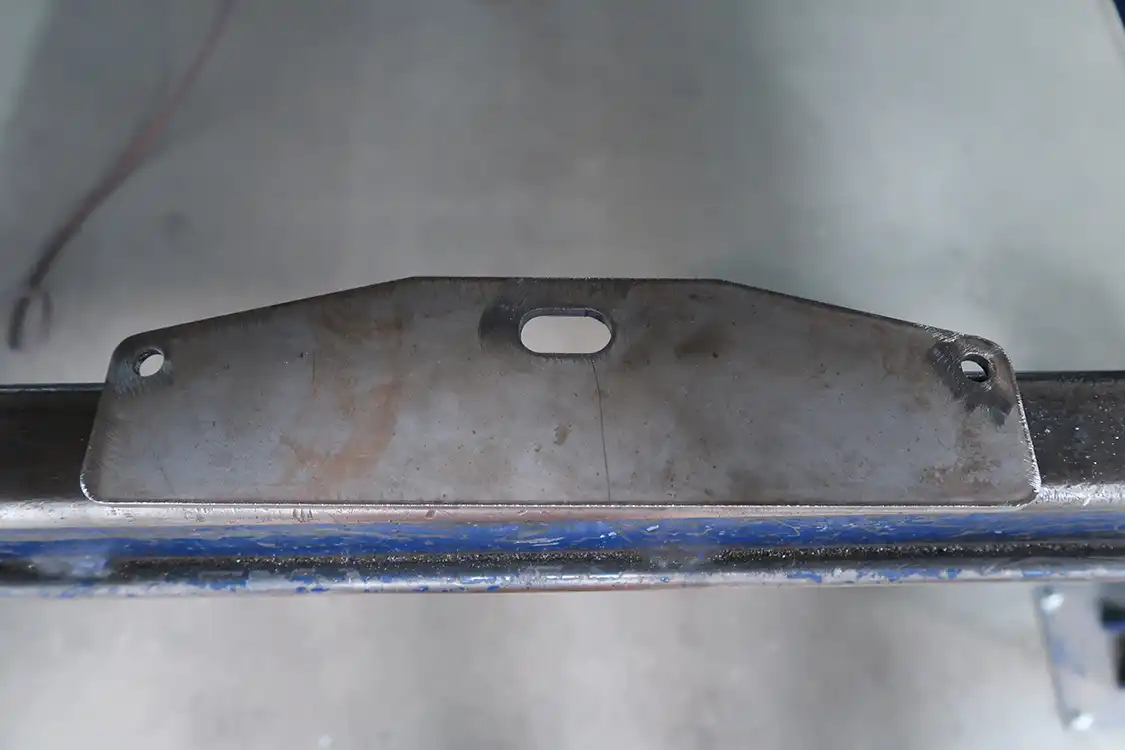
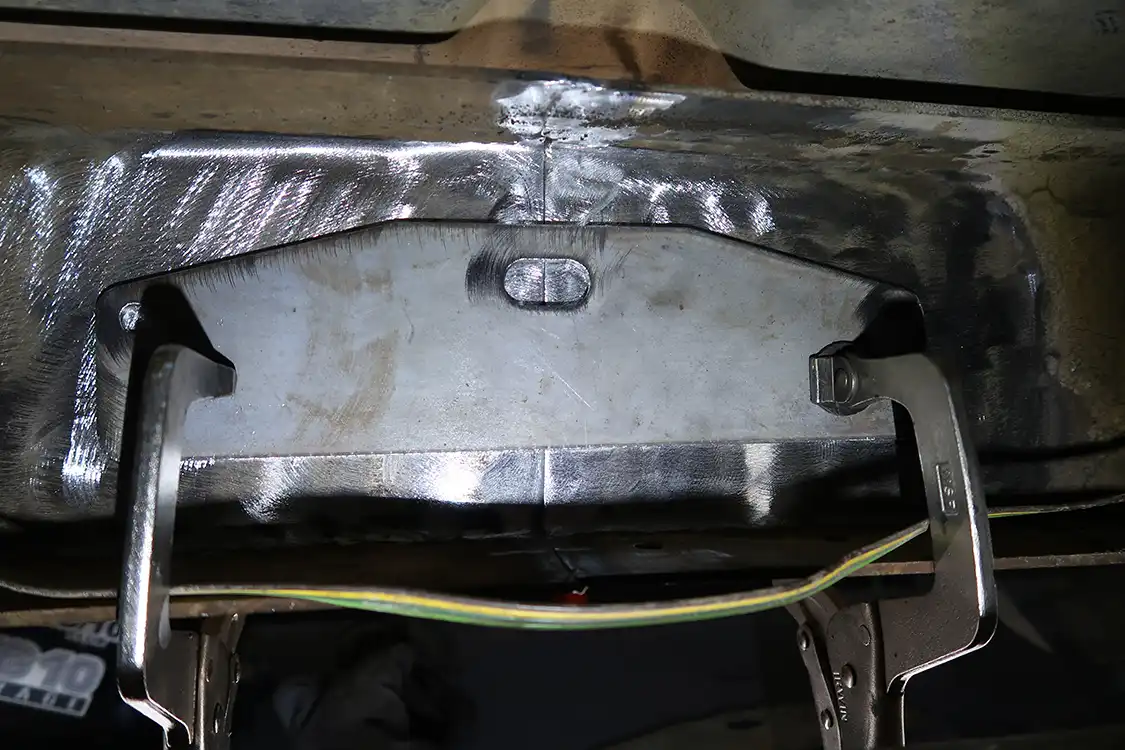
It’s an easy procedure; just take your time. One important adjustment to note is with the cab mount relocation. While the template might suggest moving it 11 1/2 inches, it’s more accurate to move it 12 inches. This small correction will save you from potential alignment issues later on.
Many users have shared their experiences with various products used in shortbed conversions. Some have had issues with specific kits, but others have found certain products to be reliable. For instance, one user mentioned purchasing a fleetside header panel that fit perfectly, with all bolt holes lining up correctly and the material being as heavy-gauge as the original.
When undertaking a shortbed conversion, attention to detail is paramount. Take your time with each step, from cutting and welding to making necessary adjustments. Listen to advice from those who have gone through the process before, and trust tried-and-tested products to make your project a success.
To give you a better idea of the parts and costs involved in a shortbed conversion, here’s a quick rundown:
These parts are essential for the project and can be sourced from various suppliers. Keep in mind that the final expenses may vary depending on the specific requirements of your vehicle and the quality of parts you choose.
The only remaining expense to consider is getting the front drive shaft shortened.
The shortbed conversion kit costs around $425, and the bed bolt kit is priced at $70.
The total cost of the shortbed conversion project is approximately $2550.


Share Link