 Chris Hamilton
.
November 20, 2025
.
Features
.
Chris Hamilton
.
November 20, 2025
.
Features
.
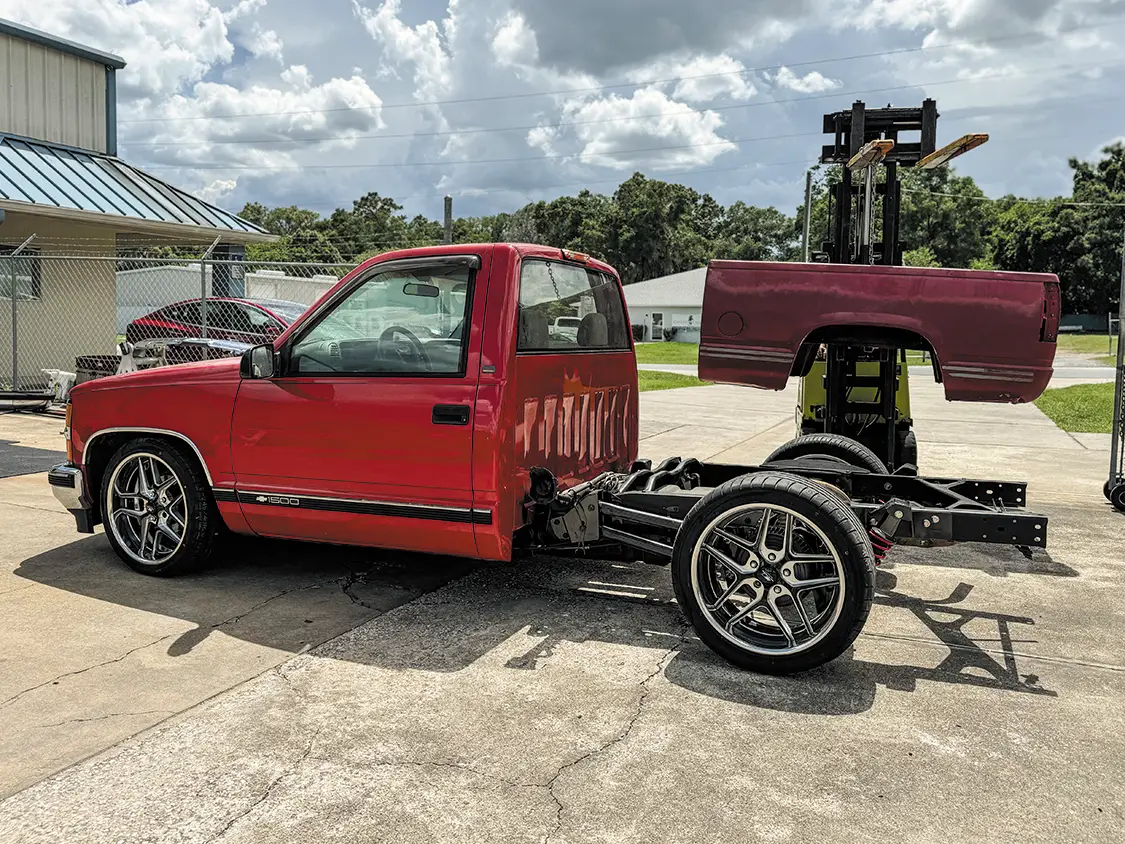
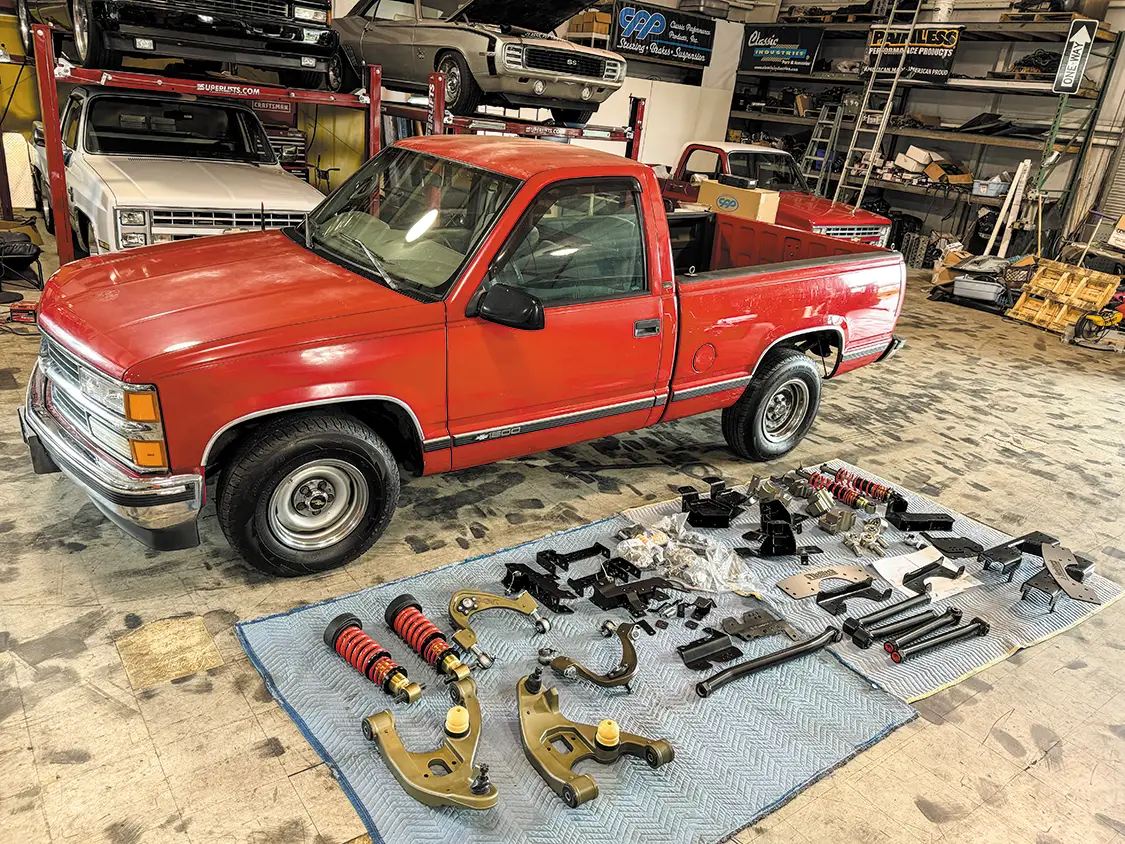
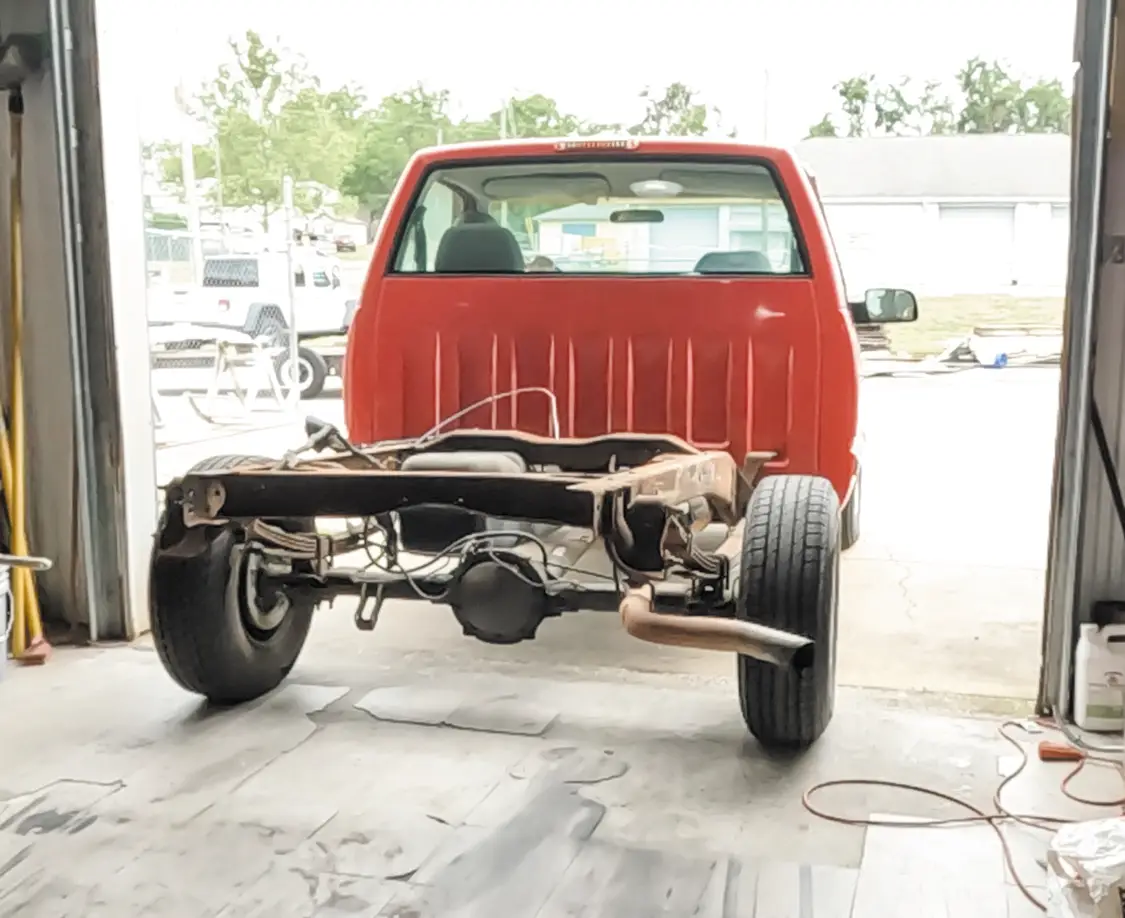
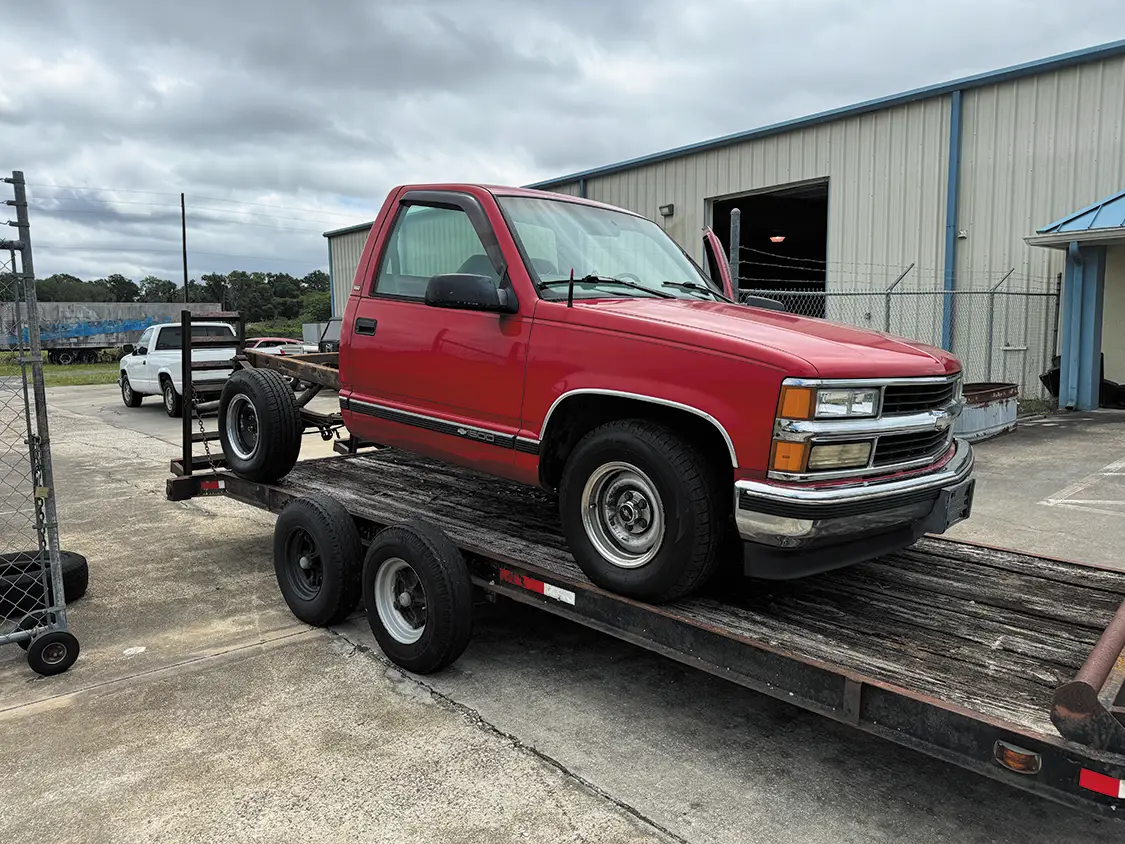
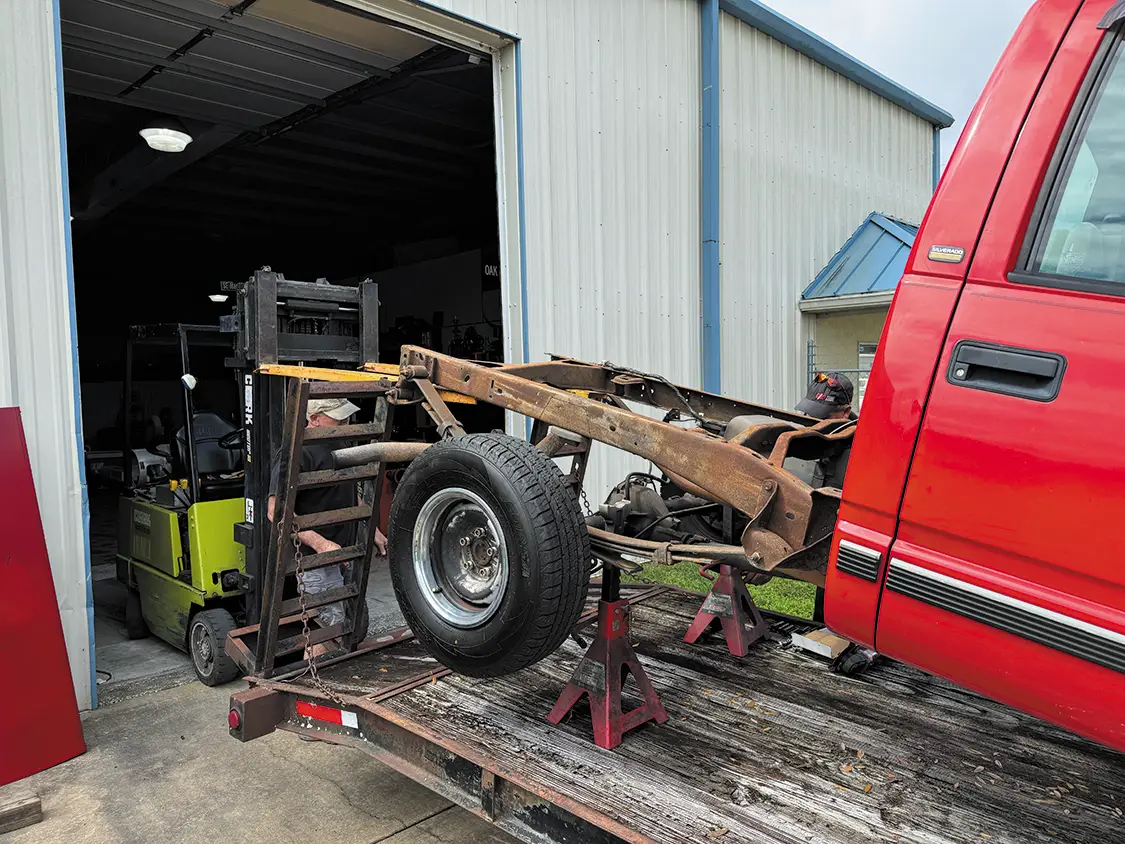
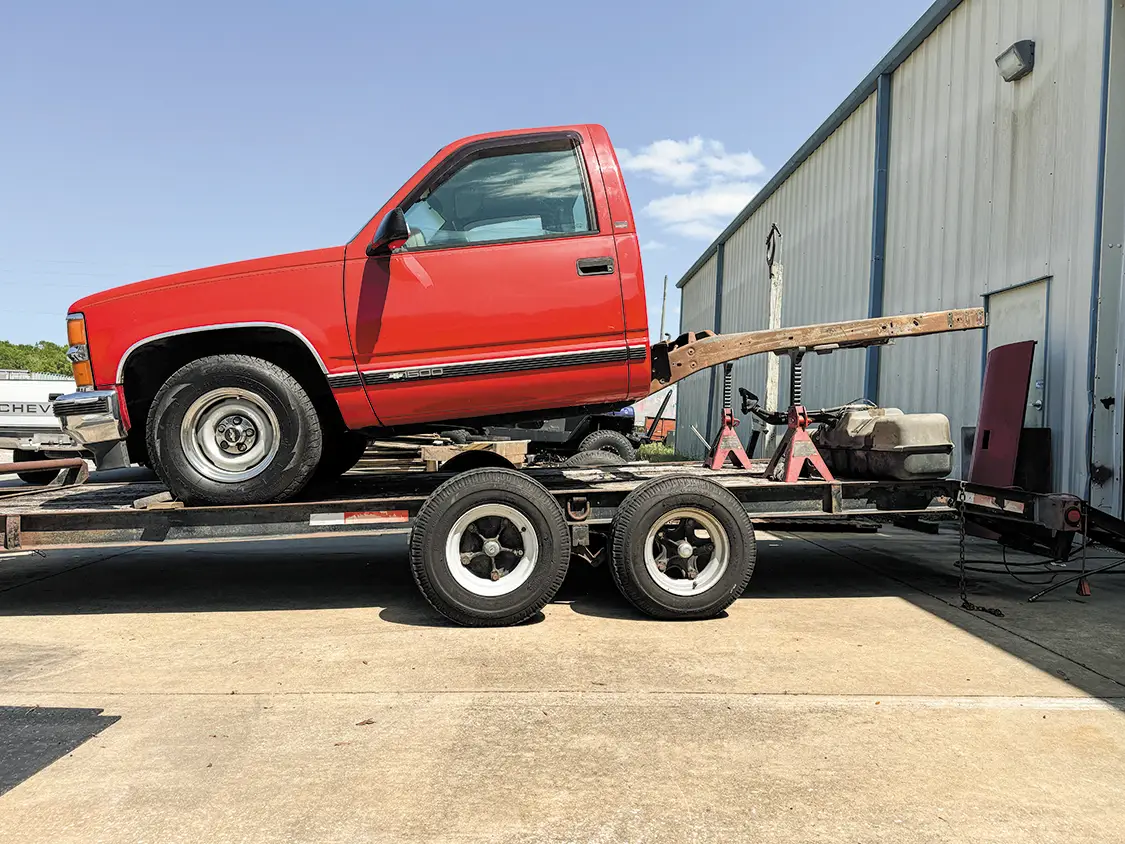
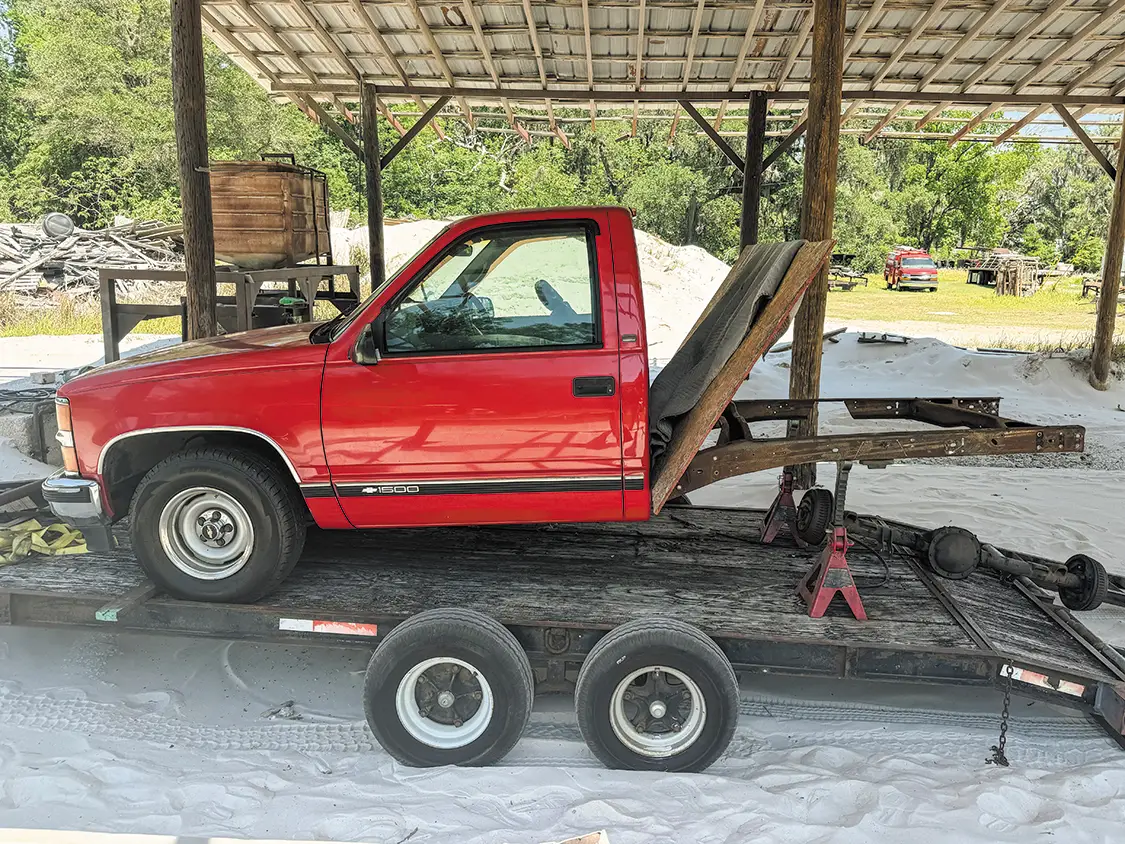
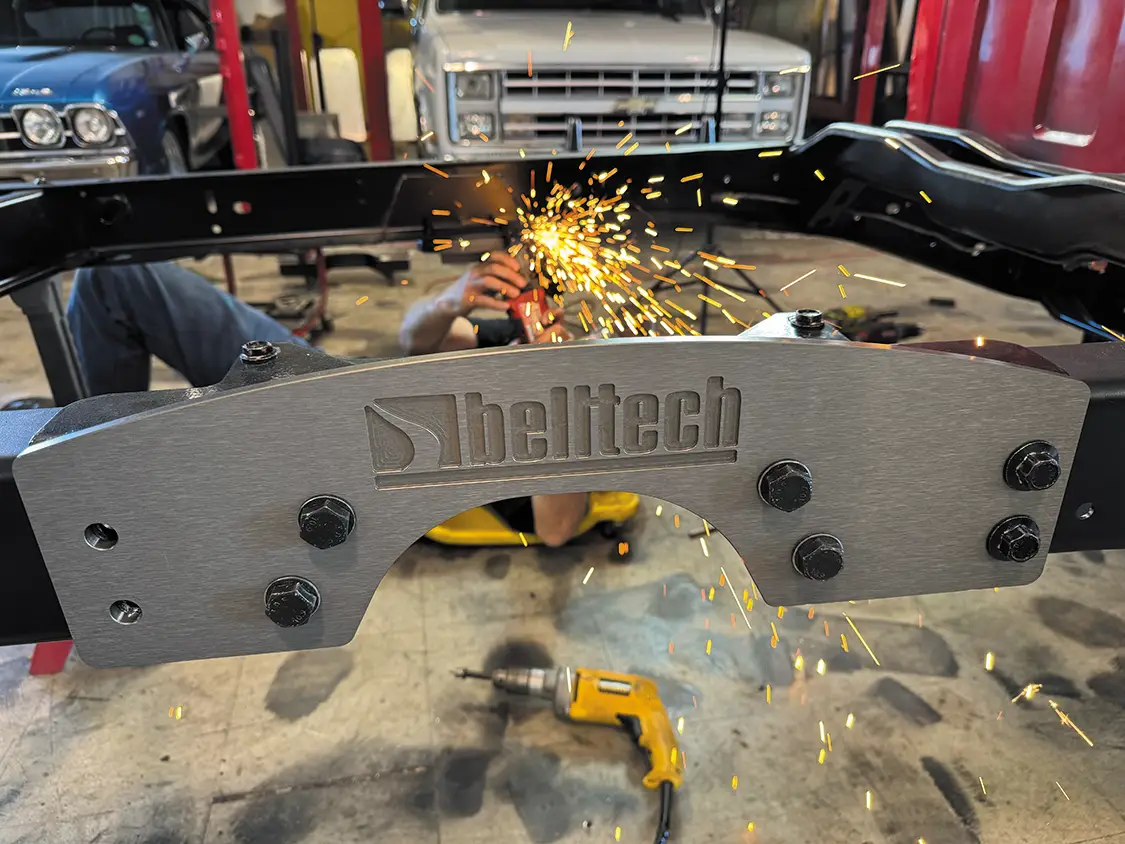
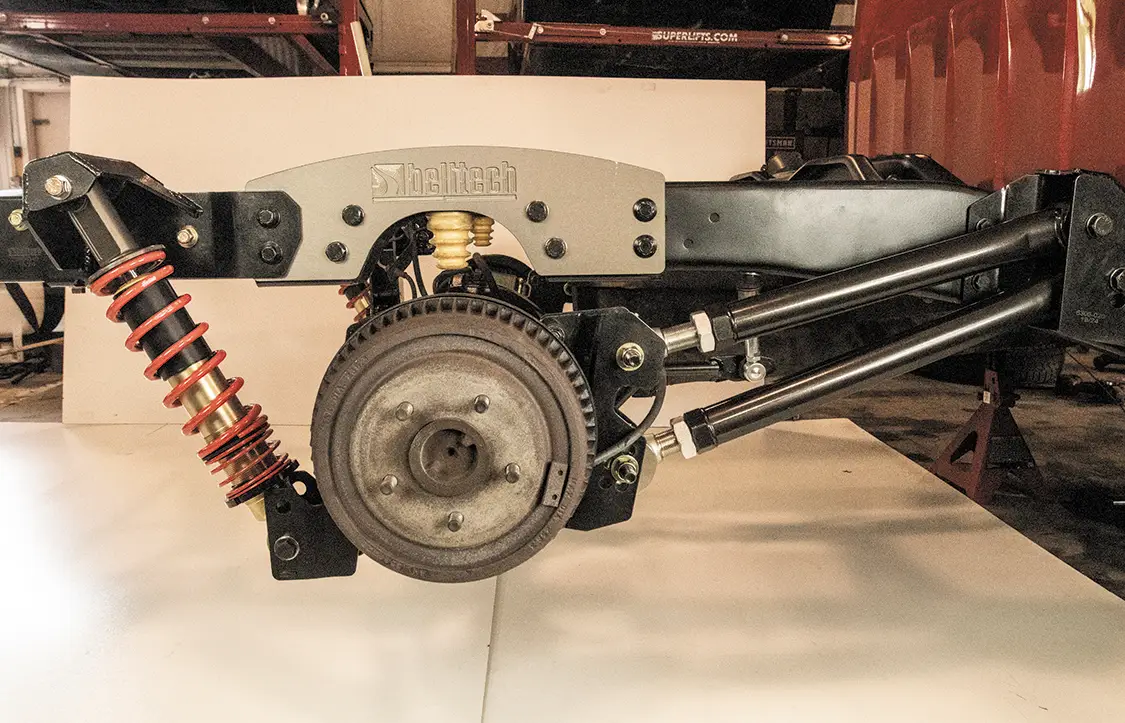
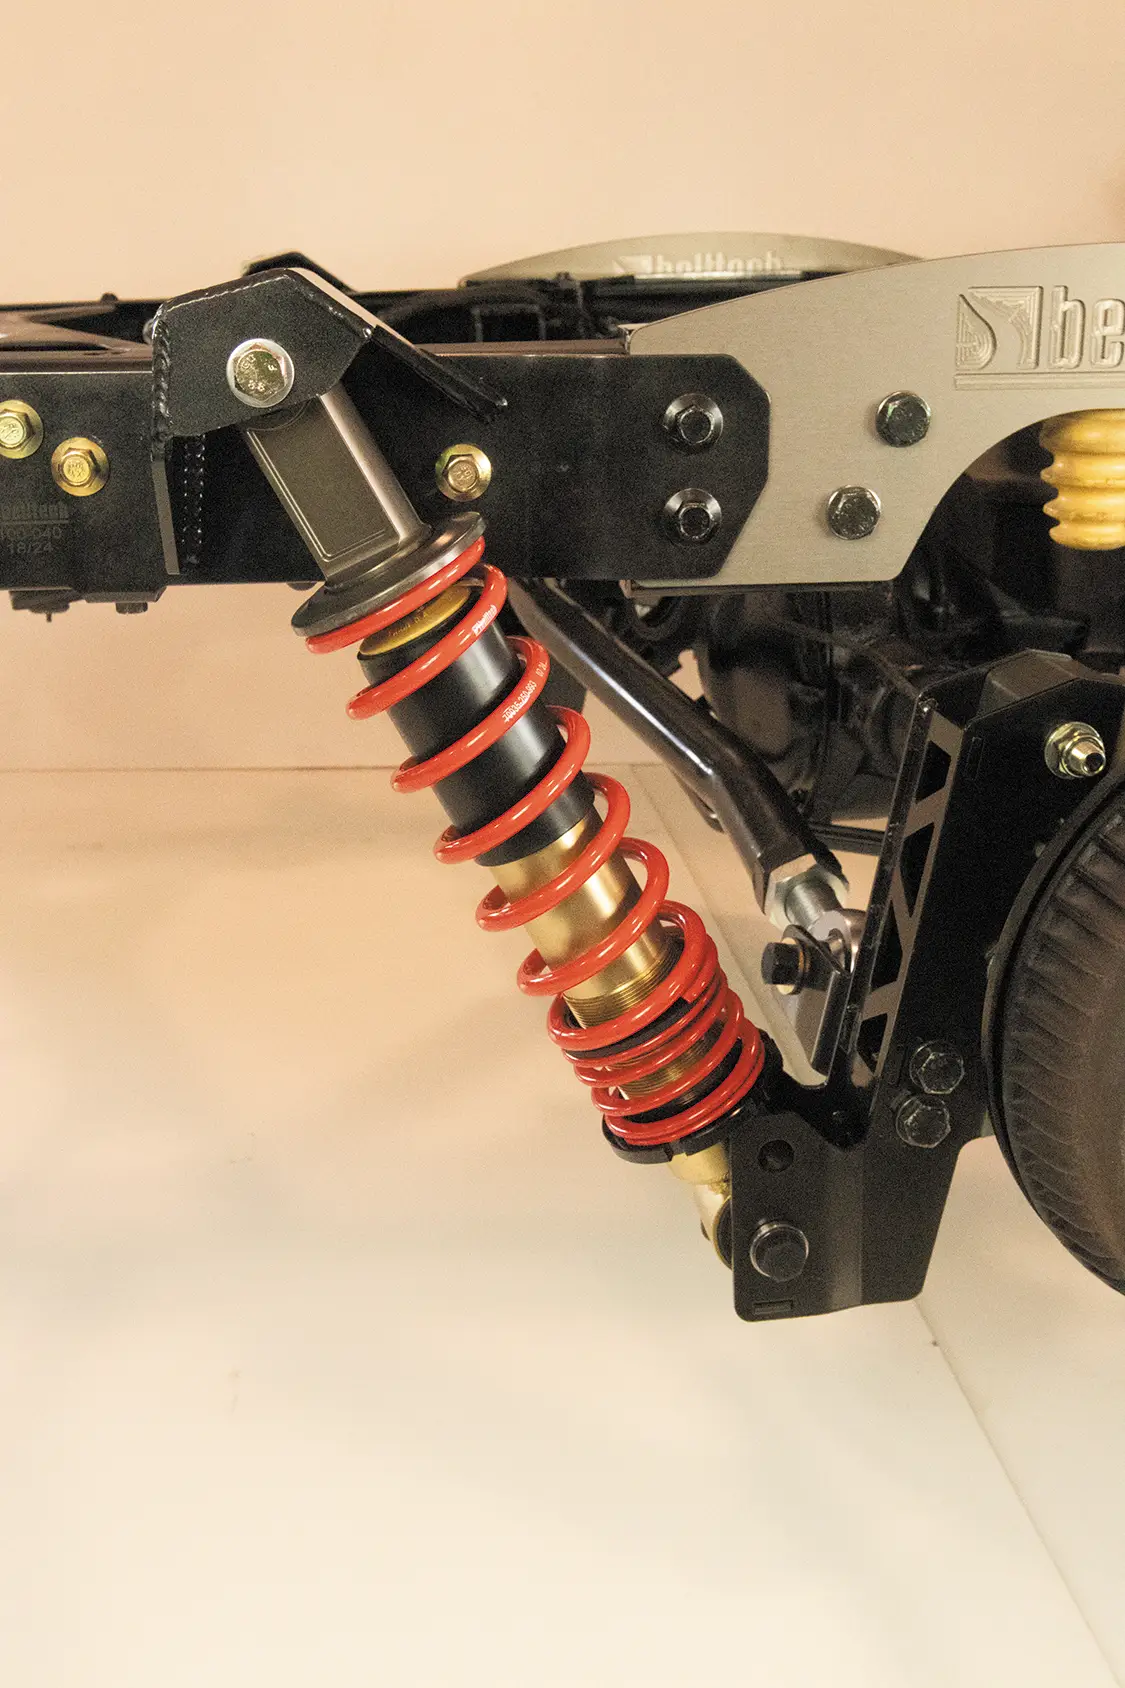
We finally got our hands on a super cherry 1997 Chevy C1500. Bone stock, clean as a whistle, and ready for a modern-day sport truck makeover. For this first phase of the build, we’re tearing into the rear end with an all-new suspension system from Belltech that’s anything but old-school. This isn’t your grandpa’s lowering block kit. Belltech went all-in with a rear coilover setup and performance-driven parallel 4-link system that’s built to handle. And yeah, we’re the first ones to bolt this kit on, so you know we’re hyped to show you how it all came together.
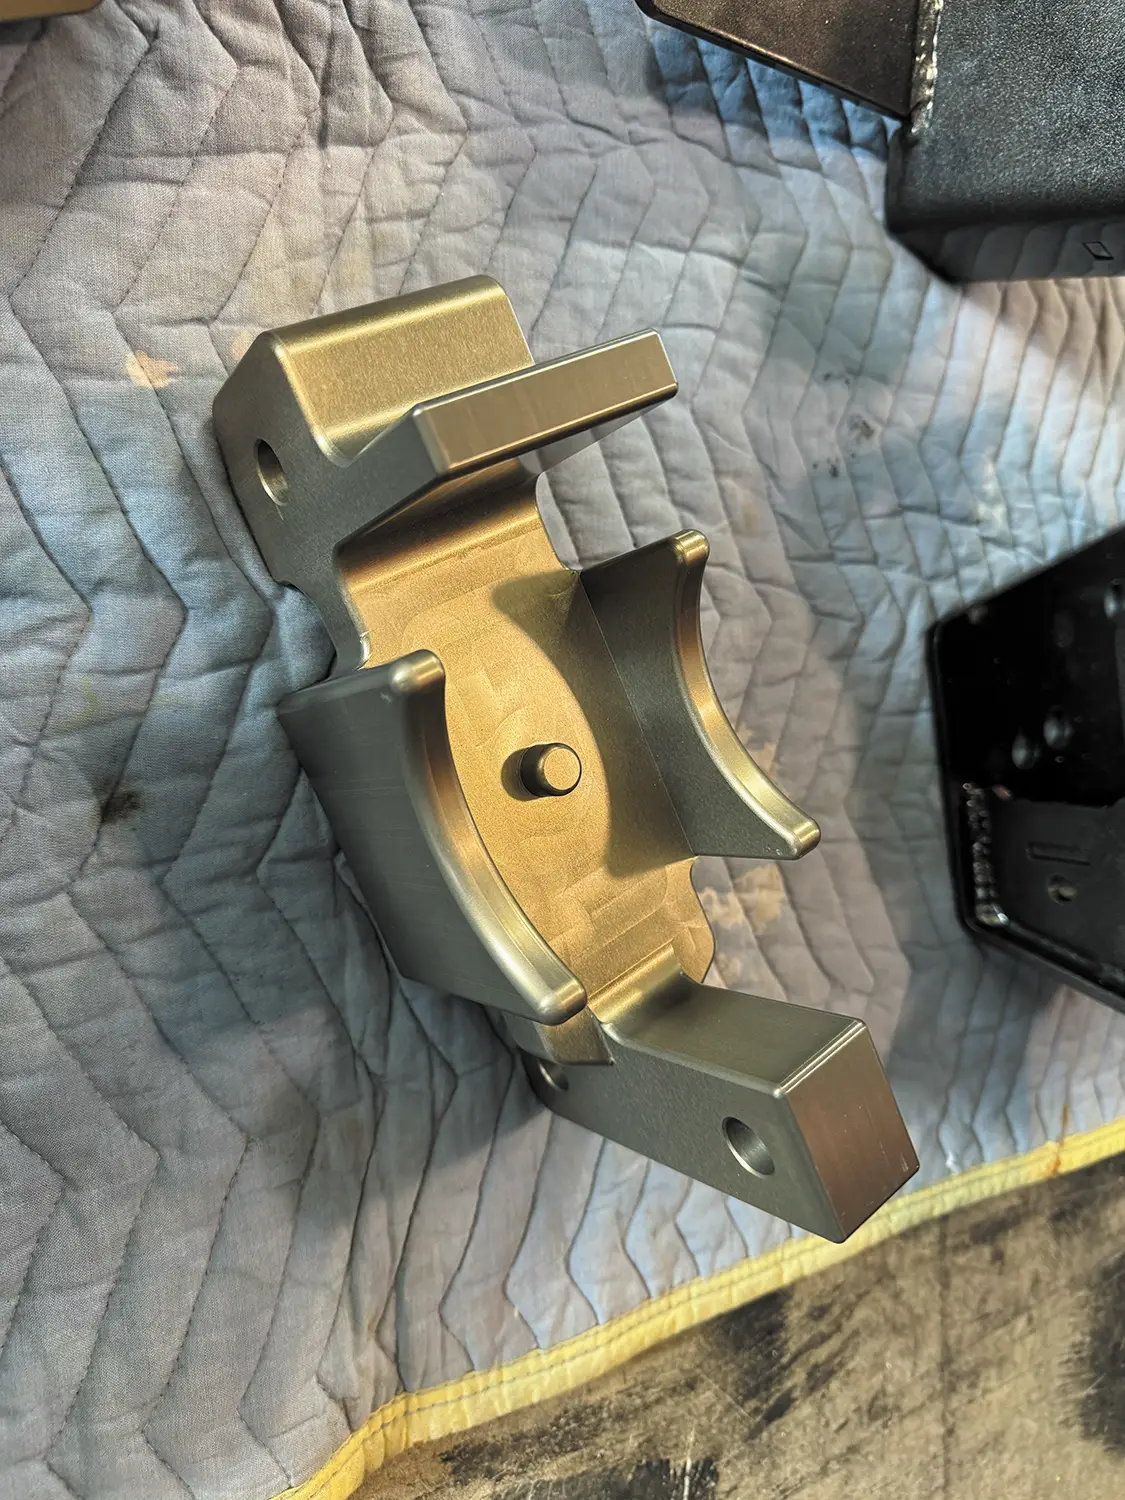
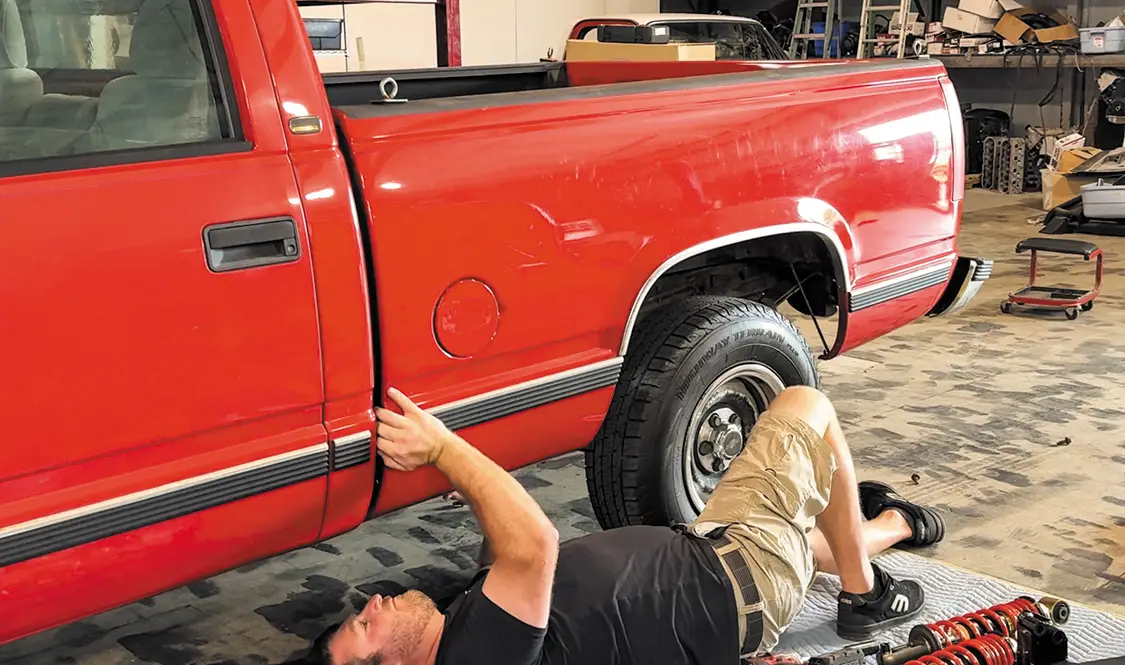
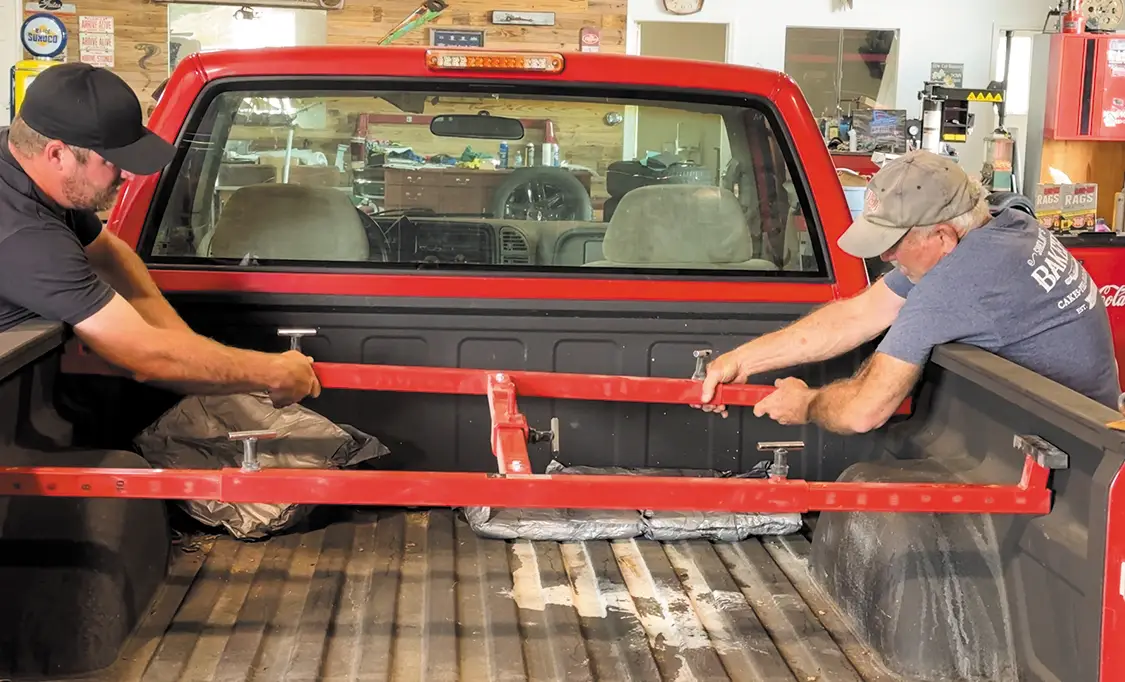
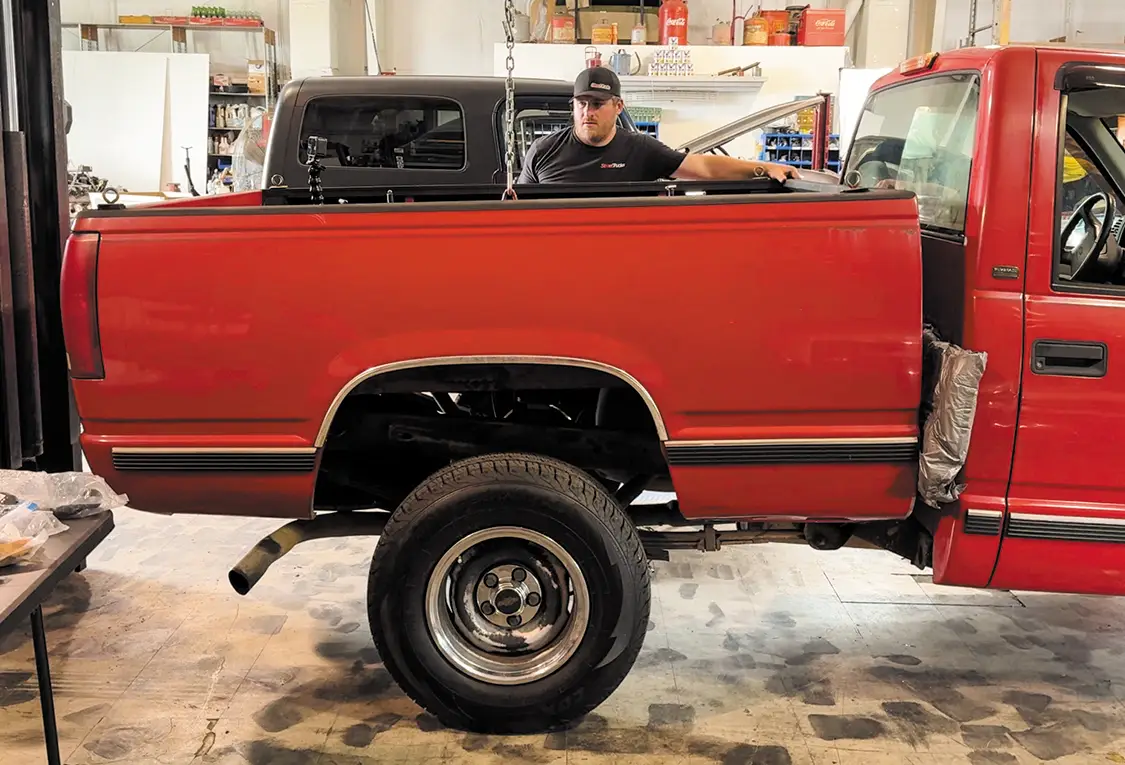
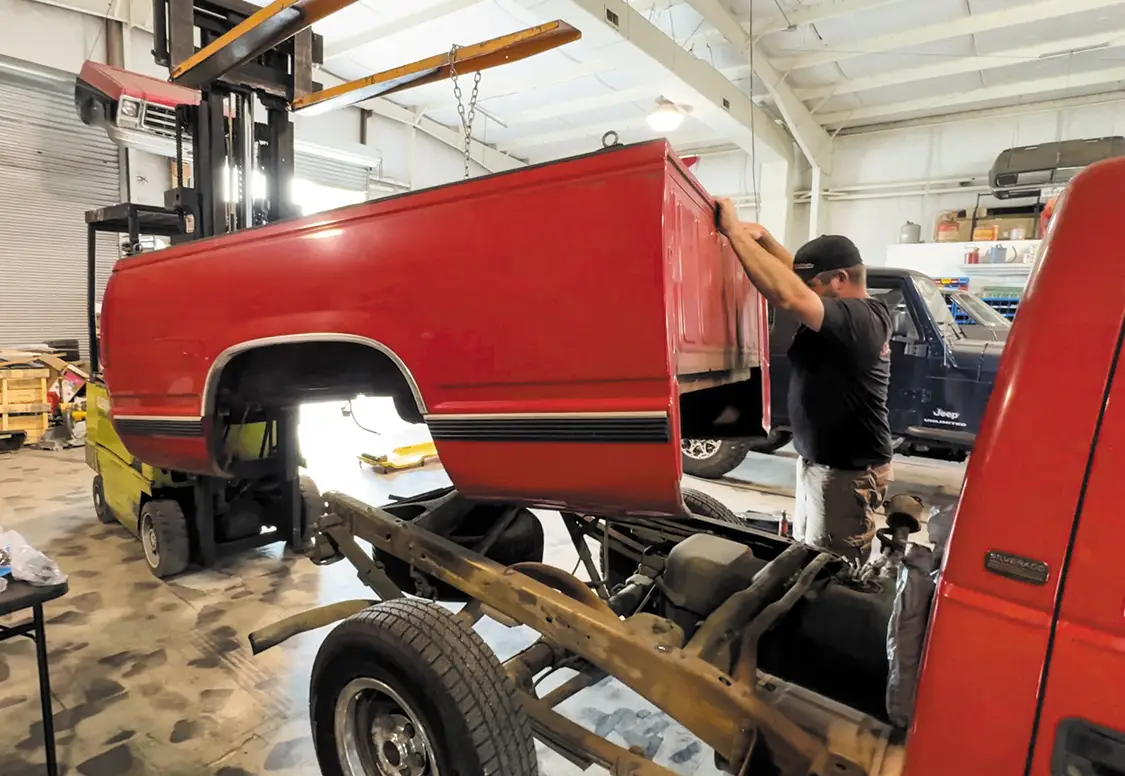
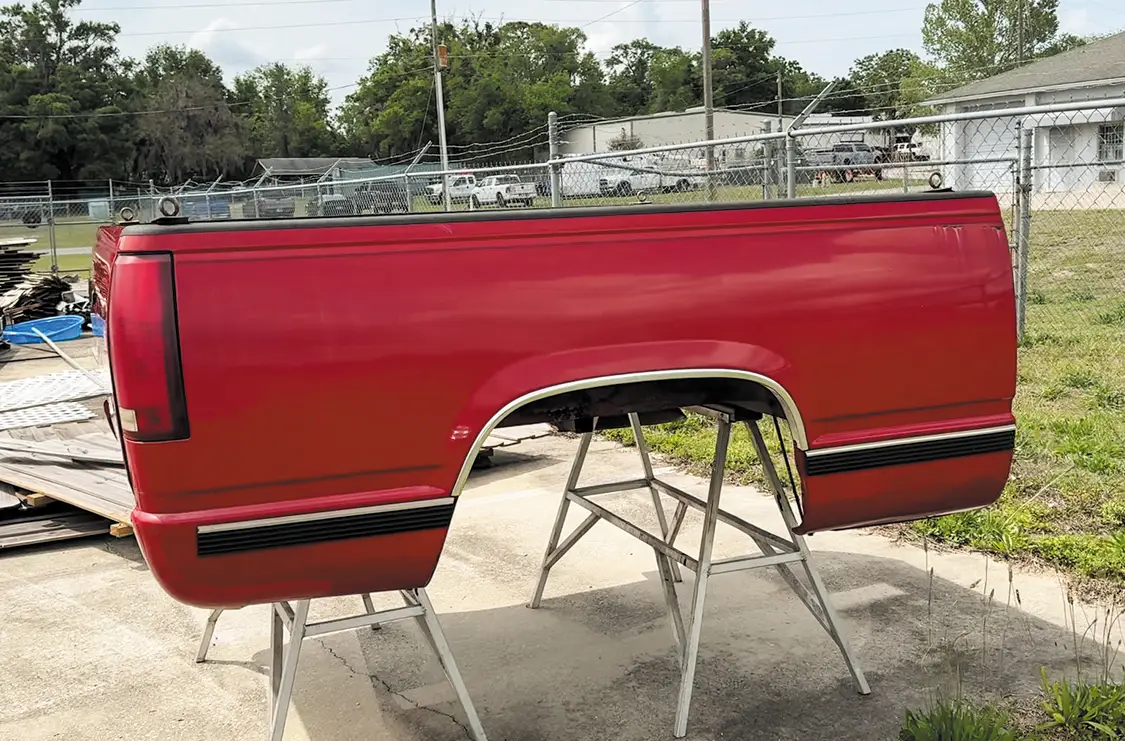
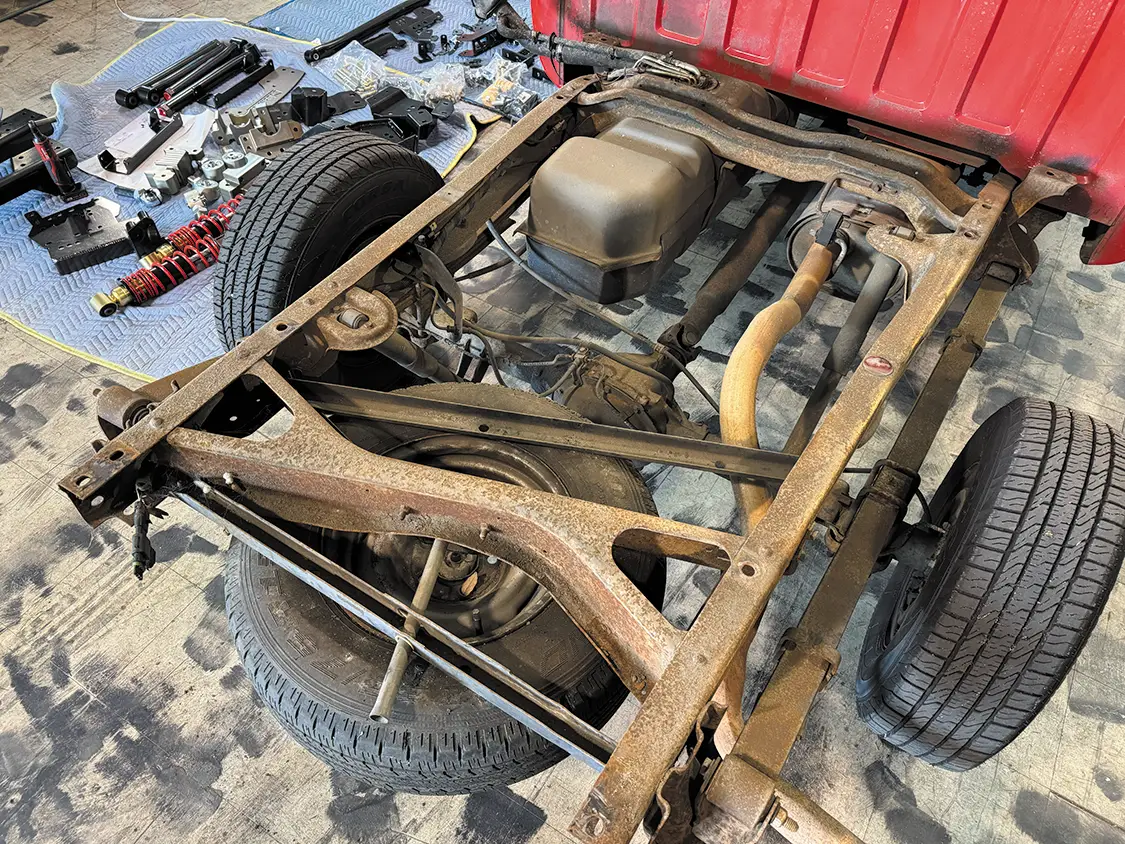
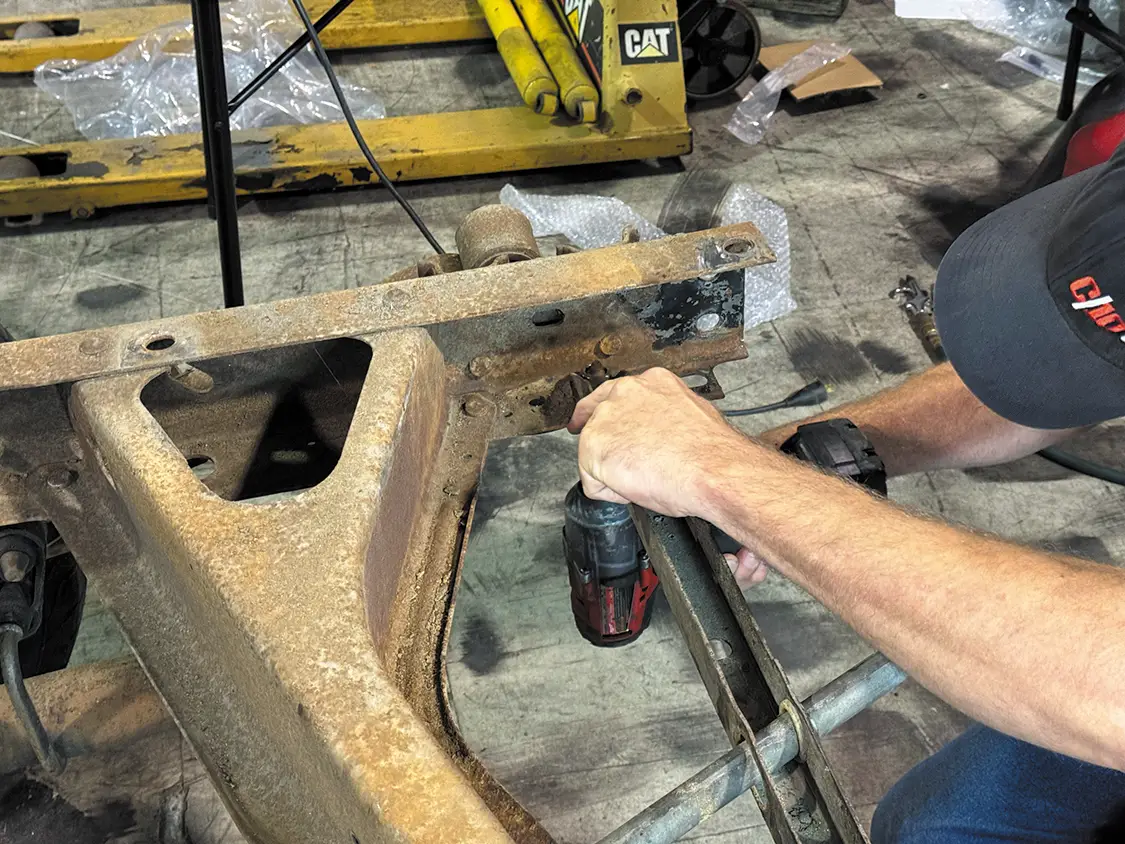
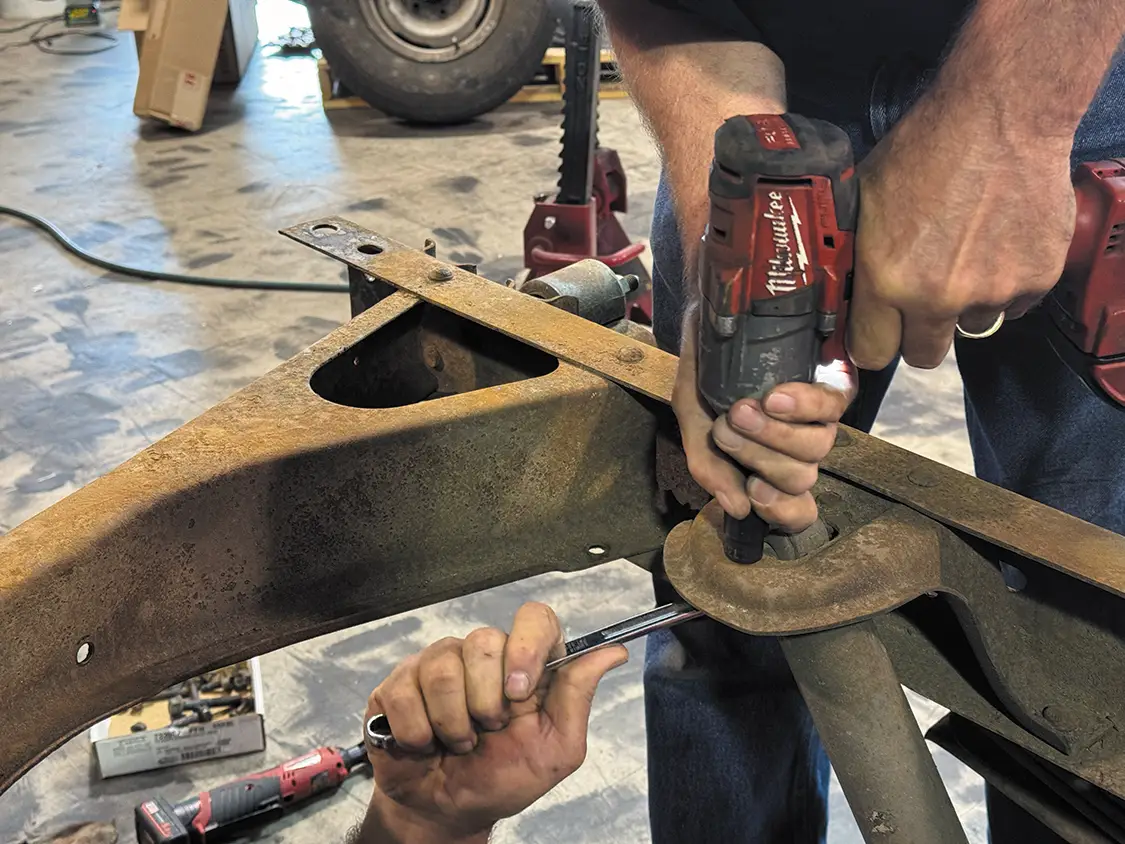
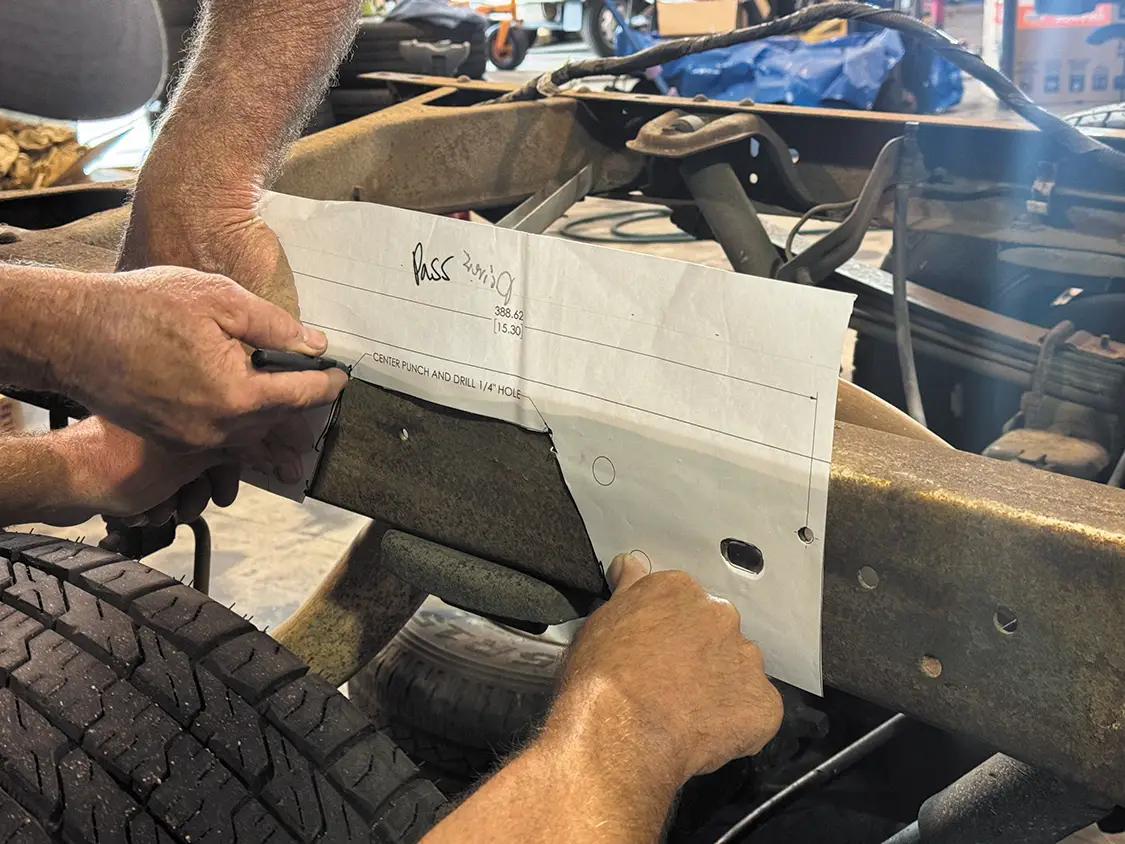
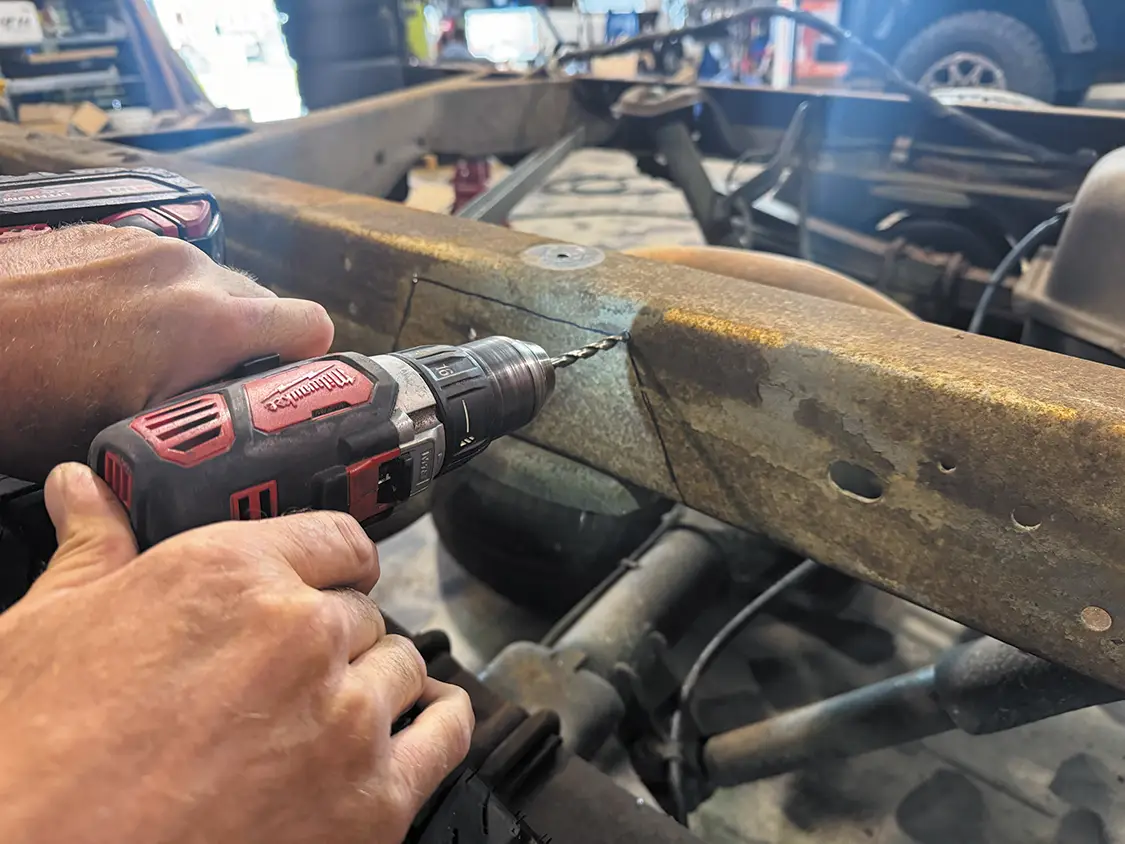
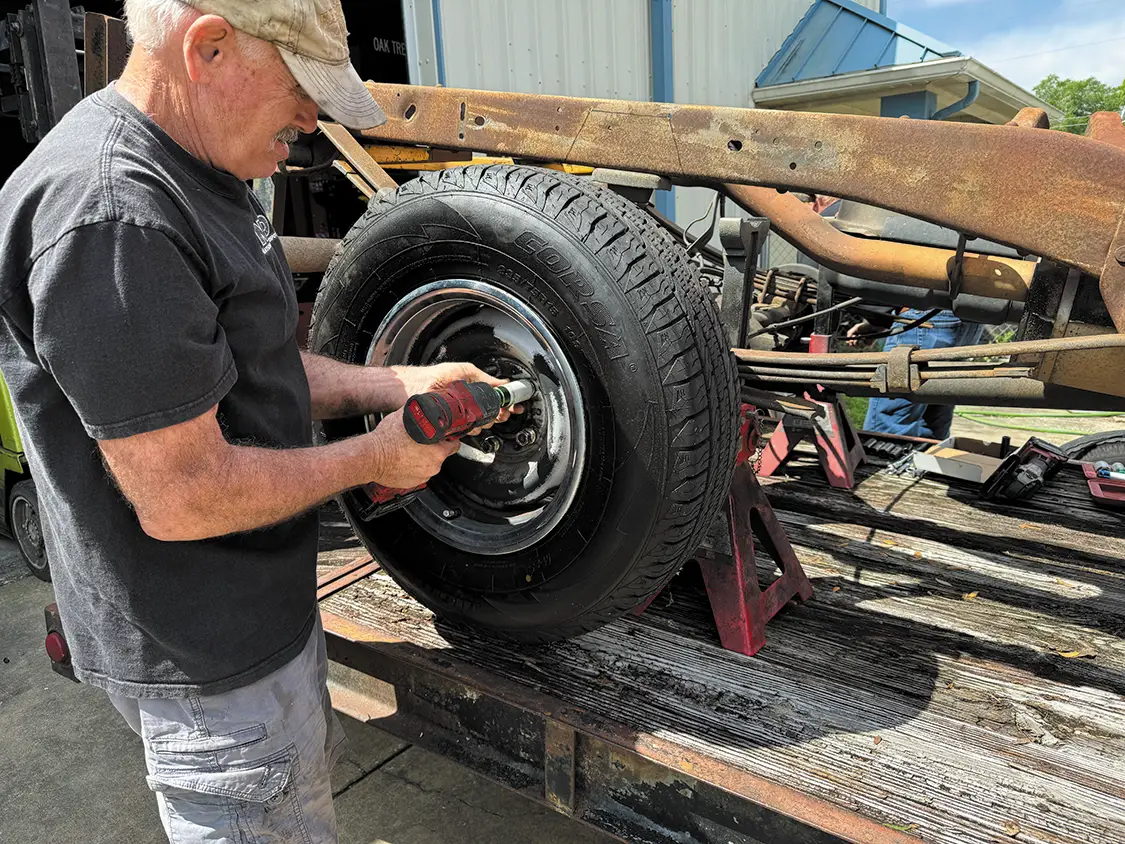
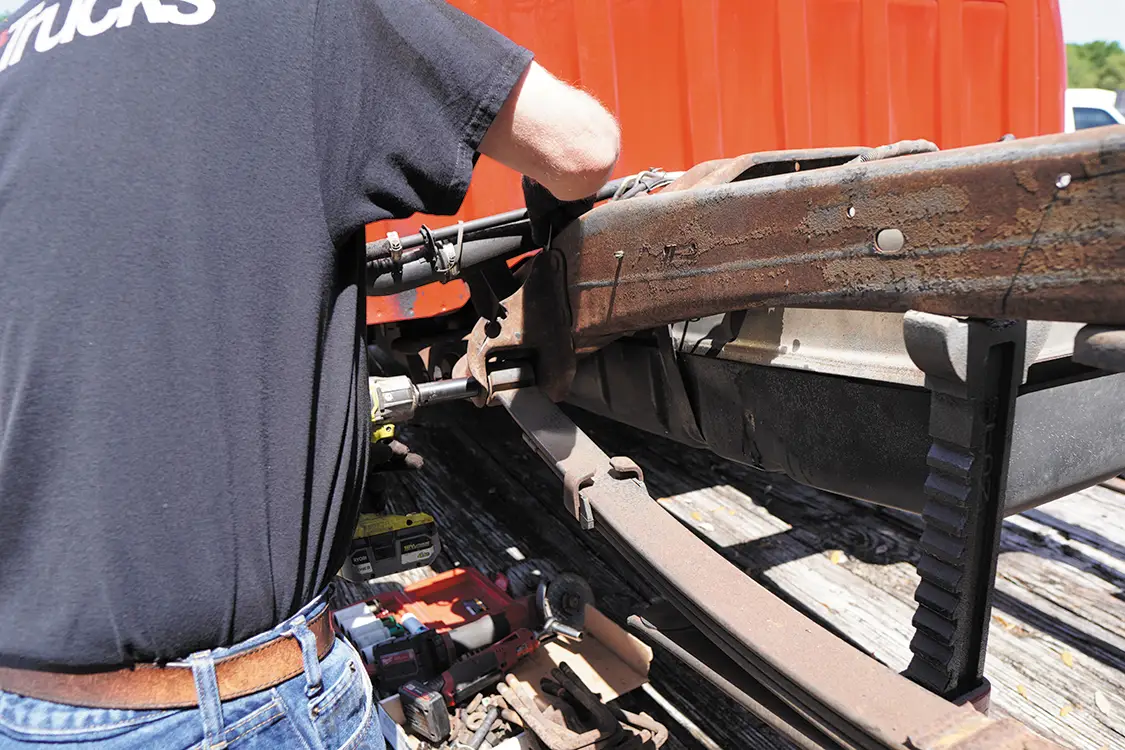
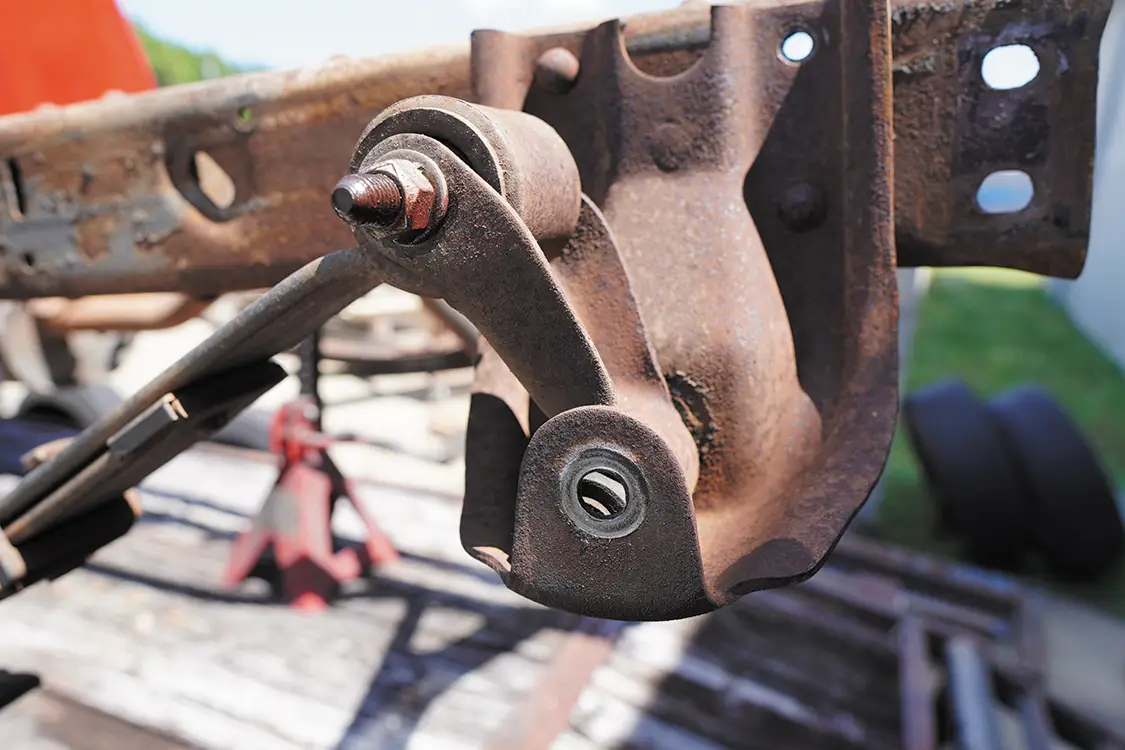
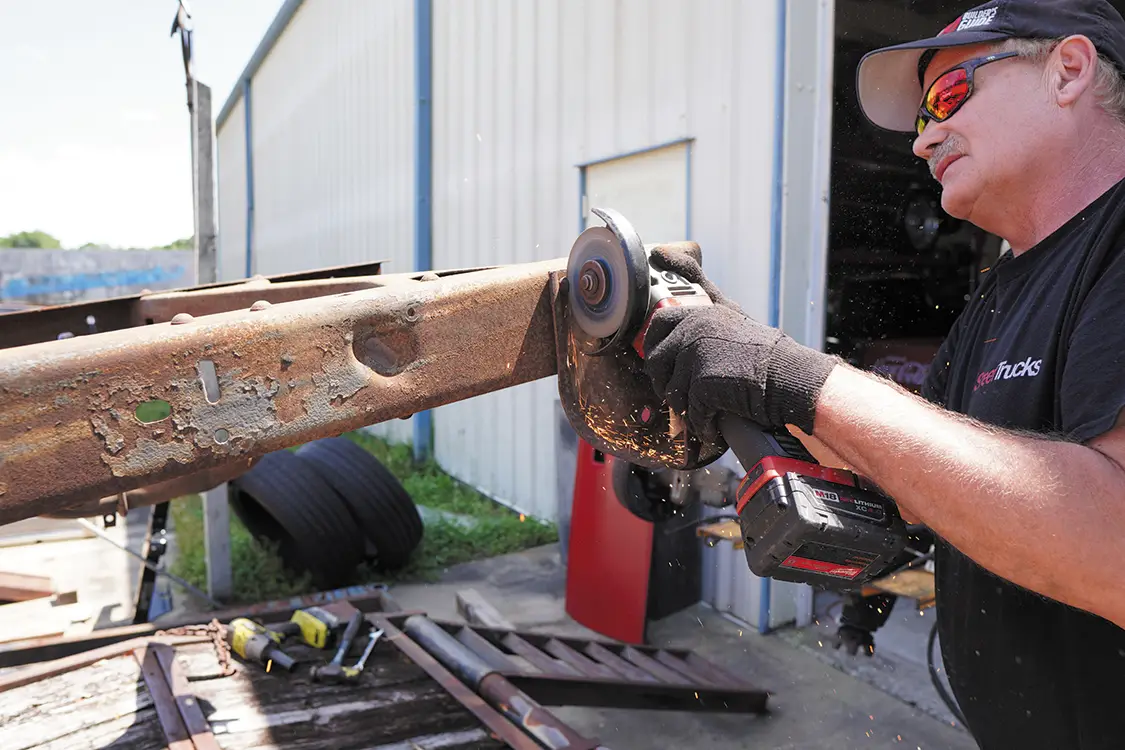
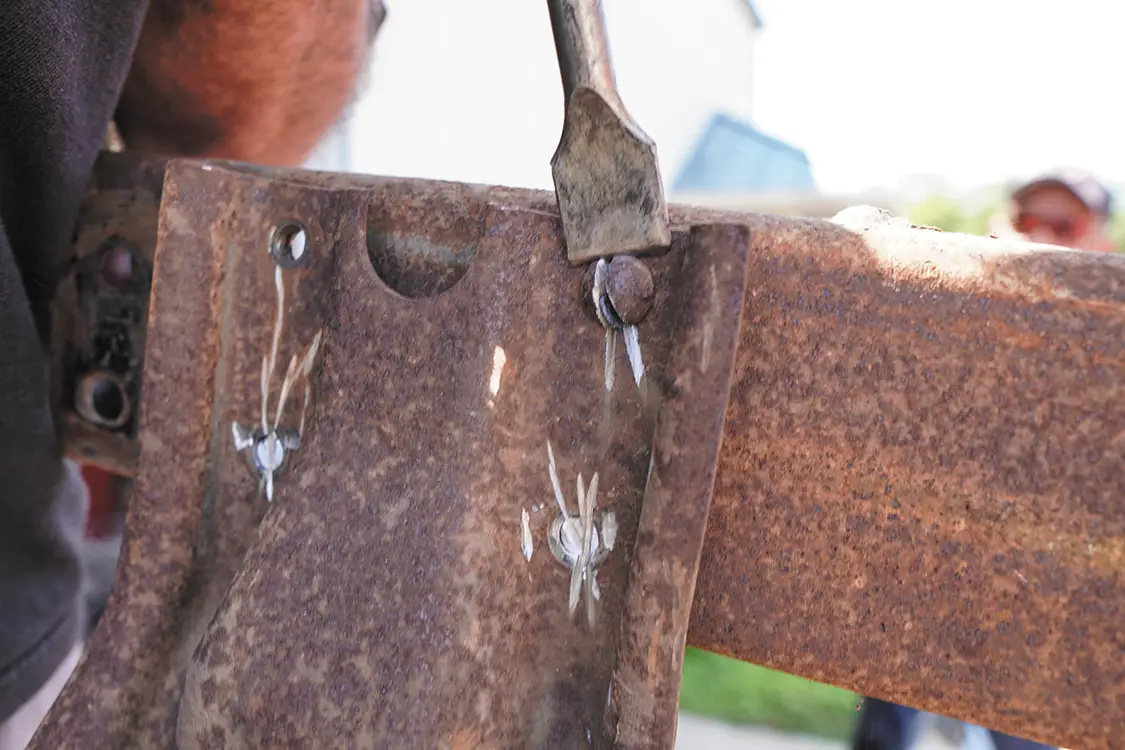
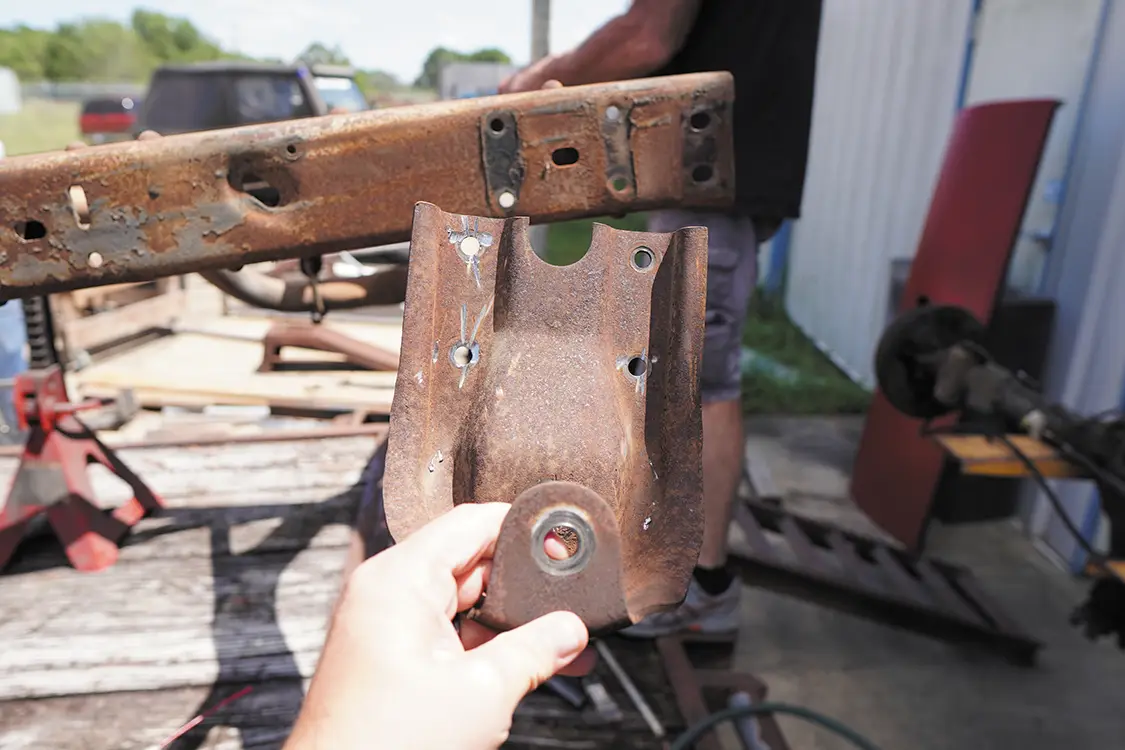
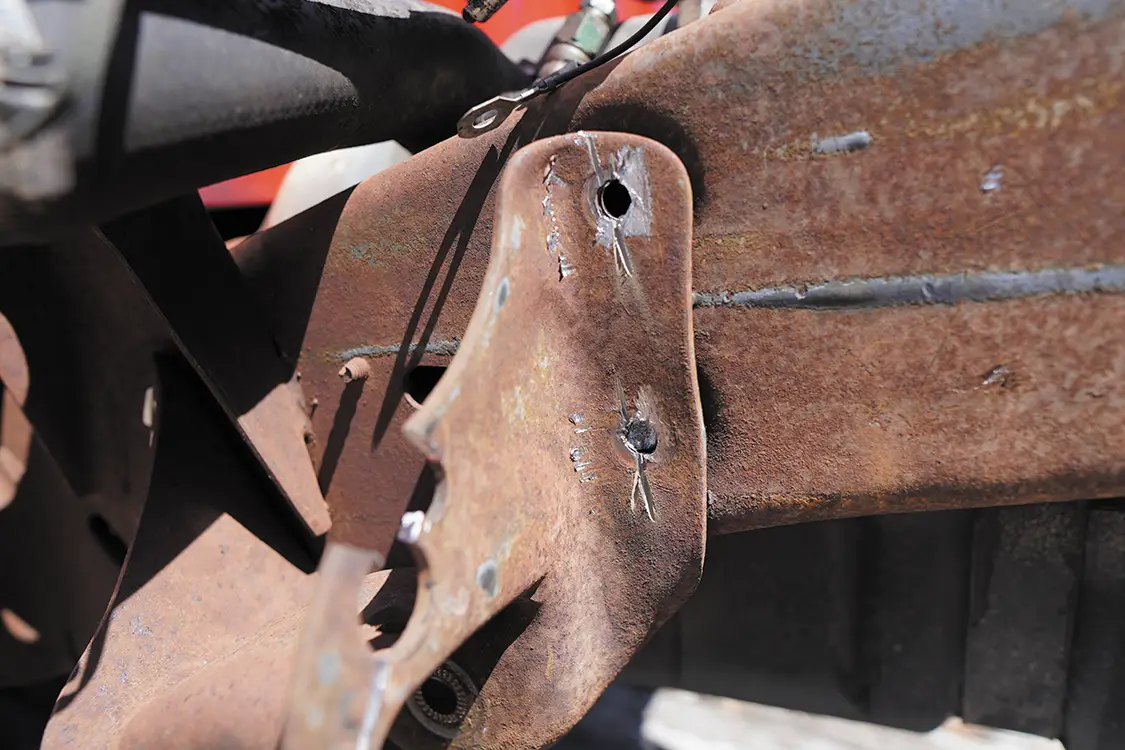
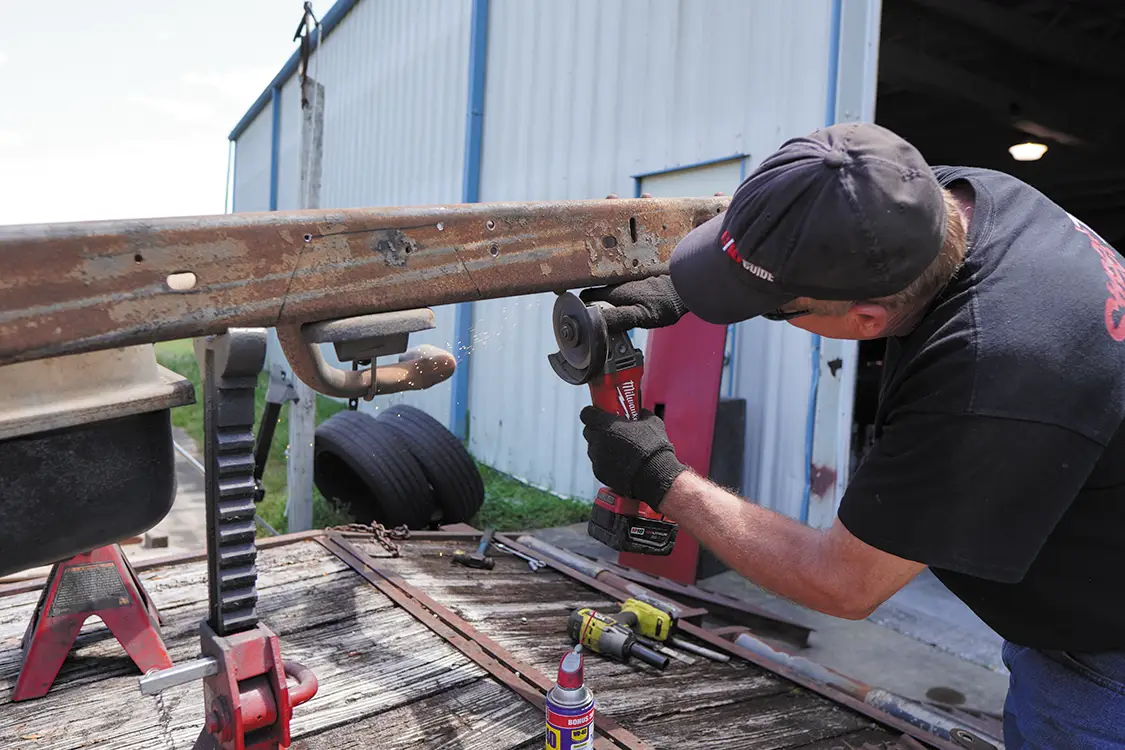
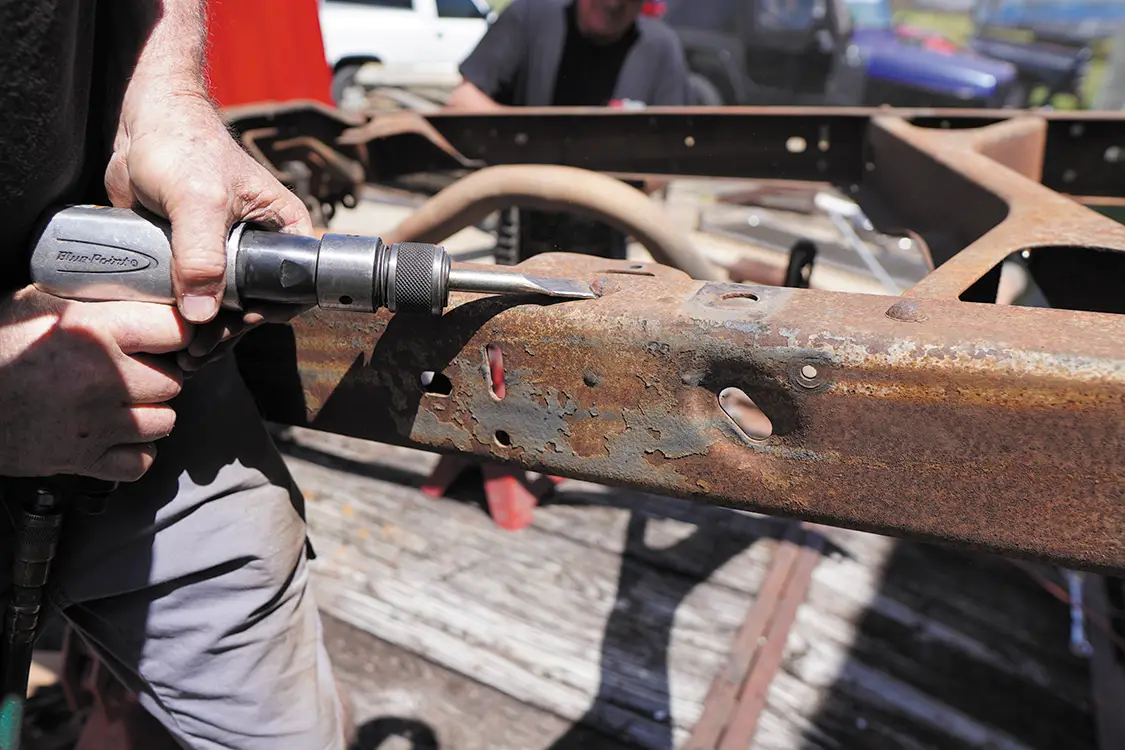
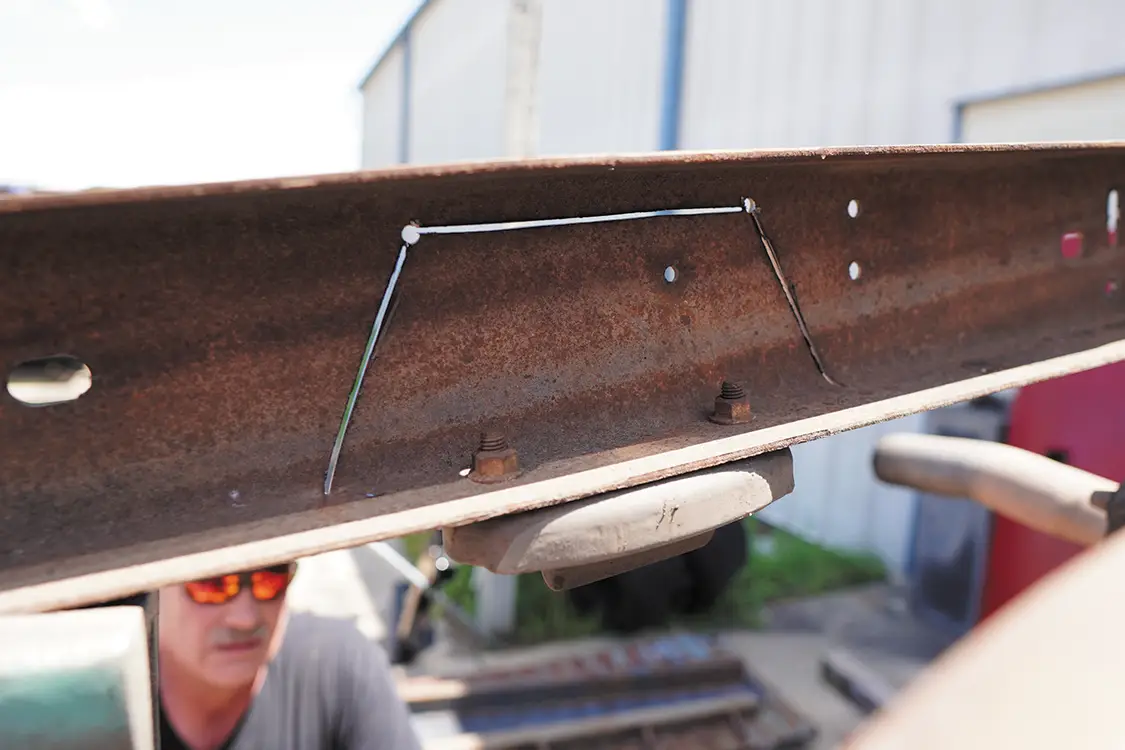
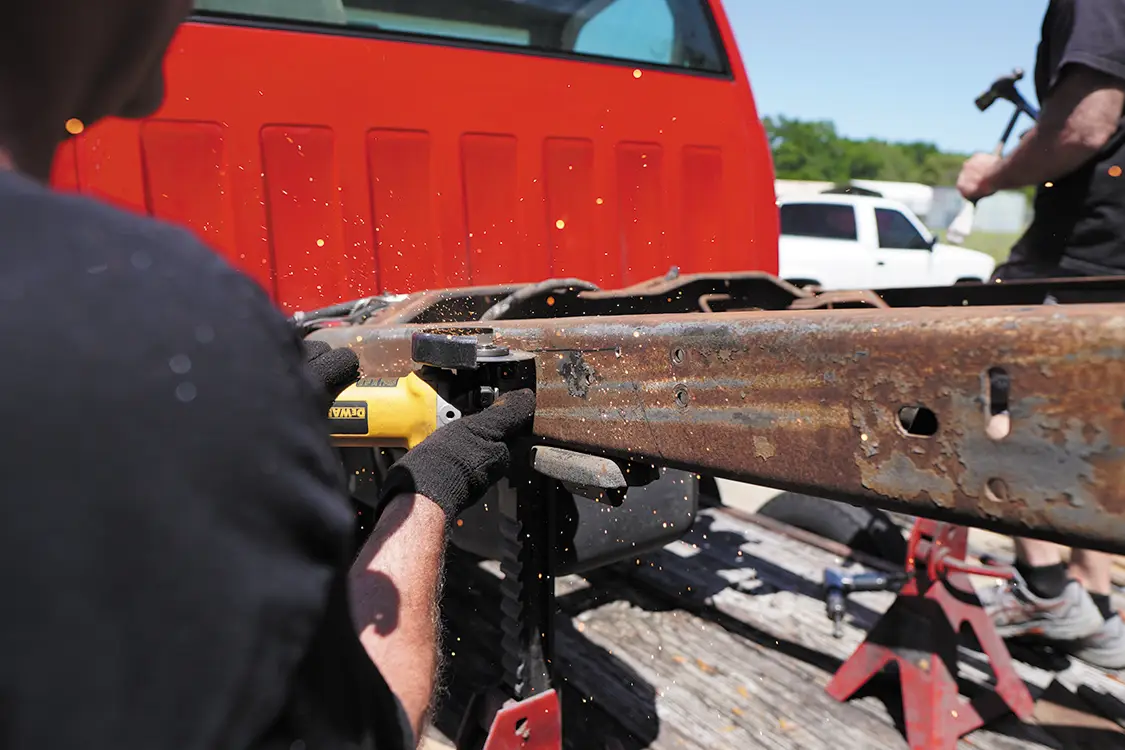
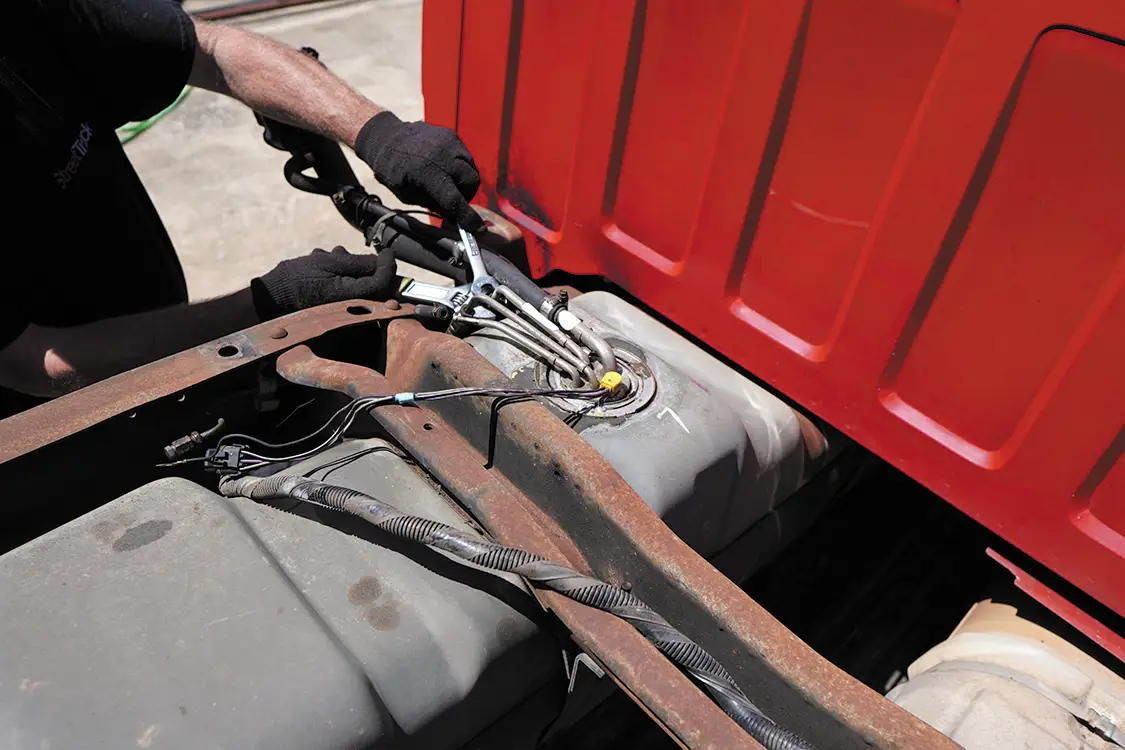
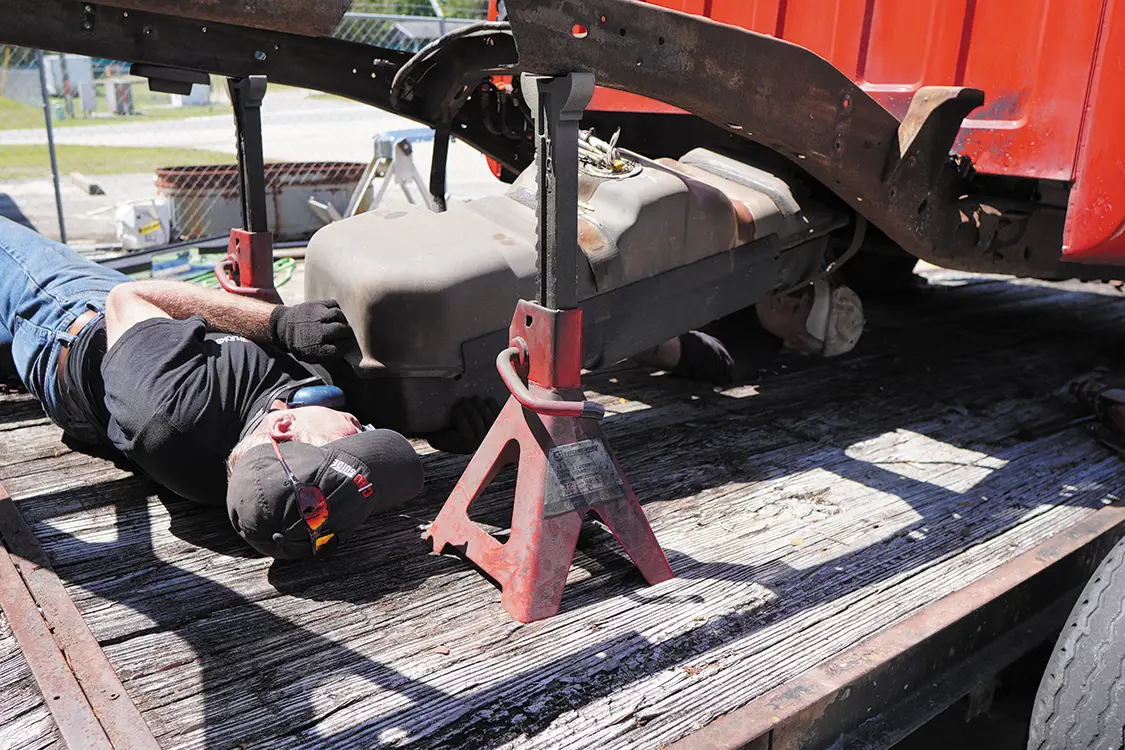
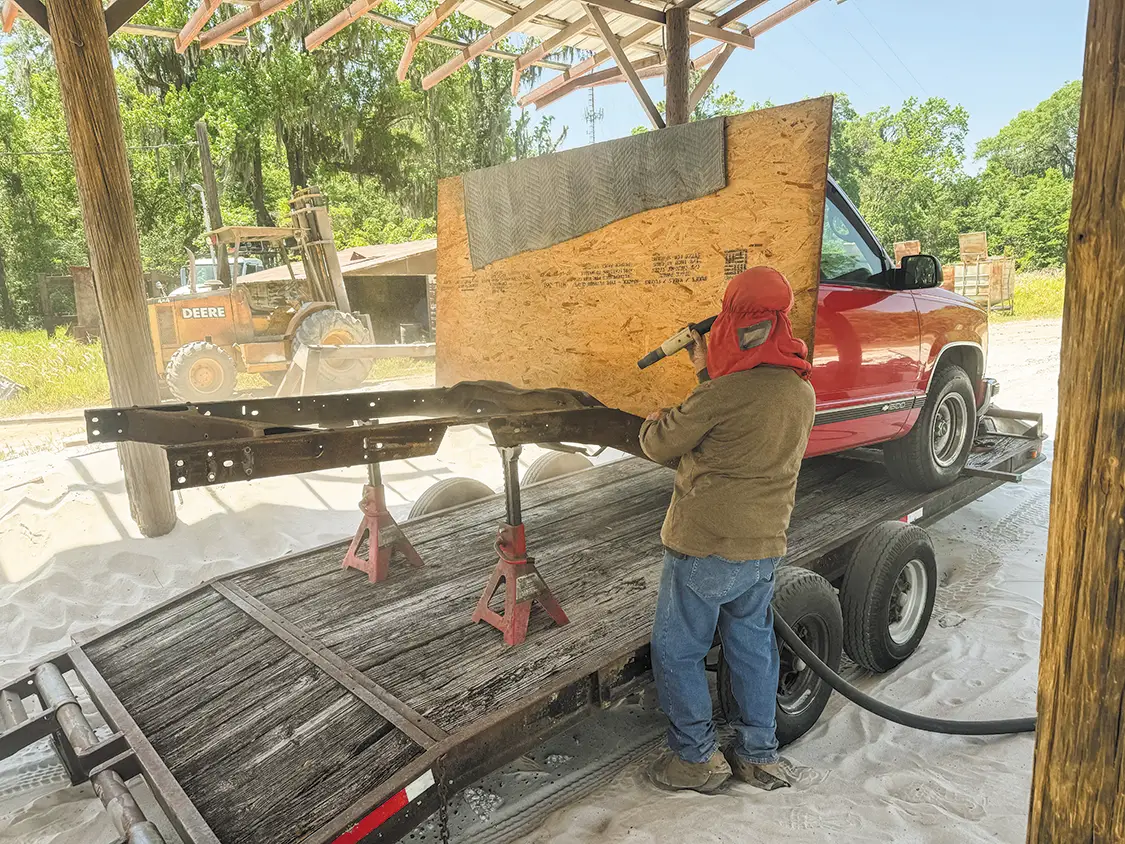
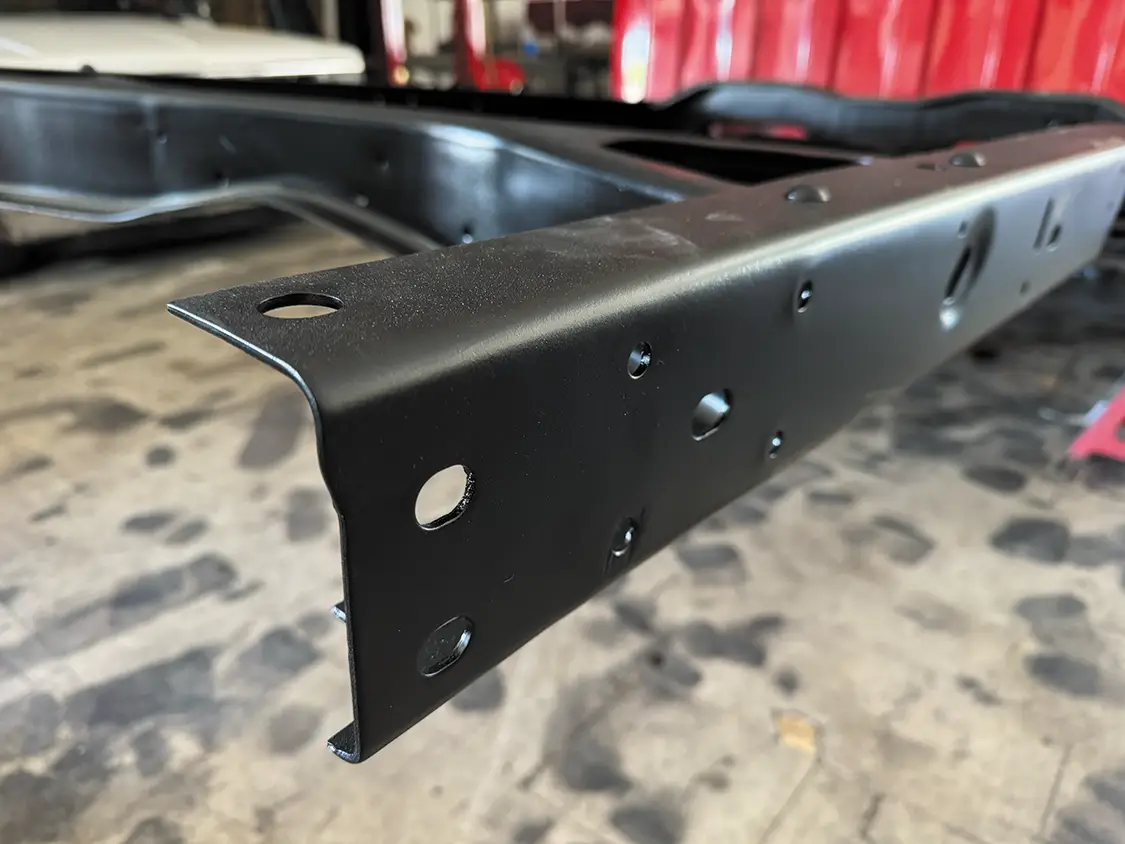
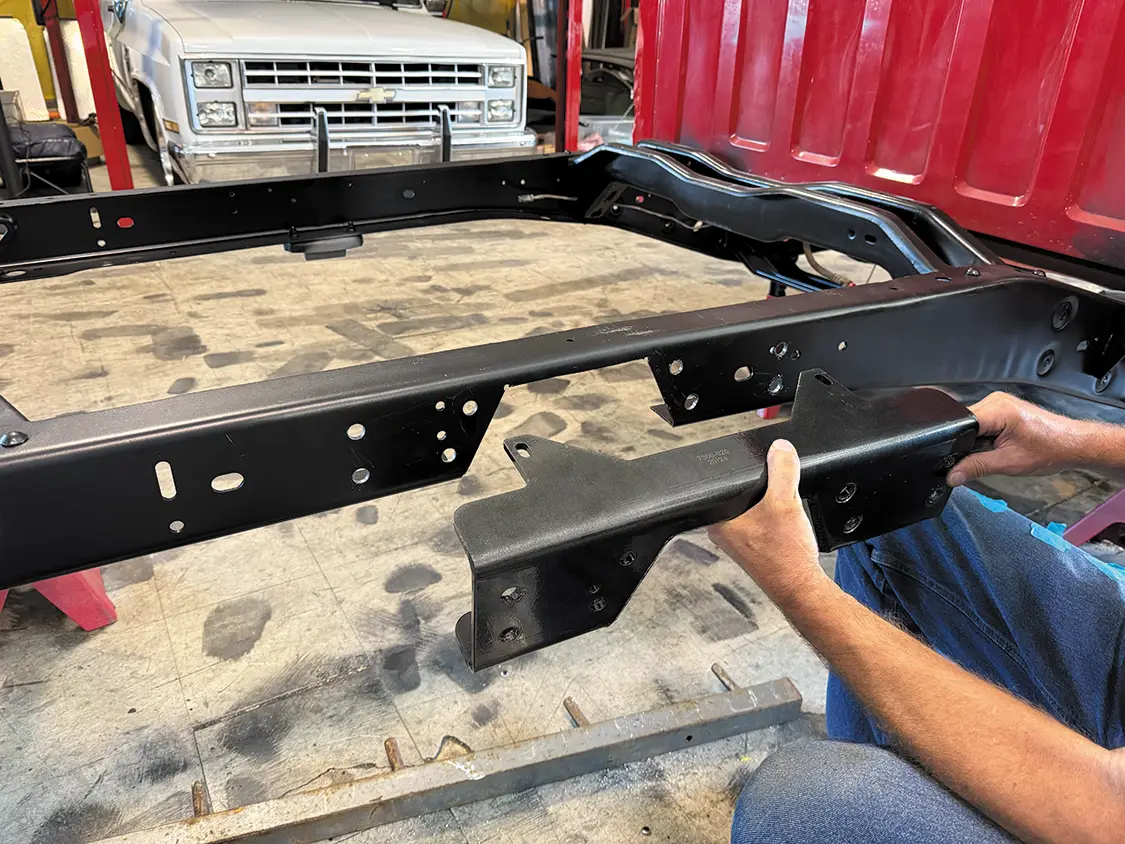
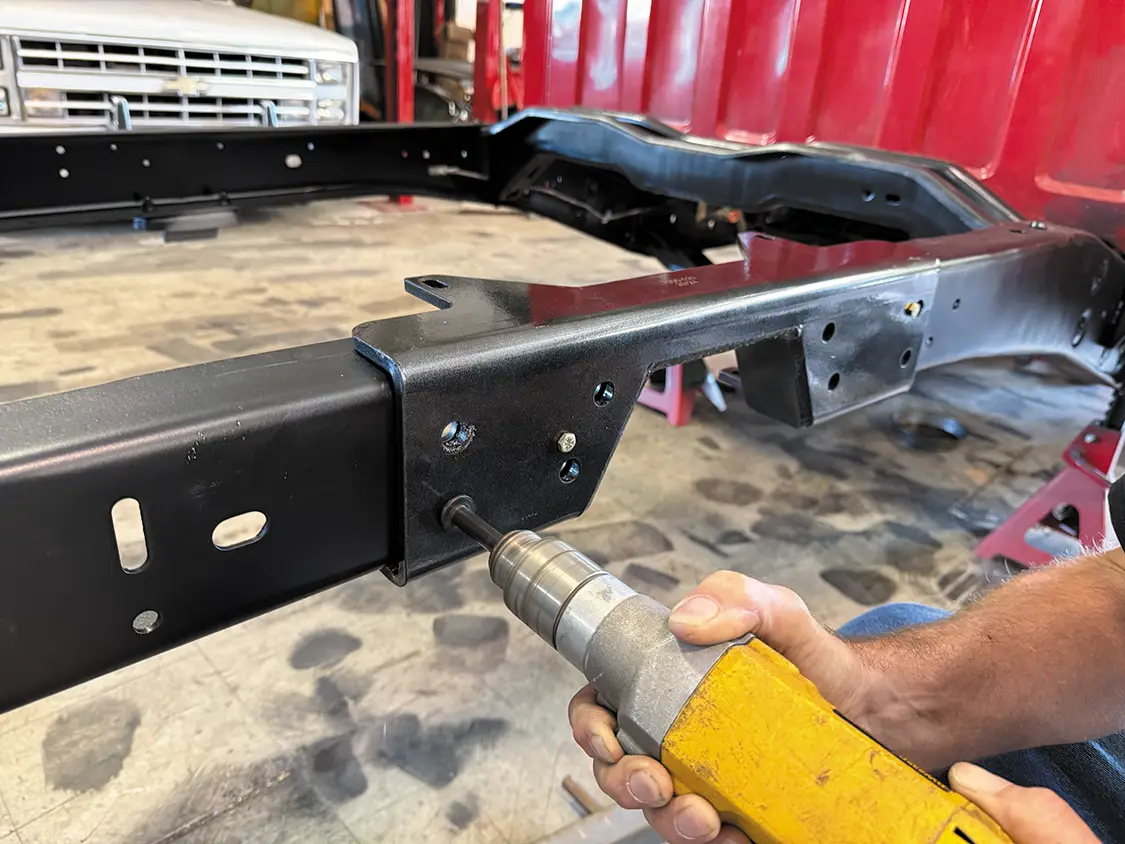
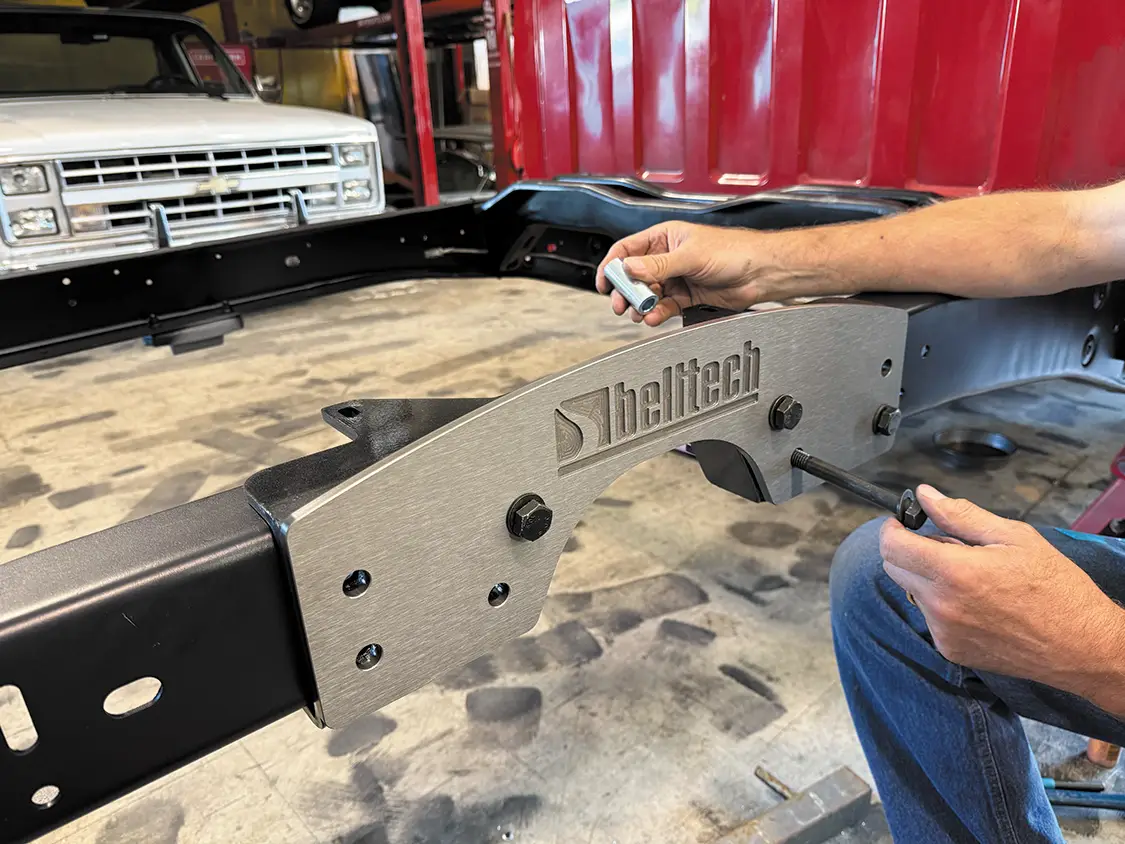
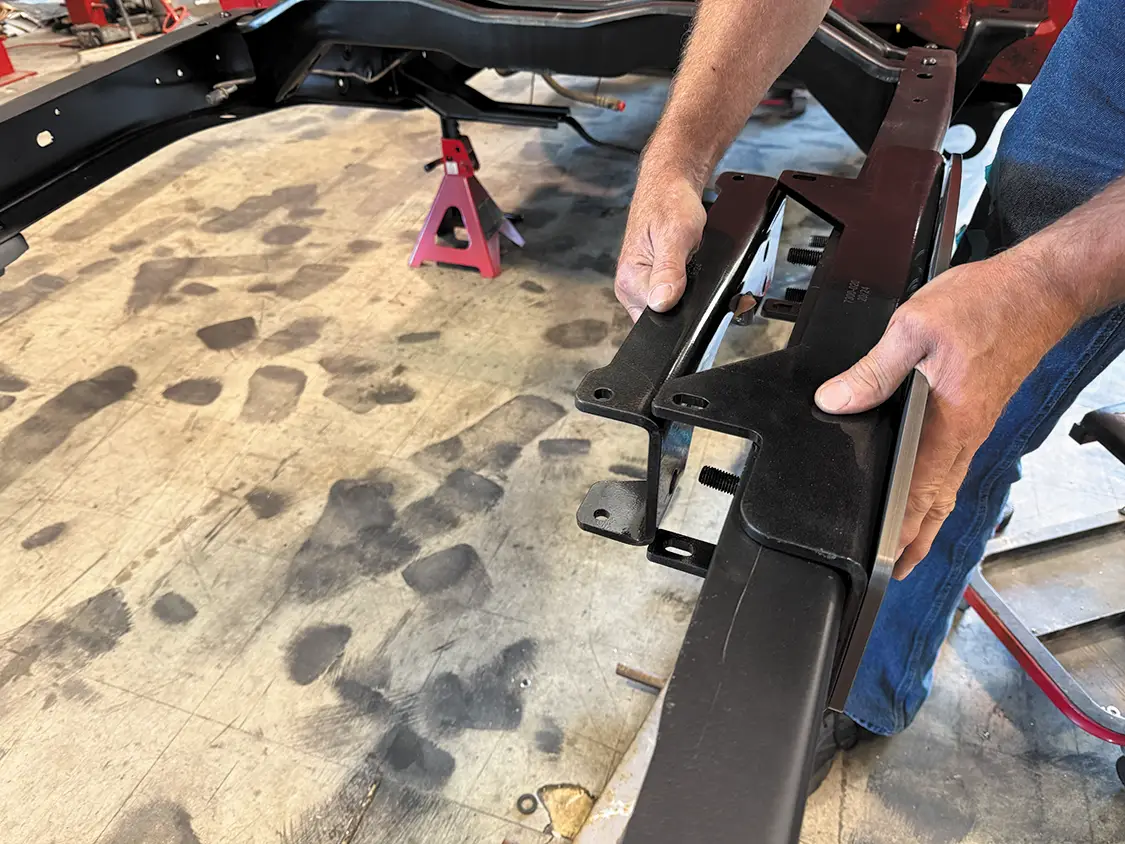
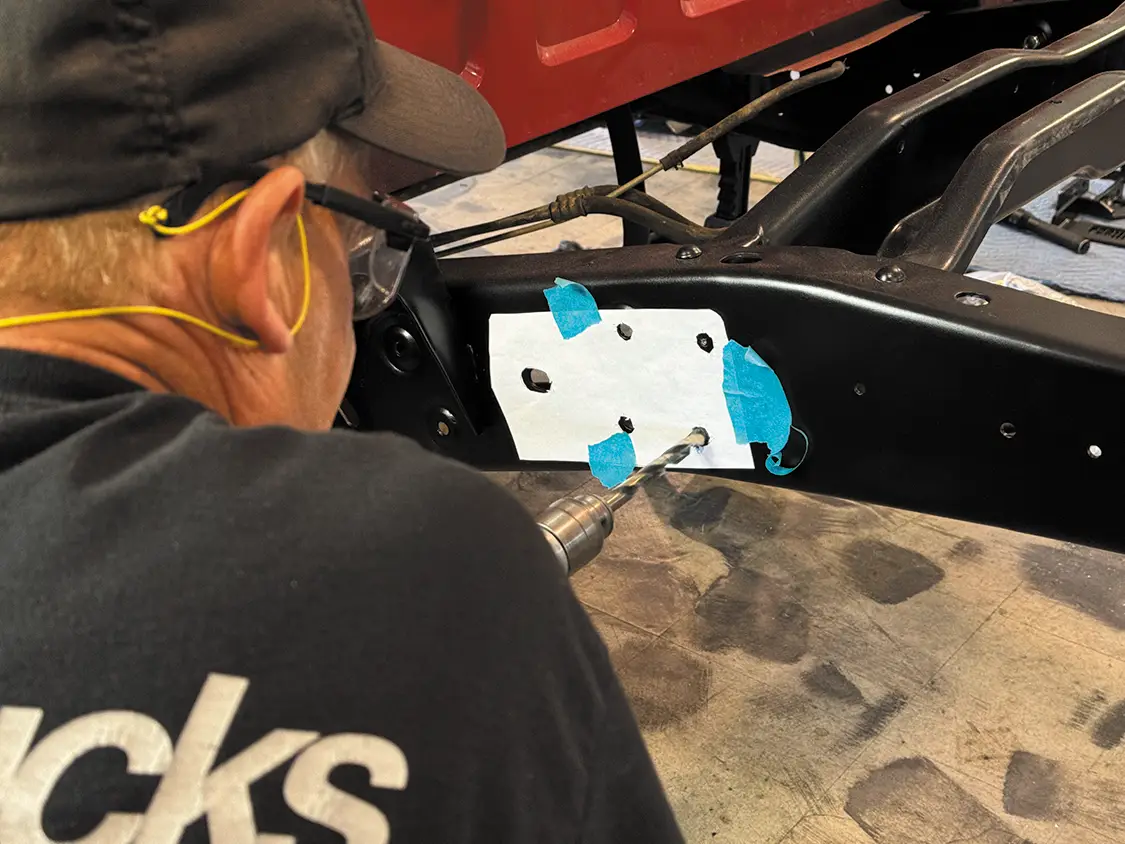
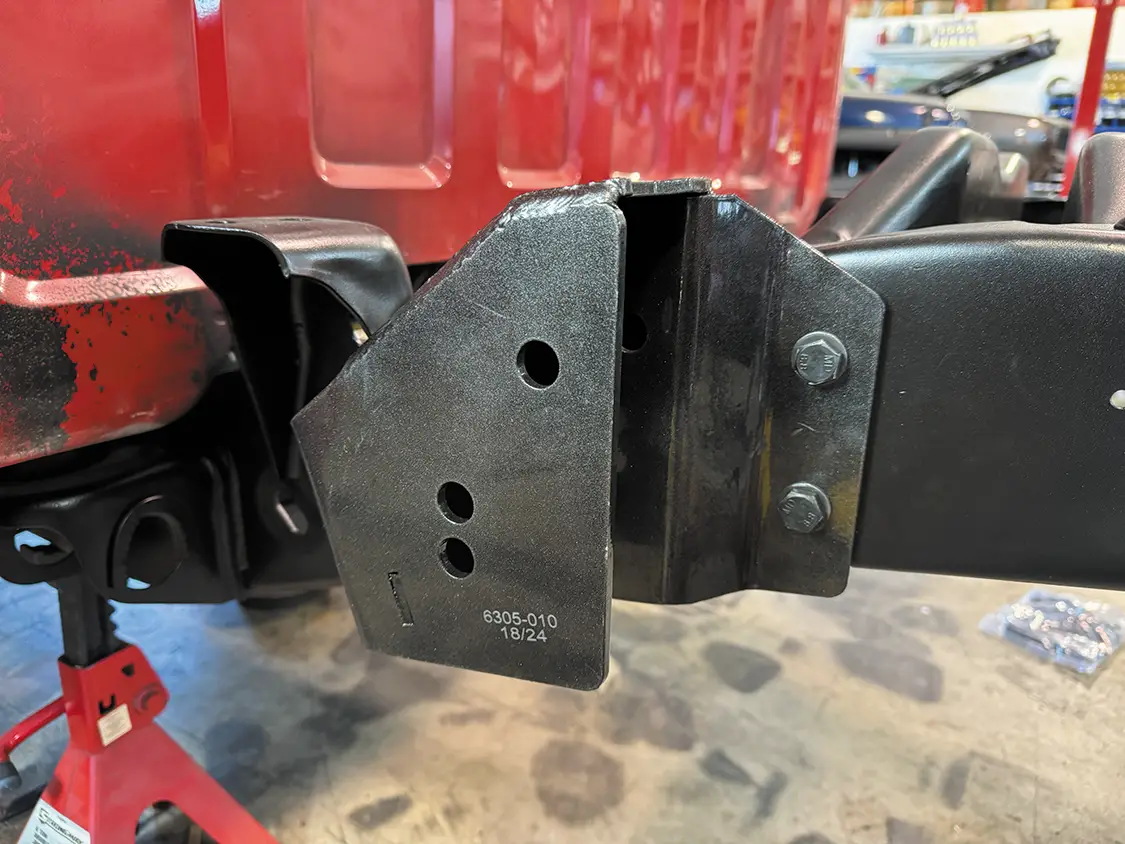
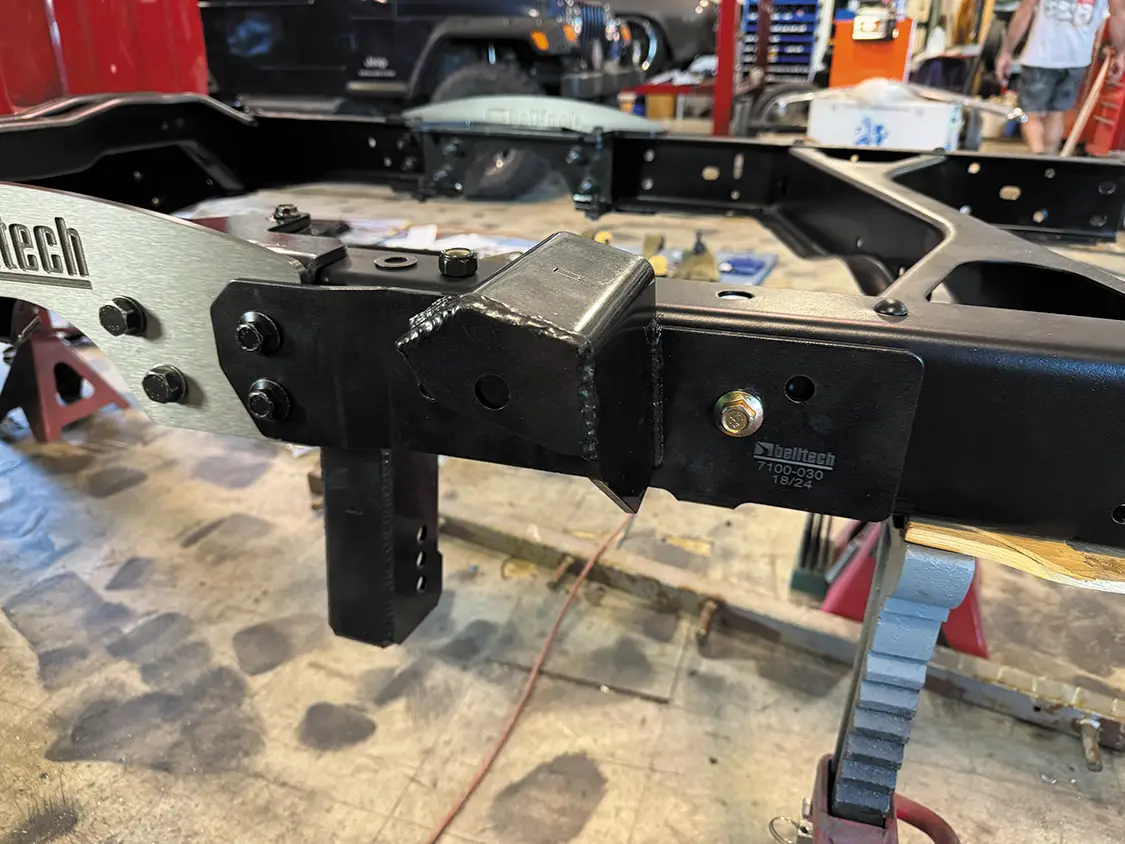
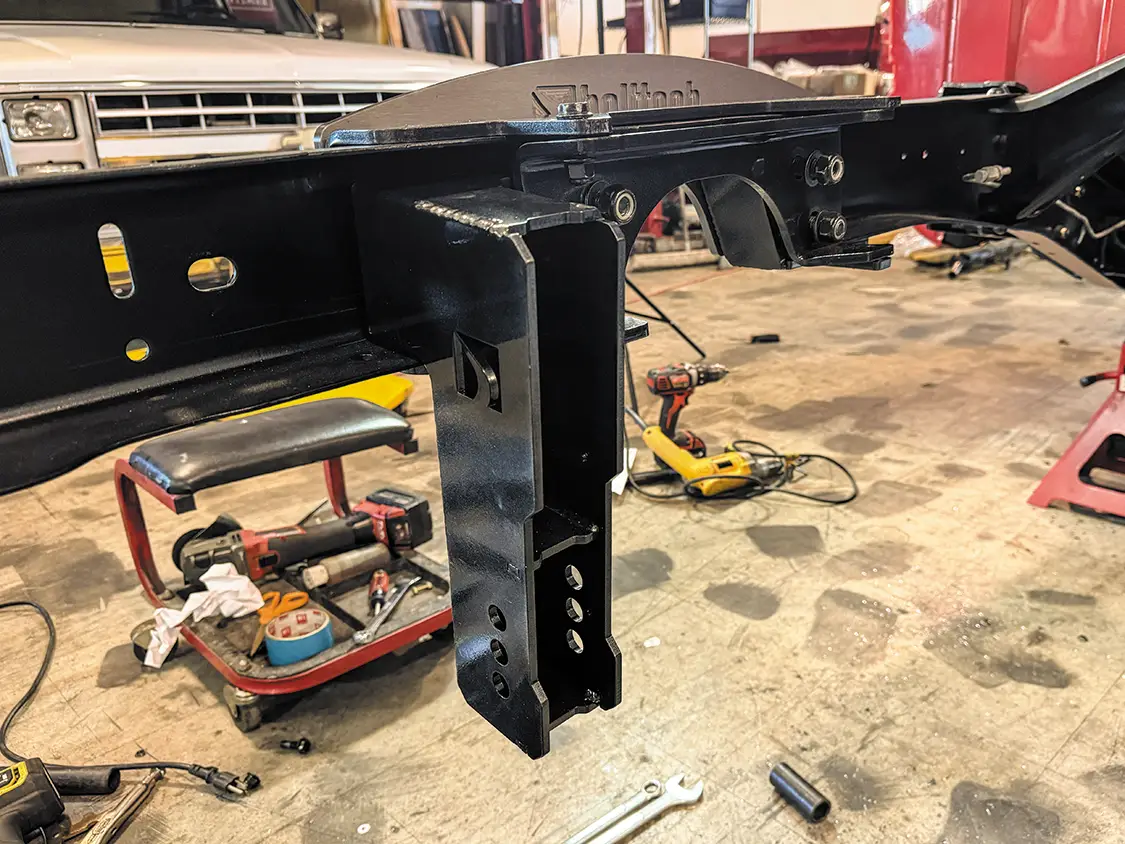
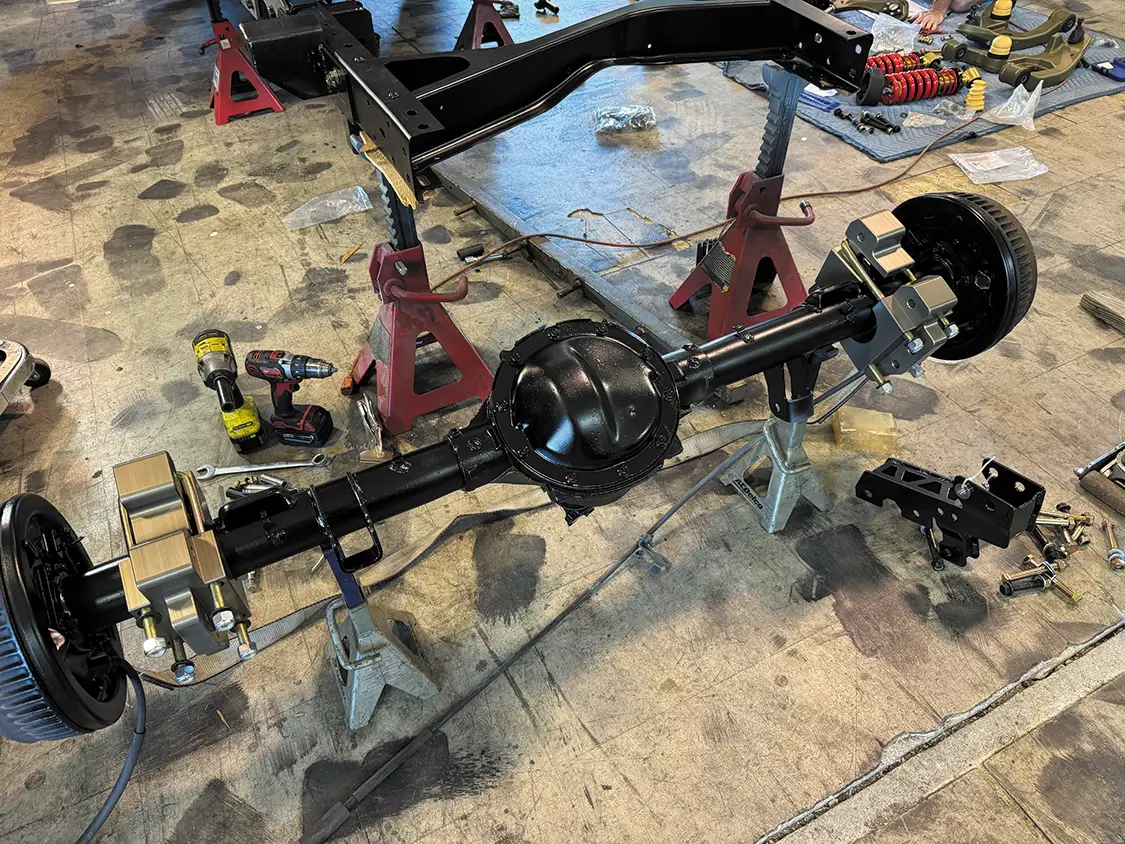
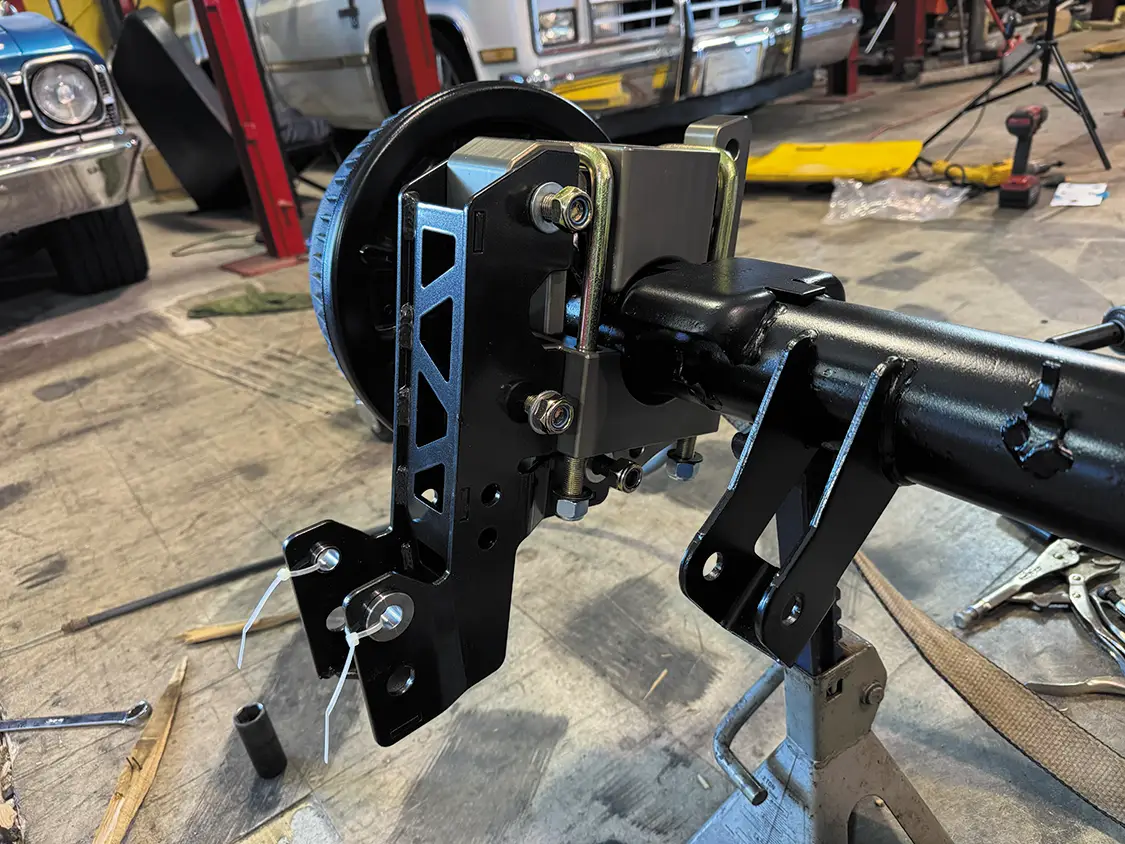
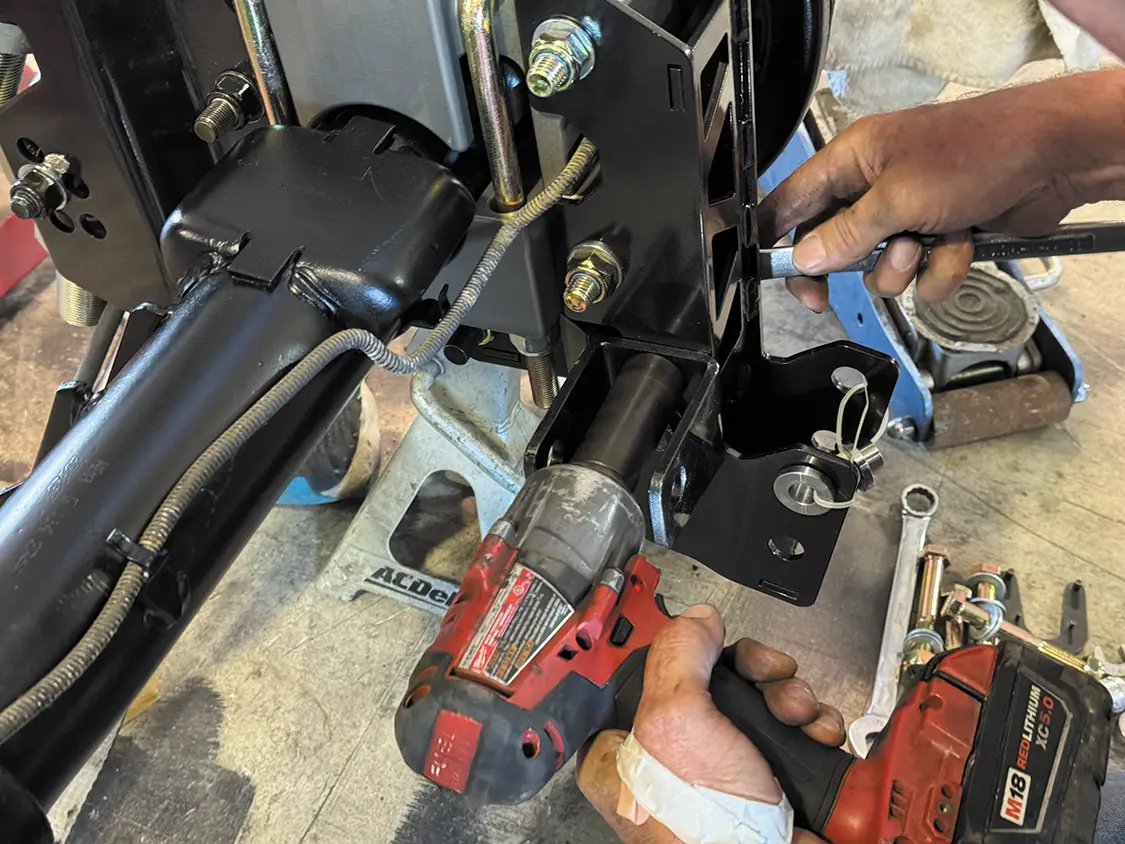
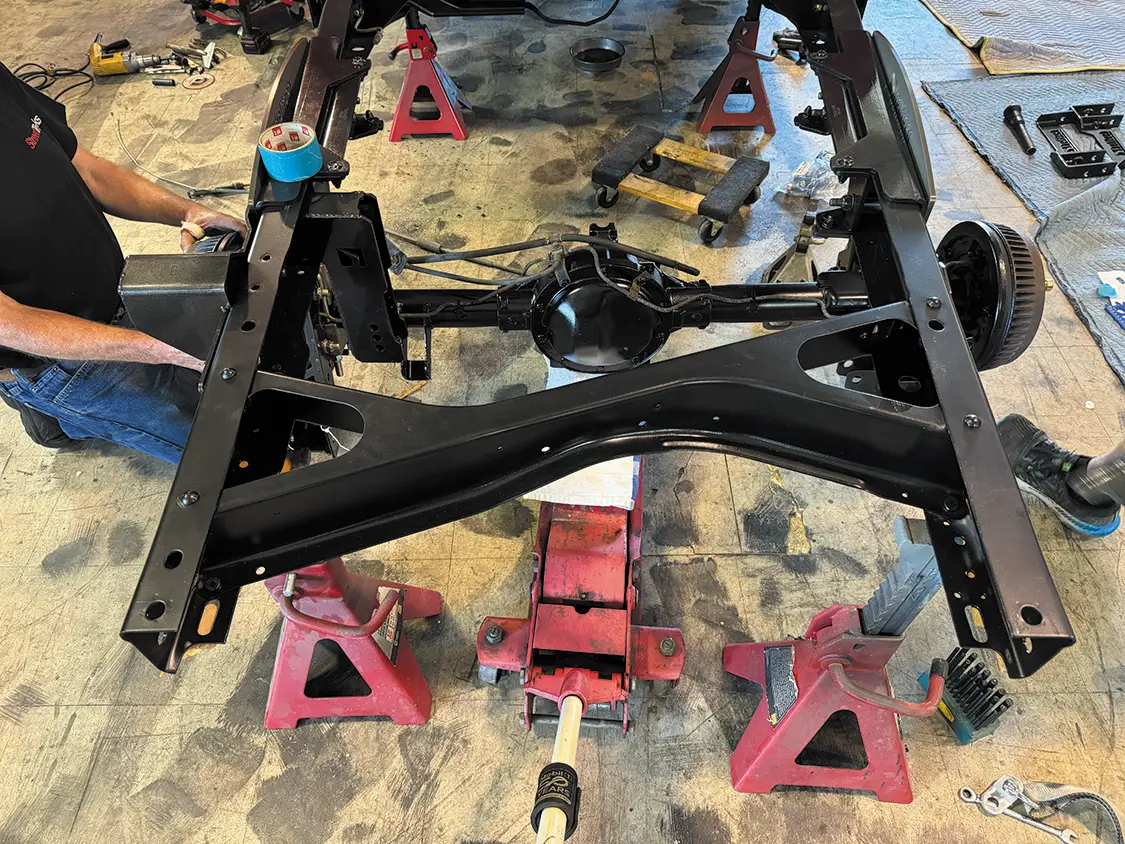
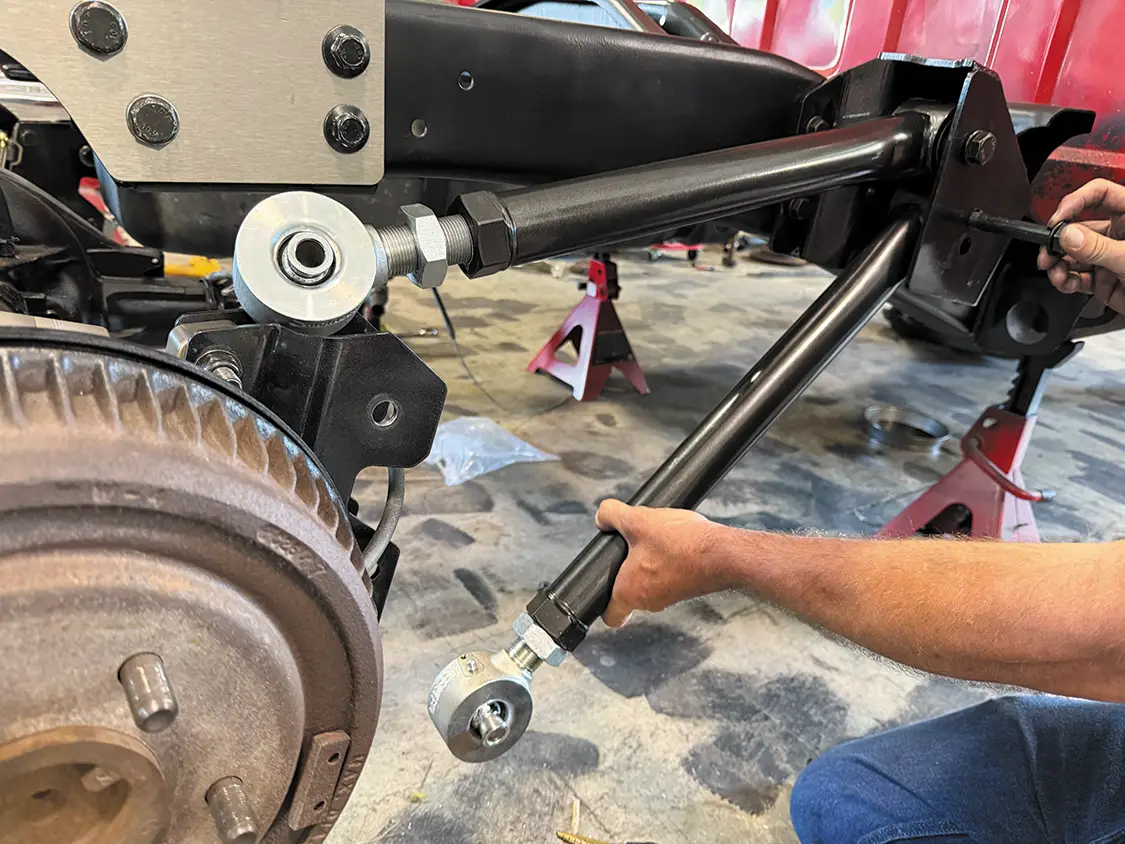
To kick things off, we yanked the bed and stripped out every piece of factory rear suspension. With the frame exposed, we hit it with the sandblaster, laid down a fresh coat of paint, and got it looking pretty close to brand new. From there, we mocked up the new heavy-duty cast axle brackets and started cutting off the old leaf spring mounts. This isn’t a bolt-on-and-go setup; this one’s for the real-deal performance junkies who aren’t afraid to put in the work.

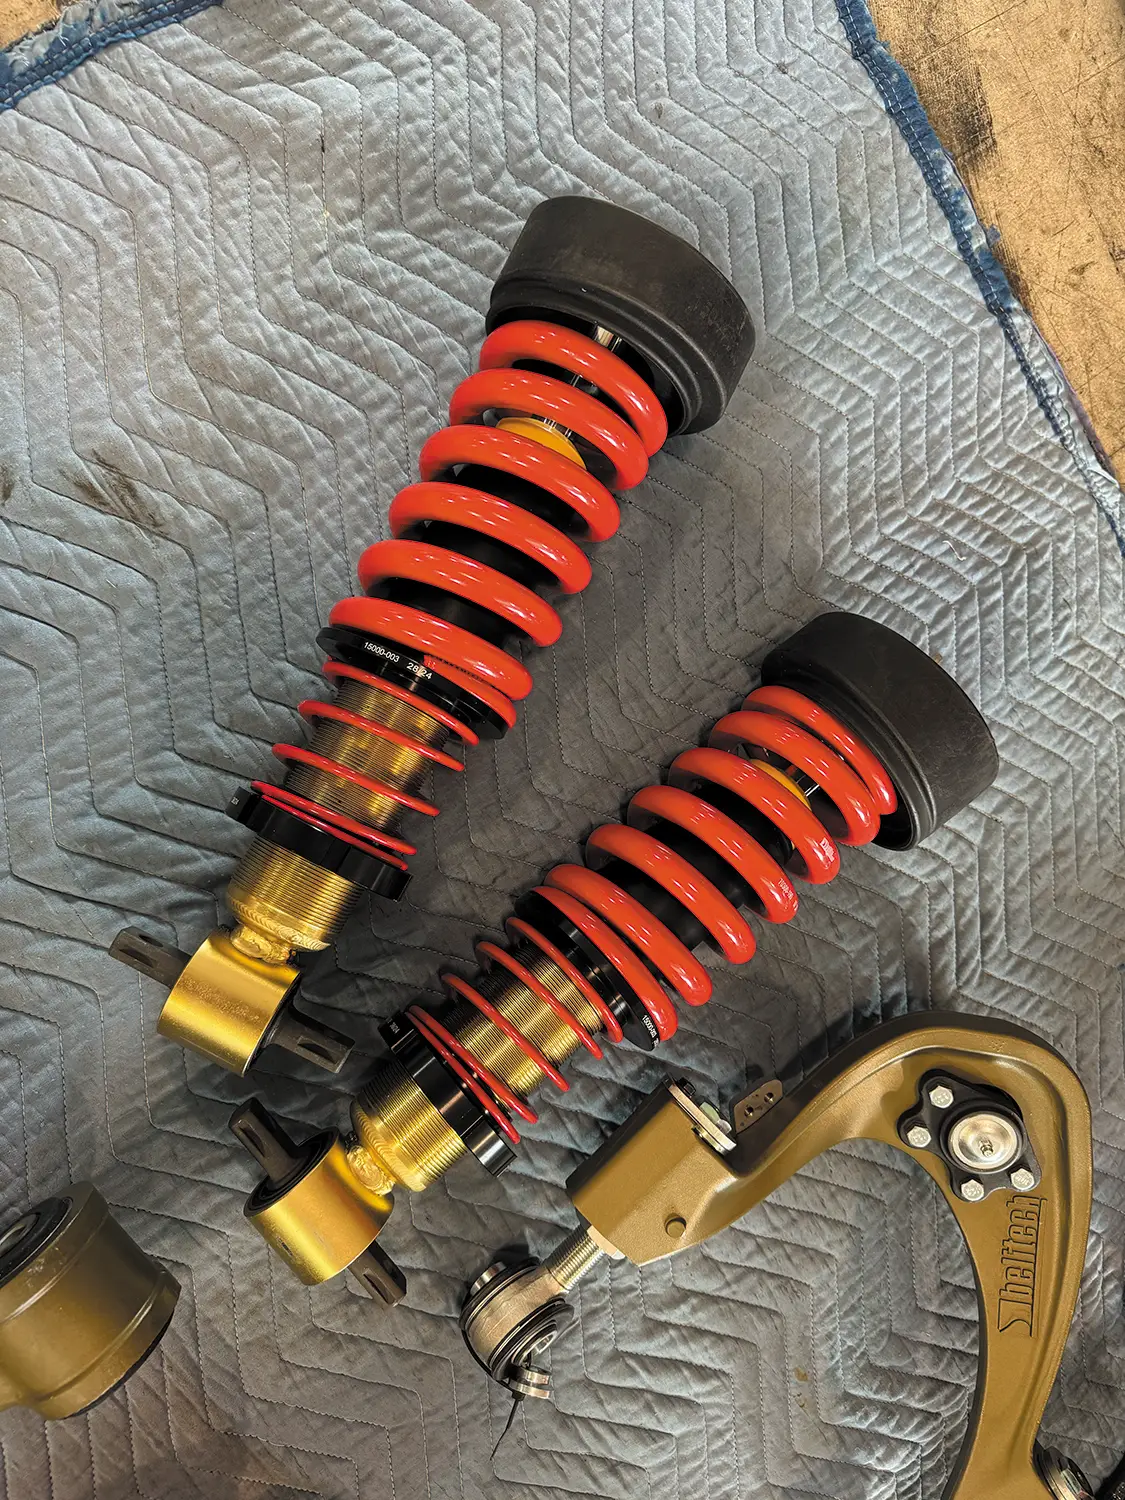
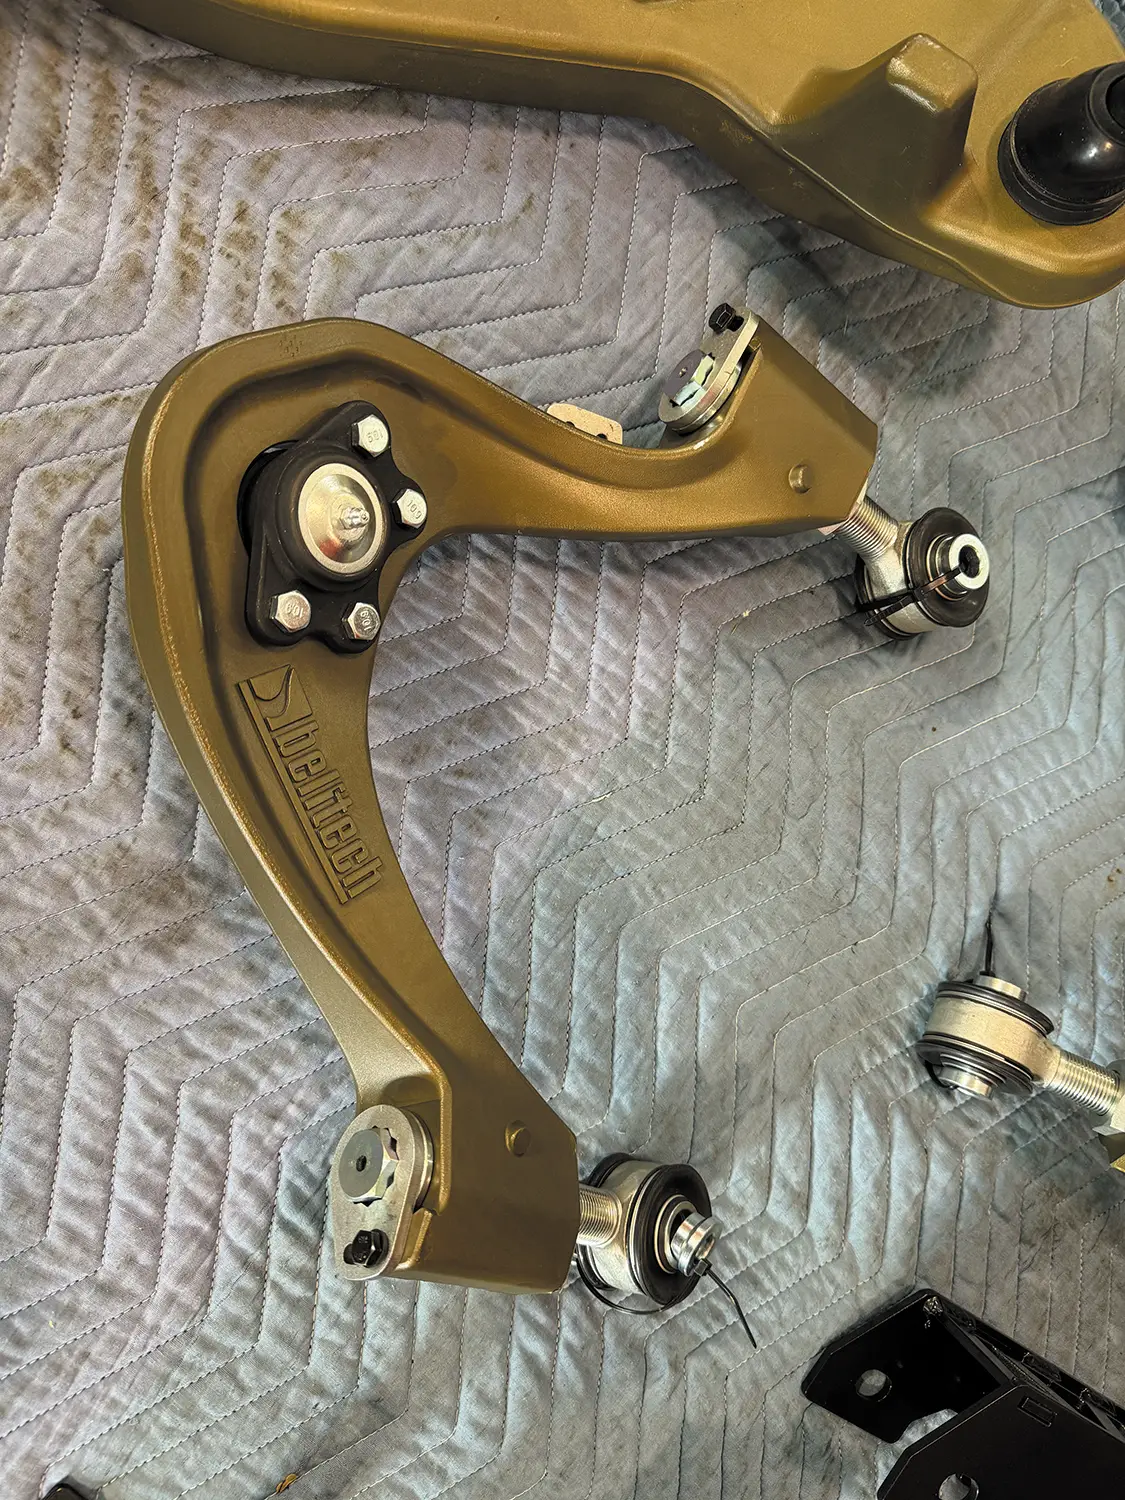
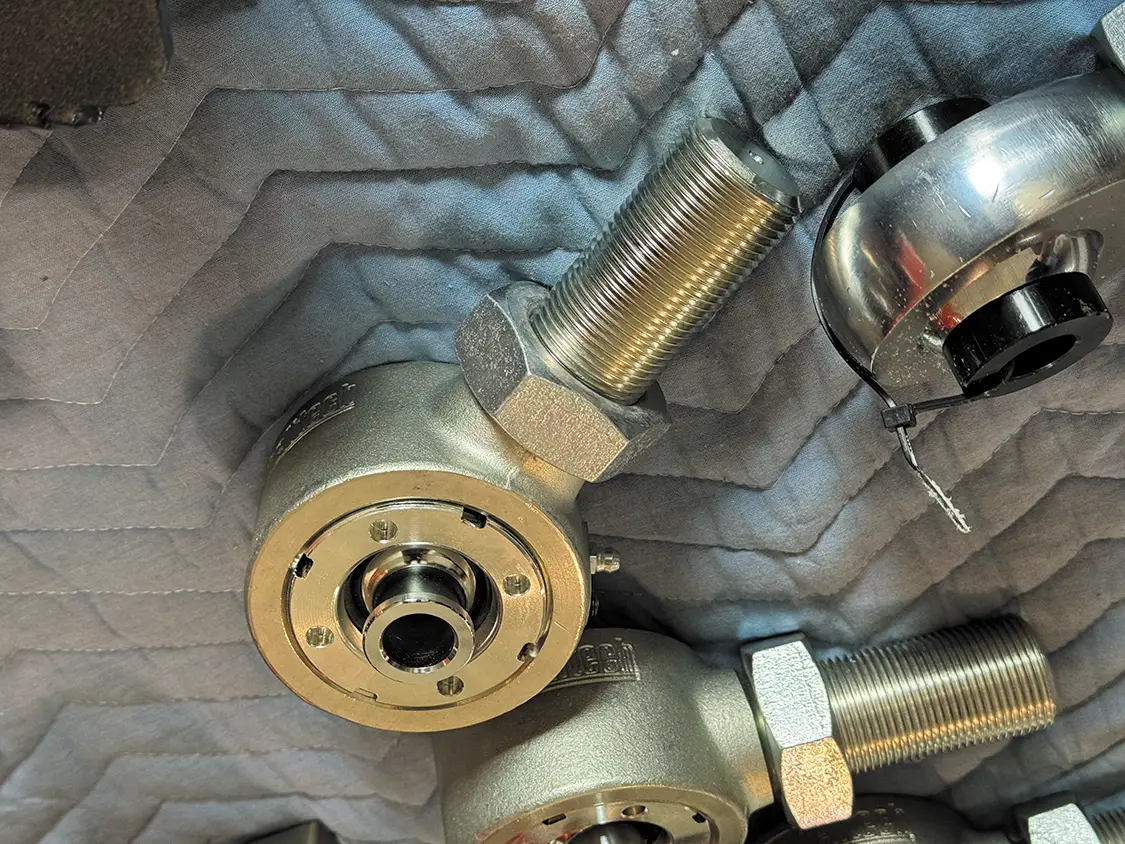
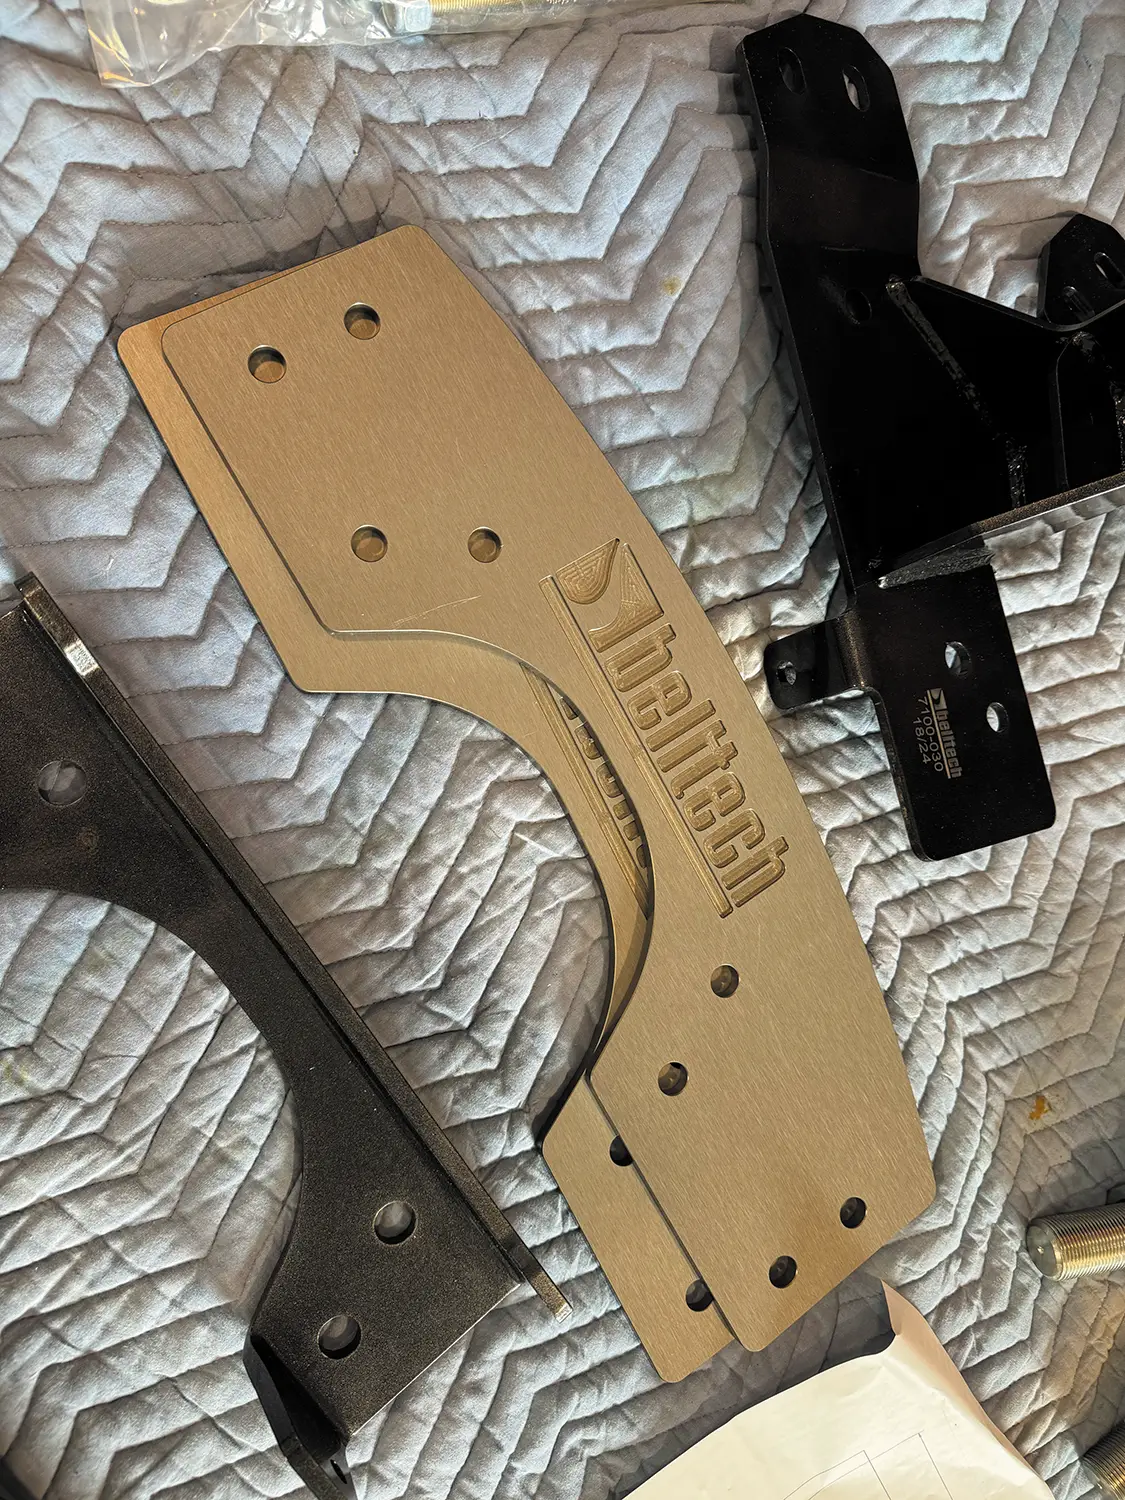
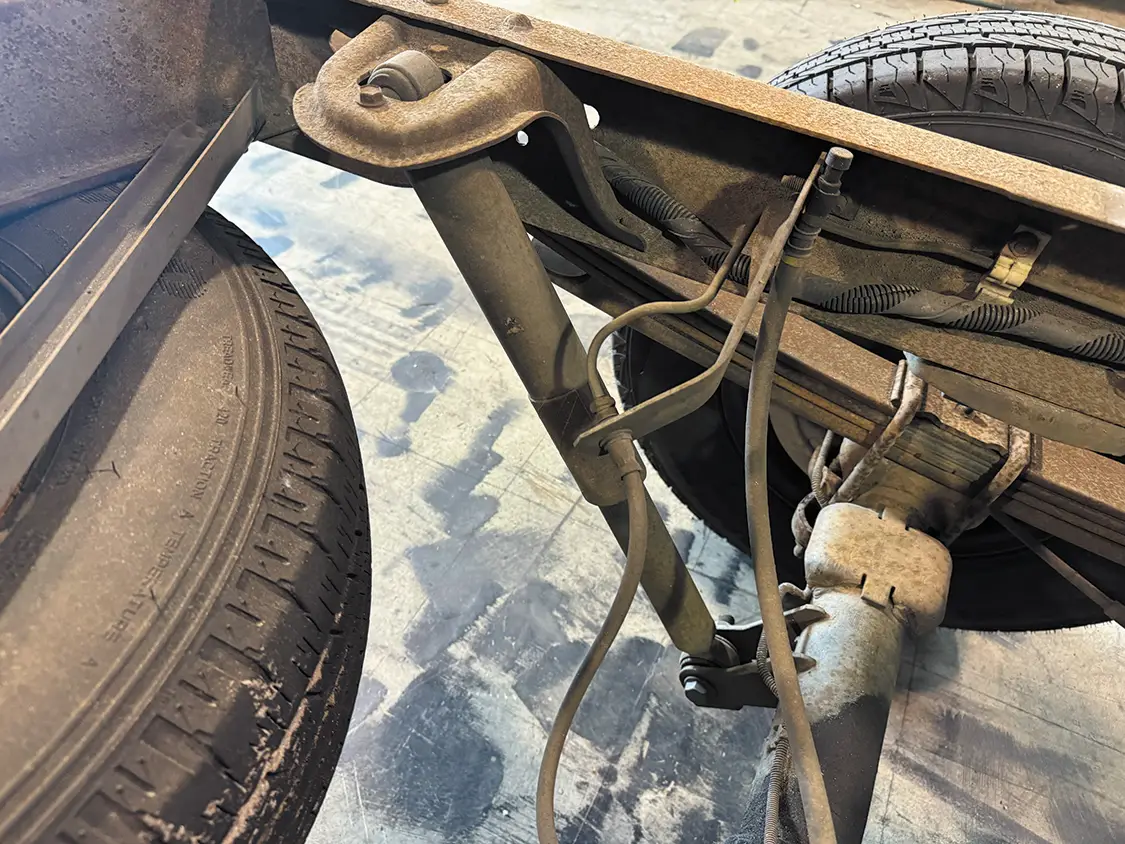
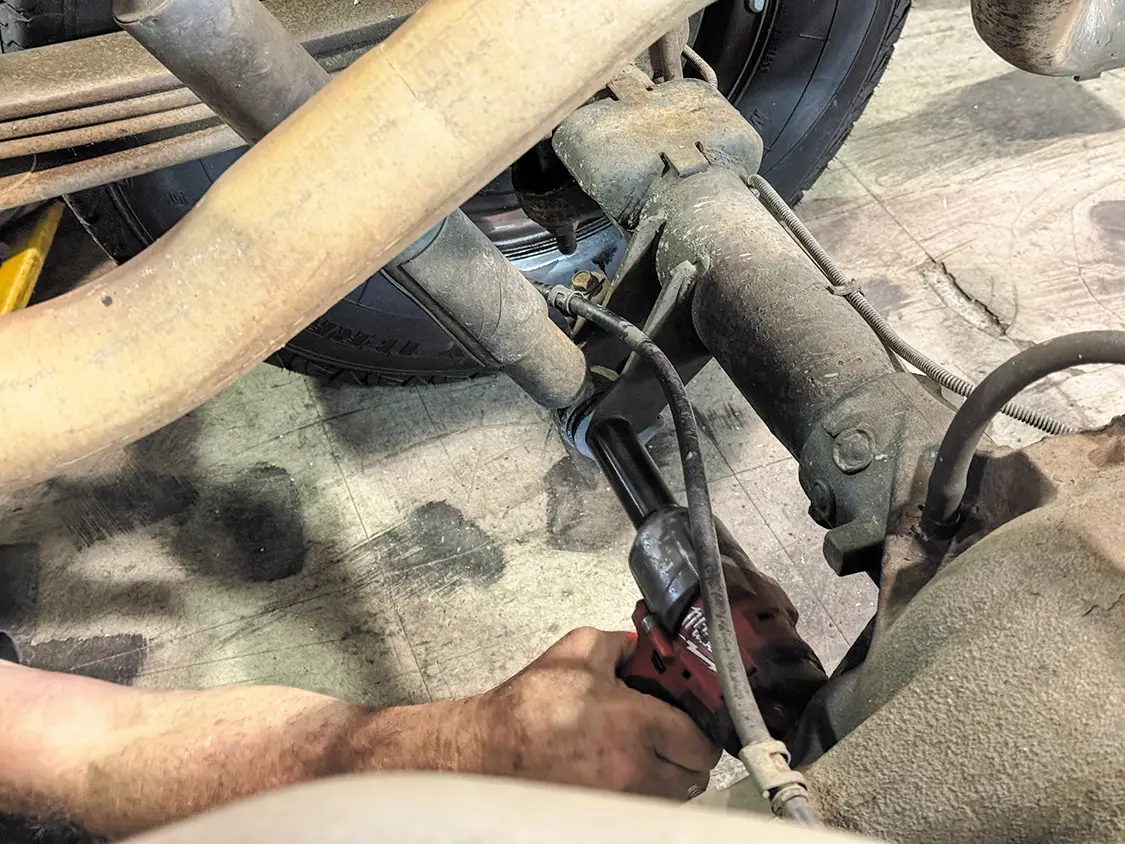
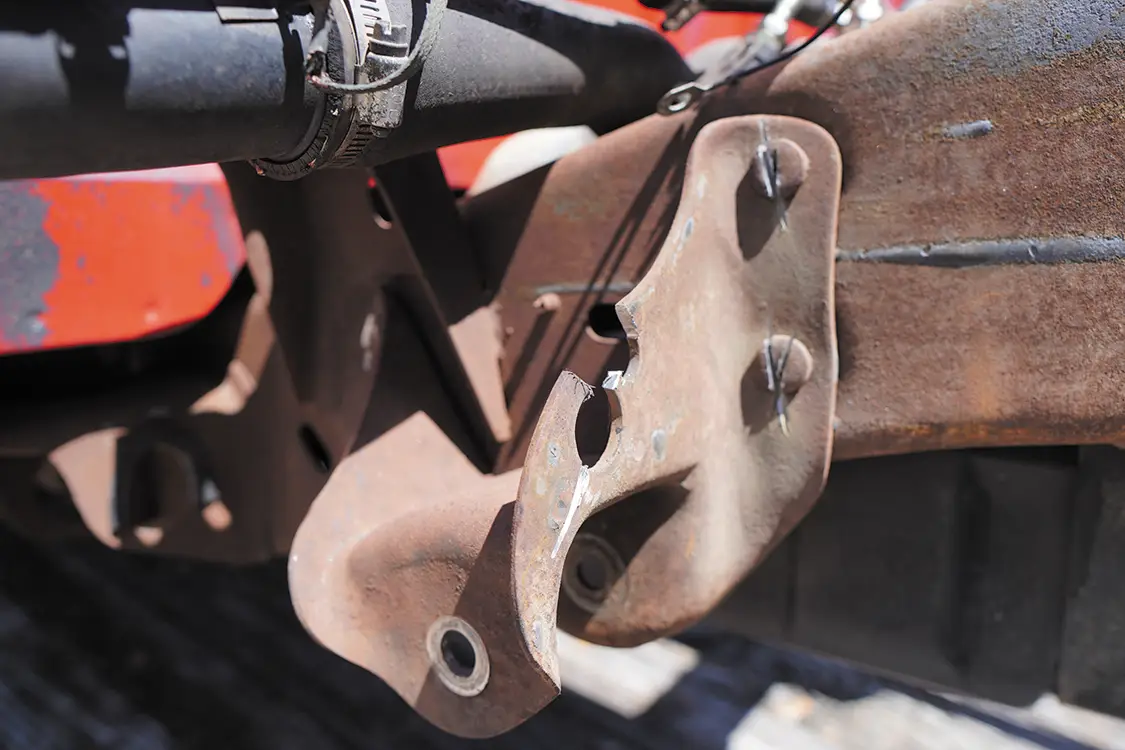
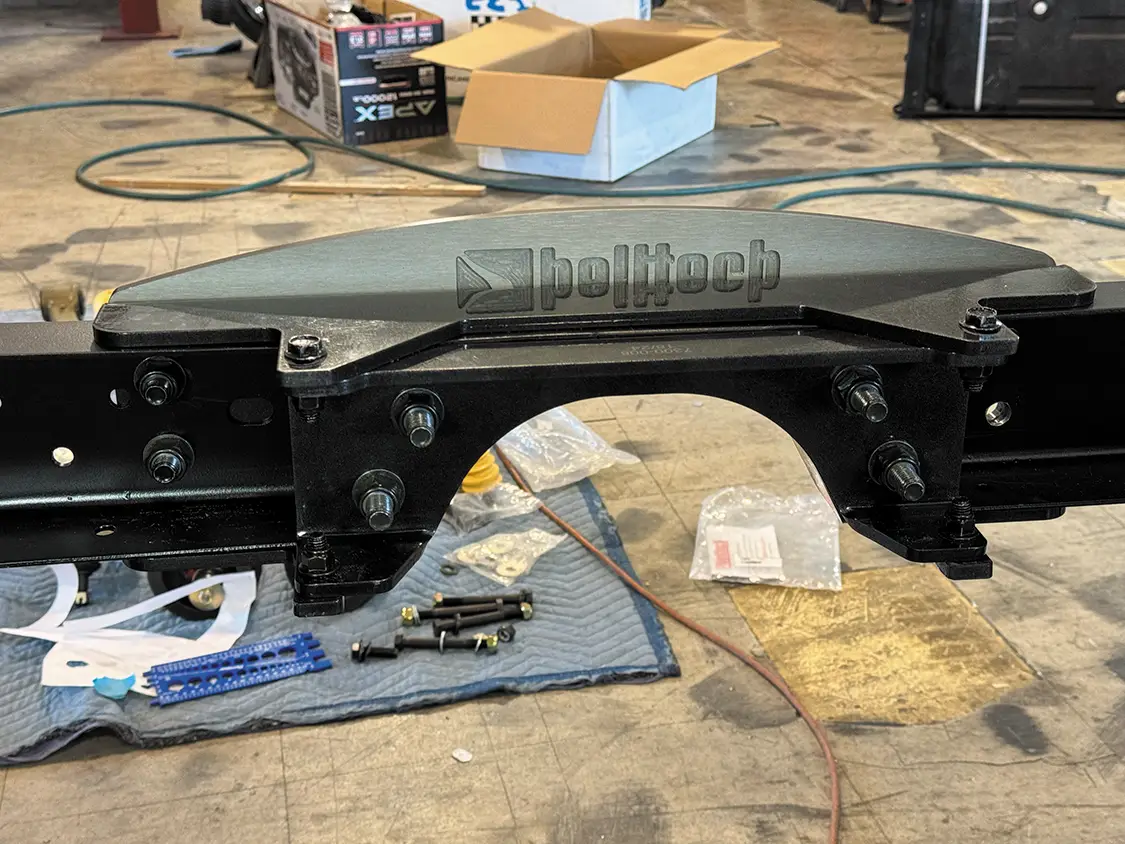
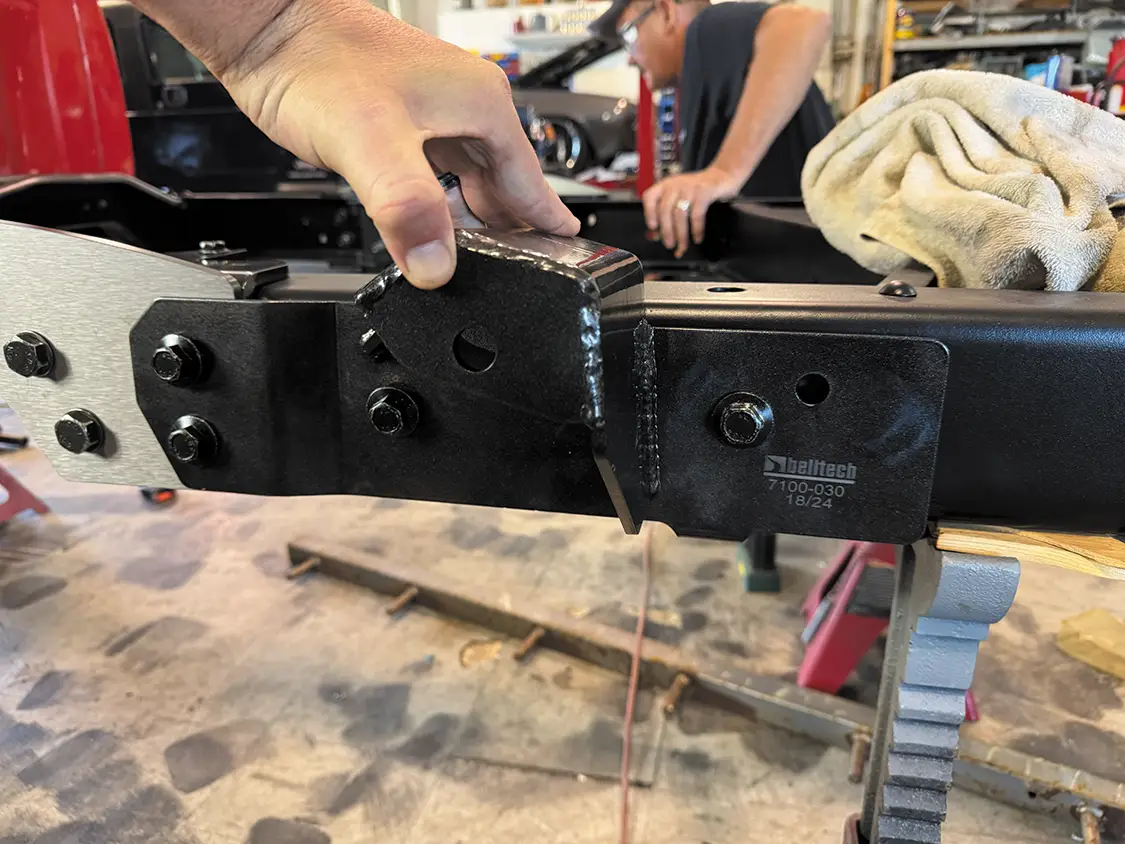
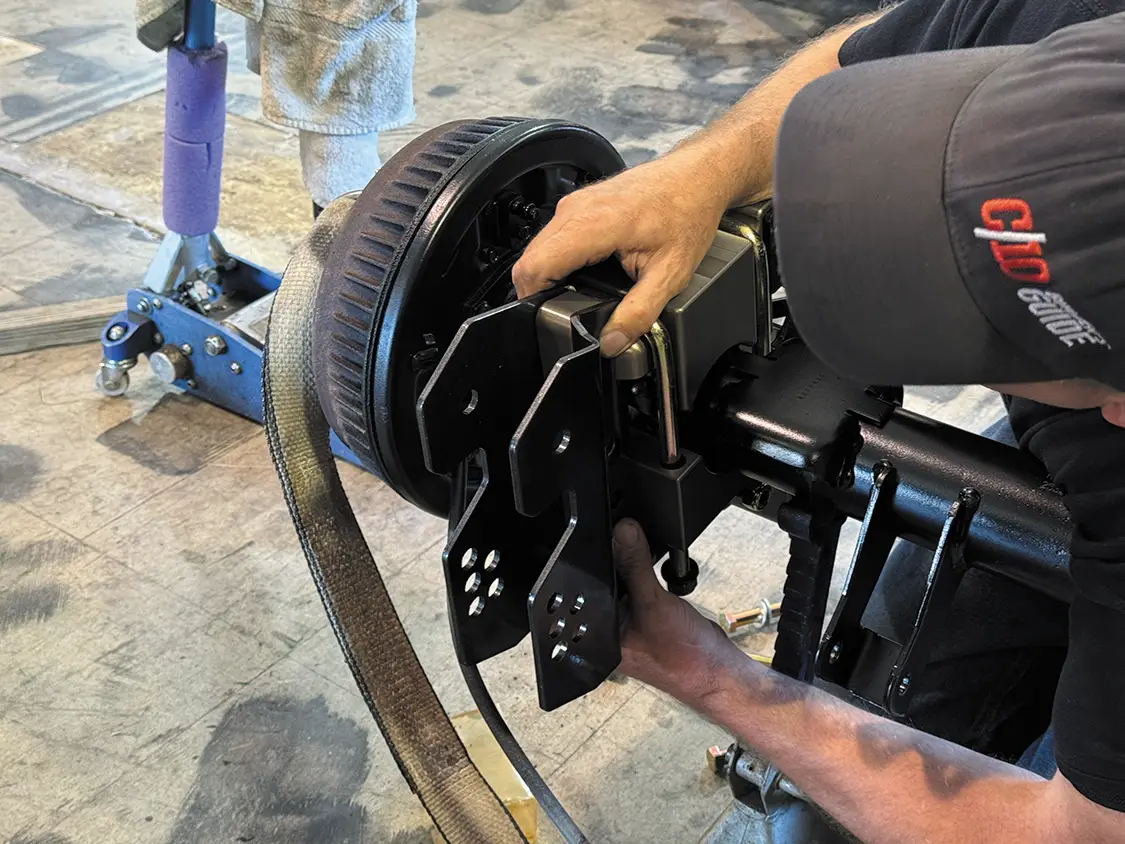
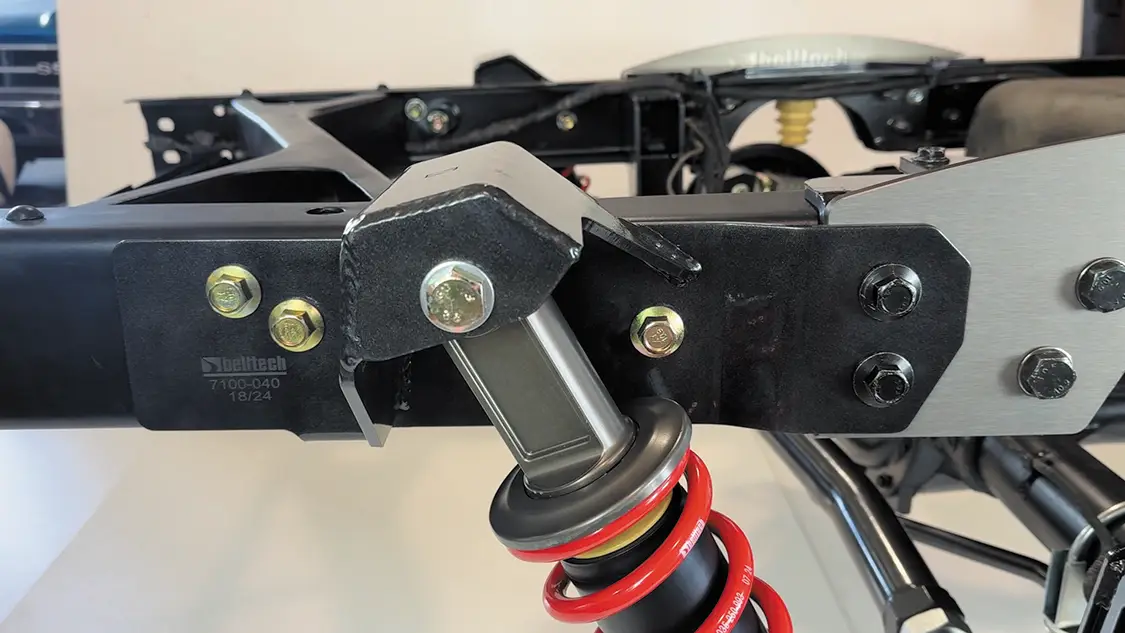
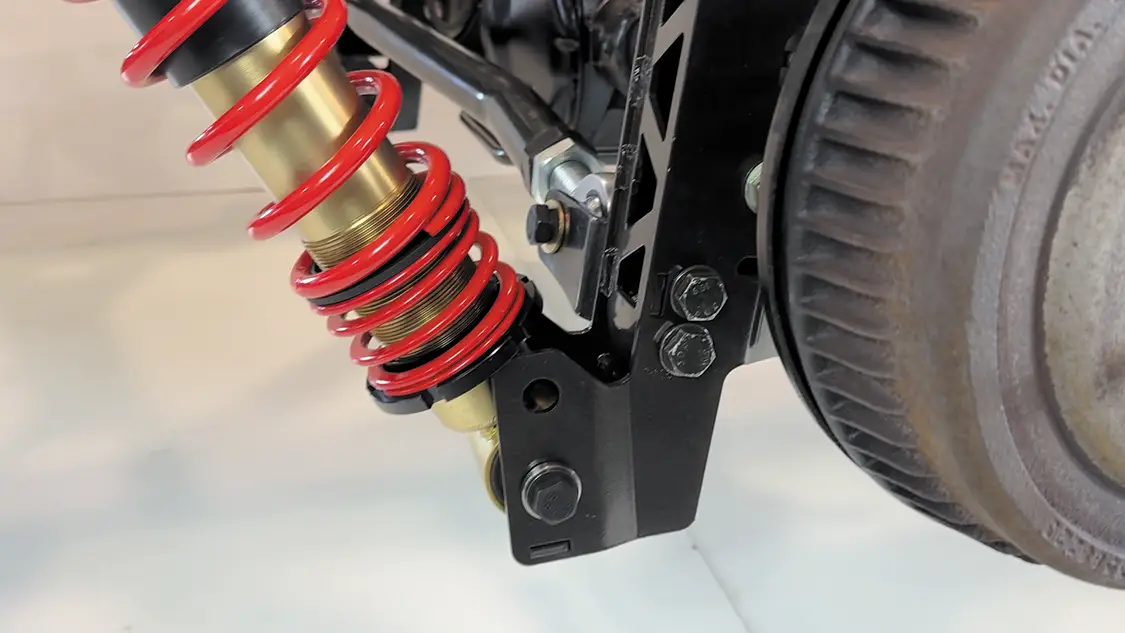
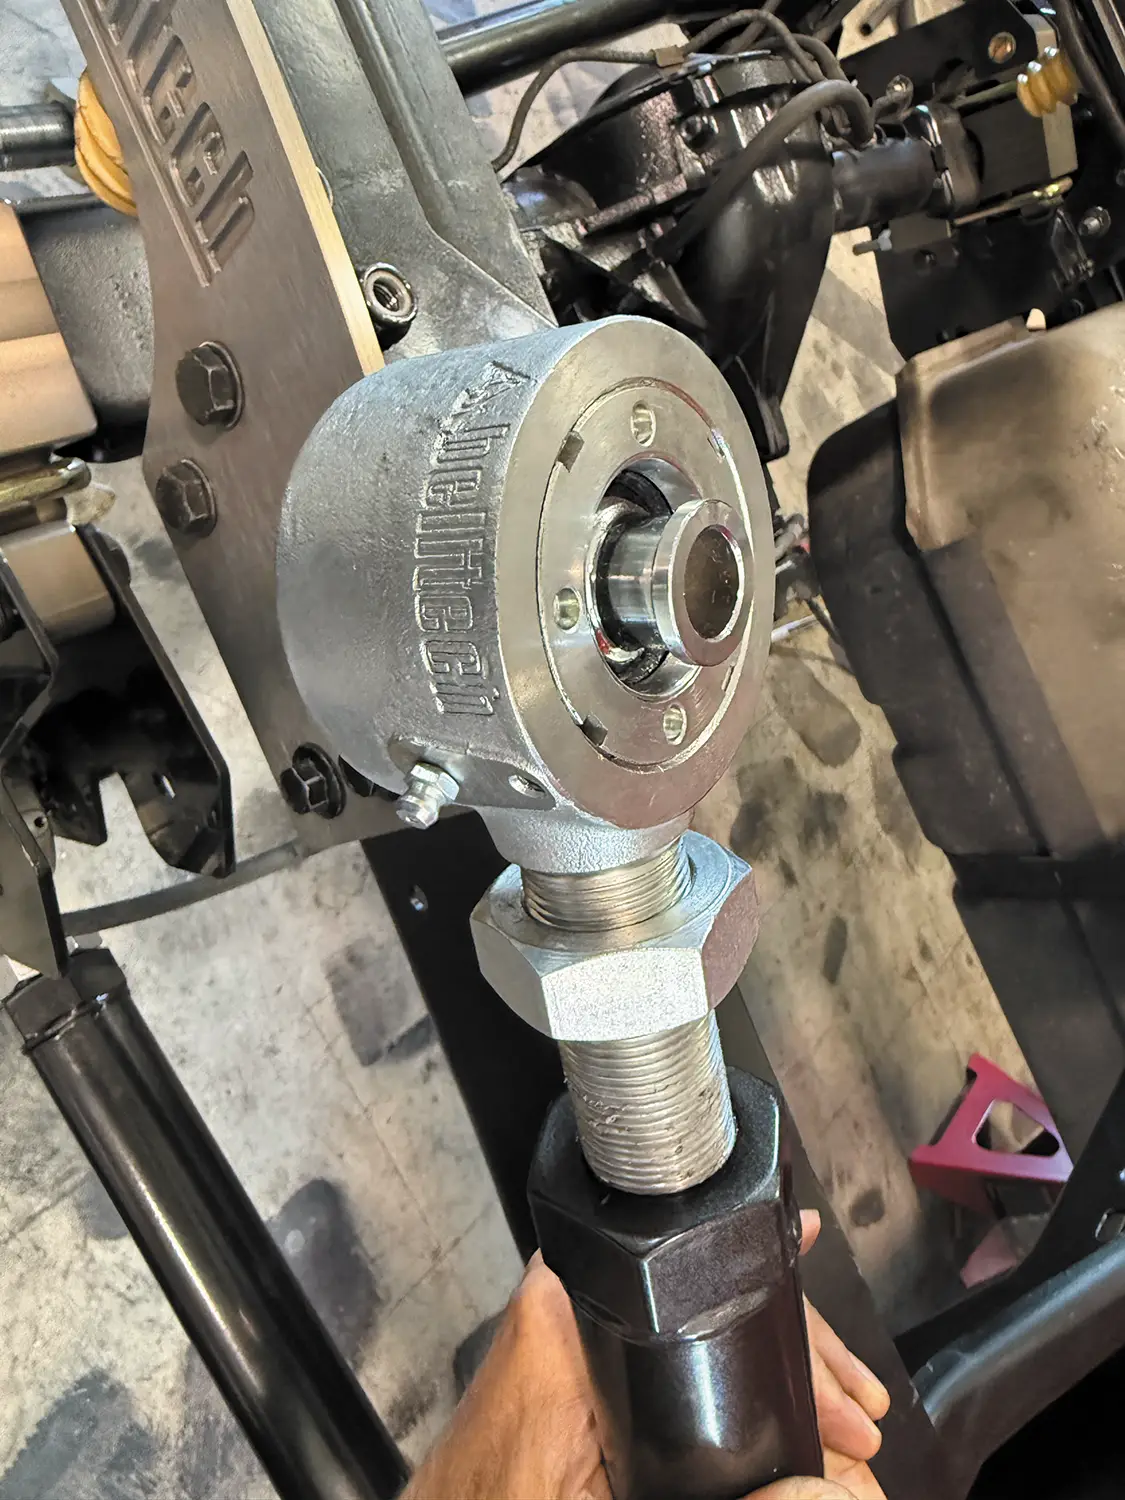
Belltech’s rear coilovers are mounted at a slight angle for added stability and tuned handling. The parallel 4-link setup ties into a beefed-up C-notch and includes a Panhard bar that connects directly to the notch brackets. Every piece of this system is well-built and well-engineered. It’s clear Belltech put serious R&D into this kit, and we can’t recommend it enough if you’re serious about how your OBS handles the road.
To keep body roll in check, we added Belltech’s front and rear sway bars. These solid steel bars are powdercoated gunmetal grey and come with grade 8 hardware and poly bushings. They’re a must-have upgrade to complement the suspension.
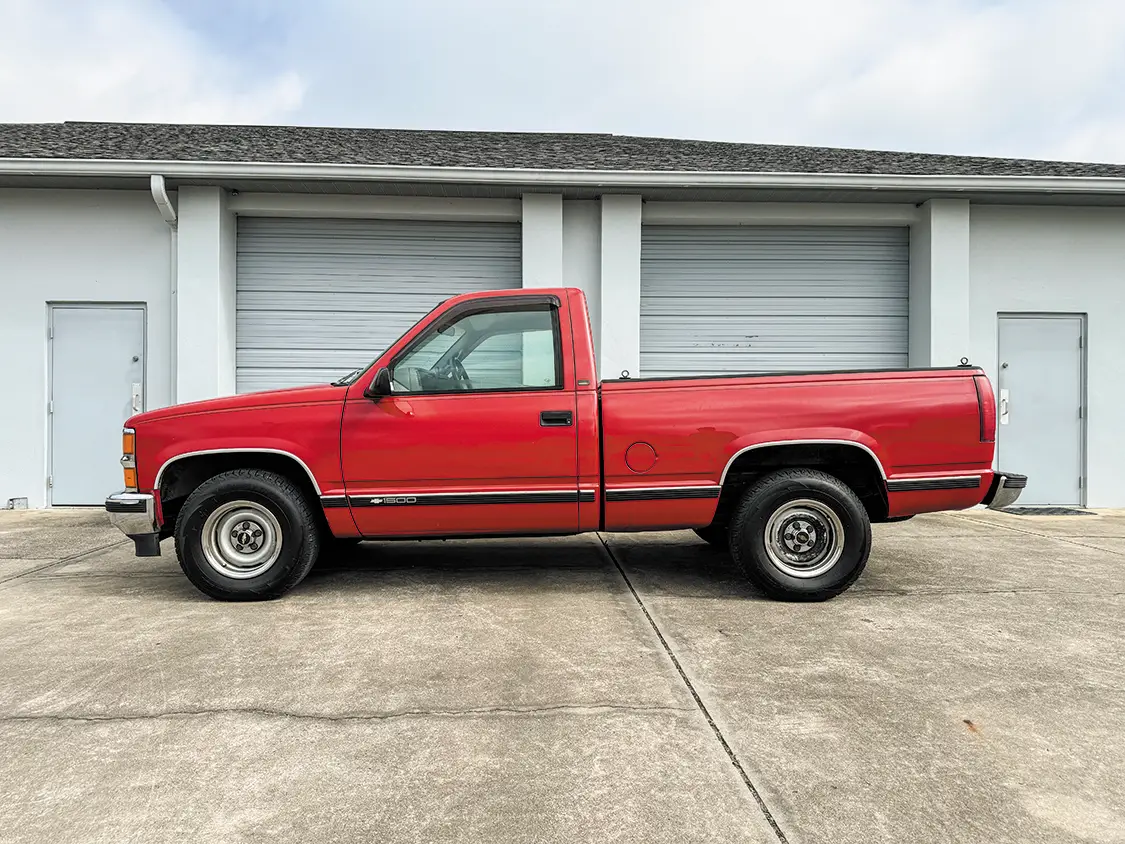
This OBS also got the full show-stopper treatment with 20-inch Billet Specialties TEC5 wheels—20×8.5 up front and 20×10 in the back, wrapped in Atturo AZ850 ultra-high-performance rubber (245/40R20 and 305/35R20). These billet wheels are built specifically for ‘88–’98 Chevy trucks and fit like a glove, giving our OBS the perfect stance.


Department
We are fully committed to the 2022 Hot Rod Power Tour and super excited about this yearly road trip. We have a few trucks available… Continue reading
Chris Hamilton . February 01, 2022
Department
The Right Hardware for Your Hauler Chevy Small Block Engine Block Summit Racing SBC engine blocks are brand new aftermarket engine blocks designed for “Street,… Continue reading
Brandon Burrell . July 09, 2024
Department
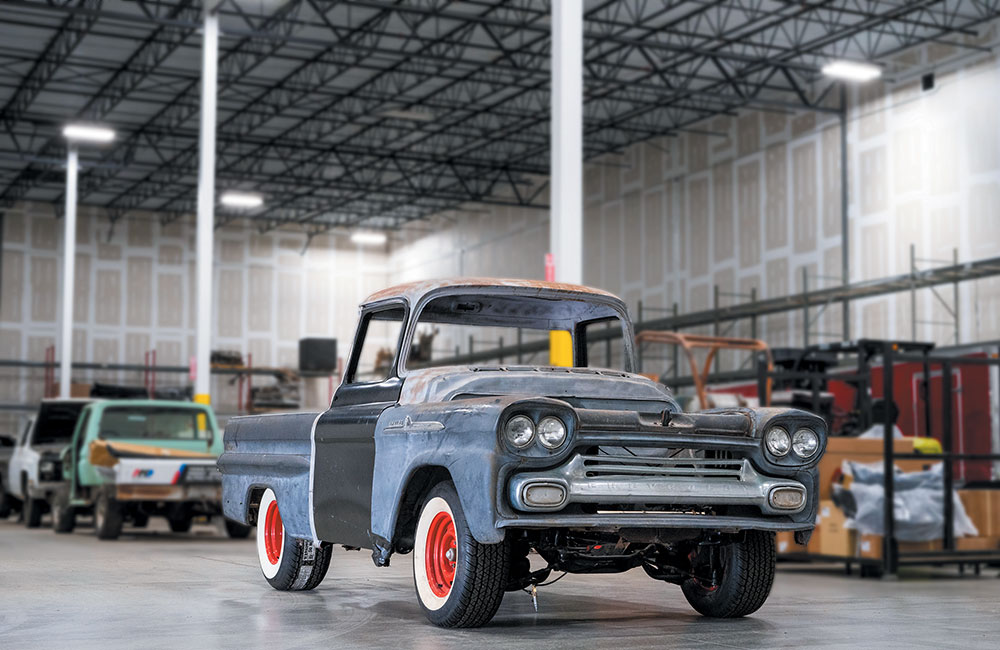
Back on Project Burnadebt! This 1959 Chevy Apache truck owned by Eddy Cebreco has been under major reconstruction. If you have been following along, you… Continue reading
Jason Chandler . September 02, 2022
Features
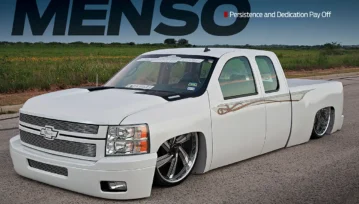
Persistence and Dedication Pay Off Details, details, details. Why do you think they say the devil is in the details when really, that’s where perfection… Continue reading
Mike Alexander . November 12, 2025
Department
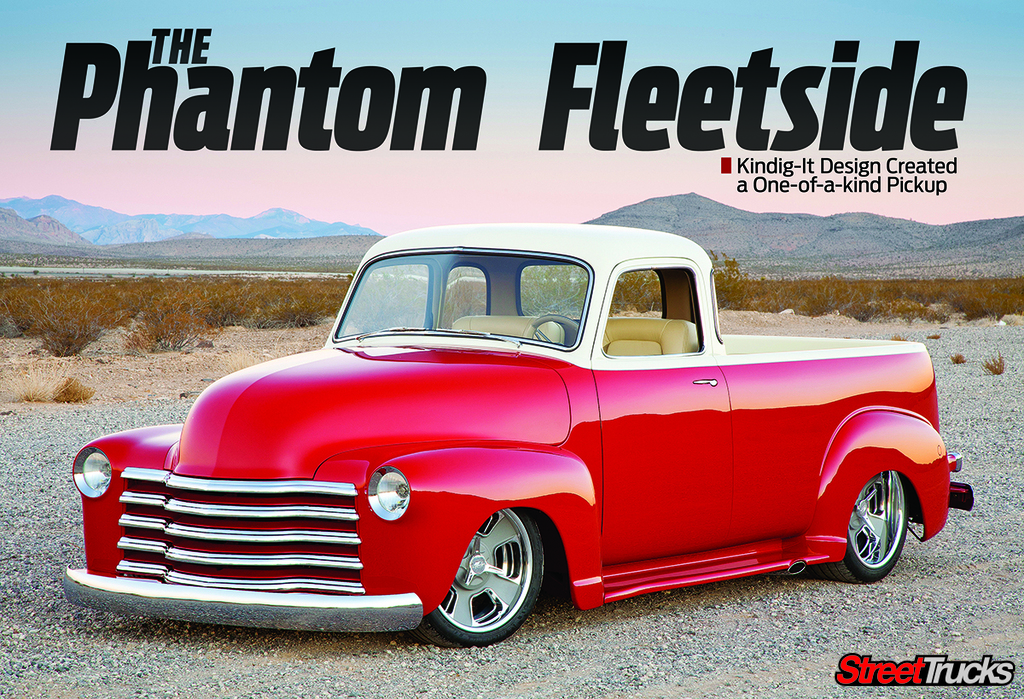
If you don’t know by now, the crew at Kingdig-It Design has been whipping out some top-notch rides for about 16 years now. Recently the… Continue reading
Chris Hamilton . June 03, 2022
c10
What if we said someone is swapping out the combustion engine in an old classic farm truck for a new fully electric Tesla Model S… Continue reading
Chris Hamilton . July 31, 2022


Share Link